
How to Fix Microsoft Defender Remediation Incomplete
Windows Defender has been around for more than a decade but is still plagued with various interface bugs, and the «Remediation incomplete» is an excellent example of one. This article will explain the cause of this error and how you can fix it.
Microsoft Defender may detect a file you downloaded as a severe threat, and when you go to your Downloads folder, you won’t see your downloaded file. Microsoft Defender might remove the file and say that your PC’s security is in good standing. However, if you go to the «Protection History» window, you will see a «Remediation incomplete» error message.
The most common cause for the «Remediation incomplete» error is a downloaded file, but it can also be an installed program. Windows Defender might not like a program you downloaded, particularly if it’s zipped, and classify it as a Trojan.
A «Remediation Incomplete» message may appear in the event of false-positive detection. Microsoft Defender may flag a safe file as malicious.
You may also get this error message if a malicious file was, in fact, on your PC. If that’s the case, you can check the scan logs in «Protection history,» which will include the file path of the malware.
Video Guide on How to Fix Microsoft Defender «Remediation Incomplete»
Table of Contents:
- Introduction
- Method 1. Delete Microsoft Defender Protection History
- Method 2. Run a System File Check Scan
- Method 3. Reset Your Computer Using Recovery
- Video Guide on How to Fix Microsoft Defender «Remediation Incomplete»
Download Computer Malware Repair Tool
It is recommended to run a free scan with Combo Cleaner — a tool to detect viruses and malware on your device. You will need to purchase the full version to remove infections. Free trial available. Combo Cleaner is owned and operated by Rcs Lt, the parent company of PCRisk.com read more.
Method 1. Delete Microsoft Defender Protection history
If you know for sure that the «Remediation incomplete» error occurred due to Microsoft Defender flagging a completely safe file, then you can clear the Microsoft Defender’s Protection history by navigating to its hidden folder where the history logs are located and deleting all of the files there.
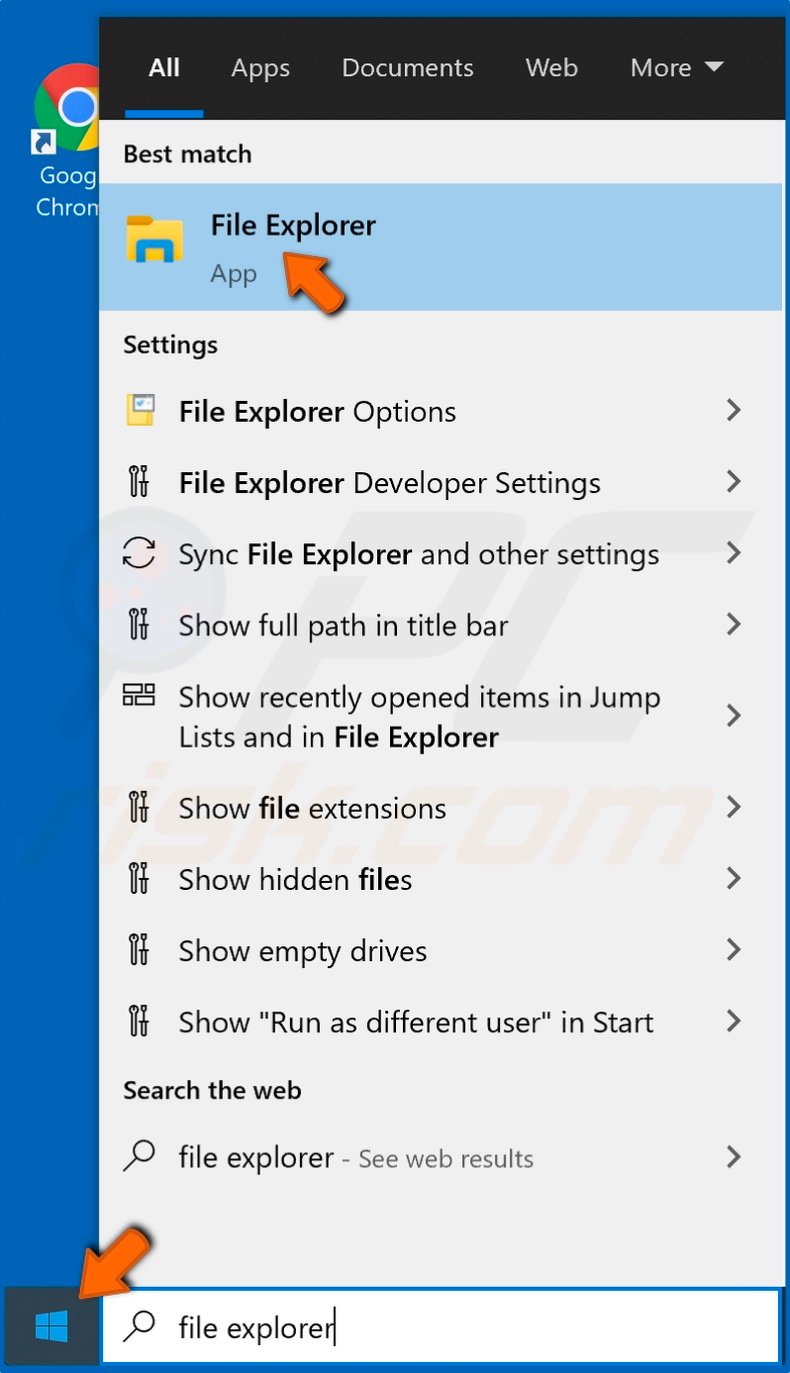
1. Click the Start Menu button, type in File Explorer and click the result.
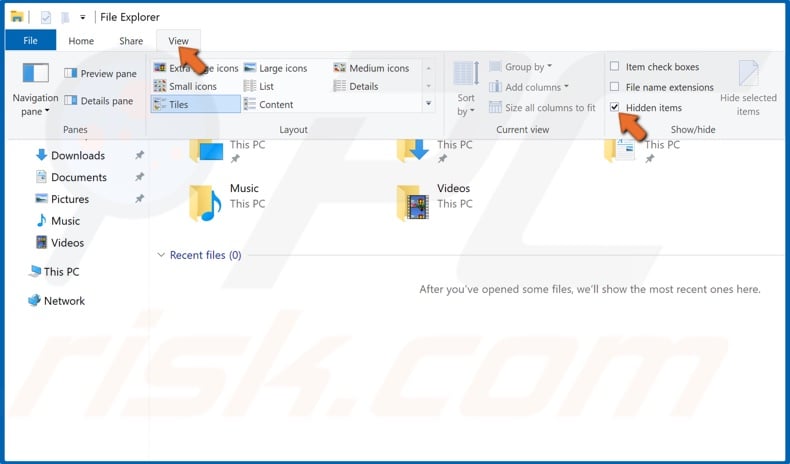
2. Click View in the menu bar and tick the Hidden items option.
3. Then, you have to navigate to C:\ProgramData\Microsoft\Windows Defender\Scans\History\Service
4. Go to This PC.
5. Go to your primary hard drive (usually Local Disk (C:)).
6. Open the ProgramData folder.
7. Then, go to Microsoft.
8. Go to the Windows Defender folder.
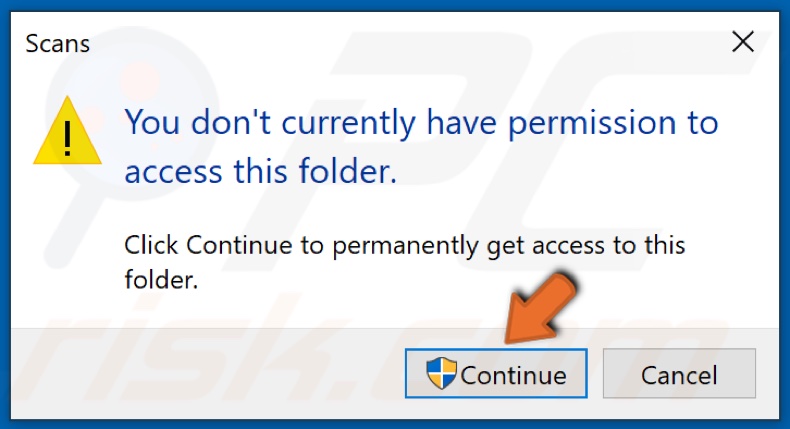
9. Open the Scans folder. Click Continue to get access.
10. Go to History.
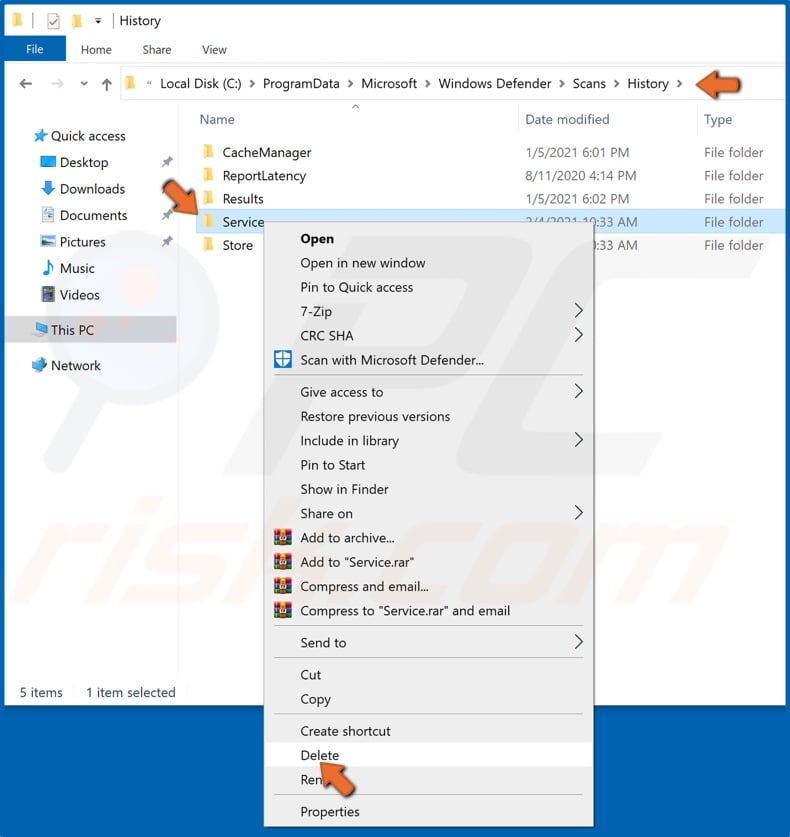
11. Select the Service folder, right-click it and click Delete.
Once you delete the Service folder, the «Remediation incomplete» error will go away.
[Back to Table of Contents]
Method 2. Run a System File Check Scan
The Windows System File Checker is a built-in tool ideal for resolving issues regarding corrupted files. You can perform a System File Checker (SFC) scan that will scan your computer for corrupted files and automatically fix problems related to Microsoft Defender.
1. Hold down Windows+R keys to open Run.
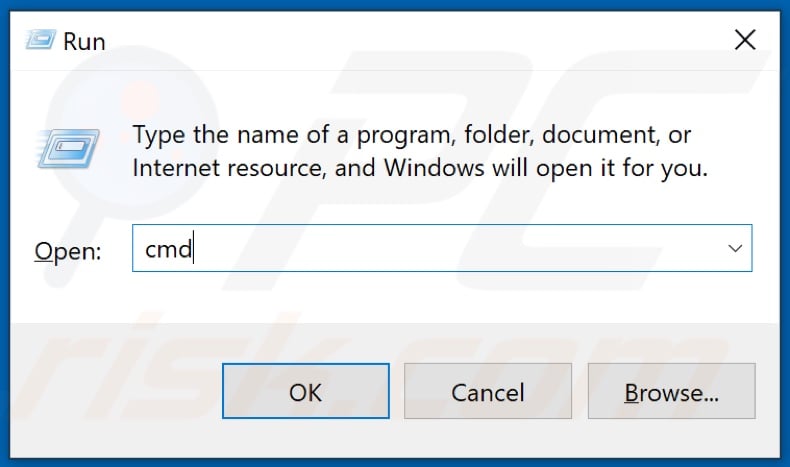
2. Then, type in CMD and hold down Ctrl+Shift+Enter keys to open the elevated Command Prompt.
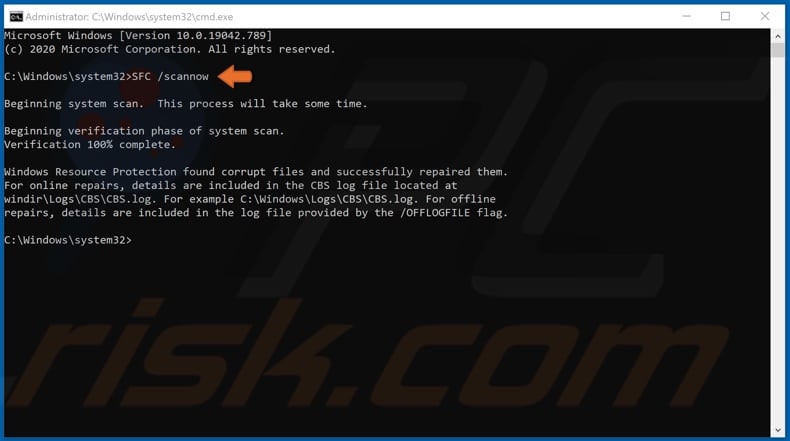
3. In the Command Prompt window, type in SFC /scannow and hit Enter to execute the command.
4. Wait for the scan to complete.
[Back to Table of Contents]
Method 3. Reset your Computer using Recovery
Note that using this method will allow you to keep all of your files but remove all of the applications you’ve installed.
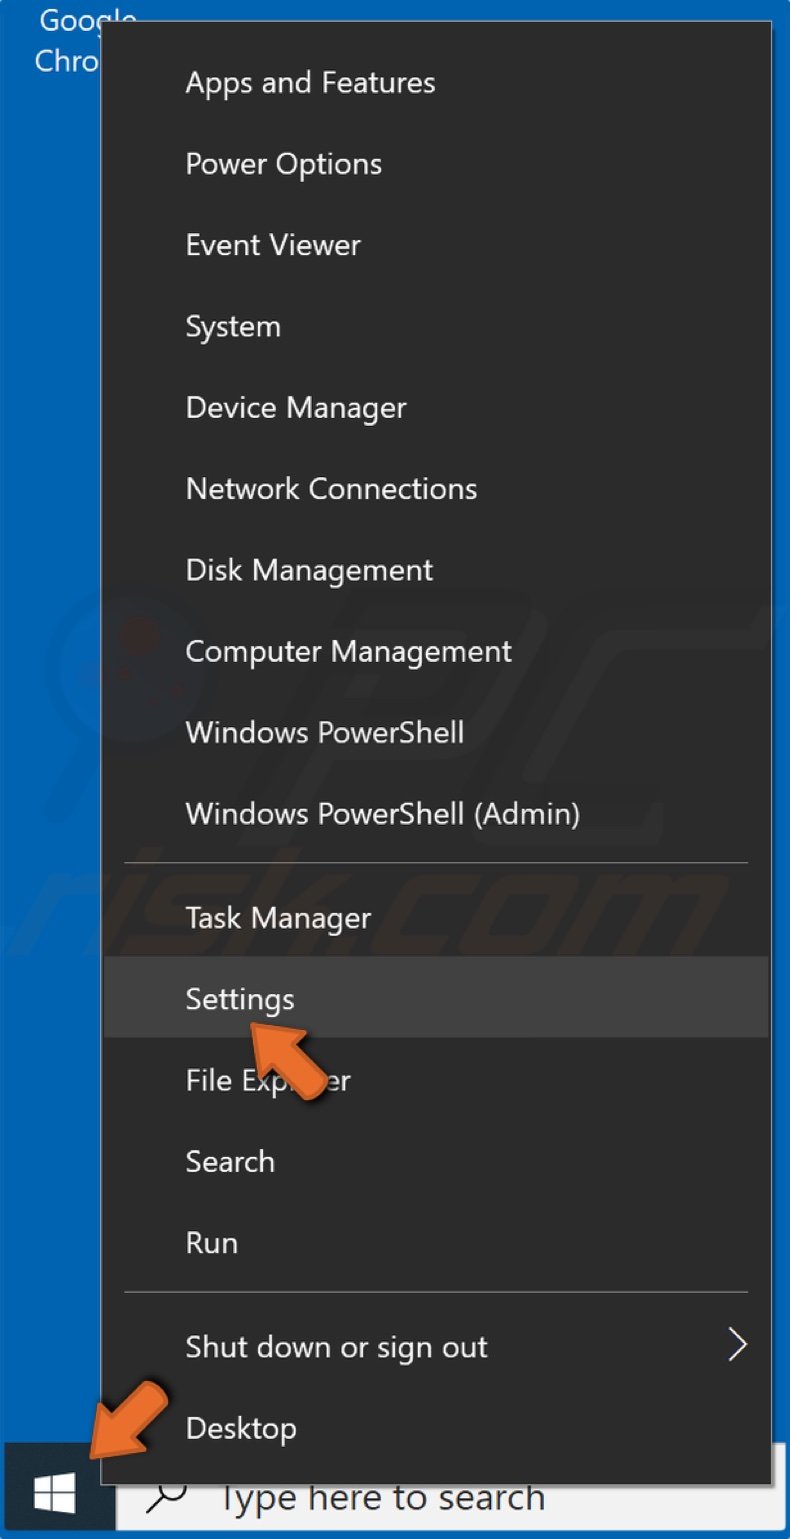
1. Right-click the Start Menu, and click Settings.
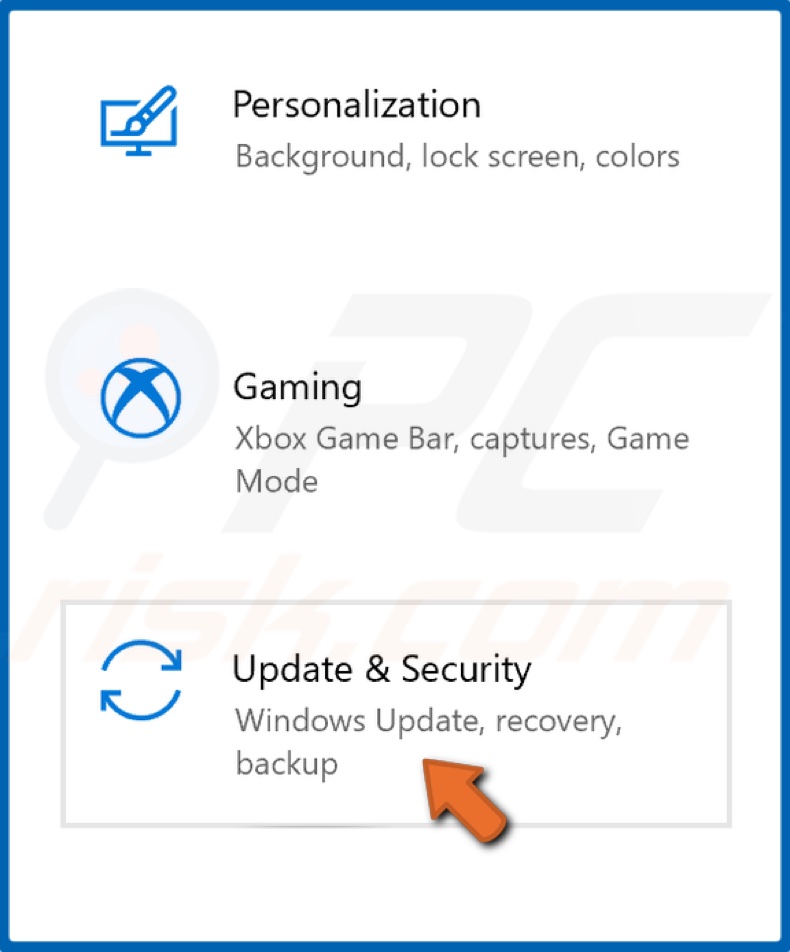
2. Select Update & Security.
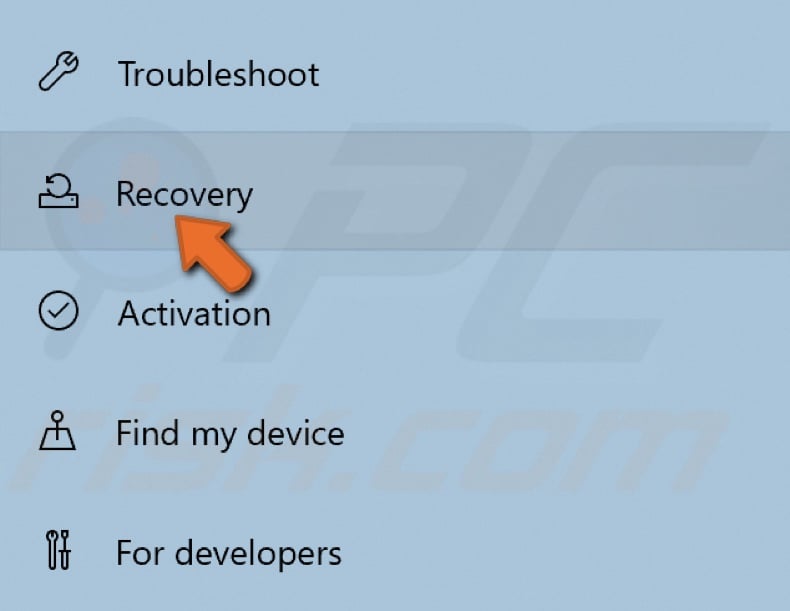
3. Click Recovery located on the left side of the window.
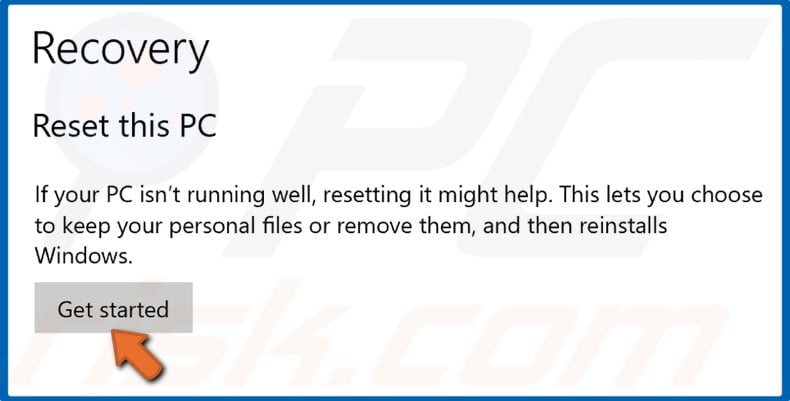
4. Click Get Started.
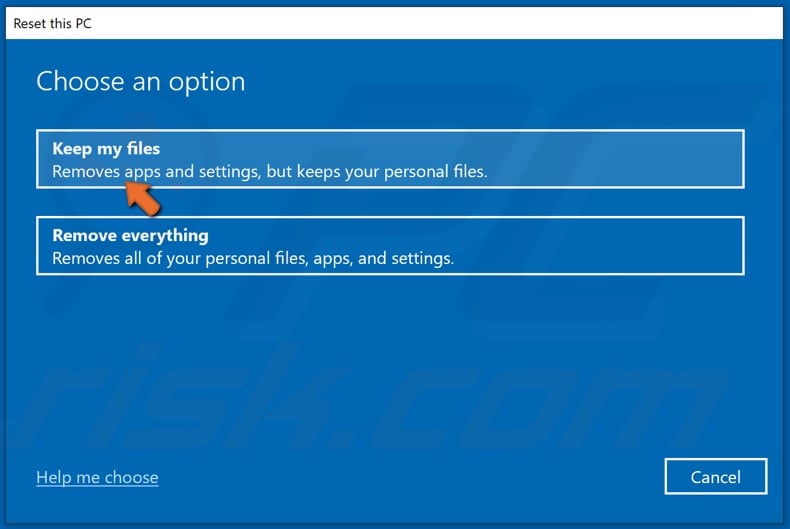
5. Select Keep My Files.
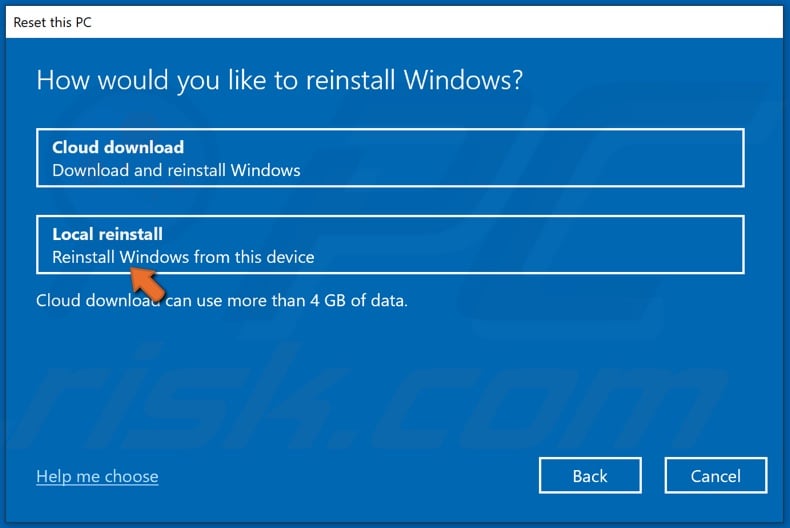
6. Select Local reinstall.
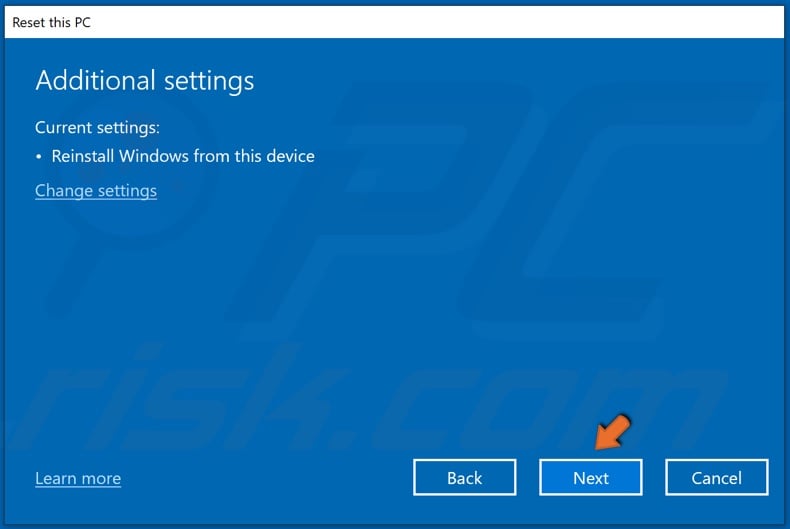
7. Click Next.
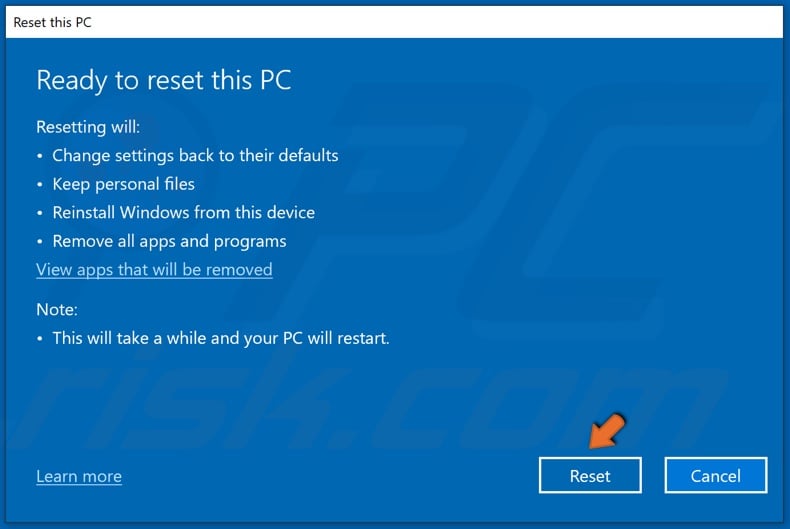
8. Click Reset.
9. Wait for the resetting process to complete.
Note that you might have to change the resolution manually as Windows might not set it automatically.
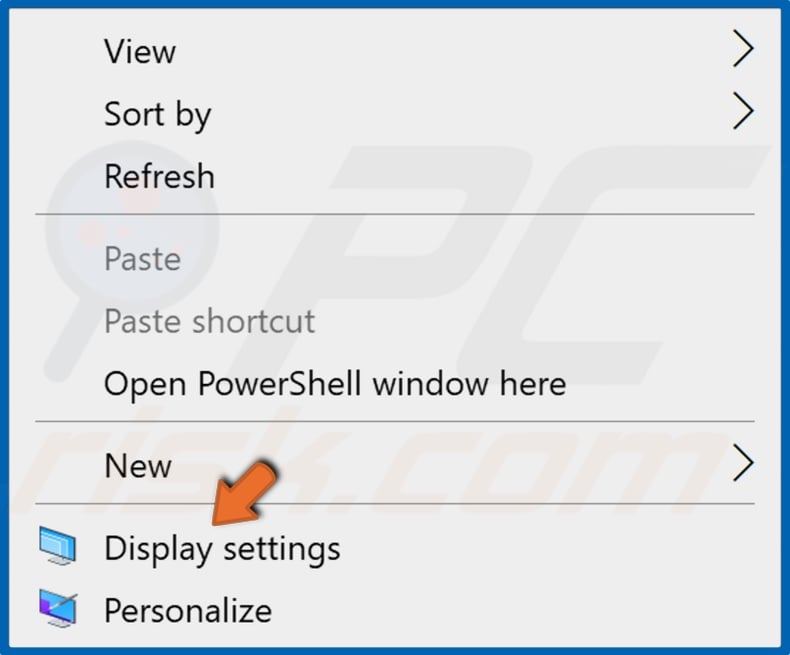
10. Click the right mouse button, and click Display settings.

11. Open the display resolution drop-down menu and select the recommended resolution.
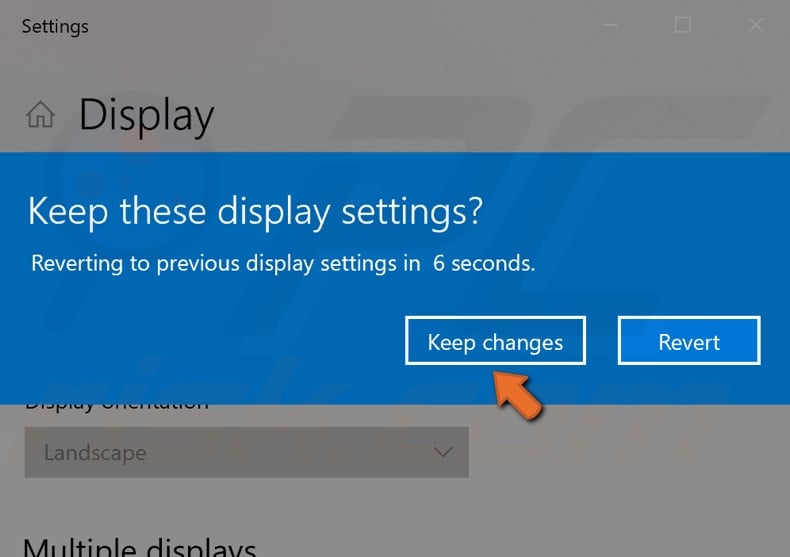
12. Click Keep changes.
[Back to Top]
-
Home
-
News
- 5 Ways to Fix Protection History Not Showing Issue
5 Ways to Fix Protection History Not Showing Issue
By Shirley | Follow |
Last Updated
Have you ever encountered the “protection history not showing” issue? This post focuses on this problem and shows you several ways to help you fix it. And this post also introduces useful data recovery software to help you recover lost protection history.
Solution 1. Check for Windows Update
An up-to-date Windows system that fixes bugs and bugs in Windows and related software can protect your computer from malicious attacks. So, when your Windows Defender protection history is not showing, you should first follow the steps below to check whether Windows needs to be updated.
Step 1. Press Windows + I key combinations to open Windows Settings.
Step 2. Go to Update & Security > Windows Update.
Step 3. Now you will see if Windows is up to date in the right panel. If not, you need to click Check for updates to get its latest version.
Solution 2. Delete Detection History Files
According to the Internet, deleting the detection history files is also an effective way if you cannot see protection history in Windows Defender. Here you can see how to delete these files.
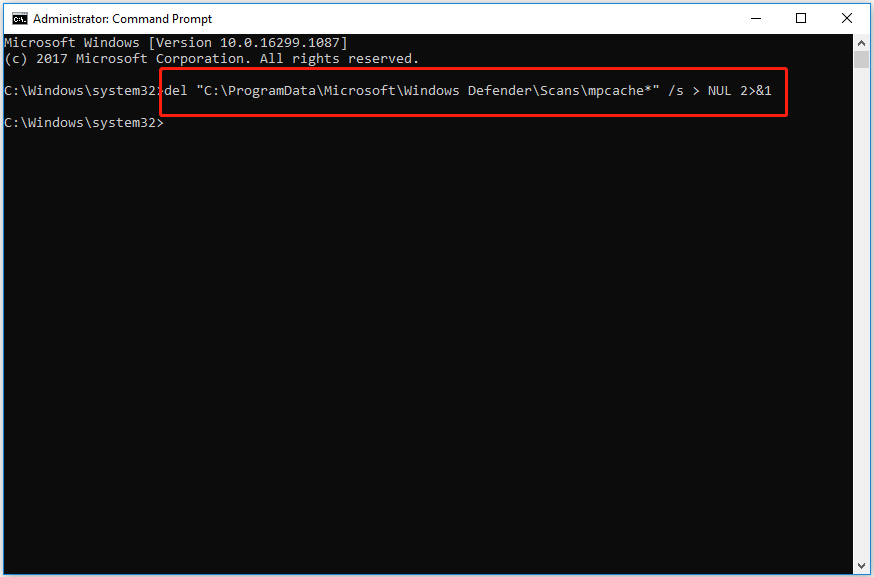
Step 1. Type cmd in the Windows search box and right-click Command Prompt to select Run as administrator under the best match result.
Step 2. In the pop-up user account control window, select Yes.
Step 3. Type del “C:\ProgramData\Microsoft\Windows Defender\Scans\mpcache*” /s > NUL 2>&1 in the new window. Then press Enter.
Step 4. Type del “C:\ProgramData\Microsoft\Windows Defender\Scans\History\Service\DetectionHistory\*” and press Enter.
Step 5. Input del “C:\ProgramData\Microsoft\Windows Defender\Scans\mpenginedb.db” and press Enter.
Step 6. Restart your computer to check whether the problem of “protection history not showing” has been fixed.
Solution 3. Run DISM and SFC Scan
If your protection history is missing, it is most likely due to corrupted system files. In this case, you need to perform a DISM and SFC scan. These two commands will scan all protected system files and replace corrupted files with correct cached copies.
Tips:
Tip: DISM/SFC only scan and repair system files without affecting your personal files.
For the detailed steps to run DISM and SFC scan, you can refer to this post: CHKDSK vs ScanDisk vs SFC vs DISM Windows 10.
Solution 4. Reset Windows Defender
If none of the above methods work. You can try to reset Windows Defender. Here you can see how to do that.
Step 1. Click the Start button and scroll down to find Windows Security.
Step 2. Right-click Windows Security and click More tools. Then select App settings.
Step 3. Scroll down to click Terminate. Then click Reset and wait for the process to complete.
Now you can check whether your protection history came back.
Solution 5. Check and Uninstall Other Apps
If there is another app installed for Windows security, the issue of “protection history not showing” may also occur. In this situation, you can follow the guide below to check and uninstall it.
Step 1. Open Control Panel using the Windows search box.
Step 2. Click on Security and Maintenance from the options.
Step 3. Expand Security by clicking the drop-down triangle on the right side.
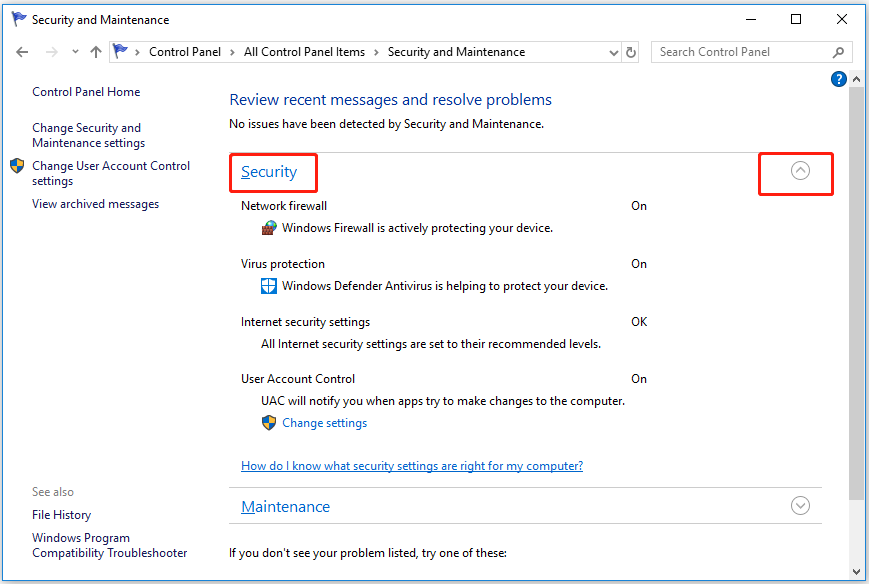
Step 4. If there is other security software here, you need to uninstall them.
Step 5. Reboot your computer to check your protection history again.
How to Recover Protection History
Some users reported that they want to recover lost protection history files but do not know how to do that. Here MiniTool Power Data Recovery, professional data recovery software is highly recommended. It is used for data recovery in Windows 11/10/8/7.
With just a few steps, you can get your deleted or lost data back with MiniTool Power Data Recovery.
For detailed steps to recover your files, please refer to this article: How to Recover Permanently Deleted Files in Windows.
Final Words
To sum up, this article introduces several ways to fix “protection history not showing”. Hope you can effectively solve your problem using the ways above.
If you have any questions about protection history or MiniTool Power Data Recovery, you can leave your comments in the comment area below or send an email to [email protected] directly.
About The Author
Position: Columnist
Shirley graduated from English major and is currently an editor of MiniTool Team. She likes browsing and writing IT-related articles, and is committed to becoming a professional IT problem solver. The topic of her articles are generally about data recovery, data backup, and computer disk management, as well as other IT issues. In spare time, she likes watching movies, hiking and fishing.
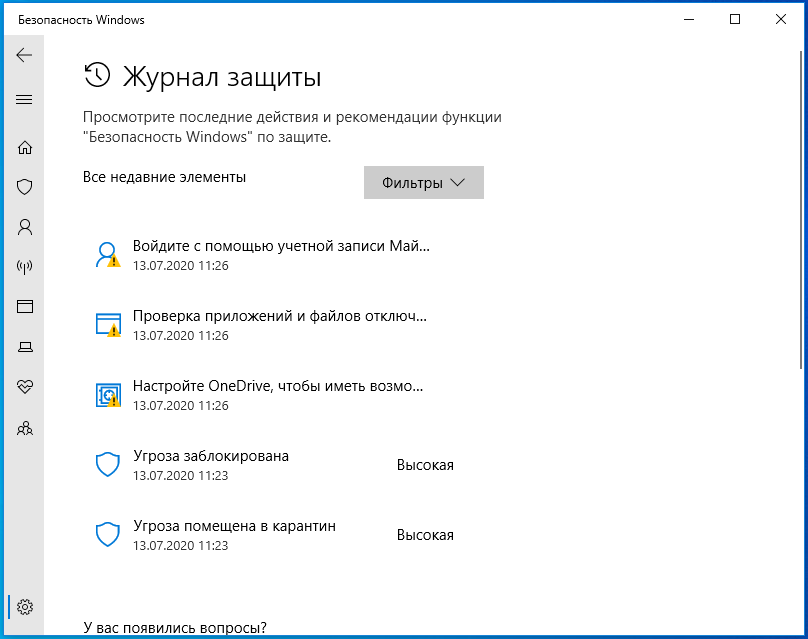
Protection history is a part of the Windows Security app that displays actions and recommendations about threats in Windows 11 and 10. The page includes Quarantined items, Cleaned items, Removed items, Allowed items, Removed items, Blocked actions, and severity of a threat. Blocked actions option has 3 sub-menus – Block folder access, Blocked items, and Ruled-base block, similarly Severity has 4 items – Severe High, Moderate, and Low. But sometimes people complain Protection History missing issue.
The Windows Defender Protection history is empty or blank and nothing can be seen on the page when the problem occurs. Immediately after running a “Quick Scan”, “Full Scan”, “Custom Scan” or “Microsoft Defender offline scan”, usually a user navigates to Protection history. But he gets disappointed and finds himself out of nowhere when finds unoccupied because he is unable to know the status of threats or clear them on his Windows 11 computer. Fortunately, there are solutions to this problem. See – Fix: Insider Program Settings Blank, Empty, or Missing in Windows 10.
Windows Defender Protection History missing
Here is how to fix Protection History missing in Windows 11 or 10 –
Way-1: Disable Windows Defender and reboot the PC
To normally access the concerned settings you can go through – How to See Protection History in Windows 10, but in this case, the content inside this page is missing. Turning off the Windows Defender and deleting the mpcache files work like wonder to fix the issue –
- Hit – Windows and R.
- Type – cmd.exe.
- Press Ctrl + Shift + Enter.
- Select Yes when the User account control setting popup opens.
- Type the following commands successively and press Enter.
del "C:\ProgramData\Microsoft\Windows Defender\Scans\History\Service\DetectionHistory\*"
del "C:\ProgramData\Microsoft\Windows Defender\Scans\mpenginedb.db"- Click on Search.
- Type Windows Security.
- Press Enter.
- Select – Virus & threat protection.
- Now click on the Manage settings link.
- From the next page, turn off Real-time protection and Cloud-delivered protection.
- Now open File Explorer (Win+E).
- Go to (C:) drive.
- Double-click on ProgramData.
- Open the Microsoft folder.
- Enter Windows Defender and the launch Scans folder.
- The path will be as follow –
C:\ProgramData\Microsoft\Windows Defender\Scans- Find all the files with prefix mpcache and delete them.
- On my computer, the Scans folder has the following files which I am deleting –
mpcache-8B71EC38EE6CA744C8B3D9719F943BEFDB9392A9.bin
mpcache-8B71EC38EE6CA744C8B3D9719F943BEFDB9392A9.bin.01
mpcache-8B71EC38EE6CA744C8B3D9719F943BEFDB9392A9.bin.6C
mpcache-8B71EC38EE6CA744C8B3D9719F943BEFDB9392A9.bin.7C
mpcache-8B71EC38EE6CA744C8B3D9719F943BEFDB9392A9.bin.7E
mpcache-8B71EC38EE6CA744C8B3D9719F943BEFDB9392A9.bin.67
mpcache-8B71EC38EE6CA744C8B3D9719F943BEFDB9392A9.bin.79
mpcache-8B71EC38EE6CA744C8B3D9719F943BEFDB9392A9.bin.80
mpcache-8B71EC38EE6CA744C8B3D9719F943BEFDB9392A9.bin.83
mpcache-8B71EC38EE6CA744C8B3D9719F943BEFDB9392A9.bin.87
mpcache-8B71EC38EE6CA744C8B3D9719F943BEFDB9392A9.bin.A0
mpcache-8B71EC38EE6CA744C8B3D9719F943BEFDB9392A9.bin.DB
mpcache-8B71EC38EE6CA744C8B3D9719F943BEFDB9392A9.bin.E6- Sometimes, you might not be able to delete mpcache files and get a message – “The action cannot be completed because the file is open in Microsoft Defender Antivirus Service”.
- In this case, press Ctrl+Shift+Esc.
- On the Task Manager, Find the processes related to Widows Security and Windows Defender.
- Right-click on each of them and select End task.
- Now try to delete mpcache files.
- Reboot the PC if you can get back the missing Protection history in Windows Defender.
Way-2: Delete mpcache files using cmd command to fix missing Windows security threat history
II you can not remove mpcache files even after turning off real-time protection and using End Task in Task Manager then a cmd command may help.
- Launch Command prompt as administrator (Steps are mentioned in the first method)
- Enter the following command –
del "C:\ProgramData\Microsoft\Windows Defender\Scans\mpcache*" /s > NUL 2>&1- Finally, restart your PC to see missing Protection History in Windows 11 or 10.
Methods:
Way-1: Disable Windows Defender and reboot the PC
Way-2: Delete mpcache files using cmd command
That’s all!!
Подобно другим антивирусам, встроенный Защитник Windows ведет историю обнаруженных угроз, просмотреть которую можно в журнале защиты. Эти записи будут отображаться в журнале, даже если опасный файл обезврежен и помещен в карантин, что может вызвать своеобразный побочный эффект, проявляющийся наличием красного или желтого значка на иконке Защитника в системном лотке. в Windows 10 2004 разработчики вроде бы должны были решить эту проблему.
Но, судя по отзывам пользователей, сталкиваться с ней приходится и в последней стабильной версии системы.
Чтобы избавиться от этих предупреждающих о несуществующей уже угрозе значков, нужно очистить журнал Windows Defender. В сборках до релиза 1903 сделать это можно было через интерфейс управления безопасностью Windows, в более поздних сборках системы кнопка очистки журнала отсутствует. Данные журнала удаляются автоматически по истечении 30-и дней, но вы можете сократить этот период или просто удалить их принудительно.
Изменение срока хранения Журнала Защитника
Для изменения срока хранения записей в журнале Защитника Windows 10 мы предлагаем использовать консоль PowerShell.
Запустив ее от имени администратора, выполните в ней команду Get-MpPreference и найдите в полученном списке параметр ScanPurgeItemsAfterDelay.
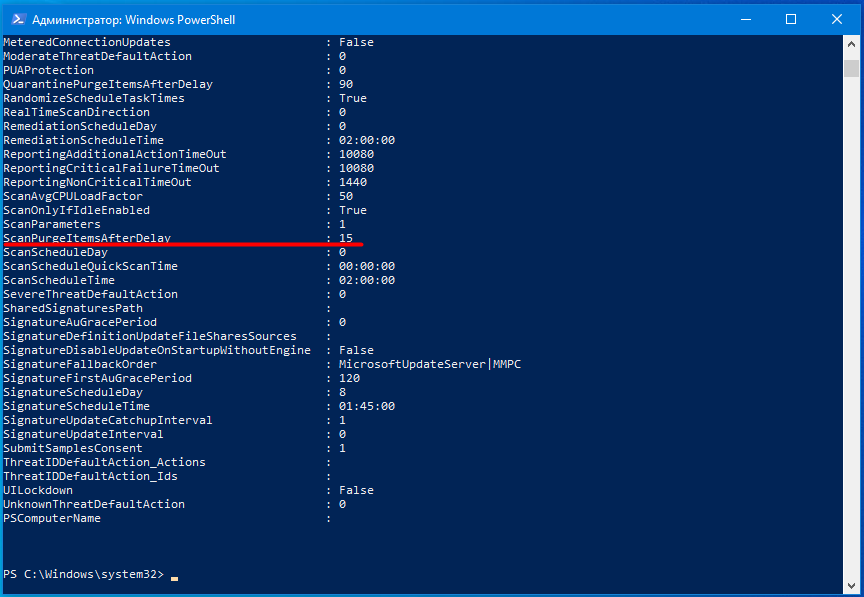
В Windows 10 2004 его значение равняется 15, то есть данные журнала хранятся 15 дней. Чтобы сократить этот срок, скажем, до двух дней, выполните в PowerShell такую команду:
Set-MpPreference -ScanPurgeItemsAfterDelay 2

Принудительная очистка Журнала Защитника
Если вы хотите очистить журнал прямо сейчас, выполните следующие действия.
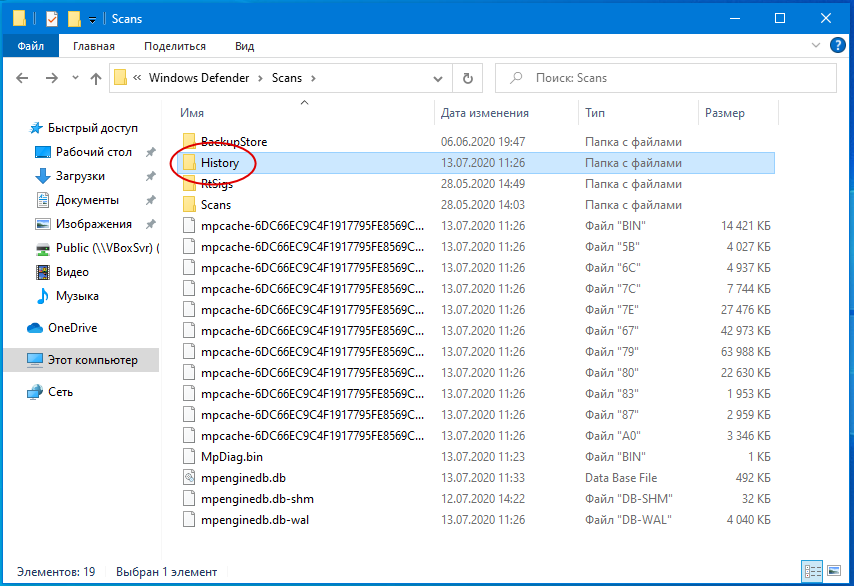
Перейдите в Проводнике в папку C:\ProgramData\Microsoft\Windows Defender\Scans, а затем зайдите в расположенную в ней папку History, подтвердив вход с правами администратора.
В свою очередь, в ней найдите папку Service и удалите ее.
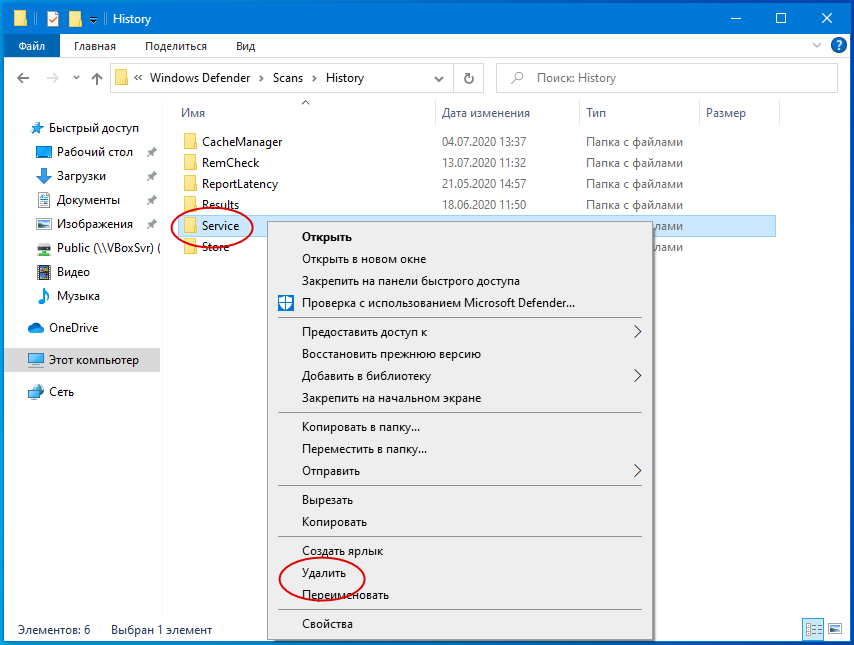
Вместе с ней будет удалена и история действий Windows Defender.
Должен исчезнуть и значок предупреждения на иконке Защитника. Однако, если у вас не настроены базовые функции безопасности, желтый значок предупреждения будет отображаться независимо от того, имеются в журнале записи или нет.