
-
Home
-
Partition Manager
- Open/Run/Use Windows Defender from Command Prompt (New Guide)
By Amy | Follow |
Last Updated
How to use Windows Defender from Command Prompt to execute various tasks? Well, this post of MiniTool would tell you how to do that in detail.
What Can Windows Defender Do
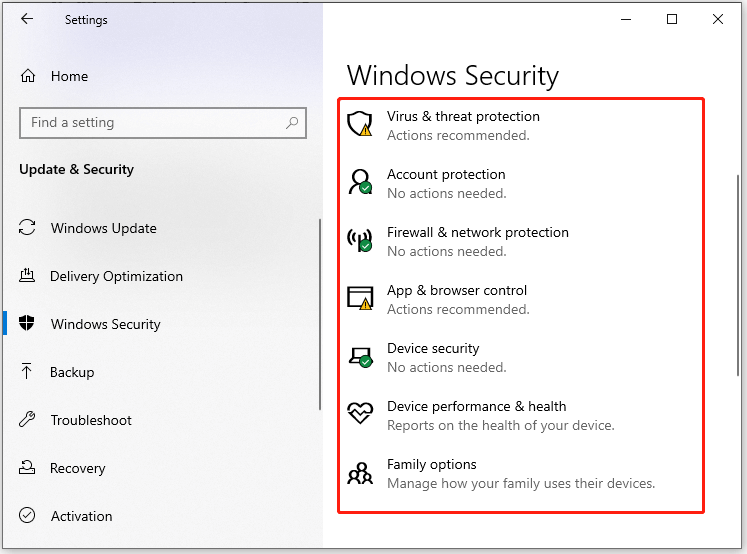
Windows Defender is also referred to as Windows Security, which is an embedded utility in Windows systems. It usually runs silently in the background and offers you real-time protection. What does it do? It scans, detects, and removes viruses, spyware, and malware.
As shown in the picture below, Windows Defender can provide you with virus & threat protection, account protection, Firewall & network protection, app & browser control, and device (performance & health) protection.
If you are locked out of its graphics user interface or don’t want to launch it, you can directly use Windows Defender from Command Prompt. This post shows you how to use Windows Defender from Command Prompt to execute different operations.
Before starting any operations, run Command Prompt as administrator. Here are the detailed steps for doing that.
Step 1: Type cmd in the search box.
Step 2: Click Run as administrator in the right panel. Alternatively, you can also right-click on Command Prompt and click Run as administrator.

Is Windows Defender Enough? More Solutions to Protect PC
Use Command Lines to Perform a Quick Scan
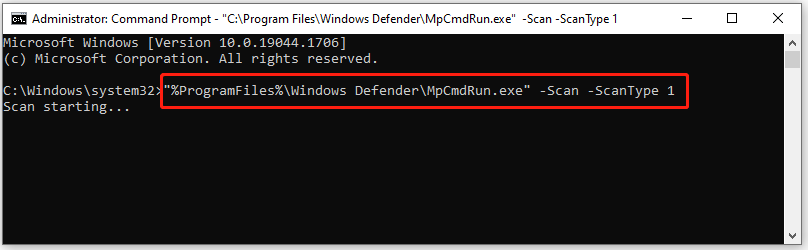
To find viruses, malware, and other threats in some common places, you can run a quick scan. As its name implies, the quick scan process will complete in a few minutes. If you want to use Windows Defender from Command Prompt to perform a quick scan, type the command below after running Command Prompt as administrator and hit Enter.
Tip: According to your configuration, you can replace 1 with 0 in the command to begin a default scan.
“%ProgramFiles%Windows DefenderMpCmdRun.exe” -Scan -ScanType 1
Use Command Lines to Perform a Full Scan
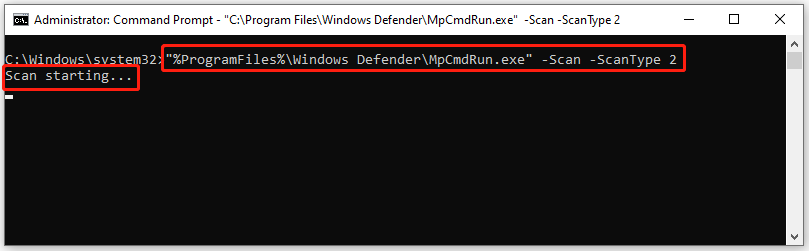
If you would like to conduct an in-depth scan on your PC, you need to perform a full scan. Compared with quick the quick scan, a full scan needs more time. To execute a full scan via command lines, type the following command in the opened prompt window and press Enter.
“%ProgramFiles%Windows DefenderMpCmdRun.exe” -Scan -ScanType 2
How to Remove Mechanical, Membrane, and MacBook Keyboard Keys
Use Command Lines to Perform a Custom Scan
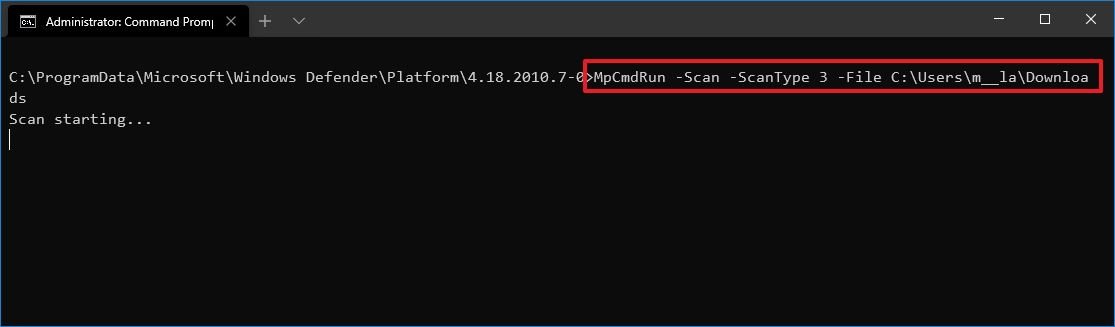
To scan specific files or folders for viruses and other threats, you should perform a custom scan. This sort of scan is also available for external storage devices like USB flash drives and external hard drives. The following command shows you how to use Microsoft Defender Antivirus from Command Prompt to conduct a custom scan.
Tip: You should replace D:FolderPath with the actual folder or file path that you would like to scan.
“%ProgramFiles%Windows DefenderMpCmdRun.exe” -Scan -ScanType 3 -File “D:FolderPath”
Use Command Lines to Scan for Infected Boot Sectors
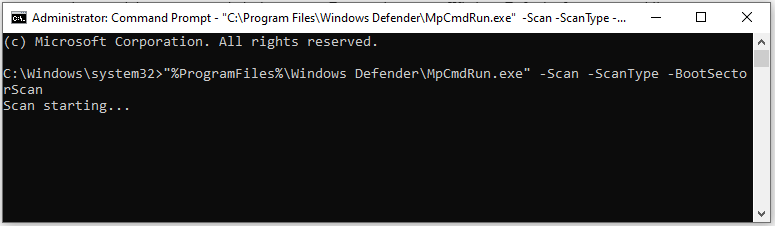
Boot sectors in the computer store all the important information related to your PC’s boot-up. However, some viruses and threats may attack the boot sector. Fortunately, you run Windows Defender from command line to scan and remove threats with boot sectors.
“%ProgramFiles%Windows DefenderMpCmdRun.exe” -Scan -ScanType -BootSectorScan
WWE 2K22 Image Upload: Use the Image Uploader or Face Scan
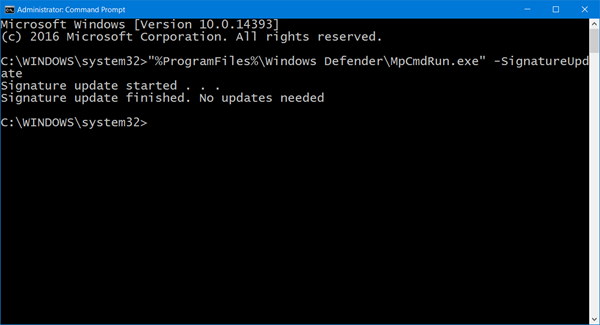
Run Command Lines to Update Windows Defender Antivirus
You can also use Windows Defender from Command Prompt to update Microsoft Defender Antivirus. For that, you simply need to type the command below and press Enter.
“%ProgramFiles%Windows DefenderMpCmdRun.exe” -SignatureUpdate
Run Commands Lines to Restore Quarantined Files
Files would be moved to Quarantine if Microsoft Defender Antivirus thinks it’s suspicious. If you need these files, you can restore them via the command lines of Windows Defender.
“%ProgramFiles%Windows DefenderMpCmdRun.exe” -Restore -ListAll
Find the file that you want to restore from the list, and then type the command below and press Enter. You should replace FileName with the exact file name you want to restore.
“%ProgramFiles%Windows DefenderMpCmdRun.exe” -Restore -Name “FileName”
How to run Windows Defender from command line? How to use Microsoft Defender Antivirus from Command Prompt? This post has shown you the answers. Read it now!
About The Author
Position: Columnist
Having writing articles about computer tech for a long time, I am rather experienced especially on the aspect of computer optimization, PC enhancement, as well as tech terms explanation. The habit of looking through tech forums makes me a great computer issues collector. And then, many articles related to these issues are released, which benefit plenty of users. Professional, effective, and innovative are always the pursuit of an editing worker.
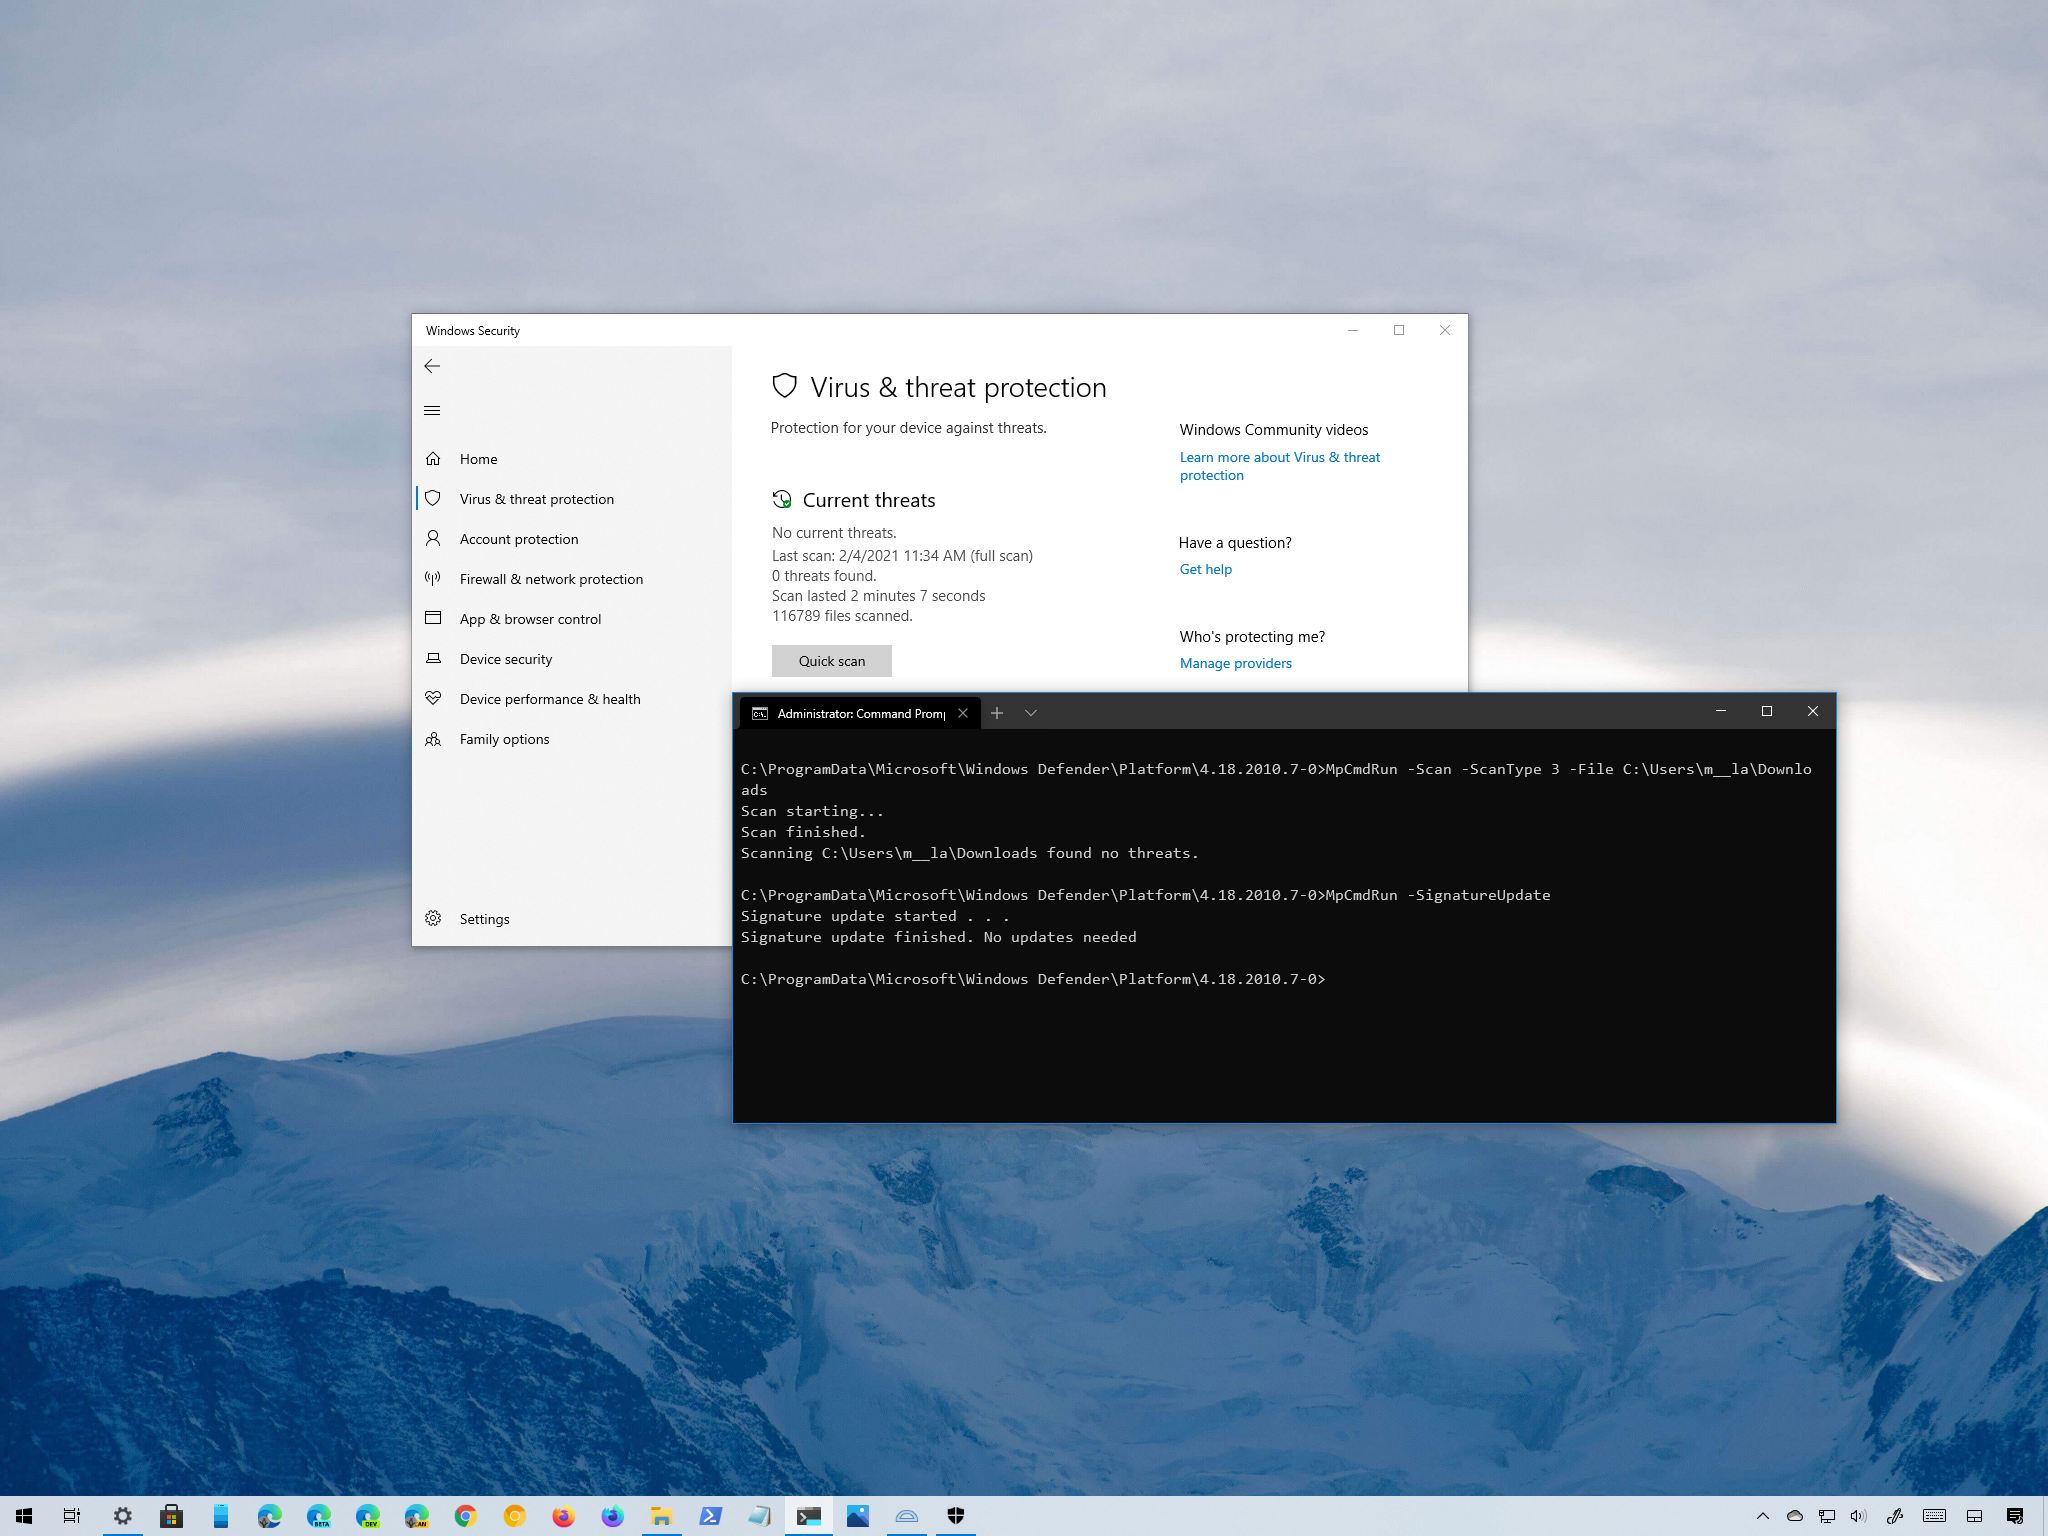
(Image credit: Windows Central)
On Windows 10, Microsoft Defender Antivirus provides advanced real-time protection to protect your device and files against viruses, ransomware, spyware, rootkits, and other forms of malware, including hackers.
Although you can easily control the feature using the Windows Security app, you can also handle various aspects of the antivirus (updates, scans, and quarantined items) through Command Prompt. Usually, managing the experience with commands can be useful in many situations. For instance, when you need to use a script to automate some of the anti-malware tasks. You want to set a specific schedule to download updates or perform a quick, full, or custom scan. Or when you need to complete particular tasks on multiple computers.
In this Windows 10 guide, we will walk you through the steps to manage Microsoft Defender Antivirus with Command Prompt.
- How to check for updates on Microsoft Defender
- How to perform quick virus scan with Microsoft Defender
- How to perform full virus scan with Microsoft Defender
- How to perform custom virus scan with Microsoft Defender
- How to perform boot sector malware scan on Microsoft Defender
- How to restore quarantined items on Microsoft Defender
How to check for updates on Microsoft Defender
To check and download updates for Microsoft Defender, use these steps:
- Open Start.
- Search for Command Prompt, right-click the top result, and select the Run as administrator option.
- Type the following command to open the antivirus tool location and press Enter:
cd C:\ProgramData\Microsoft\Windows Defender\Platform\4.18* - Type the following command to check and update Microsoft Defender Antivirus and press Enter:
MpCmdRun -SignatureUpdate
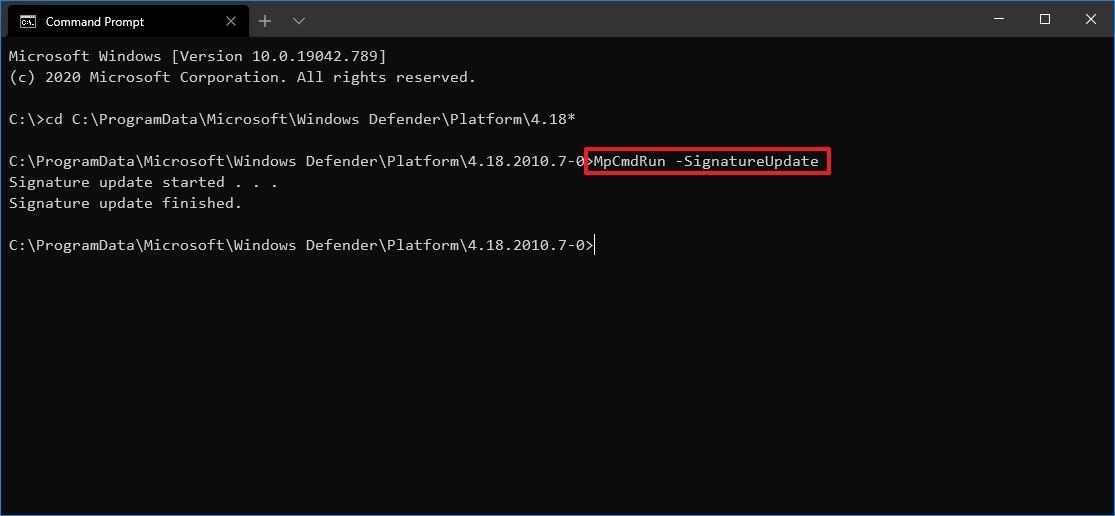
Once you complete the steps, the tool will check and download any update available for the built-in antivirus.
Uninstall definitions updates
You can also remove previously installed updates with these steps:
- Open Start.
- Search for Command Prompt, right-click the top result, and select the Run as administrator option.
- Type the following command to open the antivirus tool location and press Enter:
cd C:\ProgramData\Microsoft\Windows Defender\Platform\4.18* - Type the following command to remove the most recent definitions and press Enter:
MpCmdRun -RemoveDefinitions -AllThe -All option restores the previous definitions from the backup or original default set of signatures. - Type the following command to rollback the engine version and press Enter:
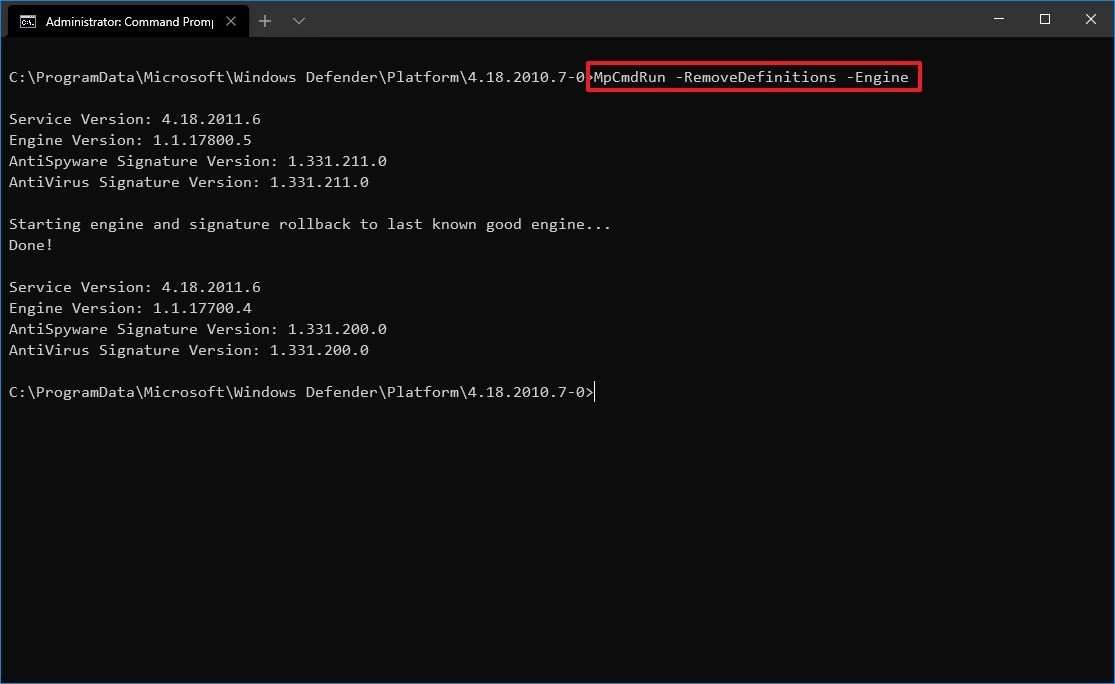
MpCmdRun -RemoveDefinitions -EngineThe -Engine option rolls back to the previous version of the antivirus engine.
- Type the following command to remove dynamic signature updates and press Enter:
MpCmdRun -RemoveDefinitions -DynamicSignaturesThe -DynamicSignatures option uninstalls only the dynamic signatures.
After you complete the steps, the definitions will be removed from your computer according to your configuration.
All the latest news, reviews, and guides for Windows and Xbox diehards.
How to perform quick virus scan with Microsoft Defender
To perform a quick Microsoft Defender scan, use these steps:
- Open Start.
- Search for Command Prompt, right-click the top result, and select the Run as administrator option.
- Type the following command to open the antivirus tool location and press Enter:
cd C:\ProgramData\Microsoft\Windows Defender\Platform\4.18* - Type the following command to perform a quick antivirus scan and press Enter:
MpCmdRun -Scan -ScanType 1Quick tip: You can also replace 1 with the 0 option in the command to start a default scan according to your configuration.

Once you complete the steps, the scan will begin, but it takes more than one day, the process will stop automatically.
How to perform full virus scan with Microsoft Defender
To perform a full Microsoft Defender scan with Command Prompt, use these steps:
- Open Start.
- Search for Command Prompt, right-click the top result, and select the Run as administrator option.
- Type the following command to open the antivirus tool location and press Enter:
cd C:\ProgramData\Microsoft\Windows Defender\Platform\4.18* - Type the following command to perform a full antivirus scan and press Enter:
MpCmdRun -Scan -ScanType 2
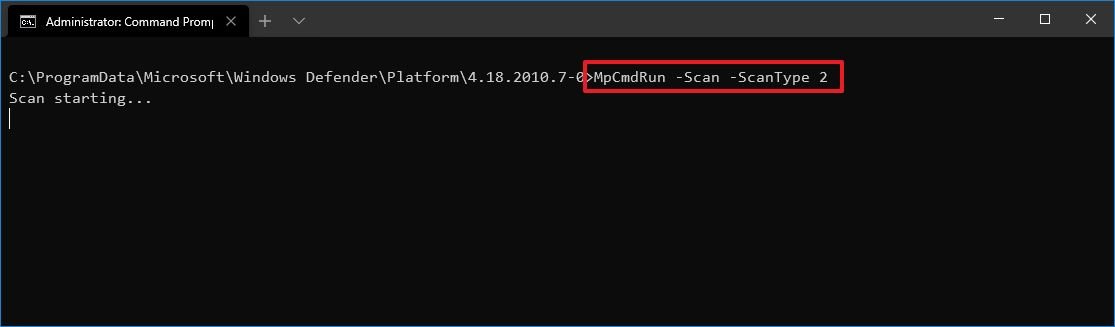
After you complete the steps, the antivirus will perform a full malware scan on your device. Depending on the amount of data, this process can take a very long time.
How to perform custom virus scan with Microsoft Defender
To customize a malware scan using Command Prompt, use these steps:
- Open Start.
- Search for Command Prompt, right-click the top result, and select the Run as administrator option.
- Type the following command to open the antivirus tool location and press Enter:
cd C:\ProgramData\Microsoft\Windows Defender\Platform\4.18* - Type the following command to perform a custom antivirus scan and press Enter:
MpCmdRun -Scan -ScanType 3 -File PATH\TO\FOLDER-FILESIn the command, make sure to specify the path to the folder you want to scan.For example, this command scans the «Downloads» folder:MpCmdRun -Scan -ScanType 3 -File C:\Users\username\Downloads
- (Optional) Type the following command to perform a custom scan with timeout time and press Enter:
MpCmdRun -Scan -ScanType 3 -File PATH\TO\FOLDER-FILES -Timeout 1In the command, make sure to specify the path to the folder you want to scan.For example, this command scans the «Downloads» folder and sets the timeout to one day:MpCmdRun -Scan -ScanType 3 -File C:\Users\username\Downloads -Timeout 1Quick note: You can always change the number for the timeout option to specify another number of days. The option is also available for quick and full scan commands.
Once you complete the steps, the anti-malware solution will only scan the location you specified. If you are using the «-Timeout» option, then if the scan is taking a long time, it will timeout once the time you specified has been reached.
How to perform boot sector malware scan on Microsoft Defender
On Windows 10, the boot sector is an essential section in the installation drive that stores the instructions on how to start the boot process. Sometimes, viruses can also attack the boot sector causing unwanted behaviors, which can be challenging to troubleshoot and fix. However, Microsoft Defender Antivirus includes an option to check and remove malicious code that may be residing in the boot sector.
To scan the boot sector for malware with Microsoft Defender, use these steps:
- Open Start.
- Search for Command Prompt, right-click the top result, and select the Run as administrator option.
- Type the following command to open the antivirus tool location and press Enter:
cd C:\ProgramData\Microsoft\Windows Defender\Platform\4.18* - Type the following command to perform a custom antivirus scan and press Enter:
MpCmdRun -Scan -ScanType -BootSectorScan

After you complete the steps, Microsoft Defender Antivirus will scan the boot sector for any malicious code that may be affecting the device.
How to restore quarantined items on Microsoft Defender
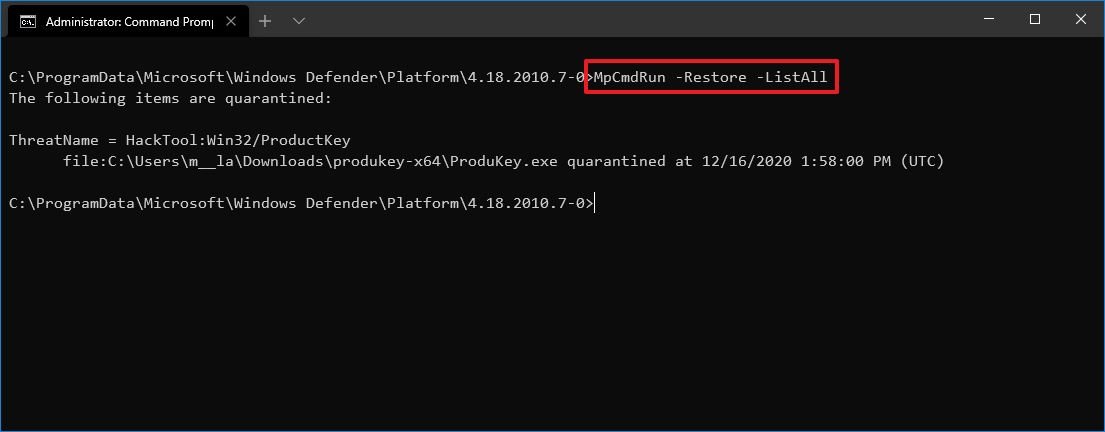
The Microsoft Defender Antivirus command-line tool also includes an option to view a list of quarantined items and another option to restore items that might have been detected as malicious when they are not harmful.
To view and restore quarantined items with Command Prompt, use these steps:
- Open Start.
- Search for Command Prompt, right-click the top result, and select the Run as administrator option.
- Type the following command to open the antivirus tool location and press Enter:
cd C:\ProgramData\Microsoft\Windows Defender\Platform\4.18* - Type the following command to view quarantined items and press Enter:
MpCmdRun -Restore -ListAll
- Type the following command to restore all quarantined item and press Enter:
MpCmdRun -Restore -All - Type the following command to restore a specific quarantined item and press Enter:
MpCmdRun -Restore -Name ITEM-NAMEIn the command, replace the «ITEM-NAME» for the name of the quarantined item you want to restore. - Type the following command to restore a specific quarantined item to a specific path and press Enter:
MpCmdRun -Restore -Name ITEM-NAME -FilePath PATH\TO\RESTOREDIn the command, make sure to specify the path to restore the item.For example, this command restores a specific item to the Documents folder:MpCmdRun -Restore -Name app.exe -FilePath C:\Users\username\Downloads
Once you complete the steps, the items will be restored in the original or alternate location, depending on the command.
This guide focuses on the more important commands you can use with Command Prompt, but the tool includes additional options, which you can view running the
MpCmdRuncommand.
While you can manage a number of functions through Command Prompt, the tool is quite limited. For example, you cannot start an offline scan or change preferences. If you want to manage settings and control virtually every aspect of Microsoft Defender Antivirus with commands, you should be using the PowerShell modules instead.
Mauro Huculak has been a Windows How-To Expert contributor for WindowsCentral.com for nearly a decade and has over 15 years of experience writing comprehensive guides. He also has an IT background and has achieved different professional certifications from Microsoft, Cisco, VMware, and CompTIA. He has been recognized as a Microsoft MVP for many years.
Download Windows Speedup Tool to fix errors and make PC run faster
Windows Defender on Windows 11/10 has the ability to scan, update, or run other tasks from the command prompt. The application MpCmdRun.exe is situated in the %ProgramFiles%\Windows Defender folder respectively and is called the Microsoft Antimalware Service Command Line Utility. You can use this tool to automate and troubleshoot Microsoft Antimalware Service.

To do so, open the command prompt as an administrator. Type the following to get the entire list of commands:
"%ProgramFiles%\Windows Defender\MpCmdRun.exe"
Run Defender Quick scan from the command line
So for instance if you wish to run a Quick scan from the command line, you can use -Scan 1 parameter:
"%ProgramFiles%\Windows Defender\MpCmdRun.exe" -Scan -ScanType 1
Run Defender Full scan from the command line
To perform a Full scan, use:
"%ProgramFiles%\Windows Defender\MpCmdRun.exe" -Scan -ScanType 2
Purge Windows Defender Definitions cache
At a command prompt (admin) enter the following command and hit Enter:
%ProgramFiles%\Windows Defender\MpCmdRun.exe -removedefinitions -all
Update Windows Defender Quick from the command line
To Update Windows Defender or to create a shortcut to update your Windows Defender you can use the following command:
"%ProgramFiles%\Windows Defender\MpCmdRun.exe" –signatureupdate
You can also create desktop shortcuts to run the following commands.
Read: You can also update Windows Defender definitions using Windows PowerShell.
MpCmdRun.exe process
Here is the entire list which I have copy-pasted from the command prompt results:
MpCmdRun.exe [command] [-options]
Command Descriptions:
- -? / -h : Displays all available options for this tool
- -Trace [-Grouping #] [-Level #] : Starts diagnostic tracing
- -RemoveDefinitions [-All] : Restores the installed signature definitions to a previous backup copy or to the original default set of signatures
- -RestoreDefaults : Resets the registry values for Microsoft Antimalware Service settings to known good defaults
- -SignatureUpdate [-UNC] : Checks for new definition updates
- -Scan [-ScanType] : Scans for malicious software
- -Restore -Name <name> [-All] : Restore the most recently or all quarantined item(s) based on name
- -GetFiles : Collects support information
- -Restore : Restore or list quarantined item(s)
- -AddDynamicSignature : Loads a dynamic signature
- -ListAllDynamicSignatures : List the loaded dynamic signatures
- -RemoveDynamicSignature : Removes a dynamic signature.
Hope this helps you get started. For details, you may visit Microsoft.
Anand Khanse is the Admin of TheWindowsClub.com, a 10-year Microsoft MVP (2006-16) & a Windows Insider MVP (2016-2022). Please read the entire post & the comments first, create a System Restore Point before making any changes to your system & be careful about any 3rd-party offers while installing freeware.
Reader Interactions
В данной статье показаны действия, с помощью которых можно управлять различными режимами Защитника Windows в командной строке.
Защитник Windows (Windows Defender) в операционной системе Windows 10 — это встроенное антивирусное программное обеспечение для управления безопасностью и антивредоносными средствами для настольных компьютеров, мобильных устройств и серверов.
Приложение Защитник Windows представляет собой простой в использовании графический интерфейс и большую часть времени работает в фоновом режиме.
Вы также можете использовать Защитник Windows с помощью командной строки. Это может пригодиться при автоматизации определенных задач, а также в познавательных целях.
Есть два способа использовать Защитник Windows в командной строке.
С помощью исполняемого файла MSASCui.exe можно управлять графическим интерфейсом антивируса, который находится в папке:
%ProgramFiles%\\Windows Defender\\
И при помощи утилиты командной строки MpCmdRun.exe, которая предоставляет больше опций по использованию Защитника Windows и команды по умолчанию выполняются незаметно для пользователя в фоновом режиме. Утилита находится в папке:
%ProgramFiles%\\Windows Defender\\
Как использовать Защитник Windows (MSASCui.exe) в командной строке
Следующие команды используют MSASCui.exe и позволяют обновлять Защитник Windows и запускать разные режимы сканирования. Каждая из команд запускает приложение для выполнения какой-либо задачи, число команд ограничено по сравнению с возможностями утилиты MpCmdRun.exe.
Запустите командную строку от имени администратора, для этого нажмите сочетание клавиш + X или щелкните правой кнопкой мыши по кнопке Пуск в панели задач и в появившемся контекстном меню выберите пункт Командная строка (администратор).
Для проверки наличия обновлений и быстрого сканирования выполните команду:
«%ProgramFiles%\\\\Windows Defender\\\\MSASCui.exe» -UpdateAndQuickScan

Для скачивания и установки обновлений выполните команду:
«%ProgramFiles%\\\\Windows Defender\\\\MSASCui.exe» -Update
Для быстрого сканирования выполните команду:
«%ProgramFiles%\\\\Windows Defender\\\\MSASCui.exe» -QuickScan
Для полного сканирования выполните команду:
«%ProgramFiles%\\\\Windows Defender\\\\MSASCui.exe» -FullScan
Также Вы можете выполнить вышеприведенные команды с параметром -hide в конце, при этом графический интерфейс приложения не будет запущен, например:
«%ProgramFiles%\\\\Windows Defender\\\\MSASCui.exe» -UpdateAndQuickScan -hide
Как использовать Защитник Windows с помощью утилиты командной строки MpCmdRun.exe
С помощью утилиты командной строки MpCmdRun.exe, Вы можете запускать задачи в фоновом режиме (без запуска графического интерфейса приложения).
Запустите командную строку от имени администратора, для этого нажмите сочетание клавиш + X или щелкните правой кнопкой мыши по кнопке Пуск в панели задач и в появившемся контекстном меню выберите пункт Командная строка (администратор).
Для запуска обновления определений (сигнатур) выполните команду:
«%ProgramFiles%\\\\Windows Defender\\\\MpCmdRun.exe» -SignatureUpdate

Для выполнения быстрого сканирования выполните команду:
«%ProgramFiles%\\\\Windows Defender\\\\MpCmdRun.exe» -Scan -ScanType 1
Для полного сканирования выполните команду:
«%ProgramFiles%\\\\Windows Defender\\\\MpCmdRun.exe» -Scan -ScanType 2
Для выборочного сканирования файлов и папок выполните команду вида:
«%ProgramFiles%\\\\Windows Defender\\\\MpCmdRun.exe» -Scan -ScanType 3 -File PATH-TO-FILE-OR-FOLDER
Пример сканирования файлов и папок внутри папки Windows
«%ProgramFiles%\\\\Windows Defender\\\\MpCmdRun.exe» -Scan -ScanType 3 -File C:\\\\Windows
Также Вы можете сканировать и удалить вредоносный код загрузочного сектора, для этого выполните команду:
«%ProgramFiles%\\\\Windows Defender\\\\MpCmdRun.exe» -Scan -ScanType -BootSectorScan
Выше приведенные команды являются самыми распространенными, для просмотра других доступных опций, выполните команду:
«%ProgramFiles%\\\\Windows Defender\\\\MpCmdRun.exe»

Важно отметить, что эти инструкции также должны быть совместимы с предыдущими версиями операционной системы, включая Windows 7, Windows 8 и 8.1.
Возможные причины:
-
Превышение лимита трафика.
В этом случае необходимо увеличить тарифный план в биллинге, в разделе «сайты» — «подробно» формируете заявку на смену тарифного плана, в разделе «неподтверждённые заявки» в этой заявке будет рассчитана сумма доплаты необходимая для смены тарифа. Если в чём-то ошиблись, то данную заявку можете удалить и сформировать другую. Если в сформированной заявке всё правильно — подтверждайте её, при необходимости пополняйте баланс.
-
Закончился оплаченный период.
Продлите срок действия сайта в биллинге в разделе «сайты» — «подробно» укажите необходимое количество месяцев для продления и нажмите «продлить», сформированную заявку подтвердите в разделе «неподтверждённые заявки», при необходимости пополните баланс любым удобным способом в разделе «баланс».
Рекомендуем включить бесплатное SMS уведомление об изменении статуса услуг.
-
Нарушение правил хостинга.
Если возникли дополнительные вопросы — пишите в службу технической поддержки.