
Все способы:
- Способ 1: Папка автозапуска
- Способ 2: «Редактор реестра»
- Способ 3: Планировщик заданий
- Способ 4: Локальные групповые политики
- Вопросы и ответы: 4
Способ 1: Папка автозапуска
Методы добавления в автозагрузку скрипта BAT ничем не отличаются от методов добавления в автозагрузку ярлыков и других файлов. Самым простым и очевидным является копирование файла батника в папку автозапуска.
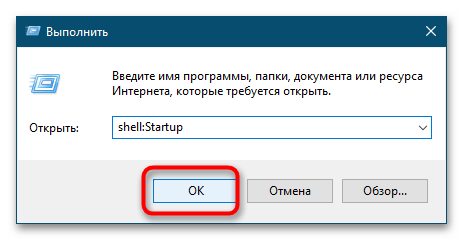
- Откройте папку автозапуска, для чего выполните в вызванном клавишами Win + R окошке команду
shell:Startup. - Скопируйте в открывшийся каталог файл BAT.
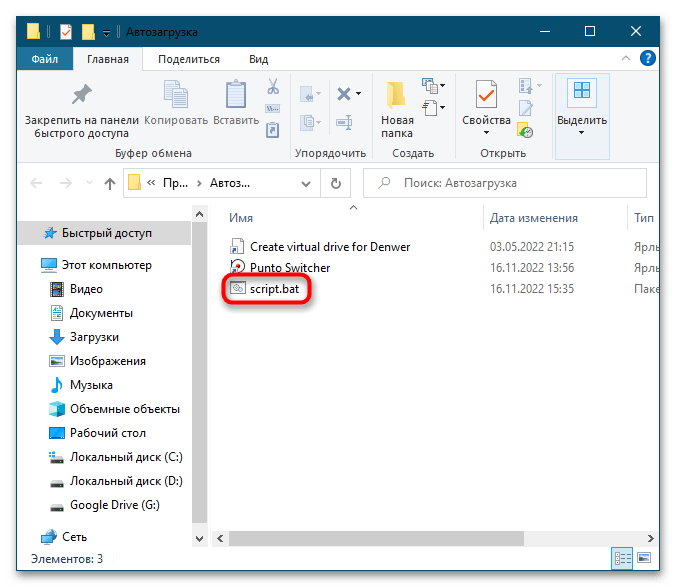
Это добавит командный файл в автозагрузку текущего пользователя. Если необходимо, чтобы скрипт выполнялся при входе в систему всех пользователей, скопируйте его в системную папку C:\ProgramData\Microsoft\Windows\Start Menu\Programs\Startup.
Способ 2: «Редактор реестра»
Добавить батник в автозагрузку можно также путем применения несложного твика реестра, прописав во встроенном «Редакторе реестра» путь к командному файлу.
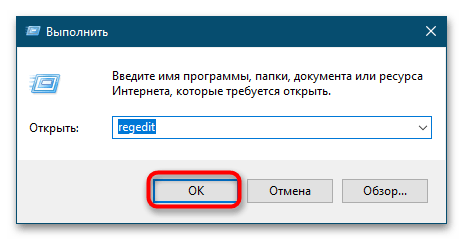
- Запустите «Редактор реестра» командой
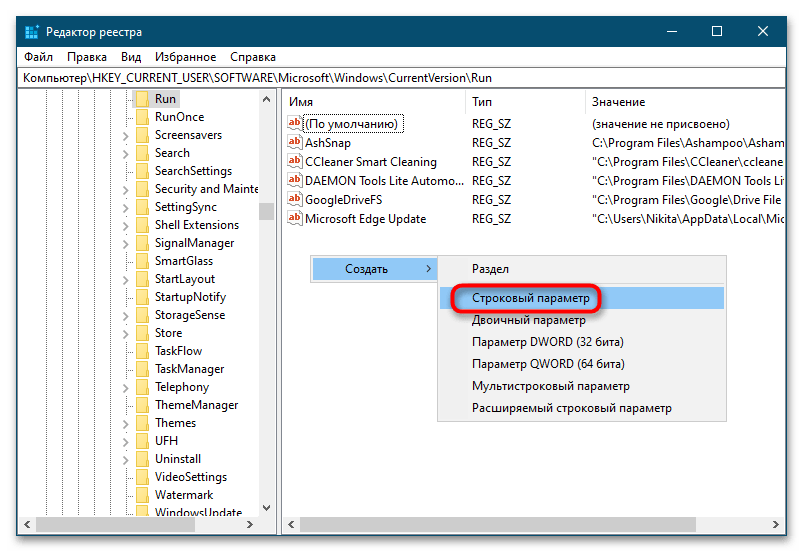
regedit, выполненной в диалоговом окошке Win + R. - Разверните ветку
HKEY_CURRENT_USER\SOFTWARE\Microsoft\Windows\CurrentVersion\RunилиHKEY_LOCAL_MACHINE\SOFTWARE\Microsoft\Windows\CurrentVersion\Run, если хотите, чтобы добавленный в автозапуск батник запускался для всех пользователей. - Создайте в правой колонке новый строковый параметр с именем файла BAT или произвольным названием.
- Откройте двойным кликом по созданному параметру окошко редактирования его значения и вставьте в поле «Значение» полный путь к BAT-файлу. Если в пути присутствуют пробелы, заключите путь в двойные прямые кавычки.

Скопировать полный путь к файлу можно в его «Свойствах» либо из его контекстного меню, вызванного с зажатой клавишей Shift.
Способ 3: Планировщик заданий
Следующий метод добавления командного файла в автозагрузку Windows 10 заключается в создании задачи в системном «Планировщике заданий».
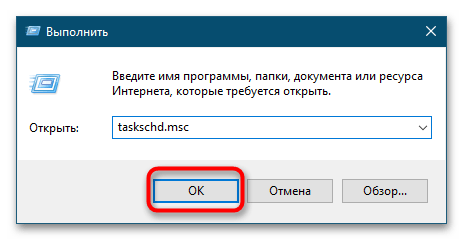
- Запустите «Планировщик заданий» командой
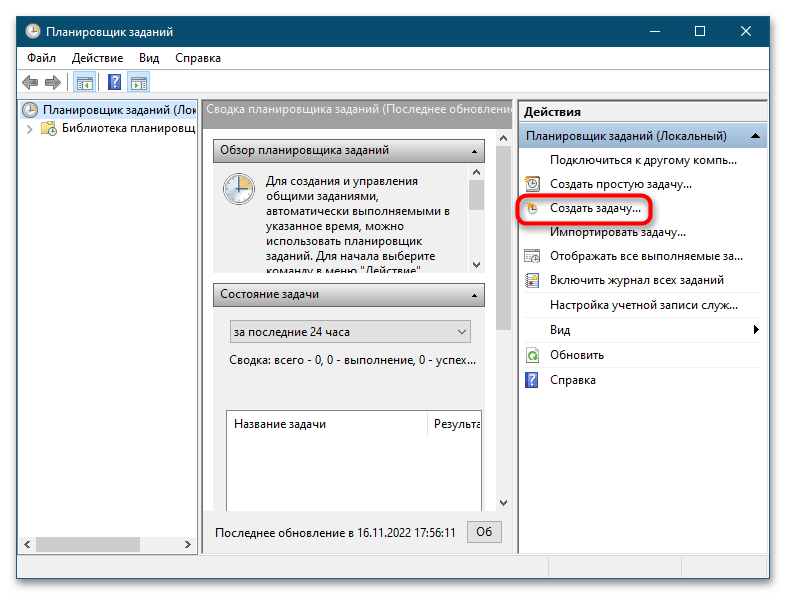
taskschd.msc, выполненной в диалоговом окошке Win + R. - Нажмите в правой колонке по «Создать задачу».
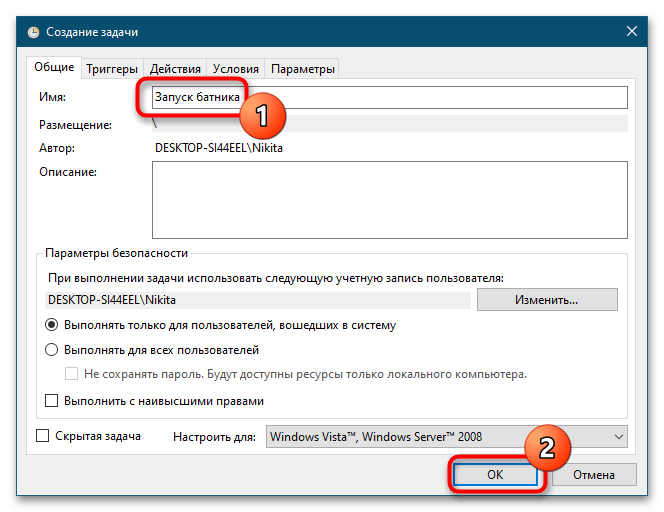
- В окне мастера создания задачи дайте новому заданию произвольное имя, активируйте, если нужно, запуск скрипта с наивысшими правами.
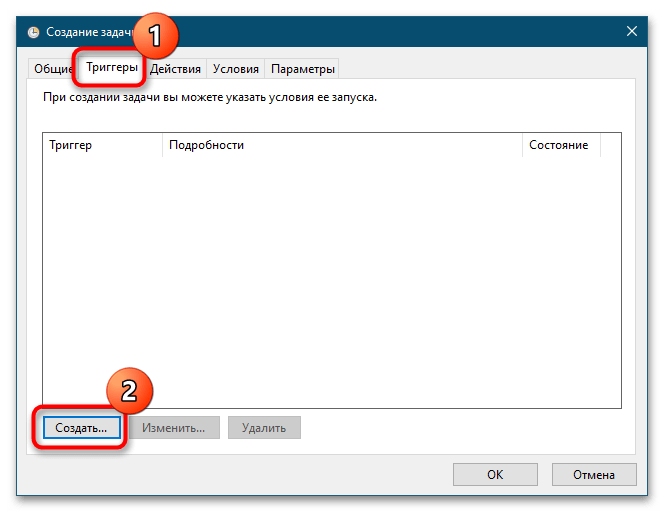
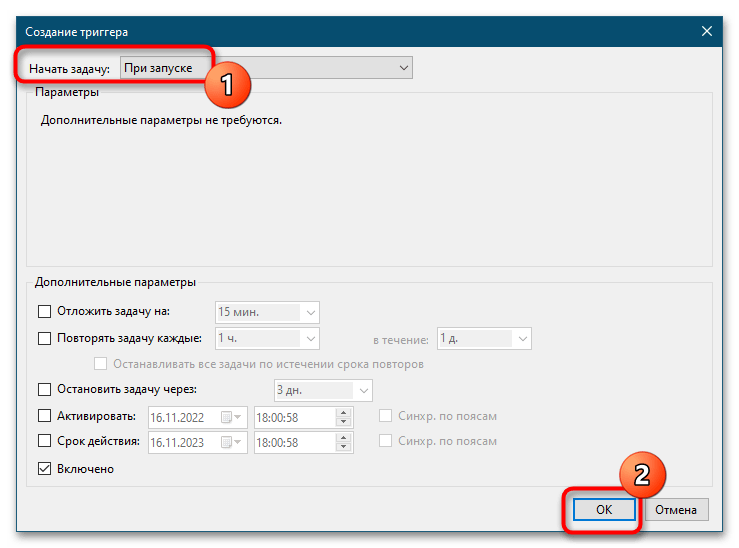
- Перейдите на вкладку «Триггеры» и нажмите кнопку «Создать».
- В выпадающем списке «Начать задачу» выберите «При запуске» или «При входе в систему». Нажмите «OK».
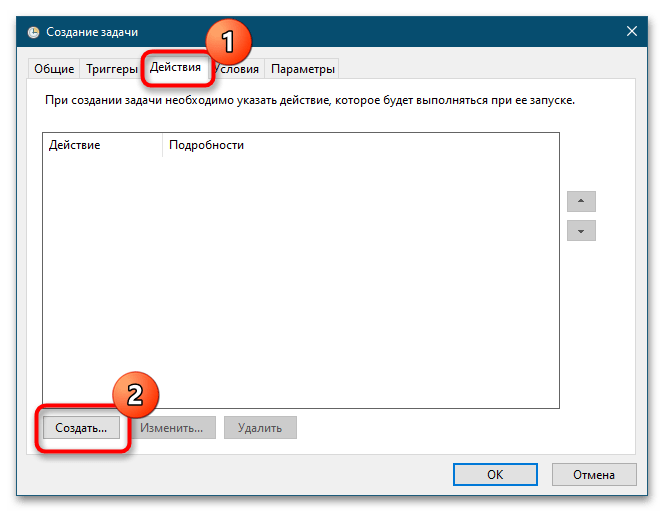
- Перейдите на вкладку «Действия» и нажмите «Создать».
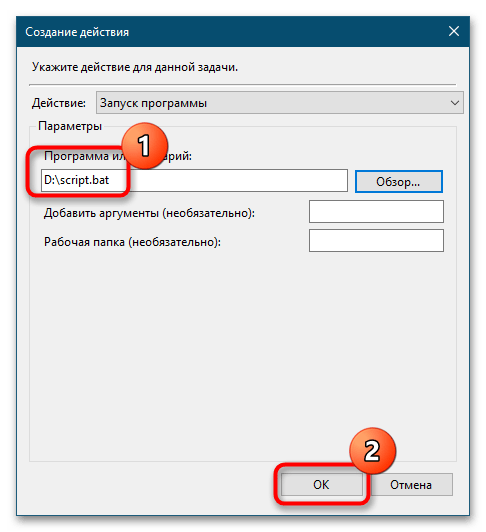
- Нажав кнопку «Обзор», выберите добавляемый в автозапуск файл BAT. Остальные настройки можно не менять, убедитесь только, что в качестве действия выбран «Запуск программы» и последовательно сохраните настройки.
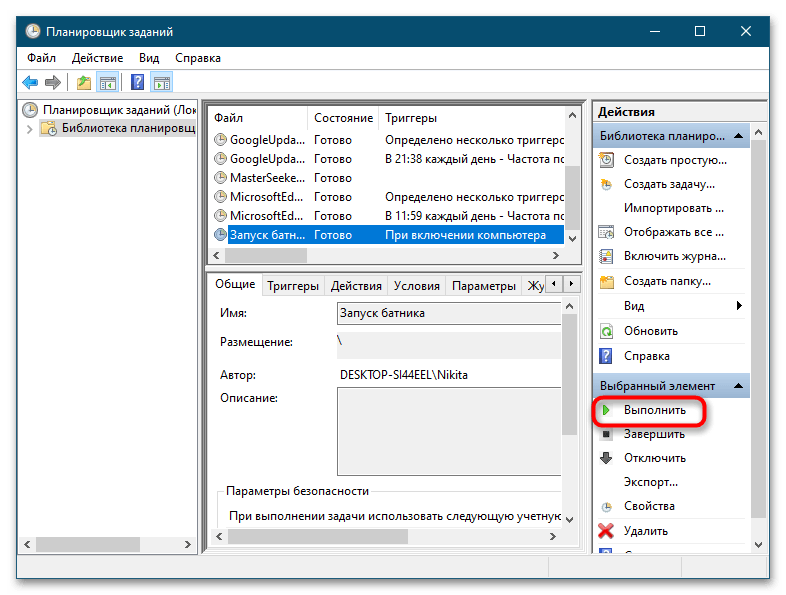
Созданная задача появится в разделе «Библиотека планировщика заданий». При желании ее можно будет испытать, выделив мышкой и нажав ссылку «Выполнить» в правой колонке «Планировщика заданий».
Способ 4: Локальные групповые политики
Этот способ добавления батника в автозагрузку подходит только для Windows 10 редакции Pro и выше.
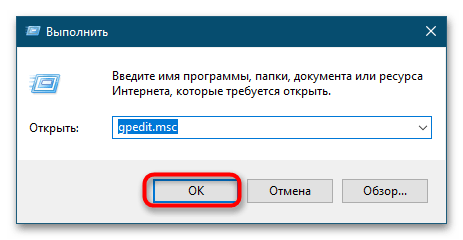
- Запустите «Редактор локальных групповых политик» командой
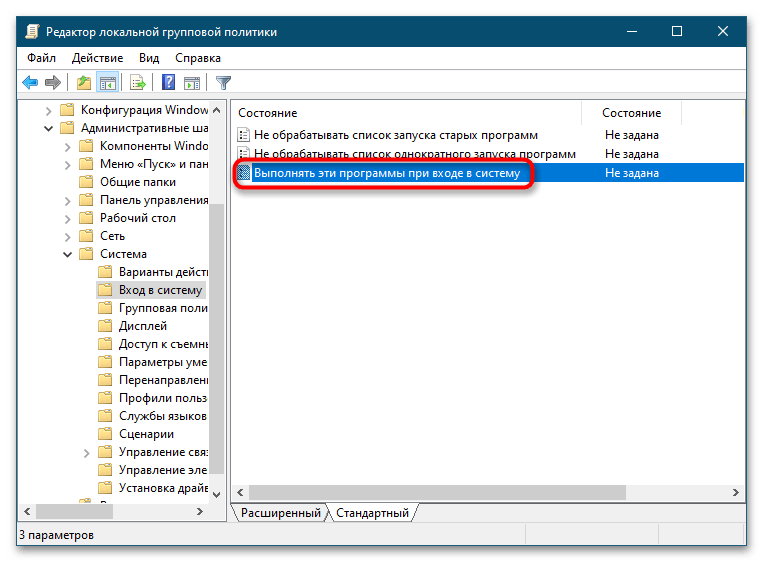
gpedit.mscчерез диалоговое окошко «Выполнить» (Win + R). - Разверните ветку «Конфигурация пользователя» → «Административные шаблоны» → «Система» → «Вход в систему» и откройте двойным кликом настройки политики «Выполнять эти программы при входе в систему».
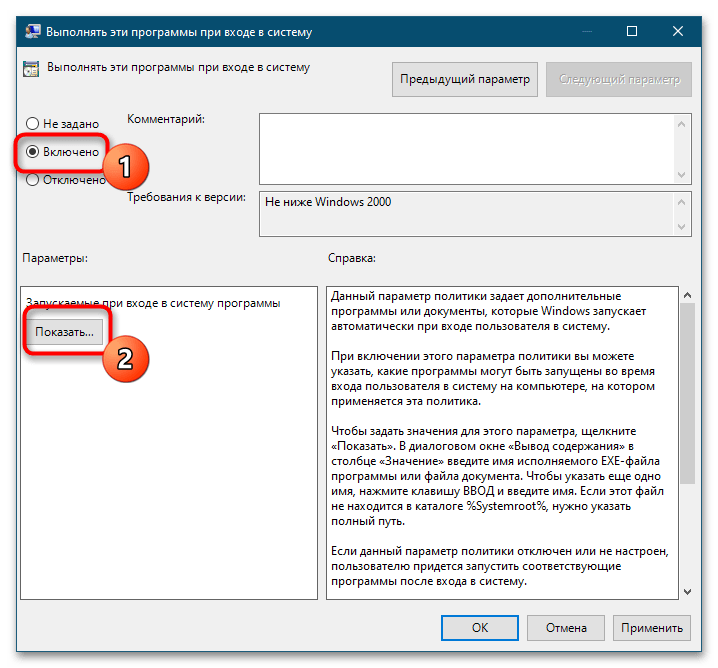
- Активируйте радиокнопку «Включено» и нажмите кнопку «Показать».
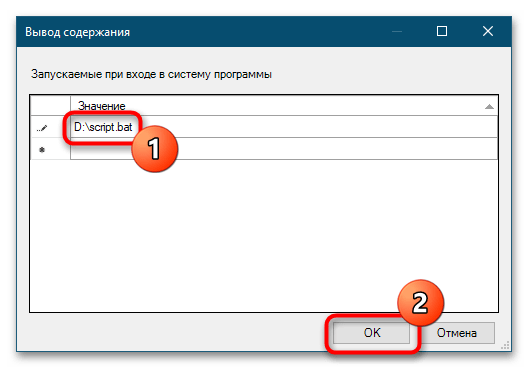
- В поле «Значение» открывшегося диалогового окошка вставьте полный путь к файлу-батнику, нажмите «OK» и сохраните настройки.
Если необходимо, чтобы батник запускался при входе в систему всех пользователей, нужно изменить одноименную политику в разделе «Конфигурация компьютера», а не «Конфигурация пользователя».
Наша группа в TelegramПолезные советы и помощь
Our script will open the Windows Calculator application at Windows startup and login based on the solution you will choose from. To meet your requirements, you can replace the script in
file.ps1with your script.
Using Startup Folder
Use the Startup folder to run the PowerShell script at startup. To do this, we must follow this section’s step-by-step instructions.
Create .ps1 File
Open Notepad, write the following command, and save the file with any name of your choice but with the .ps1 extension. You can store this PowerShell script file at any location on your local machine; we saved this file with the file.ps1 name at the E:\Test location.
|
powerShell «c:\windows\system32\calc.exe» |
This command would open the calculator on the local computer.
Create .cmd File
Launch Notepad, write the following commands, and save the file with a name but with the extension .cmd at %AppData%\Microsoft\Windows\Start Menu\Programs\Startup path. We named this file Startup.cmd and placed it in the Startup Folder.
While saving the .cmd file, don’t forget to select All Files for the Save as type: option and ANSI for the Encoding option; see the screenshot after the following script for clear understanding.
|
PowerShell —Command «Set-ExecutionPolicy Unrestricted» —Scope CurrentUser >> «%TEMP%\StartupLog.txt» 2>&1 PowerShell E:\Test\file.ps1 >> «%TEMP%\StartupLog.txt» 2>&1 |

The above script did two things. First, it sets the execution policy to Unrestricted, and the second is to use PowerShell to run the .ps1 script file in the given path. Let’s break down the above commands to learn them in detail.
The first command:
- Runs the PowerShell with the
-Commandparameter to execute theSet-ExecutionPolicy Unrestrictedcommand, which modifies the PowerShell execution policy to let us run unsigned scripts. - The
-Scopparameter applies changes to the current user instead of the entire system. - The redirection operator represented by
>>redirects the command output (if any) to theStartupLog.txtfile in the user’s%TEMP%directory. The>>operator appends the output to the end of theStartupLog.txtfile if it already exists; otherwise, it creates it. - The
2>&1operator redirects the command’s error output (2) to the exact file as the standard output (&1).
The second command:
- Runs PowerShell with the E:\Test\file.ps1 script as an argument. You might have a different path if you have stored your
.ps1file in a different location on your PC. - The redirection operator (
>>) does the same as in the first command. - The
2>&1operator also does the same thing as in the first command.
Overall, both commands use the >> and 2>&1 operators to capture the errors and output of the PowerShell command or script and write them to a StartupLog.txt file in the user’s %TEMP% directory.
Restart Your PC
Now, you have the .ps1 file and .cmd file at the required locations, so it’s time to restart your computer. Once the computer is on, the script will be executed and open the Calculator app for you.
Using Task Scheduler
Use Task Scheduler to run PowerShell script at startup. Following the below steps to do it.
Open Task Scheduler
Press Windows+R key from the keyboard, type taskschd.msc in the Run prompt and hit OK. It will open the Task Scheduler window for you. See the following screenshot.
Otherwise, you can use the Windows search menu to open Task Scheduler.
Create a Task
-
In the
Task Schedulerwindow, clickCreate Taskas demonstrated below.
-
Ensure you are on the
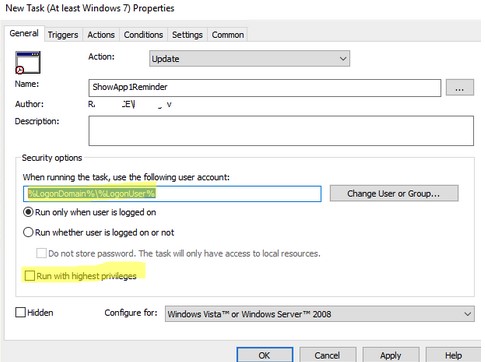
Generaltab in theCreate Taskwindow. Then, write the name of the task (step-1), select theRun only when the user is logged onradio button (step-2), check theRun with highest privilegescheckbox (step-3), and click on theActionstab (step-4).
-
Once you are on the
Actionstab, click on theNewbutton (step-2), make sure theStart a programoption is selected forActions:option (step-3), writepowershell.exeforProgram/scriptoption (step-4), addE:\Test\file.ps1as the value ofAdd arguments (optional)option (step-5) and clickOKbutton (step-6). Remember, you can specify your arguments for step-5.
-
Now, click on the
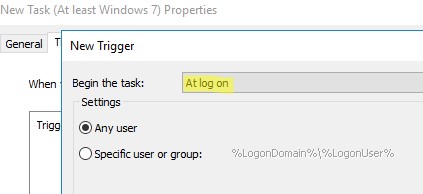
Triggerstab (step-1), click on theNewbutton (step-2), selectAt log onforBegin the task:option (step-3), choose theAny userorSpecific userbased on your requirements (step-4), clickOK(step-5), and clickOKagain (step-6).
Your task must be listed in the
Task Schedulerwindow (see the following); if it is there, you have done everything right, close this window.


Log Out and Login Your PC
Log out and log in again to your computer. You don’t need to reboot the computer to run this script. This script will open the Windows Calculator application.
Using Registry Editor
Use Task Scheduler to run PowerShell script at startup. Following the below steps to do it.
Open Registry Editor
Press Windows+R key from the keyboard, type regedit.msc in the Run prompt and hit OK. It will open the registry editor window.
Add Entry to the Windows Registry Editor
-
Navigate to the HKEY_LOCAL_MACHINE\SOFTWARE\Microsoft\Windows\CurrentVersion\Run in the registry editor (step-1).
-
Right-click the
Runkey and chooseNew->String Value(step-2). -
Give a new entry a meaningful name as we named it
PSfile. Note that this name must be unique; otherwise, you will get an error.
-
Double-click on the new entry (
PSfile) to open theEdit Stringwindow. -
In the
Edit Stringwindow, you can confirm the new entry’s name (step-3). For theValue datafield, enter thepowershell "E:\Test\file.ps1"command (step-4); you can replace the path to point your PowerShell script file. Remember to surround the path with double quotes. -
Click
OKto exit theEdit Stringwindow (step-5). -
Close the Registry Editor.

Restart Your PC
Restart your computer to run the script automatically every time Windows starts up. This script will open the Windows Calculator application for you.
Вы можете использовать групповые политики Windows для выполнения файлов различных скриптов при загрузке/выключении компьютера или входе/выходе пользователя. С помощью GPO вы можете исполнять на компьютерах домена не только классические файлы скриптов (.bat, .cmd, ,vbs), но и Startup/Shutdown/Logon/Logoff скрипты PowerShell (.ps1)
В современных версиях Windows вы можете настроить запуск логон/логоф скриптов PowerShell напрямую из редактора групповых политик (ранее приходилось вызывать ps1 скрипты из bat файлов через параметр исполняемого файла powershell.exe).
Содержание:
- Запуск PowerShell скрипта при загрузке компьютера с помощью групповой политики
- Выполнить PowerShell скрипт при входе пользователя в Windows
Запустите консоль управления доменными политиками GPMC.msc (Group Policy Management сonsole). Создайте новую политику (GPO) и назначьте ее на нужный контейнер с пользователями или компьютерами (можно использовать WMI фильтры GPO для более тонкого нацеливания политики). Перейдите в режим редактирования политики.
Вы должны выбрать раздел GPO для запуска PowerShell скрипта в зависимости от того, когда вы хотите выполнить ваш скрипт.
- Если PS скрипт должен быть запущен при входе пользователя на компьютер (настройка параметров окружения пользователя, программ, например: вы хотите при входе пользователя автоматическое создавать подпись в Outlook на основе данных из пользователя AD, настроить параметры экранной заставки или стартового экрана) или при выходе пользователя, вам нужно перейти в раздел GPO: User Configuration -> Policies -> Windows Settings -> Scripts (Logon / Logoff);
- Если вы хотите запускать скрипт PowerShell при загрузке компьютера (отключение устаревших протоколов: NetBIOS, SMBv1, настройка параметров безопасности компьютера и т.д.) или перед корректным выключением компьютера, вам нужно перейти в секцию GPO с настройками компьютера: Computer Configuration -> Policies -> Windows Settings -> Scripts (Startup / Shutdown).
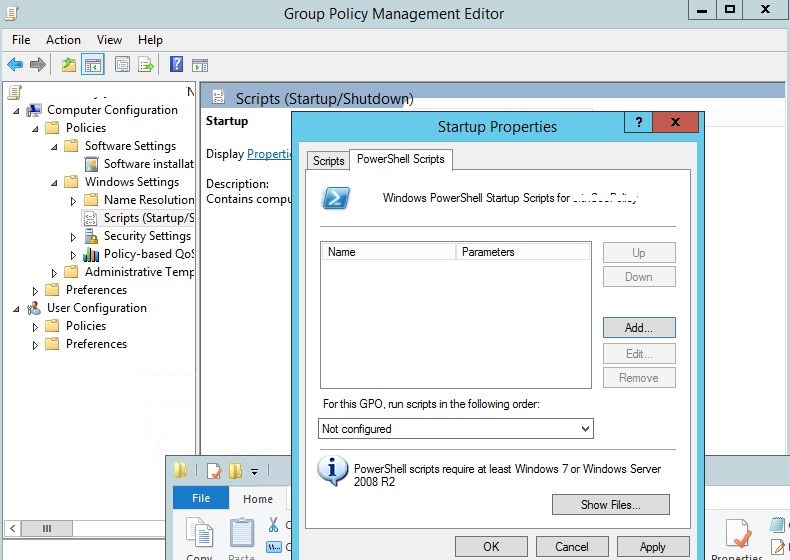
Запуск PowerShell скрипта при загрузке компьютера с помощью групповой политики
Допустим, нам нужно запускать PowerShell скрипт при загрузке Windows. Для этого нужно выбрать Startup и в открывшемся окне перейди на вкладку PowerShell Scripts.
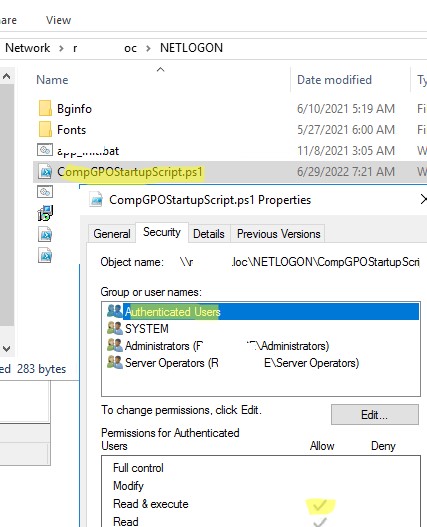
Теперь нужно скопировать файл с вашим PowerShell скриптом на контроллер домена. Скопируйте ваш файл ps1 в каталог Netlogon на контроллере домена (например,
\\winitpro.ru\netlogon
).
Т.к. мы настраиваем запуск Startup скрипта PowerShell, нужно в разрешениях ps1 файла (или всего каталога Machine\Scripts\Startup) проверить NTFS права доступа на чтение и выполнение (Read & Execute) для группы Domain Computers и/или Authenticated Users .
Теперь нужно нажать кнопку Add и укажите UNC путь к вашему файлу скрипта ps1 в Netlogon.
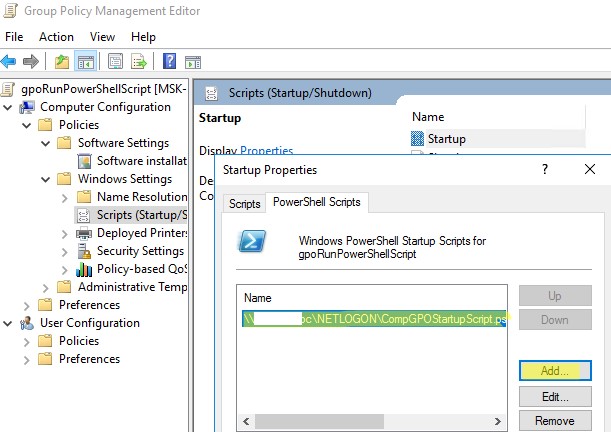
Если вы запускаете несколько PowerShell скриптов через GPO, вы можете управлять порядком из запуска с помощью кнопок Up/Down.
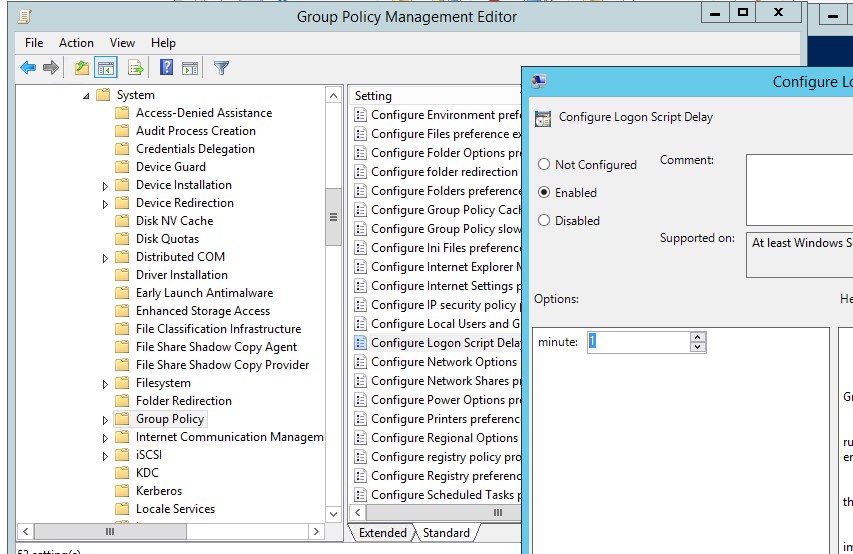
Для корректного выполнения скриптов PowerShell при загрузке компьютера нужно настроить время задержки перед запуском с помощью политики в разделе Computer Configuration -> Administrative Templates -> System -> Group Policy. Включите политику Configure Logon Script Delay (Настроить задержку сценария входа в систему) и укажите задержку в минутах перед запуском логон-скриптов (достаточное для окончания инициализации и загрузки всех необходимых служб). Обычно достаточно поставить здесь 1-2 минуты.
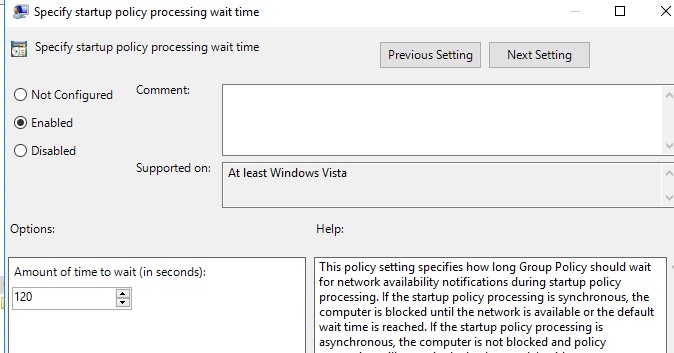
Если в вашем PowerShell скрипте используются сетевые инструменты Windows, для некоторых GPO нужно включить политику “Specify startup policy processing wait time” в разделе Computer Configuration -> Policies -> Administrative Templates -> System -> Group Policy. Попробуйте начать со значения 60 сек. После включения этой политики компьютер будет ждать 60 секунд прежде, чем начать применять стартап скрипты. Обычно этого достаточно для инициализации сетевой подсистемы Windows.
В Windows Server 2012R2 и Windows 8.1 и выше PowerShell скрипты в GPO запускаются из каталога NetLogon в режиме Bypass. Это означает, что настройки политики запуска сценариев PowerShell игнорируются. Если вы хотите запустить скрипт из другого каталога, или в вашей сети остались клиенты с Windows 7 или Windows Server 2008R2, вам нужно настроить политику выполнения PowerShell скриптов.
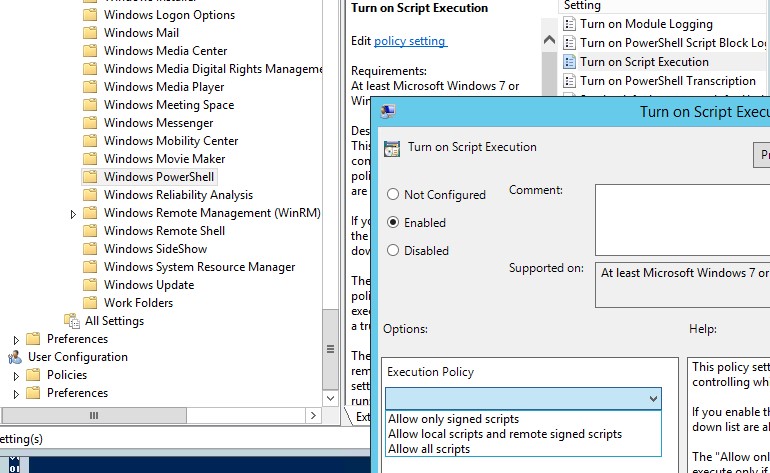
По умолчанию в настройках безопасности Windows запрещен запуск PowerShell скриптов. Значение текущей настройки политики запуска сценариев PowerShell можно получить командой Get-ExecutionPolicy. Если политика не настроена, команда вернет Restricted (блокируются любые скрипты). Параметры безопасности запуска PowerShell скриптов можно настроить через политику “Включить выполнение сценариев” / “Turn On Script Execution” (в разделе GPO Computer Configuration -> Administrative Templates -> Windows Components -> Windows PowerShell). Возможные значения политики:
- Allow only signed scripts (AllSigned)– можно запускать только подписанные скрипты PowerShell (“Как подписать скрипт PowerShell?”) –самый лучший сценарий с точки зрения безопасности;
- Allow local scripts and remote signed scripts (RemoteSigned)– можно запускать любые локальные и подписанные удаленные скрипты;
- Allow all scripts (unrestricted) – самый небезопасный вариант, т.к. разрешает запуск любых PowerShell скриптов.
Если вам не подходит не один из предложенных сценариев настройки политики запуска PowerShell скриптов, вы можете запускать PowerShell скрипты в режиме Bypass (скрипты не блокируются, предупреждения не появляются).
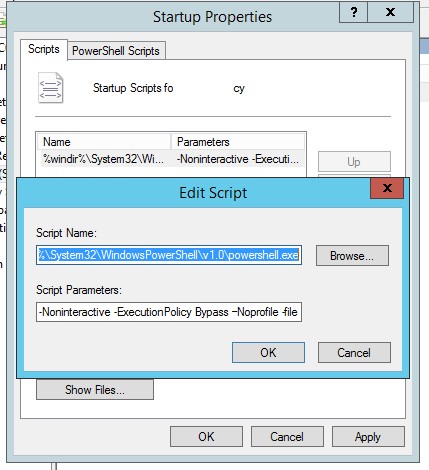
Для этого PowerShell скрипт нужно запускать из секции Startup -> Scripts. В этой секции вы можете настроить запуск ps1 сценария с помощью создания обычного Startup скрипта, запускающего исполняемый файл powershell.exe (по аналогии со сценарием, описанным в статье). Укажите:
- Script name:
%windir%\System32\WindowsPowerShell\v1.0\powershell.exe - Script Parameters:
-Noninteractive -ExecutionPolicy Bypass –Noprofile -file %~dp0MyPSScript.ps1
Символы
%~dp0
при запуске на клиенте автоматически преобразуются в UNC путь до каталога со скриптом на SYSVOL.
В данном случае вы принудительно разрешили запуск любого (даже ненадежного) скрипта PowerShell с помощью параметра Bypass.
Перезагрузите компьютер, чтобы обновить настройки GPO и проверьте, что ваш PowerShell скрипт запустился после загрузки.
Выполнить PowerShell скрипт при входе пользователя в Windows
Рассмотрим сценарий автоматического запуска PowerShell скрипта при входе пользователя в Windows (или при выходе).
Если вам нужно запустить скрипт не при загрузке компьютера, а после входа пользователя в Windows (для каждого пользователя компьютера), вам нужно привязать GPO к OU Active Directory с пользователями. В этом случае PowerShell нужно настроить в следующем разделе User Configuration вашей GPO
Если вы хотите, чтобы политика выполнялась для всех пользователей определенного компьютера, нужно привязать политику к OU с компьютерами и включить режим замыкания групповой политики (параметр Configure User Group Policy Loopback Processing mode в разделе Computer Configuration -> Administrative Templates -> System -> Group Policy). Если не включать режим замыкания, то параметры из раздела User Configuration не будут применены к пользователю. Подробнее об этом в статье Почему GPO не применяется к пользователю или компьютеру?
В этом примере для теста я буду использовать простой PowerShell скрипт, который пишет в текстовый лог файл время входа пользователя.
- Скопируйте файл скрипта PowerShell в каталог
\\winitpro.ru\NETLOGON\
на контроллере домена AD - Перейдите в раздел User Configuration -> Policies -> Windows Settings -> Scripts -> Logon;
- Перейдите на вкладку PowerShell Scripts и добавьте ваш PS1 файл скрипта (используйте UNC путь, например
\\winitpro.ru\NETLOGON\UserLog.ps1
);
- Выполните логофф пользователя на целевом компьютере и выполните вход;
- Ваш PowerShell скрипт будет запущен автоматически через GPO при входе пользователя;
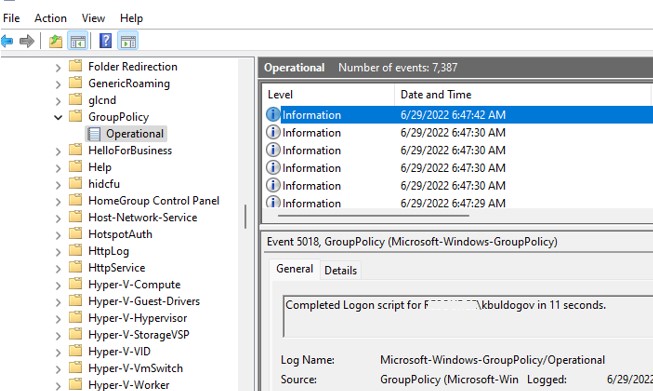
- Вы можете убедится, что логон скрипт выполнен успешно под пользователем по событию с Event ID 5018 в журнале Microsoft-Windows-GroupPolicy/Operational Event Viewer:
Completed Logon script for winitpro\kbuldogov in 11 seconds.


Если вы хотите, чтобы пользователь не мог получить доступ к своему рабочему столу до окончания работы скрипта, нужно включить параметр Run logon scripts synchronously = Enable (Computer Configuration\Administrative Templates\System\Logon). В этом случае explorer не закончится, пока не отработают все политики и логон скрипты (это увеличивает время входа!).
Обратите внимание, что скрипт выполняется с правами текущего пользователя. Если у пользователя есть права администратора на компьютере и на него действуют политики User Account Control (UAC), PowerShell скрипт не сможет внести изменения, требующие повышенных привилегий.
Для запуска PowerShell скриптов с привилегированными правами при входе простых пользователей, можно использовать назначенные задания планировщика. Для этого нужно:
- Создать задание Task Scheduler в разделе User Configuration -> Preferences -> Control Panel Settings -> Scheduled Task;
- На вкладке General указать что задание запускается от имени пользователя
%LogonDomain%\%LogonUser
и включите опцию
Run with highest privileges
;
- На вкладке Trigger укажите, что задание должно запускаться At log on;

- И на вкладке Actions укажите путь к вашему PowerShell скрипту:
Action: Start a program
Program/Script:
C:\WINDOWS\system32\WindowsPowerShell\v1.0\powershell.exe
Add Arguments (optional):
-ExecutionPolicy Bypass -command "& \\winitpro.ru\Netlogon\yourscript.ps1"
Такой PowerShell скрипт будет запускаться с правами администратора (если пользователь добавлен в группу локальных администраторов Windows).
Некоторые скрипты нужно запускать для каждого пользователя только один раз при первом входе на компьютер (инициализация рабочего окружения, копирование папок или конфигурационных файлов, создание ярлыков и т.д.). В одной из статей мы рассматривали cпособ запуска логон скрипт через GPO только один раз.
Introduction
You can specify what programs you want to run on Windows boot.
All you have to do is add the script, executable, or shortcut in to
the startup folder. Alternatively you can use scheduled tasks to
manage startup scripts. This will show you how to use both methods.
Using startup folder to launch scripts
The easiest way to trigger scripts to run at startup is to drop
then inside the startup folder.
To easily navigate to the startup folder, Windows has an alias
available: shell:startup. Use shell:common startup
You can get to the startup folder a couple ways:
- Open the Run dialog with
WindowsKey+Rand entershell:startup. - In the command prompt, enter
explorer shell:startup.
Simply copy your files that you want run on startup in to the folder.
For example, in Windows 10, these paths work for me for user and global:
%APPDATA%\Microsoft\Windows\Start Menu\Programs\Startup
%ProgramData%\Microsoft\Windows\Start Menu\Programs\StartUp
Enable and disable startup apps
Many apps run on startup that do not have any files in the startup folder.
You can manage the startup apps from the Task Manager | Startup tab or
by running taskmgr.exe.
In addition you can disable scripts from your startup folder so you don’t have
to remove them to disable them.
Right click on an item to enable or disable it.
Using scheduled tasks
An alternative to the startup folder is scheduled tasks.
You can schedule a task to run on startup.
For a GUI, run taskschd.msc
to create, delete, enable, disable, and otherwise manage
all scheduled tasks.
To manage scheduled tasks from the command prompt, use schtasks.exe.
This program will allow you to create, delete, and run
scheduled tasks. You can get help about the commands
by running one of the following:
schtasks
schtasks /?
schtasks /Run /?
schtasks /End /?
schtasks /Create /?
schtasks /Delete /?
schtasks /Query  /?
schtasks /Change /?
schtasks /ShowSid /?
Remember to run an administrator command prompt for these commands.
Example for creating a script to launch on startup as local user on login:
schtasks /create /tn "MyCustomTask" /sc onlogon /tr "cmd.exe /c pause"
You can tell a script to run as system on start like this:
schtasks /create /tn "MyCustomTask" /sc onstart /ru system /tr "cmd.exe /c pause"
Conclusion
After this, you should understand how easy it is to launch your
own programs on startup.
If you want to run a long-running or background service, consider
setting up a Windows service so you can manage it with services.msc.
Last Updated :
14 Sep, 2021
Adding a Python script to windows start-up basically means the python script will run as the windows boots up. This can be done by two step process –
Step #1: Adding script to windows Startup folder
After the windows boots up it runs (equivalent to double-clicking) all the application present in its startup directory.
Address:
C:\Users\current_user\AppData\Roaming\Microsoft\Windows\Start Menu\Programs\Startup\
By default the AppData folder under the current_user is hidden so enable hidden files to get it and paste the shortcut of the script in the given address or the script itself. Also the .PY files default must be set to python IDE else the script may end up opening as a text instead of executing.
Step #2: Adding script to windows Registry
This process can be risky if not done properly, it involves editing the windows registry key HKEY_CURRENT_USER from the python script itself. This registry contains the list of programs that must run once the user Login. just like few application which pops up when windows starts because the cause change in registry and add their application path to it.
Registry Path:
HKEY_CURRENT_USER\Software\Microsoft\Windows\CurrentVersion\Run
Below is the Python code :
Python3
import winreg as reg
import os
def AddToRegistry():
pth = os.path.dirname(os.path.realpath(__file__))
s_name="mYscript.py"
address=os.join(pth,s_name)
key = HKEY_CURRENT_USER
key_value = "Software\Microsoft\Windows\CurrentVersion\Run"
open = reg.OpenKey(key,key_value,0,reg.KEY_ALL_ACCESS)
reg.SetValueEx(open,"any_name",0,reg.REG_SZ,address)
reg.CloseKey(open)
if __name__=="__main__":
AddToRegistry()
Note: Further codes can be added to this script for the task to be performed at every startup and the script must be run as Administrator for the first time.
Similar Reads
-
Python Script to Open a Web Browser
In this article we will be discussing some of the methods that can be used to open a web browser (of our choice) and visit the URL we specified, using python scripts. In the Python package, we have a module named webbrowser, which includes a lot of methods that we can use to open the required URL in
4 min read -
Add a User in Linux using Python Script
Creating a user via command line in Linux is a tedious task. Every time someone joins your organization and you need to type a long Linux command rather than doing this you can create a python script that can ask for you the username and password and create that user for you. Examples: Input : Enter
1 min read -
Python Script to Automate Software Installation
Software installation can often be a time-consuming and monotonous undertaking, particularly when dealing with multiple applications. Python scripting gives a solution by enabling automation of the entire installation process which leads to more time consuming, enhances productivity, and gets rid of
4 min read -
Telnet Automation / Scripting Using Python
Telnet is the short form of Teletype network, which is a client/server application that works based on the telnet protocol. Telnet service is associated with the well-known port number — 23. As Python supports socket programming, we can implement telnet services as well. In this article, we will lea
5 min read -
How to use CMD for Python in Windows 10?
Using the Command Prompt (CMD) is an effective way to interact with Python on your Windows 10 machine. Whether you’re writing scripts, testing code, or running programs, mastering CMD for Python in Windows 10 is crucial. This article will guide you on how to run Python in CMD, execute scripts, and t
4 min read -
How to Run a Python Script using Docker?
Docker helps you to run your Python application very smoothly in different environments without worrying about underlying platforms. Once you build an image using dockerfile you can run that image wherever you want to run. Docker image will help you to package all the dependencies required for the a
8 min read -
How to add Python to Windows PATH?
Python is a great language! However, it doesn’t come pre-installed with Windows. Hence we download it to interpret the Python code that we write. But wait, windows don’t know where you have installed the Python so when trying to any Python code, you will get an error. We will be using Windows 10 and
2 min read -
How to setup Python, PyEnv & Poetry on Windows
Setting up a robust Python development environment on Windows involves installing Python itself, managing multiple versions with PyEnv, and handling dependencies and project environments with Poetry. This guide will walk you through each step to get your system ready for efficient and organized Pyth
3 min read -
Is Bash Script Better Than Python
Programming languages let you create programs and various online solutions like web apps, games, mobile apps, etc. There are multiple computer languages online that you can use to automate, assemble, interpret, and manage data processing. Programming languages like Bash and Python are prevalent amon
6 min read -
How to Terminate a running process on Windows in Python?
Process is a program that is being executed (processed). A process may not have to be one ran explicitly by the user, it could be a system process spawned by the operating system. Any applications that execute on an operating system firstly creates a process of its own to execute. In a typical os in
4 min read