
Setting up a print server on Windows 10 is simpler than you might think. Essentially, you’ll be sharing a printer that’s connected to your Windows 10 computer with other computers on the same network. By doing this, everyone on the network can send print jobs to the same printer without having to connect directly to it. Ready to start? Follow these easy steps!
The following steps will guide you through setting up a print server on a Windows 10 computer. This will allow multiple devices on the same network to access and use a single printer.
Step 1: Open Settings
First, go to your Windows 10 computer and open the Settings app.
To do this, click on the Start menu and then on the gear icon. The Settings app is where you manage many aspects of your computer, including devices like printers.
Step 2: Navigate to Devices
Next, in the Settings window, click on «Devices.»
This section includes all your connected gadgets, from your mouse and keyboard to any printers you’ve installed.
Step 3: Add a Printer
Now, click on «Printers & scanners» and then select «Add a printer or scanner.»
This action tells your computer to search for any printers connected to your network or directly to your machine. If your printer is already connected, it should show up here.
Step 4: Install Printer Drivers
If your printer appears, click on it and follow the onscreen instructions to install the necessary drivers.
Printer drivers are like translators between your computer and your printer. They make sure both devices understand each other. Windows 10 usually finds the right drivers automatically.
Step 5: Share the Printer
After installing the drivers, click on the printer’s name, then choose “Manage.” Select “Printer Properties” and click on the «Sharing» tab. Check the box that says, «Share this printer.»
By sharing the printer, you’re making it available to other devices on your network. You’ll need to give it a share name, which other users will use to find the printer.
Step 6: Connect Other Devices to the Printer
Go to each device that you want to connect to the printer. Open the Settings app, navigate to «Devices,» then «Printers & scanners,» and click «Add a printer or scanner.» Select the shared printer from the list.
This step ensures that other devices on your network can see and connect to the shared printer. Now, everyone can print to it without having to be directly connected.
After completing these steps, your printer is now a print server on your network. Any device connected to the same network can send print jobs to this printer.
Tips for Setting Up a Print Server on Windows 10
- Keep your computer on: Make sure the computer that the printer is connected to is always on for other devices to print.
- Use a stable network: A stable and strong Wi-Fi connection ensures smooth communication between devices and the printer.
- Regular updates: Keep your Windows 10 and printer drivers up-to-date to avoid compatibility issues.
- Check firewall settings: Sometimes, firewalls can block printer sharing. Make sure to configure your firewall to allow devices to connect.
- Secure your network: Ensure your network is secure to prevent unauthorized access to the printer.
Frequently Asked Questions
Do I need a special printer to set up a print server?
No, you can use any standard printer. The key is to make sure the printer drivers are installed on the host computer.
Can I share a printer with devices running different operating systems?
Yes, as long as the other devices support network printing, they should be able to connect to the shared printer.
What if my printer doesn’t show up in the list?
Check the printer’s connection and ensure it’s properly connected to your computer or network. Also, make sure the printer is turned on.
How do I stop sharing the printer?
Go back to the printer’s settings in the host computer, click «Printer Properties,» navigate to the «Sharing» tab, and uncheck «Share this printer.»
Is it safe to share my printer?
As long as your network is secure, sharing your printer is generally safe. Just make sure to manage permissions carefully.
Summary
- Open Settings.
- Navigate to Devices.
- Add a printer.
- Install printer drivers.
- Share the printer.
- Connect other devices to the printer.
Conclusion
Setting up a print server on Windows 10 is like setting up a hub for your printer. By following these steps, you’ve made it so anyone on your network can print documents easily. Think of it as creating a community printer that everyone can access without the hassle of connecting and disconnecting cables. It’s pretty nifty, right?
For more advanced users, you can explore additional configurations and settings to fine-tune your print server. Remember to keep everything updated and secure, and you’re all set. This small investment of time can save you loads of frustration down the road.
If you’re looking to dive deeper into the world of networking or want to explore more Windows 10 features, there’s a wealth of information out there. Don’t hesitate to keep learning and experimenting. Happy printing!
Kermit Matthews is a freelance writer based in Philadelphia, Pennsylvania with more than a decade of experience writing technology guides. He has a Bachelor’s and Master’s degree in Computer Science and has spent much of his professional career in IT management.
He specializes in writing content about iPhones, Android devices, Microsoft Office, and many other popular applications and devices.
Read his full bio here.
The print server plays an integral role in every company and organization. This function in Windows is responsible for executing print commands over the network or locally. The print server can be a software, network device, or computer and it can easily process the print jobs in the bulk by making a well-organized queue and execute one by one. If your business uses professional printers then, you must try this. If you don’t know how to start a print server in Windows 10? Well, you have come to the right place. Let’s proceed to the main part of this post.
- Part 1: Top 3 Ways to Start a Print Server in Windows 10
- Part 2: Extra Tips: What Should Do If You Forgot Windows Password
Starting the Print server on the Windows 10 is not difficult. You can easily start the print server by just going to the Print management. There are plenty of different ways to open the print management. In this part, we will talk about how to start a print server in Windows 10 through print management.
Way 1: Open print management using Run
Run is an integral part of the Windows operating system. Using this function, you can easily open any software on the program on Windows directly. Similar with print management, you can easily open the print management using the run.
Step 1: First of all, you have to open the Run by pressing the Windows Key + R button at the same time.
Step 2: Run small interface will appear, you have to enter the printmanagement.msc and click on the «OK» button.
Step 3: This will open the Print Management Window, go to the print server to start or stop the Print server.
Way 2: Open the Print Management using Command Prompt
Command prompt work as a secondary way to operate the Windows computer. As the name suggests, you have to enter the commands in order to execute the task. The Command prompt is completely command-based aka Character user interface.
Step 1: Click on the «Start» button and search for the command prompt and hit on the «Enter» button.
Step 2: Command Prompt interface will appear, simply enter the following command and hit on the «Enter» button:
Printmanagement.msc
Way 3: Directly Open the Power Management from the Cortana Search bar
Using Windows 10? Well, you can use Cortana search bar in order to get the best solution to your problem how to start a print server in windows 10.
Step 1: Simply, click on the «Type here to Search» at the bottom left of the screen.
Step 2: Cortana will pop up, simply type the printmanagement.msc on the search bar and hit on the «Enter» button.
Step 3: Print Management Window will appear with Print server settings.
Way 4: Open Power Management using Windows PowerShell
Windows PowerShell is similar to Command prompt but, there are some changes. With the launch of Windows 8.1, Microsoft has added it to their OS.
Step 1: You have to open the Windows PowerShell from the start menu.
Step 2: On the Windows PowerShell, enter the «printmanagement.msc» and hit on the «enter» button.
Extra Tips: What Should Do If You Forgot Windows Password
In a search of how to start a print server in windows 10/11, we find changing settings on the Print server require Windows password. It is not possible to change if you forget your Windows password. One can use a tool like PassFab 4WinKey in order to reset the Windows 10/11 password.
Reset Windows 10/11 Password in Minutes
Step 1: Download the PassFab 4WinKey on an accessable computer, then launch and tool.
Step 2: Insert CD/DVD/USB, and click «Next» button to start the burning process.
Step 3: Once completed, you will see Burning successfully message.
Step 4: Next, insert the disk to the locked computer and restart the computer, keep pressing F12 to enter safe mode.
Step 5: Select your disk name using the arrow key and press «Enter», then select «Save and Exit».
Step 6: Now, your comouter will reboot and you should choose your opertaing system.
Step 7: Then, select the locked Windows account and click «Reset Account Password» and hit «Next».
Last, your password will be reset and you can use the Print Server now.
Summary
The print server is a function or a computer which is responsible for printing service. It executes the printing jobs by sending the command from the computer to the remotely connected printer. Want to know how to start a print server in windows 10? This article is dedicated to you. Here, we have talked about best ways to start a print server in Windows 10 computer.
Setting up a print server on Windows 10 can greatly enhance efficiency and convenience in a workplace or home environment. A print server allows multiple computers to print to a shared printer, eliminating the need for each computer to have its own printer or for users to transfer files to a computer connected to a printer. Instead, users can send their print jobs directly to the print server, which manages the printing process. In this blog post, we will explore the various methods to set up a print server on Windows 10, providing step-by-step instructions and valuable insights along the way.
Video Tutorial:
Why You Need to Set Up a Print Server on Windows 10
There are several reasons why setting up a print server on Windows 10 is beneficial. Firstly, it allows for centralized management of printers, making it easier to monitor printing activities and control access to printing resources. This is particularly useful in a business setting where multiple employees need access to printers. A print server can provide a more organized and efficient printing environment, reducing the time and effort required to troubleshoot printing issues.
Secondly, a print server can enhance security by allowing administrators to set access permissions and monitor usage. This ensures that sensitive documents are protected and prevents unauthorized users from using the printer. Additionally, setting up a print server can also reduce costs by consolidating printers and minimizing the need for individual printers for each computer. This can result in lower maintenance and supply costs, as well as a reduced carbon footprint.
Method 1: Setting Up a Print Server via the Control Panel
Setting up a print server via the Control Panel is a straightforward process that can be done quickly. Here are the steps to follow:
Step 1: Open the Control Panel by right-clicking on the Start button and selecting Control Panel from the menu.
Step 2: In the Control Panel, click on «Devices and Printers» or «Printers and Scanners» depending on your Windows 10 version.
Step 3: Click on «Add a printer» or «Add a printer or scanner» depending on your Windows 10 version.
Step 4: Windows will search for available printers in your network. If the desired printer is listed, select it and click «Next.» If not, click on «The printer that I want isn’t listed.«
Step 5: Select the option «Add a local printer or network printer with manual settings» and click «Next.«
Step 6: Choose the port where the printer is connected (typically «Standard TCP/IP Port«) and click «Next.«
Step 7: Enter the printer’s IP address and port name, and then click «Next.«
Step 8: Windows will install the necessary drivers for the printer. If the driver is not found automatically, click on the «Windows Update» button to search for additional drivers.
Step 9: Give the printer a name that will be used to identify it on the network, and click «Next.«
Step 10: Choose whether to share the printer with other users on the network or not, and click «Next.«
Step 11: Print a test page to verify that the printer is working properly, and click «Finish» to complete the setup.
| Pros | Cons |
|---|---|
| 1. Easy and intuitive setup process. | 1. Limited options for advanced printer configuration. |
| 2. Allows for centralized printer management. | 2. Requires manual insertion of printer IP address and port. |
| 3. Provides seamless integration with the Windows operating system. | 3. May not support all printer models and brands. |
Method 2: Setting Up a Print Server Using PowerShell
Another way to set up a print server on Windows 10 is by using PowerShell. This method provides more advanced options for managing printers and allows for more granular control over settings. Here’s how to do it:
Step 1: Open PowerShell by searching for it in the Windows search bar and selecting «Windows PowerShell» from the results.
Step 2: Run PowerShell as an administrator by right-clicking on the Windows PowerShell icon and selecting «Run as administrator.«
Step 3: Enter the following command to install the necessary PowerShell module: «Install-Module -Name PrintManagement -Force«.
Step 4: Once the module is installed, enter the command «Import-Module PrintManagement» to import the module into PowerShell.
Step 5: Run the command «Add-Printer -ConnectionName \\\» to add the printer to the print server.
Step 6: To configure additional printer settings, use the command «Get-Printer | Set-Printer -Property -Value » and replace with the desired printer property and with the desired value.
Step 7: Print a test page to verify that the printer is working properly.
| Pros | Cons |
|---|---|
| 1. Offers more advanced options for printer configuration and management. | 1. Requires familiarity with PowerShell commands and syntax. |
| 2. Provides greater flexibility in printer setup and customization. | 2. May be overwhelming for users with limited technical knowledge. |
| 3. Allows for batch processing of printer setups and configurations. | 3. Some printer models may not be fully supported by PowerShell. |
Method 3: Setting Up a Print Server via Printer Manufacturer Software
In addition to using the built-in Windows tools for setting up a print server, many printer manufacturers offer their own software that simplifies the process. This software often provides additional features and customization options specific to the printer brand. Here’s how to set up a print server using printer manufacturer software:
Step 1: Download and install the printer manufacturer’s software from their official website.
Step 2: Open the software and follow the on-screen instructions to set up the printer.
Step 3: Connect the printer to the network using the provided instructions.
Step 4: Run the printer manufacturer’s software and select the option to set up a print server.
Step 5: The software will search for available printers on the network. Select the desired printer and follow the on-screen instructions to complete the setup.
Step 6: Once the printer is set up as a print server, other computers on the network can connect to it by adding a printer and selecting the network printer option.
| Pros | Cons |
|---|---|
| 1. Software provides specific features and options for the printer brand. | 1. Limited to the printer brand’s software and functionality. |
| 2. Streamlined setup process designed specifically for the printer. | 2. May not be available for all printer models or brands. |
| 3. Software may include additional tools and utilities for printer management. | 3. Can be dependent on the availability and compatibility of the software. |
Method 4: Setting Up a Print Server Using Third-Party Software
If the built-in Windows tools and printer manufacturer software do not meet your needs, there are also third-party software solutions available for setting up a print server on Windows 10. These software options often provide advanced features, centralized management, and additional security options. Here’s how to set up a print server using third-party software:
Step 1: Research and select a third-party print server software that meets your requirements.
Step 2: Download and install the software from the official website.
Step 3: Open the software and follow the on-screen instructions to set up the print server.
Step 4: Connect the printer to the network using the provided instructions.
Step 5: Configure the printer settings and access permissions according to your preferences.
Step 6: Once the print server is set up, other computers on the network can connect to it by adding a printer and selecting the network printer option.
| Pros | Cons |
|---|---|
| 1. Offers advanced features and customization options. | 1. May require a paid license or subscription for full functionality. |
| 2. Provides centralized management of printers and print jobs. | 2. Can be more complex to set up and configure compared to other methods. |
| 3. Offers enhanced security options and access controls. | 3. Compatibility may vary depending on the software and printer models. |
What to Do If You Can’t Set Up a Print Server
If you encounter difficulties setting up a print server on Windows 10, there are a few potential reasons and corresponding fixes to consider:
1. Ensure that the printer is properly connected to the network and powered on.
2. Check if the printer manufacturer provides support and troubleshooting resources, such as online guides or a support hotline.
3. Verify that the printer drivers are up to date and compatible with Windows 10. You can usually find the latest drivers on the manufacturer’s website.
4. Restart your computer and try the setup process again. Sometimes a simple restart can resolve minor issues.
5. Consider seeking assistance from an IT professional or contacting the printer manufacturer’s customer support for further guidance.
Bonus Tips
Here are three bonus tips to enhance your print server setup:
1. Regularly update the printer drivers to ensure compatibility and optimize performance.
2. Implement security measures, such as setting up user authentication or enabling print job encryption, to protect sensitive documents.
3. Monitor printer usage and implement print management software to track usage, allocate costs, and optimize resource allocation.
5 FAQs about Setting Up a Print Server on Windows 10
Q1: Is it possible to set up multiple print servers on Windows 10?
A: Yes, it is possible to set up multiple print servers on Windows 10. Each print server can manage different printers or printer groups.
Q2: Are there any limitations on the number of computers that can connect to a print server?
A: The number of computers that can connect to a print server is typically limited by the printer’s specifications, network bandwidth, and the capabilities of the print server software. It is best to consult the printer manufacturer’s documentation for specific limitations.
Q3: Can a print server be accessed remotely?
A: Yes, a print server can be accessed remotely if the necessary network and security configurations are in place. Remote access allows users to send print jobs to the print server from outside the local network.
Q4: Can print servers be set up wirelessly?
A: Yes, print servers can be set up wirelessly if the printer and print server both support wireless connectivity. This allows for greater flexibility in printer placement and eliminates the need for physical cables.
Q5: Can a print server be set up on a home network?
A: Yes, a print server can be set up on a home network, enabling multiple computers in the household to share a printer. This can be particularly useful for families or individuals who need to print from different devices.
Final Thoughts
Setting up a print server on Windows 10 can greatly simplify printing tasks and improve efficiency in a workplace or home environment. By using the built-in Windows tools, PowerShell, printer manufacturer software, or third-party software, you can easily set up a print server to centralize printer management, enhance security, and reduce costs. If you encounter any difficulties during the setup process, consider the troubleshooting steps outlined in this blog post or seek assistance from IT professionals or the printer manufacturer’s support team. With a well-configured print server, you can streamline printing workflows and enjoy greater convenience in your everyday tasks.
Print servers can facilitate centralized and efficient print management, offering advantages including lower cost, ease of configuration and access to many print devices with various capabilities.
There are many ways to approach printer management in the enterprise, but the Windows 10 Print Management tool offers a single interface for centralized print management — a cost-effective and wide-ranging approach to managing printers — in business environments.
The centralized printing management approach provides access to a few powerful network print devices managed by simple print servers and local printers for individual users.
Local printers. These attach directly to the users’ system and may require specific toner, drivers and maintenance.
Network printers. These attach to the network and are shared by many users, so fewer management tasks are required. These devices are usually more feature rich.
Network print servers and devices offer many advantages over local printer configurations:
- It’s easier to manage toner for a few standard print devices than for hundreds of locally deployed printers.
- Enterprise-class print devices reduce the cost per page of printing.
- Enterprise print devices typically need less maintenance and service.
- Centralized print permissions make maintaining security and availability easier.
As an IT administrator, your server admin team will typically construct the print server infrastructure. That team will also make connection specifications available, including hostname or IP address information, and expected access control details — which users get access to which print devices.
Your job is to connect client systems to this print infrastructure to provide reliable, consistent and secure access to print services. This client computer component is an interface for configuring connectivity to one or more printers, enabling comprehensive administration and print job oversight. The Windows Print Management utility smoothly integrates Windows clients into this managed environment.
However, you should be aware that Microsoft differentiates between printer and print device in much of its documentation. Typically, a printer is considered configurable software, and a print device is the hardware component.
Windows 10 Print Management prerequisites and setup
Most editions of Windows 10 include the Print Management tool to provide a complete view of the printing environment and options in network environments. It enables access to local and network print services to manage schedules, access, queues, etc.
Windows 10 Home Edition does not include Print Management since Microsoft assumes most home users will not be managing a large printing infrastructure.
How to access Print Management
Accessing Print Management is straightforward. As with most things in Windows, there are multiple ways to find it. Here are a few options:
- Open the Run prompt by pressing Windows Key+R, then type «printmanagement.msc.»
- Open the Windows PowerShell interface, then type «printmanagement.msc.»
- Open the Search prompt by pressing Windows Key+S, then type «print manager.«
You can always make a Desktop shortcut for quicker access.
Configure Print Management settings
Print Management almost has too many features to highlight in a tutorial such as this, but here are some of the major administrative areas that make it a strong option:
- View an entire print infrastructure from one interface.
- Manage multiple local and network printers from one tool.
- Manage print queues, including pausing, resuming and deleting jobs.
- Install, update or remove printer drivers.
- Administer printer features, including color settings, duplexing and other device capabilities.
- Configure per-user preferences.
How to manage print options
Use the steps in the previous section to open Print Management. You’ll see the familiar tree or hierarchical structure Windows uses. Major nodes include Custom Filters, Print Servers and Deployed Printers. Expanding each node shows more granular detail.
The local system appears as a Print Server in the tree, enabling access to configuration options for Drivers, Forms, Ports and Printers. Use the Drivers node to update or roll back drivers, which is a common administrative action (Figure 1).
How to add a print server
Add a print server to a specific print device by right-clicking the Print Servers node and selecting Add/Remove Servers. Browse the network for available print servers deployed by your enterprise server team (Figure 2).
The new printer becomes a configuration node in the Print Servers section of the tree. Be aware that specific printer features will vary by print device. Options such as color, duplexing and collating are only available if the device supports them.
How to connect to a print server
Create an additional printer by right-clicking the new print server and selecting Add Printer. A setup wizard will appear, and you can search the network for advertised print devices — specify a particular hostname or IP address — or indicate a printer port.
Next, you can indicate the device’s hostname or IP address, but IP addresses are usually more reliable (Figure 3). Using the latter method eliminates name resolution as an extra step in the configuration, reducing the number of things that can go wrong.
The Print Management utility will attempt to establish contact with the specified printer. Once it successfully connects, it will add a node to the Print Server. That node lets you manage printer-specific settings. The installation wizard should also detect and use the appropriate device driver, but you can manually browse to find the correct driver as well.
Next, specify a printer name. Users rely on this name, location and comment to verify which print device they’re working with. A name such as «Color_Sales_Printer» could provide the relevant details (Figure 4).
Last, complete the wizard. You can send a test print page if you’d like. That’s usually a good idea to ensure everything is correct. The printer will appear in the list.
How to manage Windows printer features and options
Now that you’ve added a printer to the interface, you can begin configuring its properties. These settings will vary by device. Select the Printers node under your Print Server. Your printer will appear in the list. Right-click the chosen printer and select Properties. This will bring you to the General Properties menu (Figure 5).
You can schedule printer availability from the Advanced tab. You can also manage network access to it from the Sharing and Security tabs and print test pages.
You may see a long list of additional options when you right-click the printer. These include managing the print queue, pausing printing, deploying the printer via Group Policy, or even managing network sharing (Figure 6).
The Custom Filters node in the main Printer Management tree contains two helpful child nodes that display printer status. The first is Printers Not Ready, showing offline or otherwise unavailable printers. The second node is Printers With Jobs, providing you with a view of print queues to see how busy specific printers are.
Damon Garn owns Cogspinner Coaction and provides freelance IT writing and editing services. He has written multiple CompTIA study guides, including the Linux+, Cloud Essentials+ and Server+ guides, and contributes extensively to TechTarget Editorial, The New Stack and CompTIA Blogs.
Все способы:
- Решаем проблему «Локальная подсистема печати не выполняется» в Windows 10
- Способ 1: Включение службы «Диспетчер печати»
- Способ 2: Встроенное средство исправления неполадок
- Способ 3: Очистка очереди печати
- Способ 4: Проверка компьютера на вирусы
- Способ 5: Восстановление системных файлов
- Способ 6: Переустановка драйвера принтера
- Вопросы и ответы: 12
В операционной системе Windows 10 была введена специальная функция, позволяющая пользоваться принтером сразу же после его подключения, без предварительного скачивания и инсталляции драйверов. Процедуру добавления файлов берет на себя сама ОС. Благодаря этому юзеры стали реже сталкиваться с различными проблемами печати, однако полностью они не исчезли. Сегодня мы бы хотели поговорить об ошибке «Локальная подсистема печати не выполняется», которая появляется при попытке распечатать любой документ. Ниже мы представим основные методы исправления этой неполадки и пошагово разберем их.
Решаем проблему «Локальная подсистема печати не выполняется» в Windows 10
Локальная подсистема печати отвечает за все процессы, связанные с подключенными устройствами рассматриваемого типа. Останавливается она только при ситуациях системных сбоев, случайного или намеренного отключения ее через соответствующее меню. Поэтому причин ее возникновения может быть несколько, а самое главное — отыскать верную, исправление уже не займет много времени. Давайте приступим к разбору каждого метода, начиная с самого простого и распространенного.
Способ 1: Включение службы «Диспетчер печати»
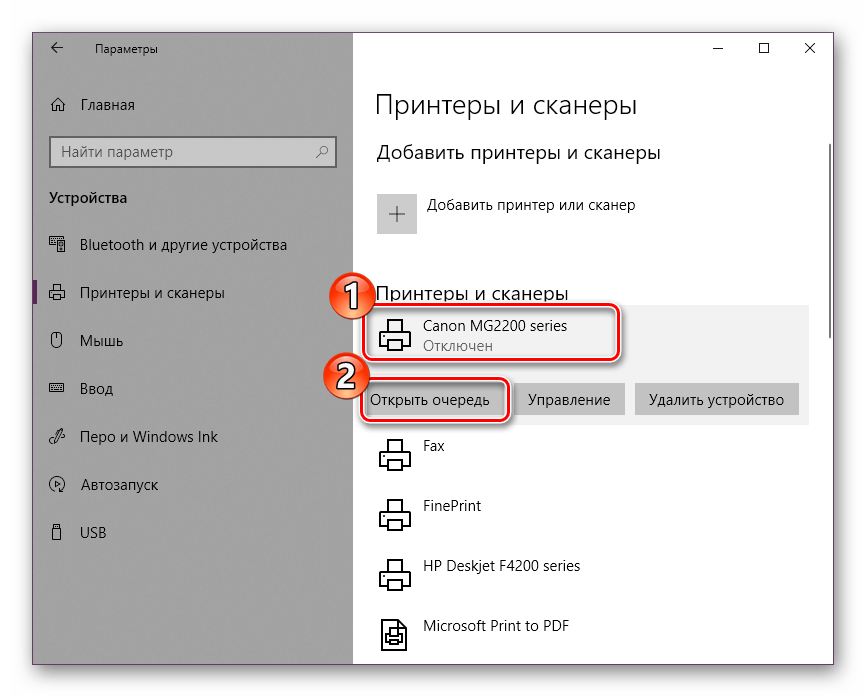
Локальная подсистема печати вмещает в себе ряд служб, в список которых входит «Диспетчер печати». Если он не работает, соответственно, никакие документы не будут передаваться на принтер. Проверить и в случае надобности запустить этот инструмент можно следующим образом:
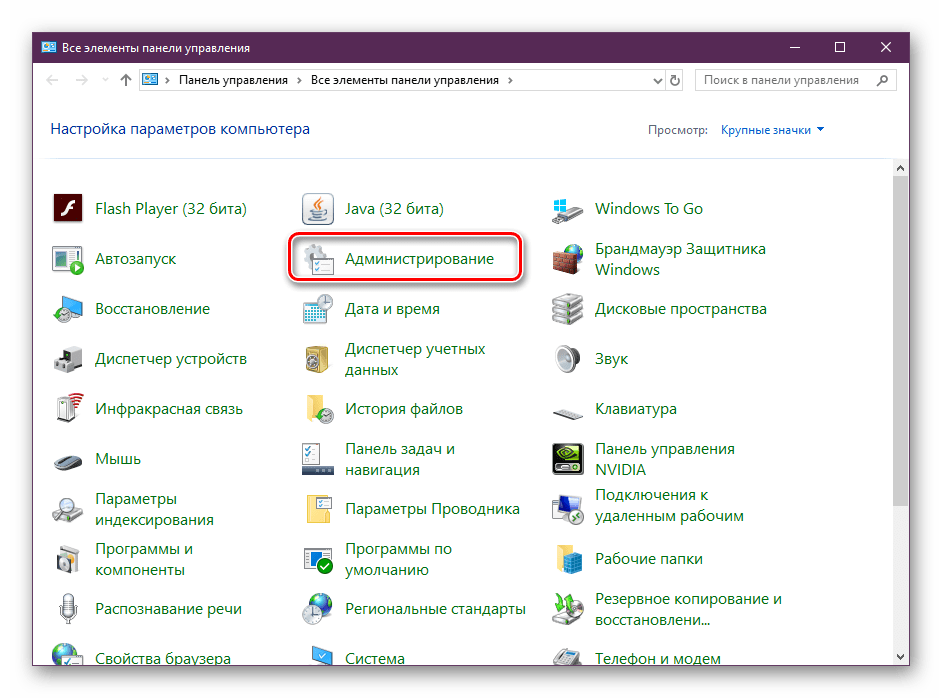
- Откройте «Пуск» и найдите там классическое приложение «Панель управления».
- Перейдите в раздел «Администрирование».
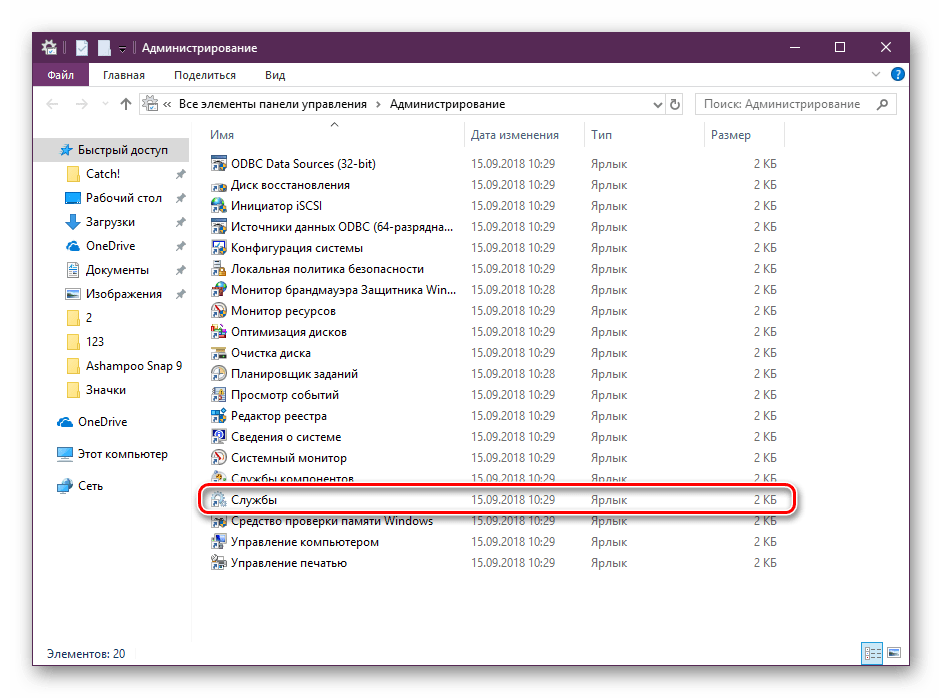
- Отыщите и запустите инструмент «Службы».
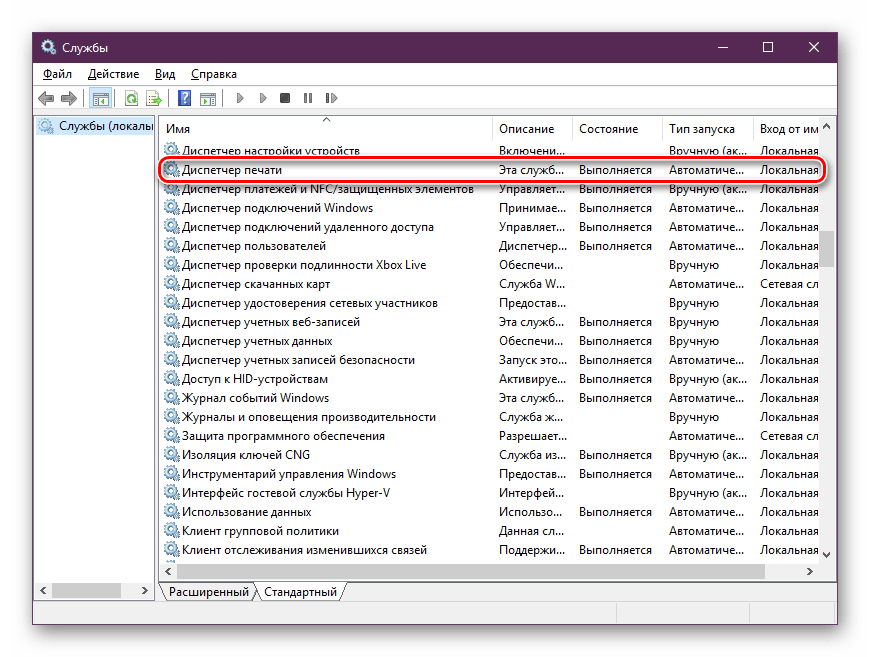
- Опуститесь немного вниз, чтобы найти «Диспетчер печати». Сделайте двойной клик левой кнопкой мыши, чтобы перейти в окно «Свойства».
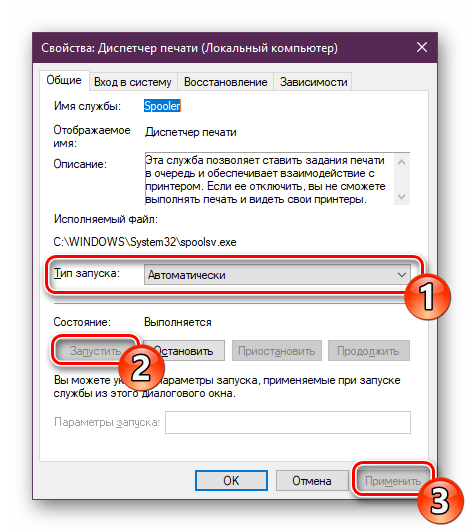
- Установите тип запуска на значение «Автоматически» и убедитесь в том, что активное состояние «Работает», в противном случае запустите службу вручную. После чего не забудьте применить изменения.

По завершении всех действий перезагрузите компьютер, подключите принтер и проверьте, печатает ли он документы сейчас. Если «Диспетчер печати» снова отключен, потребуется проверить связанную с ним службу, которая может мешать запуску. Для этого нужно заглянуть в редактор реестра.
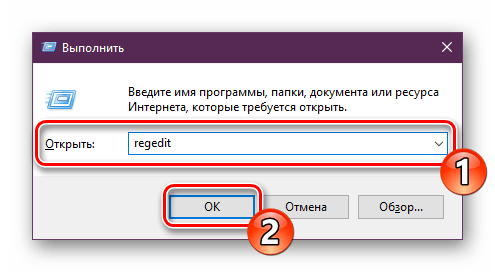
- Откройте утилиту «Выполнить», зажав комбинацию клавиш Win + R. Напишите в строке
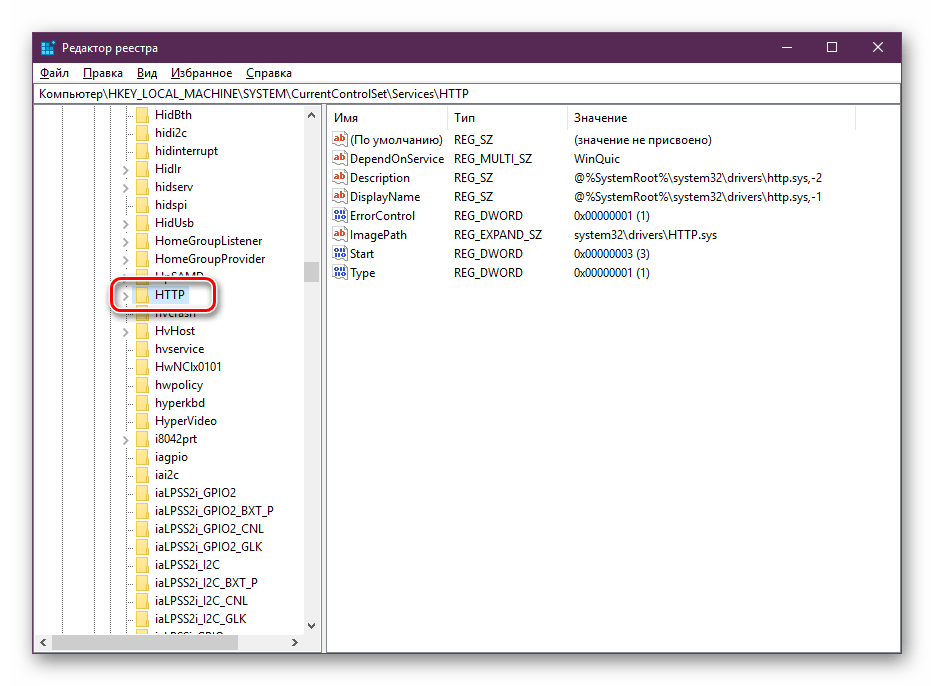
regeditи щелкните на «ОК». - Перейдите по указанному ниже пути, чтобы попасть в папку HTTP (это и есть необходимая служба).
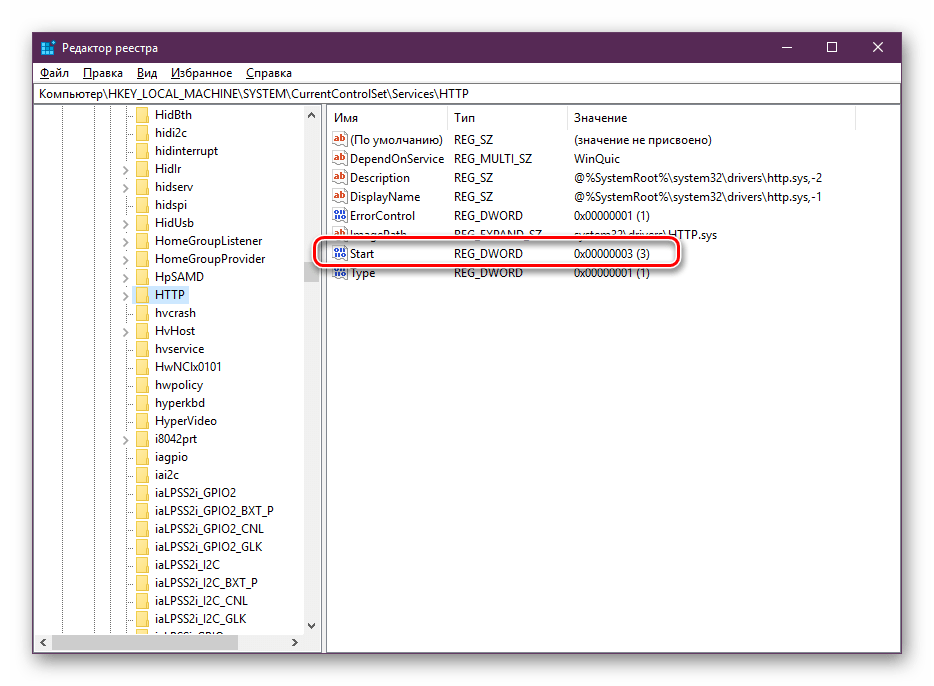
HKEY_LOCAL_MACHINE\SYSTEM\CurrentControlSet\services\HTTP - Найдите параметр «Start» и убедитесь в том, что он имеет значение 3. Иначе дважды кликните на нем левой кнопкой мыши, чтобы приступить к редактированию.
- Установите значение 3, а затем нажмите на «ОК».
Теперь осталось только перезагрузить ПК и проверить результативность выполненных ранее действий. При возникновении ситуации, что неприятности со службой наблюдаются и до сих пор, проведите сканирование операционной системы на наличие вредоносных файлов. Подробнее об этом читайте в Способе 4.
Если вирусов не было обнаружено, потребуется выявить код ошибки, свидетельствующий о причине отказа запуска «Диспетчера печати». Делается это через «Командную строку»:
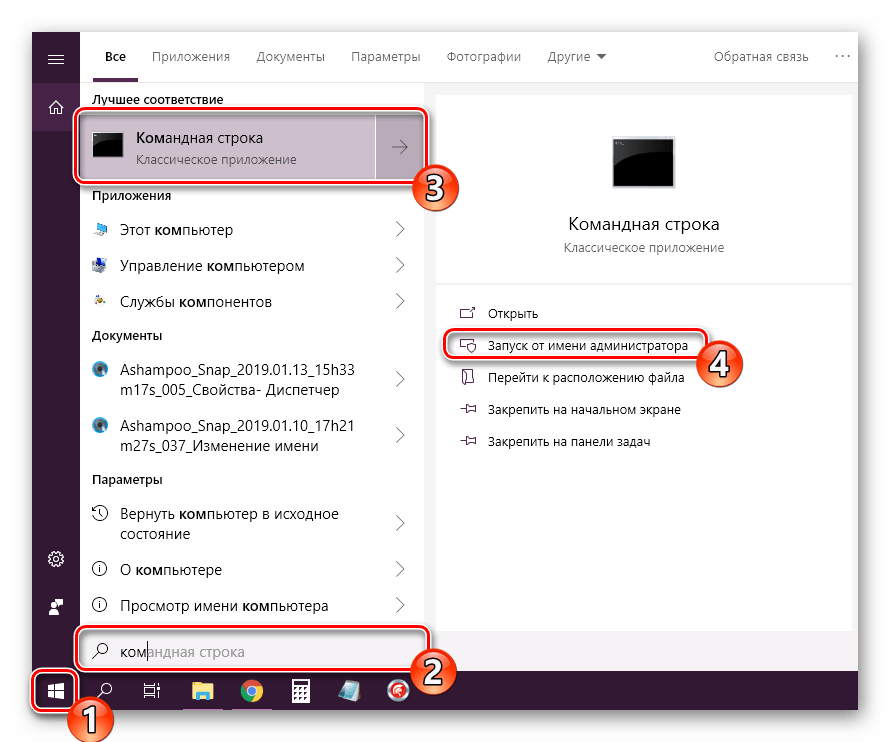
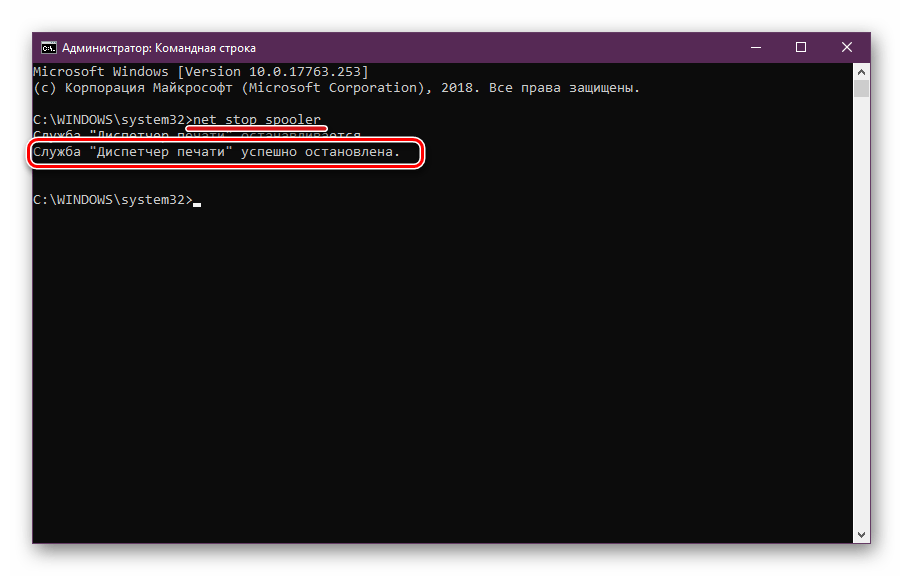
- Выполните поиск через «Пуск», чтобы отыскать утилиту «Командная строка». Запустите ее от имени администратора.
- В строке введите
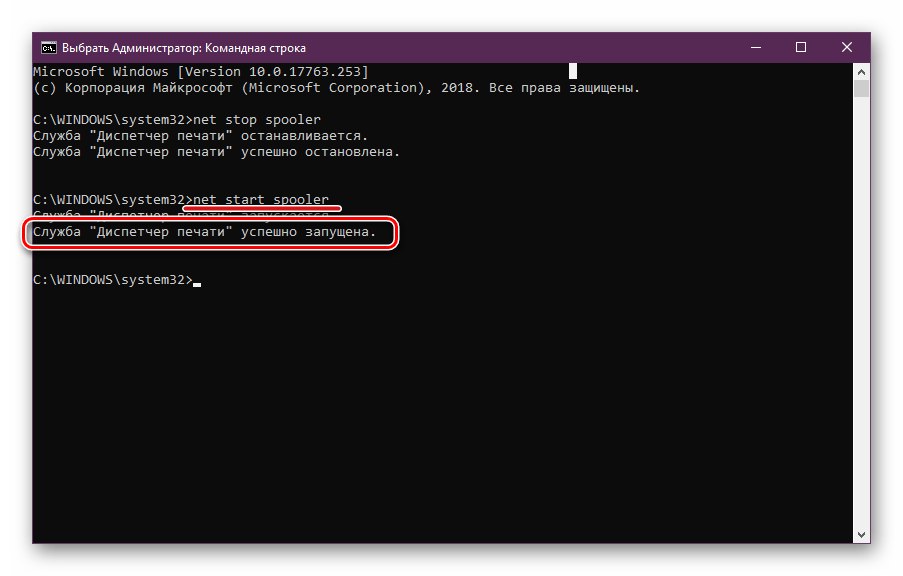
net stop spoolerи нажмите на клавишу Enter. Данная команда остановит «Диспетчер печати». - Теперь попробуйте запустить службу, введя
net start spooler. При успешном запуске приступайте к печати документа.
Если инструмент запустить не удалось и перед вами появилась ошибка с определенным кодом, обратитесь за помощью на официальный форум компании Microsoft или найдите расшифровку кода в интернете, чтобы разобраться с причиной неприятности.
Перейти на официальный форум Microsoft
Способ 2: Встроенное средство исправления неполадок
В Windows 10 присутствует встроенное средство обнаружения и исправления ошибок, однако в случае проблемы с «Диспетчер печати» оно не всегда работает корректно, поэтому мы и взяли этот метод вторым. Если упомянутый выше инструмент у вас функционирует нормально, попробуйте воспользоваться установленной функцией, а делается это следующим образом:
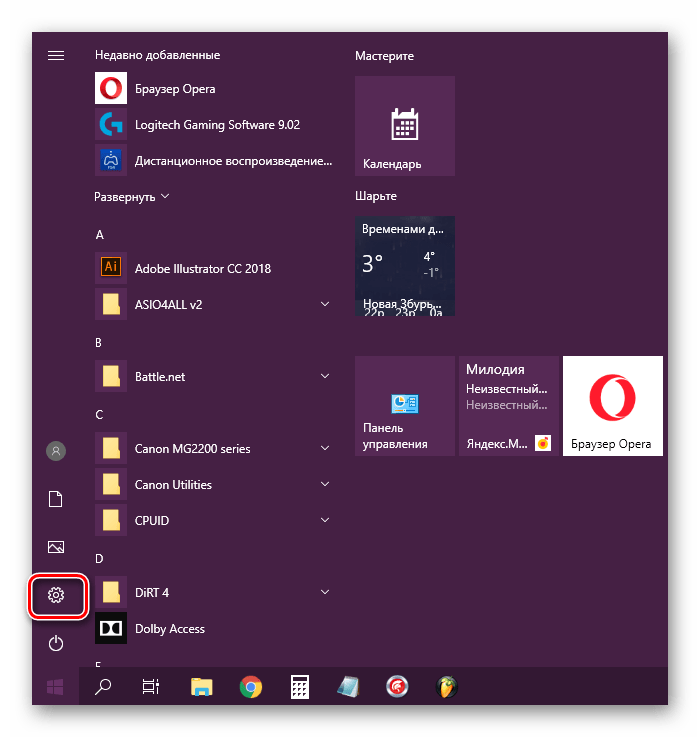
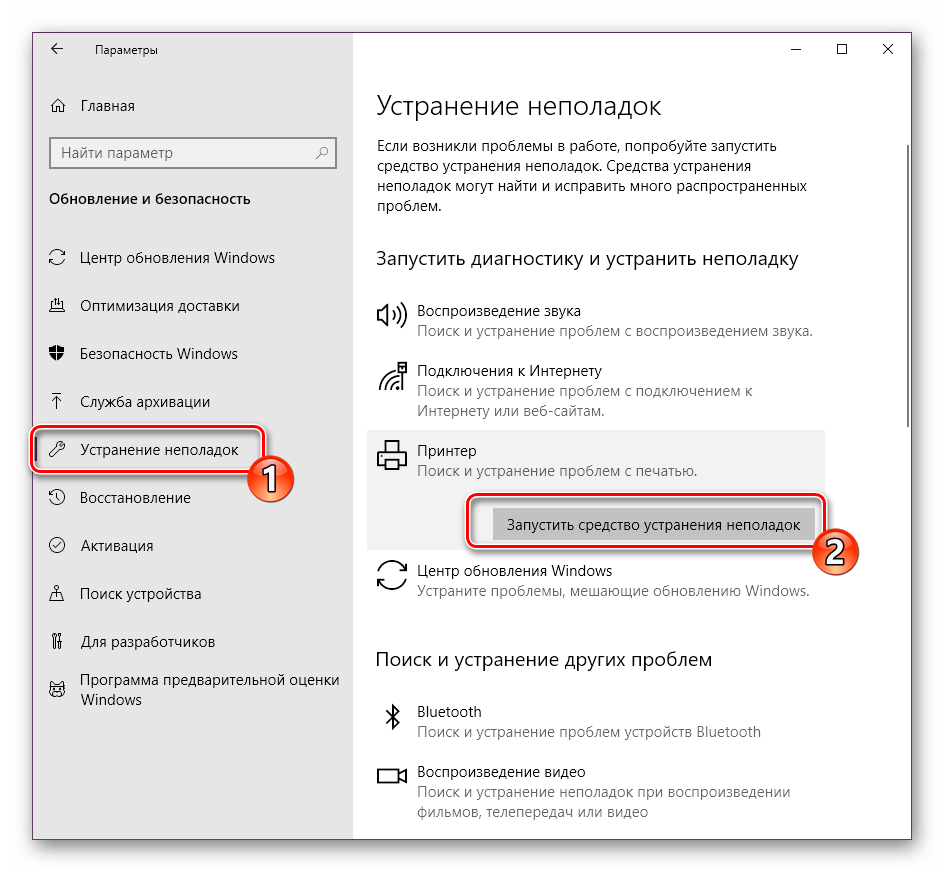
- Откройте меню «Пуск» и перейдите в «Параметры».
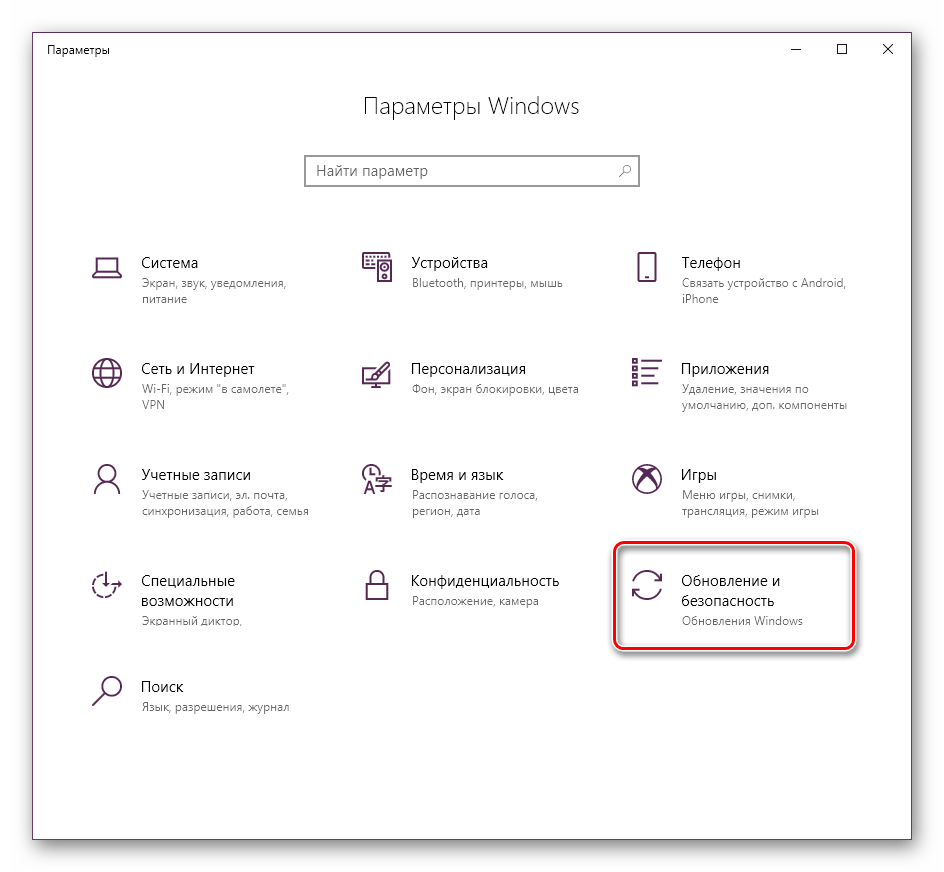
- Щелкните на разделе «Обновление и безопасность».
- На панели слева отыщите категорию «Устранение неполадок» и в «Принтер» нажмите на «Запустить средство устранения неполадок».
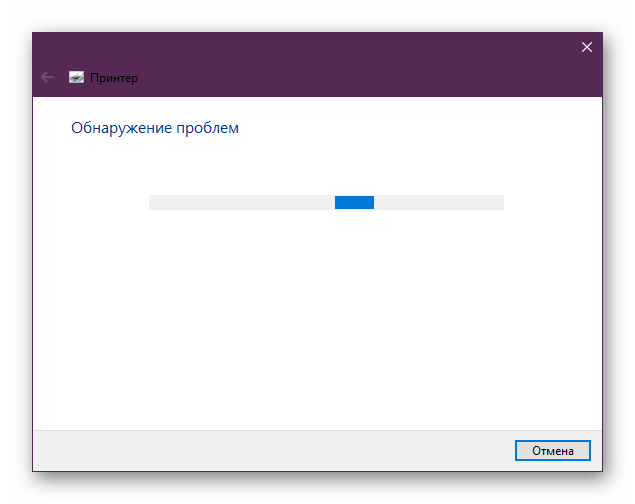
- Дождитесь завершения обнаружения ошибок.
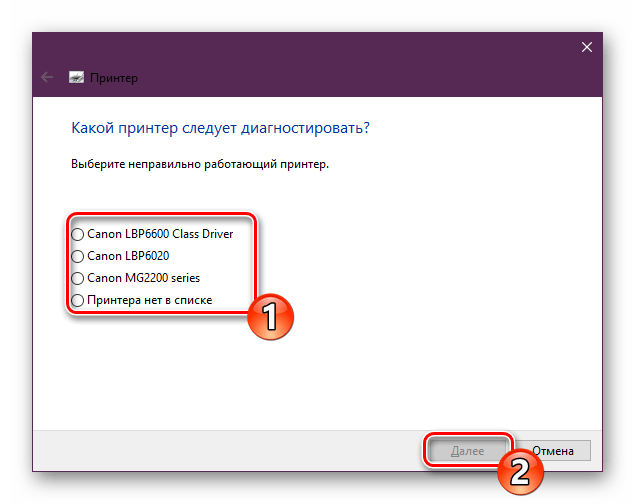
- Если принтеров используется несколько, потребуется выбрать один из них для дальнейшей диагностики.
- По окончании процедуры проверки вы сможете ознакомиться с ее результатом. Найденные сбои обычно исправляются или предоставляется инструкция по их решению.
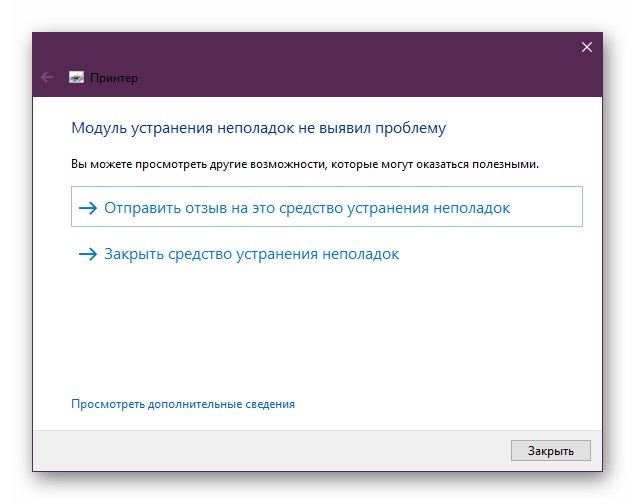
Если модуль устранения неполадок не выявил проблем, переходите к ознакомлению с другими способами, приведенными ниже.
Способ 3: Очистка очереди печати
Как известно, когда вы отправляете документы в печать, они помещаются в очередь, которая автоматически очищается только после удачной распечатки. Иногда случаются сбои с используемым оборудованием или системой, вследствие чего появляются ошибки с локальной подсистемой печати. Вам требуется вручную провести очистку очереди через свойства принтера или классическое приложение «Командная строка». Детальные инструкции по этой теме вы найдете в другой нашей статье по следующей ссылке.
Подробнее:
Очистка очереди печати в Windows 10
Как очистить очередь печати на принтере HP
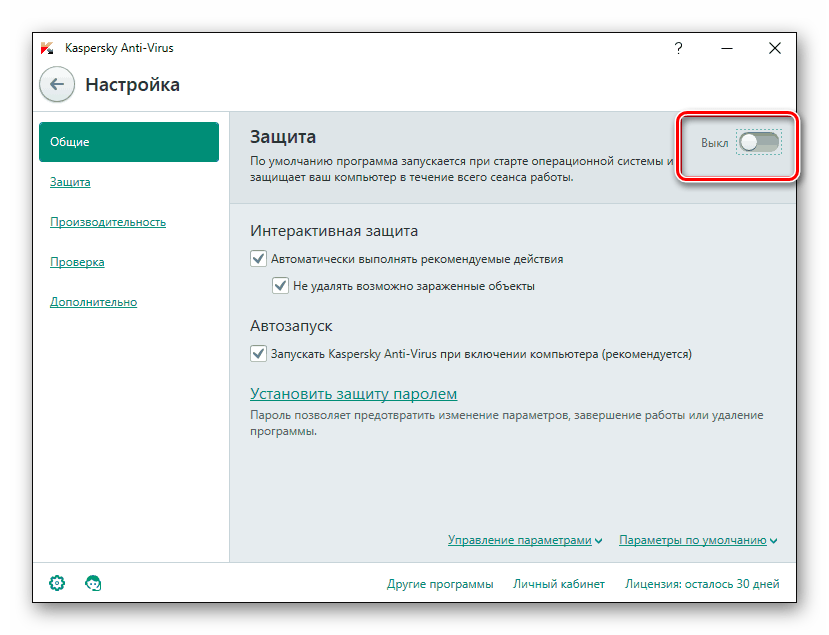
Способ 4: Проверка компьютера на вирусы
Как уже было сказано выше, проблемы с различными службами и с функционированием операционной системы могут возникать из-за заражения вирусами. Тогда поможет только сканирование компьютера с помощью специального программного обеспечения или утилит. Они должны выявить зараженные объекты, исправить их и обеспечить корректное взаимодействие необходимого вам периферийного оборудования. О том, как бороться с угрозами, читайте в отдельном нашем материале далее.
Подробнее:
Борьба с компьютерными вирусами
Проверка компьютера на наличие вирусов без антивируса
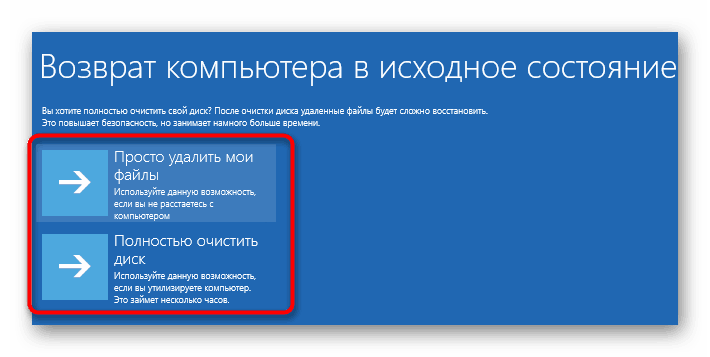
Способ 5: Восстановление системных файлов
Если приведенные выше методы не принесли никакого результата, стоит задуматься о целостности системных файлов операционной системы. Чаще всего повреждаются они из-за мелких сбоев в работе ОС, необдуманных действий пользователей или вреда от вирусов. Поэтому рекомендуется воспользоваться одним из трех доступных вариантов восстановления данных, чтобы наладить работу локальной подсистемы печати. Развернутое руководство по проведению этой процедуры вы найдете по ссылке ниже.
Подробнее: Восстановление системных файлов в Windows 10
Способ 6: Переустановка драйвера принтера
Драйвер принтера обеспечивает его нормальное функционирование с ОС, а также эти файлы связываются с рассматриваемой подсистемой. Иногда такое ПО устанавливается не совсем корректно, из-за чего и появляются ошибки различного рода, в том числе и упомянутая сегодня. Исправить ситуацию можно с помощью переустановки драйвера. Сначала его нужно полностью удалить. Детально с выполнением этой задачи вы можете ознакомиться в нашей следующей статье.
Подробнее: Удаление старого драйвера принтера
Теперь вам нужно перезагрузить компьютер и подключить принтер. Обычно Виндовс 10 сама устанавливает необходимые файлы, однако если этого не произошло, придется самостоятельно решать этот вопрос доступными методами.
Подробнее: Установка драйверов для принтера
Неисправность с работой локальной подсистемы печати — одна из самых частых неполадок, с которыми сталкиваются пользователи при попытке распечатки требуемого документа. Надеемся, приведенные выше способы помогли вам разобраться с решением этой ошибки и вы без особого труда нашли подходящий вариант исправления. Оставшиеся вопросы по поводу данной темы смело задавайте в комментариях, и вы получите максимально быстрый и достоверный ответ.
Читайте также:
Решение проблемы «Доменные службы Active Directory сейчас недоступны»
Решение проблемы с предоставлением общего доступа для принтера
Решение проблем с открытием Мастера добавления принтеров
Наша группа в TelegramПолезные советы и помощь