
Установка PostgreSQL по шагам
1. Загружаем дистрибутив
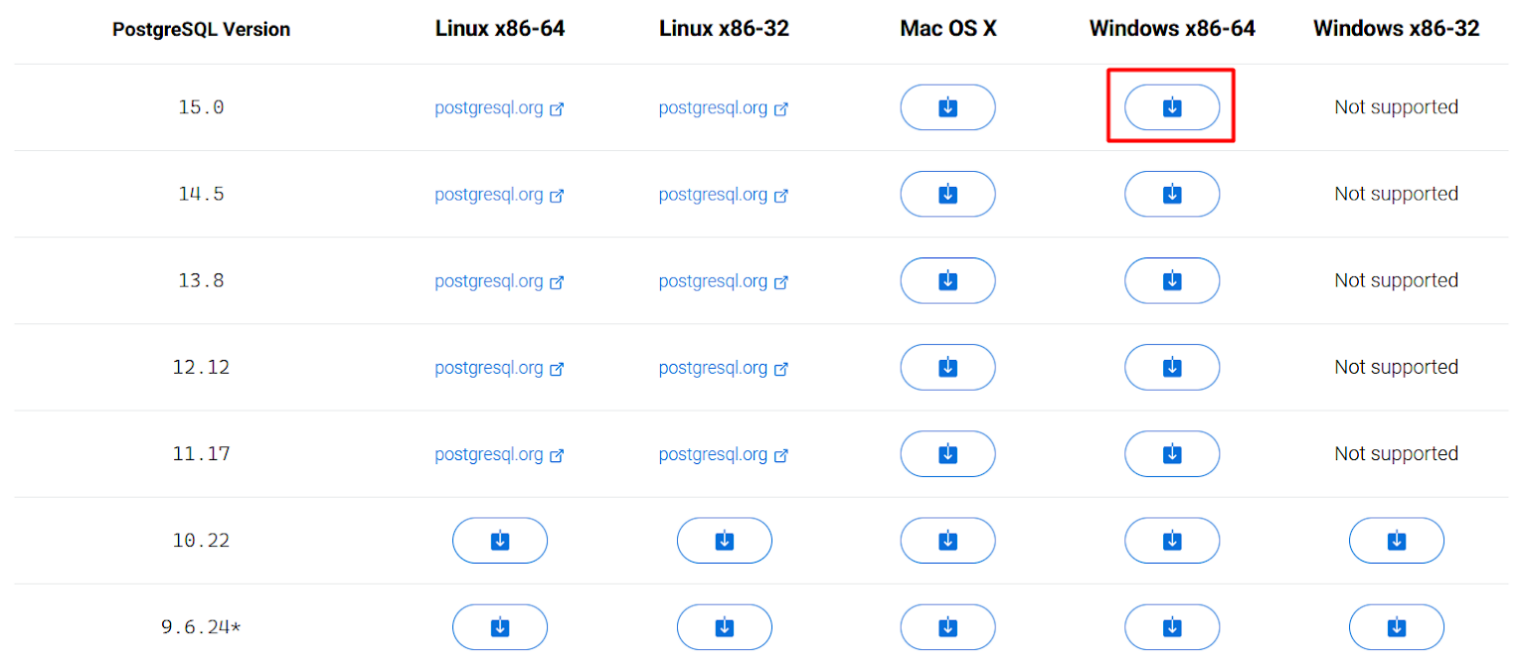
Мы советуем скачивать актуальные версии на официальном сайте СУБД. Чтобы найти установщик PostgreSQL 15 для Windows нажимаем Download → Windows → Download the installer.
На сайте выбираем интересующую нас версию PostgreSQL и платформу Windows x86-64. Начинается загрузка установочного файла на компьютер.
2. Запускаем установочный файл
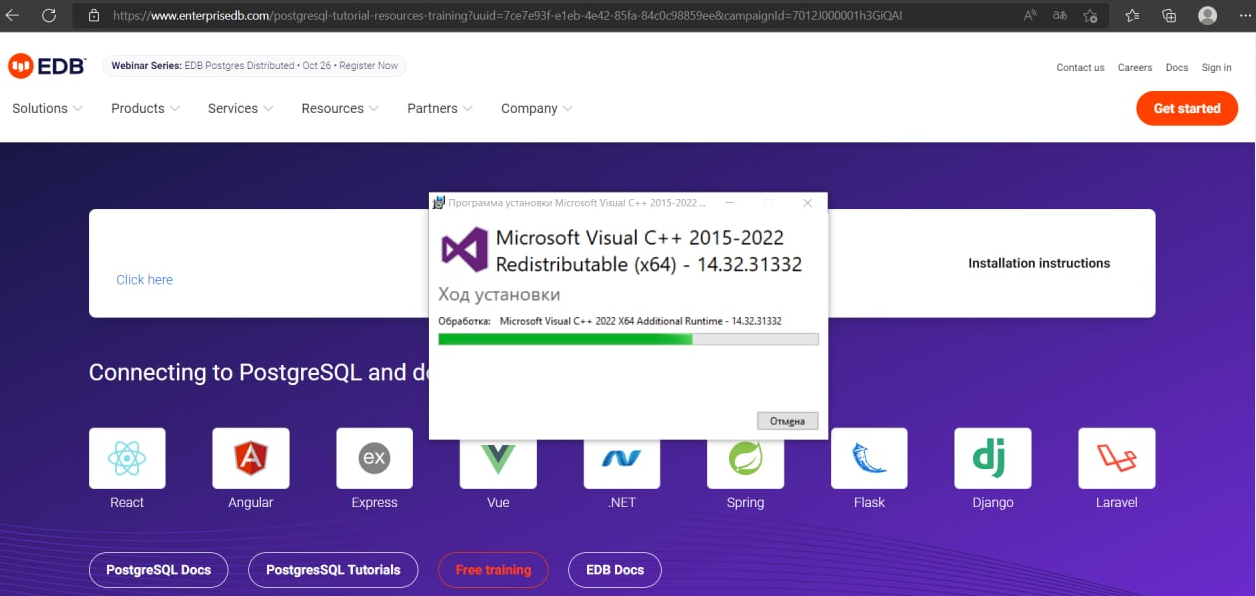
В ходе установки проводится проверка на наличие необходимых компонентов, например, Microsoft Visual C++. Если каких-то компонентов не хватает, они устанавливаются автоматически.
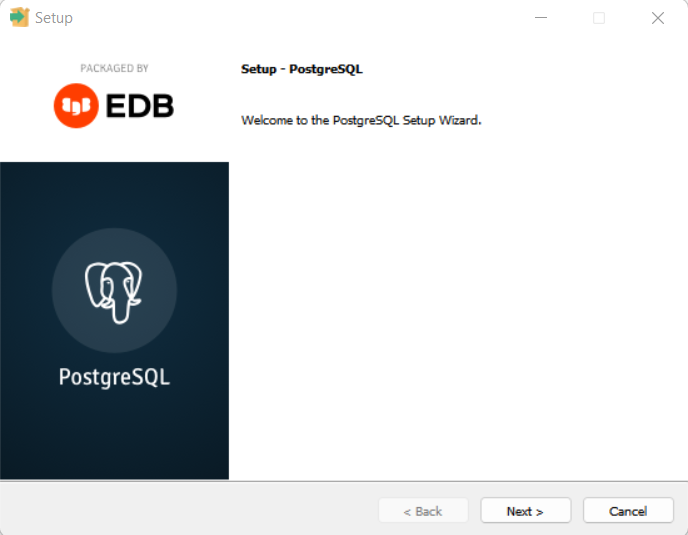
В открывшемся приветственном окне нажимаем Next.
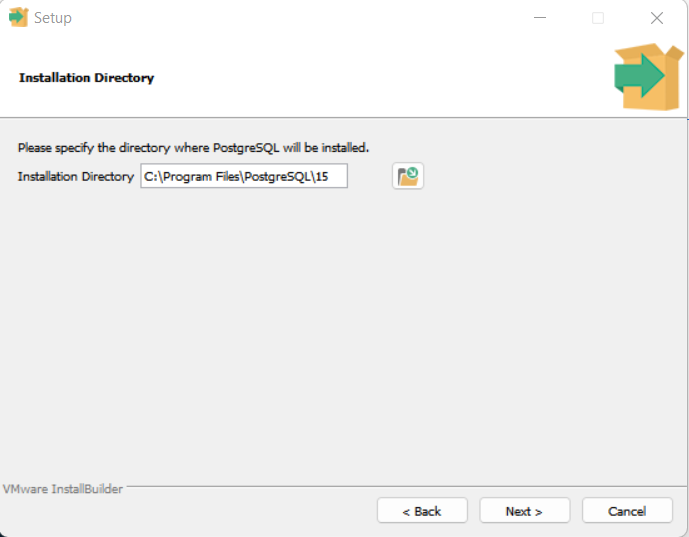
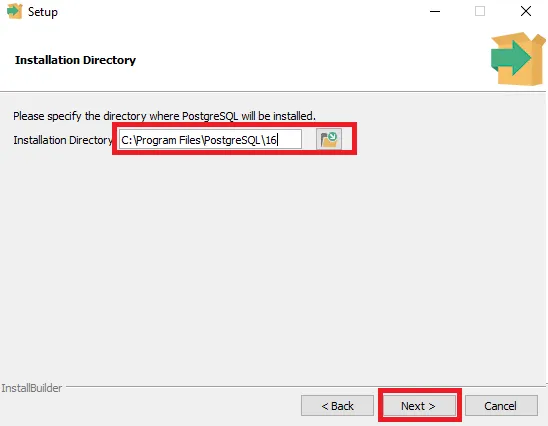
3. Указываем каталог для установки
Выбираем путь, куда нужно установить PostgreSQL 15. По умолчанию предлагается C:\Program Files\PostgreSQL\15, его можно оставить.
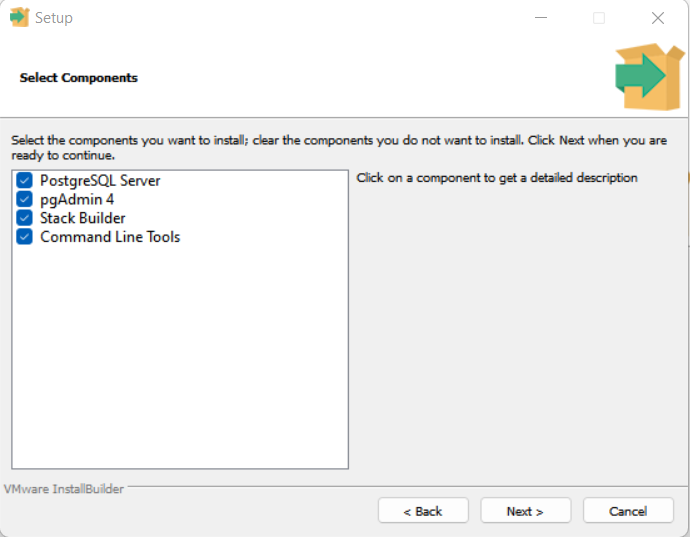
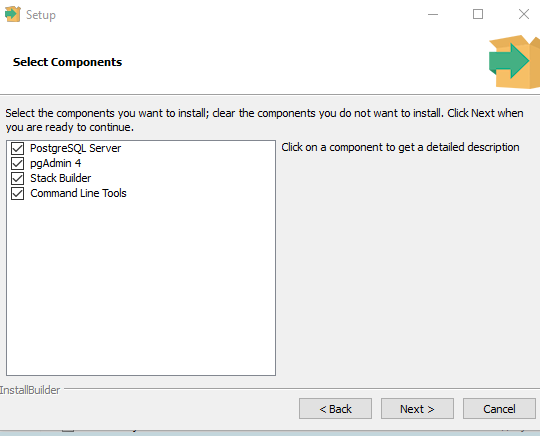
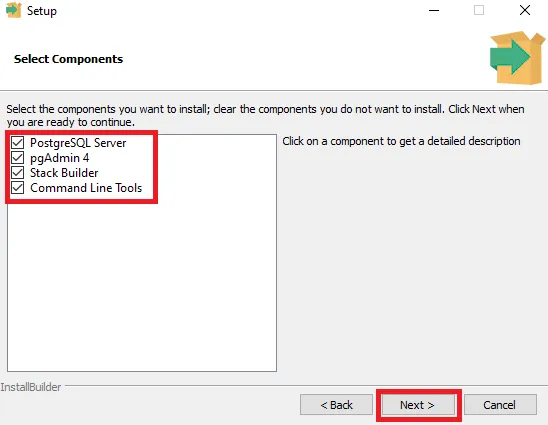
4. Выбираем дополнительные компоненты
Вместе с СУБД можно установить следующие компоненты:
- PostgreSQL Server — это сам сервер баз данных PostgreSQL;
- pgAdmin 4 — приложение с графическим интерфейсом для администрирования СУБД;
- Stack Builder — утилита, которая поможет установить дополнительные библиотеки и инструменты в PostgreSQL;
- Command Line Tools — инструменты для работы с СУБД через командную строку.
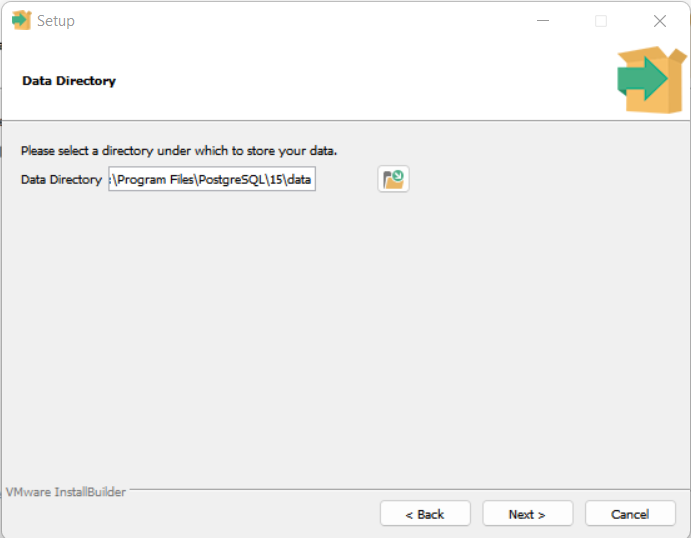
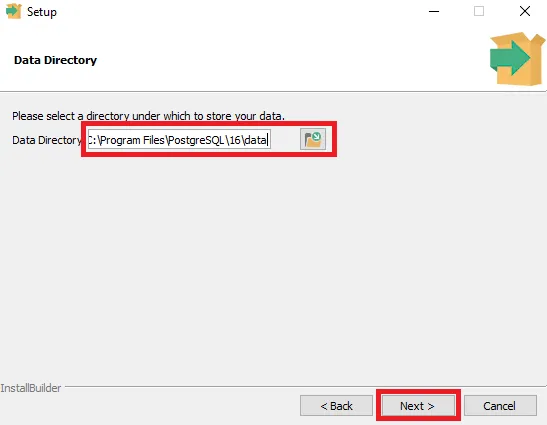
5. Указываем каталог для файлов баз данных
Можно оставить путь по умолчанию C:\Program Files\PostgreSQL\15\data или выбрать свой. Здесь будет храниться вся информация, поэтому перед выбором каталога важно проверить, что на диске достаточно свободного места.
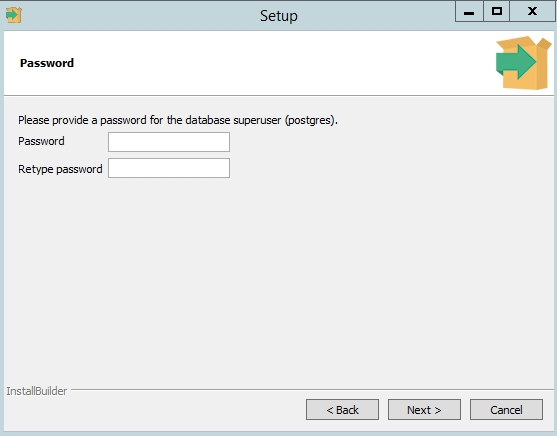
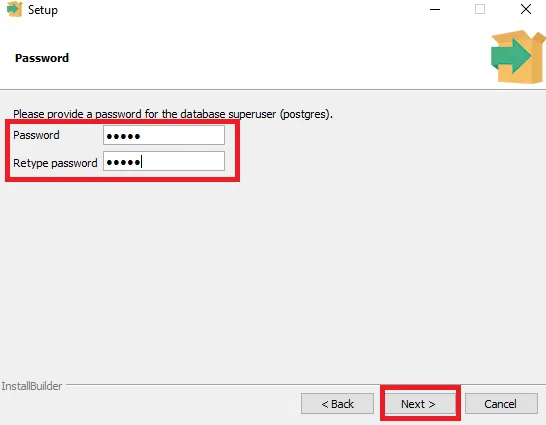
6. Устанавливаем пароль для системного пользователя
Рекомендуем выбирать пароль из 12 и более символов, со строчными и прописными буквами, цифрами и символами. Логин postgres устанавливается по умолчанию.

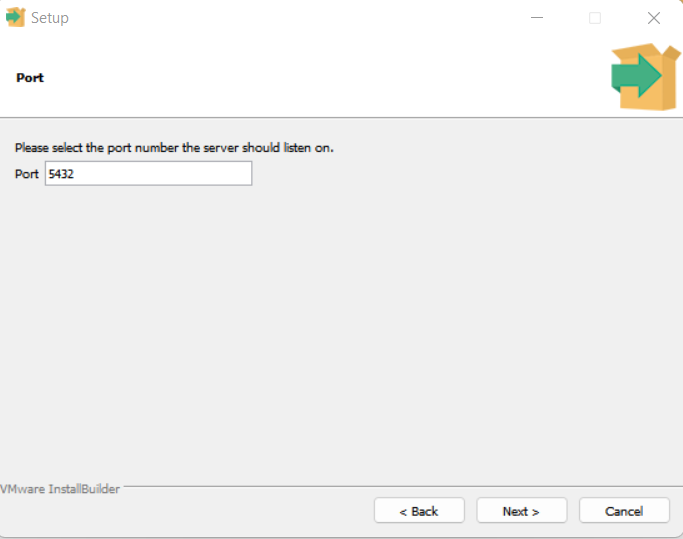
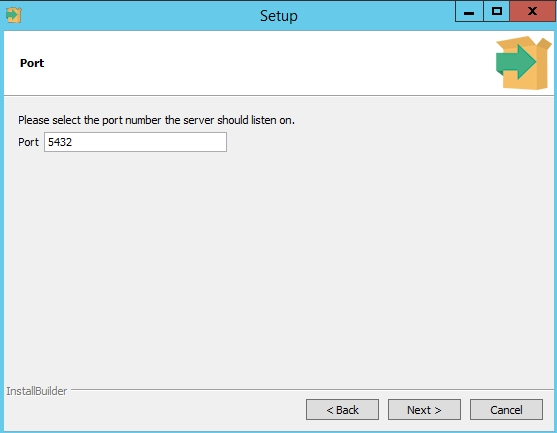
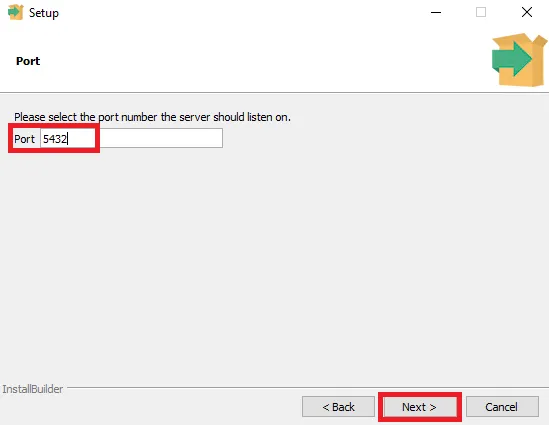
7. Выбираем порт и кодировку
Можно оставить порт по умолчанию 5432 или указать свой. Далее нажать Next.
В появившемся списке локалей выбираем подходящую для себя локализацию или оставляем значение по умолчанию [Default locale]. Нажимаем Next.
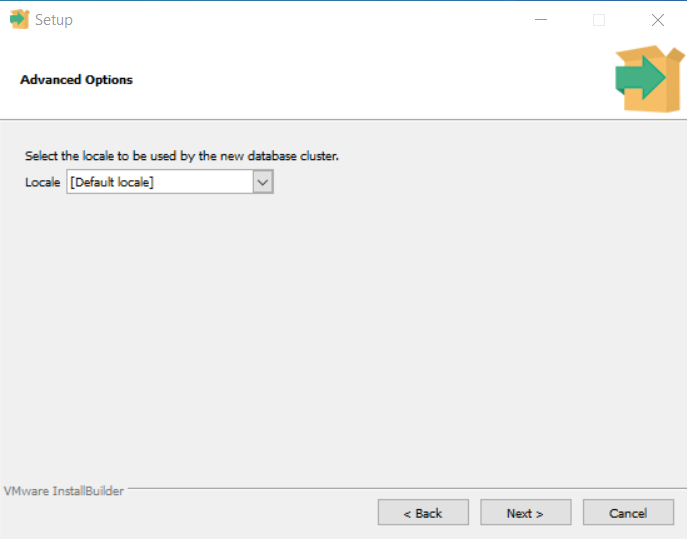
В будущем для новых баз данных на сервере можно будет указать конкретную кодировку.
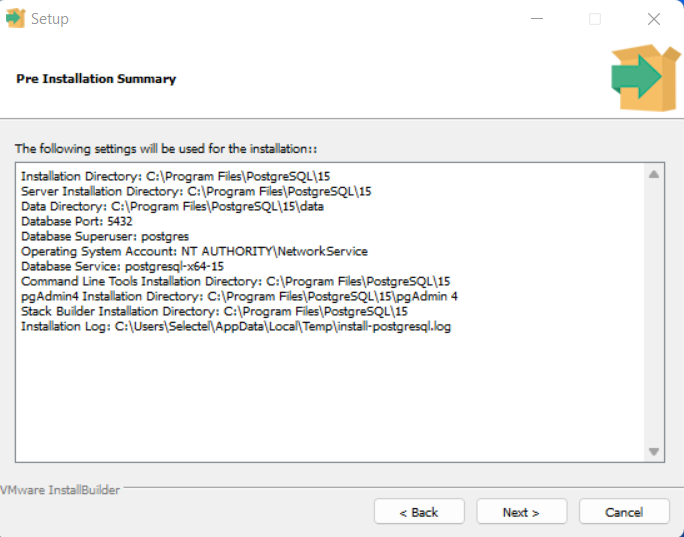
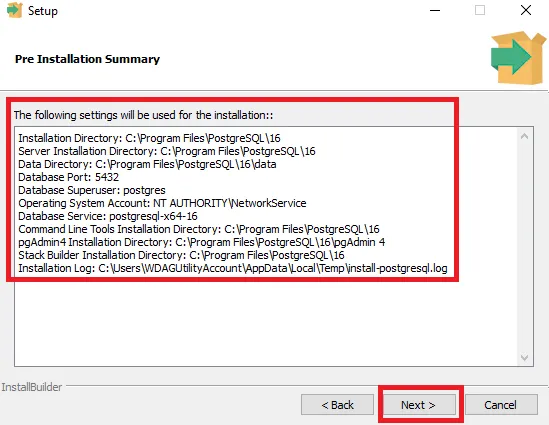
8. Проверяем параметры и завершаем установку
В финальном окне выводится сводная информация об установке PostgreSQL 15: дополнительные компоненты, выбранные порт и каталог, логин. Если параметры указаны верно, нажимаем Next или возвращаемся для корректировок с помощью кнопки Back.
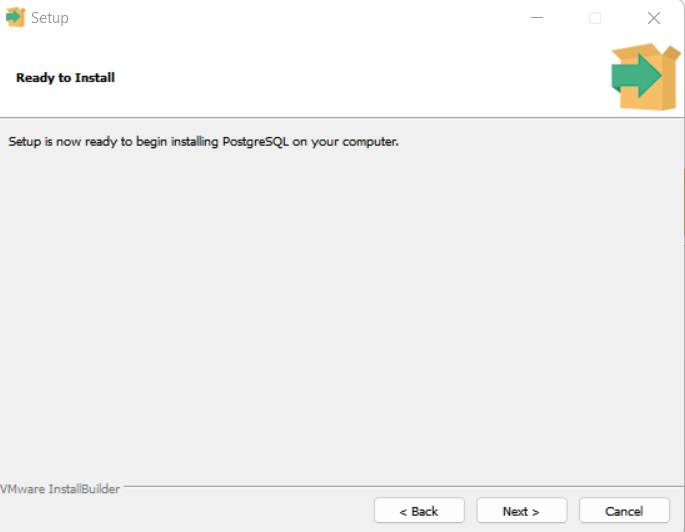
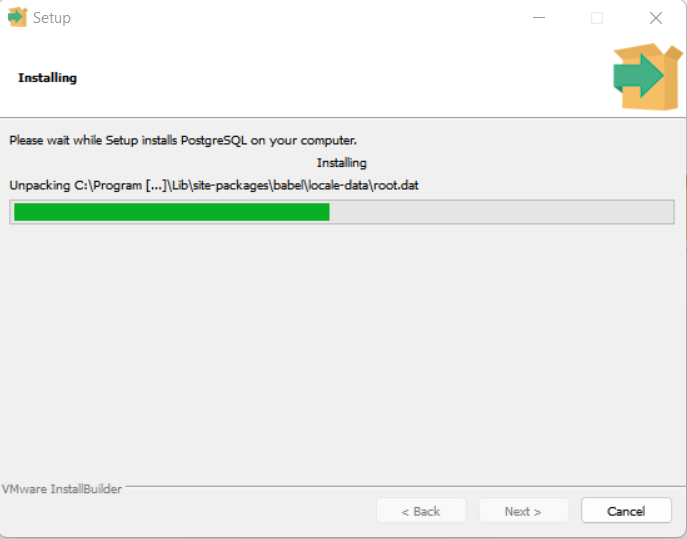
Все готово. Нажмите Next и дождитесь, когда необходимые компоненты установятся. Обычно процесс занимает не более 5 минут.
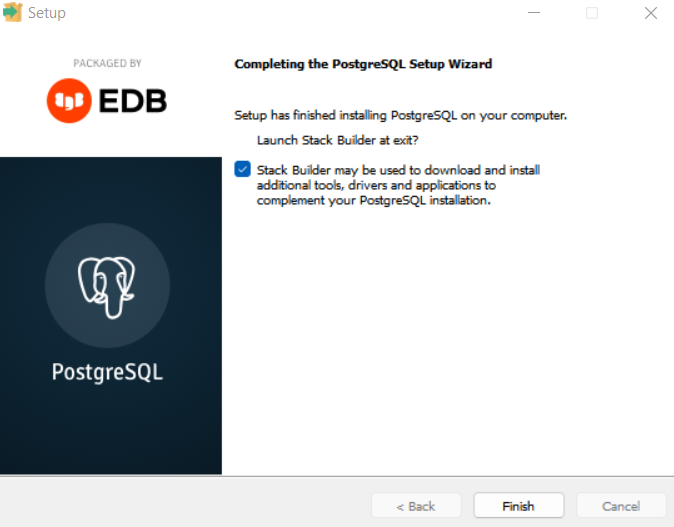
Одновременно с завершением процесса установки можно запустить компонент Stack Builder. Если запуск не требуется, снимаем флажок и нажимаем Finish.
Установка приложений с помощью Stack Builder
Запустить Stack Builder после окончания установки PostgreSQL можно с помощью команды:
C:\"Program Files"\PostgreSQL\15\bin\stackbuilder.exe
При этом путь будет зависеть от того, какие диск и каталог были выбраны во время установки СУБД.
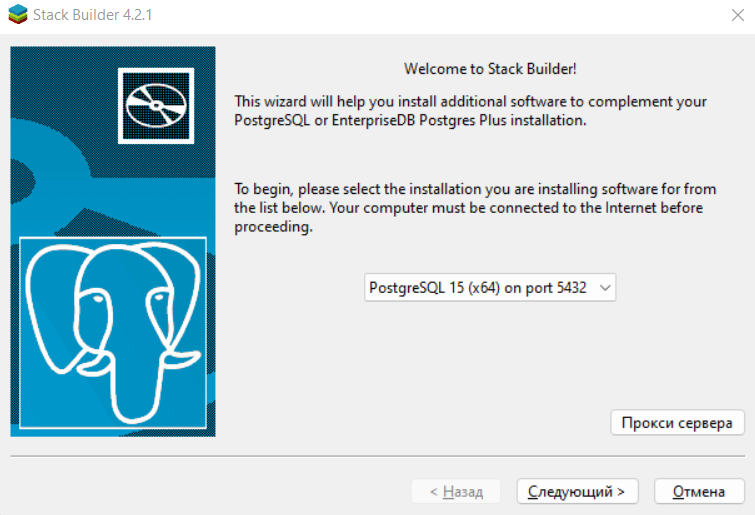
В начальном окне Stack Builder выбираем СУБД, для которой будем устанавливать дополнения. Для дальнейшей загрузки необходимо подключение к Интернету.
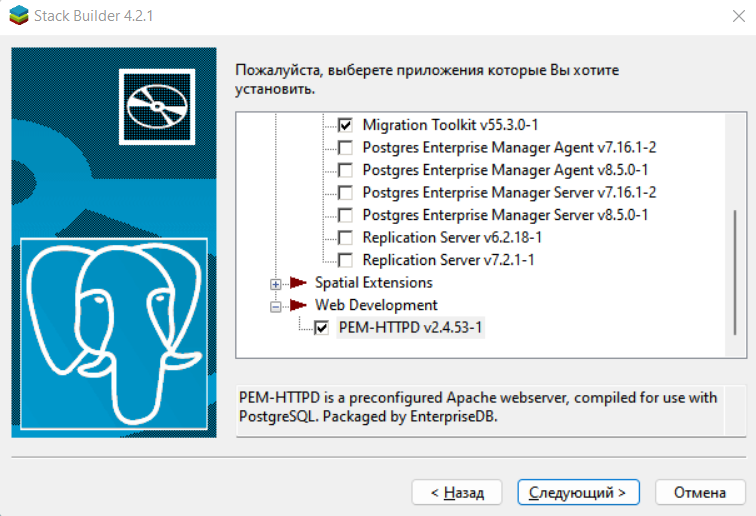
Далее выбираем дополнительные приложения, которые нужны для работы с базой данных. При клике на любой из компонентов внизу окна появляется его краткое описание. Мы выбрали Migration Toolkit и PEM-HTTPD.
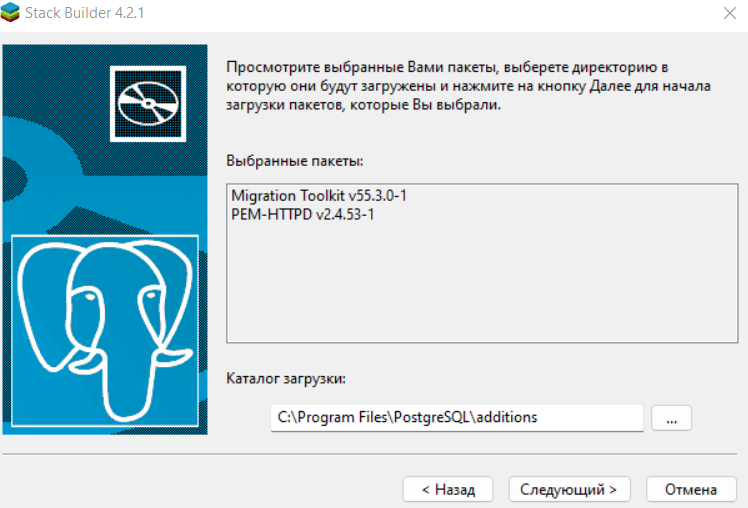
Следующим шагом указываем путь на локальной машине, куда нужно загрузить пакеты выбранных дополнений.
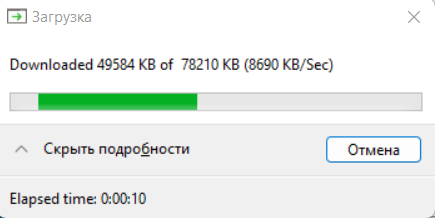
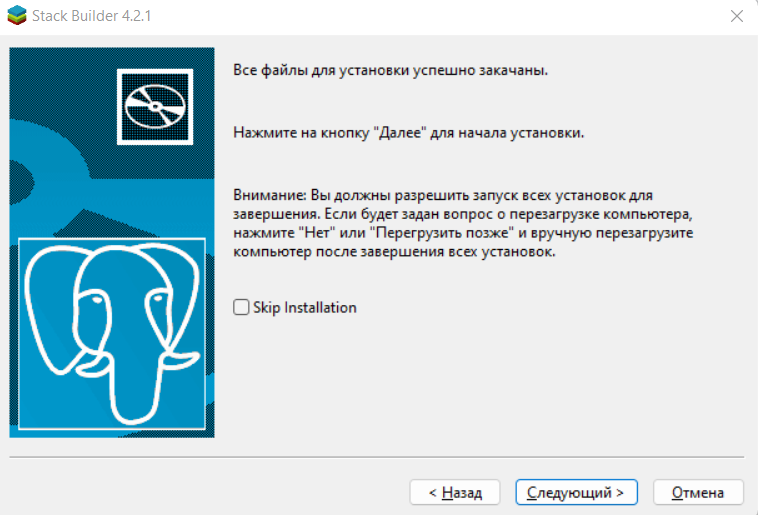
Дожидаемся загрузки файлов.
После этого скачанные приложения устанавливаются по очереди. Перезагружать компьютер следует только после того, как все дополнения из набора будут установлены.
Если устройство все-таки было перезапущено раньше, чем завершилась установка всех приложений, можно запустить инсталляцию с помощью .exe файла. Он находится в папке, которая была выбрана на предыдущем шаге. В нашем примере это папка C:\Program Files\PostgreSQL\additions.
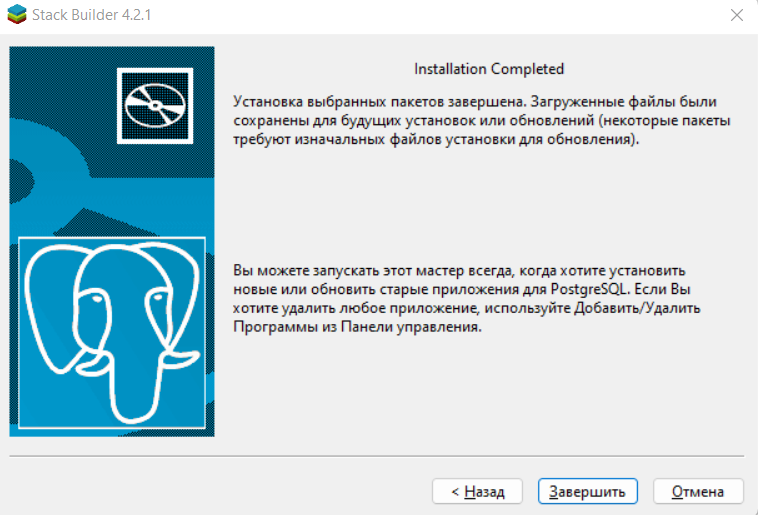
После установки всех выбранных приложений Stack Builder сообщает об успешном завершении.
Запуск pgAdmin 4
pgAdmin 4 — это утилита с простым визуальным интерфейсом, которая помогает работать с PostgreSQL. Ее можно установить отдельно от СУБД, скачав дистрибутив на официальном сайте.
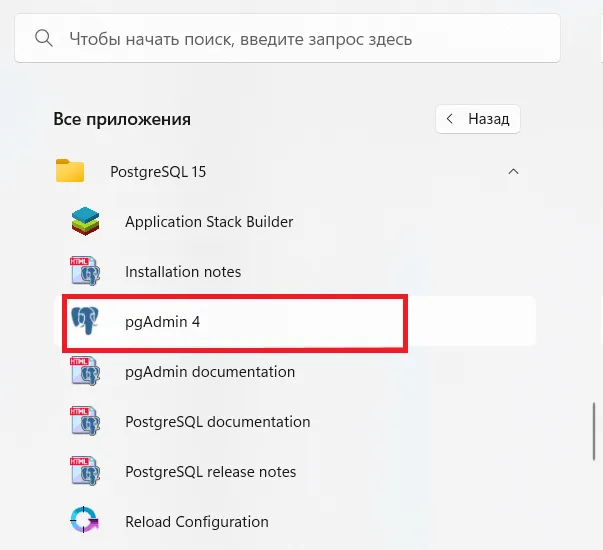
Запустить pgAdmin 4 на устройстве можно через поиск в панели Пуск.

Еще один способ запустить утилиту — ввести в командной строке:
C:\Users\Selectel>C:\"Program Files"\PostgreSQL\15\"pgAdmin 4"\bin\pgAdmin4
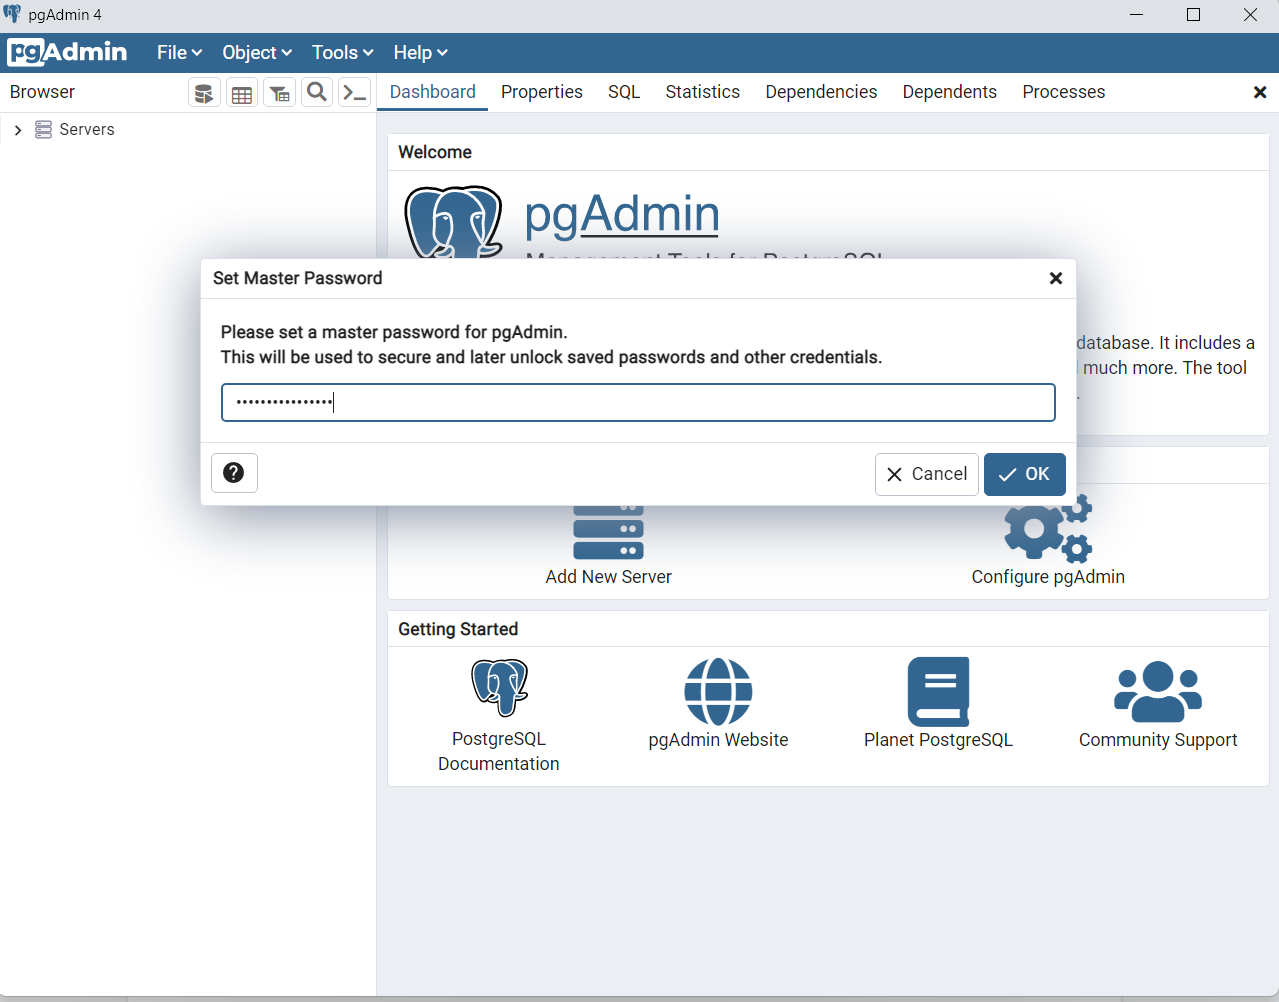
Сразу при запуске необходимо придумать мастер пароль. Он нужен для защиты сервера и последующей разблокировки сохраненных паролей.
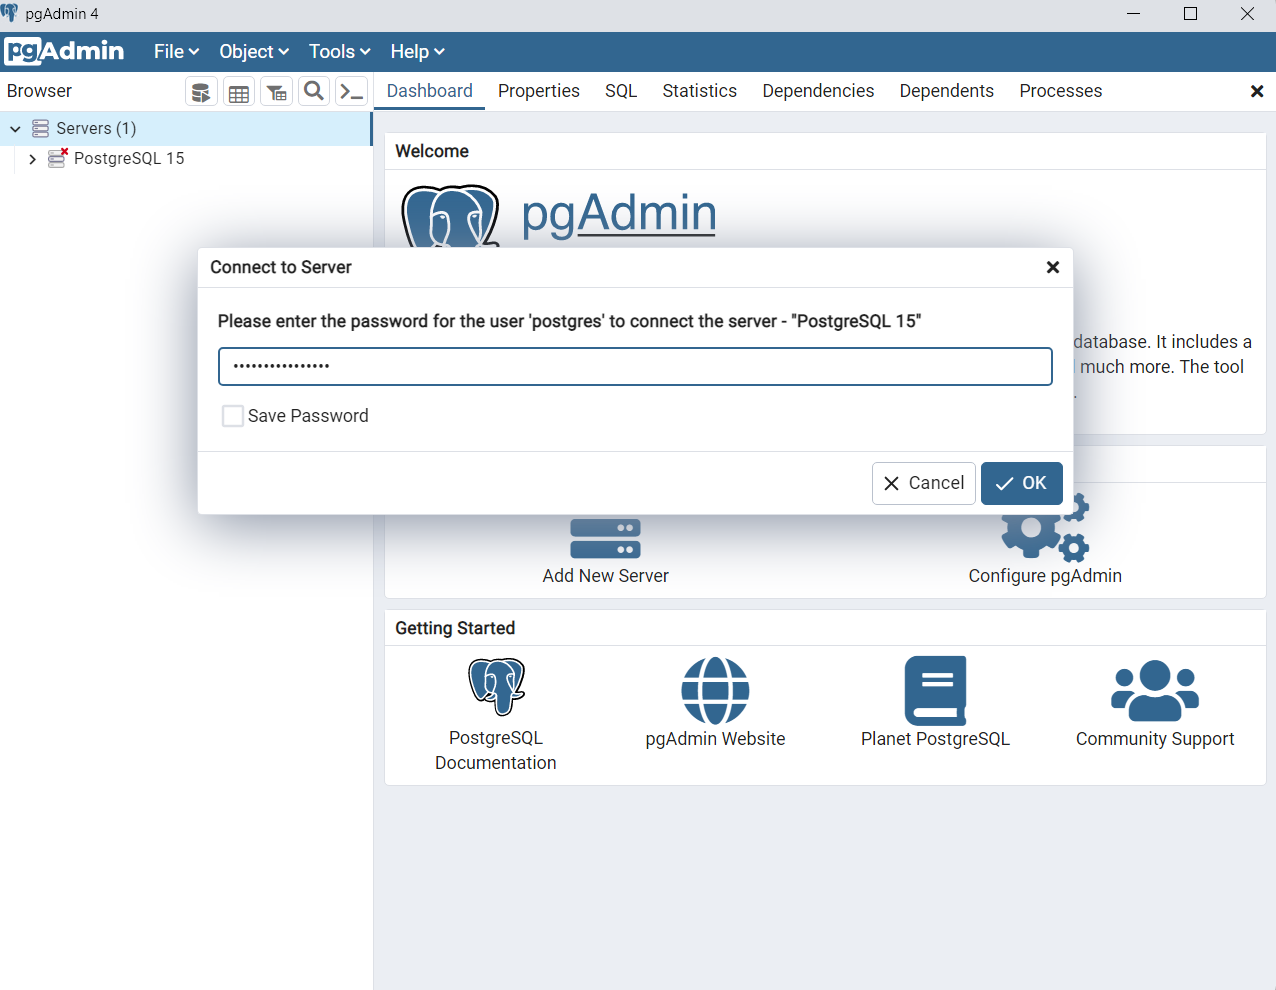
Чтобы подключиться к серверу СУБД кликните на Servers в левой панели и в раскрывшемся списке выберите PostgreSQL 15. Нажмите на него правой кнопки мыши и выберите Connect Server.

Для подключения нужно ввести пароль пользователя postgres — его мы задавали на этапе установки PostgreSQL 15.
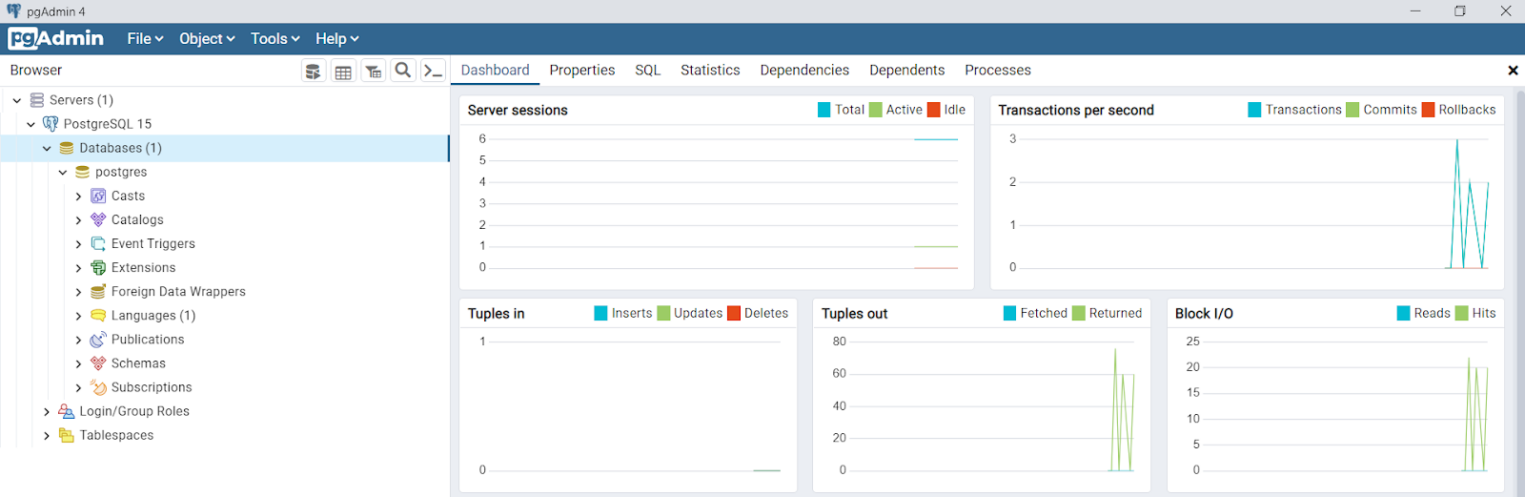
После аутентификации мы подключаемся к своему серверу PostgreSQL 15 и видим все объекты, которые на нем расположены.
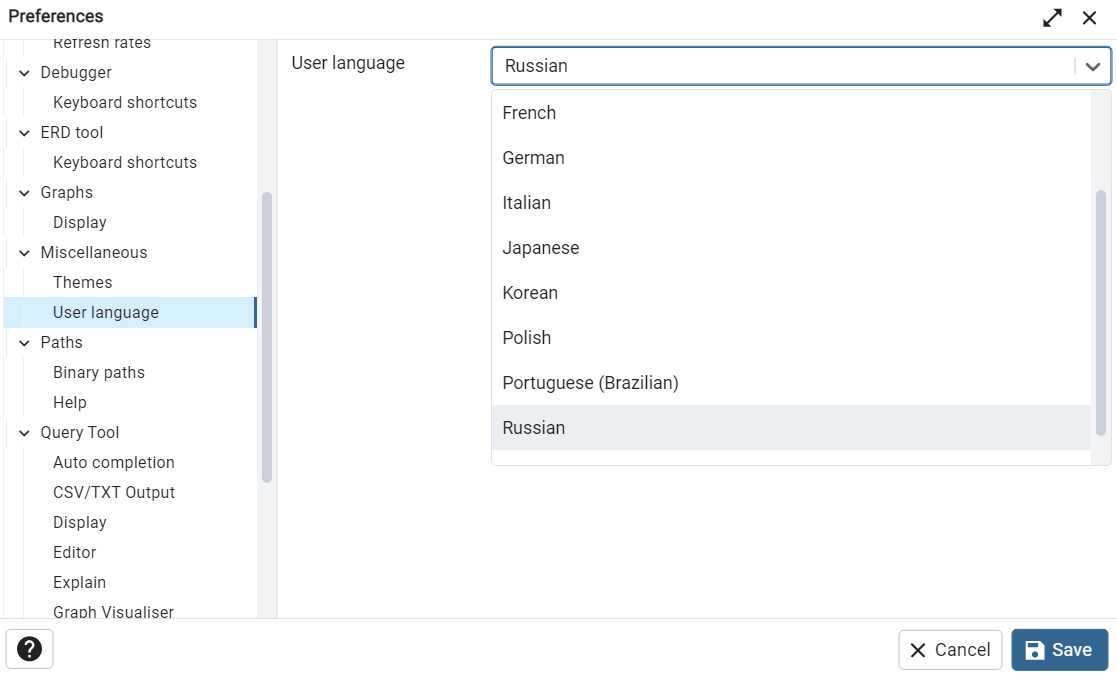
Чтобы изменить язык в pgAdmin 4 нажмите в левом верхнем углу File → Preferences. Далее в открывшемся окне в разделе Miscellaneous выберите пункт User language и в выпадающем списке с доступными языками найдите Russian. Язык изменится после перезагрузки страницы.
Сетевой доступ к PostgreSQL
Чтобы сервер PostgreSQL был доступен другим устройствам по сети, необходимо добавить правила в файрволе Windows. Проще всего сделать это с помощью PowerShell или командной строки. При этом команды необходимо выполнять от имени администратора. Еще можно использовать графический интерфейс. Ниже рассмотрим каждый из способов.
PowerShell
New-NetFirewallRule -Name 'POSTGRESQL-PORT' -DisplayName 'Selectel Port PostgreSQL2' -Direction Inbound -Enabled True -Protocol TCP -LocalPort 5432
Командная строка
netsh advfirewall firewall add rule name="Selectel Port PostgreSQL" dir=in action=allow protocol=TCP localport=5432
Графический интерфейс
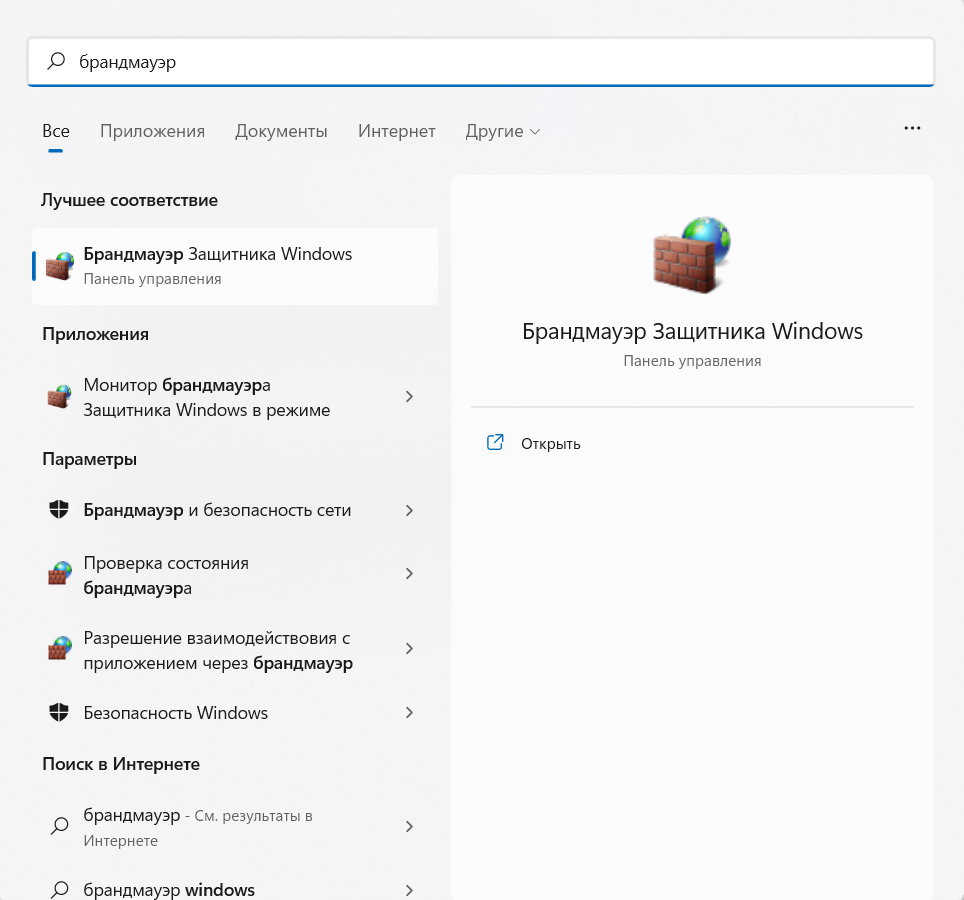
В меню Пуск ищем брандмауэр и выбираем Брандмауэр Защитника Windows.
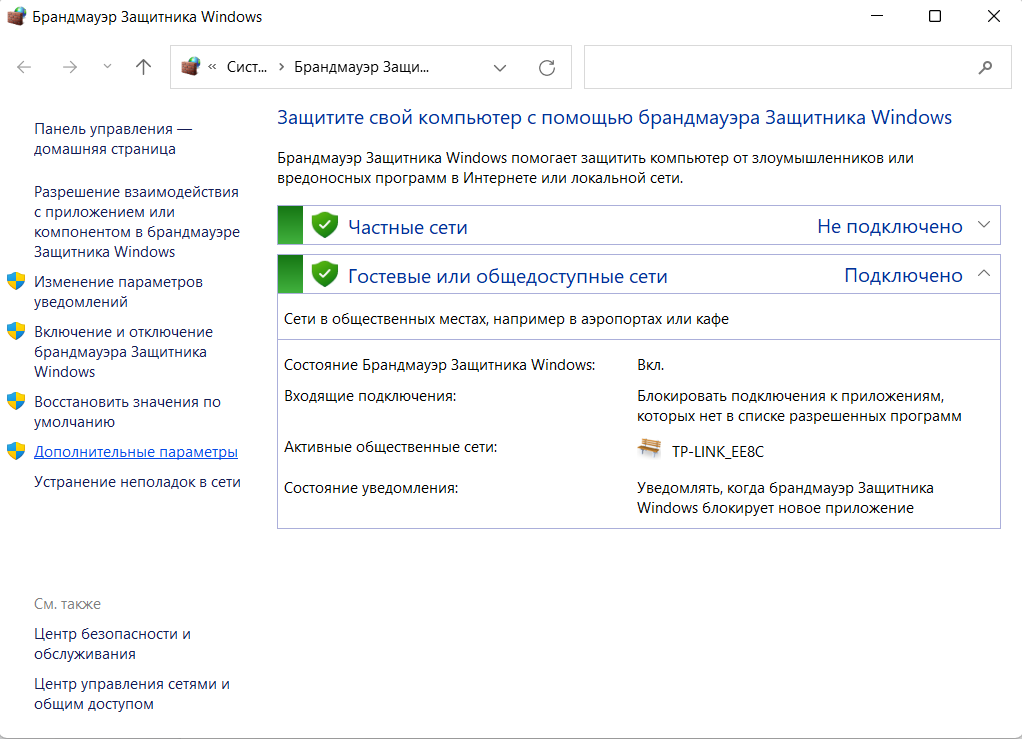
В левом меню кликаем на Дополнительные параметры.
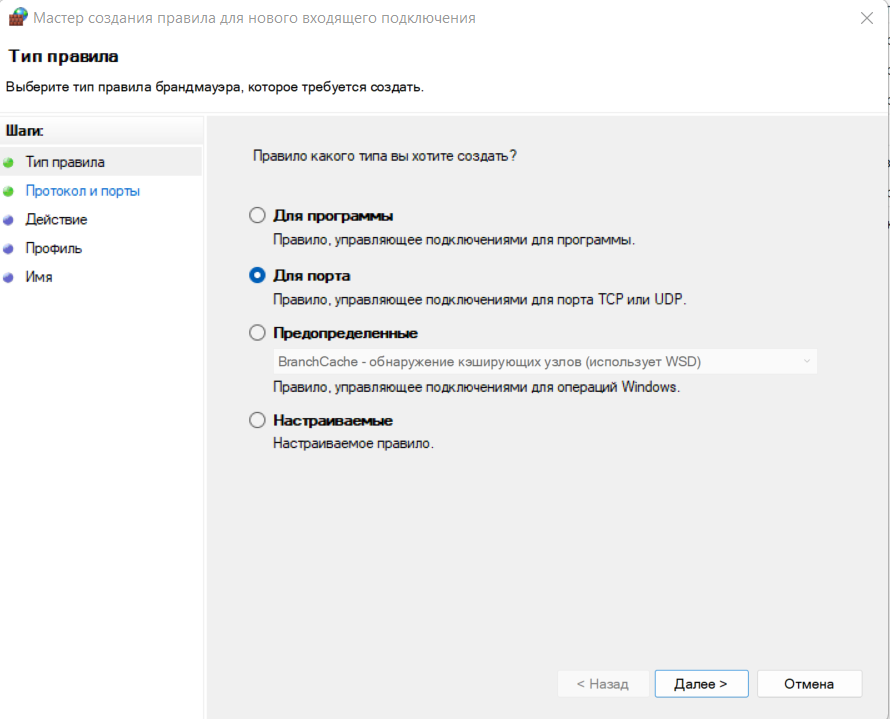
Заходим в Правила для входящих подключений и в правой части окна выбираем Создать правило.

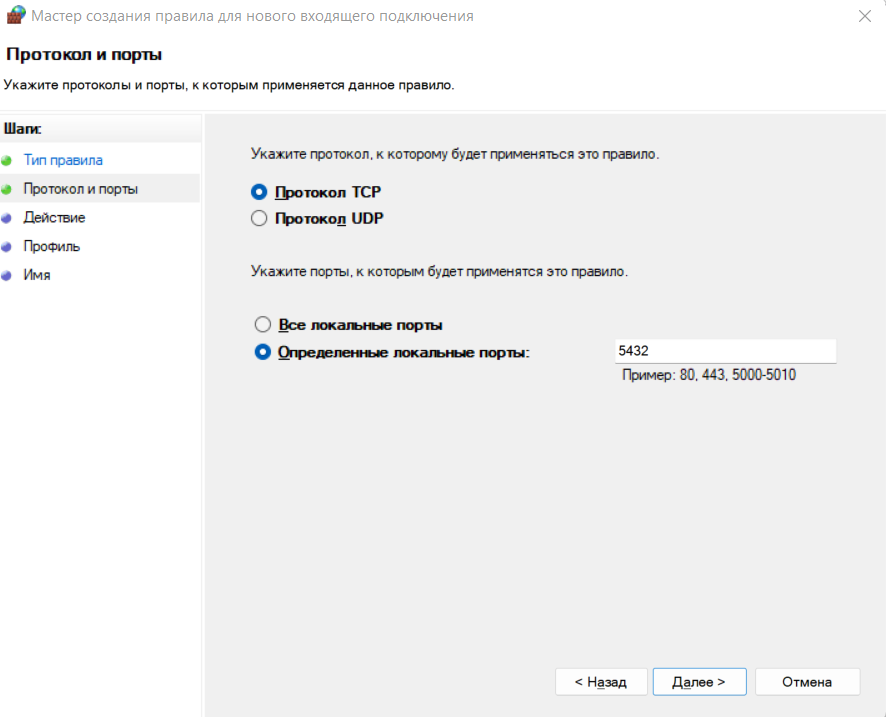
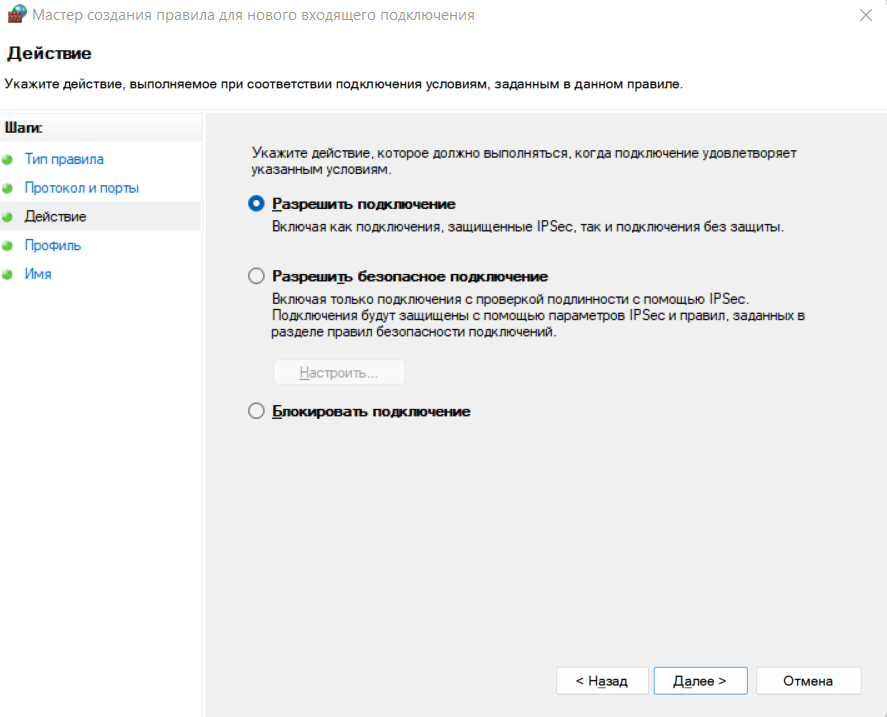
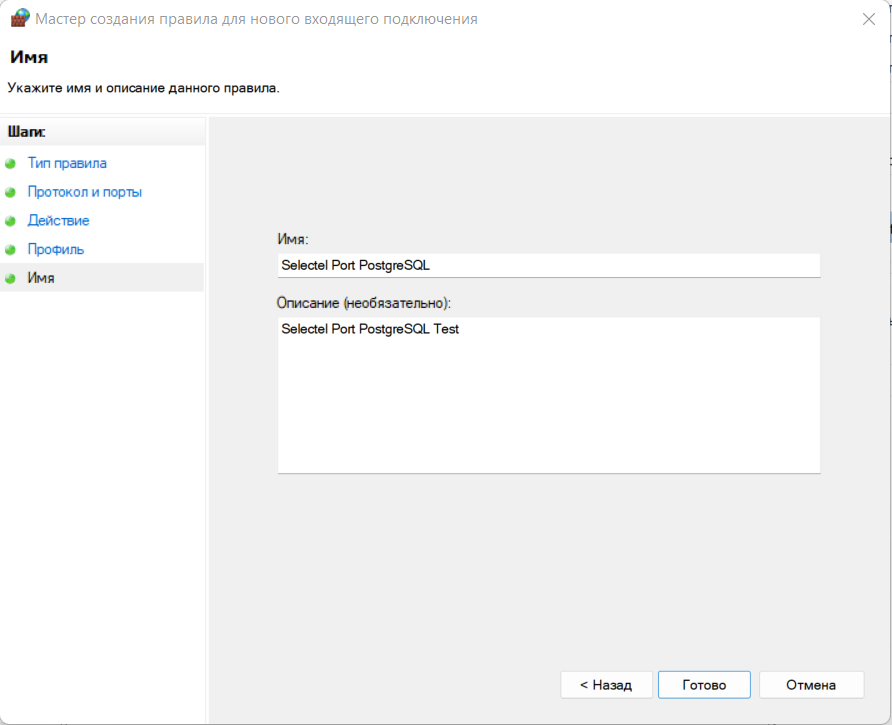
Устанавливаем настройки так, как показано на скринах ниже:
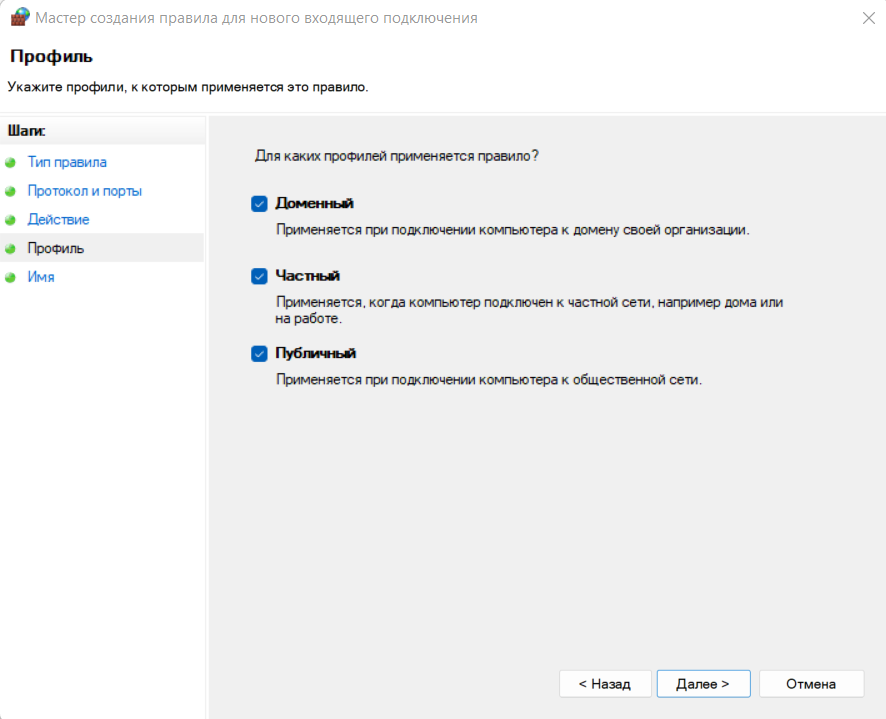
На шаге Профиль вы сами решаете, для каких профилей использовать новое правило. Мы оставим все профили включенными.
Задаем имя для нового правила и его описание.
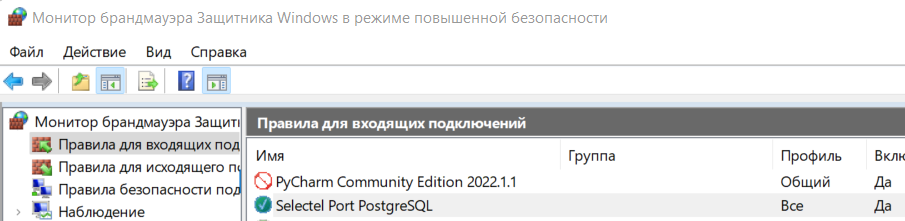
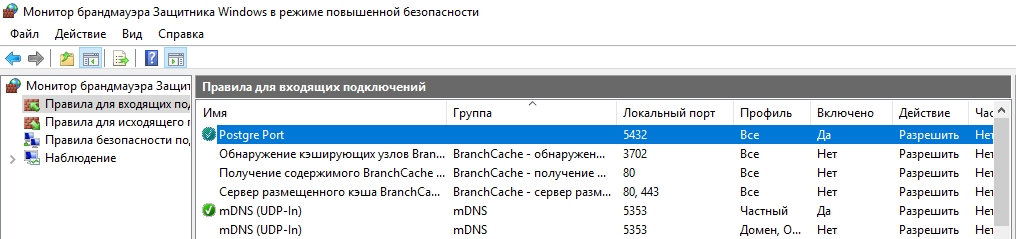
После того, как мы добавили правило в файрволе Windows любым из описанных способов, оно появится в брандмауэре.
Смена порта для подключения к СУБД
Чтобы изменить порт подключения к PostgreSQL находим файл postgresql.conf. Путь к нему — C:\Program Files\PostgreSQL\15\data.
В этом файле ищем строку с указанием port=5432 и меняем номер порта на нужный. Для поиска нужной строки поможет Ctrl+F.
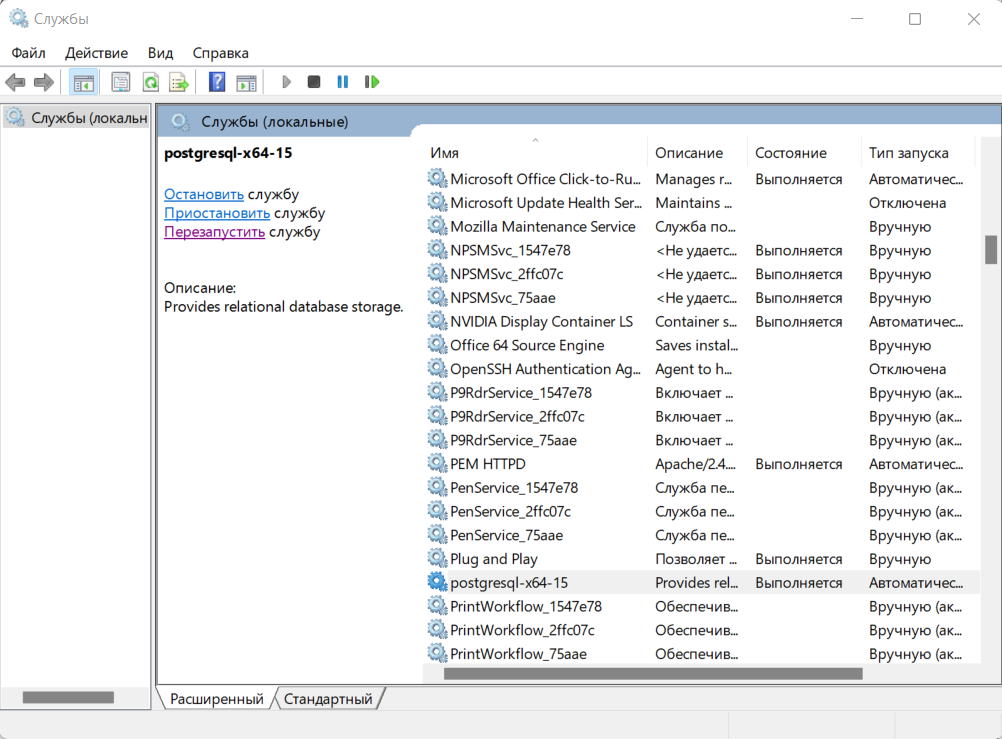
После этого перезапускаем службу postgresql-x64-15 используя встроенное в Windows приложение Службы. Его можно найти в меню Пуск или с помощью команды Win+R на клавиатуре и далее services.msc.
Еще postgresql-x64-15 можно перезапустить с помощью PowerShell. Для этого в консоли PowerShell нужно ввести команду:
Restart-Service-Name postgresql-x64-15
Проверка открытого порта
Проверить открыт ли указанный порт для входящего трафика можно с помощью пробного подключения по протоколу Telnet. Дальше рассмотрим по шагам, как включить этот протокол на Windows 11 и 10.
Telnet на Windows 11
- Через меню Пуск находим и открываем приложение Параметры.
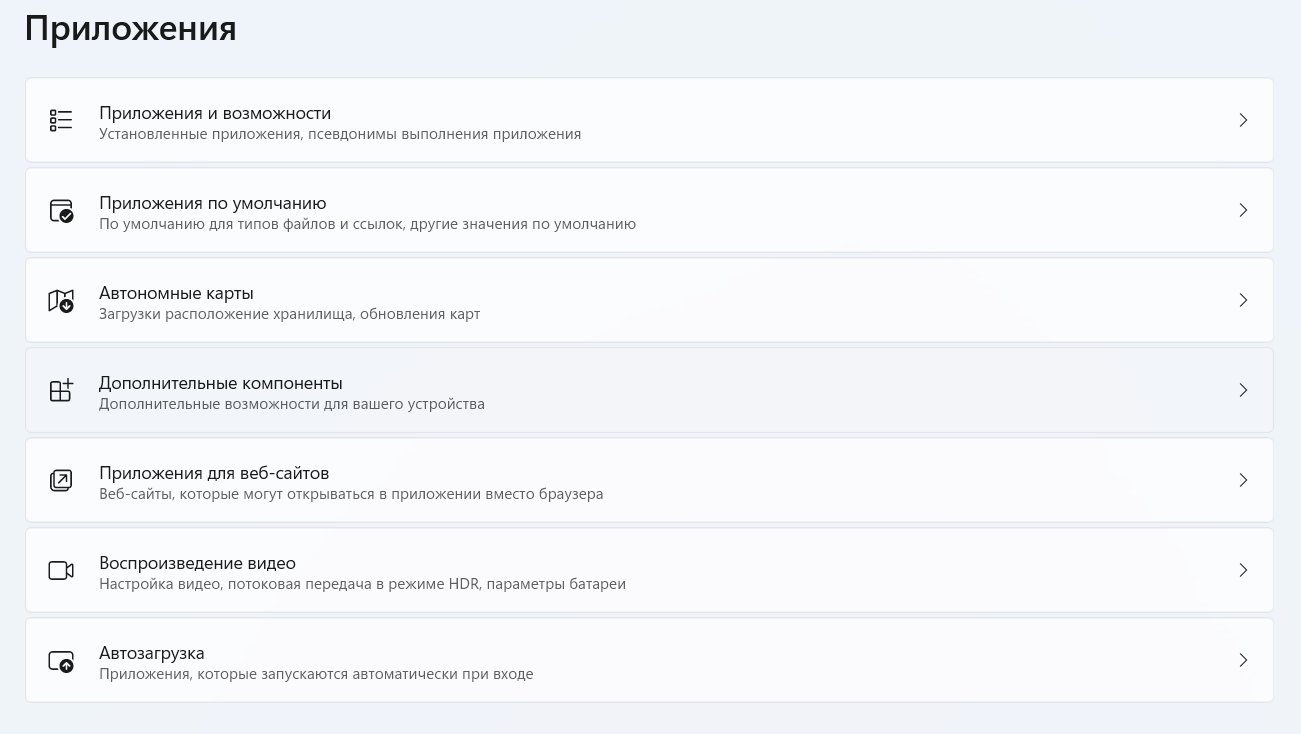
- В открывшемся окне слева выбираем Приложения.
3. В окне Приложения открываем пункт Дополнительные компоненты.
4. В поисковой строке вводим Другие компоненты и открываем указанный параметр.
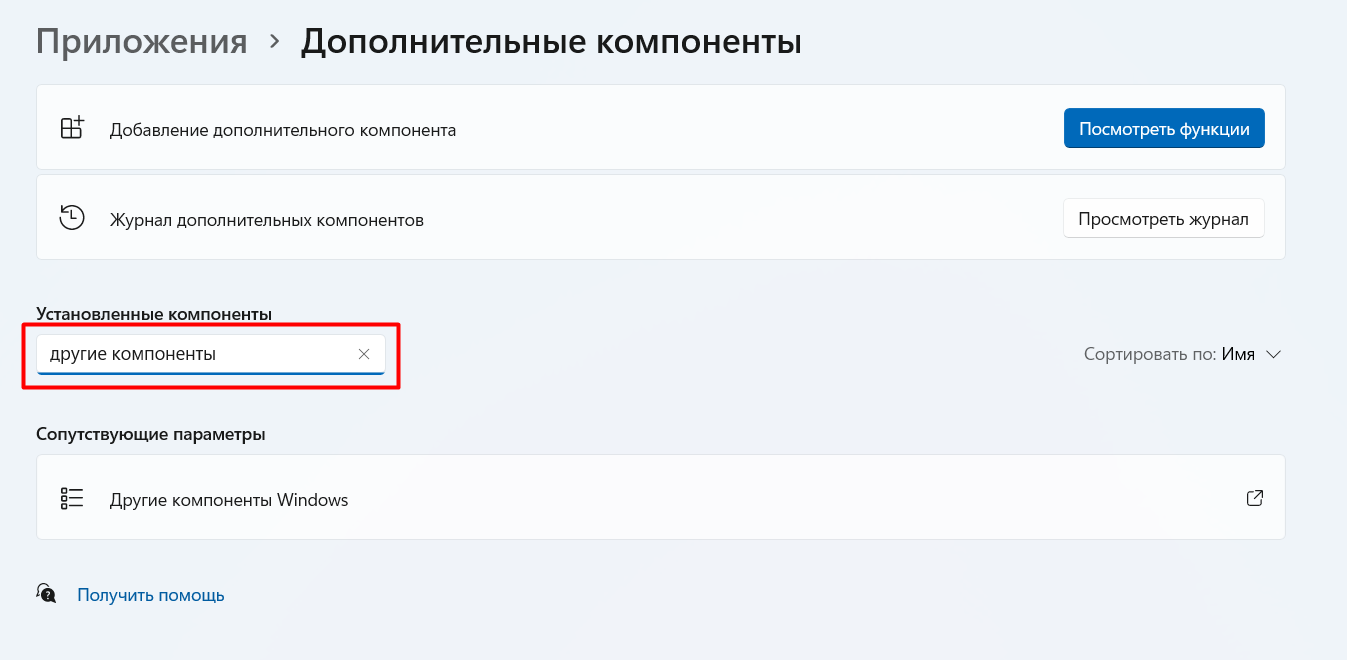
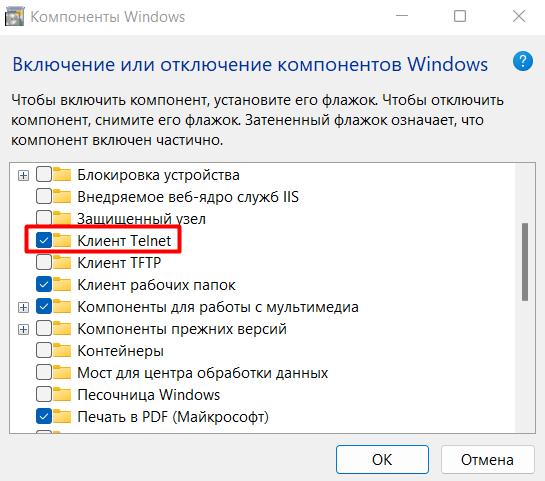
5. В открывшемся окне находим Клиент Telnet и включаем этот компонент, нажав кнопку ОК.
Telnet на Windows 10
- Через меню Пуск находим и открываем приложение Панель управления.
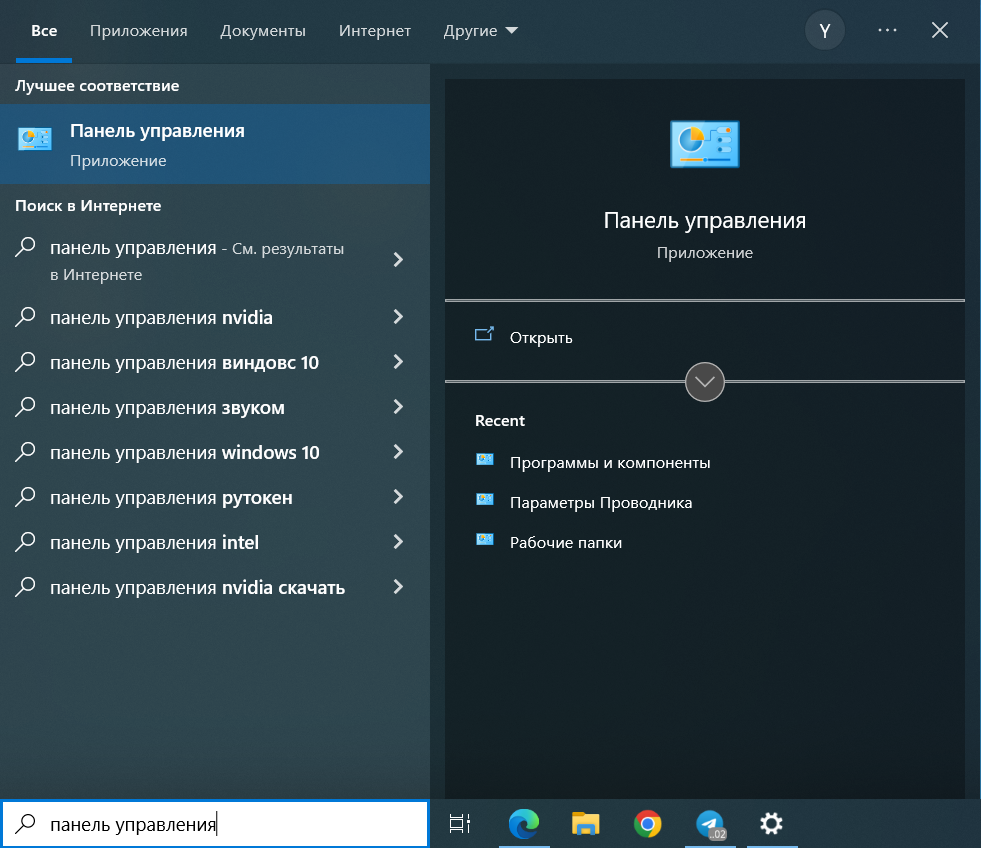
2. В открывшемся окне находим Программы и компоненты.
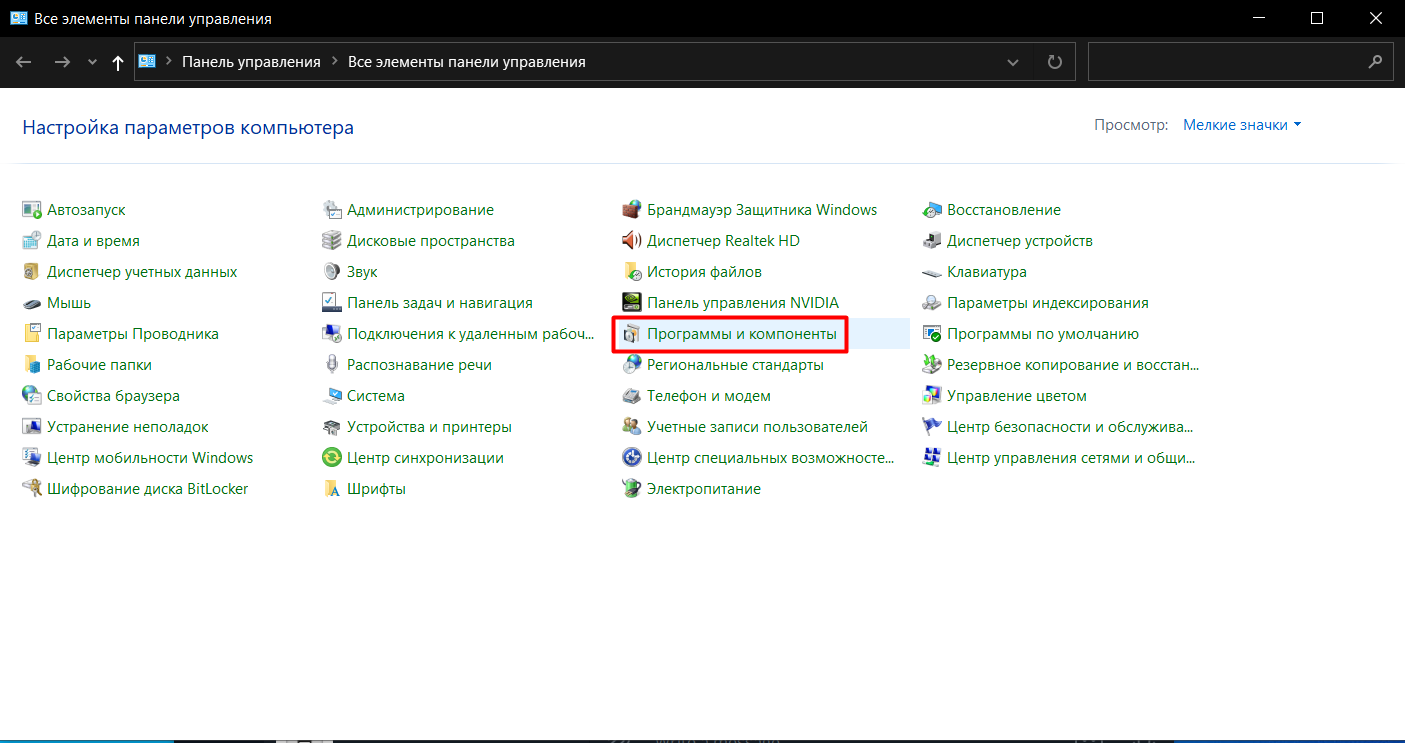
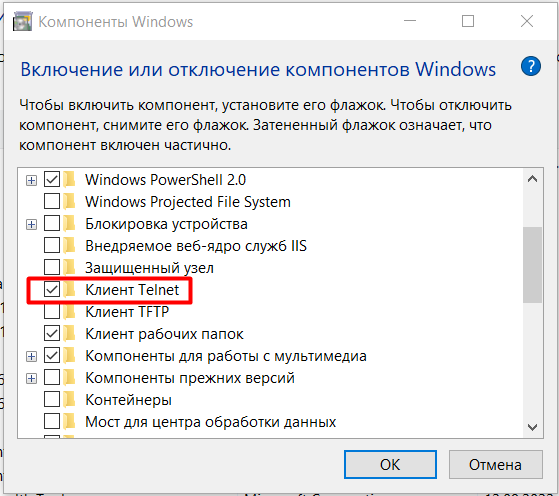
3. Кликаем слева на Включение или отключение компонентов Windows.

4. В открывшемся окне находим Клиент Telnet и включаем этот компонент, нажав кнопку ОК.
Теперь протокол Telnet включен и можно проверить открыт ли порт, который прослушивает PostgreSQL. Для этого в командной строке введем:
telnet <IP-address> <Port>
Где IP-address это IP-адрес сервера или его имя, а Port — номер порта, по которому будет производится подключение. Например,
C:\Users\Selectel>telnet 10.0.10.55 5432
Если подключение произошло успешно и порт открыт, будет отображаться пустая командная строка, а имя окна изменится на Telnet <IP-address>.
Если порт закрыт и подключение произвести не удалось, мы увидим сообщение о сбое.
Управление PostgreSQL через командную строку
Чтобы управлять СУБД с помощью командной строки, необходимо открыть ее от имени администратора.
Далее перейти в каталог \bin, так как все основные инструменты PostgreSQL лежат именно в этой папке:
C:\Users\Selectel>cd C:\Program Files\PostgreSQL\15\bin
С помощью параметра -V можно проверить версию СУБД, которая была установлена:
C:\Program Files\PostgreSQL\15\bin>psql -V
Для корректного отображения русских символов в Windows 10 и 11 советуем сменить кодировку на Windows-1251:
C:\Program Files\PostgreSQL\15\bin>chcp 1251
Чтобы создать новую базу данных есть команда:
C:\Program Files\PostgreSQL\15\bin>createdb -U postgres SelectelDatabase
Где:
createdb — сама команда создания новой базы данных;
-U — параметр для указания имени пользователя;
postgres — имя пользователя;
SelecterDatabase — название новой базы данных.
Теперь проверим была ли создана новая база данных. Введем команду с параметром -l, который выводит список доступных баз данных:
C:\Program Files\PostgreSQL\15\bin>psql -U postgres -l
Получаем список:

Чтобы создать нового пользователя воспользуемся командой:
C:\Program Files\PostgreSQL\15\bin>createuser -U postgres TRex
Где:
postgres — пользователь с правами создавать других пользователей;
TRex — имя нового пользователя.
После этого необходимо ввести пароль пользователя postgres, который инициирует команду.
Чтобы сразу изменить пароль для новой роли, можно использовать команду:
postgres=# ALTER ROLE “TRex” WITH PASSWORD 'password';
В команде вместо ‘password’ указать новый пароль.
При вводе SQL запросов важно не забывать ставить ; в конце запроса. Enter без ; в конце строки просто сделает переход на новую строку. Поэтому, если вы забыли ввести ; и нажали Enter, не нужно снова печатать всю строку. Достаточно ввести ; и запрос отправится на сервер.
Чтобы изменить права для новой роли, используется команда ALTER ROLE. Параметр CREATEDB дает право на создание базы данных:
postgres=# ALTER ROLE "TRex" CREATEDB;
Для просмотра ролей и их описания используется команда:
postgres=# \du
Теперь пользователь TRex имеет права на создание базы данных:

Для выхода из postgres можно использовать команду \q или exit.
С помощью командной строки можно также создавать таблицы и заполнять их данными. Для этого сначала подключимся к базе данных SelectelDatabase:
C:\Program Files\PostgreSQL\15\bin>psql -U "postgres" "SelectelDatabase"
Создадим таблицу с цветами Colors, где первое поле idcolor будет автоматически заполняться порядковым номером, а второе поле namecolor содержит наименование цвета:
SelectelDatabase=# CREATE TABLE Colors
SelectelDatabase-# (idcolor serial PRIMARY KEY,
SelectelDatabase(# namecolor varchar(255) NOT NULL);
Теперь добавим в созданную таблицу данные:
Ввод:
SelectelDatabase=# INSERT INTO Colors (namecolor) VALUES ('black');
Вывод:
INSERT 0 1

Ввод:
SelectelDatabase=# INSERT INTO Colors (namecolor) VALUES ('red');
Вывод:
INSERT 0 1

Ввод:
SelectelDatabase=# INSERT INTO Colors (namecolor) VALUES ('white');
Вывод:
INSERT 0 1

Ввод:
SelectelDatabase=# INSERT INTO Colors (namecolor) VALUES ('blue');
Вывод:
INSERT 0 1
Выведем на экран содержимое таблицы Colors и увидим, что данные успешно записались:
SelectelDatabase=# SELECT * FROM Colors;
Таблица:
С помощью команды \dt можно посмотреть весь список существующих таблиц в базе данных:
SelectelDatabase=# \dt
Все таблицы:
Команда \d позволяет вывести информацию о конкретной таблице. Так, указав таблицу Colors, мы видим параметры с которыми создана данная таблица:
SelectelDatabase=# \d 'Colors'
Параметры таблицы:

Таблицу можно удалить с помощью функции DROP:
SelectelDatabase=# DROP TABLE Colors;
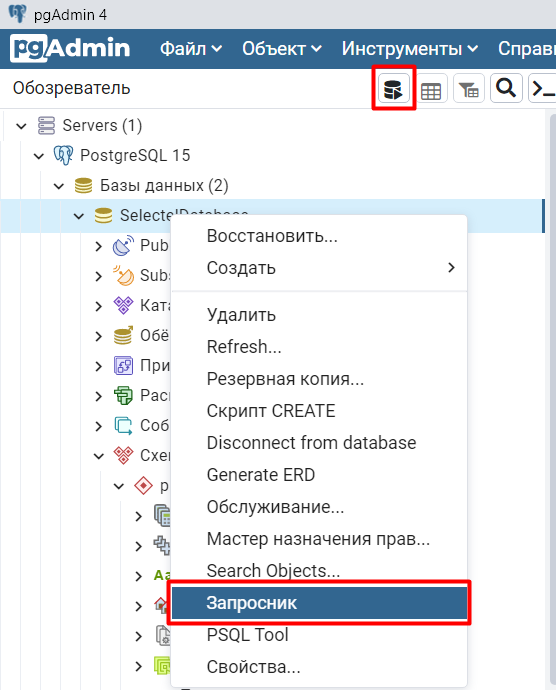
Query Tool — это редактор SQL запросов в pgAdmin 4 с удобным графическим интерфейсом. На русском редактор называется Запросник.
Открыть запросник можно, нажав на одну из указанных на скриншоте кнопок:
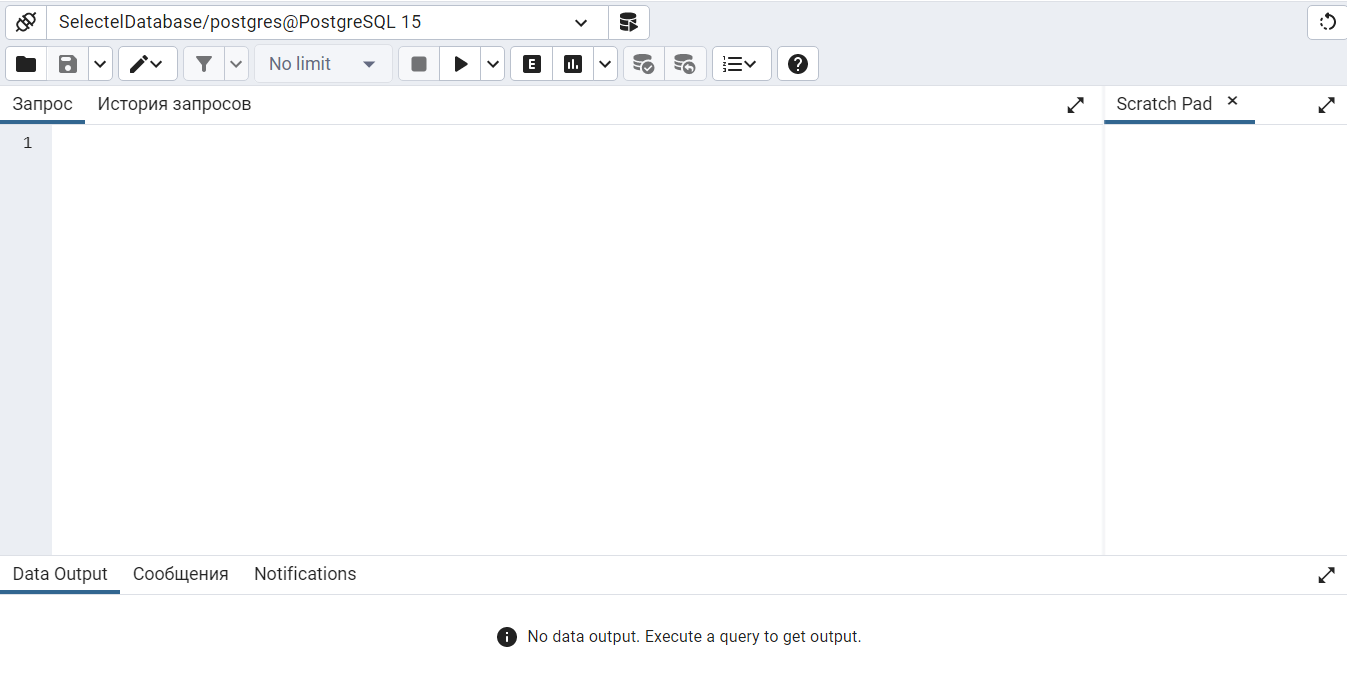
Появляется пустое стартовое окно запросника.
Покажем как работает запросник на примере. Для этого создадим таблицу из пяти полей, где будут указаны рейсы самолетов. Первое поле задается автоматически порядковым номером, второе — точка вылета, третье — точка прилета, четвертое — дата и время отправления, пятое — дата и время прибытия самолета.
Вводим запрос:
CREATE TABLE "flight"
    (
   	 idflight SERIAL PRIMARY KEY,
   	 Apoint VARCHAR(255) NOT NULL,
   	 Bpoint VARCHAR(255) NOT NULL,
   	 Atime timestamp NOT NULL,
   	 Btime timestamp NOT NULL
    );
INSERT INTO "flight" (Apoint, Bpoint, Atime, Btime) VALUES
    ('Saint-Petersburg', 'Novosibirsk', '2022-11-24 10:05:00', '2022-11-24 14:15:00'),
    ('Saint-Petersburg', 'Samara', '2022-11-21 16:45:00', '2022-11-21 18:00:00'),
    ('Saint-Petersburg', 'Moscow', '2022-11-20 13:20:00', '2022-11-20 14:25:00'),
    ('Saint-Petersburg', 'Netherlands', '2022-11-23 02:30:00', '2022-11-23 05:15:00'),
    ('Saint-Petersburg', 'Tashkent', '2022-11-27 06:25:00', '2022-11-27 10:25:00');
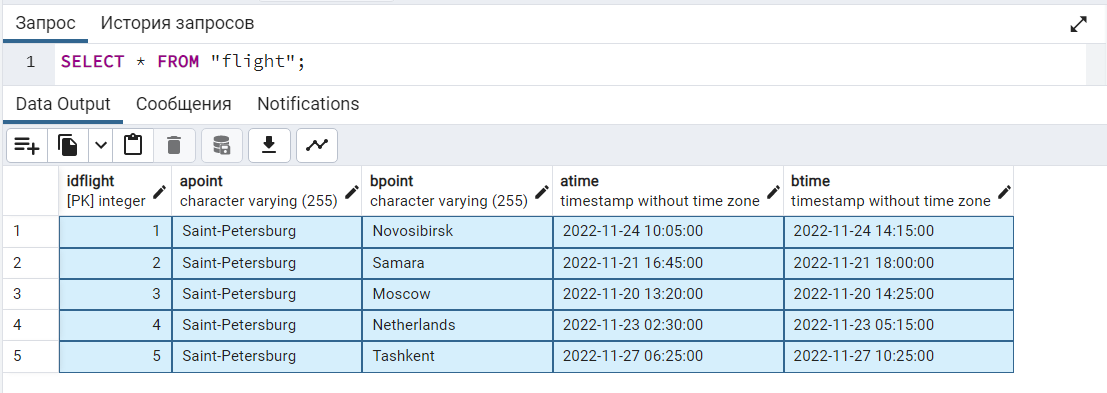
Чтобы отобразить введенную информацию выполним команду:
SELECT * FROM "flight";
Получаем вот такую таблицу с рейсами:
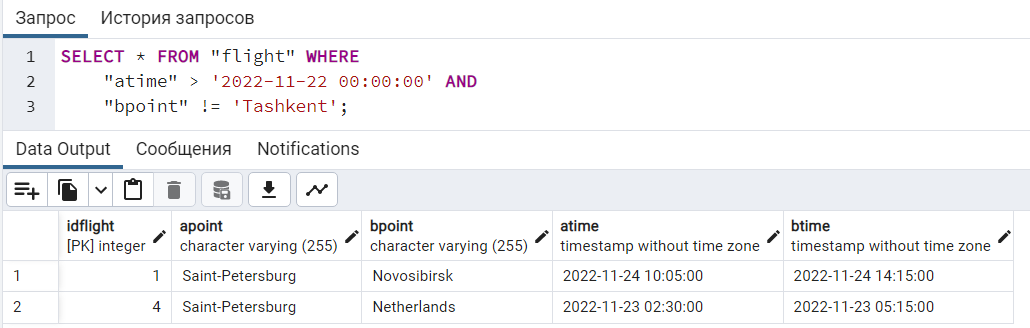
С использованием SQL запроса можно отсортировать данные в таблице по определенным условиям. Например укажем, что дата вылета должна быть после полуночи 22 ноября 2022 года и точкой прилета не должен быть Ташкент.
SELECT * FROM "flight" WHERE
    "atime" > '2022-11-22 00:00:00' AND
    "bpoint" != 'Tashkent';
Выполнив запрос, получим два рейса, которые подходят под заданные условия:
Заключение
В этой инструкции мы рассмотрели, как установить PostgreSQL на устройство с десктопной версией ОС Windows 10 и 11, а также:
- установили дополнительные приложения с помощью утилиты Stack Builder;
- создали правила файрвола для доступа к PostgreSQL по сети;
- поработали с СУБД через командную строку Windows;
- установили и русифицировали pgAdmin 4;
- рассмотрели работу запросника Query Tool.
PostgreSQL — это бесплатная объектно-реляционная СУБД с мощным функционалом, который позволяет конкурировать с платными базами данных, такими как Microsoft SQL, Oracle. PostgreSQL поддерживает пользовательские данные, функции, операции, домены и индексы. В данной статье мы рассмотрим установку и краткий обзор по управлению базой данных PostgreSQL. Мы установим СУБД PostgreSQL в Windows 10, создадим новую базу, добавим в неё таблицы и настроим доступа для пользователей. Также мы рассмотрим основы управления PostgreSQL с помощью SQL shell и визуальной системы управления PgAdmin. Надеюсь эта статья станет хорошей отправной точкой для обучения работы с PostgreSQL и использованию ее в разработке и тестовых проектах.
Содержание:
- Установка PostgreSQL 11 в Windows 10
- Доступ к PostgreSQL по сети, правила файерволла
- Утилиты управления PostgreSQL через командную строку
- PgAdmin: Визуальный редактор для PostgresSQL
- Query Tool: использование SQL запросов в PostgreSQL
Установка PostgreSQL 11 в Windows 10
Для установки PostgreSQL перейдите на сайт https://www.postgresql.org и скачайте последнюю версию дистрибутива для Windows, на сегодняшний день это версия PostgreSQL 11 (в 11 версии PostgreSQL поддерживаются только 64-х битные редакции Windows). После загрузки запустите инсталлятор.

В процессе установки установите галочки на пунктах:
- PostgreSQL Server – сам сервер СУБД
- PgAdmin 4 – визуальный редактор SQL
- Stack Builder – дополнительные инструменты для разработки (возможно вам они понадобятся в будущем)
- Command Line Tools – инструменты командной строки
Установите пароль для пользователя postgres (он создается по умолчанию и имеет права суперпользователя).
По умолчание СУБД слушает на порту 5432, который нужно будет добавить в исключения в правилах фаерволла.
Нажимаете Далее, Далее, на этом установка PostgreSQL завершена.
Доступ к PostgreSQL по сети, правила файерволла
Чтобы разрешить сетевой доступ к вашему экземпляру PostgreSQL с других компьютеров, вам нужно создать правила в файерволе. Вы можете создать правило через командную строку или PowerShell.
Запустите командную строку от имени администратора. Введите команду:
netsh advfirewall firewall add rule name="Postgre Port" dir=in action=allow protocol=TCP localport=5432
- Где rule name – имя правила
- Localport – разрешенный порт
Либо вы можете создать правило, разрешающее TCP/IP доступ к экземпляру PostgreSQL на порту 5432 с помощью PowerShell:
New-NetFirewallRule -Name 'POSTGRESQL-In-TCP' -DisplayName 'PostgreSQL (TCP-In)' -Direction Inbound -Enabled True -Protocol TCP -LocalPort 5432
После применения команды в брандмауэре Windows появится новое разрешающее правило для порта Postgres.
Совет. Для изменения порта в установленной PostgreSQL отредактируйте файл postgresql.conf по пути C:\Program Files\PostgreSQL\11\data.
Измените значение в пункте
port = 5432
. Перезапустите службу сервера postgresql-x64-11 после изменений. Можно перезапустить службу с помощью PowerShell:
Restart-Service -Name postgresql-x64-11

Более подробно о настройке параметров в конфигурационном файле postgresql.conf с помощью тюнеров смотрите в статье.
Утилиты управления PostgreSQL через командную строку
Рассмотрим управление и основные операции, которые можно выполнять с PostgreSQL через командную строку с помощью нескольких утилит. Основные инструменты управления PostgreSQL находятся в папке bin, потому все команды будем выполнять из данного каталога.
- Запустите командную строку.
Совет. Перед запуском СУБД, смените кодировку для нормального отображения в русской Windows 10. В командной строке выполните:
chcp 1251 - Перейдите в каталог bin выполнив команду:
CD C:\Program Files\PostgreSQL\11\bin

Основные команды PostgreSQL:

PgAdmin: Визуальный редактор для PostgresSQL
Редактор PgAdmin служит для упрощения управления базой данных PostgresSQL в понятном визуальном режиме.
По умолчанию все созданные базы хранятся в каталоге base по пути C:\Program Files\PostgreSQL\11\data\base.
Для каждой БД существует подкаталог внутри PGDATA/base, названный по OID базы данных в pg_database. Этот подкаталог по умолчанию является местом хранения файлов базы данных; в частности, там хранятся её системные каталоги. Каждая таблица и индекс хранятся в отдельном файле.
Для резервного копирования и восстановления лучше использовать инструмент Backup в панели инструментов Tools. Для автоматизации бэкапа PostgreSQL из командной строки используйте утилиту pg_dump.exe.
Query Tool: использование SQL запросов в PostgreSQL
Для написания SQL запросов в удобном графическом редакторе используется встроенный в pgAdmin инструмент Query Tool. Например, вы хотите создать новую таблицу в базе данных через инструмент Query Tool.
- Выберите базу данных, в панели Tools откройте Query Tool
- Создадим таблицу сотрудников:
CREATE TABLE employee
(
Id SERIAL PRIMARY KEY,
FirstName CHARACTER VARYING(30),
LastName CHARACTER VARYING(30),
Email CHARACTER VARYING(30),
Age INTEGER
);
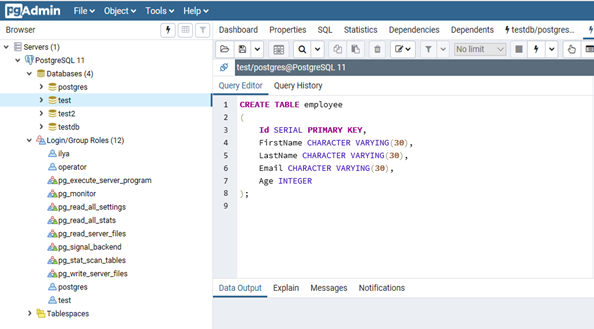
Id — номер сотрудника, которому присвоен ключ SERIAL. Данная строка будет хранить числовое значение 1, 2, 3 и т.д., которое для каждой новой строки будет автоматически увеличиваться на единицу. В следующих строках записаны имя, фамилия сотрудника и его электронный адрес, которые имеют тип CHARACTER VARYING(30), то есть представляют строку длиной не более 30 символов. В строке — Age записан возраст, имеет тип INTEGER, т.к. хранит числа.
После того, как написали код SQL запроса в Query Tool, нажмите клавишу F5 и в базе будет создана новая таблица employee.
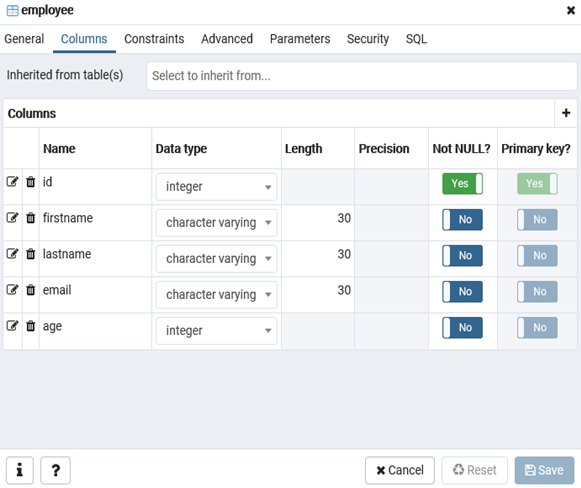
Для заполнения полей в свойствах таблицы выберите таблицу employee в разделе Schemas -> Tables. Откройте меню Object инструмент View/Edit Data.
Здесь вы можете заполнить данные в таблице.
После заполнения данных выполним инструментом Query простой запрос на выборку:
select Age from employee;
Connecting to a Database
psql is a regular PostgreSQL client application. In order to connect to a database you need to know the name of your target database, the host name and port number of the server, and what database user name you want to connect as. psql can be told about those parameters via command line options, namely -d, -h, -p, and -U respectively. If an argument is found that does not belong to any option it will be interpreted as the database name (or the database user name, if the database name is already given). Not all of these options are required; there are useful defaults. If you omit the host name, psql will connect via a Unix-domain socket to a server on the local host, or via TCP/IP to localhost on Windows. The default port number is determined at compile time. Since the database server uses the same default, you will not have to specify the port in most cases. The default database user name is your operating-system user name. Once the database user name is determined, it is used as the default database name. Note that you cannot just connect to any database under any database user name. Your database administrator should have informed you about your access rights.
When the defaults aren’t quite right, you can save yourself some typing by setting the environment variables PGDATABASE, PGHOST, PGPORT and/or PGUSER to appropriate values. (For additional environment variables, see Section 32.15.) It is also convenient to have a ~/.pgpass file to avoid regularly having to type in passwords. See Section 32.16 for more information.
An alternative way to specify connection parameters is in a conninfo string or a URI, which is used instead of a database name. This mechanism give you very wide control over the connection. For example:
$psql "service=myservice sslmode=require"$psql postgresql://dbmaster:5433/mydb?sslmode=require
This way you can also use LDAP for connection parameter lookup as described in Section 32.18. See Section 32.1.2 for more information on all the available connection options.
If the connection could not be made for any reason (e.g., insufficient privileges, server is not running on the targeted host, etc.), psql will return an error and terminate.
If both standard input and standard output are a terminal, then psql sets the client encoding to “auto”, which will detect the appropriate client encoding from the locale settings (LC_CTYPE environment variable on Unix systems). If this doesn’t work out as expected, the client encoding can be overridden using the environment variable PGCLIENTENCODING.
Entering SQL Commands
In normal operation, psql provides a prompt with the name of the database to which psql is currently connected, followed by the string =>. For example:
$ psql testdb
psql (17.4)
Type "help" for help.

testdb=>
At the prompt, the user can type in SQL commands. Ordinarily, input lines are sent to the server when a command-terminating semicolon is reached. An end of line does not terminate a command. Thus commands can be spread over several lines for clarity. If the command was sent and executed without error, the results of the command are displayed on the screen.
If untrusted users have access to a database that has not adopted a secure schema usage pattern, begin your session by removing publicly-writable schemas from search_path. One can add options=-csearch_path= to the connection string or issue SELECT pg_catalog.set_config('search_path', '', false) before other SQL commands. This consideration is not specific to psql; it applies to every interface for executing arbitrary SQL commands.
Whenever a command is executed, psql also polls for asynchronous notification events generated by LISTEN and NOTIFY.
While C-style block comments are passed to the server for processing and removal, SQL-standard comments are removed by psql.
Advanced Features
Variables
psql provides variable substitution features similar to common Unix command shells. Variables are simply name/value pairs, where the value can be any string of any length. The name must consist of letters (including non-Latin letters), digits, and underscores.
To set a variable, use the psql meta-command \set. For example,
testdb=> \set foo bar
sets the variable foo to the value bar. To retrieve the content of the variable, precede the name with a colon, for example:
testdb=> \echo :foo
bar
This works in both regular SQL commands and meta-commands; there is more detail in SQL Interpolation, below.
If you call \set without a second argument, the variable is set to an empty-string value. To unset (i.e., delete) a variable, use the command \unset. To show the values of all variables, call \set without any argument.
Note
The arguments of \set are subject to the same substitution rules as with other commands. Thus you can construct interesting references such as \set :foo 'something' and get “soft links” or “variable variables” of Perl or PHP fame, respectively. Unfortunately (or fortunately?), there is no way to do anything useful with these constructs. On the other hand, \set bar :foo is a perfectly valid way to copy a variable.
A number of these variables are treated specially by psql. They represent certain option settings that can be changed at run time by altering the value of the variable, or in some cases represent changeable state of psql. By convention, all specially treated variables’ names consist of all upper-case ASCII letters (and possibly digits and underscores). To ensure maximum compatibility in the future, avoid using such variable names for your own purposes.
Variables that control psql‘s behavior generally cannot be unset or set to invalid values. An \unset command is allowed but is interpreted as setting the variable to its default value. A \set command without a second argument is interpreted as setting the variable to on, for control variables that accept that value, and is rejected for others. Also, control variables that accept the values on and off will also accept other common spellings of Boolean values, such as true and false.
The specially treated variables are:
AUTOCOMMIT#-
When
on(the default), each SQL command is automatically committed upon successful completion. To postpone commit in this mode, you must enter aBEGINorSTART TRANSACTIONSQL command. Whenoffor unset, SQL commands are not committed until you explicitly issueCOMMITorEND. The autocommit-off mode works by issuing an implicitBEGINfor you, just before any command that is not already in a transaction block and is not itself aBEGINor other transaction-control command, nor a command that cannot be executed inside a transaction block (such asVACUUM).Note
In autocommit-off mode, you must explicitly abandon any failed transaction by entering
ABORTorROLLBACK. Also keep in mind that if you exit the session without committing, your work will be lost.Note
The autocommit-on mode is PostgreSQL‘s traditional behavior, but autocommit-off is closer to the SQL spec. If you prefer autocommit-off, you might wish to set it in the system-wide
psqlrcfile or your~/.psqlrcfile. COMP_KEYWORD_CASE#-
Determines which letter case to use when completing an SQL key word. If set to
lowerorupper, the completed word will be in lower or upper case, respectively. If set topreserve-lowerorpreserve-upper(the default), the completed word will be in the case of the word already entered, but words being completed without anything entered will be in lower or upper case, respectively. DBNAME#-
The name of the database you are currently connected to. This is set every time you connect to a database (including program start-up), but can be changed or unset.
ECHO#-
If set to
all, all nonempty input lines are printed to standard output as they are read. (This does not apply to lines read interactively.) To select this behavior on program start-up, use the switch-a. If set toqueries, psql prints each query to standard output as it is sent to the server. The switch to select this behavior is-e. If set toerrors, then only failed queries are displayed on standard error output. The switch for this behavior is-b. If set tonone(the default), then no queries are displayed. ECHO_HIDDEN#-
When this variable is set to
onand a backslash command queries the database, the query is first shown. This feature helps you to study PostgreSQL internals and provide similar functionality in your own programs. (To select this behavior on program start-up, use the switch-E.) If you set this variable to the valuenoexec, the queries are just shown but are not actually sent to the server and executed. The default value isoff. ENCODING#-
The current client character set encoding. This is set every time you connect to a database (including program start-up), and when you change the encoding with
\encoding, but it can be changed or unset. ERROR#-
trueif the last SQL query failed,falseif it succeeded. See alsoSQLSTATE. FETCH_COUNT#-
If this variable is set to an integer value greater than zero, the results of
SELECTqueries are fetched and displayed in groups of that many rows, rather than the default behavior of collecting the entire result set before display. Therefore only a limited amount of memory is used, regardless of the size of the result set. Settings of 100 to 1000 are commonly used when enabling this feature. Keep in mind that when using this feature, a query might fail after having already displayed some rows.Tip
Although you can use any output format with this feature, the default
alignedformat tends to look bad because each group ofFETCH_COUNTrows will be formatted separately, leading to varying column widths across the row groups. The other output formats work better. HIDE_TABLEAM#-
If this variable is set to
true, a table’s access method details are not displayed. This is mainly useful for regression tests. HIDE_TOAST_COMPRESSION#-
If this variable is set to
true, column compression method details are not displayed. This is mainly useful for regression tests. HISTCONTROL#-
If this variable is set to
ignorespace, lines which begin with a space are not entered into the history list. If set to a value ofignoredups, lines matching the previous history line are not entered. A value ofignorebothcombines the two options. If set tonone(the default), all lines read in interactive mode are saved on the history list.Note
This feature was shamelessly plagiarized from Bash.
HISTFILE#-
The file name that will be used to store the history list. If unset, the file name is taken from the
PSQL_HISTORYenvironment variable. If that is not set either, the default is~/.psql_history, or%APPDATA%\postgresql\psql_historyon Windows. For example, putting:\set HISTFILE ~/.psql_history-:DBNAME
in
~/.psqlrcwill cause psql to maintain a separate history for each database.Note
This feature was shamelessly plagiarized from Bash.
HISTSIZE#-
The maximum number of commands to store in the command history (default 500). If set to a negative value, no limit is applied.
Note
This feature was shamelessly plagiarized from Bash.
HOST#-
The database server host you are currently connected to. This is set every time you connect to a database (including program start-up), but can be changed or unset.
IGNOREEOF#-
If set to 1 or less, sending an EOF character (usually Control+D) to an interactive session of psql will terminate the application. If set to a larger numeric value, that many consecutive EOF characters must be typed to make an interactive session terminate. If the variable is set to a non-numeric value, it is interpreted as 10. The default is 0.
Note
This feature was shamelessly plagiarized from Bash.
LASTOID#-
The value of the last affected OID, as returned from an
INSERTor\lo_importcommand. This variable is only guaranteed to be valid until after the result of the next SQL command has been displayed. PostgreSQL servers since version 12 do not support OID system columns anymore, thus LASTOID will always be 0 followingINSERTwhen targeting such servers. LAST_ERROR_MESSAGELAST_ERROR_SQLSTATE#-
The primary error message and associated SQLSTATE code for the most recent failed query in the current psql session, or an empty string and
00000if no error has occurred in the current session. ON_ERROR_ROLLBACK#-
When set to
on, if a statement in a transaction block generates an error, the error is ignored and the transaction continues. When set tointeractive, such errors are only ignored in interactive sessions, and not when reading script files. When set tooff(the default), a statement in a transaction block that generates an error aborts the entire transaction. The error rollback mode works by issuing an implicitSAVEPOINTfor you, just before each command that is in a transaction block, and then rolling back to the savepoint if the command fails. ON_ERROR_STOP#-
By default, command processing continues after an error. When this variable is set to
on, processing will instead stop immediately. In interactive mode, psql will return to the command prompt; otherwise, psql will exit, returning error code 3 to distinguish this case from fatal error conditions, which are reported using error code 1. In either case, any currently running scripts (the top-level script, if any, and any other scripts which it may have in invoked) will be terminated immediately. If the top-level command string contained multiple SQL commands, processing will stop with the current command. PORT#-
The database server port to which you are currently connected. This is set every time you connect to a database (including program start-up), but can be changed or unset.
PROMPT1PROMPT2PROMPT3#-
These specify what the prompts psql issues should look like. See Prompting below.
QUIET#-
Setting this variable to
onis equivalent to the command line option-q. It is probably not too useful in interactive mode. ROW_COUNT#-
The number of rows returned or affected by the last SQL query, or 0 if the query failed or did not report a row count.
SERVER_VERSION_NAMESERVER_VERSION_NUM#-
The server’s version number as a string, for example
9.6.2,10.1or11beta1, and in numeric form, for example90602or100001. These are set every time you connect to a database (including program start-up), but can be changed or unset. SHELL_ERROR#-
trueif the last shell command failed,falseif it succeeded. This applies to shell commands invoked via the\!,\g,\o,\w, and\copymeta-commands, as well as backquote (`) expansion. Note that for\o, this variable is updated when the output pipe is closed by the next\ocommand. See alsoSHELL_EXIT_CODE. SHELL_EXIT_CODE#-
The exit status returned by the last shell command. 0–127 represent program exit codes, 128–255 indicate termination by a signal, and -1 indicates failure to launch a program or to collect its exit status. This applies to shell commands invoked via the
\!,\g,\o,\w, and\copymeta-commands, as well as backquote (`) expansion. Note that for\o, this variable is updated when the output pipe is closed by the next\ocommand. See alsoSHELL_ERROR. SHOW_ALL_RESULTS#-
When this variable is set to
off, only the last result of a combined query (\;) is shown instead of all of them. The default ison. The off behavior is for compatibility with older versions of psql. SHOW_CONTEXT#-
This variable can be set to the values
never,errors, oralwaysto control whetherCONTEXTfields are displayed in messages from the server. The default iserrors(meaning that context will be shown in error messages, but not in notice or warning messages). This setting has no effect whenVERBOSITYis set toterseorsqlstate. (See also\errverbose, for use when you want a verbose version of the error you just got.) SINGLELINE#-
Setting this variable to
onis equivalent to the command line option-S. SINGLESTEP#-
Setting this variable to
onis equivalent to the command line option-s. SQLSTATE#-
The error code (see Appendix A) associated with the last SQL query’s failure, or
00000if it succeeded. USER#-
The database user you are currently connected as. This is set every time you connect to a database (including program start-up), but can be changed or unset.
VERBOSITY#-
This variable can be set to the values
default,verbose,terse, orsqlstateto control the verbosity of error reports. (See also\errverbose, for use when you want a verbose version of the error you just got.) VERSIONVERSION_NAMEVERSION_NUM#-
These variables are set at program start-up to reflect psql‘s version, respectively as a verbose string, a short string (e.g.,
9.6.2,10.1, or11beta1), and a number (e.g.,90602or100001). They can be changed or unset.
SQL Interpolation
A key feature of psql variables is that you can substitute (“interpolate”) them into regular SQL statements, as well as the arguments of meta-commands. Furthermore, psql provides facilities for ensuring that variable values used as SQL literals and identifiers are properly quoted. The syntax for interpolating a value without any quoting is to prepend the variable name with a colon (:). For example,
testdb=>\set foo 'my_table'testdb=>SELECT * FROM :foo;
would query the table my_table. Note that this may be unsafe: the value of the variable is copied literally, so it can contain unbalanced quotes, or even backslash commands. You must make sure that it makes sense where you put it.
When a value is to be used as an SQL literal or identifier, it is safest to arrange for it to be quoted. To quote the value of a variable as an SQL literal, write a colon followed by the variable name in single quotes. To quote the value as an SQL identifier, write a colon followed by the variable name in double quotes. These constructs deal correctly with quotes and other special characters embedded within the variable value. The previous example would be more safely written this way:
testdb=>\set foo 'my_table'testdb=>SELECT * FROM :"foo";
Variable interpolation will not be performed within quoted SQL literals and identifiers. Therefore, a construction such as ':foo' doesn’t work to produce a quoted literal from a variable’s value (and it would be unsafe if it did work, since it wouldn’t correctly handle quotes embedded in the value).
One example use of this mechanism is to copy the contents of a file into a table column. First load the file into a variable and then interpolate the variable’s value as a quoted string:
testdb=>\set content `cat my_file.txt`testdb=>INSERT INTO my_table VALUES (:'content');
(Note that this still won’t work if my_file.txt contains NUL bytes. psql does not support embedded NUL bytes in variable values.)
Since colons can legally appear in SQL commands, an apparent attempt at interpolation (that is, :name, :'name', or :"name") is not replaced unless the named variable is currently set. In any case, you can escape a colon with a backslash to protect it from substitution.
The :{? special syntax returns TRUE or FALSE depending on whether the variable exists or not, and is thus always substituted, unless the colon is backslash-escaped.name}
The colon syntax for variables is standard SQL for embedded query languages, such as ECPG. The colon syntaxes for array slices and type casts are PostgreSQL extensions, which can sometimes conflict with the standard usage. The colon-quote syntax for escaping a variable’s value as an SQL literal or identifier is a psql extension.
Prompting
The prompts psql issues can be customized to your preference. The three variables PROMPT1, PROMPT2, and PROMPT3 contain strings and special escape sequences that describe the appearance of the prompt. Prompt 1 is the normal prompt that is issued when psql requests a new command. Prompt 2 is issued when more input is expected during command entry, for example because the command was not terminated with a semicolon or a quote was not closed. Prompt 3 is issued when you are running an SQL COPY FROM STDIN command and you need to type in a row value on the terminal.
The value of the selected prompt variable is printed literally, except where a percent sign (%) is encountered. Depending on the next character, certain other text is substituted instead. Defined substitutions are:
%M#-
The full host name (with domain name) of the database server, or
[local]if the connection is over a Unix domain socket, or[local:, if the Unix domain socket is not at the compiled in default location./dir/name] %m#-
The host name of the database server, truncated at the first dot, or
[local]if the connection is over a Unix domain socket. %>#-
The port number at which the database server is listening.
%n#-
The database session user name. (The expansion of this value might change during a database session as the result of the command
SET SESSION AUTHORIZATION.) %/#-
The name of the current database.
%~#-
Like
%/, but the output is~(tilde) if the database is your default database. %##-
If the session user is a database superuser, then a
#, otherwise a>. (The expansion of this value might change during a database session as the result of the commandSET SESSION AUTHORIZATION.) %p#-
The process ID of the backend currently connected to.
%R#-
In prompt 1 normally
=, but@if the session is in an inactive branch of a conditional block, or^if in single-line mode, or!if the session is disconnected from the database (which can happen if\connectfails). In prompt 2%Ris replaced by a character that depends on why psql expects more input:-if the command simply wasn’t terminated yet, but*if there is an unfinished/* ... */comment, a single quote if there is an unfinished quoted string, a double quote if there is an unfinished quoted identifier, a dollar sign if there is an unfinished dollar-quoted string, or(if there is an unmatched left parenthesis. In prompt 3%Rdoesn’t produce anything. %x#-
Transaction status: an empty string when not in a transaction block, or
*when in a transaction block, or!when in a failed transaction block, or?when the transaction state is indeterminate (for example, because there is no connection). %l#-
The line number inside the current statement, starting from
1. %digits#-
The character with the indicated octal code is substituted.
%:name:#-
The value of the psql variable
name. See Variables, above, for details. %`command`#-
The output of
command, similar to ordinary “back-tick” substitution. %[…%]#-
Prompts can contain terminal control characters which, for example, change the color, background, or style of the prompt text, or change the title of the terminal window. In order for the line editing features of Readline to work properly, these non-printing control characters must be designated as invisible by surrounding them with
%[and%]. Multiple pairs of these can occur within the prompt. For example:testdb=> \set PROMPT1 '%[%033[1;33;40m%]%n@%/%R%[%033[0m%]%# '
results in a boldfaced (
1;) yellow-on-black (33;40) prompt on VT100-compatible, color-capable terminals. %w#-
Whitespace of the same width as the most recent output of
PROMPT1. This can be used as aPROMPT2setting, so that multi-line statements are aligned with the first line, but there is no visible secondary prompt.
To insert a percent sign into your prompt, write %%. The default prompts are '%/%R%x%# ' for prompts 1 and 2, and '>> ' for prompt 3.
Note
This feature was shamelessly plagiarized from tcsh.
Command-Line Editing
psql uses the Readline or libedit library, if available, for convenient line editing and retrieval. The command history is automatically saved when psql exits and is reloaded when psql starts up. Type up-arrow or control-P to retrieve previous lines.
You can also use tab completion to fill in partially-typed keywords and SQL object names in many (by no means all) contexts. For example, at the start of a command, typing ins and pressing TAB will fill in insert into . Then, typing a few characters of a table or schema name and pressing TAB will fill in the unfinished name, or offer a menu of possible completions when there’s more than one. (Depending on the library in use, you may need to press TAB more than once to get a menu.)
Tab completion for SQL object names requires sending queries to the server to find possible matches. In some contexts this can interfere with other operations. For example, after BEGIN it will be too late to issue SET TRANSACTION ISOLATION LEVEL if a tab-completion query is issued in between. If you do not want tab completion at all, you can turn it off permanently by putting this in a file named .inputrc in your home directory:
$if psql
set disable-completion on
$endif
(This is not a psql but a Readline feature. Read its documentation for further details.)
The -n (--no-readline) command line option can also be useful to disable use of Readline for a single run of psql. This prevents tab completion, use or recording of command line history, and editing of multi-line commands. It is particularly useful when you need to copy-and-paste text that contains TAB characters.
Установка PostgreSQL на Windows: подробная инструкция из 9 шагов. Разбираем процесс установки и начальной настройки СУБД PostgreSQL, а также рассказываем, как пользоваться приложением pgAdmin и подключаться к серверу PostgreSQL удалённо.
PostgreSQL — это передовая open-source система управления базами данных корпоративного класса, известная высокой стабильностью, производительностью, расширенным функционалом и отказоустойчивостью. СУБД PostgreSQL поддерживает как реляционные запросы SQL, так и нереляционные JSON и по своим качествам ничем не уступает коммерческим аналогам (Oracle, SQL Server). При этом PostgreSQL распространяется по свободной лицензии и имеет открытый исходный код — в том числе и это уже более 30 лет привлекает к ней пользователей.
Прежде всего убедитесь, что выполнены следующие предварительные условия:
- версия Windows совместима с версией PostgreSQL, которую вы планируете установить (обратите внимание, что на 32-битные версии Windows установить PostgreSQL не получится);
- конфигурация системы соответствует необходимым аппаратным требованиям, таким как объём оперативной памяти и дискового пространства;
- для установки нового программного обеспечения на ПК или виртуальную машину с Windows вам необходимы права администратора.
Шаг 1. Загрузите инсталлятор
Посетите страницу загрузки СУБД PostgreSQL для Windows на сайте проекта. Щёлкните по ссылке «Скачать инсталлятор», которая перенаправит вас на веб-сайт EnterpriseDB, где можно загрузить установщики версий для Windows. Обратите внимание, что enterprisedb.com использует Amazon CloudFront для доставки контента, поэтому доступ из некоторых регионов может быть заблокирован — в этом случае используйте альтернативные способы загрузки.
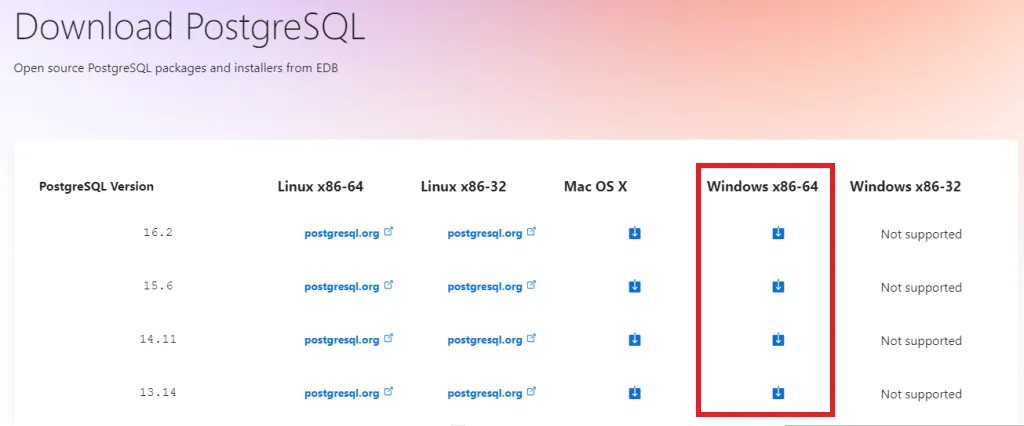
Выберите нужную версию и загрузите исполняемый файл установщика.
Шаг 2. Запустите установщик
Перейдите в папку, куда был загружен установщик. Дважды щёлкните исполняемый файл, чтобы начать процесс установки PostgreSQL. Если от службы контроля учётных записей появится запрос на подтверждение действия, нажмите «Да», чтобы разрешить установщику внести изменения в систему. Нажмите «Далее» (Next) на экране приветствия.
Укажите каталог, в который будет установлен PostgreSQL. Вы можете оставить путь, заданный по умолчанию, прописать его вручную или выбрать местоположение из дерева каталогов.
Шаг 3. Процесс установки
Отметьте галочкой следующие компоненты в мастере установки:
- PostgreSQL Server: компонент, обязательный для работы самой базы данных.
- pgAdmin 4: графический пользовательский интерфейс (GUI). Рекомендуется для более простого администрирования баз данных.
- StackBuilder: менеджер пакетов, добавляющий расширения и драйвера.
- Command Line Tools: поддержка командной строки.
Шаг 4. Каталог для хранения данных
Укажите каталог, где будут находиться файлы вашей базы данных. При сохранении настроек по умолчанию он будет расположен в каталоге установки PostgreSQL. Также вы можете выбрать любую другую директорию. Нажмите «Далее».
Шаг 5. Задайте пароль
Задайте надёжный пароль для учётной записи суперпользователя. Суперпользователь создаётся автоматически и получает имя «postgres».
Шаг 6. Конфигурация порта
Укажите номер порта, который будет прослушивать сервер PostgreSQL. Порт по умолчанию — 5432. Оставьте его без изменений, если нет особых причин использовать другой порт. Нажмите «Далее».
Шаг 7. Проверьте настройки
Этот экран предоставляет сводку выбранных параметров установки. Внимательно проверьте их и внесите изменения, если необходимо. Нажмите «Далее» для подтверждения.
Шаг 8. Запустите установку
Установщик начнёт копирование файлов и настройку PostgreSQL, это может занять несколько минут. Если вы выбрали StackBuilder, то может появиться запрос на его запуск после установки. Вы можете запустить его для установки дополнений или отложить это действие.
Шаг 9. Установка завершена
После завершения установки нажмите «Готово», чтобы выйти из мастера.
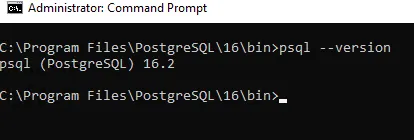
Проверьте, как прошла установка. Откройте окно командной строки. Перейдите в каталог PostgreSQL C:\Program Files\PostgreSQL\16\bin (число обозначает ветку PostgreSQL). Введите следующую команду и нажмите «Enter»:
psql --versionДолжна отобразиться информация об установленной версии:
Использование pgAdmin
Откройте приложение pgAdmin (ярлык находится в меню «Пуск», также найти его можно через строку поиска Windows).
Создайте подключение к серверу. Кликните по Servers в левой области окна →
Create → Server. Укажите следующие данные:
- Имя: на ваше усмотрение.
- Имя хоста: «localhost» для локальных установок, IP-адрес для удалённых.
- Порт: порт, который вы настроили во время установки (по умолчанию — 5432).
- Служебная база данных.
- Имя пользователя: введите «Postgres» в качестве учётной записи суперпользователя.
- Пароль: введите пароль, который вы задали во время установки.
Кроме того убедитесь, что порт PostgreSQL разрешён в брандмауэре (если требуется удалённый доступ).
После успешного подключения вы можете работать с базами данных PostgreSQL, создавать новых пользователей и управлять ими с помощью интерфейса pgAdmin.
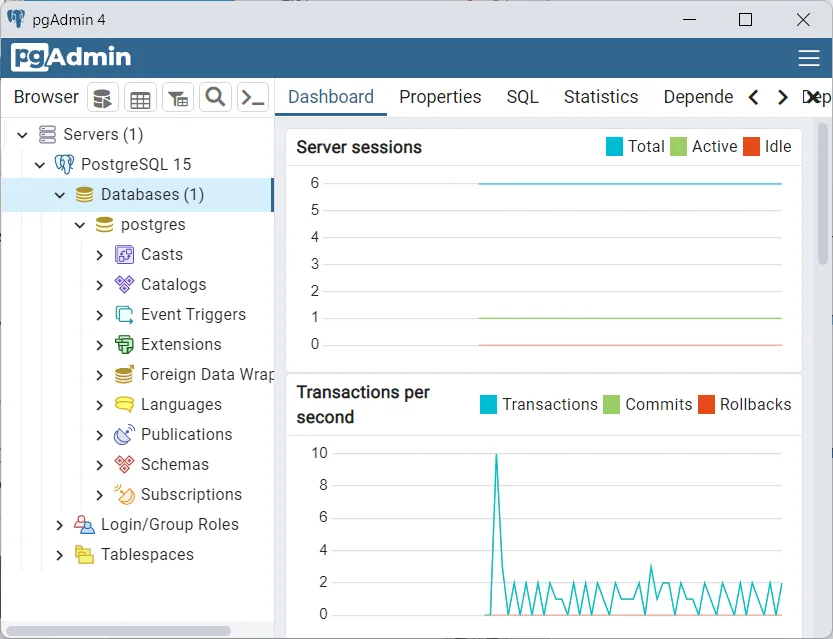
В левой области окна pgAdmin в меню перечислены все доступные серверы. На скриншоте это единственный только что установленный PostgreSQL, но вы можете добавить в приложение и другие серверы.
В списке Databases будут перечислены все базы данных. Пока здесь также только одна — «postgres», созданная по умолчанию. Если кликнуть по названию БД, то откроется список с настройками.
Ниже находится пункт Login/Group Roles, предназначенный для управления ролями и группами.
Последний пункт Tablespaces — управление местом хранения таблиц.
Чтобы создать новую базу данных, кликните по Databases правой кнопкой мыши и в выпадающем списке выберите Create, затем Database. Укажите название, владельца (выберите из списка) и нажмите Save — БД появится в меню, после чего её можно редактировать. Все новые БД создаются по образцу «template1», измените параметры «template1», чтобы настроить шаблон.
Читайте в блоге:
- Что такое Active Directory в Windows
- Установка Windows Server: комплексный подход к сетевой инфраструктуре и защите данных
- Настройка DFS на Windows Server
Provide feedback
Saved searches
Use saved searches to filter your results more quickly
Sign up