
Рассказываем, как установить и настроить Wine в Linux Mint.
- Что такое Wine
- Скачиваем Wine
- Настраиваем Wine
Говоря простым языком, Wine — это программная оболочка для запуска Windows-приложений в Linux и macOS. Она содержит в себе все ключевые компоненты операционной системы Microsoft, включая Microsoft Visuals и Direct X.
Обычно Wine используют в трех случаях:
- Когда хотят вернуть себе доступ к классическому пакету офисных приложений Microsoft (это все-таки стандарт).
- Для работы в программах корпорации Adobe.
- Когда хотят поиграть в какие-нибудь мало-мальски продвинутые игры.
Но сценариев намного больше. Если повезет, то получится без проблем запустить приложения для сведения звука, обработки видео, рисования, создания анимации и других творческих инструментов, которых не хватает в Linux.
Если вы попадаете под одну из описанных категорий или не нашли в Linux замену любимому приложению из Windows, то вам определенно нужен Wine.
Скачиваем Wine
Для начала подготовим систему к загрузке и установке Wine, а затем скачаем приложение на компьютер.
- Открываем терминал.
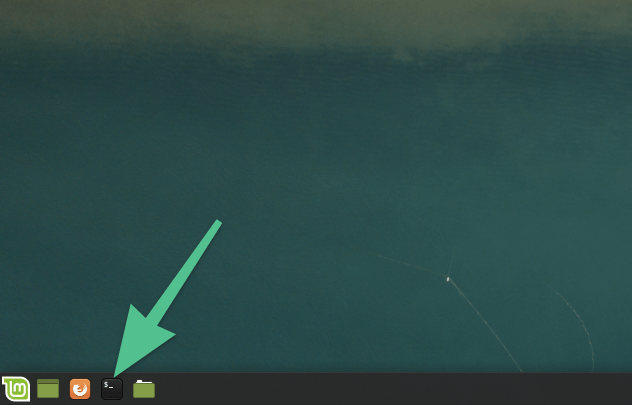
В Linux Mint, независимо от типа рабочего стола, терминал по умолчанию закреплен в панели инструментов
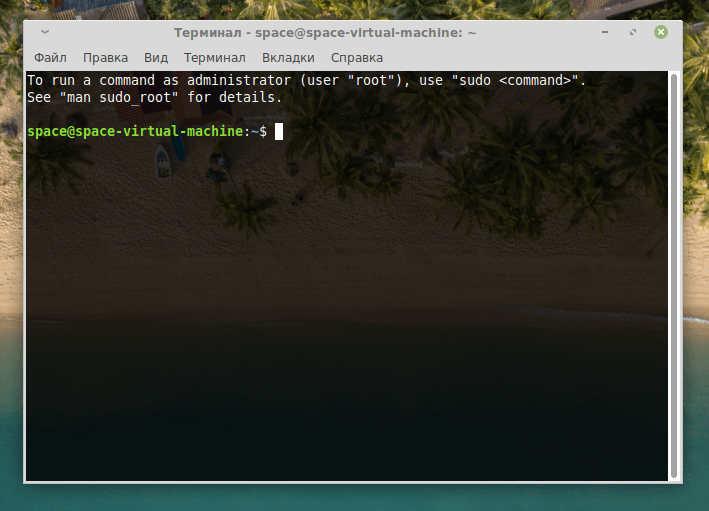
Перед нами откроется терминал, с помощью которого мы и установим Wine
- Добавим в систему поддержку 32-битной архитектуры (если установлена 64-битная операционная система). Для этого вводим команду: sudo dpkg —add-architecture i386 и нажимаем клавишу «Ввод» (Enter).
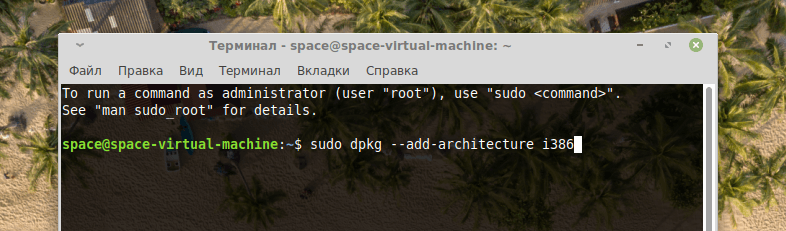
Вот, что в итоге должно получиться
- Затем вводим пароль администратора.
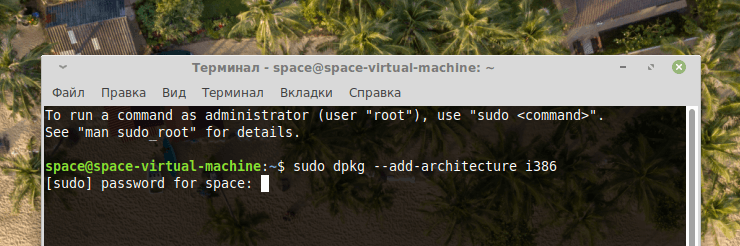
Без этого пароля нельзя выполнять такие серьезные команды. Он еще не раз понадобится
- Теперь скачиваем ключи авторизации Wine с официального сайта программы. Для этого вводим в терминал команду: wget -nc https://dl.winehq.org/wine-builds/winehq.key.
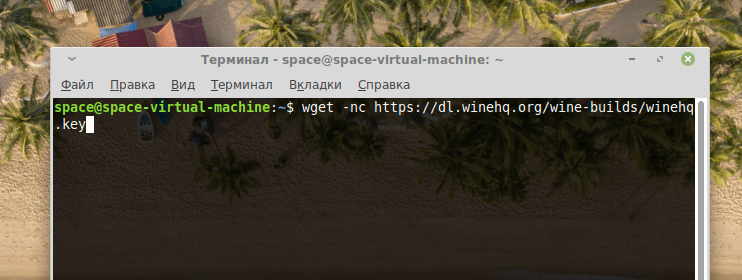
Для загрузки используем утилиту wget
- После окончания загрузки надо добавить ключ в систему с помощью команды: sudo apt-key add winehq.key.
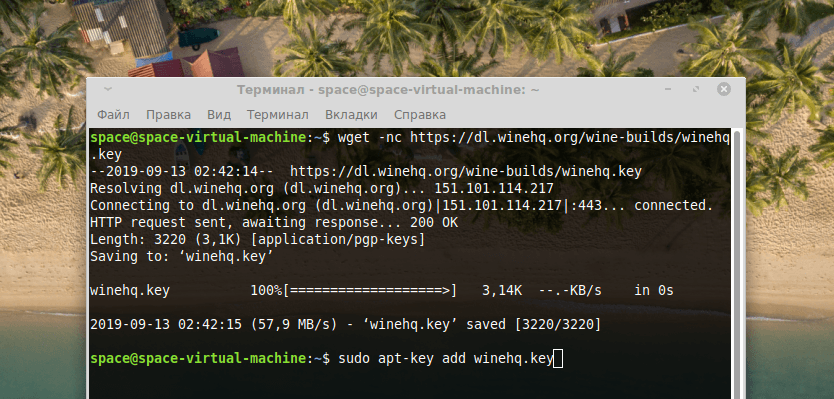
Все почти готово
- Потом подключаем репозиторий с файлами Wine для их загрузки и установки в систему. Это делается командой: sudo apt-add-repository ’deb https://dl.winehq.org/wine-builds/ubuntu/ bionic main’.
- Затем обновляем список репозиториев, подключенных к системе и установленных пакетов. Для этого вводим команду: sudo apt-get update.
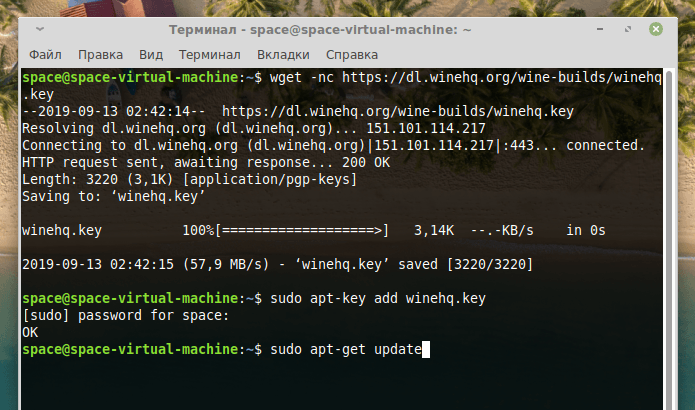
До ввода этой команды система еще не знает о существовании репозиториев Wine
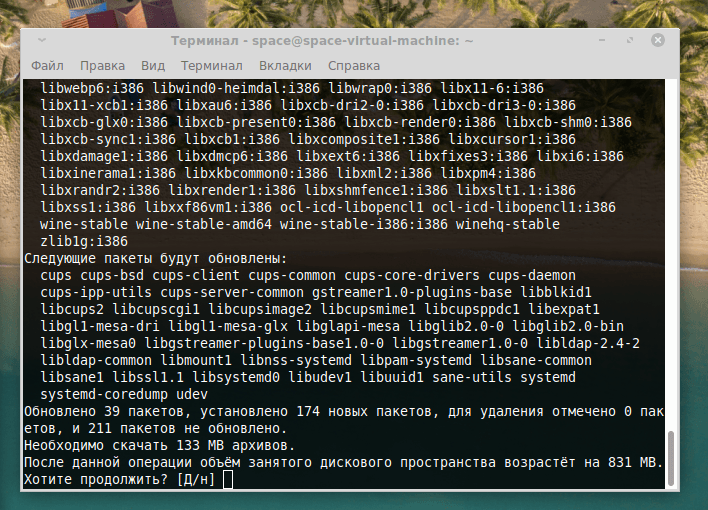
- Теперь загружаем Wine с помощью команды: sudo apt-get install winehq-stable и sudo apt-get install winetricks.
- Вводим в терминал заглавную букву «Д», чтобы подтвердить установку.

Обязательно вводим заглавную букву. Строчную Linux воспримет как отказ
Настраиваем Wine
Теперь переходим к настройке программы.
- Открываем терминал.
- Вводим и запускаем команду: winecfg.
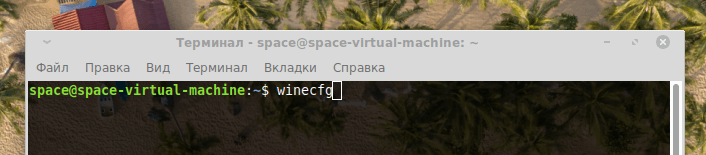
Эта команда запускаем меню с базовыми настройками Wine и меню со списком Windows-программ, которые можно установить
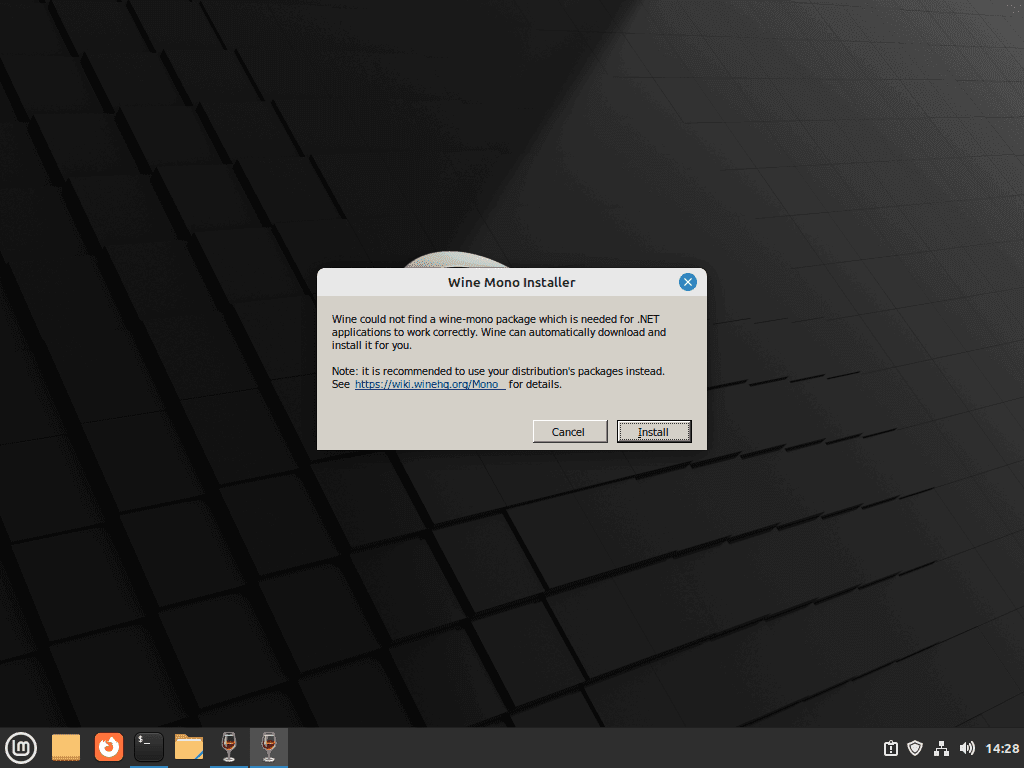
- Для работы с некоторыми программами Wine захочет скачать пакет Mono. Нажимаем «Установить».
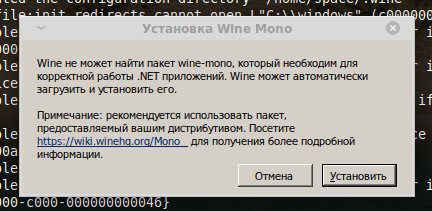
Без Mono не будут работать некоторые браузеры и программы, написанные с использование .NET
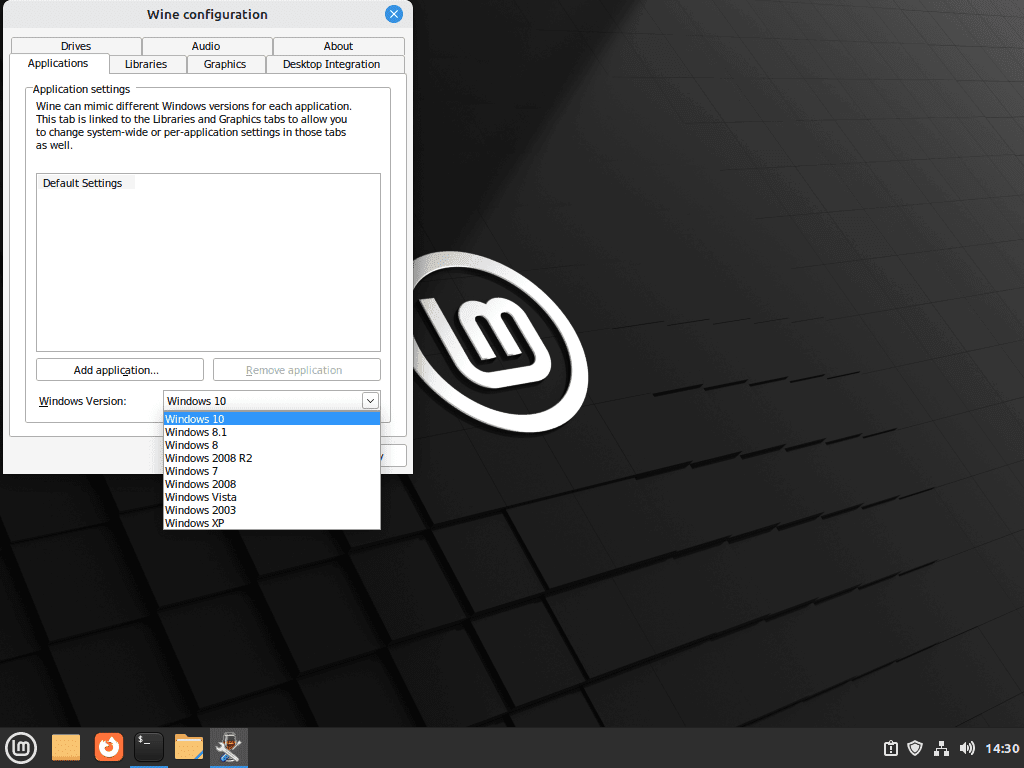
- В открывшемся окне нужно указать версию операционной системы, которую будет имитировать Wine.
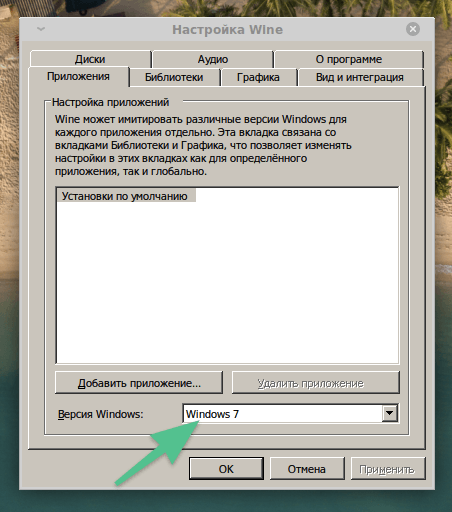
Рекомендую выбирать Windows 7, как наиболее универсальный вариант. Остальные параметры можно не трогать
- Закрываем настройки.
- Потом включаем Winetricks с помощью команды: sudo wintericks.
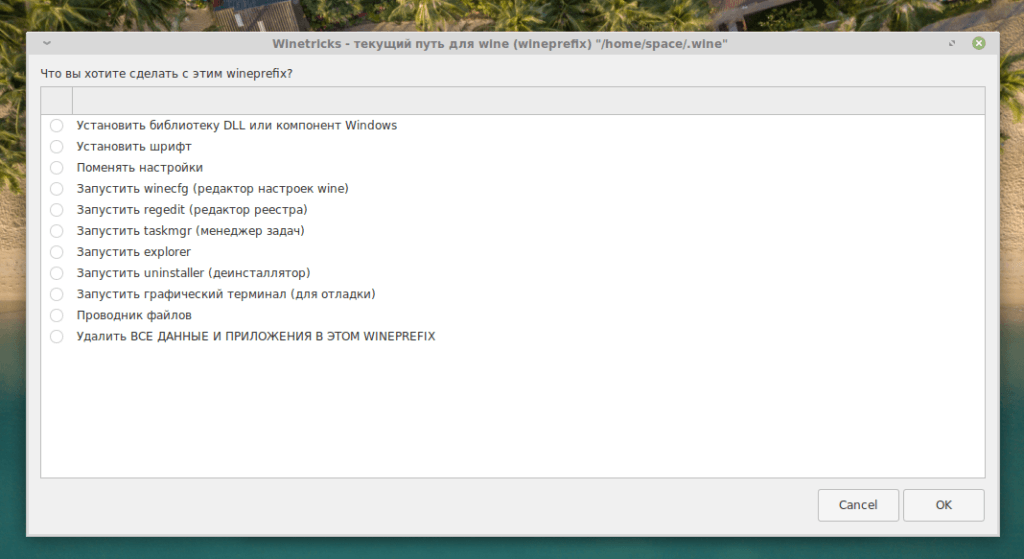
Здесь можно устанавливать и удалять программы, менять шрифты, запускать системные компоненты Windows и так далее.
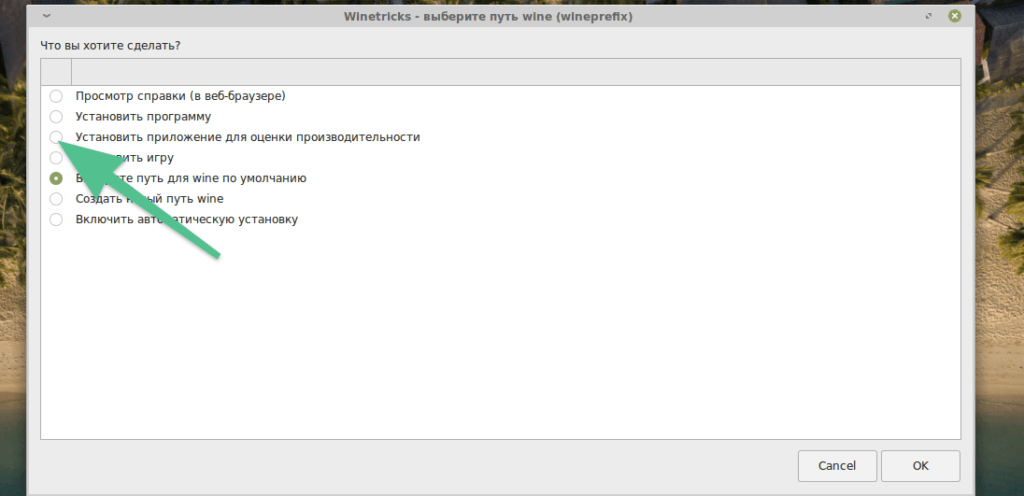
Вот кнопка для установки приложений из Windows
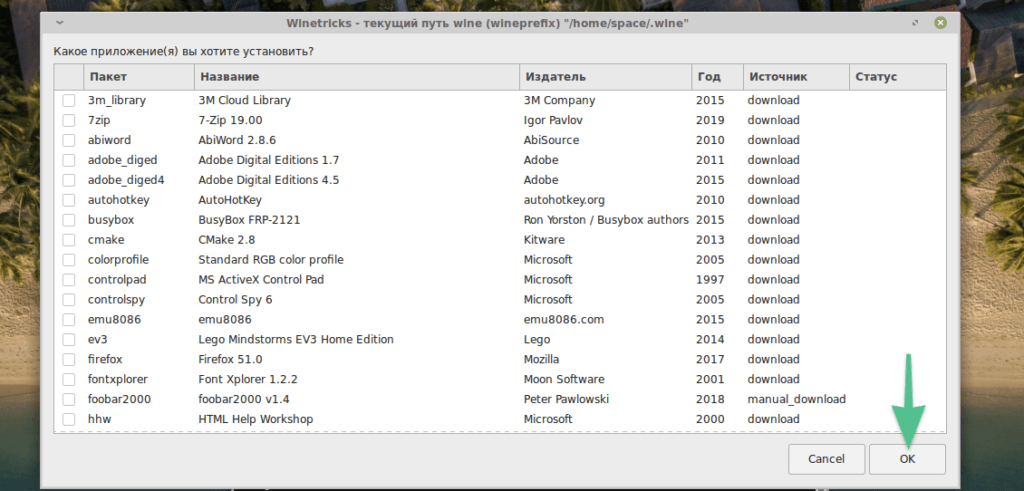
Этот список нужен для удобства. На самом деле, можно загружать игры и приложения из любых источников
Дополнительные настройки Winetricks
На этом все — программная оболочка установлена и готова к работе.
Post Views: 981
Наконец-то в одном из самых популярных дистрибутивов Linux для домашнего использования — Linux Mint 22 появилась возможность установки Wine (программа для запуска программ Windows) без использования консоли!
Перед установкой Wine в Linux Mint 22 желательно обновить систему.
Нажимаем кнопку Пуск в левом нижнем углу экрана, затем Менеджер программ

Ждем, пока завершится создание кэша

Появится вот такое окно

В левом верхнем углу в поле ввода вводим wine и ждем, пока появится такое окно. Затем жмем на Wine — реализация API Windows…

Жмем на зеленую кнопку Установить в правом верхнем углу окна

В появившемся окне жмем Продолжить

В появившемся окне вводим пароль и жмем Авторизоваться

Ждем, пока завершится установка и появится такое окно

Нажатие на кнопку «Запустить» ни к чему не приводит, поэтому просто закрываем это окно
Открываем файловый менеджер

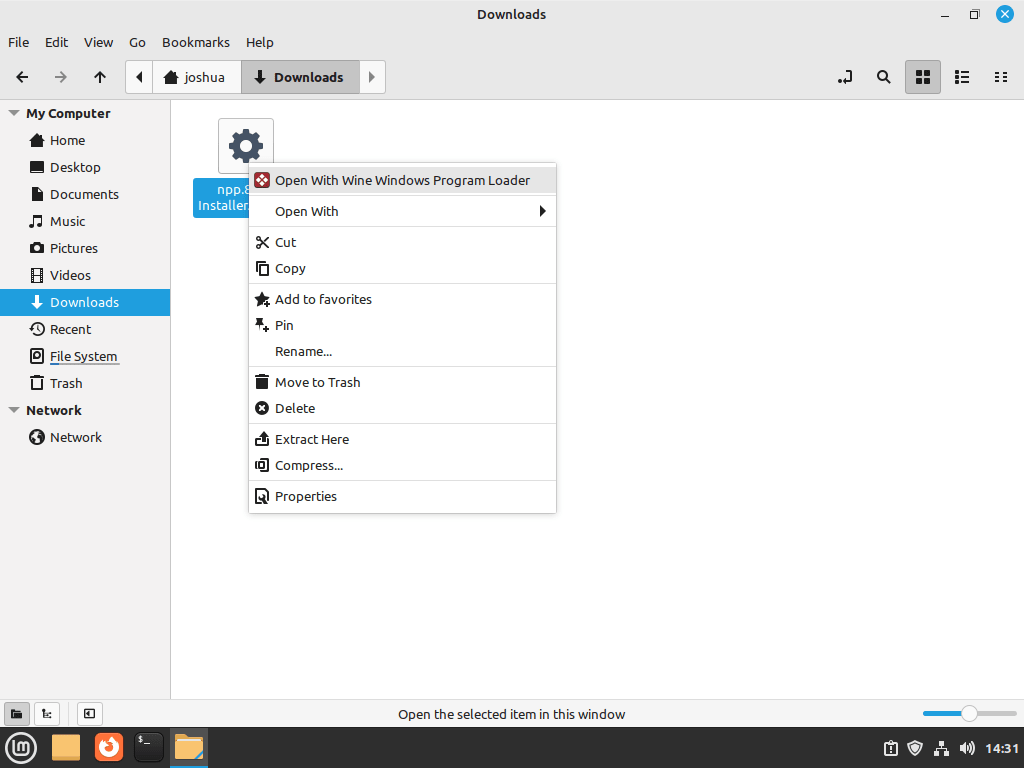
Двойной клик на приложение Windows приведет только к открытию данного файла в менеджере архивов. Поэтому нажимаем на приложение Windows правой кнопкой мыши и выбираем Открыть в другой программе

Использовать собственную команду

Обзор

Открывшееся окно проматываем вниз, выбираем wine и нажимаем Открыть

Открыть

При первом запуске Wine видим такое окно и ждем, пока оно закроется

Программа запустилась! Ура!

В следующий раз приложения Windows будут запускаться без проблем при двойном нажатии на левую кнопку мыши.
P.S. Если Вы новичок в Linux и хотите научиться работать в консоли (что поможет Вам сэкономить уйму времени), то Вам будут полезны две заметки:
Полезные однострочники и команды в Linux
Горячие клавиши в mcedit
Wine 8.0 is a compatibility layer that allows you to run Windows applications on Unix-like operating systems, such as Linux Mint. This version brings significant enhancements, including the shift to PE format for all modules, improving 32-bit application support on 64-bit hosts, and better handling of copy protection. WoW64 enhancements enable improved support for 32-bit PE modules calling 64-bit Unix libraries and an experimental WoW64 mode that closely mimics Windows architecture. Wine 8.0 also introduces a “Light” theme, Print Processor architecture, enhanced Direct2D effects, and significant Direct3D upgrades for better performance. Additional improvements include refined audio/video handling, media foundation enhancements, better input device support, internationalization features, text and font developments, and kernel optimizations.
To install Wine 8.0 on Linux Mint 22, 21, or 20 using the command-line terminal, you can follow the steps outlined in this guide. By using the WineHQ APT repository, you can choose between the latest stable version, pre-release versions, or development builds, ensuring you have the best version suited for your needs.
Update Linux Mint Before Wine Installation
Update your Linux Mint system to initiate the installation process. This step ensures that all software packages on your system are current, reducing the likelihood of conflicts during the Wine installation.
Begin by refreshing your package list:
sudo apt updateAfter updating the list, proceed to upgrade any outdated packages with this command:
sudo apt upgradeInstall Required Packages for WineHQ PPA
Specific packages must be installed before adding the WineHQ PPA (Personal Package Archive). These packages are essential for managing software repositories and secure communications.
Execute the following command to install these prerequisites:
sudo apt install dirmngr ca-certificates software-properties-common apt-transport-https curl -yEnable 32-bit Support (Optional)
This step is optional. You can skip this step if you do not intend to use older 32-bit games or applications. However, adding 32-bit support can be beneficial, as it extends the range of compatible applications and games available for use with Wine.
To enable 32-bit architecture on your system, use the following command:
sudo dpkg --add-architecture i386Enabling this support is advantageous for low-end systems, which may run older 32-bit games more efficiently, and high-end systems, which will not face any performance degradation from this addition.
Import WineHQ APT Repository
To access the latest versions of Wine, you need to import the WineHQ repository into your system. To ensure the authenticity and security of the packages, start by adding the repository’s GPG key.
Run this command:
curl -s https://dl.winehq.org/wine-builds/winehq.key | sudo gpg --dearmor | sudo tee /usr/share/keyrings/winehq.gpg > /dev/nullNext, add the WineHQ repository. Select the command corresponding to your version of Linux Mint:
Import WineHQ repository for Linux Mint 22:
echo deb [signed-by=/usr/share/keyrings/winehq.gpg] http://dl.winehq.org/wine-builds/ubuntu/ noble main | sudo tee /etc/apt/sources.list.d/winehq.listImport WineHQ repository for Linux Mint 21:
echo deb [signed-by=/usr/share/keyrings/winehq.gpg] http://dl.winehq.org/wine-builds/ubuntu/ jammy main | sudo tee /etc/apt/sources.list.d/winehq.listImport WineHQ repository for Linux Mint 20:
echo deb [signed-by=/usr/share/keyrings/winehq.gpg] http://dl.winehq.org/wine-builds/ubuntu/ focal main | sudo tee /etc/apt/sources.list.d/winehq.listConclude this step by updating your package list to recognize the newly added repository:
sudo apt updateThese steps methodically prepare your Linux Mint system for the installation of Wine 8.0, ensuring a streamlined and successful setup process.
Install Wine 8.0 – WineHQ Stable Release
Opt for the WineHQ Stable Release to balance the latest features with system stability. This version is ideal for users who need a reliable setup without the frequent updates of more experimental branches.
Execute the following command to install the stable version:
sudo apt install winehq-stable --install-recommends Post-installation, confirm the installed version of Wine with this command:
wine --versionInstall Wine 8.0 – WineHQ Staging Release
Choosing the WineHQ Staging Release grants access to beta or testing versions before their official release. This option suits users seeking newer features who are comfortable with minor risks associated with a less stable branch.
Install the staging release with this command:
sudo apt install --install-recommends winehq-stagingTo verify the version of Wine installed, use the command:
wine --versionInstall Wine – WineHQ Development Build
The WineHQ Development Build is the go-to for those who prefer cutting-edge features, albeit with a potential for instability. Recommended primarily for advanced users and developers, this build offers the most recent developments in Wine. Install it using:
sudo apt install --install-recommends winehq-develAfter completing the installation, check the Wine version installed:
wine --versionIt’s important to note that the development and staging repositories occasionally host the same version of Wine. This overlap occurs due to the continuous development cycle of Wine.
Finalize Wine 8.0 Installation
Step 1: Install Required Environments for Wine
After installing Wine, additional environments like Mono are necessary for optimal functionality. Mono is crucial as it allows Wine to run .NET applications not natively supported on Linux.
Initiate this setup with the following command:
winecfgExecuting this command will open a configuration window. A prompt will appear to install Mono and its dependencies.
Click Install to add these essential components to Wine.
Step 2: Configure Wine Window
With the environments installed, the Wine configuration dialog box will open. This interface offers customization options to tailor Wine to your specific needs. It allows you to select the default Windows version that Wine will emulate. While the default is often set to Windows 7, you can change this to a more recent version like Windows 10, depending on the compatibility requirements of your applications.
The configuration dialog also provides access to various settings tabs, such as audio and graphics. These tabs enable further customization of Wine, allowing you to adjust performance and visual aspects to align with your system’s capabilities and personal preferences. After making any desired changes, close the dialog box to finalize the configuration.
Installation of Notepad++ with Wine 8.0
Download and Open Notepad++ Installer
To begin the installation of Notepad++ on your Linux Mint system using Wine 8.0, start by downloading the Notepad++ Windows installer (a .exe file). Ensure you choose the version appropriate for your system’s architecture (32-bit or 64-bit).
Once downloaded, navigate to the file location, right-click on the installer, and select Open With Other Application. From the list of applications, choose Wine. This action prompts Wine to execute the installer, similarly to how it would run on a Windows environment.
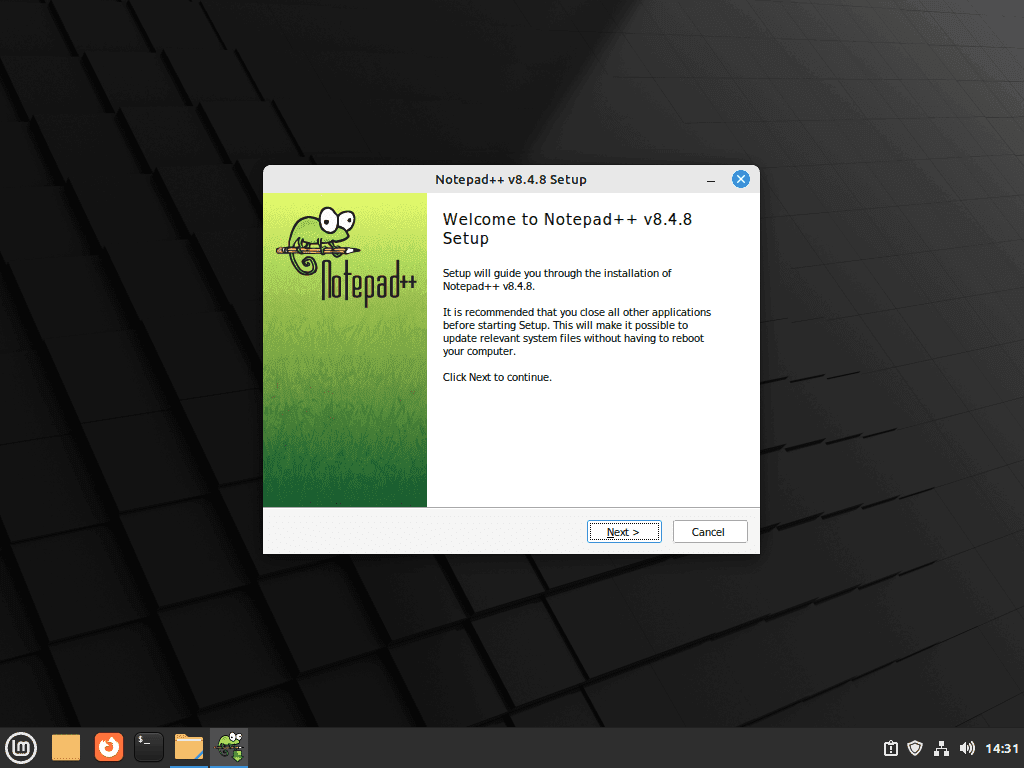
Follow the Notepad++ Installation Steps
After opening the installer with Wine, proceed with the installation steps as if operating on a Windows system. This process includes agreeing to the license terms, selecting installation options, and specifying the installation directory.
Launching Notepad++
You can locate Notepad++ in your application menu post-installation or search for it on your Linux Mint desktop. Launch the application using its coding, scripting, or general text editing features. The integration of Notepad++ through Wine demonstrates the software’s versatility in running Windows-based applications seamlessly on Linux platforms.
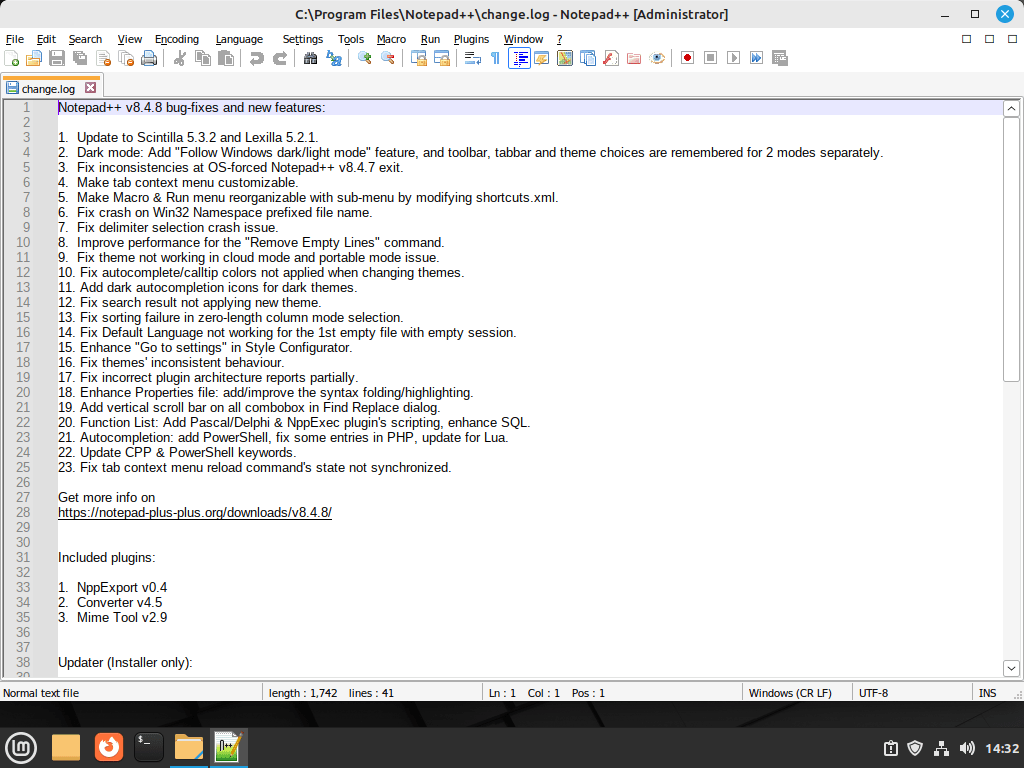
This example illustrates the simplicity and effectiveness of using Wine to install and run Windows applications, like Notepad++, on Linux Mint, expanding the range of tools available to Linux users.
First-Time Tips with Wine 8.0
Install Windows Applications Using Winetricks
Winetricks, a valuable helper script for Wine, streamlines the installation of Windows applications and libraries. It’s handy for setting up particular configurations within Wine.
To install Winetricks, execute:
sudo apt install winetricks -yOnce installed, Winetricks allows for the effortless installation of essential Windows components. For instance, to install Microsoft Visual C++ runtime libraries, use:
winetricks vcrun2015Manage Wine Prefixes
Wine prefixes create isolated environments, enabling you to run applications separately. By default, Wine uses ~/.wine as the primary prefix. To create a new, custom prefix, execute:
WINEPREFIX=~/.custom_wine_prefix winecfgReplace ~/.custom_wine_prefix with your chosen directory. This command establishes a new environment and opens its Wine configuration dialog.
Customizing Wine’s Appearance
To align the appearance of Wine applications with your Linux Mint theme, access the configuration dialog:
winecfgIn the “Desktop Integration” tab, you can customize themes, fonts, and colors to ensure that Wine applications visually integrate with your system.
Improve Performance with DirectX
For applications, particularly games, that rely on DirectX, install DirectX libraries via Winetricks for enhanced performance:
winetricks d3dx9 d3dx10 d3dx11These libraries (DirectX 9, 10, and 11) boost the compatibility and performance of Windows applications on Linux Mint.
Explore the Wine Application Database
The Wine Application Database (AppDB) offers compatibility information and tips for running Windows applications with Wine. Visit Wine AppDB for insights and user-contributed advice on specific applications.
Managing Wine 8.0
Configuring Wine as 32-bit
While Wine defaults to supporting 64-bit Windows applications on Linux Mint, you might need to run 32-bit applications. To configure Wine for 32-bit applications, set a new environment with these commands:
export WINEARCH=win32
export WINEPREFIX=~/.wine32
winecfg
Executing these commands establishes a new Wine prefix exclusively for 32-bit applications and opens the Wine configuration dialog for that specific prefix.
Running Wine from the Linux Mint Terminal
Wine can be operated directly from the terminal, providing a quick method to launch Windows applications. The command structure is as follows:
wine PROGRAM [ARGUMENTS...]To execute a Windows application, such as example_app.exe, enter:
wine example_app.exeThis method is efficient for running Windows applications without needing a graphical interface.
Update Wine 8.0
Regular updates ensure that Wine remains functional and secure. Update Wine using these standard APT commands:
sudo apt upgrade && sudo apt updateThese commands fetch the latest updates from the WineHQ repository, keeping your Wine installation current.
Remove Wine 8.0
Should you need to uninstall Wine, select the command that corresponds to your installed version:
sudo apt remove winehq-stablesudo apt remove winehq-stagingsudo apt remove winehq-develFor a complete removal, including the repository information, execute:
sudo rm /etc/apt/sources.list.d/winehq.listRemoving Wine and its related data ensures your system remains clean and organized, especially if you no longer require the software.
Conclusion
With Wine 8.0 successfully installed on your Linux Mint system, you can now easily run various Windows applications and games. Ensure you keep Wine updated to benefit from the latest improvements and compatibility fixes. Refer to the Wine documentation and community forums for any issues or further assistance. Enjoy the flexibility and convenience of running Windows software on your Linux Mint setup.
Пользователи хотели бы запускать программы для Windows в операционных системах Linux. Для этого необходимо установить Wine, программный инструмент, обеспечивающий поддержку софта для самой популярной компьютерной ОС в Линуксе.
Никакой Консоли
Способ, который предпочитают опытные пользователи Linux, я сегодня рассматривать не стану. И причина проста: именно Консоль (Терминал) является главной «страшилкой», которая мешает многим пользователям попробовать для себя Linux. Даже если вы никогда не использовали ни один из дистрибутивов Линукса, вы и так слышали, что в нем «все делается только через Консоль». Это столь же далеко от истины, как и утверждение о том, что каждому пользователю Windows необходимо знать команды операционной системы.
Любому пользователю, который хочет стать опытным, желательно освоить некоторые навыки работы с командной строкой своей ОС. Вне зависимости от того, Linux, Windows или macOS. Это расширяет кругозор, повышает степень понимания того, что вы делаете за компьютером и к каким результатам это ведет.
Установка Wine в Linux Mint
Чтобы установить Wine, сначала откройте Менеджер приложений из раздела «Система» главного меню Linux Mint. Интерфейс программы напоминает магазины приложений для мобильных операционных систем Android и iOS.

Введите «wine» в поисковой строке Менеджера программ и нажмите «Enter».

Дважды щелкните по выбранному пакету.

Нажмите кнопку «Установить».

Дождитесь завершения установки приложения. В окне появится кнопка «Удалить».

В результате в главном меню операционной системы появится строка «Wine». Подпунктами в ней станут установленные вами программы, изначально предназначенные для операционных систем Windows.
Установка софта через Wine
Установка программ осуществляется привычным для пользователей Windows способом. Рассмотрю процесс установки ПО на примере бесплатного текстового редактора WindowsWord. Он не имеет никакого отношения к Word из пакета Microsoft Office. Является его достойной альтернативой. Поддерживает форматы DOC и PDF.
Зайдите на главную страницу программы и нажмите на кнопку «Скачать».

Дождитесь завершения загрузки исполняемого файла приложения. Размер установочного файла — 27 мегабайт. Перейдите в каталог «Загрузки», куда по умолчанию сохраняются файлы, которые вы скачиваете из интернета. Найдите установочный файл текстового редактора.
Щелкните по нему правой кнопкой мыши. В контекстном меню выберите пункт «Открыть с помощью «Wine — загрузчик Windows программ»». Если данный пункт не предлагается, необходимо выбрать Wine через пункт меню «Открыть с помощью». Щелкните левой кнопкой мыши.

Откроется мастер установки приложения. Нажмите на кнопку «Далее».

Для продолжения установки программы необходимо принять условия лицензионного соглашения.

Укажите папку для установки программы, а лучше — оставьте предлагаемую по умолчанию.

Не меняйте папку для ярлыка программы в меню «Пуск».

Отключите опцию «Создать значок в Панели быстрого запуска». Опцию создания ярлыка на рабочем столе, при желании, оставьте включенной.

Вам будет предложено установить программы Яндекса. Вы можете оставить опции включенными или отключить их (конечно же отключайте).

Появится сообщение о готовности к началу установки. Нажмите кнопку «Установить».

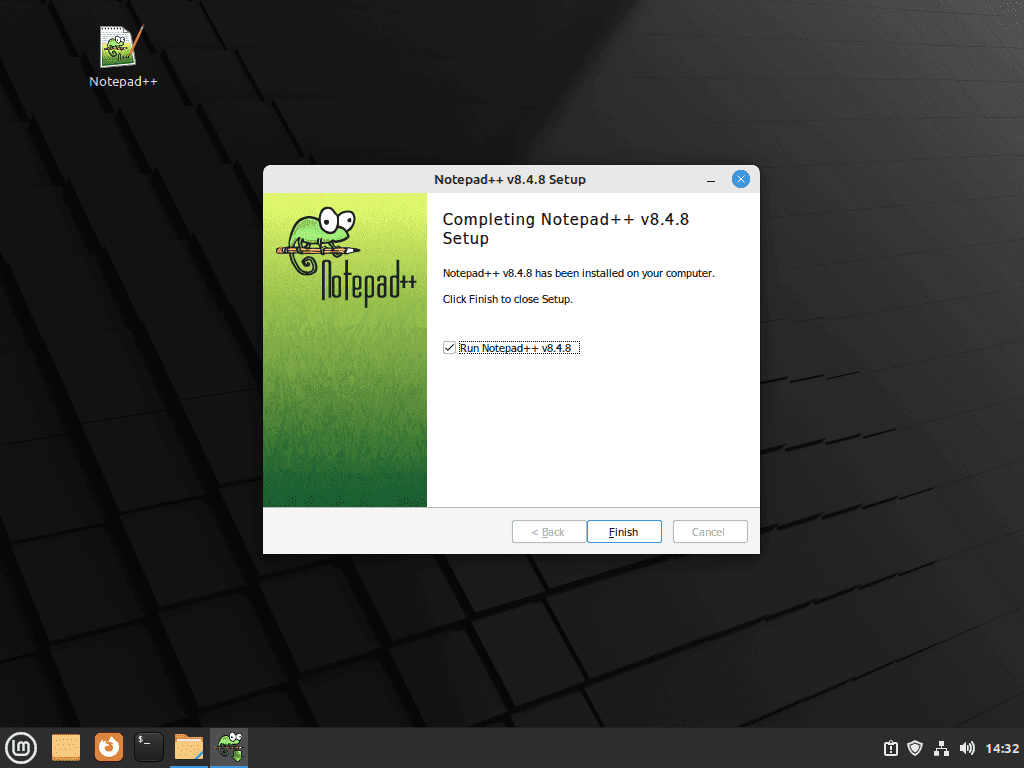
После окончания установки вам будет предложено запустить WindowsWord после щелчка по кнопке «Завершить». Нажмите ее.

Начните работу с мощным текстовым редактором, который изначально предназначен для Windows, но прекрасно работает в Linux Mint.

По аналогии вы можете устанавливать другие программы. Некоторые приложения работать не станут.
Ранее я подробно рассматривал установку приложений в Linux без применения Терминала.
Нужны ли Windows-приложения или аналоги для Linux вас полностью устраивают?
0
0
голоса
Рейтинг статьи
PlayOnLinux is an excellent program that makes installing Windows video games and Windows programs easy on Linux. In this guide, we’ll show you how you can install Windows apps on Linux Mint with it.
Installing PlayOnLinux – GUI
Follow the step-by-step instructions below to install PlayOnLinux in Linux Mint via the GUI.
Step 1: Press the Win key on the keyboard to open up the Cinnamon search menu. Or, click on the Linux Mint icon and open the menu. Once it is open, type in “Software Manager” and open the Software Manager app.
Step 2: Once the app is open, it will generate a cache. Allow it to create the cache. This process could take a couple of minutes. When the process is complete, find the search box in the top right-hand corner and click on it with the mouse.
Step 3: Type “PlayOnLinux” into the search box and press the Enter key. You’ll then see search results. Look through the results for “PlayOnLinux,” and select it with the mouse.
Step 4: Upon selecting “PlayOnLinux” in the search results, you’ll see the app’s Mint store entry. From here, locate the “Install” button, and click on it with the mouse.
Step 5: When you select the “Install” button with the mouse, a pop-up window may appear, letting you know there is “Additional software” that “has to be upgraded.” Click the “Continue” button, and enter your password.
Step 6: Once you enter your password, Linux Mint will download and install the software to your computer. Keep in mind that the PlayOnLinux installation process may take some time to complete, depending on your internet speed.
When the installation is complete, you’ll be able to launch “PlayOnLinux” from the Mint Menu on your Linux Mint PC.
Installing PlayOnLinux – CLI
If you prefer to use the terminal to install PlayOnLinux on your Linux Mint system, follow the step-by-step instructions below.
Step 1: Open up a terminal window on the Linux Mint desktop. You can do this by pressing Ctrl + Alt + T on the keyboard. Or by searching for “Terminal” in the app menu.
Step 2: Once the terminal window is open, use the apt install command to set up the “playonlinux” package.
sudo apt install playonlinux
Step 3: When you enter the command in Step 2, Linux Mint will ask you to enter a password. Using the keyboard, enter your password.
Step 4: After entering your password, Linux Mint will ask you to press the Y key to confirm that you wish to install PlayOnLinux on your Linux Mint PC. Press Y to confirm.
How to Install PlayOnLinux to Run Windows Programs on Linux Mint
Once PlayOnLinux is installed on your Linux Mint PC, follow the step-by-step instructions below to install Windows programs on Mint.
Step 1: Open up the PlayOnLinux application. You can open the app by searching for “PlayOnLinux” in the Mint app menu.
Step 2: Once PlayOnLinux is open, find the “Install” button, and click on it with the mouse.
Step 3: Upon selecting the “Install” button, PlayOnLinux will scan for programs that users can install. This process will take a bit of time, so sit back and be patient.
Step 4: When the scanning process is complete, find the search box, and click on it. Then, type in the name of the Windows program you wish to install. For example, to install Notepad++, type “Notepad Plus Plus.”
Step 5: After making a selection in PlayOnLinux, find the “Install” button, and click on it with the mouse. A pop-up window will appear when you select the “Install” button. This pop-up window is the PlayOnLinux Wizard.
Read what the PlayOnLinux Wizard says. Then, after you’ve read it, find the “Next” button to move to the next page.
Step 6: After reading the start message, another pop-up window will appear. This is the installation wizard for the app you wish to install. In this guide, we’re installing Notepad++.
Read the wizard’s message, then, when done, click on the “Next” button to move to the next page.
Step 7: On the next page in the program installer, PlayOnLinux will create a virtual drive to install the software. Be patient and allow the app set up the drive. When it is done, click “Next.”
Step 8: Once the virtual drive is created, PlayOnLinux will download the program to your computer, install it, and be ready to use.
