
Now it may seem impossible to run Mac program on Windows but it can actually be done easier than you might have initially thought. While the common perception is that Apple’s software is explicitly designed just to run on hardware that’s made by Apple itself, there are actually specific methods you can use to get it running on a Windows Machine. Whether you need to use one Mac program for a simple task or want to transfer the entire macOS to your Windows device, we’ll show you in this guide how you can run Mac programs on Windows in 5 easy ways.
Can I Run macOS Apps on Windows?
As mentioned before, the simple answer to this is yes. Using the methods we’ll list below, you can easily run macOS apps on your Windows computer with a little bit of effort. Even though Apple’s software was made to just run and be compatible with their own hardware, this may be against Apple’s licensing agreements. However, there’s no punishment or consequence to the action and there are a lot of users that have macOS apps installed on their Windows PCs because of several reasons. These may be because it’s more convenient for them, the software is more compatible with their task, or they need a certain exclusive Mac software but don’t want to purchase the device carrying the operating system itself.
5 Ways to Run macOS Apps on Windows
Now that you know that it’s actually possible to run macOS programs on Windows, here are the 5 best ways you can follow to make that happen. From the common method of using a virtual machine to a completely different take such as using a Boot Camp on Mac itself.
1. Virtual Machines
To start off our list, we have the most common and reliable method you can use to run a macOS application on your Windows device. This is called virtual machines where you use certain software such as VirtualBox or VMware to basically insert a computer into your computer. These software allow you to install and run Mac software on Windows and are mostly very secure and effective options.
However, you do need to be quite technical as there are highly specific steps you need to take such as downloading a macOS image file, creating and running the virtual machine itself, and changing some systems in your PC that are essential in the process. Still though, once you set it up, you’ll no longer have to make any major changes as the entire Mac operating system is in your hands. This means you can then download any apps you need from the App Store.
Another thing you should take into consideration is that this method requires your Windows device to be quite powerful as using virtual machines consumes a lot of resources, especially RAM and processing power.

2. Cloud-Based Virtual Machine Services
Since Virtual Machines need you to have powerful local hardware, you can choose this second option and go for a Cloud-Based Virtual Machine Service instead. These include platforms such as MacinCloud which gives you remote access to virtual macOS environments that they are hosting on their servers.
This removes the processing load from your local machine, but you’ll need a fast internet connection to avoid performance issues and latency when connecting to the remote servers. Cloud services also typically require a paid subscription, whereas local virtual machines are free aside from your own hardware costs.
3. Find Windows Versions or Alternatives
While not a true solution for running macOS itself, you may be able to find Windows versions or suitable alternatives for many popular Mac apps and tools these days. If you want to get a specific app that was only developed by Apple, you can take a look and research if the developer offers a Windows version or if there are other alternatives that have the same function.
One amazing example of this is iMovie. iMovie is an application that can only be found on Apple devices and mainly serves as its primary video editing software. However, if you are using a Windows device, you cannot access it. It’s not the end of the world though as there are other great or even better alternatives like Adobe Premiere Pro, Corel VideoStudio, Capcut, Filmora, DaVinci Resolve, and more.

4. Boot Camp
Now this method only works if you have an Intel-based Mac device. This means that you can install Windows on your Mac device using Apple’s Boot Camp Assistant. It gives you the option to choose which operating system you want your computer to boot into and essentially gives you two operating systems in one device.
Once you’re in a Windows operating system, you can just switch to a Mac whenever you need a Mac-only application. However, the biggest and most obvious downside is that you’ll still need access to Mac hardware. This isn’t a true solution for running Windows apps on a Windows PC, but it’s a handy option if you have an Intel Mac lying around. Keep in mind though it doesn’t allow Mac M1 to run Windows apps.
5. Wait for Advanced Virtualization in the Future
As computing technology continues to evolve, more advanced virtualization and emulation techniques may emerge that make it easier and less resource-intensive to run operating systems and apps cross-platform. However, this isn’t really a current solution.
Apple is also expected to open up support for alternative operating systems like Windows on its newer ARM-based silicon in the coming years, which could allow for more seamless integration. But for now, the methods above are your best bets for running macOS programs on a Windows PC. You can learn how to run Windows software on Mac as well.

The Best Platform PDF App for Both Windows and Mac
While the methods above can help you run full macOS apps on a Windows PC, there’s actually an easier solution if you only need certain functionality like PDF editing rather than an entire suite of Mac software. Meet UPDF!
UPDF is a powerful PDF editor that’s designed to work across all major platforms — Windows, Mac, iOS, and Android. With UPDF, you can ditch the hassle of virtual machines or finding alternative apps, since it gives you a seamless experience for working with PDFs no matter which operating system you prefer. So download UPDF now and experience the true PDF-editing experience.
Windows • macOS • iOS • Android 100% secure
Some of UPDF’s standout features include:
- PDF Editing: Without even breaking a sweat you can edit text, images, links, and other PDF content.
- Annotations: UPDF also allows you to add creative annotations with its vast catalog of tools and options including comments, highlights, underlines, stickers, sticky notes, and more!
- AI Capabilities: Perhaps its most unique and advanced feature, UPDF is accompanied by UPDF AI a powerful and state-of-the-art AI assistant that can help you with all of your PDF needs.
- File Conversion: UPDF also gives you the ability to convert your PDF into almost every popular file format from Word to Excel to PowerPoint and more!
- Security: You can also add passwords and watermarks to your PDF to ensure that your PDF is safe and secure and that no one can steal it.
- Electronic & Digital Signatures: With UPDF, you can sign your PDF with electronic and digital signatures
- OCR: Another unique and outstanding feature is UPDF’s OCR where you can scan documents and images and turn them into editable PDFs no matter what language they are in as UPDF has the largest collection of convertible OCR languages.
The best thing about this is that UPDF is now on sale at 61% off! With a single purchase, you can use UPDF simultaneously on all platforms — Windows, Mac, iOS, and Android. Unlike other tools, there are no separate charges for different platforms. Use UPDF on up to 4 devices: 2 desktops and 2 mobiles. So what are you waiting for? With this time-limited deal, you can get full access to UPDF’s robust toolset at a fraction of the regular cost.
Check out UPDF’s helpful video guide below!
Why Do You Need to Run Mac Programs on Windows?
There are a few common reasons why someone might want or need to run Mac programs and apps on their Windows PC. These include:
Work or Professional Needs
There are certain industries, especially in the creative fields like video production and graphic design that heavily use software that’s exclusive to macOS or is only a part of Apple’s ecosystem. This can be a rather difficult situation, especially if these are the main tools that are being used in your workplace and you have a Windows Computer.
Access to Exclusive Mac Apps
Beyond professional tools, Apple’s ecosystem is also home to many consumer apps and programs that don’t have Windows equivalents. This could include apps for creative hobbies, utilities, media tools, financial management, and more. Running macOS lets you tap into Apple’s entire app ecosystem.
Compatibility and File Sharing
In environments where both Windows and Mac hardware are used, having the ability to run apps cross-platform can make collaboration and file sharing much easier. You can avoid compatibility issues and easily move between machines depending on your needs.
FAQs on Running macOS Programs on Windows
1. Will it be slow if I run Mac apps on Windows?
Running a full virtual machine for macOS can indeed be quite slow and resource-intensive if your Windows PC doesn’t have strong hardware specs, especially RAM and processing power. However, using a cloud-based VM service or just running specific Mac apps through virtualization rather than the full operating system can help improve performance.
2. Is it free to run Mac programs on Windows?
For the most part, yes — if you’re using a local virtual machine, the only costs are for your existing Windows PC hardware. Cloud VM services typically have subscription fees, and you’ll need a license for the macOS operating system itself. But there’s no additional charge specifically for running Mac apps on Windows through these methods.
3. What are the risks of running Mac apps onWindows
For now, the biggest risk is that you are violating Apple’s software licensing terms which do not specifically allow macOS or Mac-exclusive apps to be installed on hardware not powered by Apple. There could also be some security risks if you don’t keep your virtual machines and software updated.
Conclusion
While it was initially thought that Apple’s software, especially Mac applications can only run on Apple’s own hardware, the methods mentioned above show that it is actually possible to get the Mac experience on a Windows PC with a bit of effort. However, If you simply need robust PDF editing capabilities across platforms, UPDF is an excellent solution that avoids any virtualization. UPDF gives you a seamless PDF experience on Windows, Mac, and even mobile with a single license.
Don’t settle for subpar PDF software or overly complex workarounds. Download UPDF today and see how it is easy to create, edit, annotate, convert, and secure PDFs no matter which operating system you prefer. If you want to learn more about UPDF, check out the reviews posted on the high-authority website, HowToGeek!
Windows • macOS • iOS • Android 100% secure
Most people think that Mac applications are only available on Mac devices. But what if your Intel-based PC wants in on the fun?
Running Mac apps on a Windows computer may not seem possible, but there are ways to overcome any obstacles. Read on to learn about your options.
Just like you can’t open Windows apps on a Mac, no Windows PC will be able to run a macOS app without taking a few extra steps. However, note that Mac-exclusive apps are exclusive for a reason. Nothing will beat the experience of using them on the platform they were designed for. In addition, installing Apple apps on non-Apple devices is against their terms of use. If you need to run a Mac app on a Windows PC regardless, you have the following options:
- Install a virtual machine on your computer
- Use a virtual machine on the cloud
- Look for the Windows version of the application in question.
Here’s how to tackle the issue.
Install a Virtual Machine
Installing a virtual machine is the best way to overcome any problems between you and the Mac application you want to run on your Windows PC. Imagine a virtual machine like an operating system within your operating system. It will allow you to open the macOS interface in a window on your PC and access all the apps only available on Mac.
Virtual machines can be a bit demanding for PCs with lower specs, so make sure you use a capable device for this task for the smoothest experience.
Besides a PC with strong specs, you’ll need to download two things to get started:
- A virtualizer – The best open-source, actively developed virtualizer out there is VirtualBox by Oracle Corporation. Head to the VirtualBox website and grab the software from their page.
- A copy of the macOS of your choice – You can download any still supported macOS version. Make sure there’s enough space on your computer as the file will be quite hefty.
Once you’ve installed VirtualBox and your macOS file is ready, create a Mac interface within your Windows in the following way:
- Launch VirtualBox and click the “New” button to create a new virtual machine.

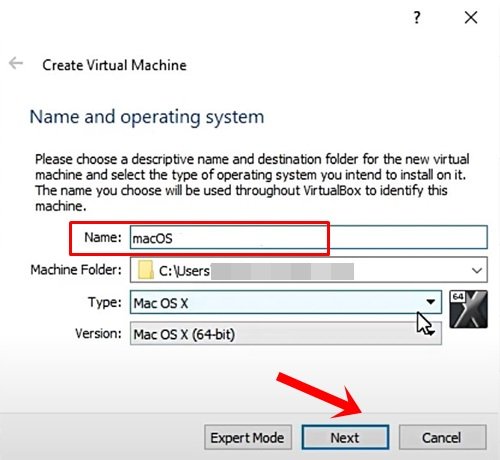
- Name your virtual machine and choose its destination folder.
- Make sure you select “Mac OS X” as the system type and “Mac OS X 64-bit” as the system version.
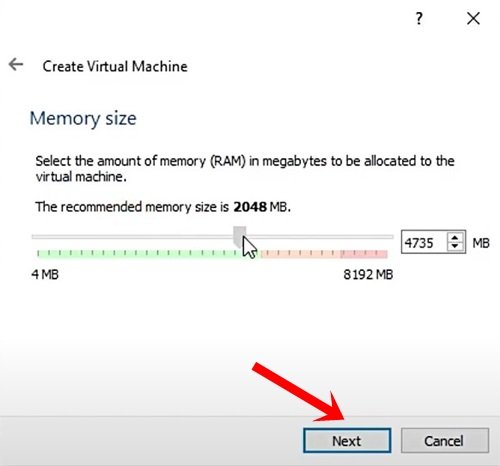
- Allocate some of your RAM for the new virtual machine. Don’t go under 4GB.
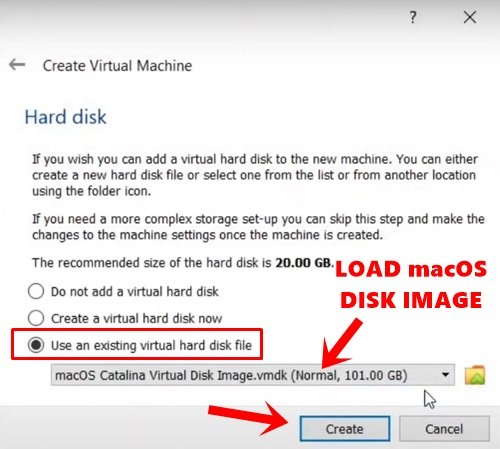
- Select the hard disk file you downloaded earlier on the next screen and click “Create.”


The virtual machine is now added to your PC. But you still need to configure the settings before you can start using it:
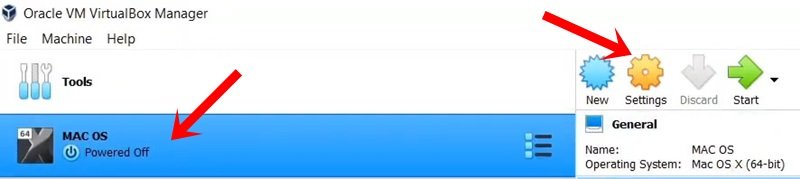
- Select the macOS you just installed on the VirtualBox main screen.
- Click the “Settings” button.
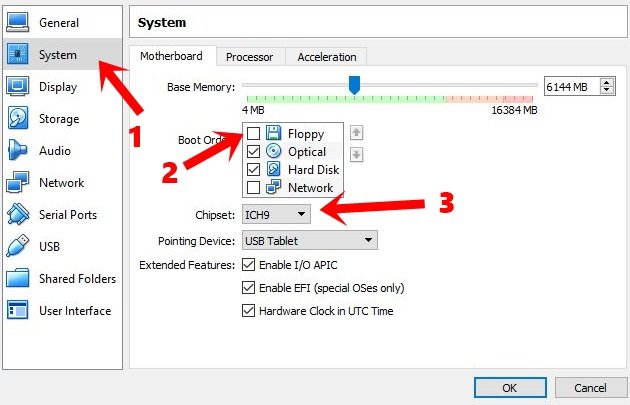
- Select “System” from the sidebar and configure the following settings:
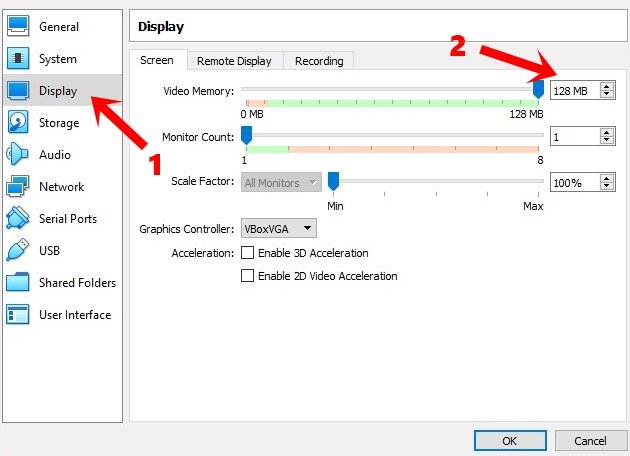
- Switch to the “Display” menu in the sidebar and allocate 128MB to Video Memory.
- Click “Storage” in the sidebar, select the empty disk from the list, and add your macOS virtual optical disk to “Optical Drivers.”
- Press the “USB” menu and select USB 3.0.
- Save the settings by clicking “OK.”
- Close VirtualBox.


Your virtual Mac is still not fully ready. The next step in the setup process involves executing a few command prompts.
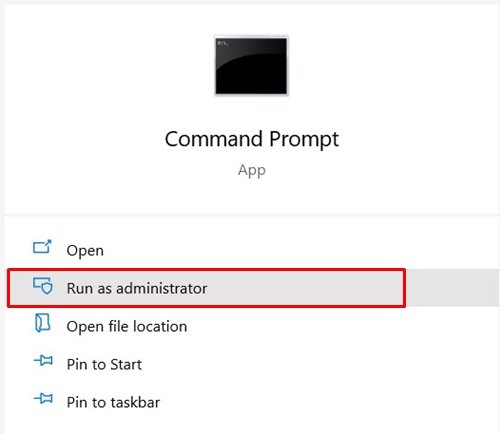
- Open Command Prompt on your Windows and select “Run as administrator.”

- Find your VirtualBox directory with the command below. Make sure to change the path in case you didn’t install VirtualBox in the default directory.
- cd “D:\VirtualBox\”

- cd “D:\VirtualBox\”
- Execute the following commands. Replace the name of your virtual machine in each code with the appropriate name.
- Exit the Command Prompt window.


Having executed these commands, you can now boot your macOS using VirtualBox.
- Launch VirtualBox.

- Select your virtual machine and hit “Start.”
- Select your language.
- Press “Disk Utility” on the next screen to create a clean drive for your macOS.

- Choose “VBOX HARDDISK Media” in the sidebar.

- Hit the “Erase” button. Adjust the settings in the new window according to the following instructions, and then press “Erase.”

- Name your drive.
- Make sure “Scheme” is set to “GUID Partition Map.”
- Name your drive.
- Exit the Disk Utility menu and proceed to install Mac on your newly created drive. Follow the instructions in the installation wizard.


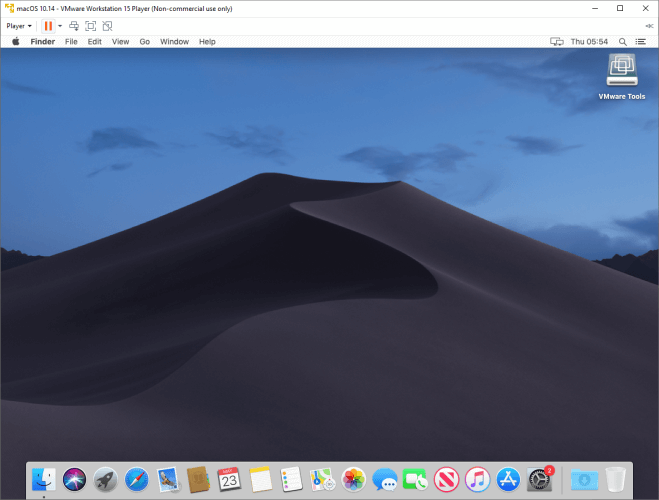
The installation process can take from several minutes to several hours, but eventually, you’ll be greeted by a Mac interface. Log in to your Apple ID, and you’ll be able to download any macOS app on your Windows PC by doing the following:
- Launch the App Store and find the app you want to download.
- Click the “Get” button and then “Install.” For paid apps, click the price button and then “Buy App.”

- Go to your Applications folder to find the app you just installed.


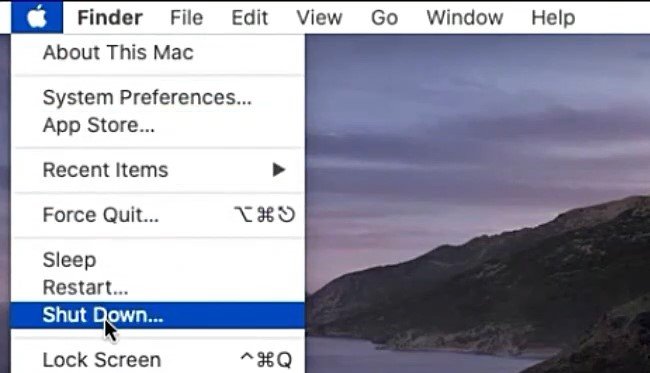
When you’re done using your Mac apps on your Windows PC, be sure to shut down your virtual Mac by clicking the Apple logo and selecting “Shut Down.”
Use a Cloud Server
Installing a virtual machine locally can be demanding for your device. On the lowest recommended settings, you might notice your computer lagging. You can leverage the same idea by using a cloud service to save your device from such hardships. A virtual machine on the cloud gives you the same options as a local one without taking up valuable space.
However, this option is not ideal either. Lags can still occur between your device and the servers, especially if your internet speed isn’t stellar. In addition, cloud services can be costly, so consider carefully whether this option is worthwhile for you.
Find an Alternative for Windows
Virtual machines do the job, but they aren’t without their drawbacks. You can skip lengthy installation processes and expensive cloud subscriptions by simply looking for an alternative to the app you need.
Many macOS apps also have Windows versions, and finding these apps may be the simplest solution to your problem. Look up the developers’ website to find the version you need. If you can’t see a Windows version, you should message the developers to ask whether one will be released in the near future. If no Windows version is available for the app you need, you can also Google an alternative to the app that will provide a similar experience.
Weigh Your Options
If running Mac apps on Windows were an easy and compromise-free process, the apps would hardly be exclusive. But nothing is impossible, and there are several ways to run Mac apps even without a Mac device when you really need to. Install a virtual machine on your device to get access to Apple’s ecosystem without the hardware. You can also choose the easier route and look for an alternative app available for Windows.
Which Mac apps do you wish were available on Windows? Do you think it’s worth going out of your way to get them on your Windows PC? Let us know in the comments section below.
Ever found yourself in a situation where you loved software, only to know that it is compatible with Mac machines? Agreed, it is an anomaly as the number of Windows compatible software is vast. But at times, you might find yourself in such a situation or may come across with certain apps that work better on macOS.
If you are stuck in such a situation, here we will state ways for you to run Mac apps on Windows 10 device. Surprised! Don’t be, just remember nothing is impossible.
Also Read: Check Out These Must Have Mac Apps
Best Ways to Run Mac Apps on Windows 10
Step 1: Make a Virtual Machine with macOS on it
This is the simplest way to get Mac on Windows and run Mac apps on windows PC. To learn how to run Mac programs on Windows check out my tutorial on How to Install macOS Mojave on Windows 10 in a Virtual Machine?
The step by step guide will make you learn how to get macOS virtual machine and how to install it on Windows 10.
Once you have the virtual machine up and running with macOS on it, come back here to learn ways to install and run Mac apps on Windows.
Step 2: Use your Apple Account
From this step onwards everything will work in a similar manner as it works on actual macOS. You’ll need to login into your Apple account to access App Store. If you don’t have one you’ll need to create an Apple account.
To create an Apple account on a web browser, follow the steps below:
1. Head to Apple ID account page, fill in all the particulars given in the form to create your AppleID. Remember provided email address will be your new AppleID.
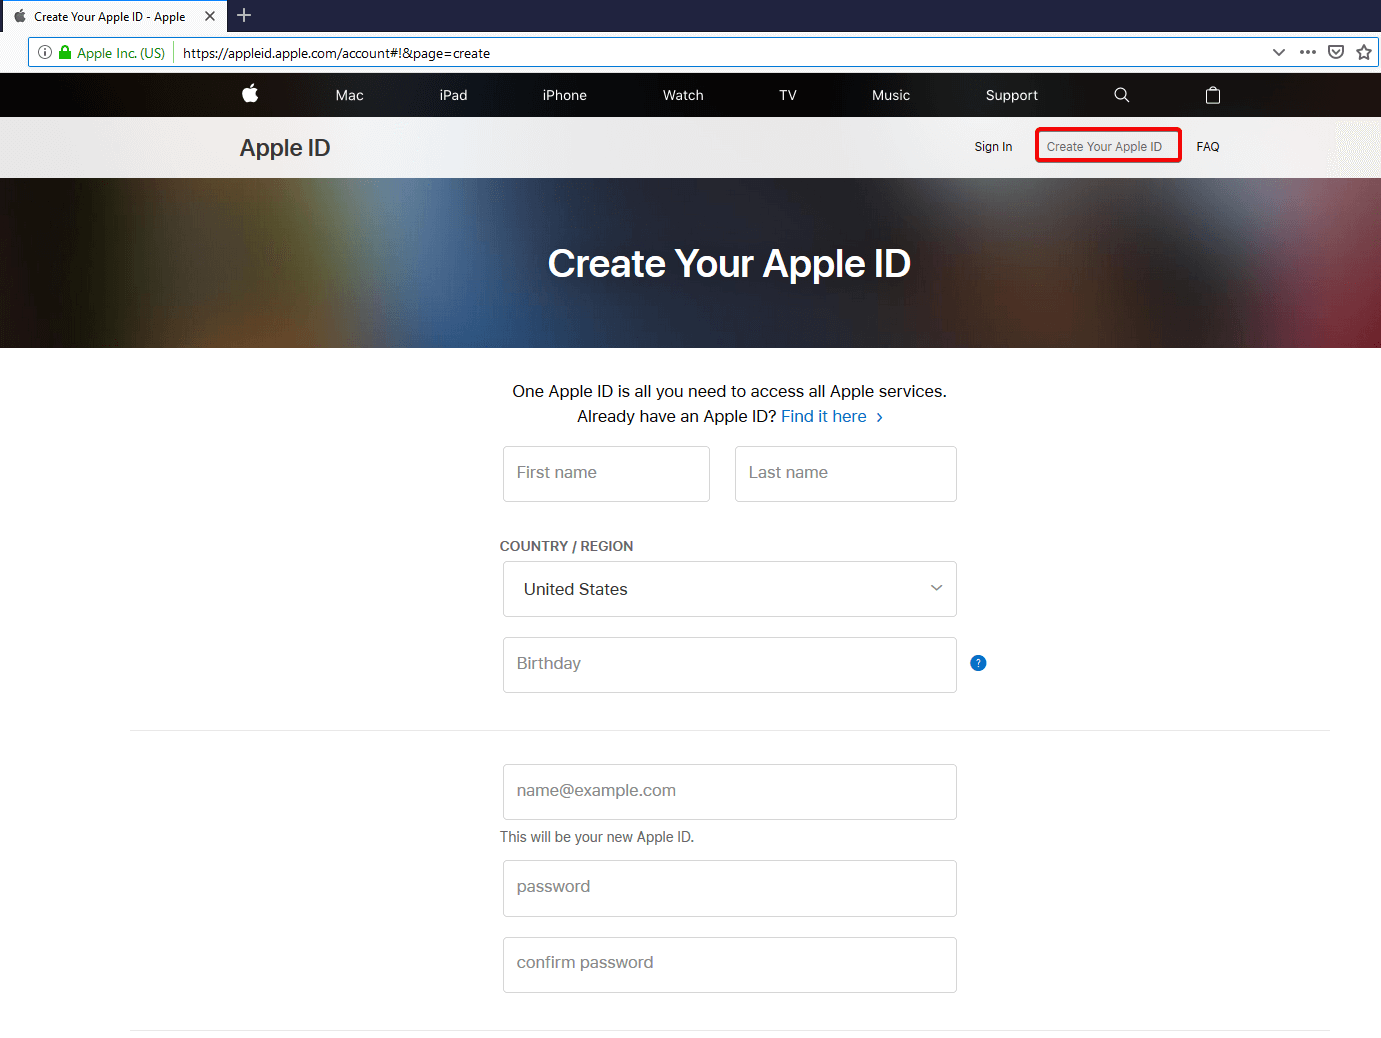
2. Next select security questions, if you want to receive updated checkbox to subscribe.
3. Click Continue.
These simple steps will help you create an Apple ID.
Once done login to your Apple account to start downloading apps from App Store. To access App Store click on App Store icon present in the dock. Log in to your Apple account > look for the app you wish to download > click on Get > Install.
This will install the apps on your macOS virtual machine installed on Windows 10.
Using these simple steps you can use macOS on Windows 10 with the help of a virtual machine.
This might hit you with questions like what about the current session? Will you able to resume it from where you left or not?
To resume working from where you left you would need to shut down virtual machine in a sequence for this click on Apple logo > Shut Down. This will help you resume working.
However, if you want to extra cautious you can take a snapshot, to save the current state of the virtual machine.
To take a snapshot on VMware click on VM > Snapshot > Take Snapshot.
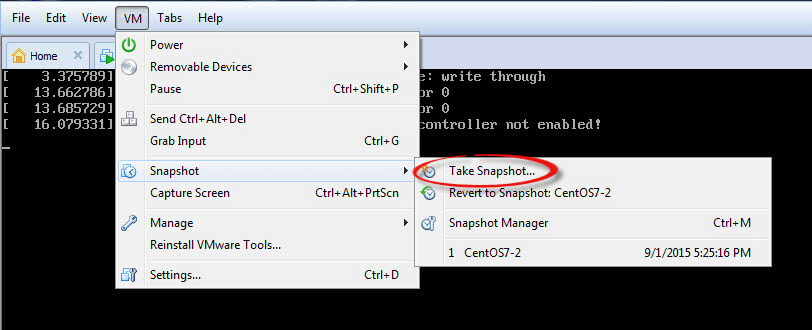
Next, give a name to the snapshot and hit Take Snapshot.
This way you’ll be able to save your current session.
Using these simple steps you can easily run Mac Apps on Windows machine. However, you must never forget since you are using a Virtual machine they might not work as on actual macOS. This is simply due to a virtual machine sharing the host machine’s system resource. In addition to this, a piece of advice avoid updating your macOS Virtual Machine as the patch that makes the macOS virtual machine run is compatible with a specific version and may not work with the updates.
FAQ’s
Can you run Mac apps on Windows?
You can run Mac apps on Windows 10 easily, but before that you need to install macOS on Windows 10 in a virtual machine. Here, virtual machines play an important role to imitate dedicated hardware by emulation of a computer system. You also need to download and install certain essential tools such as VMware to run Mac apps on Windows 10.
Can you run Mac on a PC?
Yes you can run Mac on a PC like a pro. To do this, you would require a compatible PC where you can install macOS. Here, you need to select the hard drive on which you never had Windows installed. You can run Mac on a PC by creating an image file of macOS or doing it through a virtual machine.
Can you download Apple apps on Windows 10?
Apple’s iTunes apps are now available to download on Microsoft’s Windows 10 Store. It is useful development for users who wish to access iTunes apps on Windows 10. Here, you can download, purchase, and manage iTunes apps easily from Windows 10 Store.
Is it safe to use Hackintosh?
Well, it totally depends on the method you use to access macOS on Windows machine. If you create an image of macOS and clone it on Windows PC or you try a virtual machine to access Mac apps on windows PC, you probably are in safe hands. On the other hand, it could be debatable whether using Mac on Windows is legal or not, as you are licensed to use the software and license terms don’t allow you to imitate software.
Is a Hackintosh worth it?
If you want to access all features and functionalities of Mac without spending money on buying new Mac system, then Hackintosh is a good option. It is also useful for users who tend to work on two different systems that require access to Mac and Windows features.
Of course, you can give it try, but keep in mind you can lose everything on the virtual machine in this process.
Hurry up….! Subscribe to our YouTube channel to stay updated with tech related information.
Quick Reaction:
Looking to Use macOS Apps on your Windows 7/8/8.1/10 PC? Here are the Simple Steps to Install VM on PC and Run Mac Apps on Windows.
There might have been an instance or two for Windows 10 users when they found out that their preferred app is only supported on macOS. Similarly, an application might be having more features set for the Apple ecosystem than compared to Windows. In all these scenarios, Windows users didn’t have much say, until now. Today, we will show you how to run your favorite Mac apps on your Windows PC. Follow along.
To carry out the aforementioned task, we would be installing a virtual machine on your Windows PC. Inside that virtual machine, we would then install the macOS Catalina. So grab hold of the required files from the below section and proceed with the instructions steps.
Downloads
- A virtual machine app to run macOS on Windows: Virtual Box.
- The macOS Catalina Image for Virtual Box
Step 1: Installing Virtual Box
- To begin with, you will have to install the virtual image on your PC. So go ahead and launch the Virtual Box setup and follow the on-screen instructions to install it.

- Once installed, launch the Virtual Box app and click on New situated at the top.

- Now you will have to give it a name, for this tutorial, let’s keep it macOS. Leave the other fields as they are (Type: macOS X, Version: macOS X 64-bit) and click Next.

- Next up, you will have to allocate RAM to this Virtual Machine. Give it around 50% of the total available RAM. Or 4GB at the very least if possible and click Next.

- Then under the Disk section, select Use an existing hard disk file. Browse to the downloaded macOS Catalina Image file, select it, and hit Create.

- macOS will now be added to the Virtual Machine. Select it from the left menu bar and click Settings.

- From the Settings dialog box, go to System and uncheck Floppy from the boot dialog box. Also, make sure that the Chipset is set to ICH9.

- Now go to the Processor tab and allocate two processors. Likewise, tick mark the Enable PAE/NX option.

- Next up, head over to the Display section and allocate 128MB to Vidoe Memory.

- Likewise, enable Use Host I/O Cache under Storage and USB 3.0 under the USB section and click OK.
- But even now the Virtual Box wouldn’t be able to boot up the macOS. There are a few commands that we need to execute in Window’s Command Prompt to make it work.
- So close this virtual machine and launch Command Prompt as an admin.

- Now execute the below command to find the Virtual Box directory (below is the default installation directory, if you have installed in some other directory, make sure to replace the command accordingly):
cd “C:\Program Files\Oracle\VirtualBox\” - Finally, execute the following set of commands one by one. Just make sure the replace the virtual_machine_name code with the original name of your Virtual Box.
VBoxManage.exe modifyvm “virtual_machine_name” –cpuidset 00000001 000106e5 00100800 0098e3fd bfebfbffVBoxManage setextradata “virtual_machine_name” “VBoxInternal/Devices/efi/0/Config/DmiSystemProduct” “iMac11,3”
VBoxManage setextradata “virtual_machine_name” “VBoxInternal/Devices/efi/0/Config/DmiSystemVersion” “1.0”
VBoxManage setextradata “virtual_machine_name” “VBoxInternal/Devices/efi/0/Config/DmiBoardProduct” “Iloveapple”
VBoxManage setextradata “virtual_machine_name” “VBoxInternal/Devices/smc/0/Config/DeviceKey” “ourhardworkbythesewordsguardedpleasedontsteal(c)AppleComputerInc”
VBoxManage setextradata “virtual_machine_name” “VBoxInternal/Devices/smc/0/Config/GetKeyFromRealSMC” 1
- Once you have successfully executed these commands, close the CMD window. Launch the Virtual Box and double click on the macOS virtual machine to start it up. You might be greeted with a grey loading screen for a couple of minutes, which is completely normal.

- It will then take a few minutes for the first time setup and once that is done, you should be taken the macOS overview screen.


With this, you have successfully installed macOS on your Windows PC. Let’s now turn our attention towards the steps to run macOS apps inside this Virtual machine aka your Windows PC.
Step 2: Running macOS Apps on Windows
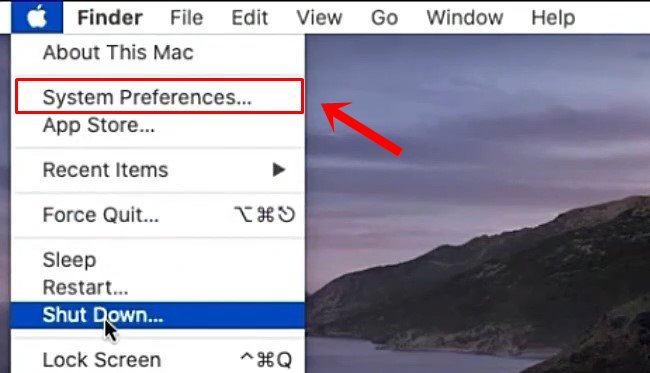
- To begin with, you have to sign in with your Apple ID. For that click on the Apple icon and go to System Preferences.

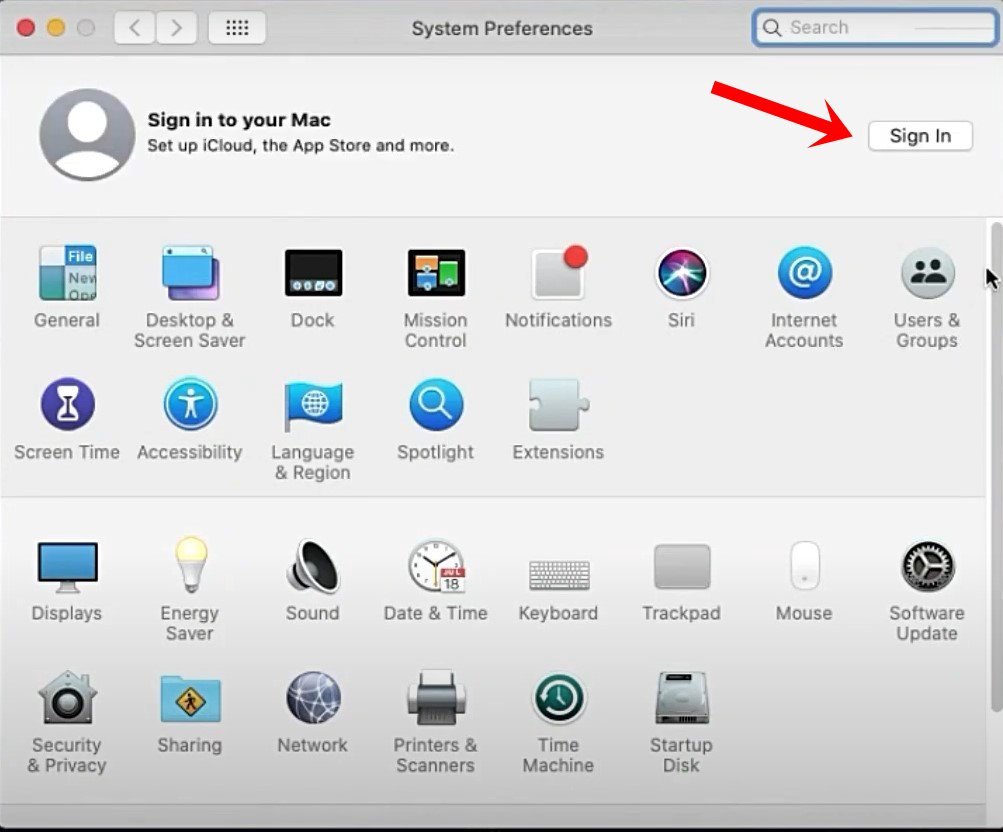
- Now click on the Sign-in button and enter your credentials.

- Once that is done, you may now access the App Store from the Dock. Then search for the desired app and click on Get > Install. When installed, just hit the Open button.

- That’s it. You may now enjoy your favorite macOS apps on your Windows PC. Just keep in mind that you should never directly close the virtual machine. Rather, you should click on the Apple icon and select the Shutdown option.

Conclusion
So this was all from this guide on how to run macOS apps on Windows. If you have any queries, do let us know in the comments section below.
If you’ve any thoughts on How to Run macOS Apps on Windows?, then feel free to drop in below comment box. Also, please subscribe to our DigitBin YouTube channel for videos tutorials. Cheers!
Меня не интересует обратное?
В Linux есть Wine, вот что-то подобное.
-
Вопрос задан
-
16462 просмотра
Пригласить эксперта
Можно попробовать через виртуальную машину + хакинтош, но стабильность под сомнением.
Есть проект Darling, который работает в этом направлении. В данный момент, кроме как через виртаульную машину, это не возможно.
официально такие инструменты вряд ли когда-либо появятся, очень уж apple такое не одобряэ  вариант с виртуальной машиной — самый ок.
Войдите, чтобы написать ответ
-
Показать ещё
Загружается…