
Download the official version of OBS Studio:


You can also visit the OBS Project GitHub Releases page.
Note: If using the .zip method for either the full or small install and installing to a non-standard program location (i.e. outside Program Files), you will need to add the security group ALL APPLICATION PACKAGES to have full control over the main OBS Studio directory and sub-directories. Certain features may not function properly without these security rights (primarily, the ability to use game capture on UWP apps).
Alternative Installation Methods
All methods below download our EXE installer directly, and verify it’s official using the hash.
winget
winget install -e --id OBSProject.OBSStudioChocolatey
choco install obs-studioScoop
scoop bucket add extras
scoop install obs-studio
Build from Source
For instructions on how to build from source, check the Build Instructions for Windows guide on the OBS Studio wiki.
Last Updated :
31 Jan, 2022
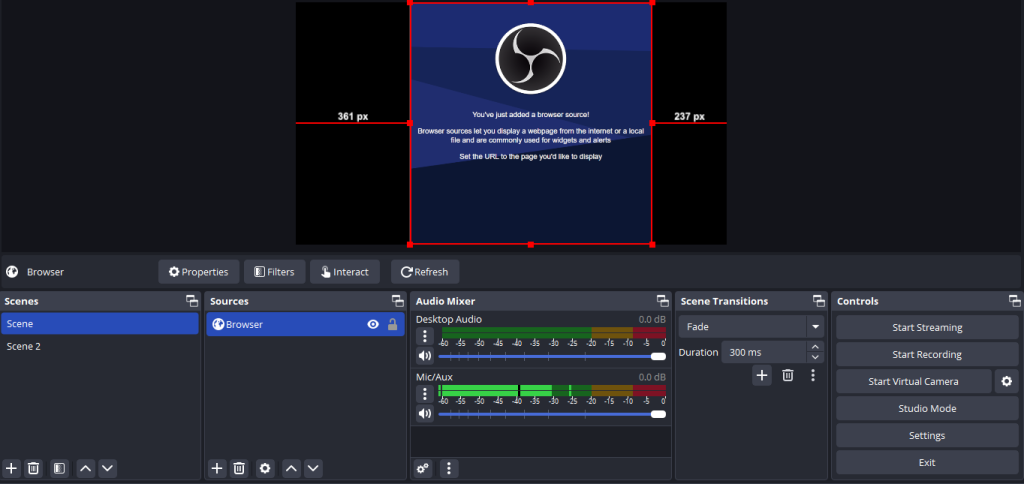
OBS Studio is open-source software, used for cross-platform screencasting and streaming app. It is developed by Hugh “Jim” Bailey and his team and was initially released on 1 September 2012. It is available in 59 different languages and written in C, C++. It also supports real-time capture, scene composition, recording, encoding, and broadcasting using Real-Time Messaging Protocol (RTMP), etc. It is used to stream videos of any RTMP-supported platform like YouTube, Instagram, etc. The main user interface of OBS studio is divided into five sections: scenes, sources, audio mixer, transitions, and controls. It is easy to use.
Features of OBS:
- It allows its users to capture their screen in HD quality.
- It supported video recording.
- It manages the quality of the captured video.
- It provides different types of configuration options so that users can add new sources very easily and manage their properties.
- It allows you to switch between an unlimited number of scenes very seamlessly.
Installing OBS Studio on Windows
Follow the below steps to install OBS Studio on Windows:
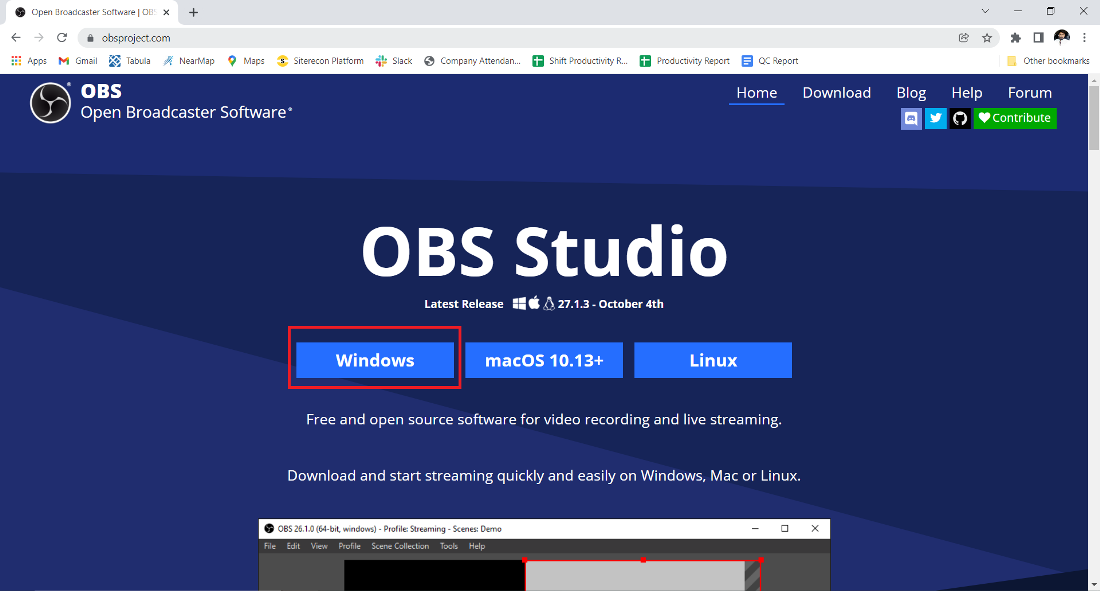
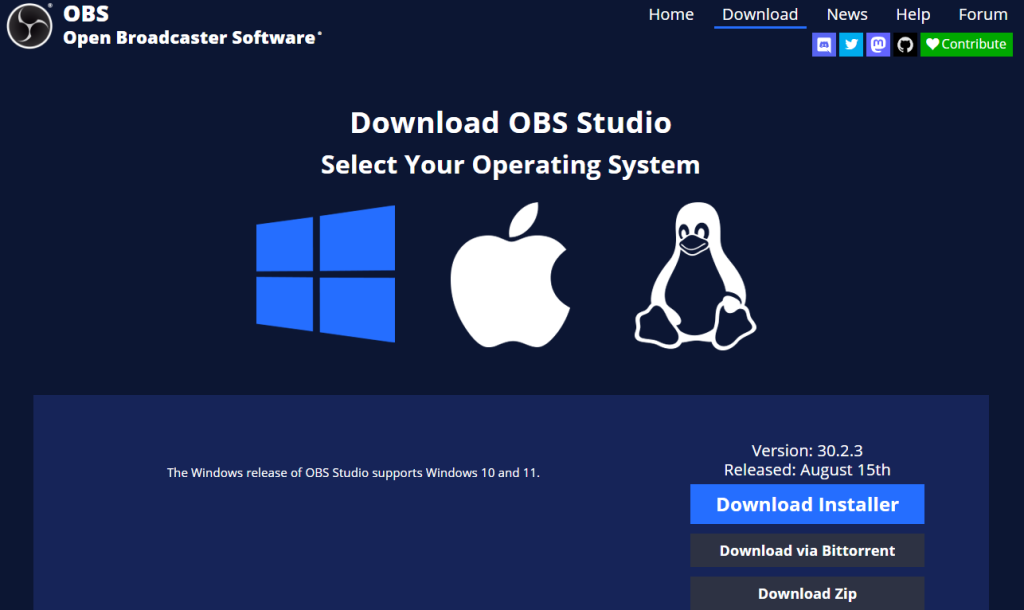
Step 1: Visit the official website using any web browser that you like.

Step 2: Click on the Windows button as shown in the below image.
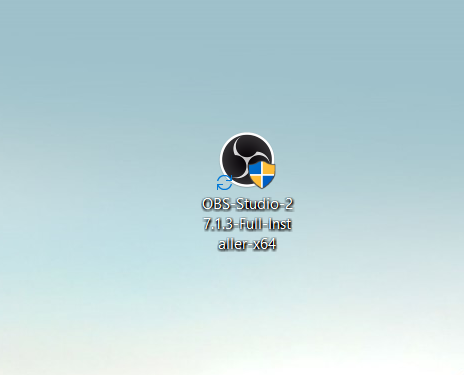
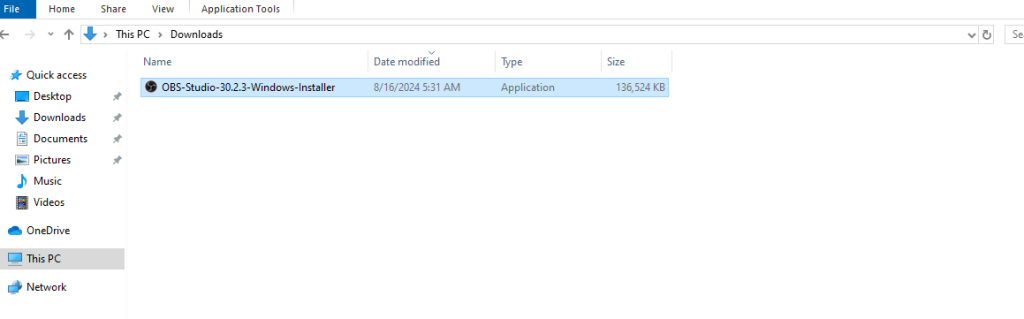
Step 3: Now find the executable file in the downloads folder in your system and open it to start the installation process.
Step 4: It will prompt confirmation to make changes to your system. Click on Yes.
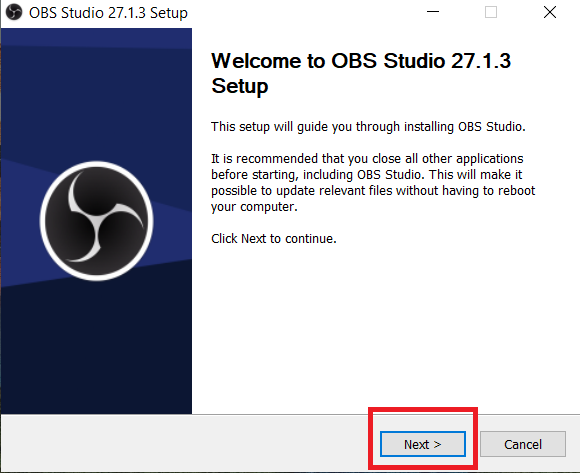
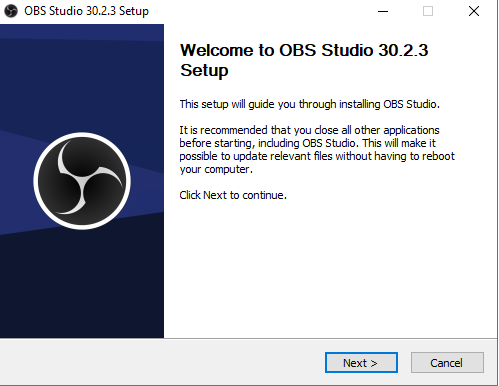
Step 5: The setup will start, now click on the Next button.
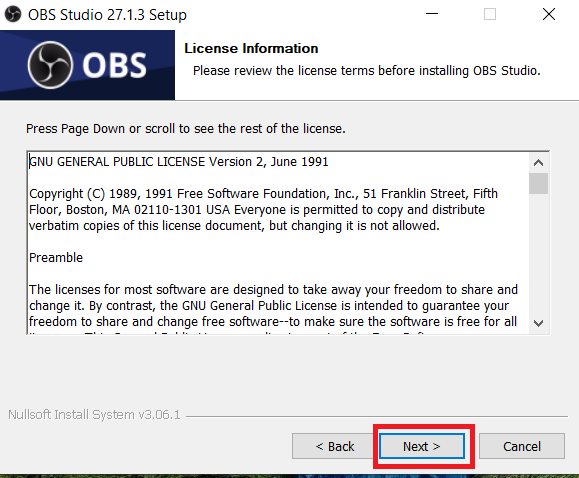
Step 6: The next window will be of License Agreement, so click on the Next button.
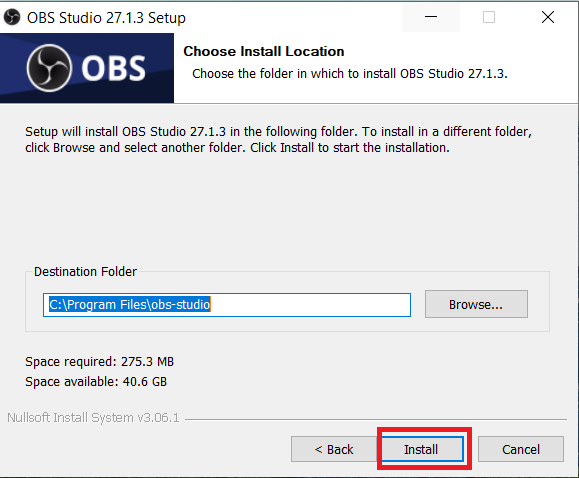
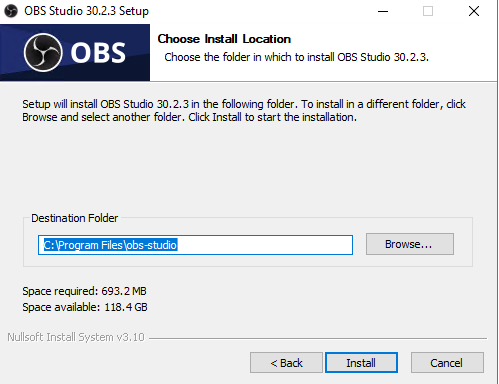
Step 7: The next window will be of selecting installing location. So select the drive in which you want to install OBS. But make sure that the drive must have sufficient memory space for installation. It required roughly 275.3 MB of memory space. Now click on the Install button.
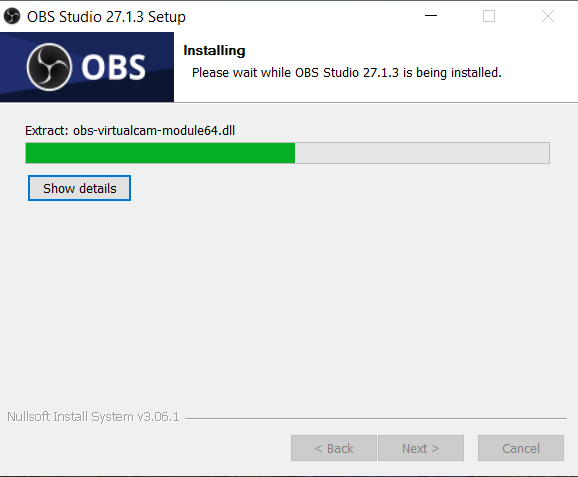
Step 8: After this installation process will start and it might take 2-5 minutes depending on your computer speed and specification to complete the installation process of OBS.
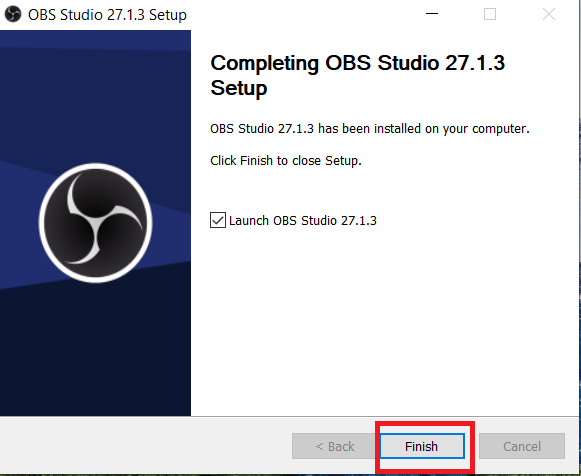
Step 9: Click on the Finish button after the installation process is complete successfully.
Now the software automatically opens at this point you can see the interface of OBS Studio.
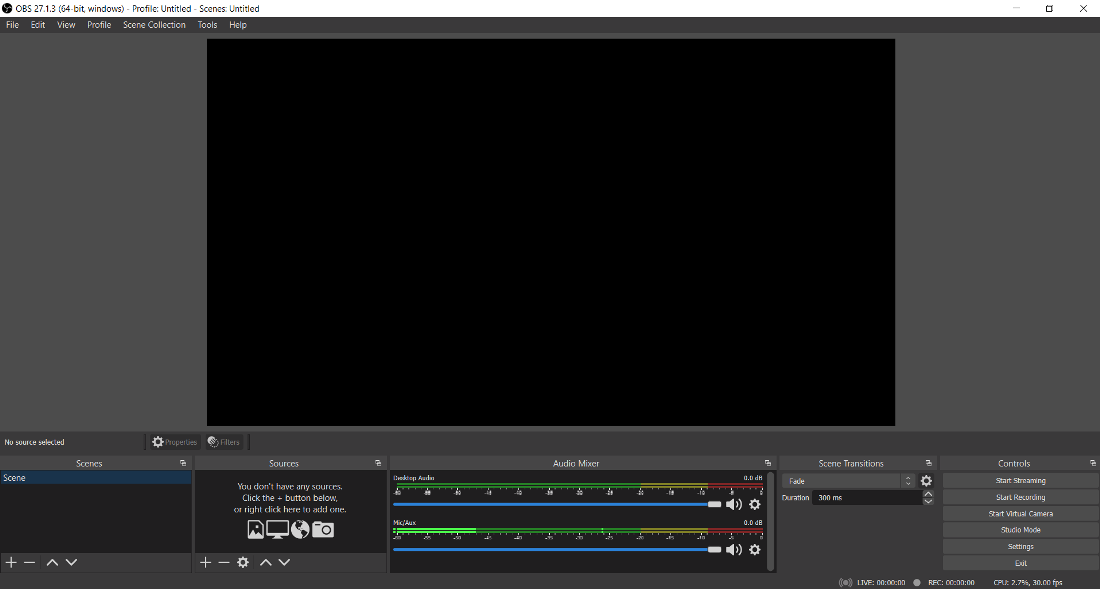
At this point, OBS Studio is successfully installed on the system and an icon is created on the desktop.
Congratulations!! At this point, you have successfully installed OBS Studio on your Windows system.
Open Broadcaster Software (OBS) is a free open-source application primarily used for video recording and live streaming. It is a versatile tool that allows users to capture and mix various audio and video sources apply effects and output the resulting composition to a stream or file.
In this article, we will cover how to install OBS Windows operating system. We will further look into the post installation set up and how to add sources to start your live streaming.
System Requirements
Before diving into the OBS installation ensure your system meets the minimum requirements:
- Operating System: Windows 10 or later
- Processor: Intel Core i5-4460 or AMD Ryzen 3 1200 equivalent or better
- Memory: 8 GB RAM
- Graphics: Integrated graphics or dedicated GPU with OpenGL 3.3 support
Downloading OBS
Open your web browser and visit the official OBS website. Choose your operating system by clicking the “Windows” icon.
Choose your download OBS Windows option you will typically have three options:
- Installer: This is the recommended option for most users. It provides a simple installation process.
- Zip File: This option gives you more control over the installation location but requires additional steps.
- BitTorrent File: This option downloads the torrent file for this you have to additionally install Torrent software on Windows.
Installing OBS
The following are two methods to install OBS Studio Windows operating system:
For the Installer
1. Double-click the downloaded .exe file to start the installation process.
2. Click “Next” to proceed through the installation wizard.
3. You can choose the default installation location or select a custom one.
4. Click “Install” to begin the installation process.
For the Zip File
1. Extract the downloaded zip file to your desired location.
2. Locate the OBS executable usually obs64.exe and double-click it to start the application.
3. Now you can follow the same instructions as mentioned above in the installer file.
Install OBS on Our Cheap Windows VPS!
With Ultahost, Hosting Windows VPS has never been easier or faster. Enjoy ultra-fast SSD NVME speeds with no dropouts and slowdowns.
Post Installation Setup
Once OBS is installed you will need to configure some basic settings:
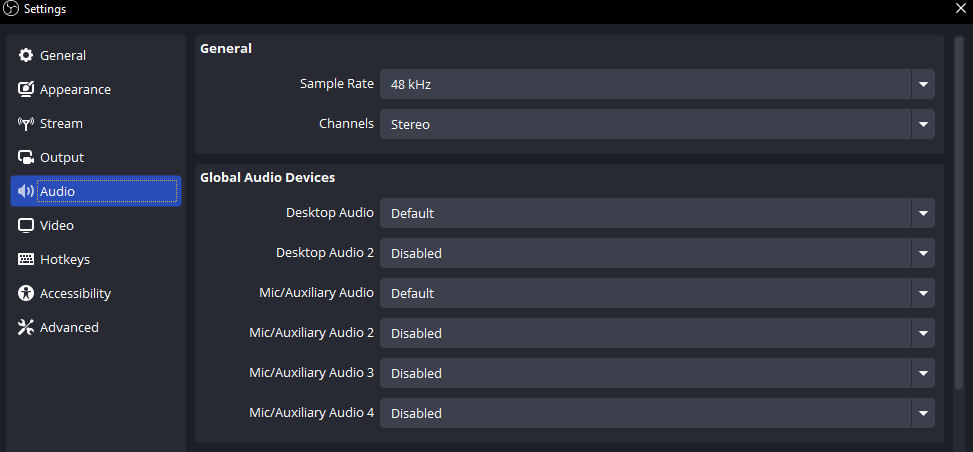
Audio Settings
- Go to “Settings” then “Audio”.
- Under “Devices” select your microphone and speakers.
- Adjust input and output levels as needed.
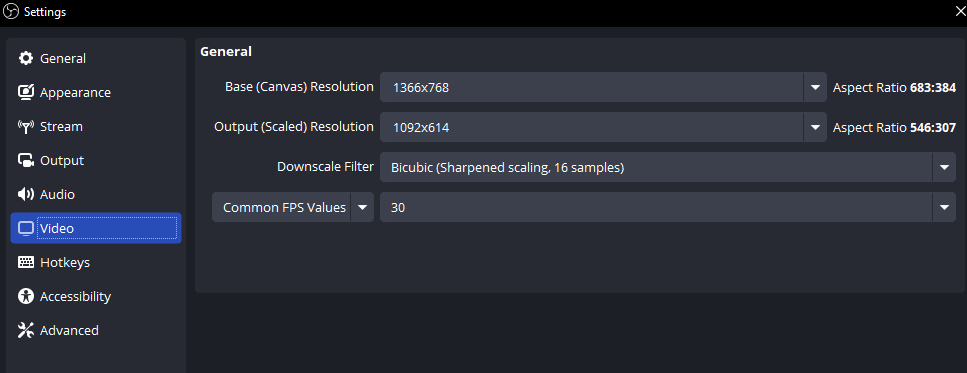
Video Settings
- Go to “Settings” then “Video”.
- Choose your desired output resolution and frame rate.
- Adjust other video settings based on your hardware and preferences.
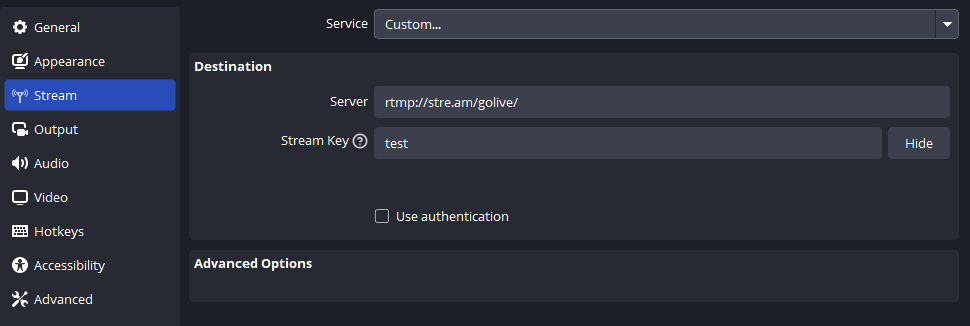
Streaming Settings
- If you plan to stream go to “Settings” then “Stream”.
- Select your streaming service like Twitch, YouTube, etc, and enter your stream key.
Now you have to setup RTMP NGINX on Ubuntu to create your own custom live streaming server. After that click the “+” icon and navigate the “Stream” option. Set “Custom” insert your RTMP URL and create a stream key like “test” apply and save changes.
Adding Sources
Sources are the elements you want to capture and display in your OBS scene. Common sources include:
- Game Capture: Captures your gameplay.
- Display Capture: Captures your entire screen or a specific window.
- Video Capture Device: Captures video input from a webcam or capture card.
- Audio Input Capture: Captures audio from a microphone or other audio source.
- Audio Output Capture: Captures audio from your computer’s output.
- Image: Displays a static image.
- Text: Displays text.
- Browser: Embeds a web browser.
Creating Sources and Scenes
Scenes are collections of sources that you can switch between. To create a scene:
- Right-click on the “Scenes” section and select “Add Scene”.
- Give your scene a name.
- Drag and drop sources onto the scene to arrange them.
Start Stream or Recording
Once you have configured your sources and scenes you can start streaming or recording:
- To start a stream: Click the “Start Streaming” button.
- To start a recording: Click the “Start Recording” button.
Important Notes
Following are important notes after installing Open Broadcaster Software Studio on the Windows operating system:
- Adjust video settings reduce unnecessary sources and close background applications to improve performance.
- Customize hotkeys for common actions like starting/stopping stream/recording, switching scenes, and more.
- OBS supports plugins that can add new features and functionality.
- OBS offers a wide range of options and settings. You can explore to enhance your live streaming.
Conclusion
Open Broadcaster Software (OBS) is a powerful and versatile tool that can be easily installed and configured on Windows systems. By following the steps outlined in this guide, you should be able to successfully set up OBS and begin capturing, mixing, and outputting your audio and video content.
Get the best VPS stream hosting for your online station. You can set high quality live streaming server. Start your journey today with a professional Ultahost hosting service. In a matter of minutes launch your own stream with professional grade software and hardware.
FAQ
What are system requirements for installing OBS Studio on Windows?
OBS Studio requires a 64-bit version of Windows 10 or 11 and a compatible GPU.
Where can I download the latest version of OBS Studio for Windows?
You can download the latest version of OBS Studio from the official OBS website.
How do I install OBS Studio on my Windows PC?
After downloading the installer from the website run it and follow the above instructions to complete the installation.
Can I install OBS Studio on Windows 10 or Windows 11?
Yes, OBS Studio is fully compatible with both Windows 10 and Windows 11.
What should I do if OBS Studio fails to install on Windows?
Ensure your system meets the requirements run the installer as an administrator and check for any antivirus interference.
Is OBS Studio free to use on Windows?
Yes, OBS Studio is open-source and completely free to use.
How do I update OBS Studio on Windows after installation?
You can update OBS Studio by downloading the latest version from the website and running the installer to overwrite the existing installation.
В этой статье мы расскажем, как можно использовать программу «OBS Studio» для проведения трансляций прямо на платформу livedigital, но вы также можете использовать любую другую программу для потокового вещания.
«OBS Studio» – это программа для захвата и записи вашего экрана на компьютере.
Важно! При потере соединения трансляция не отключится, а будет продолжаться. Изображение с трансляции обновится сразу после вашего переподключения.
Настройка OBS
Для того, чтобы приступить к трансляции, необходимо правильно настроить OBS.
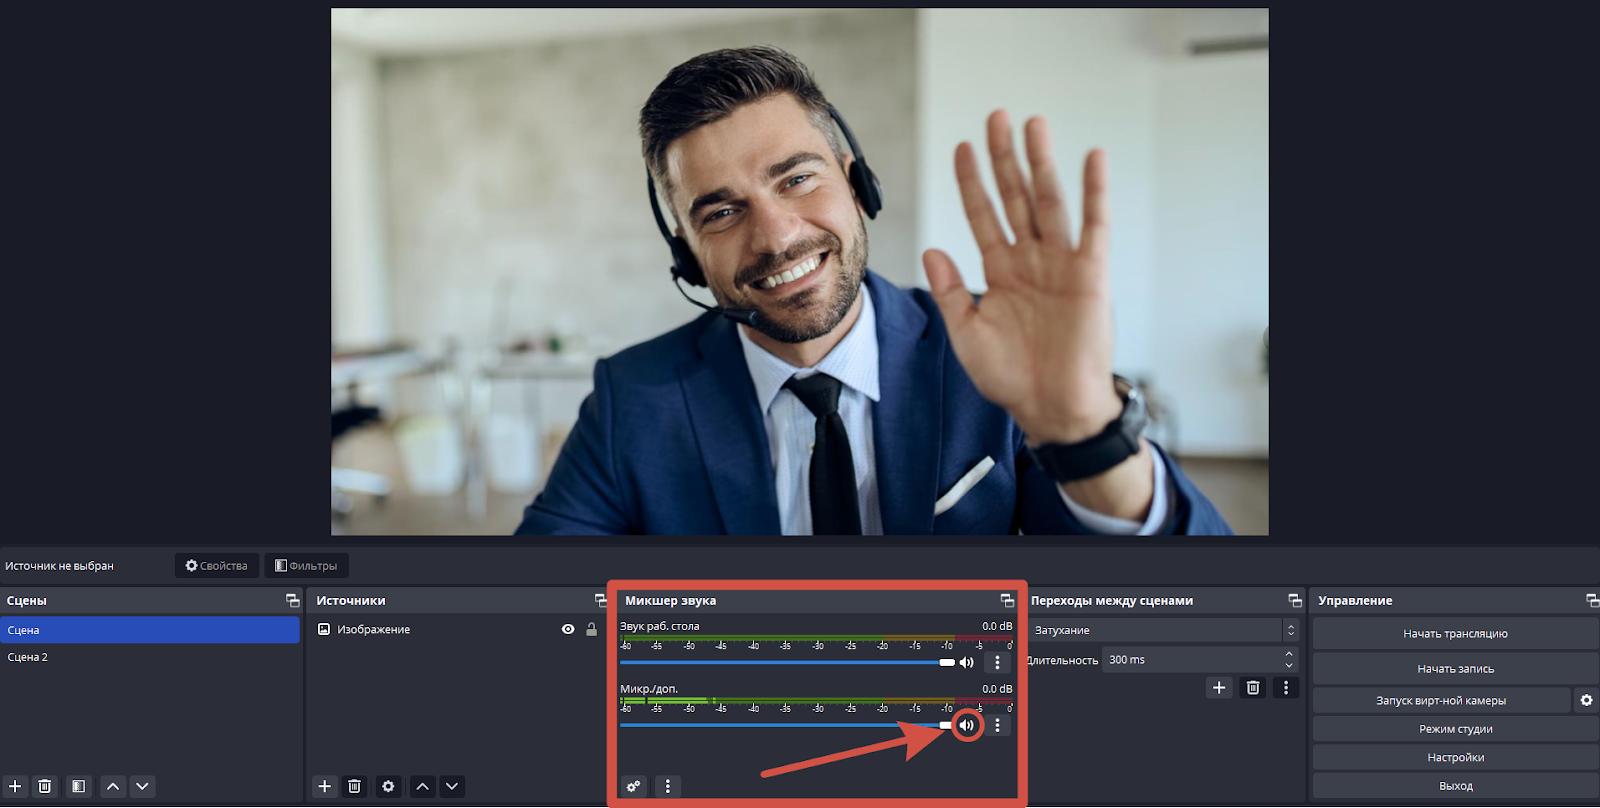
Перед началом трансляции, чтобы звук из вашего микрофона не дублировался, запустите OBS и на главном экране, в разделе «Микшер звука», отключите микрофон одинарным нажатием на значок в виде колонки.
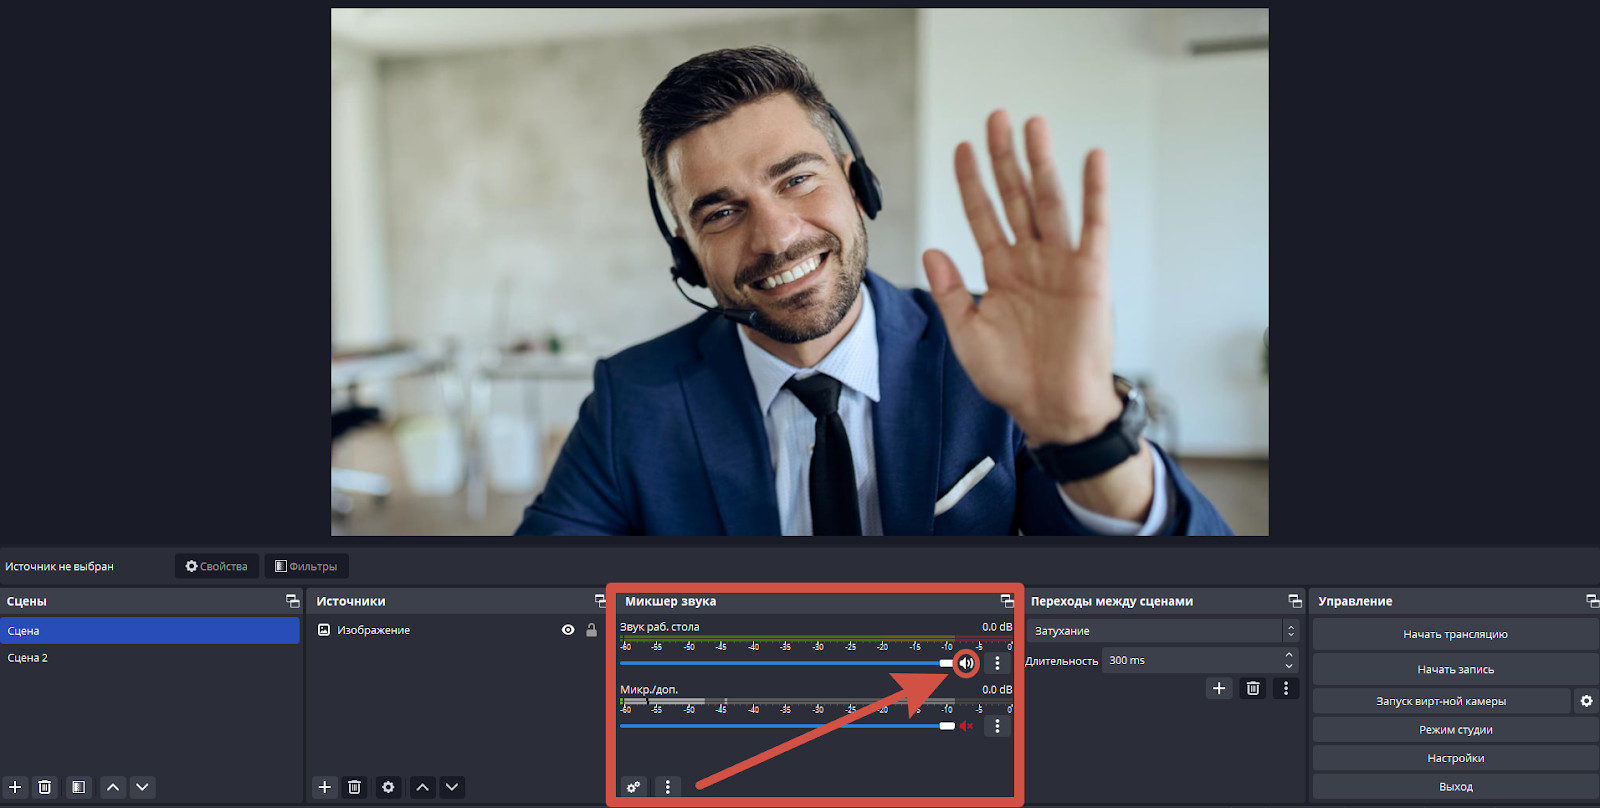
По желанию можете отключить звук с рабочего стола, чтобы остальные участники встречи не слышали себя два раза. Делается это одинарным нажатием на значок в виде колонки в разделе «Микшер звука».
После настройки звука необходимо создать сцену, которая будет транслироваться на платформу. Для создания сцены нажмите на иконку «+» в левом нижнем углу окна, в разделе «Сцены».
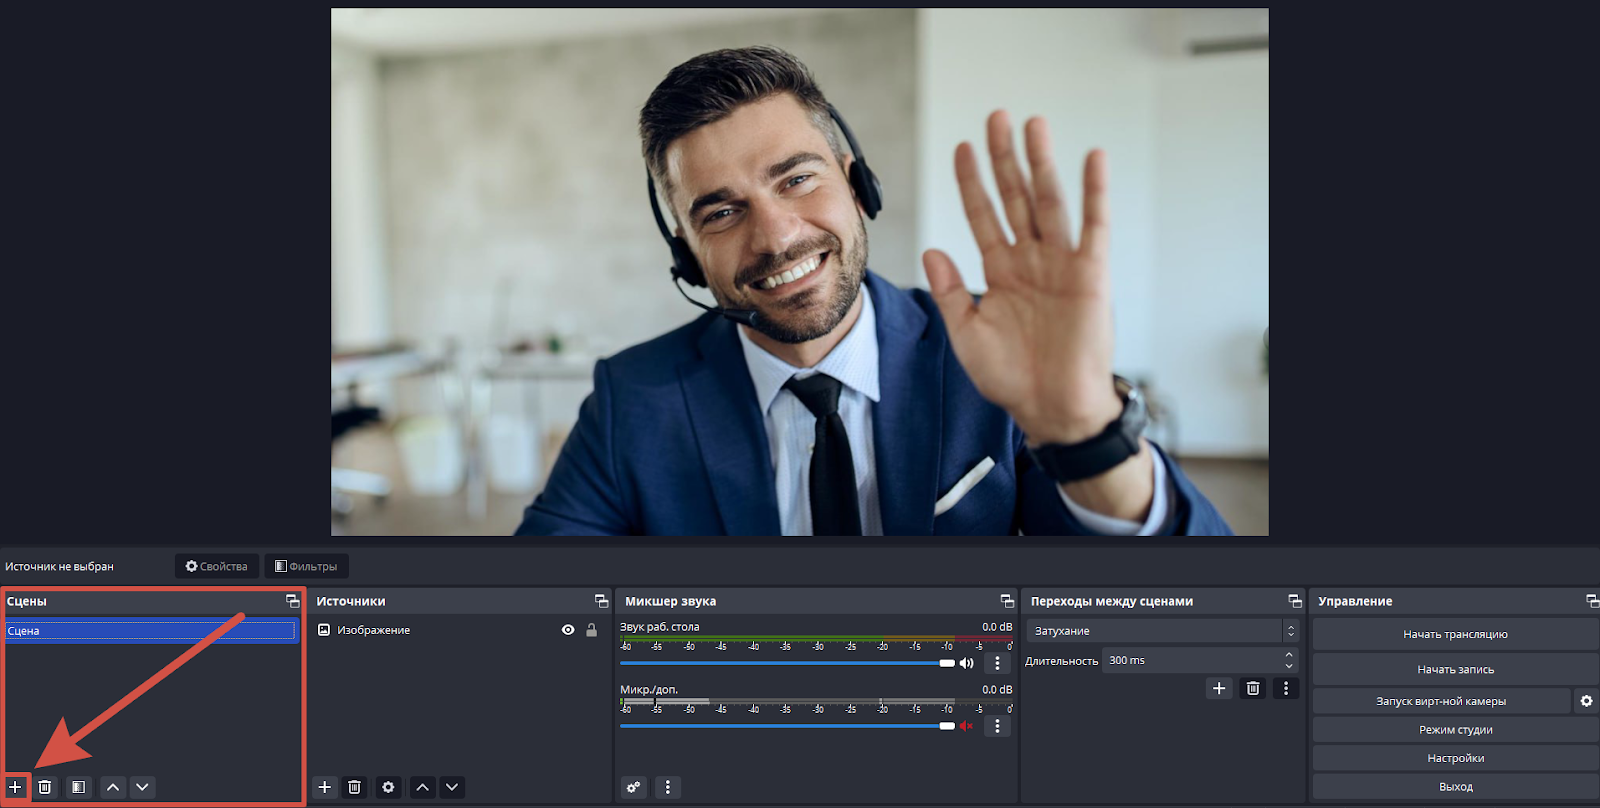
В открывшемся окне введите название сцены, а затем нажмите «ОК».

После создания сцены необходимо добавить источник. Для этого выберите ранее созданную сцену и, в разделе «Источники», нажмите на иконку «+».
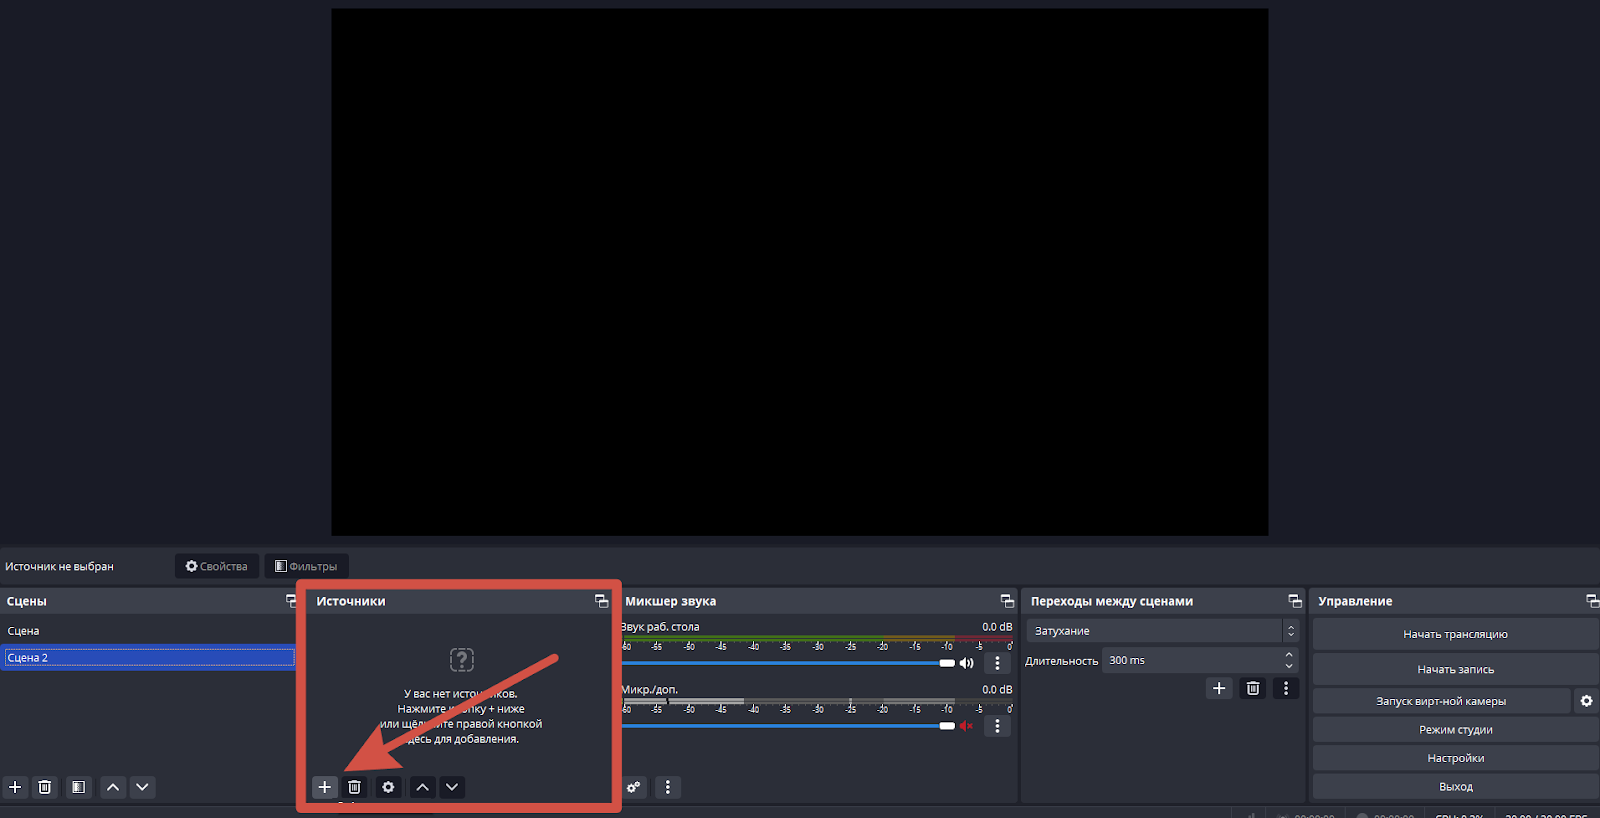
Далее в открывшемся меню выберите необходимый источник: захват экрана, захват окна или изображения.
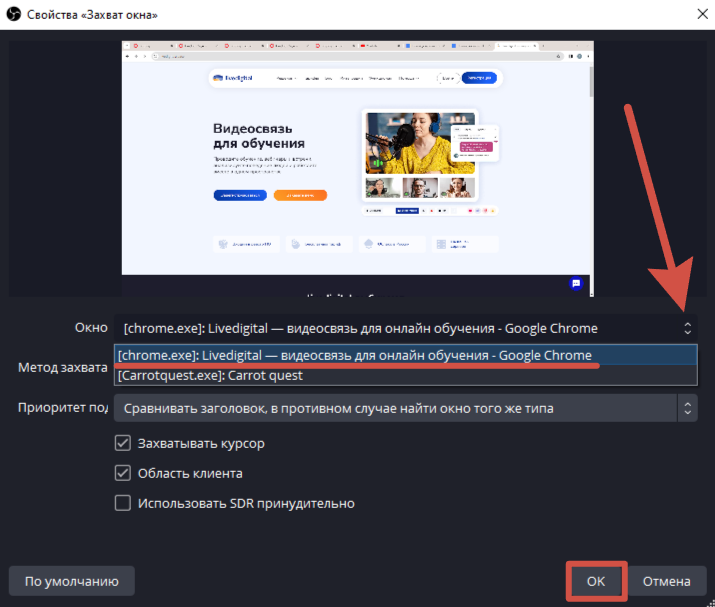
1. Захват окна — позволяет захватить изображение или видео с экрана компьютера, которое отображается в определенном окне программы или приложения.
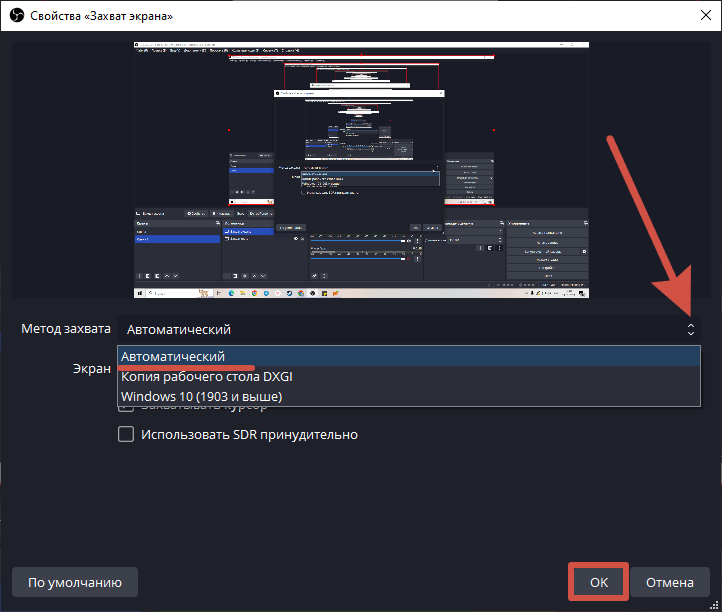
2. Захват экрана позволяет транслировать весь экран.
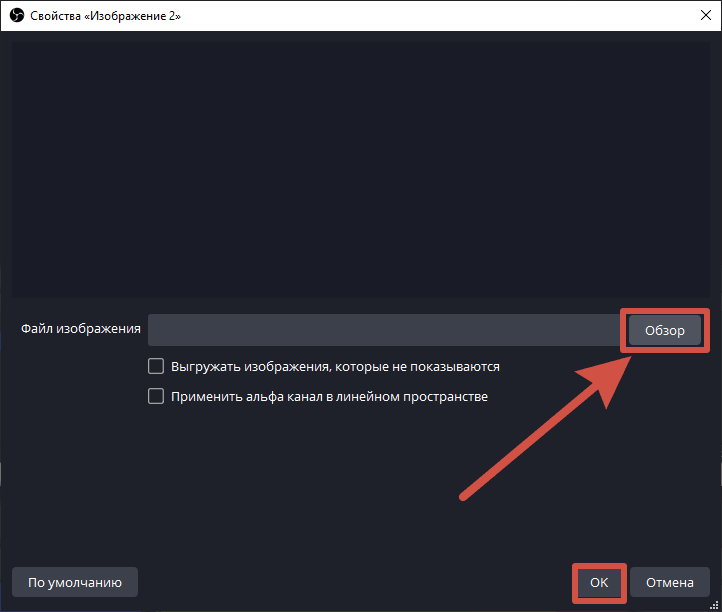
3. Режим захвата изображения — позволяет транслировать определенное изображение.
Захват окна
Выбрав опцию «Захват окна» откроется специальное меню выбора источника. Выберите «Создать новый» и нажмите «ОК».
Далее выберите окно с приложением, которое необходимо транслировать на livedigital и нажмите кнопку «ОК».
Захват экрана
При нажатии на кнопку «Захват экрана» откроется меню создания источника, в котором необходимо выбрать пункт «Создать новый» и нажать кнопку «ОК».
В следующем окне выберите метод захвата «Автоматический» и снова нажмите кнопку «ОК».
Захват изображения
Выбор метода «Захват изображения» вызовет меню, где необходимо ввести название источника и нажать кнопку «ОК».
В открывшемся окне нажмите кнопку «Обзор» и выберите нужное изображение, а затем нажмите «ОК».
Начало трансляции
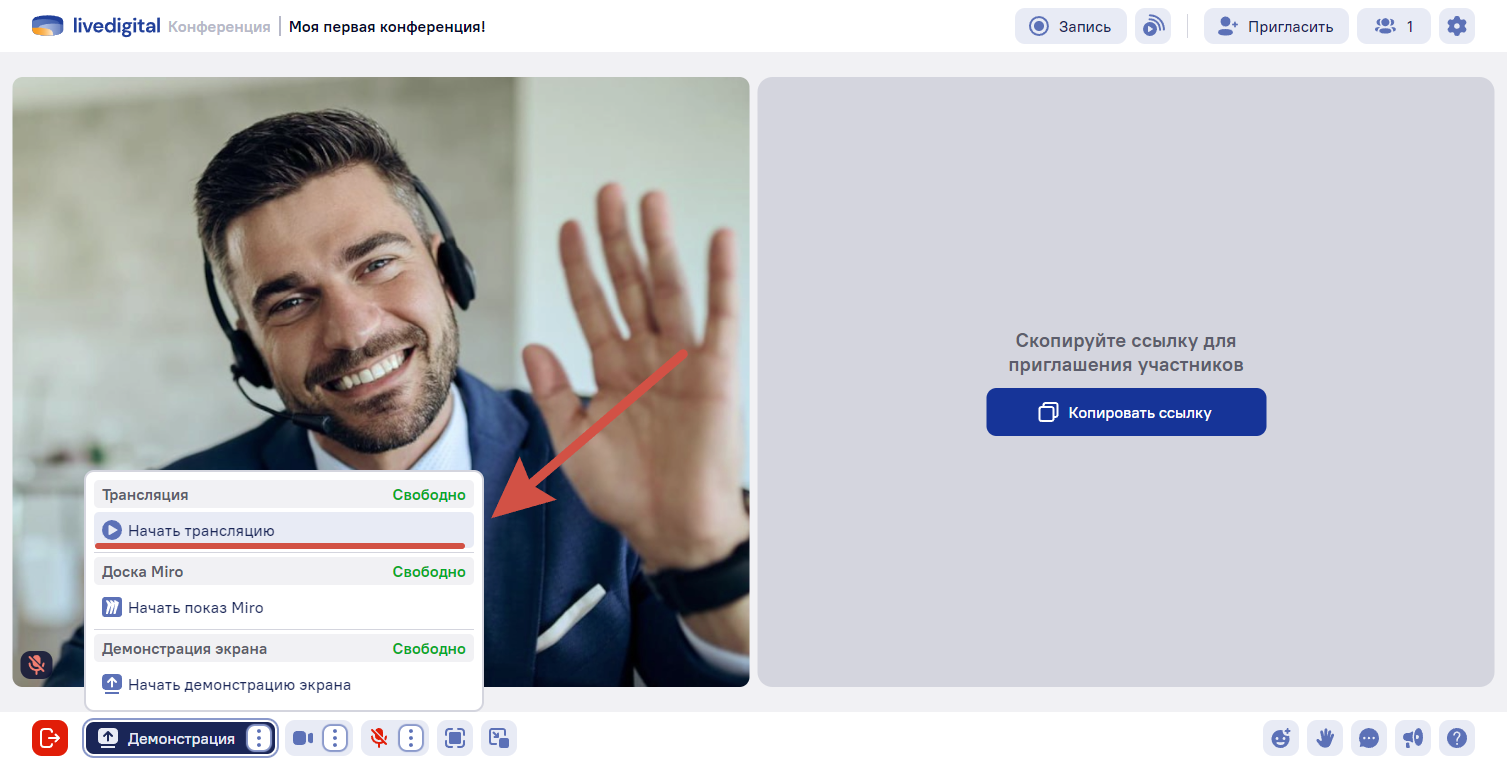
После того, как была выбрана сцена и источник трансляции, перейдите на платформу livedigital, а затем зайдите в комнату любого типа, где будет проходить встреча.
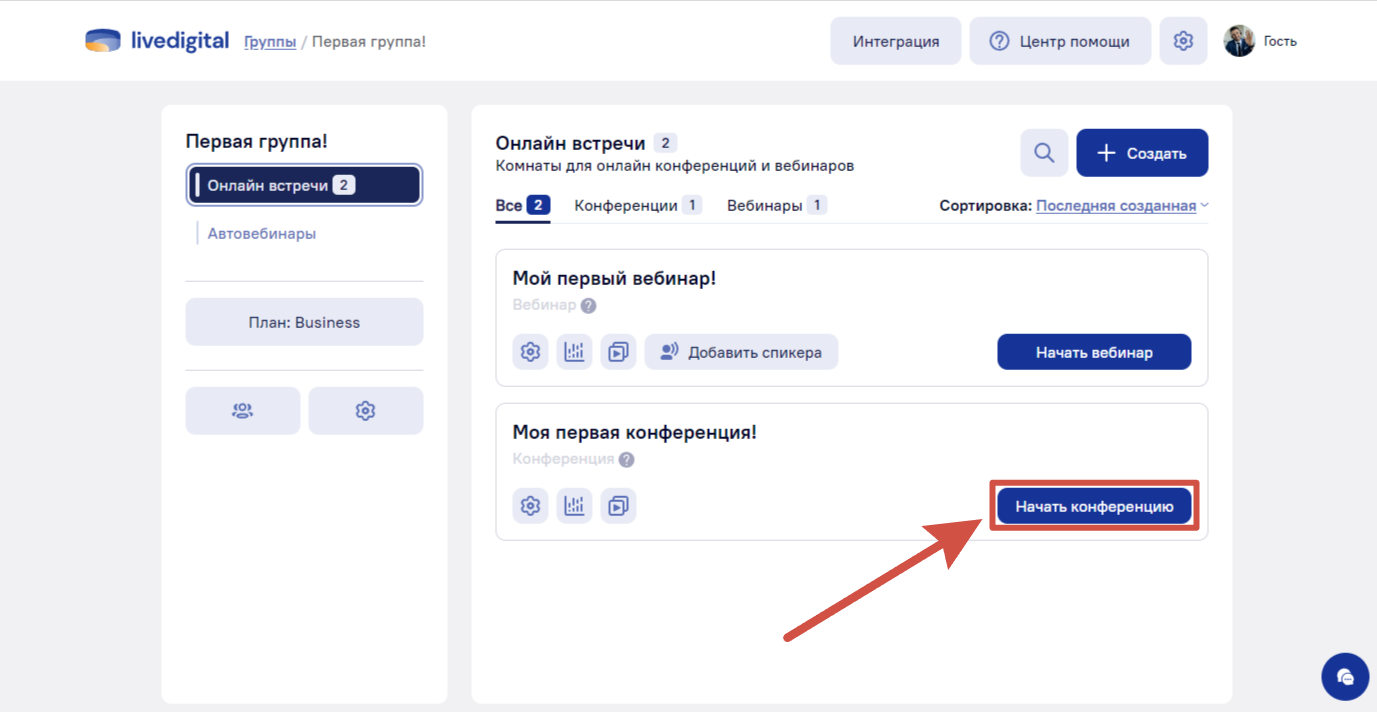
Находясь в комнате нажмите на кнопку «Демонстрация» и выберите пункт «Начать трансляцию».
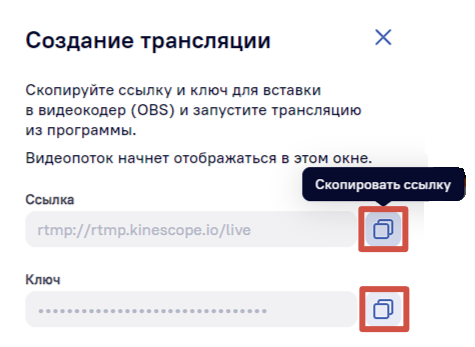
В открывшемся окне скопируйте два параметра: ссылку и ключ трансляции.
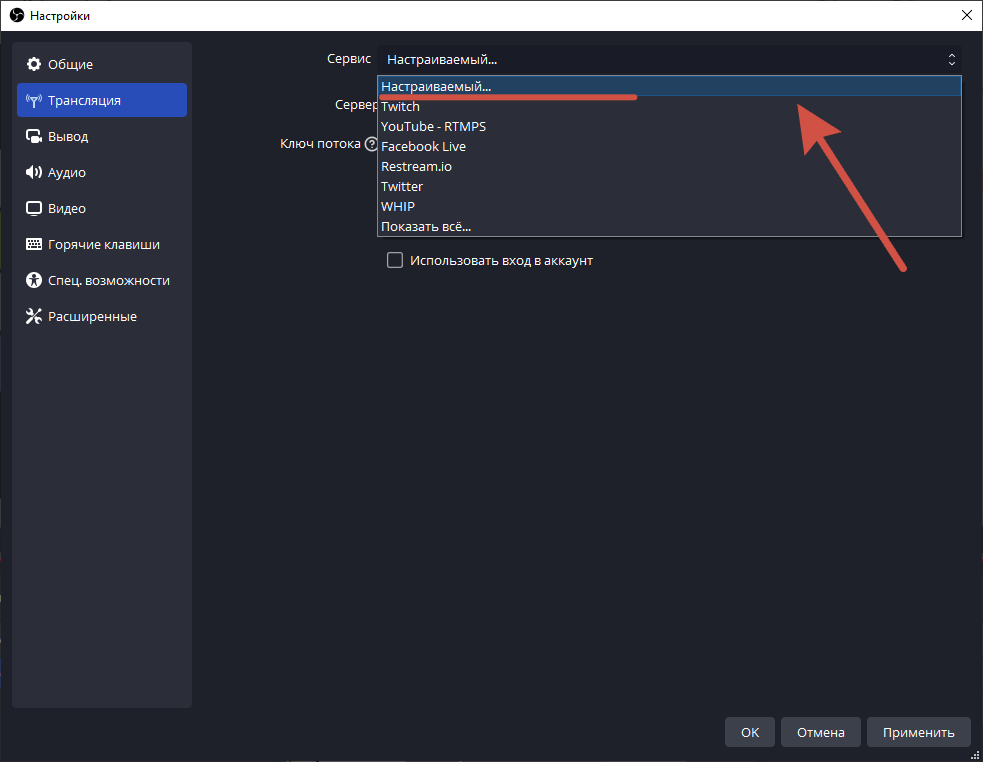
Затем перейдите в «OBS» и откройте настройки нажатием на кнопку «Файл» в верхнем левом углу и выберите «Настройки».
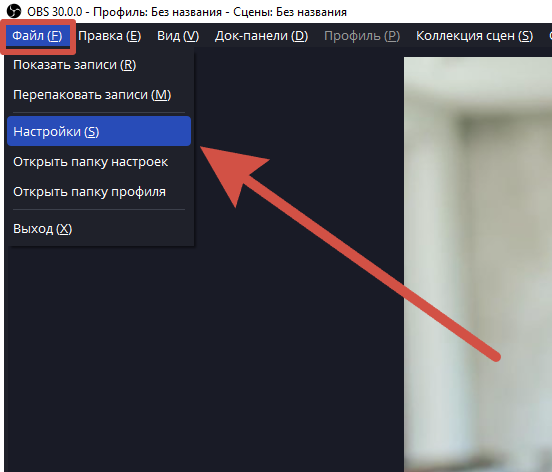
В настройках необходимо выбрать перейти в меню «Трансляция» и выбрать «Настраиваемый» сервис.
В появившиеся поля вставляем ранее скопированные параметры: в поле «Сервер» вставляем ссылку rtmp://rtmp.kinescope.io/live, а в поле «Ключ потока» вставляем ключ, нажимаем кнопку «Применить» сохраняем изменения нажатием на «ОК».
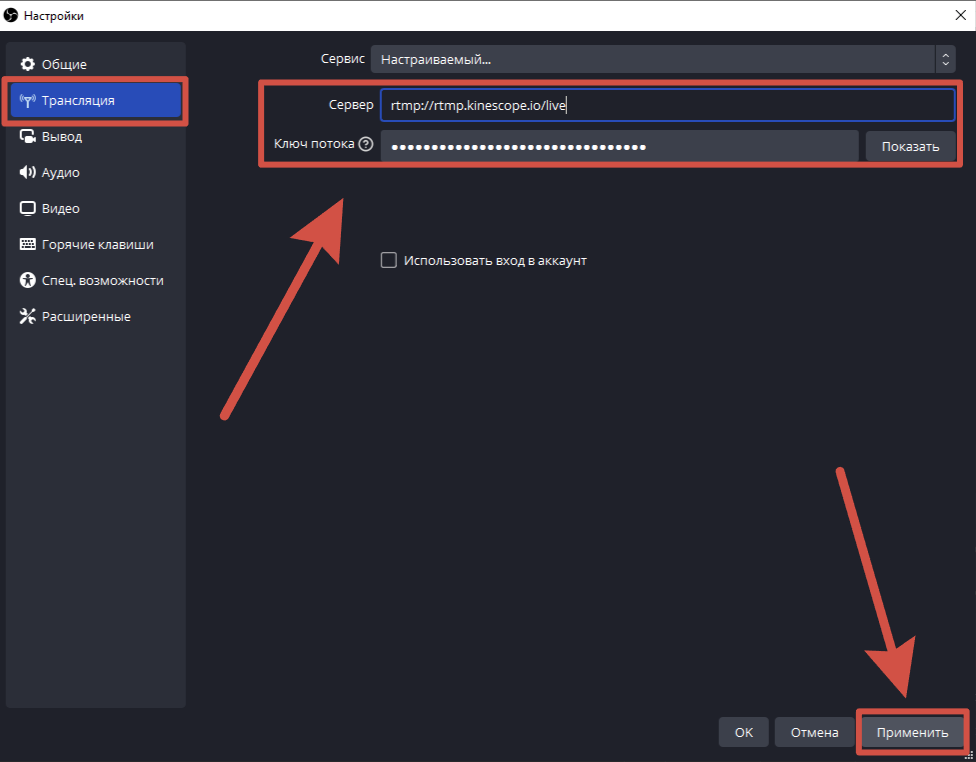
Важно! Ключ потока изменяется каждый раз, когда перезапускается трансляция.
Теперь можно начать трансляцию нажатием на специальную кнопку «Начать трансляцию» в разделе «Управление», в правой части экрана.
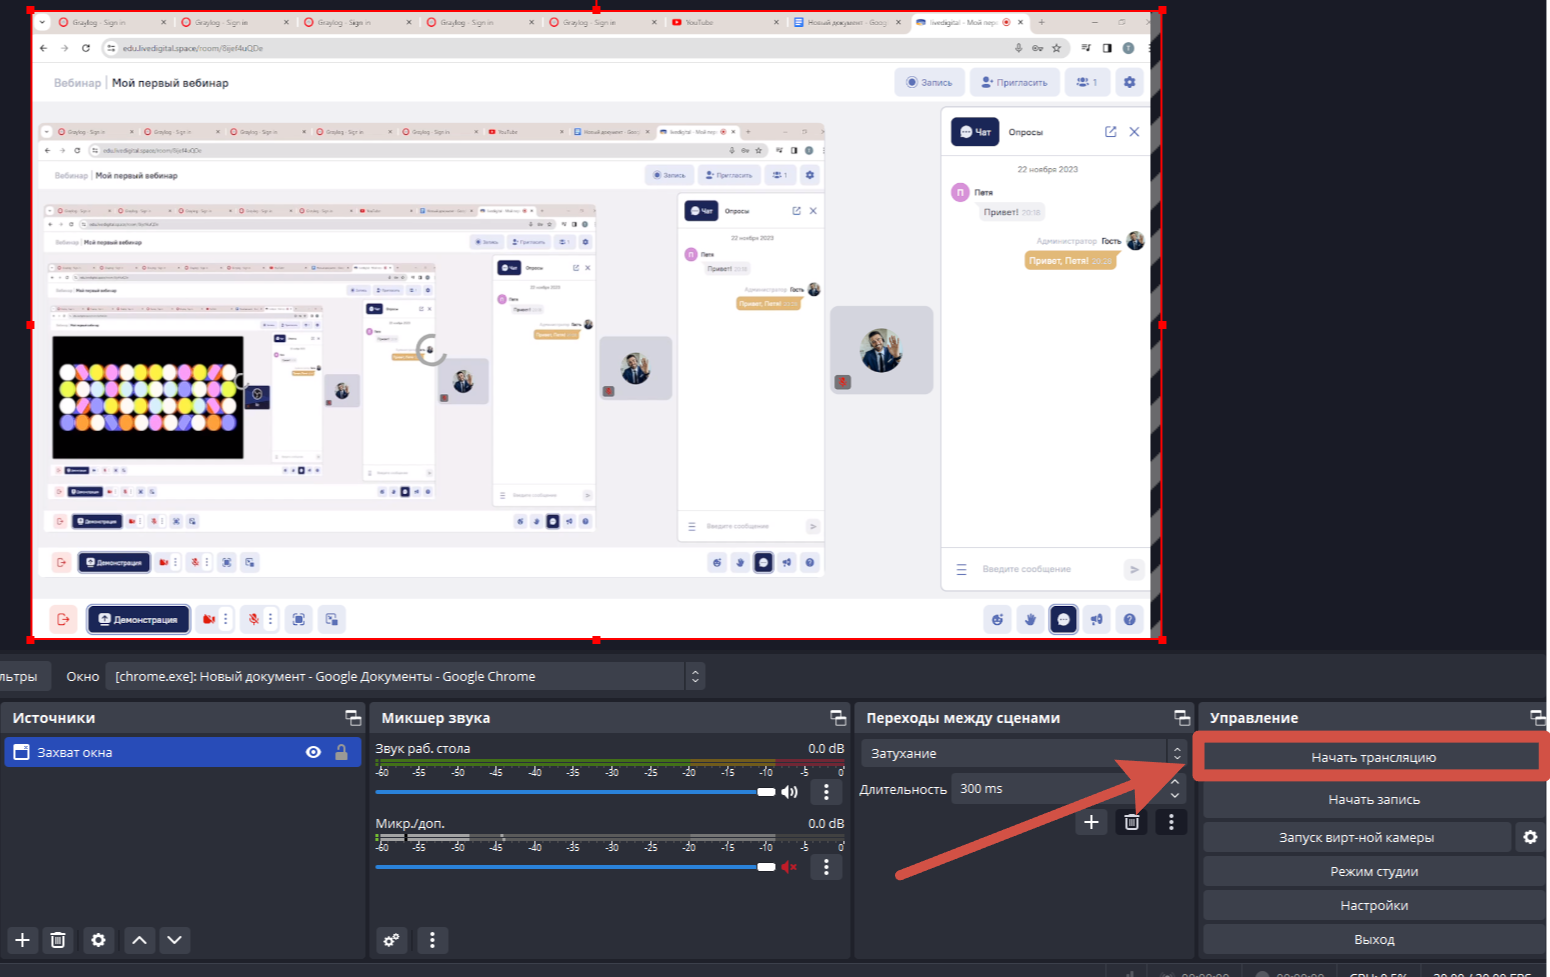
Перейдя на платформу можем заметить, что трансляция успешно запущена.
Трансляция с демонстрацией экрана, одна веб-камера, без чата
Open Broadcaster Software(OBS) is free and open-source software. The software can help you to record your screen and even you can do live streaming to a different platform such as YouTube, Mixer, and Twitch. OBS Studio is available for Windows, Mac, and Linux.
OBS has more features like can perform encoding using H264 and AAC, can store an unlimited amount of scenes and sources, allowing bilinear and lanczos3 resampling, and can give output files in MP4 or MLV format.
Here, we are going to discuss how to download and install OBS Studio on Windows 11. We will also see how to use the software to record computer screens.
Let’s first discuss, the downloading process of OBS.
Here are the steps you can follow:
1. Open any browser and search for OBS. Or simply open the link from obsproject.com
2. To download it for Windows 11, click on the Windows option and it will download the latest version of OBS onto your device.
3. After the download is complete, open the downloaded file to install OBS.
4. To install, first of all, you have to permit Windows. Now, on the setup window, click on the Next button to continue with the installation process.

5. After that, accept the license agreement to install OBS Studio and click on the Next button.

6. Select the installation folder, where you want to install the OBS Studio. If you don’t want to change the installation folder then keep it default.
7. After that, click on the Install button to continue.

8. It will take some time to install the software. Please wait for the installation process to complete.
9. Once it’s done, click the Finish button to close the setup window.
How to Configure OBS Studio on Windows 11
After the installation is completed, you have to optimize the OBS Studio software for recording the computer screen.
To do so, you can follow the steps mentioned below to optimize OBS Studio:
1. When you open OBS for the first time, you will be presented with the Auto-Configuration Wizard window.
2. Here, you have to optimize the software. If you want to use it for streaming then select the Optimize for streaming, recoding secondary option. For recording, select the Optimize just for recording, I will not be streaming option. If you want to use it for recording your virtual camera then select I will only be using the virtual camera option.
3. Then click on the Next button.

4. Now you have to configure your video settings. For that, select Base Resolution and FPS from the drop-down menu and click on the Next button.

5. On the next window, review your settings and click on the Apply Settings button to continue with the selected settings.
6. When you are done with the configuration, you can use the software.

How to Setup OBS Studio for Recording
Now, let’s discuss how we can set up OBS Studio to record the computer screen. If you have already optimized OBS Studio for recording purposes, you don’t need to change any settings. You just have to set up the scenes and sources for recording. However, if you want to record audio as well, you will need to set up the recording device.
Here are the steps to set up the OBS Studio for Recording:
1. Click on the plus icon to add the scene.
2. Here, you have to give a name to your scene and then click on the OK button.
You can record multiple scenes at a time. For that, you have to add multiple scenes on the Scenes tab.

3. Now, you have to add the source. For that, click on the plus icon on the Sources tab and select Display Capture as you want to record the computer screen. From here, you can also add the Audio Input Capture device.

4. On the next window, give a name to your source and select the Make source visible option. When you make the source visible, you can view the recording area on the OBS interface.
5. Then, click on the OK button.
6. Now, select the Capture Method and Display from the drop-down menu.
7. If you want to capture the cursor of your mouse then select Capture Cursor and click on OK to continue.

8. To record the audio, click on the Settings icon next to the mic/aux option and click on the Properties option.
9. After that, it will open a window to select your microphone. To choose the microphone, click on the drop-down menu, select the microphone, and click on the OK button.

10. Now, you’re ready to record your computer screen. For that, click on the Start Recording option.

How to Setup OBS Studio for Live Stream
Now, if you want to do live streaming, you need to set up OBS Studio for it. Once again, you have to create a scene and add the sources you want to include in your live stream. OBS Studio supports live streaming on platforms such as YouTube, Twitch, Mixer, and more.
To set it up, follow the steps below:
1. Go to Settings and click on the Stream option.
2. Here, you have to select the Service and the Server from the drop-down menu.
3. After that, you have to enter the stream key and click on the Apply button.

4. If you want, you can simply connect the stream account to OBS Studio. To start the stream, click on the Start Stream option.

Conclusion
That’s it, this is how you can install and set up OBS Studio on Windows 11 and start recording your computer screen. However, if you encounter any issues with the microphone in OBS, you can refer to our guide on how to fix the OBS microphone not working on Windows 11.
Installing and setting up OBS Studio on Windows 11 is a straightforward process. You can follow the above-outlined steps; to quickly get OBS Studio up and running, customize your scenes and sources, and start capturing high-quality content.