
- How to use the command history function in Command Prompt
- How to open Command Prompt on Windows 10, 8, 7, Vista and XP
In the following article, let’s learn about how to open Command Prompt during Windows installation.
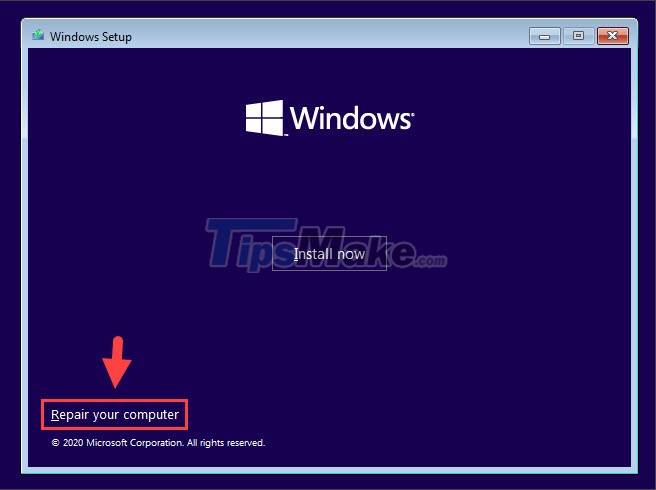
1. On the Windows 10 installation interface
Step 1: On the installation screen, click Repair your computer.
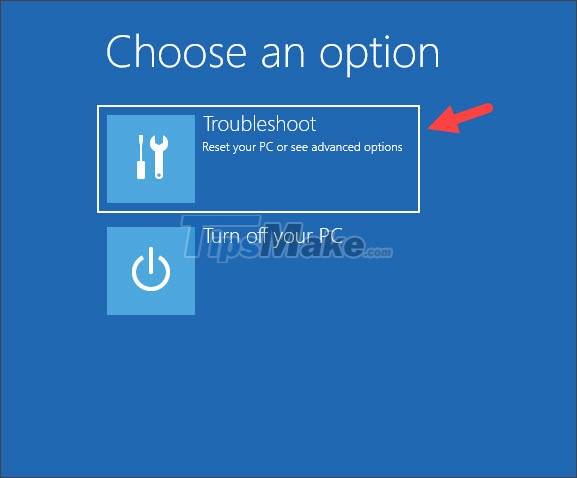
Step 2: Click Troubleshoot.
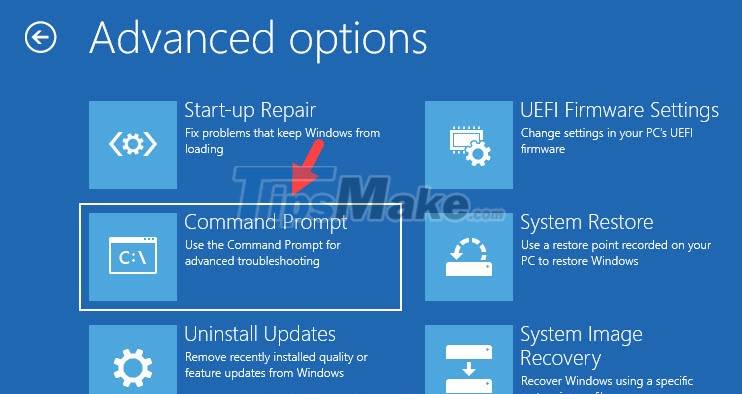
Step 3: You choose Command Prompt.
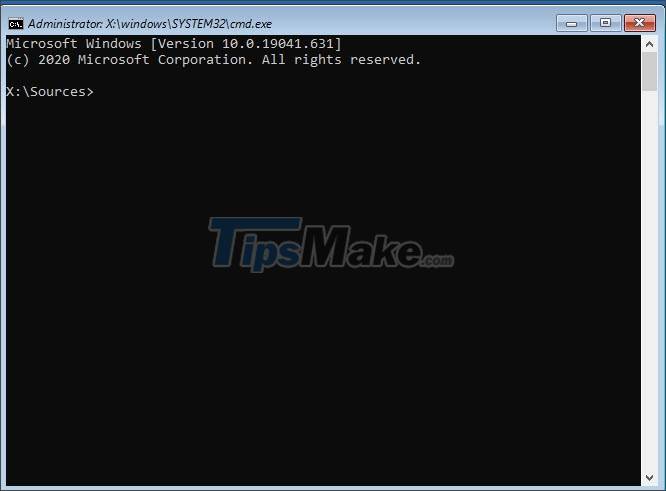
After that, the Command Prompt window will appear as success.
2. On the Windows 8/8.1 installation interface
Step 1: Click Repair your computer.

Step 2: Click Troubleshoot.

Step 3: Click on Advanced options.

Step 4: You choose Command Prompt.

After that, the Command Prompt window will appear and you can perform CMD commands on it.

3. On the Windows 7 installation interface
On the Windows 7 installation interface, you do not need to click Repair your computer, but use a keyboard shortcut to open the Command Prompt.
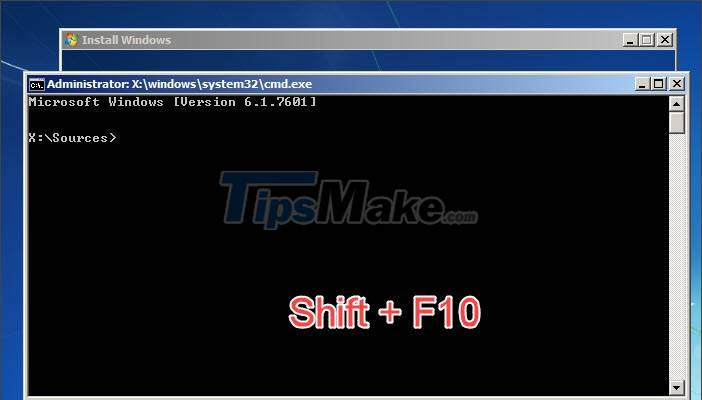
Press the keyboard shortcut Shift + F10 and the Command Prompt window will appear on the screen.
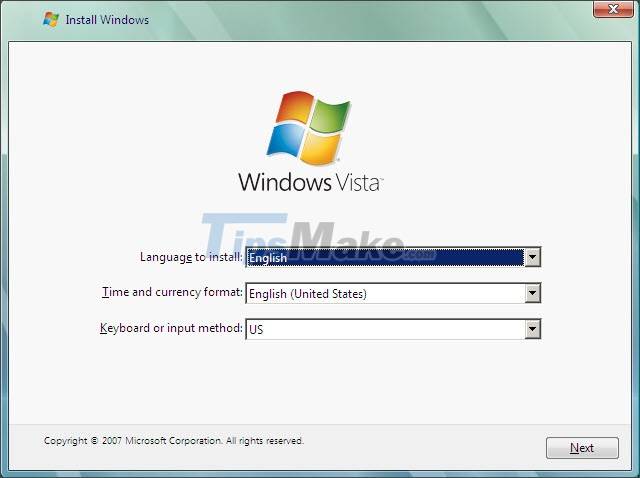
4. On the Windows Vista installation interface
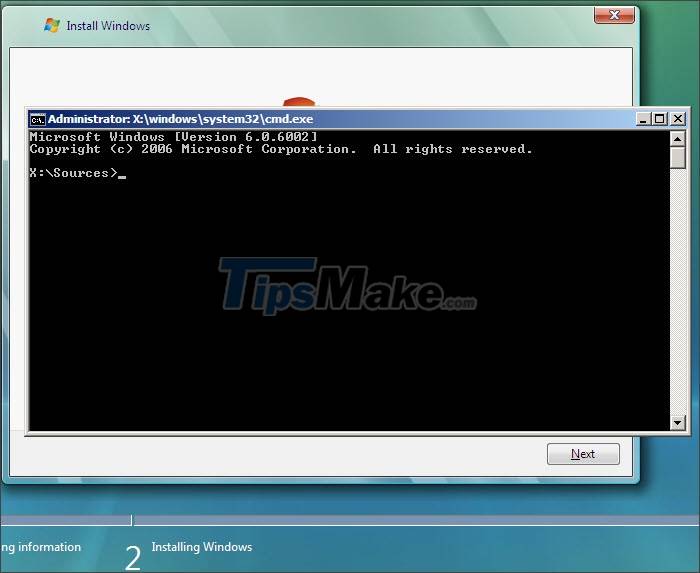
Similar to Windows 7, you can open Command Prompt on Windows Vista with the keyboard shortcut Shift + F10.
After executing the Shift + F10 command, the Command Prompt window will appear on the screen.
5. On the Windows XP installation interface
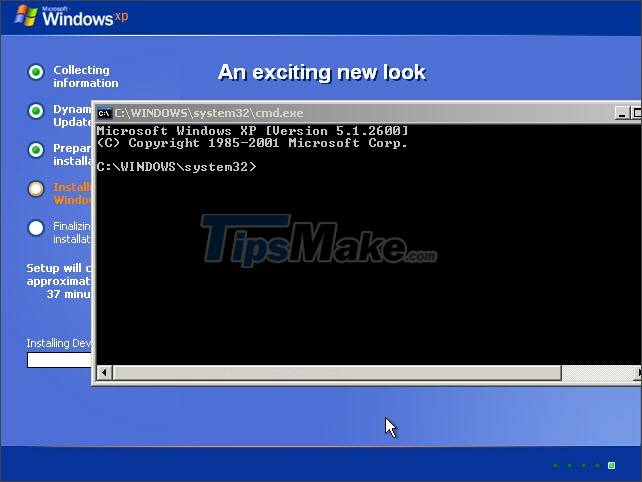
For Windows XP, you will be able to open the Command Prompt while installing to the Installing Windows step. In the meantime, press Shift + F10.
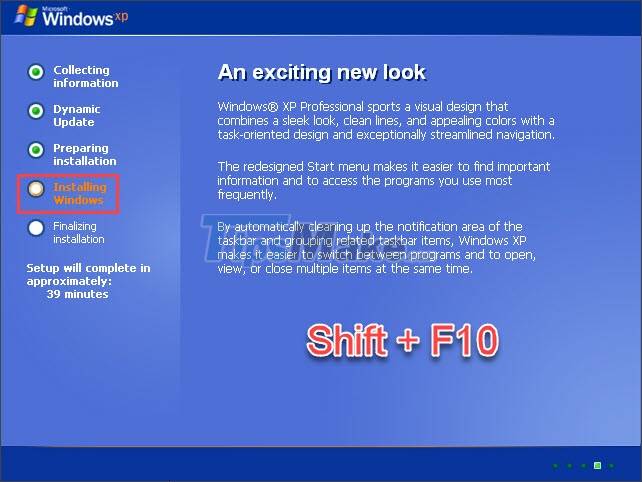
After pressing the Shift + F10 combination, the Command Prompt window will display on our screen.
Through sharing in this article, you can quickly and easily open the Command Prompt dialog box and perform CMD commands during Windows installation. Good luck!
5 stars4 stars3 stars2 stars1 star3.9 ★ | 132 Vote
You should read it
- Add Command Prompt to Power User Menu on Windows 10
- How to Execute a Program in Command Prompt
- How to Open Folders in CMD
- How to Make Command Prompt Appear at School
- How to open Microsoft Excel from Command Prompt
- Instructions for using Command Prompt
- How to Watch Star Wars on Command Prompt
- How to open Microsoft Word from Command Prompt
May be interested
- Common GHOST errors and how to fix them
summary of common errors when ghosting and instructions on how to fix it. you should consult before performing the ghost to be able to grasp the cause and offer a solution.
- Download Ghost Windows 10 LTSB 1607 2021

windows 10 ltsb is a stripped-down version of windows released by microsoft in 2016, which removed all unnecessary components to provide the most stable lightweight version of windows 10 ltsb 2016.
- Create a Windows installation USB on Ubuntu using the WoeUSB tool
detailed instructions on how to create a windows usb install on ubuntu operating system through the woeusb tool. tips to create usb install win on linux fastest
- How to download a Windows installer, Office directly from Microsoft
instructions on how to download the original windows installer, download the original office installer (all versions). download the iso file to install from the microsoft homepage
- Link to download the ISO file Windows 10 20H1 directly from Microsoft
there are many ways to get the link to download the iso windows 10 20h1 file online, but many of them are not safe, contain many malicious codes that steal user information, for the best safety, users should get the download link. genuine windows 10 iso file 20h1 from the publisher microsoft.
- How to create Hiren’s BootCD PE using ISO2USB
how to create hiren’s bootcd pe x64 usb, a legendary professional computer rescue toolkit. create professional rescue usb with hiren’s bootcd pe x64 latest updated from the author of hiren’s bootcd
Предположим, вам крайне понадобилась командная строка при установке Windows 7 с диска либо флешки, еще до того, как операционная система будет успешно установлена. В некоторых ситуациях командная строка весьма пригодится именно в таких условиях.
Причем речь идет о командной строке именно в процессе установки, а не после того, как Windows уже готова к работе. Ну вот такой вы хитрый изощренец, хочется вам и все тут.
Открыть командную строку при установке Windows 7 невероятно просто. С ее помощью можно будет как ввести соответствующую команду, так и запустить программу, которая понадобится в процессе установки.
Достаточно начать загрузку любым удобным вам образом (с диска либо флешки), после чего на первом же окне установки Windows 7 нажать комбинацию клавиш <Shift+F10>.
Первое окно установки Windows 7 (именно здесь нужно нажать указанную комбинацию клавиш)

Вот, собственно, и все. После нажатия указанной комбинации клавиш откроется командная строка и делайте с ней, что хотите. То, что вам подскажет ваша бурная фантазия 
-
Home
-
News
- [Full Guide] How to Install Windows 10 from Command Prompt?
By Yamila | Follow |
Last Updated
In some cases, you may consider installing Windows 10 with Command Prompt. How can you do that? In this post, MiniTool Partition Wizard provides a step-by-step guide on how to install Windows 10 from Command Prompt. You can take a look.
For some reason, you may randomly want to install Windows 10 from Command Prompt. To help you complete this operation, there are two methods available. Just keep reading and pick one according to your needs.
Note:
Before you install Windows from Command Prompt, you should first click here to download the Windows 10 ISO file. Then right-click the file in File Explorer and select Mount.
Method 1: Install Windows 10 from CD/DVD Using Command Prompt
If you have a CD/DVD, you can easily learn how to install Windows 10 from Command Prompt with it by following the steps below.
Step 1: Press Windows + R to open the Run dialog.
Step 2: Type cmd in the text box and then press Ctrl + Shift + Enter to open Command Prompt as an administrator.
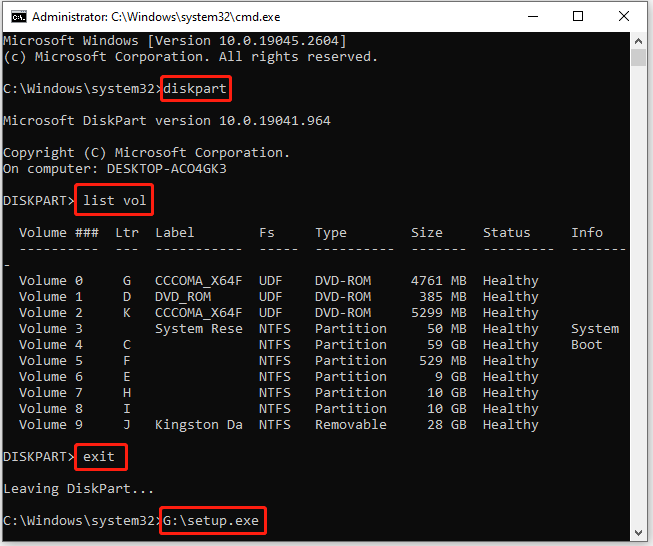
Step 3: In the elevated Command Prompt, type diskpart and press Enter.
Step 4: After that, type list vol and press Enter to execute this command. It will list all the volumes in your system. You should figure out the correct volume containing the mounted Windows 10 ISO file.
Step 5: Type exit and press Enter to quit Diskpart. Then execute the G:\setup.exe command to open the Windows 10 Setup window.
Tips:
Replace G with the drive letter of your drive where the ISO file locates.
Step 6: Follow the on-screen instructions to install Windows 10 from Command Prompt.
Method 2: Install Windows 10 from USB Using Command Prompt
In addition to installing Windows 10 from CD/DVD, it’s also a great way to use a USB drive to install Windows 10. Here’s detailed information on how to install Windows 10 from USB using Command Prompt.
Note:
The USB drive you use to install Windows from Command Prompt should have at least 8GB of space. Besides, it’s necessary to make a backup if there are important files on the USB drive.
Step 1: Connect the prepared USB drive to your PC.
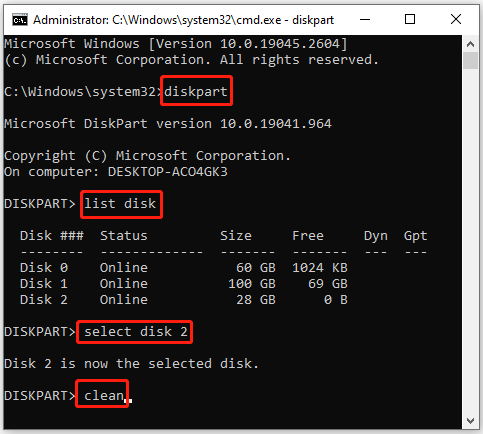
Step 2: Run Command Prompt as an administrator. Then type the following commands one by one and press Enter after each to erase the USB drive.
- diskpart
- list disk
- select disk N (N represents the number of your USB drive)
- clean
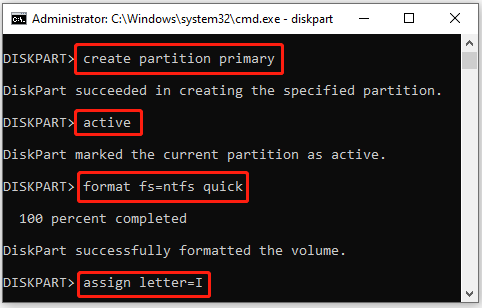
Step 3: After cleaning the USB drive, recreate a new partition by running the given commands.
- create partition primary
- select partition X (Replace X with the number of the newly created partition; you can use the list partition command to find the partition number if you are not sure which it is)
- active
- format fs=ntfs quick (You can also format the partition to FAT32 instead of NTFS)
- assign letter=I
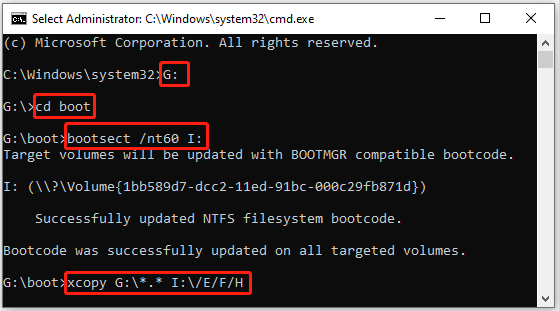
Step 4: Once done, exit Diskpart. Then execute these commands so that you can navigate to the mounted ISO image and copy it to the target USB drive.
- G: (G is the drive letter of the drive with the mounted Windows ISO image)
- cd boot
- bootsect /nt60 I: (I refers to your USB drive’s drive letter)
- xcopy G:\*.* I:\ /E /F /H (/E copies all subfolders, /H copies all hidden files, and /F displays all source and destination file names as it’s copying.)
Step 5: Set the USB drive as the first boot option with this guide: How To Change Boot Order Safely On Windows Device. Then reboot your PC from the USB drive and follow the on-screen instructions to install Windows 10.
That’s all about how to install Windows 10 from USB using Command Prompt. You can have a try.
Bonus Tip: Obtain Windows 10 Without Installing OS
From the above, you may learn how to install Windows 10 from Command Prompt. It’s a helpful but time-consuming way. And if you are not familiar with these command lines, you may sometimes feel confused while installing Windows 10 with Command Prompt.
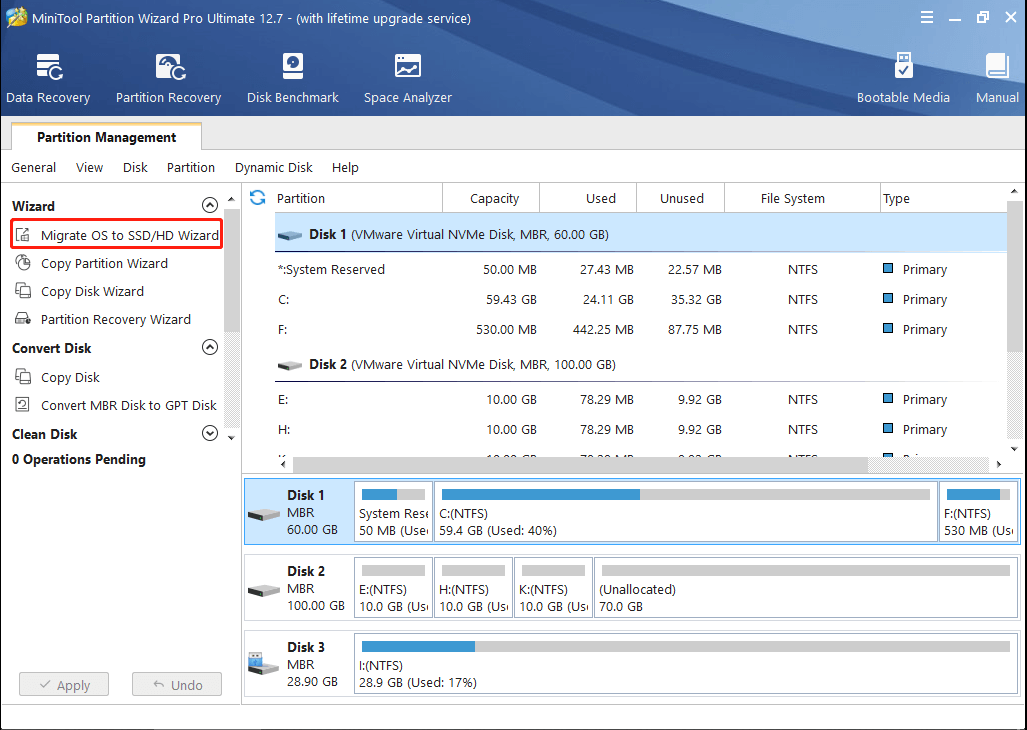
Is there an easier way to get Windows 10 on your computer? Well, to simplify the Windows installation, we’d like to recommend you take advantage of MiniTool Partition Wizard. It’s a professional disk partition software that enables you to migrate OS to SSD without installing the OS.
Therefore, if you have another computer that is running Windows 10 properly, you can try using an SSD drive to transfer the operating system to the target computer with MiniTool Partition Wizard. To do this, you need to get this program installed on the source computer to migrate Windows 10 to SSD. Then connect the SSD with Windows 10 to the target computer.
MiniTool Partition Wizard DemoClick to Download100%Clean & Safe
After reading this post, you may find ways to effectively install Windows 10 from Command Prompt. Besides, you can try getting Windows more quickly and easily with MiniTool Partition Wizard. If you have any problems with Windows installation, you can leave a message in the comment part below.
About The Author
Position: Columnist
Yamila is a fan of computer science. She can solve many common issues for computer users by writing articles with simple and clear words. The very aspect that she is good at is partition management including create partition, format partition, copy disk and so on.
When she is free, she enjoys reading, doing some excerpts, listening to music and playing games.
Installing Windows using CMD. (UEFI and BIOS Supported)
Guide created by Andrew Lee
Note that this guide does not go into detail, it’s just providing the commands to install Windows.
Be cautions when doing this when dualbooting, please backup any existing data or you will lose them all.
Open CMD
First open CMD by pressing the following keys after booting into setup: Shift + F10
Creating Partition
MBR
diskpart
list disk
select disk (number for main disk)
clean # Clearing the partitions
convert mbr
-----------------------
(Creating recovery is optional)
create part primary size 500
format quick label Recovery
assign letter R
set id 27
-----------------------
create part primary
format quick label Windows (or label of your choice)
assign letter C (or E)
active
exit
UEFI
diskpart
list disk
select disk (number for main disk)
clean # Clearing the partitions
convert gpt
create part efi size 512
format fs fat32 quick
assign letter w
create part msr size 16
-----------------------
(Creating recovery is optional)
create part primary size 500
format quick label Recovery
assign letter R
set id de94bba4-06d1-4d40-a16a-bfd50179d6ac
gpt attributes 0x8000000000000001
-----------------------
create part primary
format quick label Windows (or label of your choice)
assign letter C (or E)
exit
Go to install.wim directory
[letter of installation disk]:
cd sources
List SKUs
Listing SKUs like Home, Pro, Education, Ultimate, etc.
dism /get-wiminfo /wimfile:[Location to install.wim]
Deploying WIM file
Copies the content from the install.wim file to the main disk.
dism /apply-image /imagefile:[Location to install.wim] /index:[SKU Number] /applydir:(Drive letter to main disk)
e.g dism /apply-image /imagefile:d:\sources\install.wim /index:6 (Win10 Pro) /applydir:C:\
Creating recovery folders and copying Windows RE to the recovery partition (Optional)
md R:\Recovery
xcopy /h C:\Windows\System32\Recovery\Winre.wim R:\Recovery
C:\Windows\System32\Reagentc /Setreimage /Path R:\Recovery /Target C:\Windows
Creating boot files
MBR only
bootsect /nt60 C: (or E:) /force /mbr
MBR + UEFI
bcdboot (Drive letter to main disk):\Windows
Add argument if it’s UEFI (if needed)
/s [drive letter to UEFI]:
Bypassing the OOBE entirely (Optional)
reg load HKLM\SOFT C:\Windows\System32\config\SOFTWARE
reg load HKLM\SYS C:\Windows\System32\config\SYSTEM
reg add HKLM\SOFT\Microsoft\Windows\CurrentVersion\Policies\System /v VerboseStatus /t REG_DWORD /d 1 /f
reg add HKLM\SOFT\Microsoft\Windows\CurrentVersion\Policies\System /v EnableCursorSuppression /t REG_DWORD /d 0 /f
reg add HKLM\SYS\Setup /v CmdLine /t REG_SZ /d cmd.exe /f
Reboot
wpeutil reboot
Bypassing the OOBE entirely (P2)
Run Windows Deployment Loader then enable recovery
oobe\windeploy
Reagentc /enable (if you made a recovery parition)
Reagentc /Info /Target C:\Windows
Add user (When the boot status says «Getting Ready»)
net user /add (username) (password)
net localgroup users /add (username) # in case Windows didn't add the users group
net localgroup administrators /add (username)
Clear OOBE status
reg add HKLM\SYSTEM\Setup /v OOBEInProgress /t REG_DWORD /d 0 /f
reg add HKLM\SYSTEM\Setup /v SetupType /t REG_DWORD /d 0 /f
reg add HKLM\SYSTEM\Setup /v SystemSetupInProgress /t REG_DWORD /d 0 /f
exit
Disabling VerboseStatus and Enabling CursorSuppression (Optional)
When entering the desktop open CMD as admin and run the following.
reg add HKLM\SOFT\Microsoft\Windows\CurrentVersion\Policies\System /v VerboseStatus /t REG_DWORD /d 0 /f
reg add HKLM\SOFT\Microsoft\Windows\CurrentVersion\Policies\System /v EnableCursorSuppression /t REG_DWORD /d 1 /f
Credits
If there’s anything that needs to be added, feel free to tell me in the comments below!
- Caesar (TheDarkBomber#0229): For helping fixing some things in the script that I forgot or needed to add.