
Applies ToЗаписки
Ваши заметки живут не в одном месте. Вы можете взять с собой заметки, что позволяет записывать, находить и использовать заметки в приложениях и на ваших любимых устройствах.
Примечание: В настоящее время вы не можете Записки оставаться на вершине других приложений. Но вы можете закрепить Записки на панели задач Windows, чтобы мгновенно просмотреть список заметок или быстро создать новую заметку. Щелкните правой кнопкой мыши значок Записки на панели задач и выберите пункт Закрепить на панели задач.
В Windows 10 & 11 вам не нужно входить в учетную запись Майкрософт, чтобы начать использовать Записки. Просто начните Записки и начать jotting прочь. Записки откроется там, где вы оставили их.
Чтобы просматривать заметки на любимых устройствах в Интернете, вам потребуется, чтобы все устройства вошли в одну учетную запись Майкрософт.
Войдите, чтобы просмотреть заметки
В Записки версии 3.0 и более поздних вы можете войти в систему, чтобы синхронизировать заметки, чтобы вы могли просматривать одни и те же заметки в приложениях и на ваших любимых устройствах. Как правило, эти устройства имеют команду settings или ссылку, которые можно использовать. Если вы не уверены, обратитесь к документации по устройству.
Для Windows 10 & 11 выполните следующие действия, чтобы войти в Записки:
-
Откройте Записки и в списке заметок нажмите кнопку Параметры, расположенную в правом верхнем углу.
-
Если вы еще не вошли в систему, выберите Войти и введите учетные данные учетной записи Майкрософт.
Если вы используете новую учетную запись, вам будет предложено ввести дополнительные сведения, такие как адрес электронной почты или пароль.
-
Нажмите Продолжить.
Просмотр заметок на других устройствах
Ниже приведены некоторые места, где вы увидите синхронизированные заметки. Следите за новостями, так как этот список будет расти по мере того, как разработчики приложений узнают о ценности интеграции Записки, где вы работаете.
-
iPhone Ваши заметки отображаются с OneNote для iPhone. Откройте OneNote, а затем в правом нижнем углу коснитесь Записки. Посетите App Store iOS, чтобы установить OneNote с Записки.
-
Телефон Android Ваши заметки отображаются на OneNote для Android телефонах. Откройте OneNote, а затем в правом нижнем углу коснитесь Записки. Посетите Google Play Store, чтобы установить OneNote с Записки.
Вы также можете быстро получить доступ к заметкам без OneNote, если вы используете Microsoft Launcher в качестве пользовательского начального экрана для телефона с Android. На начальном экране Android проведите по левому краю, чтобы просмотреть веб-канал, а затем проведите вниз и коснитесь пункта Настроить веб-канал , чтобы добавить карточки. Снова проведите пальцем вниз и включите Записки, чтобы добавить в веб-канал.
-
Интернет Ваши заметки также синхронизируются с Интернетом. Перейдите к www.onenote.com/stickynotes , чтобы просмотреть их. Возможно, вам потребуется войти в предпочитаемый браузер с учетными данными учетной записи Майкрософт.
-
Outlook Изменения заметок с других устройств будут синхронизированы с заметками в Outlook на рабочем столе.
Найдите записки, независимо от того, где вы их положили
Как только вы начнете создавать много заметок и просматривать их на своих устройствах, вам может потребоваться найти их.
-
Откройте Записки и в верхней части списка заметок введите поисковое произведение или фразу в поле Поиск.
Или с клавиатуры нажмите клавиши CTRL+F для поиска.
Список заметок будет отфильтрован только по тем заметкам, которые содержат условие поиска.
-
Чтобы вернуться к списку заметок, щелкните или коснитесь поля Поиск, а затем щелкните значок закрытия ( X ) или нажмите клавишу ESC на клавиатуре.
См. также
Начало работы с Записками
Создание записки
Совместное использование записок
Удаление записки
Устранение неполадок Записки
Нужна дополнительная помощь?
Нужны дополнительные параметры?
Изучите преимущества подписки, просмотрите учебные курсы, узнайте, как защитить свое устройство и т. д.
The Sticky Notes from Windows is one of the apps people use daily to keep their lives organized: it’s simple, fast, and user-friendly. One of its best features is the ability to sync notes in the cloud using your Microsoft account. Furthermore, Microsoft’s Sticky Notes are also available on Android devices and iPhones. If you love Sticky Notes too, and you want to know how to sync them across all your Windows devices and mobile phones, read on:
How to sync Sticky Notes in Windows 11
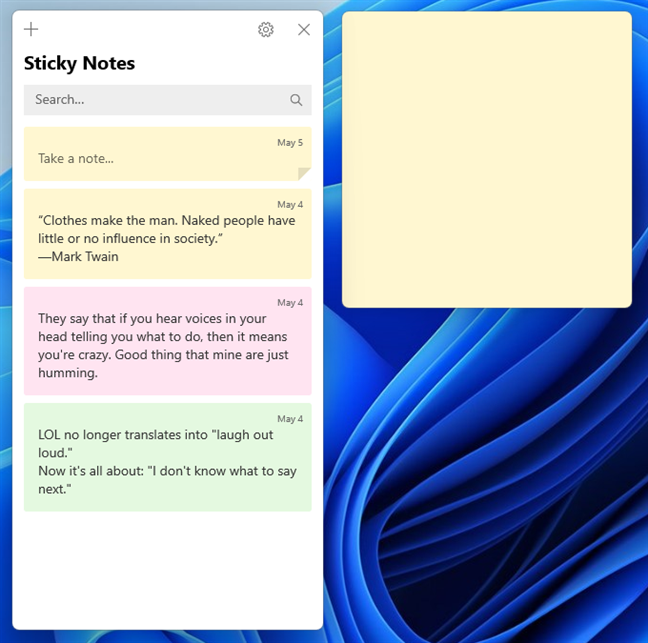
In order to sync your Sticky Notes, you must first open the Sticky Notes app. If you’re using Windows 11, a fast way to do that is to click or tap the Sticky Notes shortcut in the Start Menu.
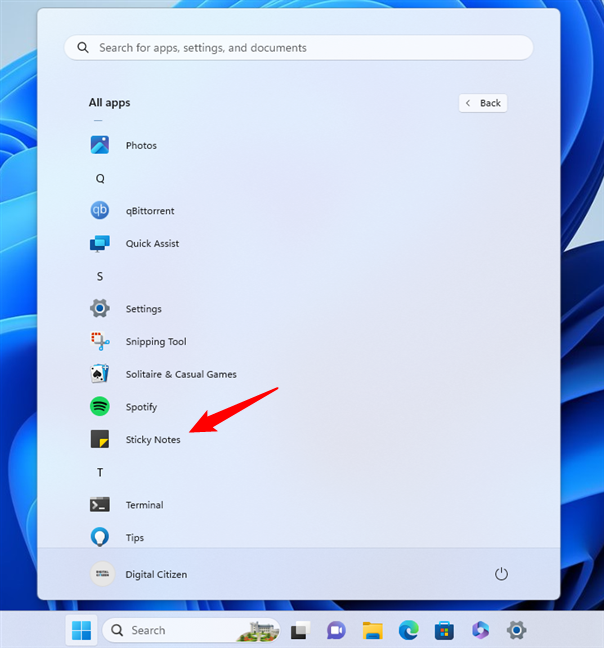
Launch Microsoft Sticky Notes in Windows 11
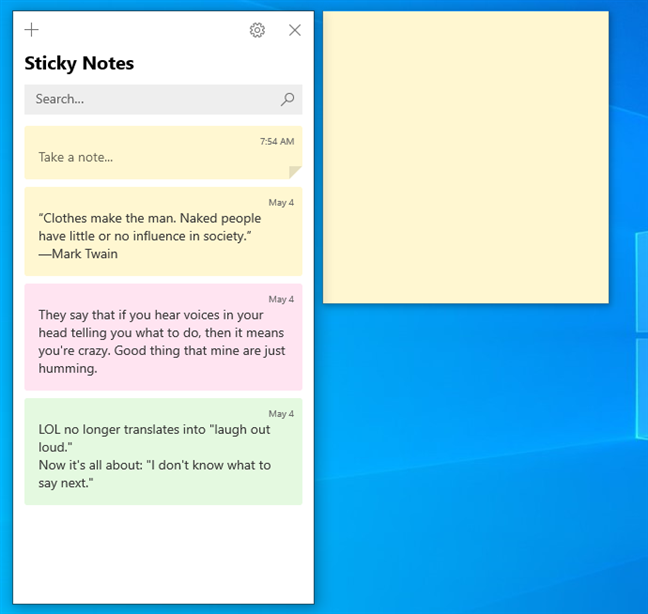
In the Sticky Notes window (the one that shows the notes list), click or tap the Settings button in the top-right corner. It looks like a small cogwheel.
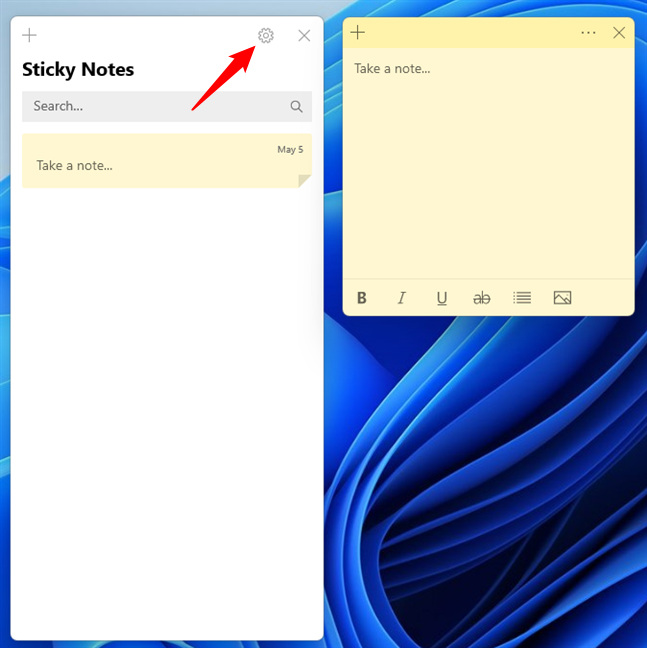
Access the Sticky Notes Settings in Windows 11
This opens the Settings page, which is the place where you can configure the way Microsoft’s Sticky Notes work on your Windows 11 computer. The first thing on the Settings page is a section that tells you to “Sign in to sync your notes to the cloud.” Click or tap the Sign in button.
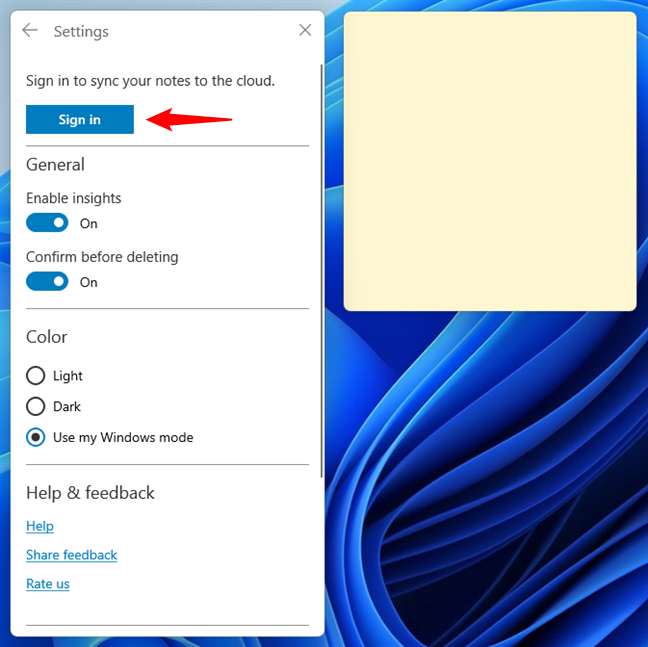
Click or tap the Sign in button in Sticky Notes on Windows 11
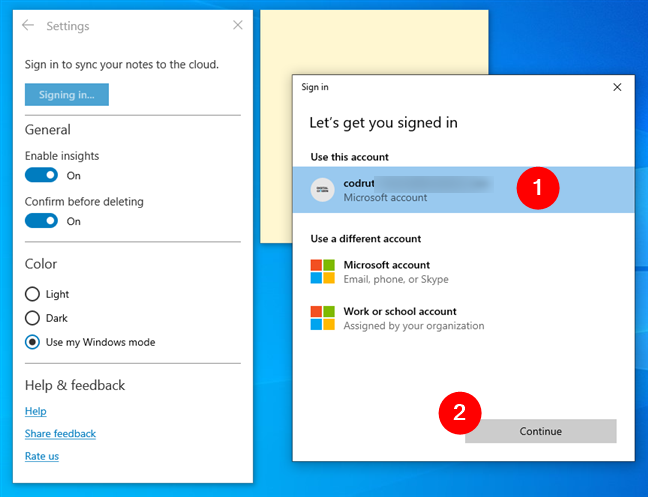
Pressing the Sign in button in Sticky Notes opens a new dialog window, where you’re asked to authenticate and log into your Microsoft account. If you’re already using a Microsoft account in Windows 11, and you intend to use the same for Sticky Notes, select your account from the list and press Continue. Otherwise, select one of the options under “Use a different account” and enter the credentials of the account you’d like to use for syncing Sticky Notes.
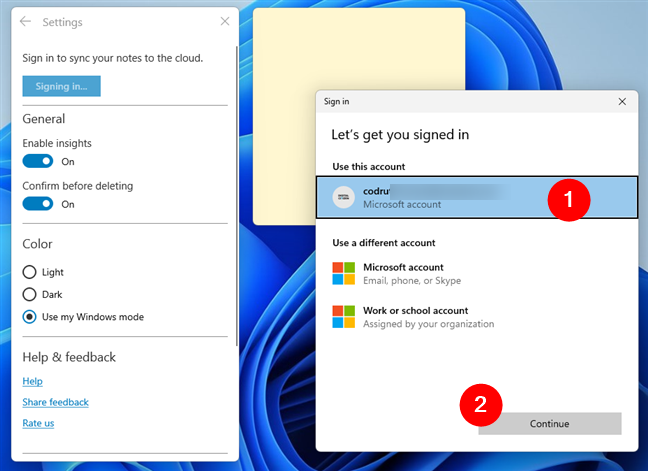
Sign in to sync your Sticky Notes to the cloud
Then, immediately after signing in with your Microsoft account, Sticky Notes syncs all your notes. When it’s done, you should see all of them, including notes created in the past and synced with Sticky Notes.
Your Sticky Notes were synced on Windows 11
Next, you can take the same steps on all your Windows 11 devices to have Sticky Notes sync your notes on all of them. No matter what changes you make on one device, they are reflected on all the others, as long as you use the same Microsoft account.
TIP: In the unfortunate event that Sticky Notes fails to sync your notes automatically, you can trigger a manual sync for your notes. For that, open the Sticky Notes app, head to its Settings, and then click or tap the Sync now button at the bottom of the window.
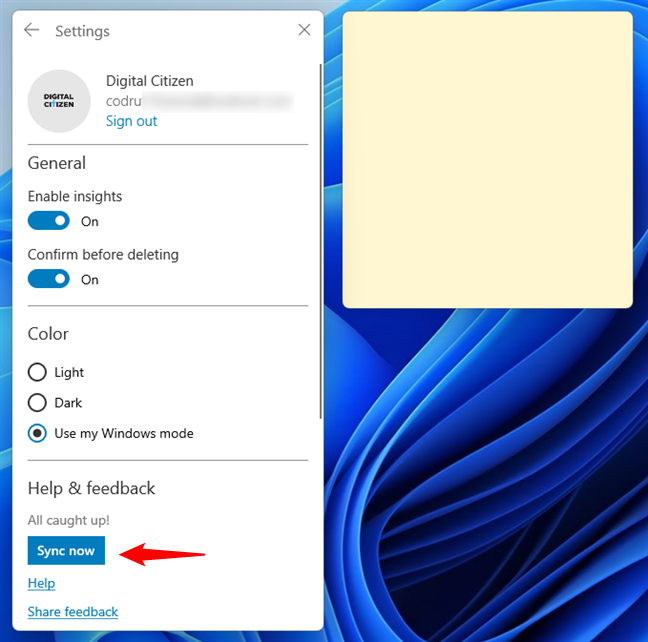
How to manually sync Microsoft Sticky Notes in Windows 11
NOTE: If you want to learn how to work with your Sticky Notes in either Windows 11 or Windows 10, read this guide: How to use Sticky Notes in Windows.
How to sync Sticky Notes in Windows 10
On your Windows 10 computer or device, start the Sticky Notes app. A quick way to do this is by clicking or tapping on its shortcut from the Start Menu.
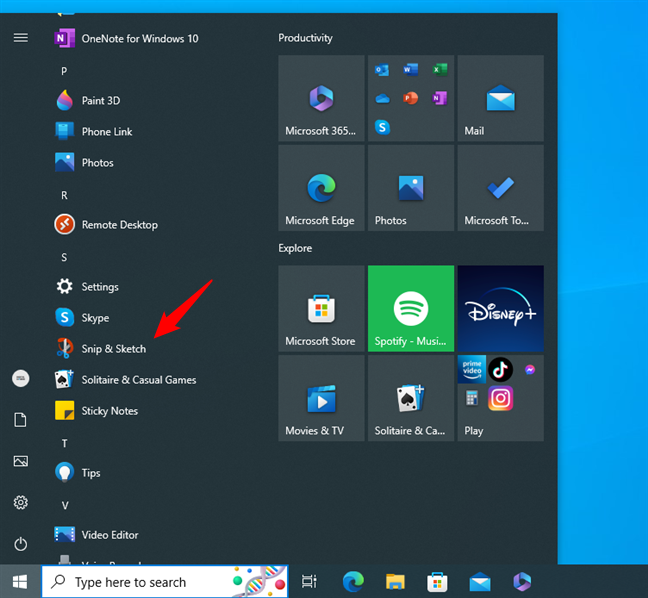
Microsoft’s Sticky Notes shortcut in Windows 10’s Start Menu
On the Sticky Notes window, click or tap the cogwheel Settings button in the top-right corner.
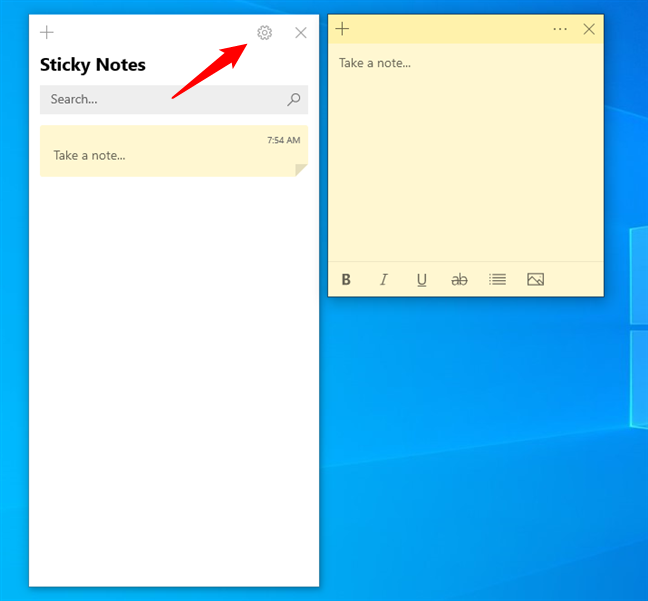
The Settings button from Windows 10’s Sticky Notes
On the Settings page, click or tap the Sign in button under “Sign in to sync your notes to the cloud.”

Sign into Sticky Notes on Windows 10
Sticky Notes opens a window called Sign in. If you’ve already configured a Microsoft account on your Windows 10 computer, and you want to use it for Sticky Notes too, select your account from the list and press Continue. Otherwise, choose to “Use a different account” and authenticate with another Microsoft account.
Choosing the Microsoft account used for signing in to Sticky Notes
After you sign in with your Microsoft account, it can take a second or two until Sticky Notes syncs all your notes. You’ll then see all your notes, including those you created long ago and synced with Sticky Notes.
The Sticky Notes app syncs all your notes
Repeat the same steps on all your Windows 10 computers and devices, and Sticky Notes syncs your notes on all of them. Make a change on one device, and it happens on all the others as long as you use the same Microsoft account.
TIP: If Windows 10 somehow fails to sync your notes, you can force a manual Sticky Notes sync. To do that, launch the Sticky Notes app, access its Settings, and click or tap the Sync now button found at the bottom of the page.
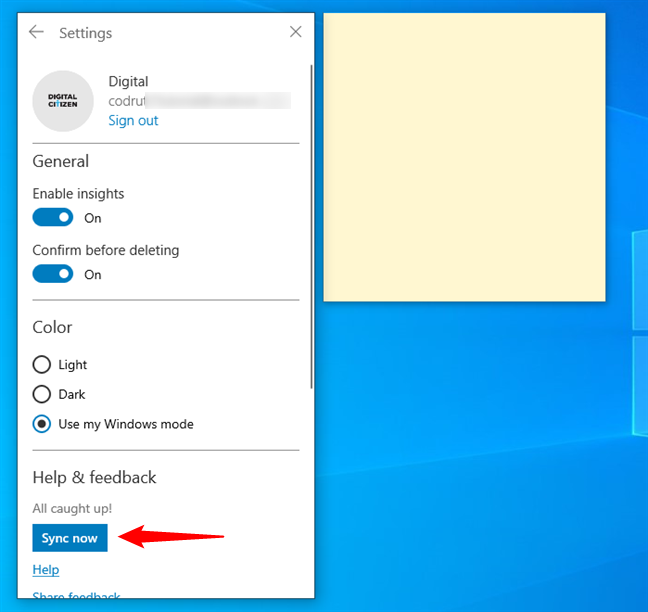
How to sync Sticky Notes manually in Windows 10
How to sync Microsoft’s Sticky Notes on Android smartphones and tablets
To get access to the Sticky Notes and be able to create, edit, delete, and sync them on your Android smartphone, you need to install OneNote. Open the Play Store and search for OneNote, or follow this direct link. When you find it, tap Install.
Installing Microsoft’s OneNote app from the Play Store
As soon as OneNote is installed, you can open it directly from its page on the Play Store. Later on, you can launch it by tapping its shortcut on your Android’s Home screen or from the apps drawer.
OneNote is found in your apps list
If you’ve already signed in to your Microsoft account in another app on your Android smartphone, all you have to do is tap your account and wait for everything in OneNote to sync. Otherwise, OneNote asks you to connect to your Microsoft account, so enter your username and password. If you also configured two-step authentication, approve the sign-in.
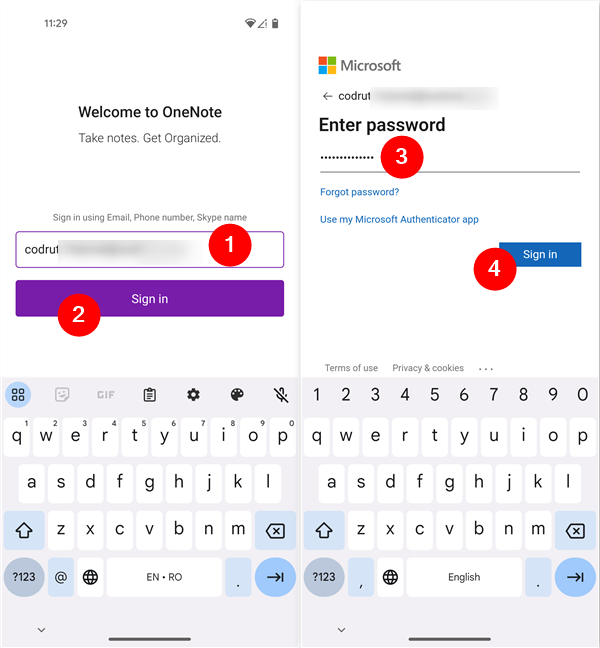
Connecting to OneNote on Android with a Microsoft account
After you sign in with your Microsoft account, OneNote needs a couple of moments to sync all your Notebooks and Sticky Notes. When OneNote finishes syncing everything, it should display a screen like the one below. On the default Home page of the app, you’ll find all the notes in your OneNote, including all your Sticky Notes.
Android’s OneNote lists all your Sticky Notes
If you want to see only your Sticky Notes, you can filter what’s shown in OneNote. On the Home page, tap the Sort & Filter button found in the top-right area of the screen. Then, select Sticky notes and tap Apply for OneNote to display only your synced Sticky Notes.
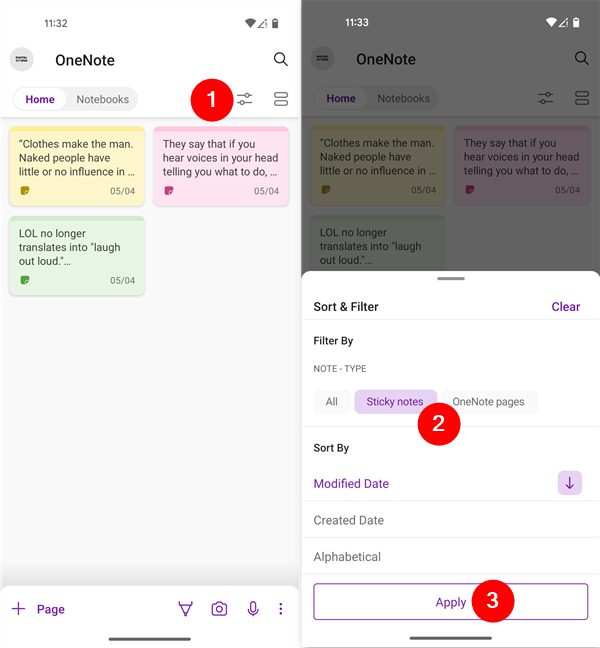
See and sync Sticky Notes on Android
Now you can work with your Sticky Notes and do whatever you like. As soon as you make changes to them, your Sticky Notes are synced to the cloud, and all those changes are immediately reflected on all your other devices, including on Windows PCs and iPhones.
TIP: If you want to force a sync for Sticky Notes on your Android device, you can. In OneNote, slide your finger from top to bottom, and the app will instantly trigger a manual sync. As long as that happens, a small circular arrow starts spinning on the screen. When it disappears, the forced notes sync is finalized.
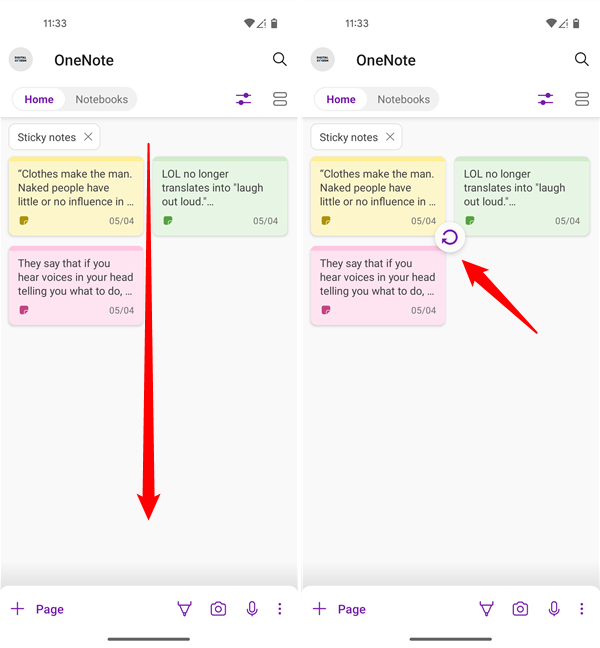
How to do a manual Sticky Notes sync on Android
How to sync Microsoft’s Sticky Notes on an iPhone
On your iPhone, open the App Store and search for OneNote, or use this direct link to get to it. Once you find it, install it by tapping the Get button.
To access Microsoft’s Sticky Notes on iPhone, install OneNote
Once installed, launch OneNote. You can do it directly from its App Store page or using its shortcut, now placed on your Home screen.
OneNote can be found on the Home screen of your iPhone
On the first screen of OneNote, you’re asked to Sign In with your Microsoft account or, if you don’t have one, to “Sign Up for Free.” If you have an account, tap the Sign In button and authenticate with your credentials. If you don’t have a Microsoft account, tap the “Sign Up for Free” and create one now.

Signing into OneNote using your Microsoft account
Then, OneNote shows you some information about your privacy and asks whether you’re OK with sending some anonymous diagnostic and usage data to Microsoft. Read everything and, if you agree, press Next on the first screen and OK on the second one. Then, OneNote should get your notes ready.
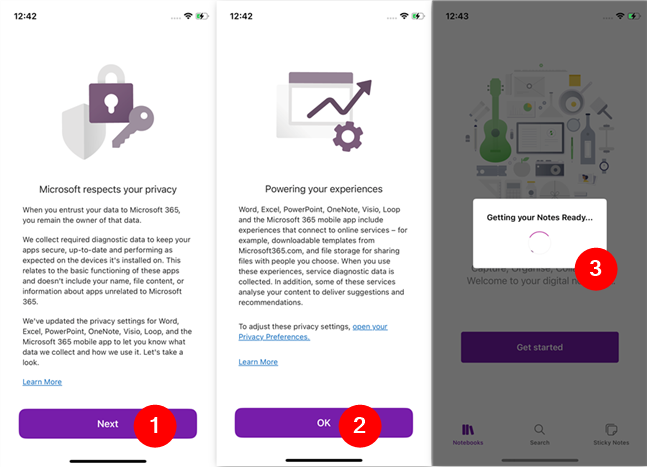
Information shown by OneNote before the first use
Finally, OneNote is ready for use, and you should see a screen similar to the one below, where you can access your Notebooks. On the bottom of the screen, there are three buttons: Notebooks, Search, and Sticky Notes. Tap the Sticky Notes one.
OneNote is ready and, at the bottom, you can find your Sticky Notes
Wait for a few moments, and you should see all your Sticky Notes, as they were last synced on any of your devices, be they Windows 11 or Windows 10 computers, Android smartphones that you own, or other iPhones where you installed OneNote and signed in using the same Microsoft account.
Microsoft Sticky Notes synced on an iPhone
Feel free to work with your Sticky Notes as you want. They are instantly synced every time you make a change.
NOTE: Unlike Windows 11, Windows 10, and Android, there is no manual Sticky Notes sync button on iPhones.
Do you want Microsoft’s Sticky Notes to sync across your devices?
I consider myself a heavy user of Microsoft’s Sticky Notes, and for a long time, I’ve been waiting for the ability to sync them. Fortunately, this feature was implemented by Microsoft a couple of years ago. Now, it works great, and I’m very happy about it. I’m certain that many users feel the same way. What’s your opinion about Sticky Notes and how they sync via your Microsoft account and OneNote? Use the comments below to let me know.
On Windows 10, Sticky Notes is an app, which as the name implies, allows you create notes on your computer instead of having stick pieces of papers around your monitor or under the keyboard.
Sticky Notes has been around for years, but starting with version 3.0, the app introduces a new design with a Sticky Notes tray to quickly find and organize your notes, and more importantly, the app now syncs your notes across devices using your Microsoft account.
Even further, Sticky Notes now also syncs to your Android device through OneNote. In the latest beta version of the popular note-taking app, you’ll find a new Sticky Notes button that lets you access your notes. Of course, you can also edit and create new notes that will then appear instantaneously on your desktop.

You only need to make sure that you’re signed in with the same Microsoft account in your desktop and phone.
Sticky Notes on Android is currently available for testing. If you want to give this feature a try, you need to become a OneNote beta tester by signing in on this Google website. Then, on your phone, follow this Google Play link to download the latest beta version of OneNote.
Why You Can Trust Pureinfotech
The author combines expert insights with user-centric guidance, rigorously researching and testing to ensure you receive trustworthy, easy-to-follow tech guides. Review the publishing process.
В Windows 11 и 10 присутствует встроенное полезное приложение — «Записки», позволяющее создавать заметки на рабочем столе Windows 10, хранить их, синхронизировать с другими устройствами, не только Windows, но и Android, iPhone или Mac.
В этом обзоре подробно о функциях приложения «Записки», работе с заметками на рабочем столе и дополнительных нюансах, которые могут оказаться полезными в контексте рассматриваемой темы. Обновление: появилась новая версия приложения Sticky Notes (Записки), являющаяся частью OneNote.
Как было отмечено выше, приложение «Записки» является встроенным в Windows 11/10, но, если вы не можете найти его в меню Пуск или через поиск на панели задач, возможно оно было удалено. Чтобы скачать заметки для рабочего стола Windows 10 от Microsoft, используйте официальный магазин Microsoft Store, в нём приложение называется Microsoft Sticky Notes.
Использование заметок на рабочем столе с помощью приложения «Записки»
Чтобы начать пользоваться встроенными заметками Windows 11/10, какие-либо особенные навыки не потребуются, достаточно будет сделать одно из:
- Запустить приложение «Записки» и создать новую заметку на рабочем столе: можно использовать простое форматирование текста, добавление изображений.
- Нажать правой кнопкой мыши по значку приложения «Записки» в меню «Пуск» или, к примеру, на панели задач, если вы решите закрепить значок там (через раздел «Дополнительно» в контекстном меню), и выбрать один из пунктов «Создать заметку», «Список заметок» (показывает одно окно, в котором собраны все ваши заметки), «Показать все заметки» (все заметки отображаются по отдельности на рабочем столе).
Теперь о некоторых базовых функциях и особенностях работы заметок:
- При закрытии заметки она не удаляется, а просто убирается с рабочего стола и остаётся доступной в списке заметок.
- Удаление заметки можно выполнить в её меню. Там же можно открыть список всех заметок или изменить цвет заметки со стандартного жёлтого на один из дополнительных 6 цветов.
- При редактировании заметок работают стандартные сочетания клавиш: вставка и копирование (в том числе для изображений), изменение стиля текста (например, Ctrl+B для полужирного), отмена последнего действия (Ctrl+Z). А для удаления активной заметки можно использовать Ctrl+D.
- При уменьшении размера заметки на рабочем столе (с помощью мыши), второстепенные элементы, такие как фото, скрываются, как на скриншоте ниже.
- Если у вас много заметок, то открыв список заметок (например, через контекстное меню ярлыка приложения «Записки»), вы сможете легко выполнить поиск по ним.
Как итог, в случаях, когда нужно что-то быстро записать и не потерять: номер телефона или внезапно пришедшую мысль или другую информацию, встроенные записи Windows 10 — могут быть отличным решением для этой цели.
Синхронизация и работа с записками Windows на других устройствах
Если вам требуется иметь доступ к заметкам на рабочем столе Windows 11/10 не на одном компьютере или ноутбуке, но и на других устройствах, в том числе Android и iPhone, прежде всего убедитесь, что в настройках приложения «Записки» используется ваша учётная запись Майкрософт — это необходимо для синхронизации.
Доступ к запискам с других устройств возможен следующими методами:
То есть почти все продукты Microsoft, имеющие отношение к производительности и организации дел имеют и доступ к заметкам на рабочем столе, из исключений — разве что приложение Microsoft To Do, где такой возможности мне найти не удалось.
Возможно, если вы уже регулярно используете приложение «Записки» в Windows, вы сможете дополнить список его возможностей или приёмов использования в комментариях — будет полезно и мне и другим читателям.
· Hot!
Just yesterday, we got confirmation that Microsoft would be bringing cross-platform syncing to Sticky Notes for Windows 10, and it seems the company didn’t take very long to deliver. Amrita Rout announced on Twitter that the feature is now live for Android users through the OneNote beta app:
Howdy people, Your @stickynotes from Windows now sync with OneNote Android Beta. Go try it now and absolutely let us know your feedback!!!! We are so excited about this awesome new offering within OneNote and hope you are too. @OneNoteC pic.twitter.com/qp6lfzgrTA
— amrita rout (@amrita_rout) October 10, 2018
To get access to the feature, you’ll need to visit the Google Play Store page for OneNote and sign up for the beta program if you haven’t already. Install the latest available version, and you’ll now see a Sticky Notes tab at the bottom of your screen. The feature is coming to iOS as well, but the update to the OneNote app is still pending approval from Apple. You can download the app here so you get it as soon as it’s live.
To have your notes sync across devices, you’ll need to have version 3.0 of the Windows 10 Sticky Notes app, which started rolling out to general users last month. This release also includes a new charcoal color for notes, new text formatting tools, and a hub for all the notes you’ve created so they’re not always spread all over the screen.
Tags
- Microsoft
- Windows 10
- Sticky notes
- Onenote
- Android
- Onenote for android