
Hey guys, in this article we are going to learn how to create round corner controls in WinForms C#.
How to create Round Corner Control in WinForms C# – Source Code
Windows Forms and Round Corner Controls
WinForms is a UI framework for building Windows Desktop Applications. The initial release of this framework was 21 years ago, and not much has changed. Well, at least not on the most basic level.
One of the most interesting things to note, is that after 21 years of existence, WinForms has not graced us with rounded edges for the controls it provides. Just as a comparison, WPF has this feature implemented right out of the box. As a result, when you need a feature like this I would recommend you to use WPF.
But there are still legacy projects out there. What if you are in a situation where you need to create a Round Corners for your controls? Well, you are in luck, because we are going to extensively cover how to do that with any basic WinForms control.
Although C# is our language of choice, you can easily do this using Visual Basic as well.
So, what do we mean when we say Rounded Corners Control?
We refer to a control that is rectangular in shape and have rounded corners, or in other words, the corners do not form a sharp point, but instead they are curved into an arc. Visually it looks and feels better. Especially for buttons. So, in this tutorial we will learn how to create round corner controls in WinForms using C#.
What are we going to build
As you can see, we are going to start building the base. First, we will create a rounded user control. Then we will use this as the base for everything else. The possibilities are endless. Please note, that we are not going to take the easy route. In this tutorial on how to create Round Corner Controls in WinForms C# we will override how a control is painted on a window. Once we take control over the pain method, you will be surprised by all the possibilities WinForms has to offer.
Although, you might find other easier solutions for this problem, I think that this is the safest and the best approach. At the beginning, the code might look intimidating but just bear with me. I will provide you with a graphics extension class that you can use for your projects. As a result, you will only need to focus on designing the look and feel of your WinForms custom controls.
So, let’s start building our base.
If you want to follow this tutorial, you need to create a new Windows Forms project. Before we start, there is one very important thing I need you to do. And that is to import the Graphics class extension methods.
The Graphics class provides methods for drawing objects to the display device. If you have never used this class it would be beneficial to look at some tutorials first. For example, take a look at how to create graphics objects for drawing. Next, see how you can draw a fill rectangle on a Windows form.
Once you are comfortable with the basics of the Graphics class, you should know that you can obtain a Graphics object by calling the Control.CreateGraphics method on an object that inherits from System.Windows.Forms.Control. This class defines the base class for controls, which are components with visual representation.
More on DevInDeep
- Create Face Mask Detection in C#
- Implement Text Detection from image in C#
- Create Handwritten Digit Recognition Application in C#
And there is one more way we can get to the Graphics class. That is by handling the control’s Control.Paint event. If you look at the definition of this method, you will notice it provides PaintEventArgs class. This class carries the Graphics property. And this is exactly what we are after.
Now, let’s break down all this information into something more useful to us. We want to create Round Corner Controls. Because .NET and WinForms doesn’t provide us with a way to do this, we will need to create our own. To do that, we need to draw how we want our control to look like. As a result, we are going to be using the second method for creating round corners. And that is by handling the Paint event.
The Paint Event
Every single Windows Forms control inherits from the base class Control. As a result, this base class provides drawing functionality via its Paint event. The Paint event is raised when the control is redrawn. As you can imagine, this happens quite often. When you drop the control onto the Windows form, this event will be raised. Many other actions can cause the same. For example, when you minimize/maximize the window, move and resize the control and so on.
But you can also make the control redraw itself as well. We will see that in just a moment.
How to code Round Corner Controls in WinForms C#
If you already have your empty Windows Forms project ready, you can start by importing the Graphics class extension methods. These methods are nothing more than drawing a round edges on the rectangle. I would advise you to look at how to draw rectangle and then investigate the code for drawing a rounded edge.
This class is a little bit too big to share it as a C# code listing. You can download my project and expand the Extensions folder and look into GraphicsExtension.cs class. I am guessing you know what an extension method is by now. But in case you don’t, extension methods enable you to “add” methods to existing types without creating a new derived type, recompiling, or otherwise modifying the original type.
In other words, these custom methods will now be part of our Graphics object.
Create Round Corner User Control
We are at a point where we have the knowledge to create the base control for our custom rounded corner controls. So, let’s create our User Control.
Right click on your project then navigate to Add and in the sub-menu look for New Item. Click on it.
As a result of your action a new window will pop up.
More on DevInDeep
- Image Face Detection with C#
- Article Classification with C#
- Image Search with C#
In this window you want to select User control (Windows Forms), name it RoundControl and click Add. This will do it. We just took the first step of the tutorial on how to create Round Corner Controls in WinForms C#. Now, let’s write some C# code.
What you need to do next is to navigate to the C# code file. You can select the newly created user control and press F7 on your keyboard. This action will open up a new window with the code file for your round corner user control.
Before going further please include the following using statements at the beginning of the file.
using RoundTextBoxProject.Extensions;
using System.Drawing;
using System.Drawing.Drawing2D;
using System.Windows.Forms;
Please note that the first using statement is including the namespace for the extension methods of the Graphics class. Depending on how you have set up your project, this line may be different for you.
Now let’s add a couple of properties.
Rounded Corner Radius
private int _radius = 10;
public int Radius
{
     get { return _radius; }
     set
     {
          _radius = value;
          Invalidate();
     }
}
In order to draw the arc of the rounded corner we need to set the radius. This defines the degree the corner of the control is rounded.
Rounded Control Background Color
private SolidBrush _backgroundBrush = new SolidBrush(SystemColors.Control);
private Color _backgroundColor = SystemColors.Control;
public Color BackgroundColor
{
     get { return _backgroundColor; }
     set
     {
          _backgroundBrush = new SolidBrush(_backgroundColor = value);
          Invalidate();
     }
}
We need to set up the background for the custom control. Thus, we define a new property called BackgroundColor. This may come a little bit weird to you since we have the BackColor property as well. Why not override it? Well, the background property will color the full control. And BackgroundColor will fill the rectangle inside the control we are going to draw.
Usually, you will set the BackColor property to Transparent (if possible) or the color of your Windows Form. We will take a close look at this in just a moment. For now, let’s leave it at that.
Rounded Control Border Color
private Color _borderColor = SystemColors.Control;
private Pen _borderPen = new Pen(ControlPaint.Light(SystemColors.Control, 0.0f), 0);
public Color BorderColor
{
     get { return _borderColor; }
     set
     {
          _borderColor = value;
          _borderPen = new Pen(ControlPaint.Light(_borderColor, 0.0f), _borderWidth);
          Invalidate();
     }
}
As part of this project, I decided to include a Border as well. The control looks nicer when a border is included.
Rounded Control Border Width
private float _borderWidth = 1.0f;
public float BorderWidth
{
     get { return _borderWidth; }
     set
     {
          _borderWidth = value;
          _borderPen = new Pen(ControlPaint.Light(_borderColor, 0.0f), _borderWidth);
          Invalidate();
     }
}
Since we already have a BorderColor property, why not include a BorderWidth as well. The name explains itself, there is nothing more to converse about the width of the border. We will see it in action soon enough.
There are two classes that we have not discussed. Those are SolidBrush and Pen class.
- Solid Brush: Defines a brush of a single color. Brushes are used to fill graphics shapes, such as rectangles, ellipses, pies, polygons, and paths.
- Pen: Defines an object used to draw lines and curves.
As you can see, we use the brush to fill a rectangle with a single color and the pen class to draw the border around the rectangle.
You may have noticed that after each change of the property we call the Invalidate method. We inherit this method from the Control class, which as you remember is the base for our custom control. Calling this method causes a paint message to be sent to the control. As a result, OnPaint will be raised.
But before we raise OnPaint let’s create two more helper methods.
Draw the Round Corner Control in WinForms C#
Because we have all the properties we need, we can finally draw the rounded rectangle on the control. Take a look at the following C# code listing.
private void drawBorder(Graphics g) =>
            g.DrawRoundedRectangle(_borderPen, 10, 10, Width - 20, Height - 20, _radius);

private void drawBackground(Graphics g) =>
            g.FillRoundedRectangle(_backgroundBrush, 10, 10, Width - 20, Height - 20, _radius);
The first method draws the border. The border line starts at (10,10) position point inside the control and ends at (width-20, height-20). This defines a rectangle with start position and its width and height. But see, because we are using the pen to draw it, it will only draw the border or rather the line that follows the rectangular shape. We also provide the radius. The radius controls the arc of the border line. You can play with these variables to see which ones are best suited for your solution. Maybe you can even expose them as a control’s properties? It is up to you.
The second method draws a fill rectangle with rounded corners. This method in turn will draw a rectangle filled with the specified background color. This function also accepts a radius as well. Since I want the border and the rectangle to blend in seamlessly, I use the same radius for the both of them. Play around with this argument and see how it affects the drawing.
Paint the Round Corner Control
Finally, we are able to paint the control using the following C# code.
protected override void OnPaint(PaintEventArgs e)
{
     Graphics g = e.Graphics;
     g.SmoothingMode = SmoothingMode.AntiAlias;
     drawBorder(g);
     drawBackground(g);
}
As you can see, we are overriding the OnPaint method. This method is called every time there is some kind of visual update to the form or the control.
First, we obtain the Graphics object. Then we set the SmoothingMode. Since we want our control to look it’s best, we need to set the mode to AntiAlias. Same as HighQuality they specify rendering mode with smoothing applied.
Next, we draw the border and the background.
That’s it.
How to create Round Corner Controls in WinForms C#: Conclusion
I hope you enjoyed this tutorial. Like i said, this is only the beginning. Next, we will focus on creating a round corner TextBox and round corner Button using C# and WinForms UI framework.
1 2 3 4 5 6 7 8 9 10 11 12 13 14 15 16 17 18 19 20 21 22 23 24 25 26 27 28 29 30 31 32 33 34 |
class RoundedButton : Button { GraphicsPath GetRoundPath(RectangleF Rect, int radius) { float r2 = radius / 2f; GraphicsPath GraphPath = new GraphicsPath(); GraphPath.AddArc(Rect.X, Rect.Y, radius, radius, 180, 90); GraphPath.AddLine(Rect.X + r2, Rect.Y, Rect.Width - r2, Rect.Y); GraphPath.AddArc(Rect.X + Rect.Width - radius, Rect.Y, radius, radius, 270, 90); GraphPath.AddLine(Rect.Width, Rect.Y + r2, Rect.Width, Rect.Height - r2); GraphPath.AddArc(Rect.X + Rect.Width - radius, Rect.Y + Rect.Height - radius, radius, radius, 0, 90); GraphPath.AddLine(Rect.Width - r2, Rect.Height, Rect.X + r2, Rect.Height); GraphPath.AddArc(Rect.X, Rect.Y + Rect.Height - radius, radius, radius, 90, 90); GraphPath.AddLine(Rect.X, Rect.Height - r2, Rect.X, Rect.Y + r2); GraphPath.CloseFigure(); return GraphPath; } protected override void OnPaint(PaintEventArgs e) { base.OnPaint(e); RectangleF Rect = new RectangleF(0, 0, this.Width, this.Height); using (GraphicsPath GraphPath = GetRoundPath(Rect, 50)) { this.Region = new Region(GraphPath); using (Pen pen = new Pen(Color.CadetBlue, 1.75f)) { pen.Alignment = PenAlignment.Inset; e.Graphics.DrawPath(pen, GraphPath); } } } } |
- Download demo (RAR) — 50.1 KB
- Download demo (ZIP) — 52.4 KB
Introduction
This tip gives an overview to modify existing button control in Winforms to achieve rounded edge Button Control (or rounded corner button control).
Background
Recently, I came across a requirement which asked for rounded edge button (or rounded corner button). I know WinForms is almost outdated and this feature can be achieved very easily in WPF. This tip is written for any programmer who is struggling to get this requirement done.

Final Output
Using the Code
The basic idea of getting this done is to inherit button control to a class ButtonModified and override OnPaint to obtain our requirement.
The first thing is to set the button’s FlatStyle as «Flat» from constructor. We can also set the common properties which we use throughout our project like Font, BorderSize, etc. This can also be modified individually from the forms which we refer this.
//the modified button class looks like this

 class ButtonModified : System.Windows.Forms.Button
    {
        //we can use this to modify the color of the border
        public Color BorderColor = Color.LightGray;
        //we can use this to modify the border size
        public int BorderSize = 5;
        public ButtonModified()
        {
            FlatStyle = FlatStyle.Flat;
            BackColor = Color.White;
            FlatAppearance.BorderColor = BorderColor;
            FlatAppearance.BorderSize = BorderSize;
            Font = new System.Drawing.Font("VAGRounded-Light",
            30F, System.Drawing.FontStyle.Regular, System.Drawing.GraphicsUnit.Pixel, ((byte)(0)));
            ForeColor = System.Drawing.Color.FromArgb(((int)(((byte)(84)))),
            		((int)(((byte)(33)))), ((int)(((byte)(107)))));

            this.MouseDown += new MouseEventHandler(ButtonLastest_MouseDown);
            this.MouseUp += new MouseEventHandler(ButtonLastest_MouseUp);
        }

        void ButtonLastest_MouseUp(object sender, MouseEventArgs e)
        {
            ForeColor = System.Drawing.Color.FromArgb(((int)(((byte)(84)))),
            			((int)(((byte)(33)))), ((int)(((byte)(107)))));
            BackColor = Color.White;
        }

        void ButtonLastest_MouseDown(object sender, MouseEventArgs e)
        {
            BackColor = System.Drawing.Color.FromArgb(((int)(((byte)(84)))),
            			((int)(((byte)(33)))), ((int)(((byte)(107)))));
            ForeColor = System.Drawing.Color.White;

        }
         int top ;
         int left;
         int right ;
         int bottom;

        protected override void OnPaint(PaintEventArgs pevent)
        {
            // to draw the control using base OnPaint
            base.OnPaint(pevent);
            //to modify the corner radius
            int CornerRadius = 18;

            Pen DrawPen = new Pen(BorderColor);
            GraphicsPath gfxPath_mod = new GraphicsPath();

            top = 0;
            left = 0;
            right = Width;
            bottom = Height;

            gfxPath_mod.AddArc(left, top, CornerRadius, CornerRadius, 180, 90);
            gfxPath_mod.AddArc(right - CornerRadius, top, CornerRadius, CornerRadius, 270, 90);
            gfxPath_mod.AddArc(right - CornerRadius, bottom - CornerRadius,
				CornerRadius, CornerRadius, 0, 90);
            gfxPath_mod.AddArc(left, bottom - CornerRadius, CornerRadius, CornerRadius, 90, 90);

            gfxPath_mod.CloseAllFigures();

            pevent.Graphics.DrawPath(DrawPen, gfxPath_mod);

            int inside = 1;

            Pen newPen = new Pen(BorderColor, BorderSize);
            GraphicsPath gfxPath = new GraphicsPath();
            gfxPath.AddArc(left + inside + 1, top + inside, CornerRadius, CornerRadius, 180, 100);

            gfxPath.AddArc(right - CornerRadius - inside - 2,
            	top + inside, CornerRadius, CornerRadius, 270, 90);
            gfxPath.AddArc(right - CornerRadius - inside - 2,
            	bottom - CornerRadius - inside - 1, CornerRadius, CornerRadius, 0, 90);

            gfxPath.AddArc(left + inside + 1,
            bottom - CornerRadius - inside, CornerRadius, CornerRadius, 95, 95);
            pevent.Graphics.DrawPath(newPen, gfxPath);

            this.Region = new System.Drawing.Region(gfxPath_mod);
        }
    }
Now we have two approaches.
Easier Approach
The easier way is to first build your solution and the button will be available in your toolbar which you can use like normal button control.

Approach Two to Modify Existing Buttons Already Aligned and Placed In Project
We all know that normal buttons when placed in winform by dragging and dropping will generate a designer class. We can easily modify our designer class as explained below. To modify the existing buttons in our project:
 //Auto Generated Designer When We Drag and Drop Button
  Partial Class Buttontype
    {
        Private System.ComponentModel.IContainer Components = Null;

        Protected Override Void Dispose(bool Disposing)
        {
            if (Disposing && (Components != null))
            {
                components.Dispose();
            }
            base.Dispose(disposing);
        }

        #Region Windows Form Designer Generated Code

        Private Void Initializecomponent()
        {
            this.btn_Next = new System.Windows.Forms.Button();

            this.SuspendLayout();

            //
            // Btn_next
            //
            this.btn_Next.BackColor = System.Drawing.Color.White;
            this.btn_Next.BackgroundImageLayout = System.Windows.Forms.ImageLayout.Stretch;
            this.btn_Next.FlatStyle = System.Windows.Forms.FlatStyle.Flat;
            this.btn_Next.Font = New System.Drawing.Font("Verdana", 20.25F,
            System.Drawing.FontStyle.Regular, System.Drawing.GraphicsUnit.Point, ((Byte)(0)));
            this.btn_Next.ForeColor = System.Drawing.Color.FromArgb(((int)(((byte)(84)))),
            		((Int)(((byte)(33)))), ((Int)(((byte)(107)))));
            this.btn_Next.Location = New System.Drawing.Point(244, 204);
            this.btn_Next.Name = "Btn_next";
            this.btn_Next.Size = New System.Drawing.Size(234, 94);
            this.btn_Next.TabIndex = 63;
            this.btn_Next.Text = "Next";
            this.btn_Next.UseCompatibleTextRendering = True;
            this.btn_Next.UseVisualStyleBackColor = False;
            //
            // Buttontype
            //
            this.AutoScaleDimensions = New System.Drawing.SizeF(6F, 13F);
            this.AutoScaleMode = System.Windows.Forms.AutoScaleMode.Font;
            this.ClientSize = New System.Drawing.Size(778, 374);
            this.Controls.Add(this.btn_Next);

            this.Name = "Buttontype";
            this.Text = "Aint";
            this.ResumeLayout(false);
        }

        #Endregion

        Public System.Windows.Forms.Button Btn_next;
    }
See the bolded portion of the code:
this.btn_Next = new System.Windows.Forms.Button();
This needs to be replaced as:
this.btn_Next = new ButtonDemo.ButtonModified();
This will update your designer once you rebuild the solution.
The method is depicted here so as to modify any existing project easily without any hassles, i.e., you wouldn’t need to align your existing button or modify the font, etc. Use this only if your requirement is just to round off your existing Buttons which were previously aligned and set.
Points of Interest
This is just a method which I came up with. If someone comes up with a better solution, it can be posted here so that it can be a reference to anyone who needs this in the future.
Windows Forms — одна из самых популярных библиотек программирования приложений для операционных систем семейства Windows. Одной из важных составляющих любого интерфейса являются кнопки. Стандартные кнопки в Windows Forms имеют прямоугольную форму с острыми углами, но иногда требуется создать кнопку с более эстетичным внешним видом, например, с закругленными углами.
Создание такой кнопки не представляет большой сложности, однако требует некоторых дополнительных настроек. Для начала, необходимо использовать элемент управления Button из библиотеки Windows Forms. Затем, в свойствах этого элемента управления нужно настроить стиль кнопки на Custom, чтобы получить возможность изменять ее вид.
Далее, для создания кнопки с закругленными углами нужно задать соответствующие значения свойствам CornerRadius и FlatStyle. Свойство CornerRadius позволяет задать радиус закругления углов, а свойство FlatStyle определяет способ отображения кнопки. Если установить значение свойства FlatStyle на Flat, то кнопка будет иметь плоский вид, без выделенных краев.
Кнопка с закругленными углами в Windows Forms — руководство по созданию
Создание кнопки с закругленными углами в Windows Forms может показаться сложной задачей на первый взгляд, но на самом деле это может быть достигнуто с помощью нескольких простых шагов.
|
Шаг 1. Создайте новый проект Windows Forms в Visual Studio. |
|
Шаг 2. Добавьте новый элемент Button на форму. |
|
Шаг 3. Используйте свойство FlatAppearance для настройки внешнего вида кнопки. Установите свойство BorderSize в значение 0, чтобы удалить границы кнопки. Затем установите свойство BorderRadius в значение, определяющее радиус закругления углов. |
|
Шаг 4. Настройте фон кнопки, используя свойство BackColor. |
|
Шаг 5. Настройте текст и цвет кнопки, используя свойства Text и ForeColor. |
После завершения этих шагов вы получите кнопку с закругленными углами, которая будет гармонично вписываться в общий дизайн вашего приложения.
Таким образом, создание кнопки с закругленными углами в Windows Forms возможно с помощью нескольких простых шагов. Закругление углов кнопки придает интерфейсу пользователя современный и элегантный вид, делая его более привлекательным для пользователей.
Раздел 1: Начало работы с Windows Forms
Для создания приложения с Windows Forms сначала необходимо создать проект в Visual Studio. Для этого откройте Visual Studio и выберите «Создать новый проект» из меню «Файл». В открывшемся окне выберите «Приложение Windows Forms», укажите имя проекта и нажмите «Создать».
После создания проекта вы увидите главное окно Visual Studio с элементом управления «Form», который представляет собой основное окно нашего приложения. В окне свойств «Form» вы можете настроить размеры и цвет фона окна, а также добавлять другие элементы управления, такие как кнопки, текстовые поля и т.д.
Один из наиболее часто используемых элементов управления в Windows Forms — это кнопка. Чтобы добавить кнопку в приложение, перейдите на вкладку «Toolbox» и найдите элемент «Button». Щелкните по нему и затем щелкните на главном окне, чтобы разместить кнопку на форме.
После размещения кнопки вы можете настроить ее свойства, такие как текст, размер, цвет и стиль шрифта, а также обработку событий при нажатии на кнопку. Можно использовать код C# или Visual Basic .NET для добавления логики обработки этого события.
Теперь, когда вы знакомы с основами работы с Windows Forms, вы можете начать создавать свои собственные оконные приложения с закругленными углами кнопок и другими интересными возможностями.
Раздел 2: Основы создания кнопки
В этом разделе мы рассмотрим основные шаги по созданию кнопки с закругленными углами в Windows Forms.
1. Откройте проект в Visual Studio и добавьте на форму элемент управления «Button».
2. В свойствах кнопки найдите параметр «FlatStyle» и установите его значение в «Flat» или «System». Это позволит скрыть стандартное оформление кнопки и создать настраиваемый вид.
3. В свойствах кнопки найдите параметр «FlatAppearance» и раскройте его. Далее найдите параметр «BorderRadius» и установите нужное значение, чтобы задать закругление углов кнопки. Можно экспериментировать с разными значениями, чтобы достичь желаемого эффекта.
4. При желании вы можете задать цвет фона и текстов целиком или отдельно. Для этого используйте параметры «BackColor» и «ForeColor».
5. Теперь ваша кнопка с закругленными углами готова к использованию! Вы можете добавить необходимую логику обработки нажатия на кнопку, например, с помощью обработчика события «Click».
Таким образом, вы научились основам создания кнопки с закругленными углами в Windows Forms. Продолжайте экспериментировать с разными параметрами и стилями, чтобы создать уникальный и привлекательный интерфейс для вашего приложения!
Раздел 3: Добавление закругленных углов к кнопке
Если вы хотите создать кнопку с закругленными углами в Windows Forms, вам потребуется использовать свою собственную реализацию кнопки или воспользоваться сторонней библиотекой. В данном разделе мы рассмотрим пример, как добавить закругленные углы к кнопке, используя библиотеку MetroFramework.
Для начала убедитесь, что вы установили библиотеку MetroFramework через менеджер пакетов NuGet. В Visual Studio откройте менеджер пакетов NuGet, найдите пакет MetroFramework и установите его.
После установки библиотеки MetroFramework, вы сможете использовать класс MetroButton, который предоставляет возможность создания кнопки с закругленными углами.
Вот пример кода, который показывает, как добавить закругленные углы к кнопке:
using MetroFramework.Controls;
// Создание кнопки
MetroButton button = new MetroButton();
// Установка размеров и положения кнопки
button.Size = new Size(100, 30);
button.Location = new Point(50, 50);
// Установка закругленных углов кнопки
button.UseCustomBackColor = true;
button.UseCustomForeColor = true;
button.UseSelectable = true;
button.BackColor = Color.FromArgb(255, 102, 102);
button.ForeColor = Color.White;
button.FontSize = MetroButtonSize.Tall;
button.AutoSize = true;
button.Style = MetroFramework.MetroColorStyle.Red;
// Добавление кнопки на форму
this.Controls.Add(button);
В этом примере мы создаем новый экземпляр кнопки MetroButton и устанавливаем ее размеры и положение на форме. Затем мы устанавливаем свойство UseCustomBackColor на значение true, чтобы использовать собственный цвет фона кнопки. Аналогично мы устанавливаем свойство UseCustomForeColor для использования собственного цвета текста кнопки.
Для добавления закругленных углов к кнопке используются следующие свойства:
- UseSelectable: устанавливает, может ли кнопка быть выбрана
- BackgroundColor: устанавливает цвет фона кнопки
- ForeColor: устанавливает цвет текста кнопки
- FontSize: устанавливает размер шрифта кнопки
- AutoSize: устанавливает автоматический размер кнопки в соответствии с содержимым
- Style: устанавливает стиль кнопки из доступных стилей библиотеки MetroFramework
После установки свойств для кнопки, добавляем ее на форму с помощью метода this.Controls.Add(button).
Теперь, когда вы знаете, как добавить закругленные углы к кнопке, вы можете создавать стильные и современные пользовательские интерфейсы в своих приложениях Windows Forms. Библиотека MetroFramework предоставляет множество других компонентов пользовательского интерфейса, таких как заголовки, текстовые поля, списки и другие, которые также могут быть стилизованы с использованием закругленных углов. Используйте свою фантазию и создавайте интерфейсы, которые будут выделяться!
Раздел 4: Изменение внешнего вида кнопки
Когда мы создаем кнопку в Windows Forms, по умолчанию она имеет прямоугольную форму с прямыми углами. Однако, зачастую мы хотим изменить внешний вид кнопки, сделав ее более привлекательной или соответствующей дизайну нашего приложения. В этом разделе мы рассмотрим несколько способов изменения внешнего вида кнопки в Windows Forms.
1. Изменение цвета фона кнопки:
- Для изменения цвета фона кнопки можно использовать свойство BackColor. Например, чтобы сделать задний фон кнопки красным, можно установить свойство BackColor следующим образом: button.BackColor = Color.Red;
- Также можно изменить цвет фона кнопки, используя стандартную палитру цветов. Для этого можно использовать диалоговое окно ColorDialog. Например, при нажатии на кнопку «Изменить цвет фона» можно открыть диалоговое окно, в котором пользователь сможет выбрать новый цвет фона кнопки.
2. Изменение формы кнопки:
- Чтобы изменить форму кнопки с прямоугольной на закругленную, можно использовать свойство FlatStyle и установить его в значение System.Windows.Forms.FlatStyle.Flat. Затем, можно установить также свойства FlatAppearance.BorderSize и FlatAppearance.BorderColor, чтобы задать толщину и цвет границы кнопки.
- Другой способ изменить форму кнопки — использовать графические ресурсы. Вы можете создать изображение, которое будет выступать в качестве фона кнопки, с нужной вам формой и границами. Затем, можно установить свойство BackgroundImage кнопки в это изображение.
3. Изменение шрифта и цвета текста на кнопке:
- Чтобы изменить шрифт текста на кнопке, можно использовать свойство Font. Например, чтобы задать шрифт Arial размером 12, можно установить свойство Font следующим образом: button.Font = new Font(«Arial», 12);
- Для изменения цвета текста на кнопке можно использовать свойство ForeColor. Например, чтобы сделать текст кнопки зеленым, можно установить свойство ForeColor следующим образом: button.ForeColor = Color.Green;
В этом разделе мы рассмотрели несколько способов изменения внешнего вида кнопки в Windows Forms. Вы можете применить эти методы или комбинировать их, чтобы создать уникальный и привлекательный внешний вид кнопки, который соответствует вашим предпочтениям и дизайну вашего приложения.
Раздел 5: Реагирование кнопки на действия пользователя
После создания кнопки с закругленными углами в Windows Forms, мы можем добавить поведение, которое будет активироваться при действиях пользователя.
Для этого мы можем использовать обработчики событий, которые предоставляет класс Button. Самое распространенное событие для кнопки — это событие Click, которое возникает при щелчке пользователя на кнопке. Мы можем создать обработчик для этого события и определить, что должно произойти при нажатии кнопки.
Ниже приведен пример кода, который показывает, как добавить обработчик события Click для кнопки:
private void button1_Click(object sender, EventArgs e)
{
// код, который должен выполниться при нажатии кнопки
}
В этом примере обработчик события Click называется button1_Click. Вы можете выбрать любое имя для обработчика, если оно соответствует правилам именования в C#.
Внутри обработчика вы можете указать любой код, который должен выполниться при нажатии кнопки. Например, вы можете изменить цвет фона формы или открыть новое окно.
Чтобы связать обработчик события с кнопкой, вы можете открыть дизайнер формы в Visual Studio и дважды щелкнуть по кнопке. Это откроет обработчик события Click в окне кода и связывает его с кнопкой.
Теперь, когда пользователь щелкает на кнопке, будет вызван обработчик события Click и выполнится код, который вы определили в обработчике.
Это всего лишь один из примеров того, как кнопка с закругленными углами может быть настроена и реагировать на действия пользователя. Вы можете использовать и другие события и методы класса Button, чтобы добавить дополнительную функциональность к вашей кнопке.
Да-да, я знаю, что лучше не делать на Windows Forms красивые приложения – для этого есть WPF. Однако, если проект уже разросся, то переносить его из-за пары красивостей не хочется. Тем более, что при достаточной сноровке можно делать симпатичные кнопочки и на Windows Forms.
Итак, сначала создаем кнопку. Называем её неоригинально – button1. Сначала закругляем ей края при загрзуке формы (событие лоад):
System.Drawing.Drawing2D.GraphicsPath Button_Path = new System.Drawing.Drawing2D.GraphicsPath();
            Button_Path.AddEllipse(-10, -9, this.button1.Width+20, 40);
            Region Button_Region = new Region(Button_Path);
            this.button1.Region = Button_Region;
Числа подбираются индивидуально — чтобы края у кнопки были закруглены равномерно — я же не заню, какого размера она у вас.
Теперь нам надо закрасить кнопку. Но не просто однотонно, а с градиентом. Это тоже реализуется довольно просто. В обработчик перерисовщика кнопки кидаем:
    private void button1_Paint(object sender, PaintEventArgs e)
        {
            Graphics g = e.Graphics;

                g.FillRectangle(
                    new LinearGradientBrush(PointF.Empty, new PointF(0, button1.Height), Color.Black, Color.Green),
                    new RectangleF(PointF.Empty, button1.Size));
            g.DrawString("Вход за преподавателя", new Font("Arial", 10), System.Drawing.Brushes.White, new Point(10, 3));

        }
И получается вот такая картина:
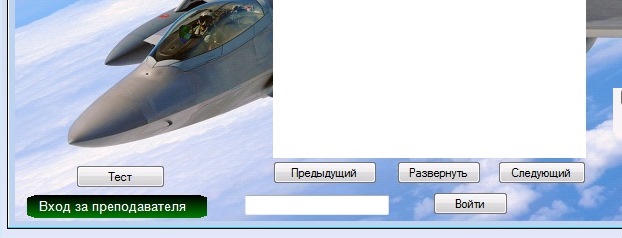
Не сказать, чтобы очень красиво, но своей цели мы все же добились. Если вам требуется помощь программиста по C# или другим языкам программирования, то вы можете написать мне — за небольшую плату я вам с удовольствием помогу.
Автор этого материала — я — Пахолков Юрий. Я оказываю услуги по написанию программ на языках Java, C++, C# (а также консультирую по ним) и созданию сайтов. Работаю с сайтами на CMS OpenCart, WordPress, ModX и самописными. Кроме этого, работаю напрямую с JavaScript, PHP, CSS, HTML — то есть могу доработать ваш сайт или помочь с веб-программированием. Пишите сюда.