
Сотрудники службы техподдержки пользователей попросили написать PowerShell скрипт, позволяющий быстро получить скриншот рабочего стола пользователя с удаленного компьютера. При этом сотрудник HelpDesk не должен подключаться к компьютеру пользователя через графические средства удаленной поддержки (SCCM, Remote Assistance, теневую RDP сессию и т.д.).
Содержание:
- Получить скриншот экрана пользователя в скрипте PowerShell
- Как получить скриншот рабочего стола с удаленного компьютера из PowerShell?
- PowerShell: сделать скриншот окна активного приложения
Получить скриншот экрана пользователя в скрипте PowerShell
Для получения текущего изображения экрана пользователя можно использовать встроенный .NET класс System.Windows.Forms. Следующий PowerShell скрипт создаст локальную папку для хранения снимков экрана, определит текущее разрешение графической среды и сохранит содержимое экрана в PNG файл.
$Path = "C:\ps\screenshots"
# Проверяем, что каталог для хранения скриншотов создан, если нет - создаем его
If (!(test-path $path)) {
New-Item -ItemType Directory -Force -Path $path
}
Add-Type -AssemblyName System.Windows.Forms
$screen = [Windows.Forms.SystemInformation]::VirtualScreen
# Получаем разрешение экрана
$image = New-Object System.Drawing.Bitmap($screen.Width, $screen.Height)
# Создаем графический объект
$graphic = [System.Drawing.Graphics]::FromImage($image)
$point = New-Object System.Drawing.Point(0, 0)
$graphic.CopyFromScreen($point, $point, $image.Size);
$cursorBounds = New-Object System.Drawing.Rectangle([System.Windows.Forms.Cursor]::Position, [System.Windows.Forms.Cursor]::Current.Size)
# Получаем скриншот экрана
[System.Windows.Forms.Cursors]::Default.Draw($graphic, $cursorBounds)
$screen_file = "$Path\" + $env:computername + "_" + $env:username + "_" + "$((get-date).tostring('yyyy.MM.dd-HH.mm.ss')).png"
# Сохранить скриншот в PNG файл
$image.Save($screen_file, [System.Drawing.Imaging.ImageFormat]::Png)
# Очистка памяти
$graphic.Dispose()
$image.Dispose()
Запустите PowerShell скрипт и проверьте, что в указанном каталоге (можно указать UNC путь к сетевой папке) появился PNG файл со снимком вашего рабочего стола в момент запуска скрипта. Для удобства имя PNG файла содержит имя компьютера, пользователя, текущую дату и время.
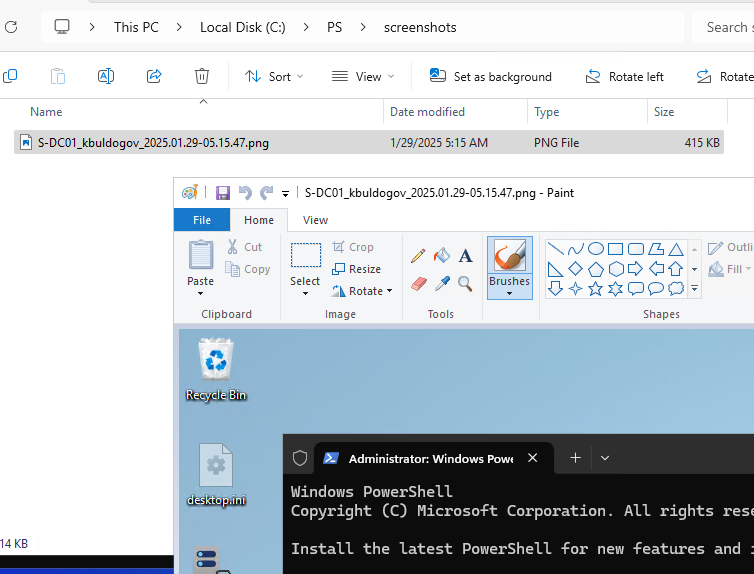
Скрипт захватит на скриншоте в том числе положение курсора мыши.
Если на компьютере используются несколько мониторов, в снимок экрана попадут все рабочие столы активных мониторов (не только основного).
Чтобы создавать скриншоты экрана каждые несколько секунд, нужно поместить код скрипта в цикл while:
while($true){
{ SCRIPT }
 sleep(60) # Пауза 60 секунд
}
Для вызова этого PowerShell скрипта из планировщика задач или BAT файла сценария, используйте такую команду (в этом случае не придется изменять настройки PowerShell ExecutionPolicy):
powershell.exe -executionpolicy bypass -file c:\ps\PS-Capture-Local-Screen.ps1
С помощью GPO можно поместить ярлык на этот PowerShell скрипт на рабочие столы пользователей и назначить горячие клавиши для его вызова. Теперь при появлении какой-то проблемы или ошибки в любом приложении пользователю достаточно нажать назначенную комбинацию клавиш. В результате в сетевой папке HelpDesk появится скриншот рабочего стола пользователя.
Как получить скриншот рабочего стола с удаленного компьютера из PowerShell?
Этот PowerShell скрипт можно использовать для получения скриншот рабочего стола пользователя на удаленном рабочей станции или сервере.
Если нужно получить скриншот рабочего стола с RDS сервера (или десктопной Windows , на которой разрешены множественные RDP подключения), сначала нужно получить ID сессии пользователя на удаленном компьютере.
Чтобы получить список сессий пользователей на удаленном компьютере, выполните команду:
qwinsta /server:msk-rds1

На удаленном компьютере должно быть включено правило Windows Firewall, разрешающее доступ по 445 порту (правило
File and Printer Sharing (SMB-In)
). Правило брандмауэра можно включить через GPO.
В данном случае пользователь выполнил вход на консоль (сессия 1).
Скопируйте файл PS-Capture-Local-Screen.ps1 в сетевой каталог и отредактируйте в нем путь, чтобы он сохранял скриншоты в сетевую папку (предоставьте права записи в эту папку для пользователей):
$Path = \\server1\Screen\Log
Теперь с помощью утилиты
PsExec
можно выполнить PowerShell скрипт получения скриншота для пользователя по ID его сессии (
1
в нашем примере).
.\PsExec.exe -s -i 1 \\wks333 powershell.exe -executionpolicy bypass -WindowStyle Hidden -file "\\s-fs01\scripts\PS-Capture-Local-Screen.ps1"
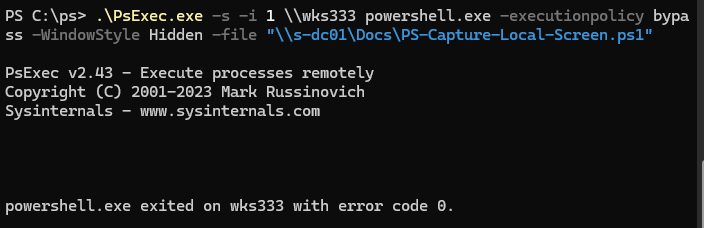
Строка powershell.exe exited on wks333 with error code 0 указывает, что скрипт был выполнен успешно.
Теперь, сотрудники HelpDesk могут запустить эту команду со своего компьютера, и в указанном сетевом каталоге появится скриншот изображения рабочего стола пользователя удаленного компьютера.
PowerShell: сделать скриншот окна активного приложения
Рассмотренный выше скрипт помещает в PNG файл содержимое всех мониторов пользователя. Можно делать снимок только открытого окна приложения, с котороым работает пользователь в данный момент.
В GitHub также загружен обновленный скрипт PS-Capture-Current-App-Screen.ps1, позволяющий сделать в сесии пользователя скриншот только содержимого окна активного приложения.
To capture a screen using Windows PowerShell, you can make use of the Add-Type cmdlet to access the User32 Windows API and the GetDesktopWindow function. Here’s an example:
1 2 3 4 5 6 7 8 9 10 11 12 13 14 15 16 17 18 19 20 21 22 23 24 25 26 27 28 29 30 31 32 33 34 35 36 37 38 39 40 41 42 43 44 45 46 47 48 49 50 51 52 53 54 55 56 57 58 59 60 61 62 63 64 |
# Import the necessary API functions Add-Type -TypeDefinition @" using System; using System.Runtime.InteropServices; public class ScreenCapture { [DllImport("user32.dll")] public static extern IntPtr GetDesktopWindow(); [DllImport("user32.dll")] public static extern IntPtr GetWindowDC(IntPtr ptr); [DllImport("gdi32.dll")] public static extern IntPtr CreateCompatibleDC(IntPtr hdc); [DllImport("gdi32.dll")] public static extern IntPtr CreateCompatibleBitmap(IntPtr hdc, int nWidth, int nHeight); [DllImport("gdi32.dll")] public static extern IntPtr SelectObject(IntPtr hdc, IntPtr hgdiobj); [DllImport("gdi32.dll")] public static extern bool BitBlt(IntPtr hdcDest, int nXDest, int nYDest, int nWidth, int nHeight, IntPtr hdcSrc, int nXSrc, int nYSrc, int dwRop); [DllImport("user32.dll")] public static extern bool ReleaseDC(IntPtr hWnd, IntPtr hdc); [DllImport("gdi32.dll")] public static extern bool DeleteDC(IntPtr hdc); [DllImport("gdi32.dll")] public static extern bool DeleteObject(IntPtr hObject); public static IntPtr CaptureScreen() { IntPtr hDesk = GetDesktopWindow(); IntPtr hSrce = GetWindowDC(hDesk); IntPtr hDest = CreateCompatibleDC(hSrce); IntPtr hBmp = CreateCompatibleBitmap(hSrce, GetSystemMetrics(0), GetSystemMetrics(1)); IntPtr hOldBmp = SelectObject(hDest, hBmp); bool success = BitBlt(hDest, 0, 0, GetSystemMetrics(0), GetSystemMetrics(1), hSrce, 0, 0, 0x00CC0020 | 0x40000000); SelectObject(hDest, hOldBmp); DeleteDC(hDest); ReleaseDC(hDesk, hSrce); // Clean up bitmap object DeleteObject(hBmp); return hBmp; } } "@ # Call the CaptureScreen method to capture the screen $screenCapture = [ScreenCapture]::CaptureScreen() # Save the captured screen as an image file $img = [System.Drawing.Image]::FromHbitmap($screenCapture) $img.Save("C:\path\to\output\image.png") # Release the captured screen resources $img.Dispose() |
This code defines a PowerShell class called ScreenCapture. The CaptureScreen method uses various Windows API functions to capture the screen and stores the captured image in bitmap format. The bitmap is then converted to a System.Drawing.Image object and saved as an image file (in this example, image.png). Finally, resources are released to avoid memory leaks.
Best PowerShell Books to Read in May 2025
1
Rating is 5 out of 5
Mastering PowerShell Scripting: Automate and manage your environment using PowerShell 7.1, 4th Edition
2
Rating is 4.9 out of 5
Windows PowerShell Cookbook: The Complete Guide to Scripting Microsoft’s Command Shell
3
Rating is 4.8 out of 5
PowerShell Cookbook: Your Complete Guide to Scripting the Ubiquitous Object-Based Shell
4
Rating is 4.7 out of 5
Learn PowerShell in a Month of Lunches, Fourth Edition: Covers Windows, Linux, and macOS
5
Rating is 4.6 out of 5
PowerShell for Beginners: Learn PowerShell 7 Through Hands-On Mini Games
6
Rating is 4.5 out of 5
PowerShell for Sysadmins: Workflow Automation Made Easy
7
Rating is 4.4 out of 5
Learn PowerShell Scripting in a Month of Lunches
8
Rating is 4.3 out of 5
Windows PowerShell Step by Step
9
Rating is 4.2 out of 5
PowerShell 7 for IT Professionals: A Guide to Using PowerShell 7 to Manage Windows Systems
10
Rating is 4.1 out of 5
Windows Server Automation with PowerShell Cookbook: Powerful ways to automate, manage and administrate Windows Server 2022 using PowerShell 7.2, 5th Edition
11
Rating is 4 out of 5
PowerShell Automation and Scripting for Cybersecurity: Hacking and defense for red and blue teamers
Can you specify the output file format for screen captures in Windows PowerShell?
In Windows PowerShell, the output file format for screen captures depends on the command used to capture the screen.
If you are using the Get-ScreenCapture cmdlet from the Windows.UI.Composition module, the output file format is PNG by default. However, you can specify a different file format by using the -ImageFileFormat parameter along with one of the available options: BMP, GIF, JPEG, PNG, TIFF. For example:
1
|
Get-ScreenCapture -ImageFileFormat JPEG
|
If you are using the Send-ScreenShot cmdlet from the Posh-Screenshot module, the output file format is also PNG by default. However, you can specify a different file format by using the -Format parameter along with one of the available options: BMP, EMF, EXIF, GIF, ICON, JPEG, PNG, TIFF, WMP. For example:
1
|
Send-ScreenShot -Format JPEG
|
These are just a couple of examples, and there might be other ways to capture screens or take screenshots in PowerShell with different default file formats or options. It’s always a good idea to consult the specific documentation or help for the command/module you are using to capture the screen.
Are there any limitations or system requirements when performing screen captures in Windows PowerShell?
Yes, there are limitations and system requirements when performing screen captures in Windows PowerShell. Some of the notable limitations and requirements include:
- PowerShell version: Screen capturing functionality is available in PowerShell 5.0 and later versions. If you are using an older version, you may not have the necessary cmdlets and methods for capturing screens.
- System requirement: Your computer should have an active graphics adapter capable of rendering graphics. Screen captures require the ability to access the video memory and capture the current screen image.
- Limited to the console window: PowerShell’s screen capture functionality is primarily focused on capturing the console window itself. It does not provide direct support for capturing other application windows or the desktop.
- Limited to text-based output: Screen captures in PowerShell are limited to capturing the text-based output displayed in the console window. It does not capture graphical elements, images, or videos.
- Capturing full buffer: By default, PowerShell captures the visible portion of the console window. If you want to capture the entire buffer, including text that is scrolled out of view, additional code may be required.
- Encoding issues: PowerShell captures the text-based output as Unicode, which may cause encoding issues if the captured text contains special characters or specific encodings are expected.
- Dependency on screen resolution: The captured image may be affected by the screen resolution settings of your computer and might not look exactly the same on different systems.
It is important to note that PowerShell’s screen capture functionality is relatively basic and may not provide the same versatility as dedicated screen capture tools or libraries. If you require more advanced features or need to capture application windows or the desktop, third-party tools or libraries might be more suitable.
Is it possible to capture screens during a specific event or action in Windows PowerShell?
Yes, it is possible to capture screens during a specific event or action in Windows PowerShell. You can use various PowerShell commands and modules to take screenshots programmatically.
One way to capture screens in PowerShell is by using the System.Windows.Forms .NET assembly. Here’s an example script that captures the entire screen and saves it to a file:
1 2 3 4 5 6 7 8 9 10 11 12 13 14 15 16 17 18 |
Add-Type -TypeDefinition @" using System; using System.Drawing; using System.Windows.Forms; public class ScreenCapture { public static void CaptureScreen() { Bitmap screenshot = new Bitmap(Screen.PrimaryScreen.Bounds.Width, Screen.PrimaryScreen.Bounds.Height); Graphics graphics = Graphics.FromImage(screenshot); graphics.CopyFromScreen(0, 0, 0, 0, screenshot.Size); screenshot.Save("screenshot.png"); } } "@ [ScreenCapture]::CaptureScreen() |
The script defines a ScreenCapture class that captures the screen using the CopyFromScreen method and saves it to a file. The Add-Type cmdlet is used to compile the C# code on-the-fly and make it accessible in PowerShell. You can modify the code to capture only a specific window or region of the screen by specifying the desired dimensions in the CopyFromScreen method.
To capture screens during a specific event or action, you can add this script snippet at the appropriate location within your PowerShell script or add it to a function that is called during the desired event or action.
Another option is to use external tools like nircmd or screenshot-cmd to capture screens from PowerShell. These tools provide command-line utilities to take screenshots and can be executed using the Start-Process cmdlet in PowerShell.
Why would you want to do a screen capture in Windows PowerShell?
There are several reasons why you might want to do a screen capture in Windows PowerShell:
- Documentation: Screen captures can be useful for documenting specific steps or processes within PowerShell scripts or commands. It helps in providing visual illustrations or references to explain complex concepts or workflows.
- Troubleshooting: When encountering errors or issues within PowerShell scripts, screen captures can capture the error messages or the current state of the script execution. This helps in providing accurate information to seek assistance or perform debugging.
- Sharing: Screen captures enable sharing of PowerShell outputs, command results, or specific code snippets with colleagues, developers, or community forums. This facilitates better communication and support when seeking help or troubleshooting.
- Training or presentations: Screen captures can be used in tutorials, presentations, or training materials to demonstrate specific PowerShell commands, script execution, or output results. It helps in creating visually interactive materials for better understanding and learning.
- Documentation of system configurations: Screen captures can capture specific system configurations, software installations, or PowerShell module configurations for documentation purposes. It assists in creating accurate and comprehensive system documentation.
Overall, screen capturing in Windows PowerShell can be beneficial for documentation, troubleshooting, sharing information, training, or creating comprehensive system documentation.
Can you recommend any third-party tools or libraries for screen capture in Windows PowerShell?
Yes, there are a few third-party tools and libraries that can be used for screen capture in Windows PowerShell. Some popular options include:
- Snipping Tool++: It is an enhanced version of the built-in Snipping Tool in Windows. It provides additional features and customization options for capturing screenshots. You can call the Snipping Tool++ executable from PowerShell to capture screenshots programmatically.
- Greenshot: It is a free and open-source screenshot tool that allows capturing full screen, specific regions, or selected windows. Greenshot has a command-line interface that can be invoked from PowerShell to capture screenshots and save them to desired locations.
- ShareX: It is a comprehensive screen capture and sharing tool that supports capturing screenshots, recording screen activity, and more. ShareX offers a rich set of features and integrates with various image hosting services. It also provides command-line capabilities that make it suitable for automation with PowerShell.
These tools provide more capabilities and flexibility compared to the built-in PowerShell cmdlets and functions for screen capture. However, remember to review and adhere to the licensing terms of these third-party tools if you plan to use them in your projects.
Can you recommend any resources or tutorials for further learning about screen captures in Windows PowerShell?
Yes, here are some resources and tutorials to further your learning about screen captures in Windows PowerShell:
- Microsoft Documentation: The official Microsoft documentation provides detailed information and examples on how to capture screens using PowerShell. You can find it at: https://docs.microsoft.com/en-us/powershell/scripting/samples/displaying-windows-wmi-objects-in-a-grid-view-output
- PowerShell Gallery: PowerShell Gallery is a platform where you can find a variety of PowerShell scripts and modules. Searching for «screen capture» or related terms in the gallery can provide useful scripts and examples shared by the PowerShell community. Visit: https://www.powershellgallery.com/
- YouTube Tutorials: YouTube has numerous video tutorials that walk you through screen capturing in PowerShell. Search for keywords such as «screen capture PowerShell tutorial» or «PowerShell screenshot» to find helpful videos.
- Blog Posts: There are several blogs dedicated to PowerShell that cover screen capturing topics. Popular blogs such as «PowerShell Magazine,» «Hey, Scripting Guy! Blog,» and «Tales from the Script» often share articles on this subject. Searching for «screen capture PowerShell blog» can yield some informative posts.
- PowerShell Scripting Community: Engaging with the PowerShell community can be beneficial for learning. Websites like PowerShell.org and PowerShell subreddit (r/PowerShell) have active communities where you can ask questions, share experiences, and find helpful resources.
Remember to practice what you learn and experiment with different approaches to gain proficiency in screen capturing with PowerShell.
Applies ToWindows 11 Windows 10
С помощью снимков можно копировать слова или изображения со всего экрана ПК или его части. Используйте приложение «Ножницы», чтобы вносить изменения, добавлять заметки, а также сохранять и отправлять снимки.
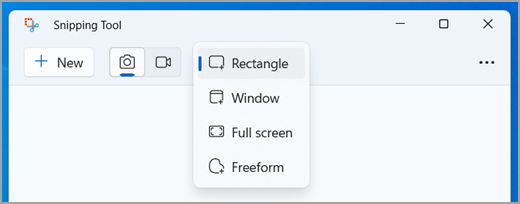
Поддерживаются следующие типы фрагментов:
|
Свободное поле |
Нарисуйте фигуру свободной формы вокруг объекта. |
|
Прямоугольник |
Обведите указатель вокруг объекта, чтобы образовать прямоугольник. |
|
Окно |
Выберите окно, которое требуется захватить, например диалоговое окно. |
|
Полноэкранный режим |
Захват всего экрана. |
|
Фрагмент видео |
Запишите видеоклип прямоугольного фрагмента любой части экрана, который вам нравится. |
После того как снимок экрана сделан, он автоматически копируется в окно приложения «Ножницы», где его можно изменить, сохранить и отправить.
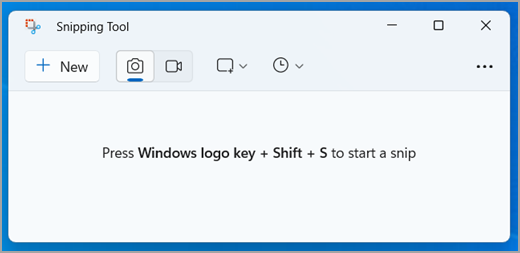
Открытие приложения «Ножницы»
Существует четыре способа открыть ножницы:
-
Нажмите кнопку Пуск , введите ножницы, а затем выберите Инструмент ножницы в результатах.
-
Нажмите клавишу с логотипом Windows +SHIFT+S для статического фрагмента изображения.
-
Нажмите кнопку Print Screen (PrtSc) для статического фрагмента изображения.
-
Нажмите клавишу с логотипом Windows + SHIFT + R для фрагмента видео.
Работа со снимками экранов
Открыв ножницы, выберите один из следующих вариантов, чтобы создать снимки экрана и работать с ним.
В средстве ножницы выберите Режим. В более ранних версиях Windows щелкните стрелку рядом с кнопкой Создать. Затем, когда вы выберете нужный тип фрагмента, вы увидите, что весь экран немного изменится на серый. После выбора любого элемента на экране выберите область экрана, которую требуется захватить.
После захвата фрагмента изображения вы можете:
-
Напишите или рисуйте на или вокруг него, нажав кнопки Перо или Маркер.
-
Добавьте фигуры или эмодзи в фрагмент, нажав кнопку Фигуры .
-
Выберите Ластик, чтобы удалить добавленные линии или фигуры.
-
Обрезка изображения, нажав кнопку Обрезка изображения .
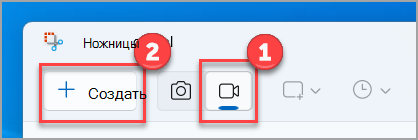
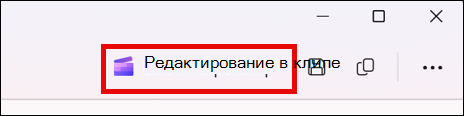
Чтобы записать фрагмент видео, откройте ножницы, нажмите кнопку Записать , а затем выберите Создать запись или нажмите клавишу с логотипом Windows +SHIFT+ R. Выберите область экрана, которую вы хотите записать, а затем нажмите кнопку Пуск. По завершении нажмите кнопку Остановить. На этом этапе вы можете сохранить запись как есть или выбрать Изменить в Clipchamp , чтобы работать с ней в видеоредакторе Clipchamp.
Завершив запись фрагмента видео, нажмите кнопку Изменить в Clipchamp , чтобы добавить субтитры или аудио.
Создание и добавление субтитров
-
Перейдите на вкладку Субтитры и нажмите кнопку Транскрибировать мультимедиа .
-
Выберите язык и параметры фильтрации во всплывающем окне.
-
Перейдите и выберите Transcribe media (Транскрибировать носитель), чтобы создать субтитры.
Добавление и отключение звука из фрагмента видео
-
Выберите вкладку Звук на боковой панели.
-
Настройте громкость в диапазоне от 0 до 200 %.
-
Чтобы скачать звук отдельно, нажмите кнопку Отсоединить звук .
-
Чтобы открыть скачанный аудиофайл, нажмите клавишу с логотипом Windows + R и введите «downloads» в диалоговом окне.
Дополнительные сведения см. в статье Добавление субтитров и звукового описания к фрагменту видео.
Примечания:
-
Чтобы добавить автозаголовок в фрагмент видео, см . статью Использование автозаголовок в Clipchamp.
-
Сведения о том, как использовать функцию преобразования текста в речь, см. в статье Использование функции преобразования текста в речь.
-
После записи фрагмента нажмите кнопку Сохранить как.
-
В поле Сохранить как введите имя файла, расположение и введите, а затем нажмите кнопку Сохранить.
После записи фрагмента выберите меню Дополнительно в правом верхнем углу и выберите Поделиться.
После захвата фрагмента нажмите кнопку Действия текста , чтобы активировать функцию оптического распознавания символов (OCR). Это позволяет извлекать текст непосредственно из изображения. Здесь вы можете выбрать и скопировать определенный текст или использовать инструменты для копирования всего текста или быстро отредактировать все адреса электронной почты или номера телефонов в фрагменте. Все процессы распознавания текста выполняются локально на вашем устройстве.
|
Сочетание клавиш |
Действие |
|---|---|
|
ALT + M |
Выбор режима ножниц. |
|
ALT + N |
Создание нового фрагмента в том же режиме, что и последний. |
|
SHIFT +клавиши со стрелками |
Перемещение курсора для выбора различных типов фрагментов. |
|
ALT + D |
Задержка захвата на 1-5 секунд |
|
CTRL + C |
Копирование фрагмента в буфер обмена |
|
CTRL + S |
Сохранение фрагмента |
Открыв запись в инструменте ножницы, выберите Изменить > Изменить с помощью paint, чтобы использовать функции для изменения размера, цвета, текста и многих других улучшений.
В папке, в которую вы сохранили фрагмент, щелкните правой кнопкой нужный фрагмент. Выберите Печать из параметров и выберите способ печати изображения.
В поле поиска на панели задач введите ножницы. Вы увидите приложение «Ножницы» и список действий, которые можно выполнить. Выберите Закрепить на панели задач.
Сначала определите меню или другие компоненты, которые требуется записать. В инструменте ножницы выберите Задержка , а затем выберите, например, 5 секунд. Выберите Режим, чтобы начать 5-секундный обратный отсчет. В течение 5 секунд откройте меню или составьте изображение иным образом. Через 5 секунд, когда вы увидите, что экран становится серым, используйте мышь для рисования вокруг нужной области.
Нужна дополнительная помощь?
Нужны дополнительные параметры?
Изучите преимущества подписки, просмотрите учебные курсы, узнайте, как защитить свое устройство и т. д.
Не знаю для каких задач вам может пригодиться снимать с экрана скриншоты, но надеюсь что для абсолютно легальных. Например для родительского контроля.
Родительский контроль это ведь легально, да?
Следующий скрипт захватывает изображение с экрана, вместе с курсором, и помещает в папку C:\Temp\Screenshot.
$Path = "C:\Temp\Screenshot\"
Add-Type -AssemblyName System.Windows.Forms
$ScreenBounds = [System.Windows.Forms.Screen]::PrimaryScreen.Bounds
$Image = New-Object System.Drawing.Bitmap($screenBounds.Width, $ScreenBounds.Height)
$CopyScreen = [System.Drawing.Graphics]::FromImage($Image)
$Point = New-Object System.Drawing.Point(0, 0)
$CopyScreen.CopyFromScreen($Point,[Drawing.Point]::Empty, $Image.Size);
$СursorBounds = New-Object System.Drawing.Rectangle([System.Windows.Forms.Cursor]::Position, [System.Windows.Forms.Cursor]::Current.Size)
[System.Windows.Forms.Cursors]::Default.Draw($CopyScreen, $СursorBounds)
$CopyScreen.Dispose()
if(![System.IO.Directory]::Exists($Path)){ New-Item -ItemType Directory $Path }
$Image.Save( $path+ "$(get-date -f yyyy.MM.dd_h\h_m\m)"+".jpg" )
$Image.Dispose()
Для съемки экрана через заданные интервалы времени, код можно поместить в цикл while
while($true){   { SCRIPT }
   sleep(60) # Пауза в 60 секунд
}
Не захватывать курсор
Если вам не нужен курсор на изображениях, то удалите из кода следующие строки
$СursorBounds = New-Object System.Drawing.Rectangle([System.Windows.Forms.Cursor]::Position, [System.Windows.Forms.Cursor]::Current.Size)
[System.Windows.Forms.Cursors]::Default.Draw($CopyScreen, $СursorBounds)
Возможные проблемы
Exception calling "CopyFromScreen" with "3" argument(s): "Неверный дескриптор"
Если вы получаете такую ошибку, то скорее всего вы пытаетесь выполнить скрипт на удаленном компьютере.
Ошибка возникает потому, что переменная $Image не содержит значения, из-за того что вы не указываете для какого сеанса нужно выполнить код, а PowerShell не может определить монитор, с которого нужно выполнить захват изображения.
При этом в целевой папке создаются файлы с белым фоном и размером до 10кб.
Для успешного захвата изображения, используя PsExec, укажите ключи -s и -i для того что бы выполнить скрипт в активной на данный момент сессии.
Вместо ключа -s можно указать ключ -u и конкретизировать учетную запись, имеющую права администратора
psexec -i -s \\CompName powershell -nologo -WindowStyle hidden -inputformat none -ExecutionPolicy Bypass -file "C:\Temp\Script.ps1"
Что бы завершить выполнение удаленного процесса, выполните для целевого компьютера WMI команду:
wmic /node:CompName process where "ExecutablePath like '%power%'" delete
Записки администратора
Even though Windows 10 has made taking screenshots so much easier, using PowerShell for the same task still gives a lot of good use. But PowerShell doesn’t have the capability of taking screenshots out of the box. You will need to leverage .NET for a few things.
Here is a good example of taking a full window screenshot using PowerShell.
$File = 'fullpath\filename.png'
Add-Type -AssemblyName System.Windows.Forms
Add-type -AssemblyName System.Drawing
# Gather Screen resolution information
$Screen = [System.Windows.Forms.SystemInformation]::VirtualScreen
$Width = $Screen.Width
$Height = $Screen.Height
$Left = $Screen.Left
$Top = $Screen.Top
# Create bitmap using the top-left and bottom-right bounds
$bitmap = New-Object System.Drawing.Bitmap $Width, $Height
# Create Graphics object
$graphic = [System.Drawing.Graphics]::FromImage($bitmap)
# Capture screen
$graphic.CopyFromScreen($Left, $Top, 0, 0, $bitmap.Size)
# Save to file
$bitmap.Save($File, [System.Drawing.Imaging.ImageFormat]::Png)
Write-Output "Screenshot saved to:"
Write-Output $File
Running the script saves the current desktop in PNG format automatically at the location of your choice.
Guess what would be more useful? Taking the screenshot of a remote computer.
And that’s where the challenge comes in.
Since you will need to run the script as a currently logged-on user so it could take the screenshot on an active session, you can’t use Invoke-Command anymore.
The easy workaround is to use SysInternal’s popular PsExec command line to execute the script from a remote computer using the currently logged-in user’s session. Use the command line QUser to find the session ID if needed.
psexec -s -i $sessionID \$computer Powershell.exe -executionpolicy bypass -file "fullpath\script.ps1"
However, where I work, PsExec is blocked by the Anti-malware system because of its widespread popularity among hackers.
If you are using a paid version of PDQ Deploy, it’s relatively easy to set up a new package that runs the PowerShell script as a logged-on user.