
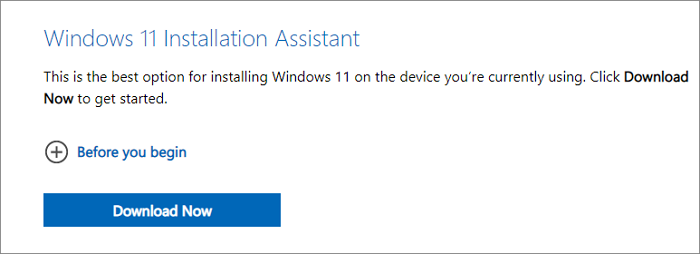
Windows 11 Installation Assistant
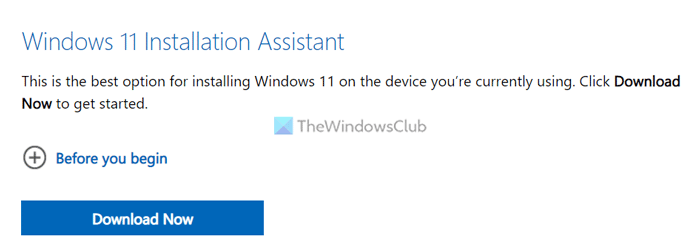
This is the best option for installing Windows 11 on the device you’re currently using. Click Download Now to get started.
Note: Windows 11 Installation Assistant doesn’t run on Arm-based PCs; it only works for x64 processors.
-
Before you begin, check to see if the following conditions apply to you:
- You have a Windows 10/11 license.
- Your PC must have Windows 10, version 2004 or higher installed to run Installation Assistant.
- Your PC must have 9 GB of free disk space to download Windows 11.
Note: Your PC meets the Windows 11 device specifications for upgrade requirements and supported features. Certain features require additional hardware. We also recommend that you visit your PC’s manufacturer’s website for information about updated drivers and hardware compatibility.
After you download the Installation Assistant:- Select Run. You need to be an administrator to run this tool.
- Once the tool confirms the device hardware is compatible, you will be presented with the license terms. Select Accept and Install.
- Once the tool is ready, click the Restart Now button to complete installation on your computer.
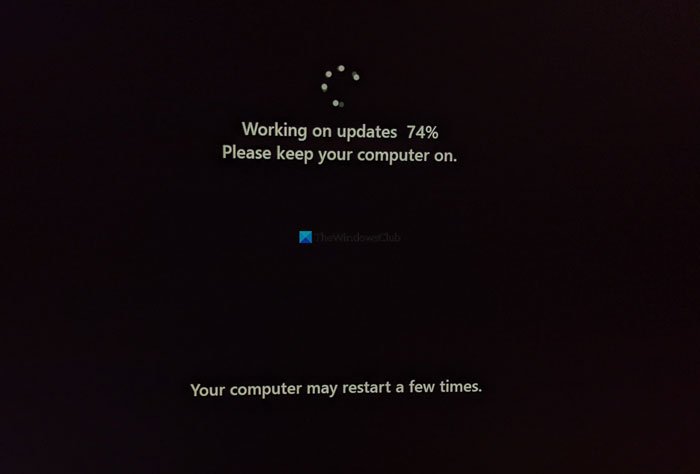
- It might take some time to install Windows 11, and your PC will restart a few times. Make sure you don’t turn off your PC.
Note: Windows 11 Installation Assistant doesn’t run on Arm-based PCs. It’s only supported for PCs using x64 processors. If you need installation media to install Windows 11 on a different PC, see Create Windows 11 Installation Media.
Create Windows 11 Installation Media
If you want to perform a reinstall or clean install of Windows 11 on a new or used PC, use this option to download the media creation tool to make a bootable USB or DVD.
Note: Windows 11 media creation tool cannot be used to create installation media for Arm-based PCs; it can only create media for x64 processors.
-
To get started you first need a license to install Windows 11 or have a Windows 10 device that qualifies for an upgrade to Windows 11.
Make sure you have:
- An internet connection (internet service provider fees may apply).
- Sufficient data storage available on the computer, USB, or external drive you are downloading the .iso file to.
- A blank DVD disc with at least 8GB (and DVD burner) to create a bootable disc. We recommend using a blank USB or blank DVD, because any content on it will be deleted during installation.
- If you receive a “disc image file is too large” message while attempting to burn a DVD bootable disc from an ISO file, consider using a higher capacity Dual Layer DVD.
Ensure the PC you want to install Windows 11:
- Has a 64-bit CPU: Windows 11 can only run on 64-bit CPUs. To see if your PC has one, go to Settings > System > About, or search “System Information” in Windows and look under “System Type.”
- Windows 11 Media Creation Tool creates installation media only for x64 processors. For Arm-based PCs, you should wait until you are notified through Windows Update that the upgrade is ready for your PC.
- Meets system requirements: Not all devices running Windows 10 are eligible to receive a Windows 11 upgrade. See the Note below with the link to: Windows 11 device specifications for upgrade requirements and supported features. Certain features required for additional hardware.
- WARNING: Installing Windows 11 media on a PC that does not meet the Windows 11 minimum system requirements is not recommended and may result in compatibility issues. If you proceed with installing Windows 11 on a PC that does not meet the requirements, that PC will no longer be supported and won’t be entitled to receive updates. Damages to the PC due to lack of compatibility aren’t covered under the manufacturer warranty.
- Matches your current language: You’ll need to choose the same language when you install Windows 11. To see what language you’re currently using, go to Time & language in PC settings or Region in the Control Panel.
Note: See the Windows 11 device specifications for upgrade requirements and supported features. Certain features require additional hardware. We also recommend that you visit your PC’s manufacturer website for information about updated drivers and hardware compatibility.
Using the Media Creation Tool to create installation media:
- After downloading, run the media creation tool. You need to be an administrator to run this tool.
- If you agree to the license terms, select Accept.
- On the What do you want to do? page, select Create installation media for another PC, and then select Next.
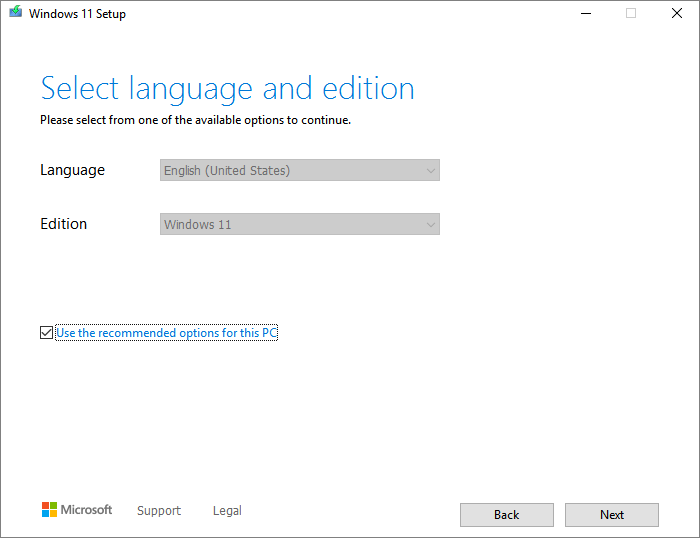
- Select the language, edition, and architecture (64-bit) for Windows 11.
- Select which media you want to use:
- USB flash drive: Attach a blank USB flash drive with at least 8GB of space. Any content on the flash drive will be deleted.
- ISO file: Save an ISO file to your PC. This can be used to create a bootable DVD. After the file is downloaded, you can go to location where the file is saved, or select Open DVD burner, and follow the instructions to burn the file to a DVD.
After the installation media is created, follow the steps below to use it.
- To check for updates now, select the Start button, and then go to Settings > Windows Update, and select Check for updates. You may also wish to visit your device manufacturer’s support site for any additional drivers that may be needed.
Note: Drivers for Surface devices may be found on the Download drivers and firmware for Surface page.
Before you install Windows 11, it’s a good idea to save any work and back up your PC before you start. If you used the Media Creation Tool to download an ISO file for Windows 11, remember to burn it to a DVD before following these steps:
- Attach the USB flash drive or insert the DVD on the PC where you want to install Windows 11.
- Restart your PC.
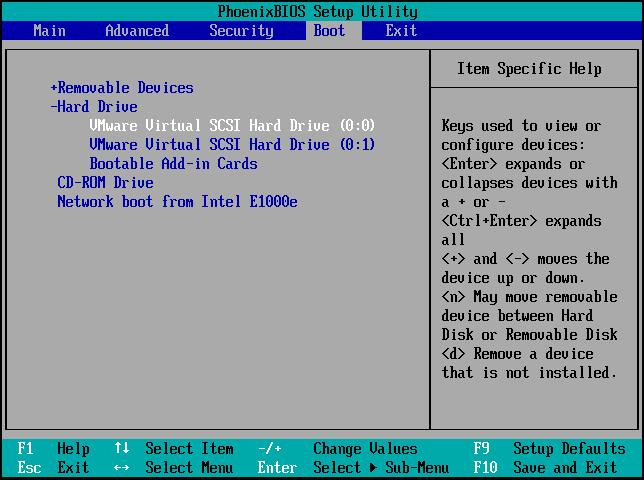
- If your PC does not automatically boot to the USB or DVD media, you might have to open a boot menu or change the boot order in your PC’s BIOS or UEFI settings.
- To open a boot menu or change the boot order, you’ll typically need to press a key (such as F2, F12, Delete, or Esc) immediately after you turn on your PC. For instructions on accessing the boot menu or changing the boot order for your PC, check the documentation that came with your PC or go to the manufacturer’s website.
- If you do not see the USB or DVD media device listed within the boot options, you may need to reach out to the PC manufacturer for instructions for temporarily disabling Secure Boot in your BIOS settings.
- If changing the boot menu or order doesn’t work, and your PC immediately boots into the OS you want to replace, it is possible the PC had not fully shut down. To ensure the PC fully shuts down, select the power button on the sign-in screen or on the Start menu and select Shut down.
- On the Install Windows page, select your language, time, and keyboard preferences, and then select Next.
- Select Install Windows.
Important Note: If you made changes to the boot order in step 2, you may face a scenario where the initial Install Windows page will display after the installation process is complete. To resolve this, you will need to revert the changes you made to the boot order. This ensures that the internal drive you just installed Windows on will boot normally.
Download Windows 11 Disk Image (ISO) for x64 devices
This option is for users that want to create a bootable installation media (USB flash drive, DVD) or create a virtual machine (.ISO file) to install Windows 11. This download is a multi-edition ISO which uses your product key to unlock the correct edition.
Windows 11 ISOs for Arm64 devices are available here.
Select an edition from the drop down menu.
-
- An internet connection (internet service provider fees may apply).
- Sufficient data storage available on the computer, USB, or external drive you are downloading the .iso file to.
- A blank DVD disc with at least 8GB (and DVD burner) to create a bootable disc. We recommend using a blank USB or blank DVD, because any content on it will be deleted during installation.
- If you receive a “disc image file is too large” message while attempting to burn a DVD bootable disc from an ISO file, consider using a higher capacity Dual Layer DVD.
Ensure the PC you want to install Windows 11:
- Has a 64-bit CPU: Windows 11 can only run on 64-bit CPUs. To see if your PC has one, go to Settings > System > About , or search “System Information” in Windows and look under “System Type.”
- Meets system requirements:
Not all devices running Windows 10 are eligible to receive a Windows 11 upgrade. See the Note below for details.- WARNING: Installing Windows 11 media on a PC that does not meet the Windows 11 minimum system requirements is not recommended and may result in compatibility issues. If you proceed with installing Windows 11 on a PC that does not meet the requirements, that PC will no longer be supported and won’t be entitled to receive updates. Damages to the PC due to lack of compatibility aren’t covered under the manufacturer warranty.
Once the download completes you can use the Verify your download option to ensure the integrity of the file.
Note: See the Windows 11 device specifications for upgrade requirements and supported features. Certain features require additional hardware. We also recommend that you visit your PC’s manufacturer website for information about updated drivers and hardware compatibility.
Installation instructions (DVD):
- Locate the folder where you downloaded the Windows 11 ISO to.
- To use Windows Disk Image Burner to create the installation DVD, right-click on the ISO file and select Properties . Under the «General tab», click «Change…» where it says, «Opens with:» and select Windows Explorer. Select Apply . This will enable the Burn disc image to display when you right-click on the ISO file.
- To use a third-party DVD burning program, you can right-click on the ISO file and select Open with .
Installation instructions (ISO):
- If you want to install Windows 11 directly from the ISO file without using a DVD or USB flash drive, you can do so by mounting the ISO file. This will perform an upgrade of your current operating system to Windows 11.
- To mount the ISO file:
- Go to the location where you downloaded the ISO file. Then, right-click the ISO file and select Properties .
- On the «General» tab, click »Change…» where it says, “Opens with:» and select Windows Explorer for the program you would like to use to open ISO files and select Apply .
- Right-click the ISO file and select Mount .
- This will create a “virtual” bootable disc. Double-click on it to view the files within. Double-click setup.exe to start Windows 11 setup.
Select the product language
You’ll need to choose the same language when you install Windows. To see what language you’re currently using, go to Time and language in PC settings or Region in Control Panel.
Select a language from the drop down menu.
Error
We encountered a problem processing your request. Please try again later.
Download — {{GetProductDownloadLinksBySku.ProductDownloadOptions.0.LocalizedProductDisplayName}}
-
If you would like to verify the data integrity and authenticity of your download, you can follow these steps:
- Download the desired product ISO file and follow the installation guidelines.
- Launch Windows PowerShell. If you need help finding the location of PowerShell for your operating system, get help in finding the location of PowerShell here: Get Help in finding the location of PowerShell.
- In PowerShell, compute the hash value for the ISO file you downloaded using the Get-FileHash cmdlet. For example:
Get-FileHash C:\Users\user1\Downloads\Contoso8_1_ENT.iso
- If the SHA256 output matches the value in the below table, for the product that you downloaded, this confirms that the file has not been corrupted, tampered with or altered from the original.
Get additional information on the Get-FileHash command.
Hash values for the ISO files for Each Language
Hash values for the ISO files for Each Language
Country Locale Hash Code Arabic 64-bit 97ED2DF27DEBE5A8E94FB37BE4383EB8516D5C24117793BDA5C1E13568D3F754 Bulgarian 64-bit 1C1BD6E96290521B7E4F814ACA30C2CC4C7FAB1E3076439418673B90954A1FFC Chinese Simplified 64-bit BD1ECBA89BC59B7B62EF12C88C4E70D456EDAC10B969ECB3299EBD458B1F0FB3 Chinese Traditional 64-bit B92C3D6D428D12CF78A8D287B8FB28FFBC44D4A36B74C1B121C3CF443DC67ED2 Croatian 64-bit 95C7008AB1B0BA65212A36FB728AC93B9D7611400A78393FE7B319ED5B74AC5C Czech 64-bit 76120E535DB895D0EA69F47D55B836940821352A010DEDFCBCFC1E22E619FC4B Danish 64-bit D5D34DFFE45BA557581ADA14AC025DB8AA58989D054706061B7D0E5B47F5FDB9 Dutch 64-bit EE9BC545673D8F954A1EDAC691D749438D3E4DFA10A75D2519F79E3708D79FDC English 64-bit B56B911BF18A2CEAEB3904D87E7C770BDF92D3099599D61AC2497B91BF190B11 English International 64-bit D5A4C97C3E835C43B1B9A31933327C001766CE314608BA912F2FFFC876044309 Estonian 64-bit D12DC03FA15A7F436A800692E9BA30DBDDAA4CD6122DD71719A2898E953B5407 Finnish 64-bit D6057E058021A9DF8A02B7BB16331D88C38E8BB63D5AD897D094E0DF6C6ADB5A French 64-bit B73AA55DB50D2AD348F61C6537DA05C0D6DED78A143763454E977BE85B444119 French Canadian 64-bit 3CA47351DAD16BD3F7AFA27CDEB321DD726B79859DE8D2769359C7621DE38EC4 German 64-bit 96E036F1219F9EE59F96312CE43EC7DF093E768383A77132750271940926A013 Greek 64-bit 92248F9F5A8735337D4B0DCCE4DD13348F8718858590FD9D1EB00020B5AFB33A Hebrew 64-bit 27D8090B9266A2DAC04E403FE63E46ADE661A5661BF26CA5EBB1A2F13245E86F Hungarian 64-bit 7B58807592AEB2FC5DDF5AF9749FA023CE9165AA4A1BF4F4741709F8AA2EE9D3 Italian 64-bit D95EC65EC06B4036835C7571FE0108159848D2883EF5DA3A67E480130B1F5862 Japanese 64-bit A1E1BCB6C014F39E4A324EC24DB1B745EE62617D29A450BF7B2596A3DCCECD7D Korean 64-bit 63ED86ADFC53F464649478F931EAE39A42DB3FD86C266C9B5AF7F8E19D318C51 Latvian 64-bit F4C2BF7C16576E6D631070D7B7CF6F55E8359D0729B571C570DC6F39D77D9EA6 Lithuanian 64-bit 23B14643B0AD6FDD0231EA201C5E1B000912EE3A0542F1B1F6907DB470AE7D7B Norwegian 64-bit 6CBD6C3FED9CE08AF85420F19D01C287FC58EC0C42DC7409D1D5C341CEB6492B Polish 64-bit 654273603A945EBA3B185FD5D2C22207A0EB788B5E3402F71E6D0839B3026943 Brazilian Portuguese 64-bit 1BC63E9C62FE3EB7E46778F24C790933770FA7430304583BBDF96B47A5D61F1F Portuguese 64-bit FAAFEDFC301A381B0712FC8DB9F0A16ADE2716B998DD4855D0A38172A9A87AB4 Romanian 64-bit 8B23AD43DF35EB75FADDFDFC85D616A001A4D72C757E5286011E3DC9452A5862 Russian 64-bit D0FBDB93864BF6C8ADE844473C9600EBB031C8BB656A272C736E45DFBD9B3BC9 Serbian Latin 64-bit 566047460EEA2F0E0D36E7A378DCFEEA79D7D3C0328227646BE4AB9AC39A9E36 Slovak 64-bit 5B77F2B5F7C77ABF68E628AC37A8841BB1058B7173C1C76DC5A5F6C5BBA855FD Slovenian 64-bit 73F0DC7CC15885F565C76D78D54E4E4D9934720FFE583B52EFDDA2E2457402D7 Spanish 64-bit 708AF7C9AC63B7EB045CA9B196568758B6C1749E8D13CADE61FAACBC7C66D142 Spanish (Mexico) 64-bit BA7A9B9A2052DEF8C24BCB88C76A47B2E6A6C6EE547EED226B9702C5C63AFC69 Swedish 64-bit F3674D377253E2D12635FDEAB76193E80BD80C56A41D10AB9CCEFDB0CDF1AD82 Thai 64-bit CAD5590347376103E369D7E04941B94C037F4CC6C75D81DC50E194FFA87C8CF8 Turkish 64-bit A47E054FE0B762F5B48D08E2B6F768F4B1CA0BC6DB831A76E829F92E578483AF Ukrainian 64-bit 68BABB954E4BFDF8A03ABC188D5120CF12D4DCA3CAE68EB1BFD4B64F872826E2
Links valid for 24 hours from time of creation.
Links expire: {{GetProductDownloadLinksBySku.DownloadExpirationDatetime}} UTC
Error
We encountered a problem processing your request. Please try again later.
*Your use of the media creation tools on this site is governed by the Microsoft Terms of Use for this website.
Windows 11 Installation Assistant is one of the best ways to upgrade your computer to Windows 11. If you want to upgrade your PC from Windows 10 to Windows 11, this step-by-step guide could be handy for you. Here is how you can use Windows 11 Installation Assistant to install Windows 11.

If you want to update your Windows 11 to the latest Windows 11 2022 Update version 23H2 Feature Update on your computer, then too you can use the Windows 11 Installation Assistant or Windows Update Assistant to do the job for you. Even if you haven’t received the update via Windows Updates, you can use this official tool to download the same update.
Before going ahead with the steps, you must know a few things:
- Your PC must support Windows 11 in terms of hardware. Otherwise, you cannot use this method to install or upgrade to Windows 11.
- You must have an internet connection to download Windows 11 and complete the installation.
- It allows you to keep your Windows 10 settings, apps, and files intact. However, you can remove them if you wish.
- You must have a valid Windows 10 license.
- It is mandatory to have Windows 10 version 2004 or later. Otherwise, the Windows 11 Installation Assistant won’t work.
- You must have the PC Health Check app on your PC.
If your hardware meets these requirements, please proceed.
To use Windows 11 Installation Assistant to install Windows 11, follow these steps:
- Visit the official Microsoft website to download the Installation Assistant.
- Double-click on the setup file.
- Click on the Refresh button if you haven’t downloaded the PC Health Check app earlier.
- Click the Accept and Install
- Let it download and verify everything from the official resource.
- Click the Restart now
- Continue with the installation.
Let’s delve into these steps in detail.
To get started, visit the official Microsoft website at microsoft.com to download the Windows 11 Installation Assistant on your computer.
Then, double-click on the setup file.
If you already have the PC Health Check app on your computer, you can click the Accept and Install button.

However, if your PC doesn’t have the PC Health Check app, you need to download it, verify if your computer meets t the Windows 11 hardware requirements, and click the Refresh button.
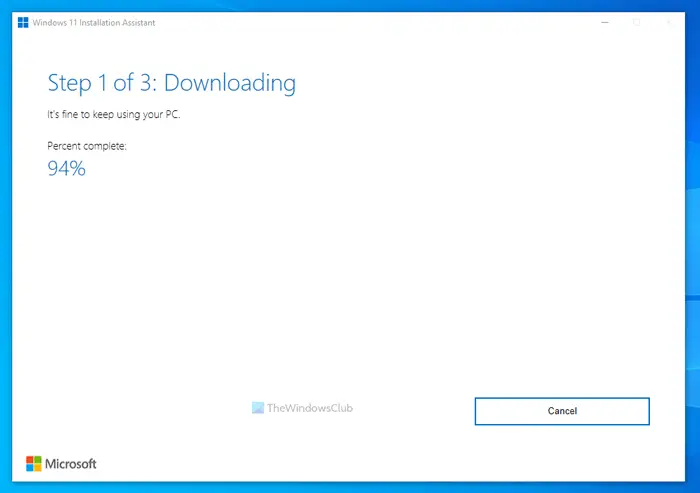
Once done, the Windows 11 Installation Assistant will start downloading and verifying the update.
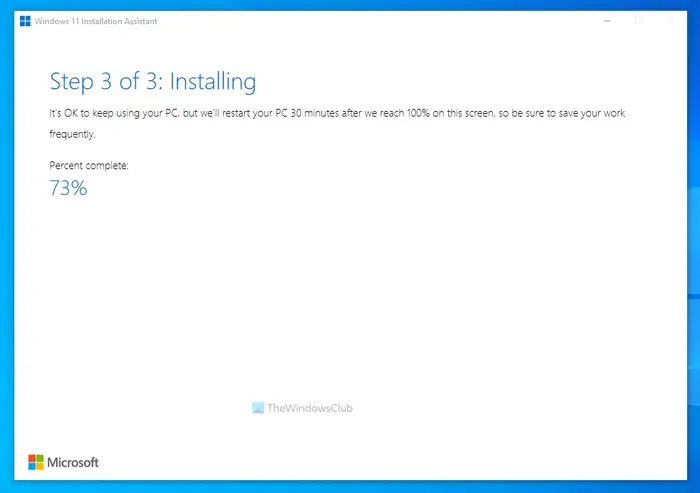
After that, it will start installing Windows 11 automatically. Meanwhile, you need to save your ongoing work since your PC will restart automatically after a specific time once it reaches 100%.
If you do not want to wait and restart immediately, click the Restart now button.
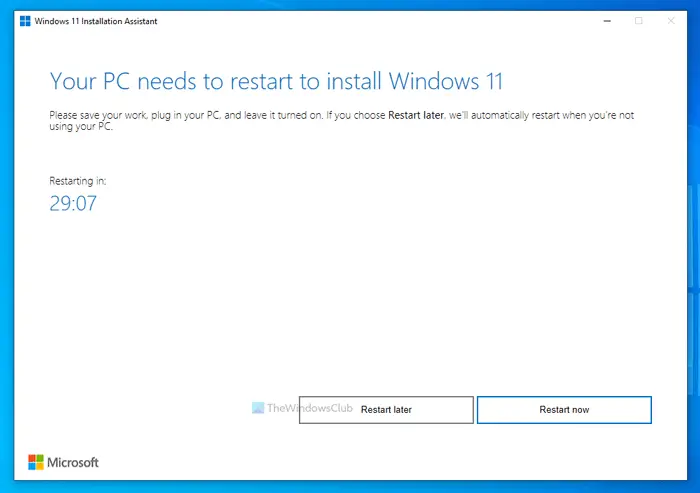
Following that, it will continue with the installation. Do not turn off your computer in the meantime.
Once done, you can find the lock screen of your computer. You need to enter your passcode/PIN to log in to your user account.
How do I install Windows 11 officially?
There are three ways to install Windows 11 officially on supported hardware. You can use the Windows 11 Installation Assistant to upgrade from Windows 10 to Windows 11. Other than that, you can create a bootable Windows 11 USB flash drive using Media Creation Tool or download Windows 11 ISO from the official website and create a bootable installation media using Rufus.
Read: How to install Windows 11 on unsupported hardware.
Can you download Windows 11 now?
Yes, you can download Windows 11 now from the official website. Whether you want to download the stable or Insider Preview build, both are possible at this moment. To download the stable version of Windows 11, you can visit the official download page.
Can my device run Windows 11?
To check if your device or PC can run Windows 11 or not, you need to use the PC Health Check app. It tells you whether your hardware is fully compatible with Windows 11 or not. For your information, you can install Windows 11 on unsupported hardware at your own risk.
Read: How to install Windows 11 without an Internet Connection
How do I install Windows 11 Installation Assistant?
Windows 11 Installation Assistant is a portable application. That said, you do not need to install Windows 11 Installation Assistant on your computer. However, if you want to install the latest version of Windows 11, you can download Windows 11 Installation Assistant from the official website and double-click on the executable file to start downloading the update.
Read: How to Clean Install Windows 11 from USB
Can you manually install Windows 11 updates?
Yes, you can manually install Windows 11 updates. There are multiple methods you can follow. For example, you can download an update from the official Microsoft Updates Catalog. On the other hand, you can install Feature Updates using the Windows 11 Installation Assistant or Windows 11 Update Assistant.
How do I manually install Windows 11 23H2?
If you haven’t received the Windows 11 23H2 update using Windows Updates, you can install it manually using Windows 11 Installation Assistant or Media Creation Tool. You can also download the ISO and install the update, respectively. No matter which build of Windows 11 you use, you can update your PC to the latest version using these methods.
I hope this guide helped.
Related reads:
- Download Windows 11 Disk Image (ISO) file from Microsoft
- Create Windows 11 bootable installation media using Media Creation Tool.
Microsoft выпустила стабильную версию Windows 11 для пользователей по всему миру. Обновление бесплатно для обладателей Windows 10 на совместимых для установки компьютерах.
Чтобы выполнить обновление до Windows 11, вы можете дождаться, когда оно станет доступно через «Центр обновления Windows». Если ваш компьютер соответствует всем требованиям, вы увидите предложение обновиться в ближайшие недели.
Другой вариант для самых нетерпеливых — загрузить Microsoft Windows 11 Download Assistant. Этот инструмент работает аналогично тому, что Microsoft использовала для Windows 10. Система загрузит обновление для вас самостоятельно, а затем вы сможете начать процесс установки в удобное время.

Посмотрите, какие минимальные системные требования выдвигает Microsoft для установки Windows 11:
- Процессор: не менее двух ядер с тактовой частотой не менее 1 ГГц на совместимом 64-битном процессоре или Системе на кристалле (SoC)
- Память: 4 ГБ
- Накопитель: 64 ГБ
- Экран: дисплей высокой четкости (720p) с диагональю более 9 дюймов, 8 бит на цветовой канал
- Безопасность: TPM 2.0 / UEFI Secured Boot
- Интернет: требуется подключение
- Видеоадаптер: совместим с DirectX 12 или более поздней версии с драйвером WDDM 2.0
- Разрядность ОС: только 64-bit
Проверить, поддерживает ли ваше нынешнее устройство Windows 11, также можно с помощью приложения Microsoft PC Health Check. Это специальная утилита, которая подскажет, по каким критериям ваше устройство не подходит, если с установкой обновления есть проблемы. Скачать PC Health Check можно по прямой ссылке.
Дополнительные сведения о системных требованиях, а также информация о том, каким образом можно обновить некоторые компьютеры или изменить настройки их параметров, чтобы они соответствовали требованиям, смотрите на сайте Microsoft.
Что изменилось в новой версии ОС:
Листайте галерею, чтобы выбрать процессор, который подойдет под ваши задачи:
- Робот Boston Dynamics показал «лунную походку» (видео)
- Более 40 смартфонов не смогут открывать WhatsApp. Проверьте свой (список гаджетов)
- Ракету «Циркон» впервые испытали с атомной подводной лодки
Introduce Windows 11
On June 24, 2021, Microsoft unveiled its new Windows 11 operating system that can be used on computers and tablets. On June 28th, Microsoft released the Insider Preview version. The official version may be launched later this year and support upgrades in 2022.
Windows 11 has made significant improvements in both system functions and user interface. The main features of Windows 11 are shown below.
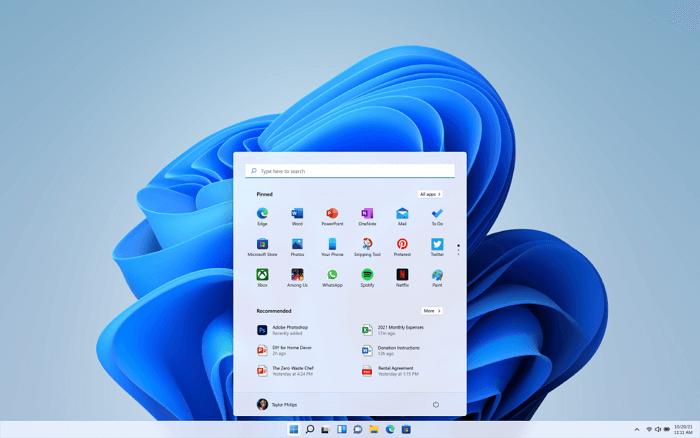
Brand new user interface
In appearance, Windows 11 has added a new day and night theme. The rounded corners and suspended frosted glass design make the interface look new. Windows 11 provides a brand-new Start menu.
Dynamic tiles have been completely deleted, replaced by simplified «icons» and an algorithm-driven recommendation list. At the same time, the centered taskbar is nailed. Whether it is newly installed or upgraded, it will appear by default. A switch will be provided to restore the previous usage habits.
A fresh way to connect — Microsoft Teams
For communication on Windows 11, Microsoft Teams will replace the previous Skype (the latter can also be downloaded from the Microsoft Store). Compared with Skype, Microsoft Teams has more extensive functions. In addition to completing audio and video calls between teams, it can also achieve more high-end functions such as document synchronization and office collaboration.
Better gaming experience
Windows 11 gives PC gamers a much better experience than Windows 10. The new DirectX 12, auto-open Auto HDR, DirectStorage performance improved 100 times, etc., so players get a better picture and faster loading speed.
In addition, Windows 11 features improvements in the widget, snap layout, and tablet mode. The Microsoft Store has also been revamped with more significant icons and a prettier interface. The new store will give developers more opportunities to capitalize on this new platform. Except for traditional UWP apps, the new Microsoft Store will offer .exe, PWA, .apk, and more downloadable application formats. And expand music, video, film, and more resources.
Windows 11 Download Requirements
On Microsoft’s official website, the software and hardware requirements for downloading and upgrading Windows 11 are clearly stated. The specific minimum system requirements are as follows.
- Processor: 1 gigahertz (GHz) or faster with two or more cores on a compatible 64-bit processor or System on a Chip (SoC)
- Memory: 4 GB RAM
- Storage: 64 GB or larger storage device
- System firmware: UEFI, Secure Boot capable
- TPM: Trusted Platform Module (TPM) version 2.0
- Graphics card: DirectX 12 compatible graphics / WDDM 2.x
- Display: >9» with HD Resolution (720p)
- Internet connection: A Microsoft account and internet connectivity are required for setup for Windows 11 Home.
Then how to test if your computer is compatible with Windows 11? You can use a Windows 11 Upgrade Checker from EaseUS to check if your PC or laptop meets the upgrade requirements.
The most common incompatible configuration items are:
- Boot Method: Windows 11 requires UEFI Secure Boot. If your CPU supports UEFEI boot mode, you can learn how to change legacy BIOS to UEFI.
- Disk Partition Type: Windows 11 requires the disk partition type of the system disk to be GPT. If your system is in MBR, learn how to convert MBR to GPT without data loss.
- TPM: Windows 11 requires TPM 2.0, and it should be enabled. Learn TPM for Windows 11 and how to enable it.
- Secure Boot: The secure boot on Windows 11 is required to be enabled.
How to Download Windows 11 in 3 Ways Step by Step
If your PC meets the Windows 11 minimum specifications, you can download and install Windows 11 from ISO file now. But you should back up your PC to keep data safe in advance.
Important:
Upgrading to a new operating system is somewhat risky. If you lose data due to improper operation, stop using your disk immediately and refer to professional Windows 11 data recovery software to recover lost files.
Method 1. Use Windows 11 Installation Assistant
To upgrade a Windows 10 PC to Windows 11, using the Windows 11 Installation Assistant of Microsoft is a great choice. Ensure your PC has a Windows 10 license and runs Windows 10, version 2004 or higher. Also, ensure your PC meets the Windows 11 minimum specifications and has 9 GB of free disk space.
Step 1. Open Microsoft’s Download Windows 11 webpage.
Step 2. Find Windows 11 Installation Assistant at the top of the page and click «Download Now».
Step 3. Run this tool as an administrator. After the tool confirms your PC is compatible, select «Accept and Install» to start the installation.
Step 4. Follow the on-screen instructions to install Windows 11 on your computer. It may take some time to download and install the new system, and your PC will restart a few times. Make sure you don’t turn off your PC.
Method 2. Install Windows 11 from a Bootable USB Drive
The first and the most simple way to get Windows 11 is by using EaseUS Windows 11 installation software, which lets you download Windows 11 with a simple click. All you need is to prepare a USB flash drive of 4GB to download the Win11 ISO file we have prepared for you, and then you can install Windows 11 with the bootable USB drive.
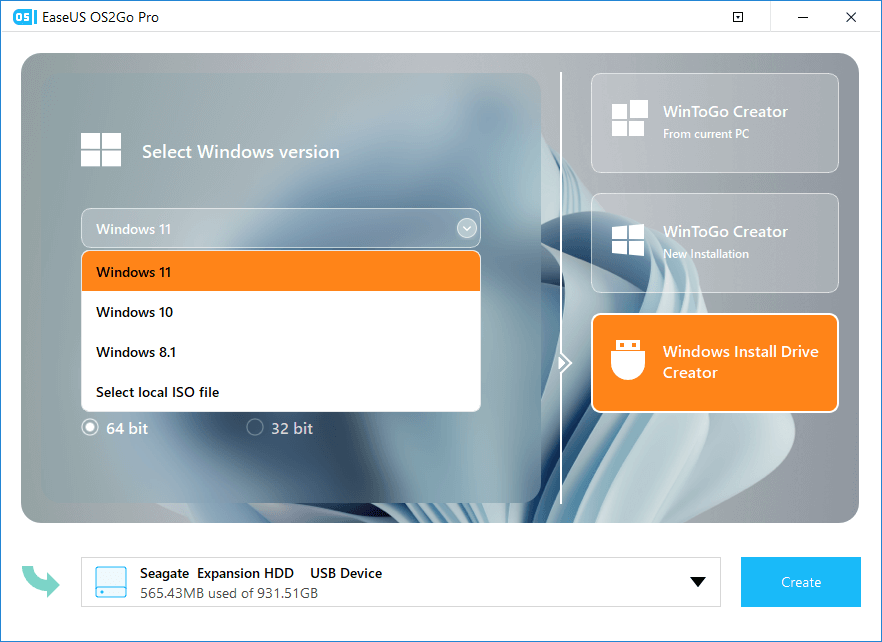
Step 1. Launch OS2Go after installation, and click Windows Install Drive Creator. The obtained system information is available on the home screen, and it keeps updating all the time. Apart from Windows 11, Win11 builder also supports you to download Windows 10/8.1.
Step 2. Connect your USB flash drive to the computer. Win11 builder will automatically detect your USB device, so all you need to do is click the Create button.
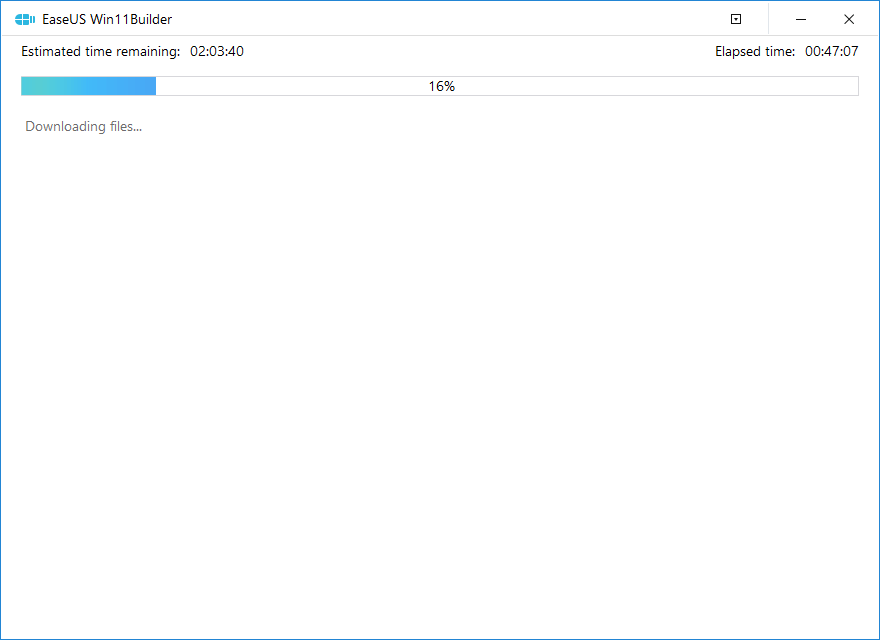
Step 3. The software will empty your USB drive data if it’s a used one. Once the downloading process begins, wait there until it finished or leave for a while to do you own job.
Step 4. After successfully downloading the Windows 11 iso image file on the USB drive, start to install Windows 11 from the bootable USB drive on your computer by following the installation wizard step by step.
Method 3. Use Create Windows 11 Installation Media Tool
If you need to perform a reinstall or clean install of Windows 11 on a new or used PC, you can do it by using the «Create Windows 11 Installation Media» tool.
Make sure that your PC meets these prerequisites:
- A stable internet connection.
- A blank DVD or USB drive with at least 8GB to create a bootable device. We recommend using a blank USB or blank DVD because the files on it will be deleted during installation.
- If you get the «disc image file is too large» message while attempting to burn a DVD bootable disc from an ISO file, consider using a higher capacity Dual Layer DVD.
Step 1. Go to the Download Windows 11 page of Microsoft. Find «Create Windows 11 Installation Media» and click «Download Now».

Step 2. Run the media creation tool as administrator to run this tool.
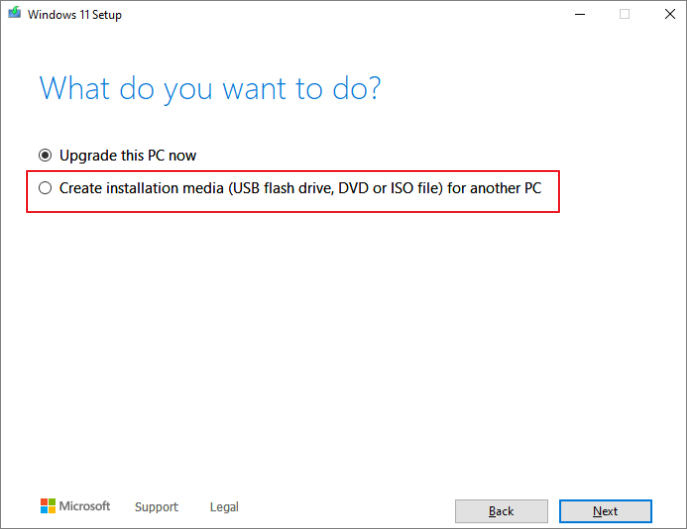
Step 3. On the »What do you want to do?» page, select «Create installation media (USB flash drive, DVD or ISO file )for another PC», and then select »Next».
Step 4. Select the language, edition, and architecture (64-bit) for Windows 11.
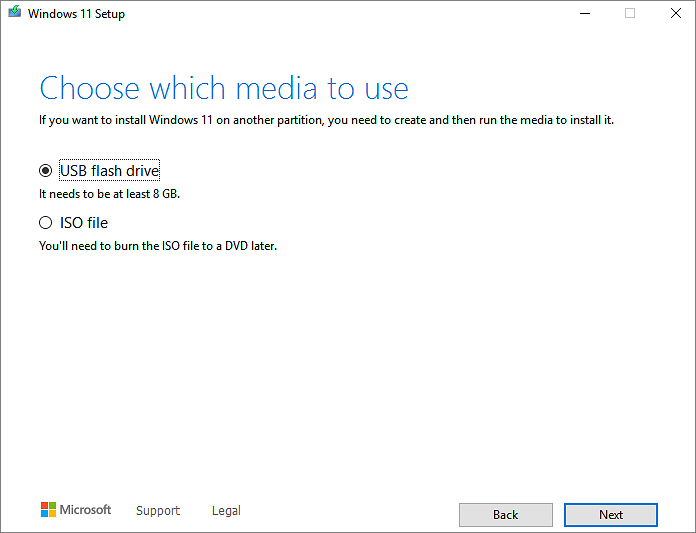
Step 5. Choose «USB flash drive» or «ISO file» to create the bootable installation media.
Also read: How to download Windows 11 ISO file to install Windows 11
Step 6. When the process finishes. Insert the bootable USB in the PC you want to install Windows 11, then restart it.
Step 7. Press F2, F12, Delete, or Esc (this varies by manufacturer) immediately after you turn on the computer to open the boot menu and change to boot from USB or DVD.
Step 5. Follow the instructions to finish installing Windows 11.
Windows 11 Download FAQs
Here are more related questions about Windows 11 downloads. Check the answers and information.
Can I download Windows 11 right now?
Windows 11 is now available for download to Windows Insiders as a preview build.
How to download Windows 11? You can navigate to Settings > Update & Security > Windows Update. In the window that appears, click Check for updates. If you have joined the Windows Insider Program, the Windows 11 Insider Preview build should appear, and you can download and install it just like a Windows 10 update.
Will I get Windows 11 for free?
If you’re using Windows 10, the Windows 11 download is a free upgrade, and there is no specific end date for the free upgrade service for eligible systems. Ordinary users can wait for the official version of the launch to be downloaded and installed.
Concluding Words
This page focuses on Windows 11 downloads. You should first make sure that your computer meets the minimum requirements to upgrade to Windows 11 and free up disk space for upgrading.
Then, download and install Windows 11 using Windows 11 Installation Assistant, EaseUS Windows 11 installation software, and Create Windows 11 Installation Media tool.
Home » Windows 11 » Windows 11 Installation Assistant: Where to download
Where to get this essential tool for upgrading your OS.
Updated: Oct 5, 2021 12:28 pm
WePC is reader-supported. When you buy through links on our site, we may earn an affiliate commission. Prices subject to change. Learn more
Windows 11 has finally been released after an eager wait from fans and enthusiasts alike, and the Windows 11 Installation assistant is finally available to the public. Though, some people may be wondering where they might be able to upgrade to Microsoft’s brand new OS, which has been announced as having a phased rollout for free to existing users of Windows 10. However, due to this, some people might not be able to upgrade directly through Windows 10 itself. This is where the multitude of installation options come in, including the Windows 11 Installation Assistant, which is a separate app that you’re able to download. There are other methods, including a Media Creation Tool in addition to an ISO for those of you who might still be running an optical drive in your system for whatever reason. But for the people wanting the most seamless Windows 11 upgrade experience, the Windows 11 Installation Assistant is the way to go.
Windows 11 Installation Assistant Download
You can find the link to install the Windows 11 Installation Assistant right here. Though, you may be wanting to check a couple of things on your system before attempting to install the latest version of Microsoft’s brand-new OS. Microsoft advises the following:
- Have Windows 10 installed on your system
- Have a working Windows 10 license
- That your PC Supports the Windows 11 System Requirements
- Have 9GB free on your storage device
How to use the Windows 11 Installation Assistant
- Select ‘Run’ as an administator on the system
- It will check if your PC is compatible, once this is confirmed click ‘Accept and Install’
- It will begin preparing the installation process, hit ‘Restart Now’ when it appears
- Your PC will begin to install Windows 11.
Congratulations! you’ve just installed Windows 11. If you run into any trouble, you can check out our massive Windows 11 hub, where you’ll be able to find out more about Microsoft’s brand-new operating system, and any issues that you might run into.