
Sometimes when you trying to switch to Windows display language, it shows a message that say, “Your Windows License Only Supports One Display Language.”
If you are getting an error message that says “Your Windows License Only Supports One Display Language” when you try to switch the display language on Windows. This indicates that your copy of Windows you’re running on your PC offers “single language license”.
The downside of this license is that it only allows you to use one language for your display or changing display language isn’t allowed with this license.
You can confirm this by going to Settings > System > Windows Specification > Edition. If its “Windows 11 Home Single Language“, then you’re using single language license.

If you want to switch the display language, then you have two options; Purchase the Windows 11 Home to Pro upgrade licence from Microsoft and perform clean installation of Windows 11 and during installation select preferred display language.
Fortunately, there’s a quick workaround using which you can change Windows display language without opting for two methods discussed above. So, without further delay, lets learn the trick:
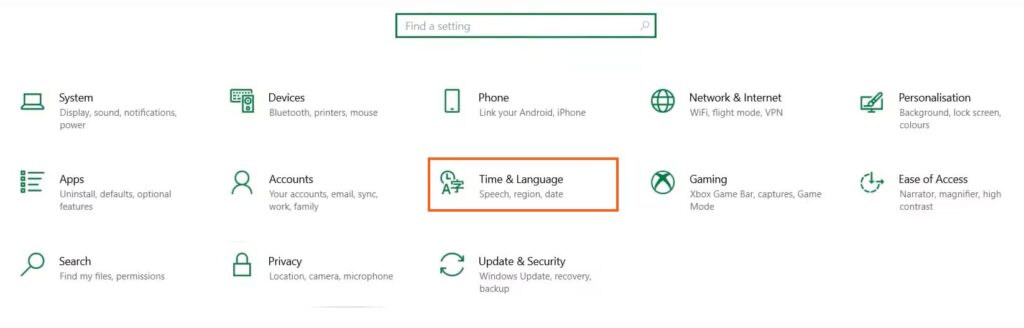
Right-click on the Start button and select Settings from the menu that opens.
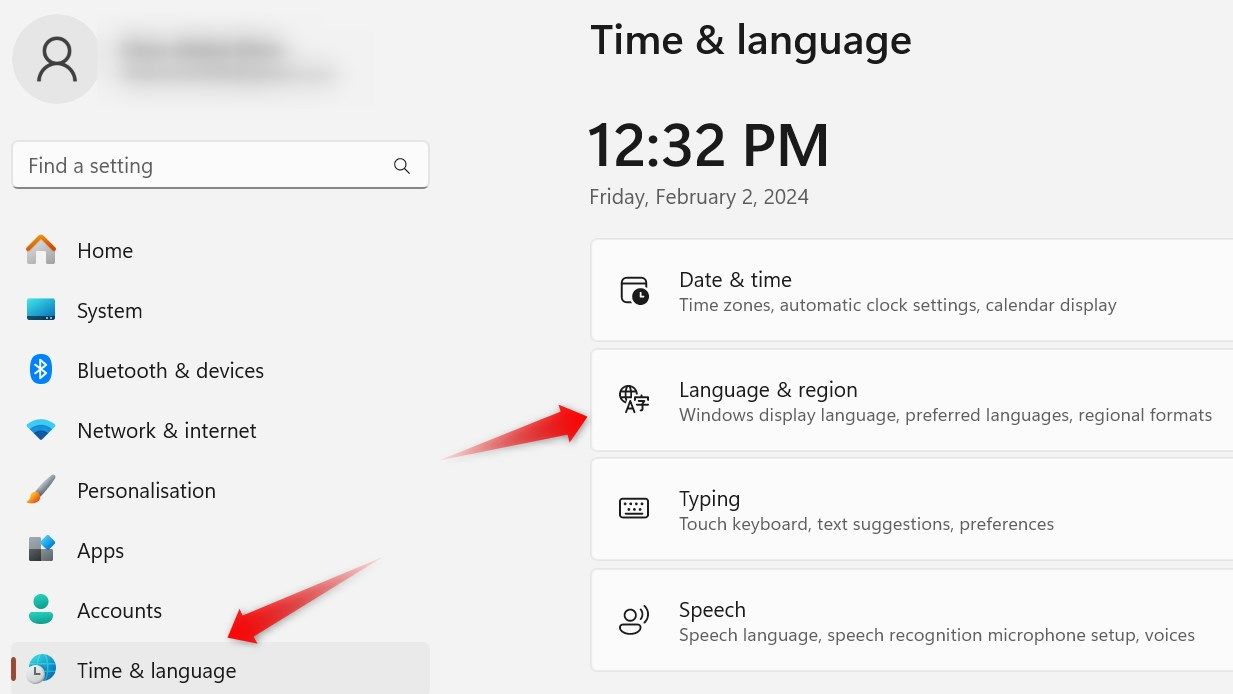
In the Settings app, you switch to Time and language, and then click on the “Language and Region.”

Under Language section, click on the “Add a language” button available next to “Preferred language.

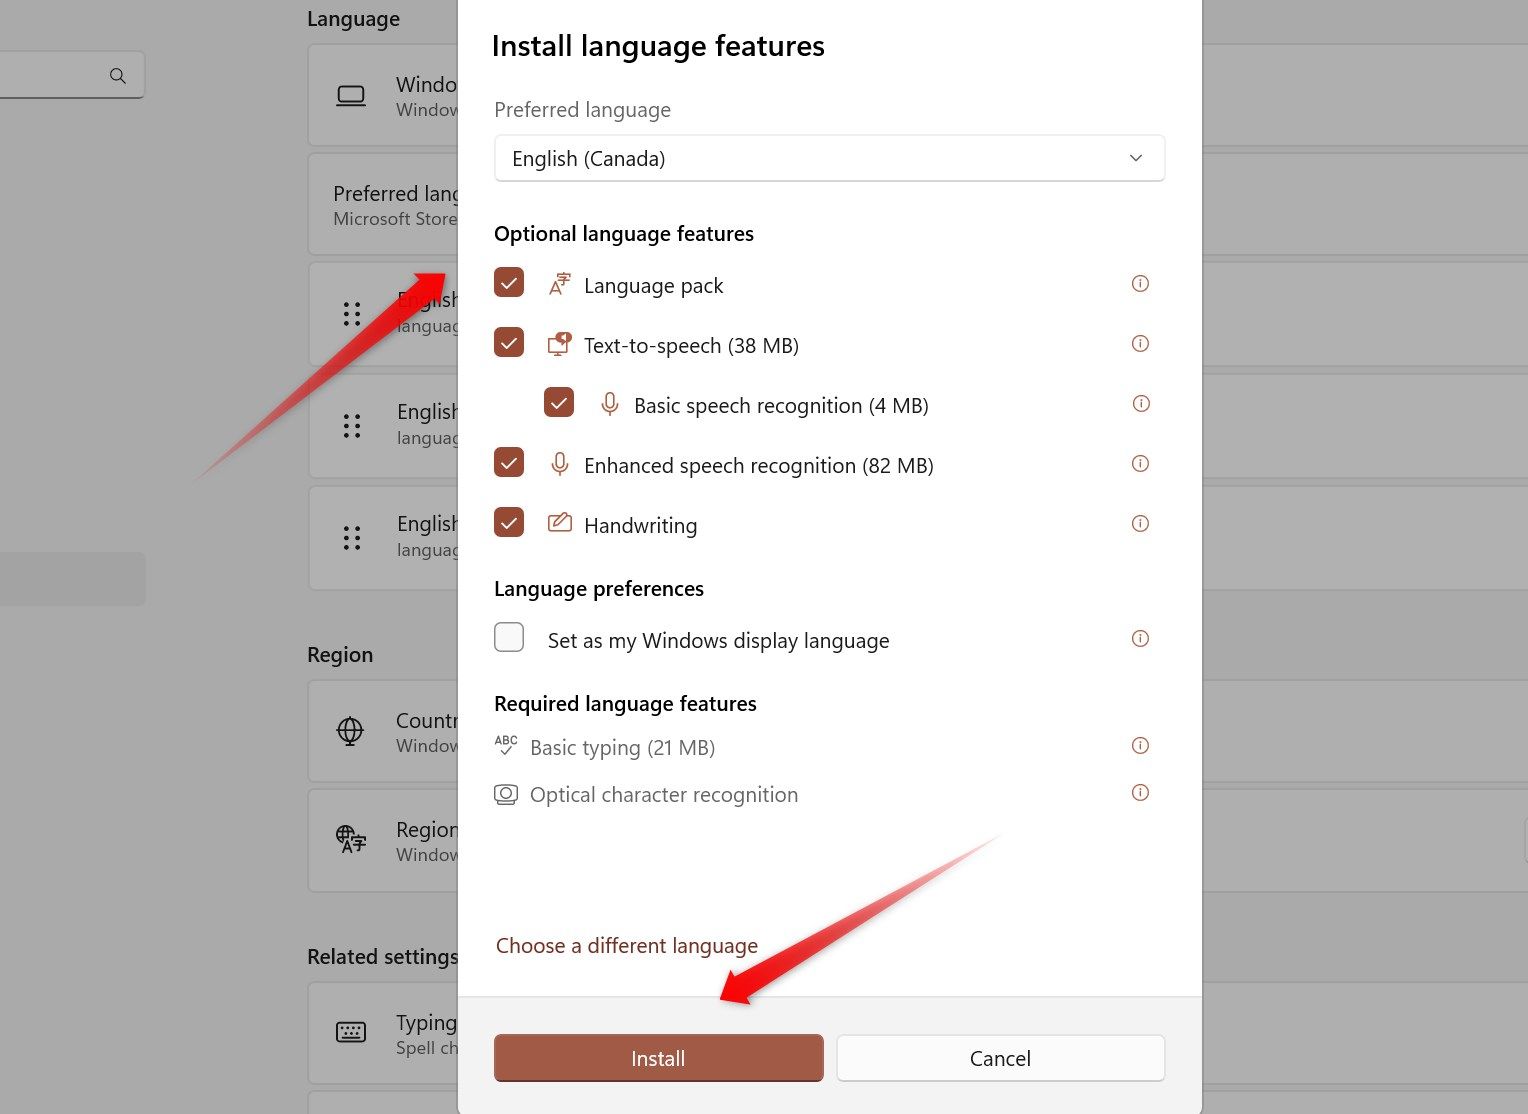
From the Install language feature dialog, select your preferred language from the list, and click on the “Next.”

On the next screen, check the boxes for all optional language features, and click on “Install” to now wait till Windows installs the preferred language.
After that restart your computer to apply the changes.
Steps to Switch to preferred Language Via Registry Editor
After installing the preferred language pack, you need to make use of Registry editor to switch to the preferred display language.
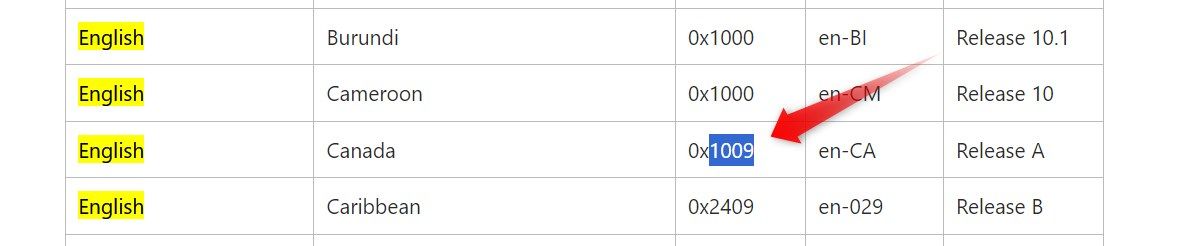
Before that, you need to find the Language ID for Windows Display Language. For that, click on this link to visit the Microsoft Website. Press Ctrl + f simultaneously to open search box. Now type name of your desired language.

This will highlight the searched query. Simply, copy the last four digits of the Language ID.
Open Registry Editor on your PC. For that, click on the search icon and type Registry Editor, and when it appears in search results, click to open it.
When prompted, click on “Yes” in the UAC window.
In the Registry editor, you need to navigate to HKEY_LOCAL_MACHINE > SYSTEM > CurrentControlSet > Control > NIs > Language

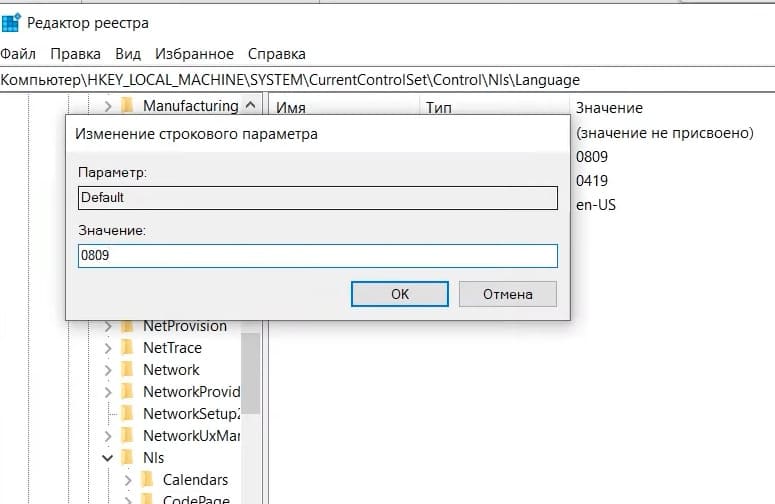
On the right side, double-click on the “Default” string, you will see a “Value Data” field on screen. Paste the last four digits of the Language ID you copied from Microsoft website. Click on “OK.” And close the Registry Editor. Restart your PC.
This process allows the user to change their preferred display language. In case you want to switch back to earlier language or another language, simply find the preferred language ID as discussed earlier steps and modify the values in Registry editor.
In case you encounter any sort of difficulty while applying this workaround or have specific query, feel free to ask via comments. We will love to answer your query.
Viney Dhiman, the mind behind GeekerMag, is a seasoned content writer with over 12 years of experience. Specializing in simplifying complex tech concepts, he covers Windows OS, Android, iOS, web apps, and product reviews. His work can be found on popular tech websites like Gizmodo and The Verge, and he has been interviewed by the Microsoft Edge team.
В данной статье мы обсудим как изменить язык если ваша лицензия Windows поддерживает только один язык интерфейса («Single Language» или «Для одного языка»).
Решить данную проблему поможет редактор реестра.
— Переходим в поиск и вводим «Реестр» => Запускаем его с правами администратора
— Проходим по следующему пути:
HKEY_LOCAL_MACHINE\SYSTEM\CurrentControlSet\Control\Nls\Language
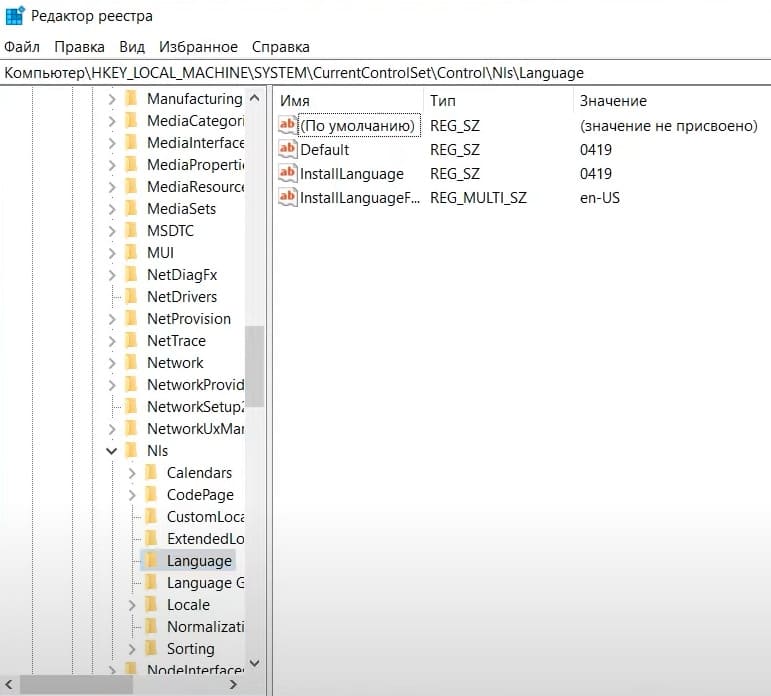
— В данном меню нас интересуют значения полей Default и InstallLanguage. В нашем примере установлены значения 0419, что соостветствует Русскому языку.
Полный список всех языков, которые соостветствуют опредленной кодировке вы сможете найти в данном документе от Microsoft
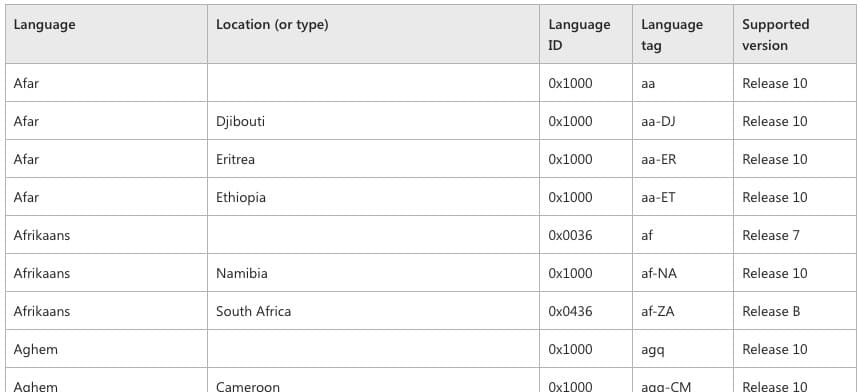
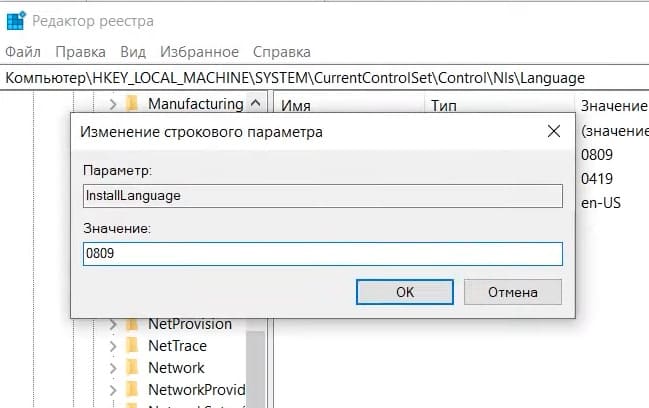
— Попробуем изменить язык на Английский, копируем последние четыри цифры кода — 0809. Вставляем его как значение Default и InstallLanguage.

— Теперь необходимо перезагрузить операционную систему.
— Не обращаем внимания если дата при входе в систему на Русском языке, это можно будет поменять в параметрах языка и даты, в разделе регионального формата.
Но как мы можем увидеть далее, все значки уже на Английском языке.

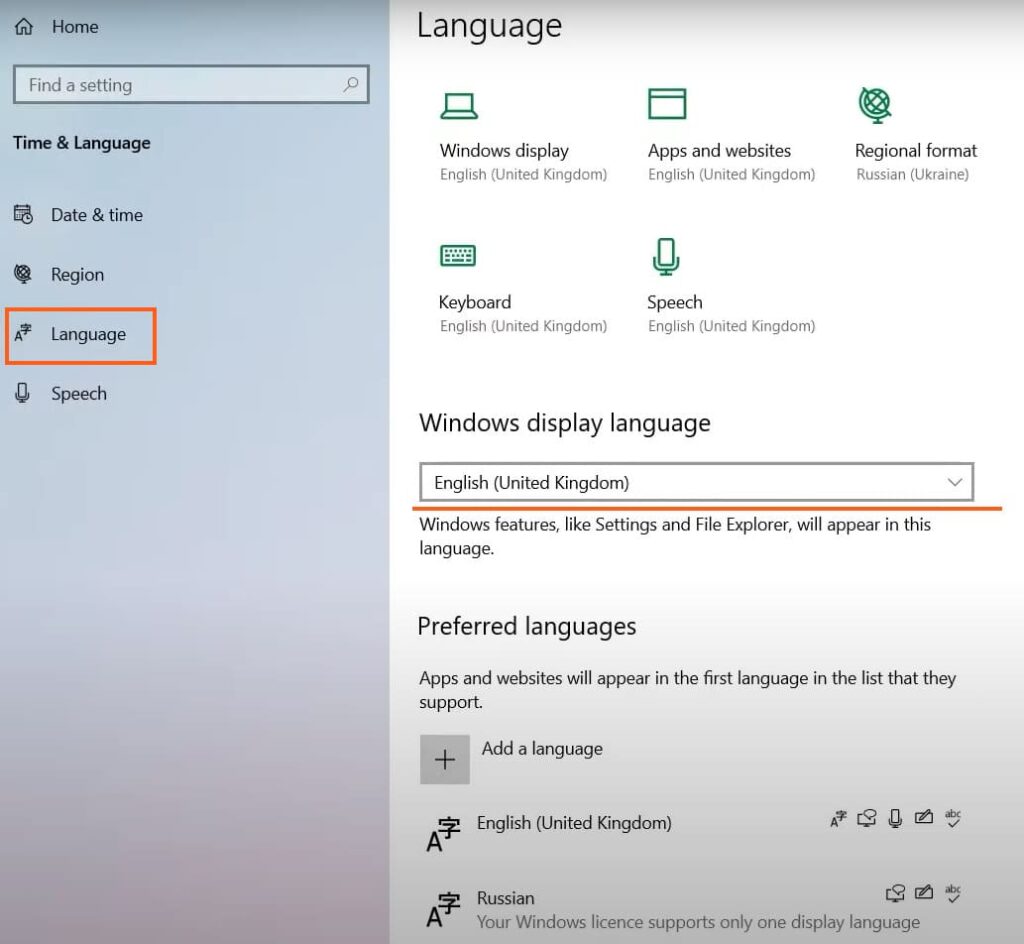
— Проверим Язык параметров. Заходим в Settings => Time & Language
— В разделе «Language» вы увидите что уже выбран Английский Язык.
Таким образом вы можете поменять вашу систему на любой нужный вам язык, даже если ваша система поддерживает только один язык интерфейса.
Лицензионный ключ активации Windows от
Как сменить язык интерфейса в Windows 11 Single Language через PowerShell
Чтобы поменять язык будем использовать нестандартные (неофициальные) способы.
1. Для смены языка скачайте языковой пакет
2. Откройте от имени администратора программу PowerShell
3. Скопируйте путь к файлу Microsoft-Windows-Client-Language-Pack_x64_ru-ru.cab (Выделите Microsoft-Windows-Client-Language-Pack_x64_ru-ru и нажмите Ctrl+Shift+C) (или выберите «copy as path» в контекстном меню) ИМЕННО РАЗАРХИВИРОВАННОЙ ПАПКИ!!!
4. Выполните последовательно команды:
- dism.exe /online /Add-Package /PackagePath: путь до вашего файла.cab
- reg add HKLM\SYSTEM\CurrentControlSet\Control\Nls\Language /v InstallLanguage /t REG_SZ /d 0419 /f
- reg add HKLM\SYSTEM\CurrentControlSet\Control\Nls\Language /v Default /t REG_SZ /d 1049 /f
- cd
5. После этого перезагрузите систему и попробуйте изменить язык интерфейса стандартным способом.
Sign in to your How-To Geek account

Summary
- Go to Settings > Time and Language > Language and Region. Then, click «Add a Language,» select your desired language, and install it.
- After that, copy the Language ID from the Microsoft website and input it into the Registry Editor to switch to your desired language.
Have you encountered an error stating «Your Windows License Only Supports One Display Language» while attempting to switch your display language on Windows? If so, you’re using a single language license, which doesn’t allow language changes. Don’t worry; we have a workaround.
Install the Language Pack of Your Preferred Language
To begin, download and install the language pack for your desired language if it’s not already downloaded. Right-click on the Start button and open «Settings.» Navigate to the «Time and Language» tab, then go to «Language and Region.»
Click on the «Add a Language» button, choose your preferred language from the list, and click «Next.» Check the boxes for all optional language features, and click «Install» to allow Windows to install the chosen language.
If you’re on Windows 10, installing a language pack follows a slightly different procedure.
Switch the Language Using Registry Editor
After installing the language pack, you can switch to that language using the Registry Editor. Before you do that, go to the Microsoft website, press CTRL+F, and type the name of your desired language to locate it. Once found, copy the last four digits of its Language ID.
After that, type «Registry Editor» in Windows Search and open the Registry Editor app. If prompted, click «Yes» in the UAC window. Navigate to HKEY_LOCAL_MACHINE > SYSTEM > CurrentControlSet > Control > Nls > Language in the Registry Editor. Then, double-click on the «Default» string, and paste the last four digits of the Language ID into the «Value Data» field. Click «OK.»
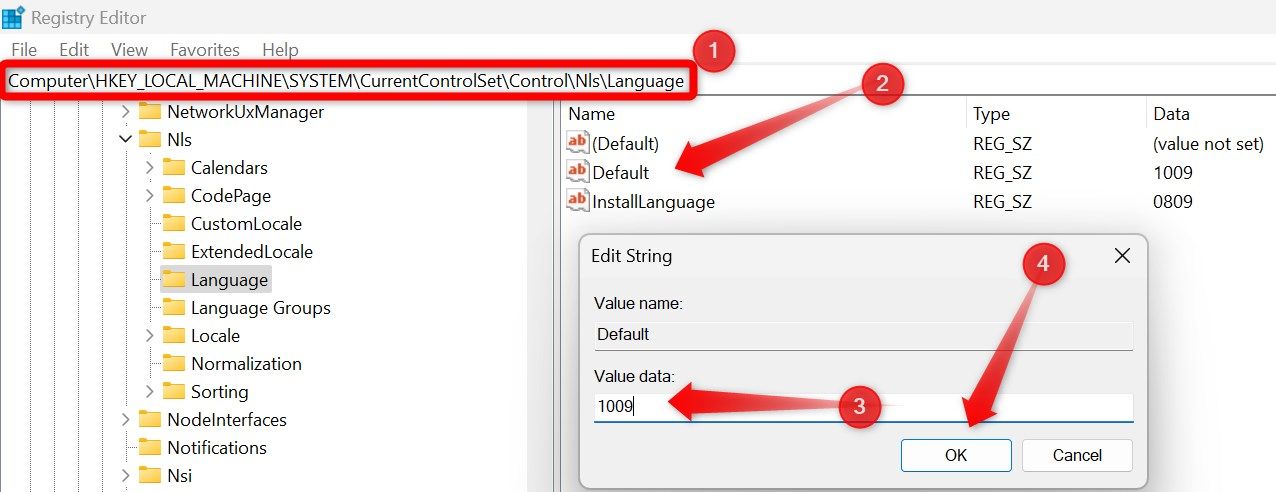
After that, double-click on the «InstallLanguage» string, input the copied digits in the «Value Data» field, and click «OK.» Close the Registry Editor and restart your device once.
While this method lets you change the language, it’s important to note that you’ll need to modify the values again if you wish to switch back. So, we suggest upgrading your Windows license. This way, you’ll be able to effortlessly use and switch between languages without the need to tweak the Registry Editor.