
When upgrading Windows you usually have the option to Keep your personal files and apps, but for some, this option is greyed out. This issue is mostly caused to the fact that you’re trying to install a lover version of Windows that the currently installed or the personal files and apps are stored into unsupported folders.
If you’re running an old Windows 10 version, your PC is victim to a bub that can be fixed by installing the Feature Update to Windows 10 20H2 via Enablement Package (KB4562830) from the Microsoft website.
The problem may also be due to a different language installation or corrupted system files. Here are some other ways to fix it.
How can I fix Windows settings, personal files, and apps error?
1. Check your system language
- Click the Start button, type cmd, and select Run as administrator to run Command Prompt with full privileges.

- When Command Prompt starts, enter the following command and press Enter:
DISM /online /get-intl
- You should see your operating system language in the Default system UI language section.

- Insert Windows 10 DVD or a bootable USB drive and boot your computer from it.
- Choose the Repair option.

- Select Troubleshoot.
- Click on Advanced options.
- Select Command Prompt.
- When Command Prompt starts, enter the following and press Enter to run it:
DISM /image:C: /set-uilang:en-US
- This will set your system language to en-US and you’ll be able to keep your files when you upgrade to Windows 10. If en-US doesn’t work, you might have to set your language, so it matches the language from the Windows 10 ISO.


You might get the You can’t keep Windows settings, personal files, and apps message if your system language doesn’t match the language on Windows 10 ISO. To change the system language, do as described above.
If you’re having trouble accessing Command Prompt as an admin, then you better take a closer look at our guide on how to fix Command Prompt.
2. Update your drivers
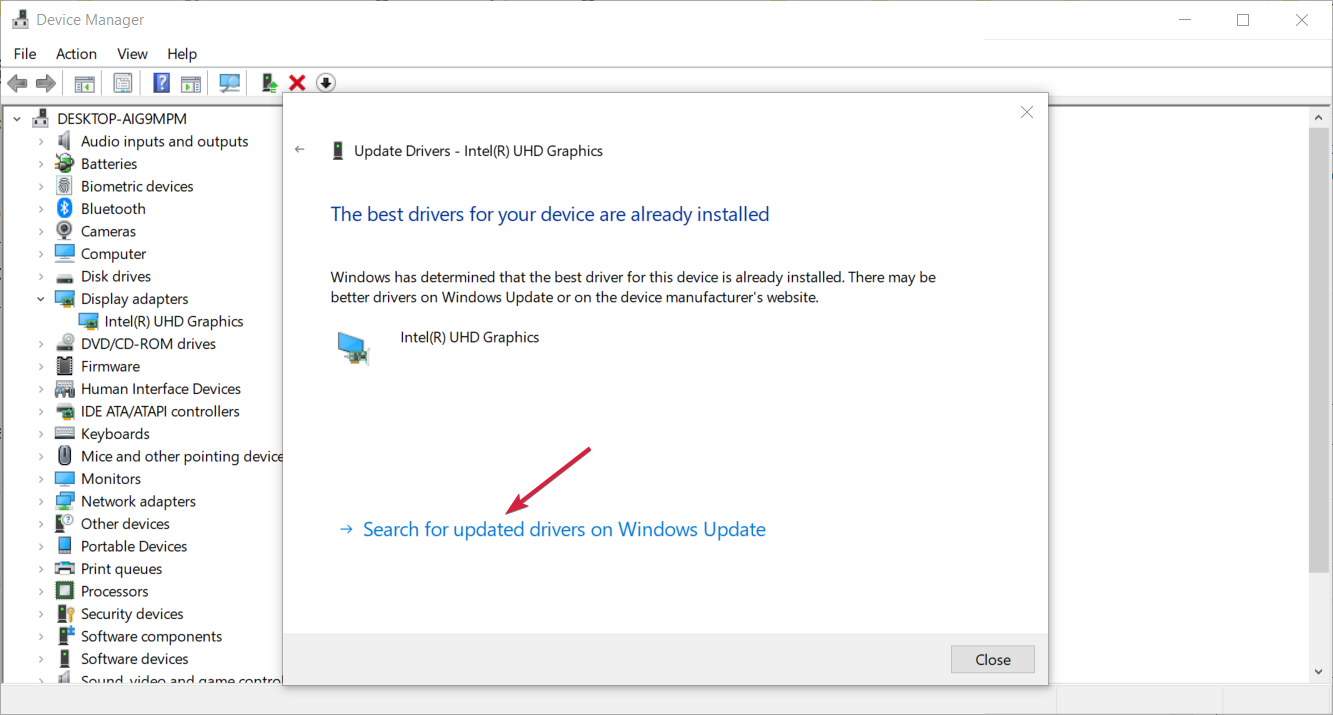
- Right-click the Windows button and select Device Manager from the list.
- Expand the Display adapters section, then right-click the driver and select Update driver.

- Choose Search automatically for drivers.

- If the system detects a new one, it will install it and you will be prompted for a restart. If it doesn’t, click on Search for updated drivers on Windows Update.
- You will be redirected to Windows Update. Click on the Check for updates button.

- If the system doesn’t find new updates, click on View optional updates.

- Expand the Driver updates section and check if there are any updates related to your graphics card, click their box, and hit the Download and install button below.


Drivers are a crucial part of Windows, and without drivers, you won’t be able to use your hardware properly.
Speaking of drivers, several users reported that the You can’t keep Windows settings personal files and apps error was caused by outdated drivers.
According to them, their graphics card driver was out of date, and that caused this problem to appear. To fix the issue, update your graphics card driver to the latest version and check if this makes any difference.
If you find this solution too complicated, be sure to check our guide on how to update the graphics card driver.
Keep in mind that other drivers can also cause this problem, so be sure that all your drivers are up to date before you try to upgrade.
Did you know that the majority of Windows 10 users have outdated drivers? Be a step ahead and learn how to update your drivers.
We strongly recommend using a dedicated driver-updated tool and automatically downloading all the outdated drivers on your PC.
With this kind of tool, you will be safe from downloading and installing the wrong driver versions, which could seriously harm your system.
⇒ Get Outbyte Driver Updater
3. Change system locale from Control Panel
- Open Control Panel and go to Region.

- Go to the Administrative tab and click on Change system locale.
- Set Current system locale to English (United States) and click OK to save changes.
- Click Apply and OK in the Region window.
- Restart your computer and try to upgrade to Windows 10 again.


You can’t open Control Panel? Take a look at this step-by-step guide when Control Panel is not opening to find a solution.
4. Download the Windows 10 version that matches your system language
You can’t keep Windows settings, personal files, and apps message appears during Windows 10 setup when the language from your previous operating system doesn’t match the one on your Windows 10 ISO file.
We showed you how to change your system language in order to install Windows 10, but what if you wish to keep your current system language?
- FIX: Encrypt folder is greyed out in Windows 10/11
- Set associations for a program is blank/greyed out [SOLVED]
- Error no Ace Condition 804 (0x324): Fix it With 4 Steps
- Error Corrupt Log Cleared 798 (0x31E): Fix it With 4 Steps
If you don’t want to switch your system language to US English, you can simply download the Windows 10 ISO that uses the same language as your current operating system.
To do that, just download the Media Creation Tool and choose the desired language from the list of languages.
Having problems with the Windows Media Creation Tool? Don’t worry, we’ve got you covered with this quick guide on what to do if the Media Creation Tool is not working.
5. Remove problematic applications
If you can’t upgrade to the latest version of Windows 10, the problem might be a third-party application that is installed on your PC.
It seems that this problem was caused by Java installation. To solve it, it’s advised to uninstall Java and try to perform the upgrade again.
It’s worth mentioning that a regular uninstall might not be able to remove Java completely.
Sometimes certain leftover files and registry entries can still interfere with Windows causing this and many other problems to appear.
To fix the issue, it’s advised to completely remove the problematic application. For this, we recommend you use a dedicated utility that’s able to uninstall Java and remove any junk files left behind.
These applications are specially designed to completely remove any application from your PC, so we encourage you to try them out.
That’s why is strongly recommended to use a professional tool like CCleaner that has a simple to use Uninstall utility built-in.
Once you remove the problematic application, the issue should be resolved. Keep in mind that other applications can also cause this problem, so you’ll need to find these applications on your own and remove them.
If you don’t know how to complete this procedure in Windows 10, take a look at this dedicated guide on how to uninstall programs.
6. Remove any additional non-English languages
If you can’t keep your files from the previous version of Windows, perhaps you should try removing any other installed languages.
After you’ve removed all additional languages besides English, try installing Windows 10 again. This might not be the best solution, but it works according to users, so you might want to try it out.
7. Remove your antivirus
Sometimes the main cause for You can’t keep Windows settings personal files and apps error is your antivirus.
Even though antivirus software is important, sometimes it can interfere with Windows and cause this problem to appear.
To fix the problem, it’s advised that you disable your antivirus completely. If the issue persists, you might be able to solve it simply by uninstalling your antivirus software.
For the Norton users, we’ve got a dedicated guide on how to completely remove it from your PC. There’s also a useful guide for McAfee users.
If you’re using any antivirus solution and you want to get rid of it, be sure to check out this amazing list with the best uninstaller software you can use right now.
If removing the antivirus solves the problem, you might want to consider switching to a different antivirus in the future. There are many great antivirus solutions that are offering advanced security features and are also compatible with all versions of Windows 10.
8. Check your registry
- Press Windows key + R and enter regedit. Press Enter or click OK.
- In the left panel, navigate to the following key:
Computer\HKEY_LOCAL_MACHINE\SOFTWARE\Microsoft\Windows\CurrentVersion
- In the right panel, locate ProgramFilesDir, Program FilesDir (x86), ProgramFilesPath, and ProgramW6432Dir. Check the data values for these strings. If you changed the location of the Program Files directory, the values should look like X:\Program Files. To fix that, open each of these strings and change the drive letter to C.

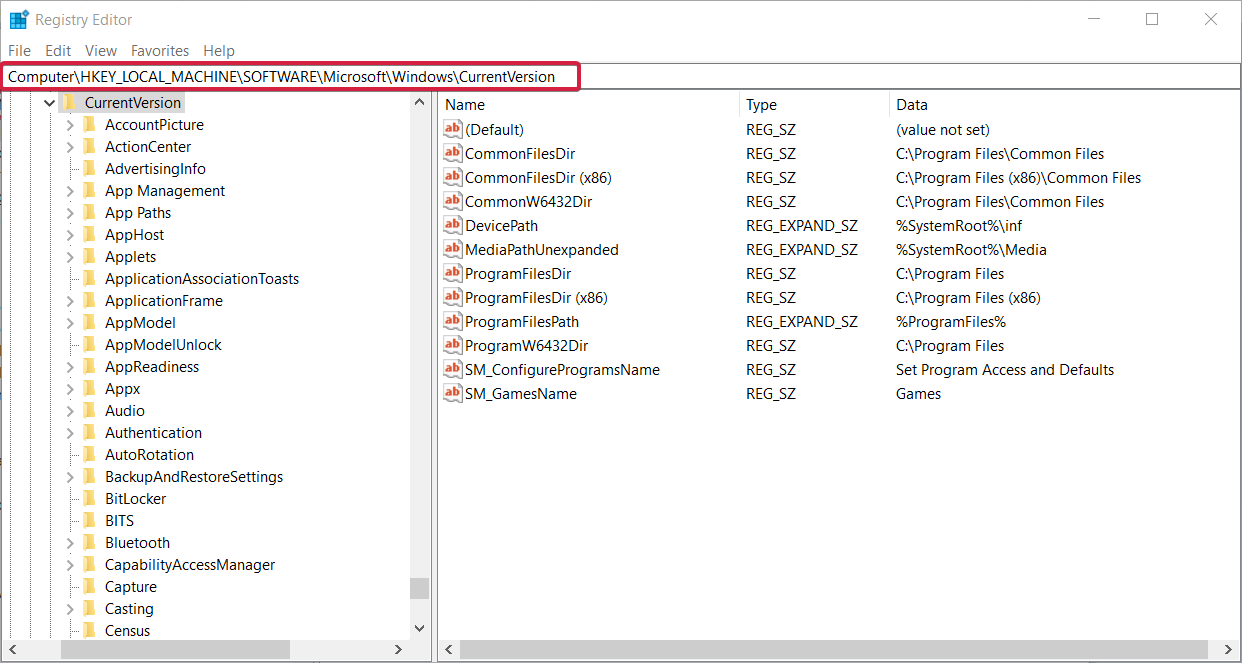

According to users, you can sometimes encounter You can’t keep Windows settings personal files and apps message due to your registry settings.
Several users reported that they changed the location of the Program Files directory, and that caused this issue to appear. However, you can fix the problem by doing as described above.
After making changes to your registry, try to upgrade your Windows again and check if the problem reappears.
Read this handy guide if you can’t edit Windows 10’s Registry and find the quickest solutions to the issue.
9. Check the location of user account directory
If you’re trying to install a new version of Windows, you might find keep personal files and apps greyed out. This can appear if your user account directory is moved.
While installing a new version of Windows, your user account directory is needed in order to create a backup of your files.
If this directory is moved or missing, you won’t be able to upgrade, and you’ll encounter this problem.
However, you can fix the issue simply by moving your user account directory to the C: Users folder on your PC. After doing that, you should be able to upgrade without any problems.
10. Change your product key or edition
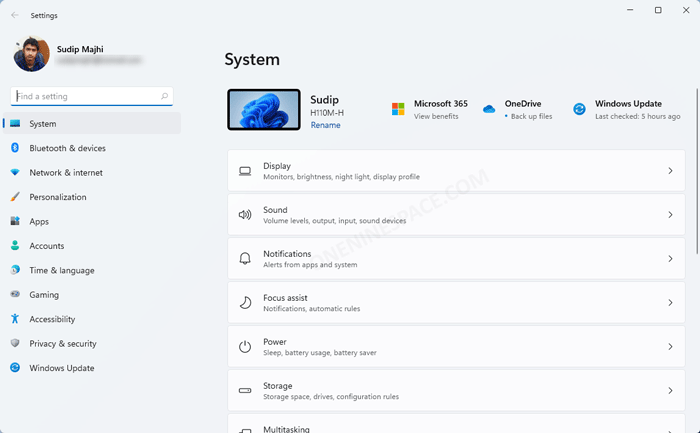
- Open the Settings app. You can do that quickly by pressing Windows key + I.
- When the Settings app opens, go to the System section.

- Navigate to About section in the menu on the left. Now select Change product key or upgrade your edition of Windows.
- Click on Change product key.
- Now enter the product key for the version of Windows you’re upgrading to.


Sometimes, the error saying You can’t keep Windows settings personal files and apps can appear if you’re trying to switch to a different version of Windows.
Many users reported this problem while trying to switch from Home to Pro version of Windows. Since you can’t keep personal files and apps as they are greyed out, things shouldn’t remain this way for too long.
In case you notice that your Windows default apps are missing, it’s possible that this issue is causing this problem.
This isn’t the only feature that can go missing, and many reported that Windows Update is not showing on their PC as well.
Problems such as grayed out Windows apps are caused by corrupted installation, so you might have to repair it to fix this problem.
Personal files and folders are rather important, and if you’re getting this error during installation, make sure that you try some of our solutions. Even more, check out this guide if Windows 10 doesn’t let you access your files.
As always, for additional questions and suggestions, do not hesitate to use the comments section below.
Windows 10: Can’t keep my apps and settings in upgrade to WIN10
Discus and support Can’t keep my apps and settings in upgrade to WIN10 in Windows 10 Installation and Upgrade to solve the problem; After a succesfull upgrade from WIN7 to WIN10 on my Laptop, I now try to
install WIN10 on a Desktop Pc and that causes me a problem.
When I…
Discussion in ‘Windows 10 Installation and Upgrade’ started by DRIESMUL, Aug 4, 2015.
-
Can’t keep my apps and settings in upgrade to WIN10
After a succesfull upgrade from WIN7 to WIN10 on my Laptop, I now try to
install WIN10 on a Desktop Pc and that causes me a problem.When I upgraded the Laptop from WIN7 to WIN10, all my applications and settings
were kept during the upgrading process and 2 hours after I started the upgrade,
the laptop was working as usual (but on WIN10 now)However, when I try to upgrade Windows 7 to Windows 10, I am not able to keep all programs and settings.
I am only given the option to do a clean install, where afterwards I will have to re-install, setup
and customize all my applications.For both upgrades I used the same 4GB USB stick that contains the bootable WIN10 installation files.
This USB stick was created with the Media Creation Tool.Here is what I did.
— Boot from the WIN10 bootable USB stick
— Then (after a while) the panel with the 3 questions shows up
* Language to install: HERE I CAN ONLY SELECT «English (United States)
As this suits me fine, I keep this selection* Time and Currency format: Here I get plenty of options
I selected «Dutch»* Keyboard or Input method: Here I get plenty of options
I selected «Dutch»— After a while the system asks me: Do you want «Upgrade» or «Clean Install»
I selected: «Upgrade»— When the system tells me to Reboot normal Windows (WIN7), I did and
rebooted the Normal WIN7 Operating System.— While running this Windows 7, I ran setup.exe from the WIN10 USB stick
— In the Next panel, I selected: «Download and Install Updates»
At the Next panel, the problem arises:
— The next panel shows 3 options, of which unfortunately the
FIRST OPTION IS GREY* Keep personal files and apps
You will be able to manage your Windows settings* Keep personal files only
Your setting and Apps will be deleted but your files will be kept* Nothing
Everything will be deleted including files, apps and settingsThe screen gives an explanation, but unfortunately, it doesn’t make sense:
The explanation is: You can’t keep Windows settings, personal files, and apps
because you’ve chosen to install Windows10 using a different
language than you are currently using.The explanation is complete crap, because at the very first question that was asked,
I was not given another option than English (United States)Note: The very initial installation language on the existing WIN7 system was Dutch,
but that was later changed into English with a program program called «Vistalizator»I ran Vistalizator again, to go back to Dutch again on the WIN7 system, but still
the WIN10 upgrade does not give me any other option than English (United States)Here I am stuck: I want to keep my settings and I don’t want to spend
3 days on installing again my email, compilers and all the other useful
programs that I use every day.Hope someone can shine some light on this problem.

-
why is the windows 10 downloader tool, i downloaded from the en-us microsoft page, in german?
due to the tool being in german for no reason and my win10 techpreview install being in english, i can’t keep my apps and settings
-
Will MediaCreationTool allow me to downgrade 10 Pro to 10 Home?
By mistake I did a clean install of WIn10 Pro on a new boot drive before I upgraded my old Win7 Home system to Win10. So now my Win10 system say its activation will expire on Jan 20, 2016.
I understand that I should have done the Win10 upgrade to Win7 first, but I did not. So now I’d like to use the MediaCreationTool to get the WIn10 Home install files and install it on top of my Win10 Pro system, but tell it to keep all my apps and settings.
So my question is — will this work? I am trying to avoid having to do a totally clean install of WIn10 Home and the subsequent installation of all my apps and settings.

Can’t keep my apps and settings in upgrade to WIN10
-
Can’t keep my apps and settings in upgrade to WIN10 — Similar Threads — Can’t keep apps
-
Can’t keep settings and apps when upgrading from Windows 8.1 Pro to 10
in Windows 10 Installation and Upgrade
Can’t keep settings and apps when upgrading from Windows 8.1 Pro to 10: I think the question says it all. I’m trying to upgrade a friend’s PC running Windows 8.1 Pro to Windows 10, using the Media Creation Tool. I’ve tried both the ‘Upgrade this PC now’ and ‘Create installation media’ options. I’ve also tried with a downloaded ISO from an earlier… -
can’t upgrade to 2004 update in my win10 pc
in Windows 10 Installation and Upgrade
can’t upgrade to 2004 update in my win10 pc: helloi bought a new computer of BMAX company who comes with win10 build in.
i tried to upgrade to the 2004 update but the tool say «this pc can’t be upgraded to windows 10. your pc isn’t supported yet on this version of windows 10…»
some ideas to solve it?…
-
Keeps Apps (Insider Upgrade)
in Windows 10 Ask Insider
Keeps Apps (Insider Upgrade): Hello, is anyone else getting the Windows Insider expiring message?
Okay well, when I go to the Insider in the settings it’s just blank, no option to update.So okay question is can I use a up to date Windows ISO on a USB and keep all my files and games and stuffs? I don’t…
-
Proxy Settings will not Save after Win10 Upgrade
in Windows 10 Network and Sharing
Proxy Settings will not Save after Win10 Upgrade: My Win7 machines that were just upgraded to Win10 will not save any Proxy settings in Win10. Any changes to Lan Settings in IE or Proxy settings in Win10 Proxy will not save.What happened after the upgrade? Why can I not make changes to my proxy settings now.
Please…
-
This pc can’t be upgraded to WIN10
in Windows 10 Installation and Upgrade
This pc can’t be upgraded to WIN10: Last few days, my pc gets updates prompt, but always freezes and failed to complete the update when I activated the update. So I had to forced restart it and PC undoing the changes made.I don’t know what is this issue.
This problem now re-appears after more than one year….
-
Win10 «This App Can’t Open»
in Windows 10 Software and Apps
Win10 «This App Can’t Open»: Hello! Friends:In the last few days, a number of Apps can’t open (icon blurry under Start/All Programs).
Error message: This App Can’t Open
I tried to repair it with the Window Store Troubleshooter, but to no avail.
Any suggestions much appreciated. Thank you….
-
win10 update/upgrade resets network settings
in Windows 10 Updates and Activation
win10 update/upgrade resets network settings: Really Microsoft needs to reconsider the whole Win10 update philosophy.. We will now take remedial action so that updates will no longer be applied as the the result can cause severe business issues.Yesterday, were we performing a system clean up which does necessitate…
-
Can’t access my DVD drive after upgrading to Win10
in Windows 10 Drivers and Hardware
Can’t access my DVD drive after upgrading to Win10: My DVD drive worked fine in Win7, and still works fine if I boot from it, but since upgrading to Win10 I can’t access any disk in it. File Explorer «sees» my G drive, but when I want to look at a disk it tells me to insert a disk. Device manager told me that my drive was a… -
Win10 upgrade keeps getting stuck at 86%
in Windows 10 Installation and Upgrade
Win10 upgrade keeps getting stuck at 86%: Hi all,trying to upgrade my desktop (self-built) from Win7 to Win10 but it keeps getting stuck at 86% (configuring settings 46%). Since at that point there is no task manager or anything and my system has no hdd activity light it’s hard to tell if anything is still…
Users found this page by searching for:
-
win10 upgrade settings and apps will be deleted
,
-
win10 keep settings

- If you get the error: You can’t keep Windows settings, personal files, and apps, that means you will lose your data when upgrading the OS.
- This can be caused by a trivial problem like the language settings of your system.
- Corrupted or problematic drivers can also produce this issue so make sure you update them.
Why is Keep personal files and apps greyed out Windows 11 and 10?
In case you notice that your Windows default apps are missing, it’s possible that this issue is causing this problem.
This isn’t the only feature that can go missing, and many reported that Windows Update is not showing on their PC as well.
Problems such as grayed out Windows apps are caused by corrupted installation, so you might have to repair it to fix this problem.
What are the variations of this error?
This can be a big problem, and our readers also reported the following variations:
- Keep personal files and apps greyed out – Many users said that the option to keep their personal files and apps is disabled while upgrading to a new version of Windows 10. This can be a serious inconvenience, but you should be able to fix it using one of our solutions.
- You can’t keep Windows settings personal files and apps because your current version, unsupported directory, different language – There are many reasons that can prevent you from upgrading to a new version of Windows. In most cases, they’re related to your system language or locale.
- You can’t keep Windows settings registry – This error can appear if you change the location of your Program Files or user account directory. However, you can fix this problem by making a couple of changes in your registry.
These can turn into a huge problem, but there are some ways to fix them. Check them out below.
How can I fix Windows settings, personal files, and apps error?
1. Check your system language
- Click the Start button, type cmd, and select Run as administrator to run Command Prompt with full privileges.
-

- When Command Prompt starts, enter the following command and press Enter:

DISM /online /get-intl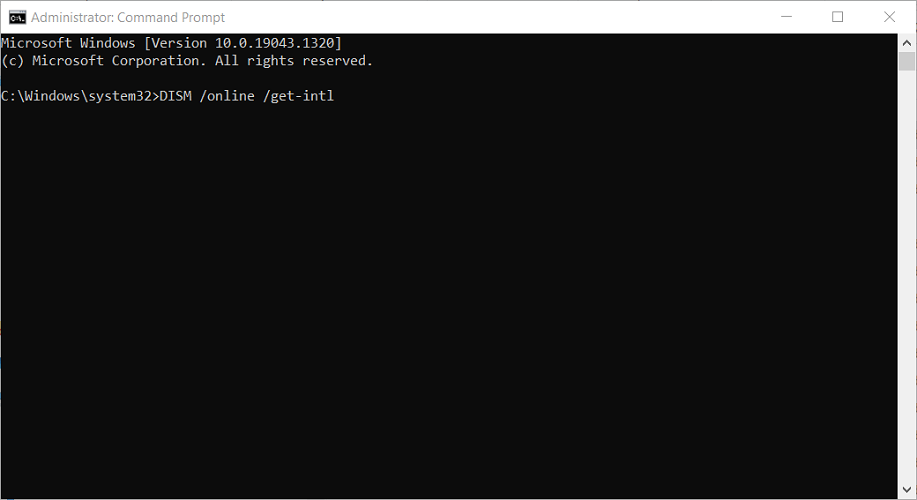
3. You should see your operating system language in the Default system UI language section.

4. Insert Windows 10 DVD or a bootable USB drive and boot your computer from it.
5. Choose the Repair option.

6. Select Troubleshoot.

7. Click on Advanced options.

8. Select Command Prompt.

9. When Command Prompt starts, enter the following and press Enter to run it:
DISM /image:C: /set-uilang:en-US
10. This will set your system language to en-US and you’ll be able to keep your files when you upgrade to Windows 10. If en-US doesn’t work, you might have to set your language, so it matches the language from the Windows 10 ISO.
You might get the You can’t keep Windows settings, personal files, and apps message if your system language doesn’t match the language on Windows 10 ISO. To change the system language, do as described above.
2. Update your drivers
- Right-click the Windows button and select Device Manager from the list.
- Expand the Display adapters section, then right-click the driver and select Update driver.
- Choose Search automatically for drivers.
- If the system detects a new one, it will install it and you will be prompted for a restart. If it doesn’t, click on Search for updated drivers on Windows Update.
- You will be redirected to Windows Update. Click on the Check for updates button.
- If the system doesn’t find new updates, click on View optional updates.


7. Expand the Driver updates section and check if there are any updates related to your graphics card, click their box, and hit the Download and install button below.

Drivers are a crucial part of Windows, and without drivers, you won’t be able to use your hardware properly.
Speaking of drivers, several users reported that the You can’t keep Windows settings personal files and apps error was caused by outdated drivers.
According to them, their graphics card driver was out of date, and that caused this problem to appear. To fix the issue, update your graphics card driver to the latest version and check if this makes any difference.
Keep in mind that other drivers can also cause this problem, so be sure that all your drivers are up to date before you try to upgrade.
3. Change system locale from Control Panel
- Open Control Panel and go to Region.

Go to the Administrative tab and click on Change system locale.

Set Current system locale to English (United States) and click OK to save changes.
Click Apply and OK in the Region window.
Restart your computer and try to upgrade to Windows 10 again.
5. Download the Windows 10 version that matches your system language
You can’t keep Windows settings, personal files, and apps message appears during Windows 10 setup when the language from your previous operating system doesn’t match the one on your Windows 10 ISO file.
We showed you how to change your system language in order to install Windows 10, but what if you wish to keep your current system language?
If you don’t want to switch your system language to US English, you can simply download the Windows 10 ISO that uses the same language as your current operating system.
To do that, just download the Media Creation Tool and choose the desired language from the list of languages.
6. Remove any additional non-English languages
If you can’t keep your files from the previous version of Windows, perhaps you should try removing any other installed languages.
After you’ve removed all additional languages besides English, try installing Windows 10 again. This might not be the best solution, but it works according to users, so you might want to try it out.
7. Remove your antivirus
Sometimes the main cause for You can’t keep Windows settings personal files and apps error is your antivirus.
Even though antivirus software is important, sometimes it can interfere with Windows and cause this problem to appear.
To fix the problem, it’s advised that you disable your antivirus completely. If the issue persists, you might be able to solve it simply by uninstalling your antivirus software.
If you’re using any antivirus solution and you want to get rid of it, be sure to check out this amazing list with the best uninstaller software you can use right now.
If removing the antivirus solves the problem, you might want to consider switching to a different antivirus in the future. There are many great antivirus solutions that are offering advanced security features and are also compatible with all versions of Windows 10.
8. Check your registry
Press Windows key + R and enter regedit. Press Enter or click OK.

In the left panel, navigate to the following key:
Computer\HKEY_LOCAL_MACHINE\SOFTWARE\Microsoft\Windows\CurrentVersion
In the right panel, locate ProgramFilesDir, Program FilesDir (x86), ProgramFilesPath, and ProgramW6432Dir. Check the data values for these strings. If you changed the location of the Program Files directory, the values should look like X:\Program Files. To fix that, open each of these strings and change the drive letter to C.

According to users, you can sometimes encounter You can’t keep Windows settings personal files and apps message due to your registry settings.
Several users reported that they changed the location of the Program Files directory, and that caused this issue to appear. However, you can fix the problem by doing as described above.
After making changes to your registry, try to upgrade your Windows again and check if the problem reappears.
9. Check the location of user account directory
If you’re trying to install a new version of Windows, you might encounter the error: You can’t keep Windows settings personal files and apps. This can appear if your user account directory is moved.
While installing a new version of Windows, your user account directory is needed in order to create a backup of your files.
If this directory is moved or missing, you won’t be able to upgrade and you’ll encounter this problem.
However, you can fix the issue simply by moving your user account directory to the C: Users folder on your PC. After doing that, you should be able to upgrade without any problems.
10. Change your product key or edition
- Open the Settings app. You can do that quickly by pressing Windows key + I.
- When the Settings app opens, go to the System section.

3.Navigate to About section in the menu on the left. Now select Change product key or upgrade your edition of Windows.

4. Click on Change product key.
5. Now enter the product key for the version of Windows you’re upgrading to.
Sources : Windowsreport.com
If you are a new Windows 11 user and you do not know how to get to Windows Settings, you should check out this article. Here is how to open Settings in Windows 11/10. Also, you can find some important options and features that are available in Windows 11/10 Settings panel only.
What is Windows Settings in Windows 11/10?
Windows 11/10 comes with a traditional control panel substitute called Settings, which pops up if you press Win+I button. This Settings panel is probably the best inclusion in this operating system that you can find in all the latest builds. Although this is not the exact substitute of the Control Panel, it has almost all the essential options you might need. If you have recently installed Windows 11/10, and you want to know anything about new options in Windows 11/10 Settings, you can follow this post.
There is a couple of methods to open Windows 11/10 Settings panel so that you can make various changes. Some of the methods are mentioned below.
1. Use keyboard shortcut
You can use the keyboard shortcut, which is probably the fastest method to open the Settings panel in Windows 11/10. The shortcut to open Windows 11/10 Settings panel is Win+I.
2. Open from start menu
You can open Settings in Windows 11/10 from the Start menu. If you are using Windows 11/10, you might know that Microsoft brought back the start menu in this version. This start menu has an option to open the Settings panel in Windows 11/10. There is a dedicated button that you can use to get it done. For that, open the start menu > click the settings gear icon visible on your left-hand side.
3. Use Taskbar search box
You can use the Taskbar search box to open the Settings in Windows 11/10. You need to make a search for ‘Settings’ and open the respective result.
4. Use Win+X menu
Microsoft has introduced a new keyboard shortcut that allows you to open a couple of options and settings. The Windows 11/10 Settings is available in that preset list. Therefore, you can press Win+X and select Settings from the list.
5. Create desktop shortcut
You can create desktop shortcut to open Windows 11/10 Settings. This is possible to pin the shortcut to your Taskbar as well.
- Right-click on Desktop.
- Select New >> Shortcut.
- Enter this-
ms-settings:
- Write a desired name.
- Double-click on this shortcut to open the Settings panel.
6. Open Windows 11 Settings using run prompt
You can use the Run prompt to open Settings in Windows 11. For that, press Win + R to open the Run prompt and enter this-
ms-settings:
7. Open Windows Settings from Action Center (Windows 10)
You can open Settings from the Action Center as well. If you expand the Action Center from your taskbar, you can find an option called All Settings that you can use to open the Settings panel.
These are some of the best methods to open Settings in Windows 10. However, there are some other ways to get the same thing done. For instance, you can use Windows PowerShell, Task Manager etc. to open the same as well.
Please Note: All these following options are available in Windows 10 v1909.
Windows Settings options
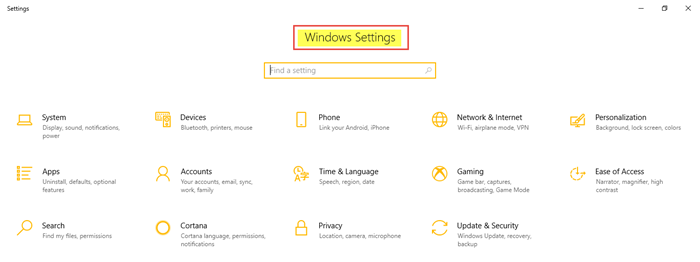
The user interface of Windows 11 Settings panel is neat and clean. You cannot find any clutter since all the options are well organized. Having said that, Windows 11 Settings panel has thirteen different categories and they are-
- System
- Devices
- Phone
- Network & Internet
- Personalization
- Apps
- Accounts
- Time & Language
- Gaming
- Ease of Access
- Search
- Cortana
- Privacy
- Update & Security
Each of the categories comes with some sub-options to manage every aspect of your computer. From changing the wallpaper to troubleshoot common Windows problems using in-built troubleshooters, you can find everything in this Settings panel. Therefore, just read on to check all the options Windows 10 Settings panel has.
1. System
The System settings category generally allows you to manage some features or functionalities related to hardware and all. More specifically, you can find these in this section-
Display: If you want to manage your dual monitor setup, choose primary monitor, change resolution, text/app size, enable or disable Night Light, change dual monitors’ behaviours, etc. you can find all the options here.
Sound: If you want to change audio output device, volume, troubleshoot common audio related problems, set app-based volume, etc. this is the section you need to open.
Notifications & actions: You can add or remove icons or options from Action Center, enable/disable notifications on lock screen, show reminders and incoming VoIP calls on the lock screen, show Windows welcome experience after updates and occasionally when you sign in to highlight what’s new and suggested, get tips, tricks, and suggestions as you use Windows, get notifications from apps and other senders, etc. Apart from that, you can choose which app can show notification in the Action Center. It lets you unclutter the Action Center and increase your productivity.
Focus assist: Formerly Quiet Hour, Focus assist will let you set various rules so that you do not get distracted by any app. You can choose the notification type, set different rules and many more.
Power & sleep: You can choose when your computer will turn off or go to sleep.
Storage: You can check your free and used storage space here. Apart from that, you can enable or disable Storage Sense, which helps you automatically clear folders like Recycle Bin, Temporary folder, etc.
Tablet mode: If you want to turn your computer’s screen into a tablet, you can use the Tablet mode. Other than enabling this feature, you can hide the taskbar in tablet mode.
Multitasking: In Multitasking section, you can enable or disable different features that are responsible for your multitasking functionalities. For example, you can enable or disable these settings-
- Arrange window automatically by dragging them to the sides or corners of the screen
- When I snap window, automatically size it to fill available space
- When I snap a window, show what I can snap next to it
- When I resize a snapped window, simultaneously resize any adjacent snapped window
- Show suggestions occasionally in your timeline
Projecting to this PC: If your Windows 10 computer has Miracast support, you can project your Android or Windows device to this PC wirelessly. This section has all the options to manage the projection.
Shared experiences: If you want to allow apps on other devices open and message apps on your current device or the opposite of it, you can use the Shared experiences section.
Clipboard: Windows 10 comes with Cloud Clipboard that helps you synchronize your clipboard items across multiple devices. You can enable, disable or tweak the corresponding settings from here.
Remote Desktop: To manage your Windows device from Android, iOS, or macOS, you can use the Remote Desktop option.
2. Devices
The Devices category of Windows 10 Settings offers all the options to manage various external devices you have or can use with your computer.
Bluetooth & other devices: From this panel, you can handle all the devices that are connected via Bluetooth. From mouse or keyboard, to other phone, you can find everything here.
Printers & scanners: If you have a printer connected with your computer, you can tweak different settings of that printer from here.
Mouse: It helps you open mouse settings on Windows 10. To change the primary button’s function of your mouse, or how many lines your want to scroll each time, you need to open this section.
Typing: The Typing panel comes some options to toggle these features-
- Autocorrect misspelt words
- Highlight misspelt words
- Show text suggestions as I type on the software keyboard
- Add a space after I choose a text suggestion
- Add a period after I double-tap the Spacebar
- Show text suggestions as I type
- Show text suggestions based on the recognized languages you’re typing in
Pen & Windows Ink: If you want to change the font when using handwriting feature or if you want to get some app suggestions, you can use this feature.
AutoPlay: If you frequently insert a CD or DVD or SD card, and you want to perform a certain task, you can use the AutoPlay section.
USB: It has only one setting and that lets you notify if there are issues connecting to USB devices.
3. Phone
Let’s assume that you are browsing a website on your mobile but the website is not responding correctly on the mobile device. At such a moment, you might want to open the same page on your computer. If so, you can use this functionality that allows you to continue your work on your PC from your mobile. In a nutshell, you can get SMS, email, phone call, etc. on your computer if your phone is connected via this functionality.
4. Network & Internet
As the name suggests you can manage your network-related options from here. More specifically, you will get the following options in this panel.
Status: If you want to check whether you have a valid internet connection or not, this is the best path you can navigate to. From here, you can manage your adapter settings, sharing option, as well as, reset network to fix Wi-Fi connected but not internet issue, troubleshoot common networking related problems.
Ethernet: If you are using an Ethernet connection, you can make your network private or public from here. Other than that, you can set up a metered connection.
VPN: If you want to use a system-wide VPN, you can use this panel. From here you can set up the VPN, all it to use over metered networks and while roaming.
Data usage: You can check how much data you have used in the past couple of days. You can choose a network name and check the usage accordingly. This is also possible to set a data limit if you have limited bandwidth.
Proxy: If you want to use a proxy, you need to open this setting. From here, you can choose manual proxy settings and change the settings according to your requirements. In simple words, it lets you open proxy settings in Windows 10. For your information, some HTTP status codes such as 305, 407 etc. can also be fixed from here.
5. Personalization
From the initial days, Microsoft has been including a dedicated panel so that users can manage wallpaper, theme, etc. Even in Windows 10, you can similar options in the Settings panel.
Background: You can find wallpaper settings in Windows 10 and change your wallpaper from here.
Colors: This is possible to choose a colour for your computer. More specifically, you can turn on-off transparency effect, title bar colour, windows border colour, taskbar colour, start menu colour, etc. The best thing is you can enable or disable Dark mode from here.
Lock screen: If you want to change the lock screen background, you can find that option here. You can also use a solid colour, and Windows spotlight.
Themes: Although Microsoft ditched the theme functionality in Windows 8/8.1, they have retained it in Windows 10. You can create, enable or disable a theme from this panel.
Start: If you want to customize your Start menu, you should follow these options-
- Show more tiles on Start
- Show app list n Start menu
- Show recently added apps
- Show most used apps
- Show suggestions occasionally in Start
- Use Start fullscreen
- Show recently opened items in Jump Lists on Start or the taskbar
Taskbar: The Taskbar is an important element of your Windows computer and if you want to tweak various settings of options of Taskbar, you can open this section. This panel offers the following options-
- Lock the Taskbar
- Automatically hide the taskbar in desktop mode
- Automatically hide the taskbar in tablet mode
- Use small taskbar buttons
- Replace Command Prompt with Windows PowerShell in the menu when I right-click the start button or press Windows key + X
- Show badges on taskbar buttons
- Set taskbar location
- Combine taskbar buttons
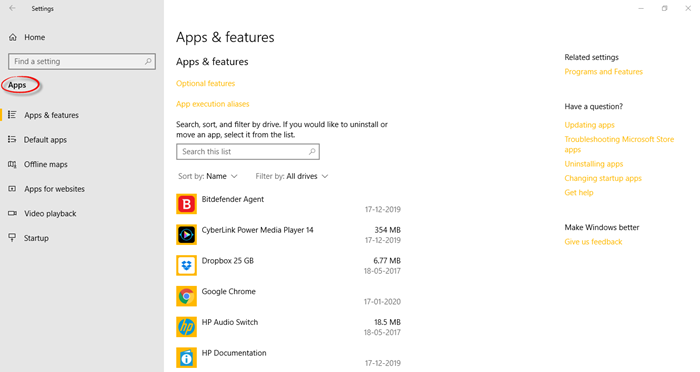
6. Apps
From the Apps menu, you will be able to manage your apps. From changing the location to terminate it whenever needed, you can do everything with the help of the Apps menu.
Apps & features: You can prevent third-party apps from being installed on your computer, uninstall installed apps, reset in-built apps, and many more.
Default apps: As per the name, you can set default apps for various things like email, maps, music, video, etc. This is also possible to choose default apps by file type. For example, if you do not like Microsoft Edge, and you want to set Google Chrome as the default browser, you can do that from here.
Offline maps: If you use the Maps app, you can download maps offline and use that even when you do not have an internet connection.
Apps for websites: You can open various apps if a website is associated with the app. For example, it opens Microsoft Edge, when your system faces share.microsoft.com.
Video playback: You can manage Windows HD colour settings, play video at a lower resolution and much more.
Startup: This is possible to manage, add, remove startup items in Windows 10.
7. Accounts
All the local and Microsoft account-related options are visible here. That said, you can find these following options.
Your info: You can manage your basic account settings, profile picture etc. from here.
Email & accounts: You can add email account that will be used by the email, calendar, contacts etc.
Sign-in options: You can set up Windows Hello, change account password, set up picture password, enable Dynamic Lock, etc.
Family & other users: If you use Microsoft Family feature or service, you can manage your accounts from here. Apart from that, you can add your family member to your computer as well.
Sync your settings: If you have multiple Windows 10 computers and you want to use the same settings, themes, languages preference, etc. you can synchronize those across multiple devices from this panel.
8. Time & Language
If you want to change the time zone, time, date, etc. you need to open Time & Language settings. Apart from those, you can change the default voice for apps.
9. Gaming
This is very easy to record gameplay on Windows 10 after the inclusion of Game Bar. You can record, broadcast any game with the help of this Gaming functionalities. There is another option called Game Mode. If you activate Game Mode, your computer will use maximum resources to spruce up the gaming experience.
10. Ease of Access
As the name defines, this section is popular among them, who want to make icons, text, etc. bigger or smaller, use high contrast theme, magnifier, enable narrator, enable Speech Recognition, and many more.
11. Search
The Search category has three different sub-categories and they are Permissions & History, Searching Windows, and More details. In the first tab, you can find some options to manage the web search result, cloud content search result, history and so on. This is possible to deal with the type of result you want to get while searching for a keyword in the taskbar search box. The second section will let you include or exclude any folder, file, app, etc. from the Windows search result.
12. Cortana
Although Cortana is near to death, there are many people who love to use a digital assistant on their mobile or computer. If you are one of them, who would like to give Cortana a try, you can check out these settings. From this section, you will be able to enable Hey Cortana voice command, keyboard shortcut, enable Cortana on lock screen, choose Cortana language, etc. Other than that, you can get phone notifications on your current computer as well.
13. Privacy
Microsoft gathers a lot of information from Windows 10 users. If you are unaware of that, you might need to open the Privacy section in Windows 10 Settings panel. From here, you can manage everything related to privacy and personal security. You can allow or block a particular app from accessing a particular hardware or another app, and so forth. Also, you can enable online speech recognition, view diagnostic data, and more.
14. Update & Security
This section not only has all the options to manage your updates, but also you can find some troubleshooters to fix common problems.
Windows Update: You can download, install, manage your updates from this location.
Delivery Optimization: You can allow your current computer to download updates from PCs on your local network.
Windows Security: Windows Defender is now much more useful than before and you can tweak various settings of Windows Defender from this panel.
Backup: You can backup your files to another drive. It becomes handy when you lose your data from a drive since this backup can pull up data when the original file is damaged.
Troubleshoot: Microsoft has included some troubleshooters to fix different problems related to Bluetooth, Windows Update, Audio, Printer, Internet Connection, Power etc. If you are facing any problem, you can head over to the Troubleshoot menu and run a troubleshooter in Windows 10 accordingly.
Recovery: In case you need to Reset your PC or boot PC into Advanced Startup options, you can use the Recovery menu.
Activation: This is probably the first thing you need to open after installing a fresh copy of Windows 10 since it lets you activate your Windows 10 PC.
Find my device: If you enable this feature, you can track the location of your device from Microsoft website. However, you need to sign in with your Microsoft account first.
For developers: If you want to sideload apps from third-party resources, or do other tasks related to device discovery, portal, etc. you can manage them from here.
Windows Insider Program: If you are using the stable release of Windows 10 and you want to sign up for Windows Insider Program to test the Insider Preview builds, you can hit the corresponding Get started button.
These are all the settings you can find in Windows 10 Settings panel. You should follow the first method to open Settings in Windows 10 and navigate to the path that you want to open.
How to hide specific settings page of Windows Settings?
Windows 10 offers a lot of pages or options in the Windows Settings panel. Many people might not need all those settings – especially when they are handing over the computer to their little kid, who is not aware of such functionalities. If you are one of them, who wants to hide specific settings page of Windows Settings, you should follow this tutorial. There are two ways to hide specific settings page of Windows 10 Settings Panel. You can use either Local Group Policy Editor or Registry Editor. If you are using Windows 10 Home edition, you have to use the Registry Editor method since Group Policy Editor is not available in your computer. Apart from that version, all the other users can use any of these two tricks.
Hide specific page of Windows Settings using Group Policy Editor
To hide specific page of Windows Settings using Group Policy Editor, follow these steps:
- Open Group Policy Editor. Press Win+R, type gpedit.msc and hit the Enter button.
- Navigate to this path:
Computer Configuration > Administrative Templates > Control Panel
- Double-click on Settings Page Visibility that you can find on your right-hand side.
- Select Enable and write down the URI of all the page that you want to hide. It should look like this-
hide:about; - Click Apply and OK to save your change.
If you want to hide multiple pages, you need to keep listing everything like this-
hide:about;backup;activation;
Hide specific page of Windows Settings using Registry Editor
To hide specific page of Windows Settings using Registry Editor, do follow these trick:
- Open Registry Editor by searching regedit in the Taskbar search box or Start Menu.
- Go to –
HKEY_LOCAL_MACHINE\SOFTWARE\Microsoft\Windows\CurrentVersion\Policies\Explorer
- Create a new String Value on your right-hand side and name it SettingsPageVisibility.
- Double-click and enter something like this in the Value data box –
hide:about; - Click OK to save your change.
Like Group Policy Editor, if you want to hide multiple pages, you need to add all the values one after one.
Microsoft Technet website has listed down all the page URI for users’ benefit. Here is the list you might need-
- about
- activation
- appsfeatures
- appsforwebsites
- backup
- batterysaver
- bluetooth
- colors
- cortana
- datausage
- dateandtime
- defaultapps
- developers
- deviceencryption
- display
- emailandaccounts
- extras
- findmydevice
- lockscreen
- maps
- network-ethernet
- network-mobilehotspot
- network-proxy
- network-vpn
- network-directaccess
- network-wifi
- notifications
- optionalfeatures
- powersleep
- printers
- privacy
- personalization
- recovery
- regionlanguage
- storagesense
- tabletmode
- taskbar
- themes
- troubleshoot
- typing
- usb
- windowsdefender
- windowsinsider
- windowsupdate
- yourinfo
How to show only specific pages of Windows 11/10 Settings?
If you want to show only specific pages of Windows Settings on Windows 11/10, there are two methods. First, you can apply the aforementioned tricks to hide all unnecessary pages. However, that process is quite longer and you need to list down all the pages one by one. Here is a simpler guide that that, which lets you hide all the pages at once except desired one.
You need to open Registry Editor or Group Policy Editor and go to the same location as you did earlier. Here you need to enter something like this-
showonly:about;recovery;printers;
In other words, Technet introduced two keywords i.e. hide and showonly. If you use hide keyword, it will hide all the specific pages. The showonly keyword does the exact opposite thing.
Windows Settings vs Control Panel
Control Panel was introduced a long time back, which contained all the options. From account settings to personalization – everything was possible through the Control Panel. However, the days are gone now. Windows Settings does all those jobs for you. The old Control Panel is still available in the latest stable release of Windows 11/10. However, that is next to useless since almost all the important and daily-life options including Windows Troubleshooters, which are important to fix common Device Manager error codes, are migrated from Control Panel to Windows Settings. Some options like Uninstall a program, Change account type are still available in the Control Panel.
Most of the users are already using the new panel to manage every aspect. If you have recently installed Windows 11, you should not opt for the Control Panel because Microsoft is about to kill that traditional tool. Also, you should not have any problem with the Settings panel as it is more user-friendly than the old one. It is very easy to find some options, settings, etc. The user interface is quite better as well.
If you have installed Windows 10, you might have started exploring it already. Windows 10 offers new opportunities for users to personalize it according to their preferences. In this post, we will take a bird’ s-eye view of the settings offered by Windows 10.
While Microsoft has always offered a decent range of settings options and personalization capabilities in all its Windows versions, things are slightly different in Windows 10. While the familiar Control Panel is still there, the new Settings app comes with a new design and a new interface.
Windows 10 offers a wide range of settings, which include personalization, system, and privacy options. You will be able to see this once you open the Windows 10 Settings window and explore your way through all the options. The new Windows 10 Settings app now comes with a new design and interface allowing users to customize and personalize it according to their preferences.
In this post, we will be covering the following points:
- How to open the Windows 10 Settings app.
- How to use the Windows 10 Settings app.
TIP: This post talks about Windows 11 Settings.
Users can sync their settings by using their email ID, manage sign-in options, change privacy settings, manage and update security, customize the Start menu and Taskbar, and a lot more. We will first see how to open the Settings app in Windows 10 and then go through all the settings step by step. So, let’s get started!
To open the Windows 10 Settings app, click on the Start button, and then further click on the gear icon called Settings. The Settings app window will open.
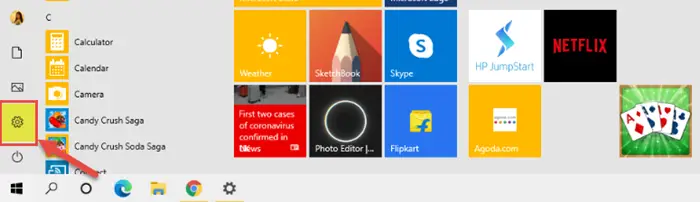
Another way to open it is to search for it in the Taskbar Search option simply. The keyboard shortcut is Windows key + I.
As you can see, the Windows 10 Settings include the following sections.
- System
- Devices
- Phone
- Network & Internet
- Personalization
- Apps
- Accounts
- Time & Language
- Gaming
- Ease of Access
- Search
- Cortana
- Privacy
- Update & Security
How to use Windows 10 Settings
Windows 10 Settings allow users to customize and configure the operating system as they need. We will now go through all the sections and settings in detail.
1. System

The System Settings let you adjust the settings of all your apps, notifications, display, and power. You can change the display resolution, display orientation, and brightness and color of the built-in display. You can also change the size of the text, apps, and other items.
In the Sound category, you can choose your input and output devices, manage all sound devices, and set other advanced sound options. You can also edit, add, remove, select quick actions, show or hide notifications, adjust the power, sleep, and battery saver settings, configure storage settings, and more.
Storage lets you decide where your apps, documents, music, pictures, and videos are saved by default. Using a touch-enabled device, you can set your PC into tablet mode from System Settings > Tablet mode.
The Multitasking feature enables you to work with multiple windows and virtual desktops. Projecting to this PC allows you to project your Windows phone or PC to the existing screen to use its keyboards, mouse, and other devices. You can share or receive content with a nearby device using Bluetooth and WiFi. It is also possible to sync your clipboard data across devices and clear it.
You can set up Remote Desktop, which lets you connect and control your existing PC from a remote device using a remote desktop client. In the About section, you can see your device specifications, such as the device name, processor, installed RAM, device ID, product ID, etc.
2. Devices

You can adjust the Devices Settings for connected devices like printer, scanner, mouse, keyboard, etc. You can explore the touchpad sensitivity and advanced typing and keyboard settings. Other related settings such as AutoPlay, USB, and Pen and Windows Ink are also under this section of settings.
Read: How to configure Mixed Reality settings.
3. Phone
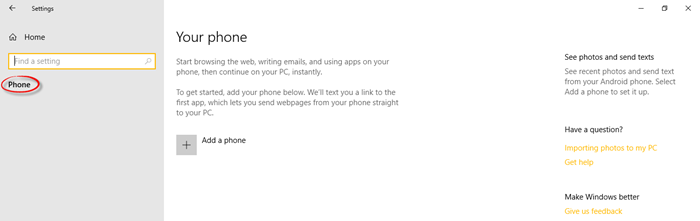
Under Phone Settings, you can add a phone and link it to your PC which will allow you to browse the web and use apps on your phone and then instantly switch onto your computer.
4. Network and Internet

All your WiFi networks, Dial-up connections, VPN, Ethernet, etc. can be managed here in the Network & Internet section of settings. You can check for available networks and change the connection properties. More settings related to a mobile hotspot, airplane mode, data usage, Wi-Fi Sense and the proxy can be found here.
5. Personalization
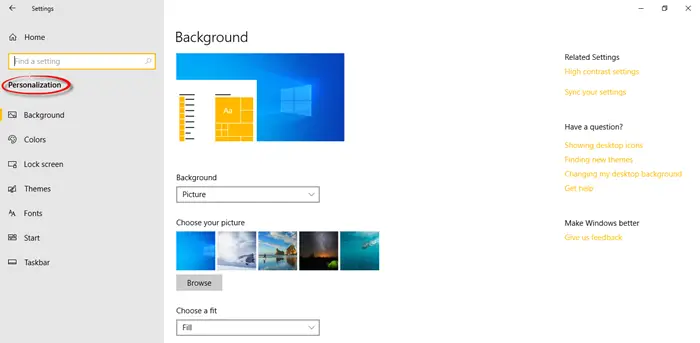
Under Personalization Settings, the users can customize the background, colours, lock screen, fonts, and themes. The Start menu and the Taskbar can also be personalized as per the user’s preferences.
6. Apps
In Apps & features, you can search, sort, filter, move as well as uninstall the apps here. You can choose the default apps, download offline maps, associate apps with websites, and so on. You can also change the video playback and startup apps settings.
7. Accounts

In the Accounts settings section, you will find all your information, such as billing details, subscriptions, family settings, and all about your Microsoft account. You can add another Microsoft account as well as a work/school account here. There are several sign-in options to choose from, such as a password, picture password, PIN, fingerprint, etc. You can sync your settings as well.
8. Time and Language

The Time & Language settings include the date and time settings, region and language settings, and speech settings. You can change date formats, add additional clocks for different time zones, choose the language you speak with your device, and also add preferred languages.
9. Gaming
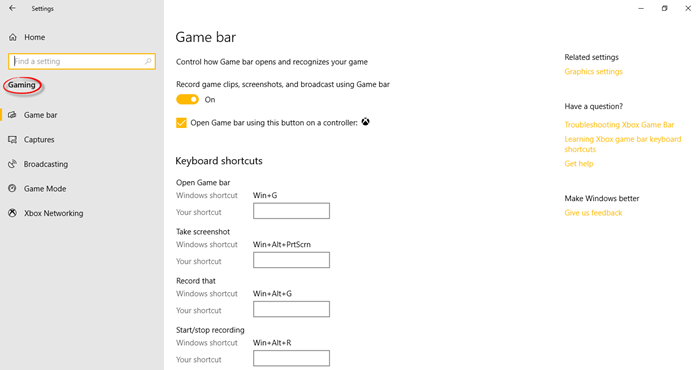
The Gaming settings let you control how the Game bar opens and recognizes your game. You can create your own keyboard shortcuts for various functions such as to open game bar, start/stop recording, microphone on / off, and so on.
This section allows you to control and determine the audio quality, microphone volume, system volume, and how you capture your game through screenshots and game clips. You can turn the game mode on here and control how your game appears when you broadcast. Under Xbox Networking, you will find details regarding the connection status and performance.
10. Ease of Access
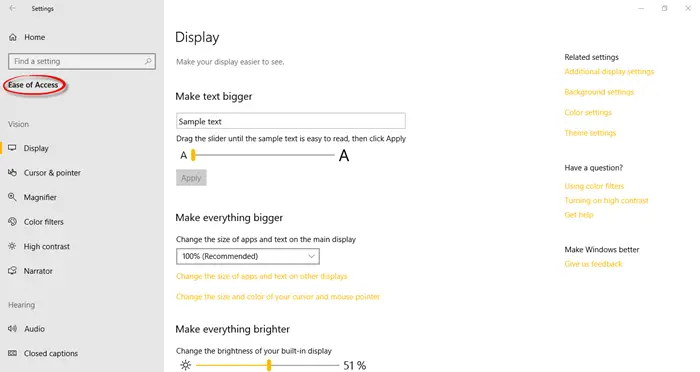
The Ease of Access settings is categorized into three settings related to vision, hearing, and interaction.
Vision includes settings that make your display, pointer, cursor, and touch feedback easier to see. For a better viewing experience, you can use a magnifier to zoom, a narrator, high contrast, and color filters. Hearing includes settings that make your device easier to hear or use without sound by displaying audio text. Interaction includes all the settings related to speech, keyboard, mouse, and eye control.
11. Search

Under Search Settings, you will find the permissions, search history, and advanced search indexer settings and learn all about the Windows Search and your privacy.
12. Cortana
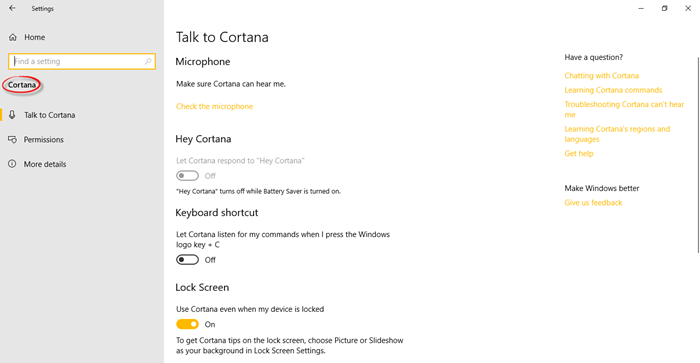
The Cortana Settings section lets you learn all about Cortana and your privacy settings where you can manage what you permit Cortana to do, see, and use.
13. Privacy
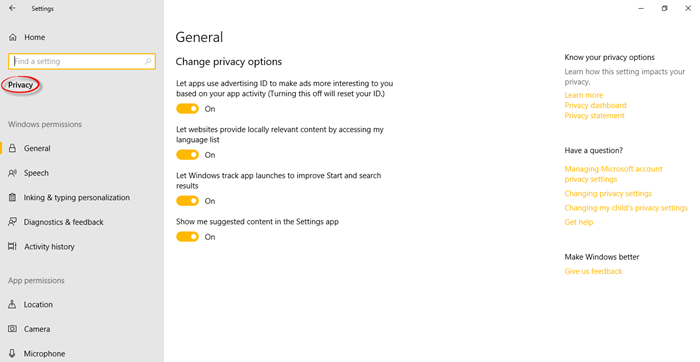
Privacy includes Windows and App permissions.
Windows permissions include general settings, speech, ink and typing personalization settings, diagnostics and feedback, and activity history. App permissions include all the settings related to location, camera, microphone, voice activation, notifications, account info, calendar, contacts, phone calls, history, email, tasks, messaging, radio, other devices, background apps, app diagnostics, automatic file download, documents, pictures, videos, and file system. Take a look at the Windows 10 Privacy Settings.
14. Update and Security

Microsoft has added an option of Update and Security settings where you can check for the latest Windows updates, Check Activation state, adjust the Windows Defender settings, open Windows Security and also rollback to your previous version of Windows via Recovery option.
Read: Windows 10 Security features.
In this section, you will find all about the Windows updates and security, delivery optimization and troubleshooting settings. You can backup using file history and explore the recovery options. You will find information regarding the activation and product key here in this section under the Activation tab. You will also see the Find my device settings and Developers settings here.
New settings available in Windows 10 Settings

System settings
Some features are removed from this System Settings panel of Settings. However, the following features are new in this latest version of Settings panel.
- Shared experiences: This function helps users to open apps, send a message and on any other devices running the same Microsoft account. However, this is also possible to share apps and send messages to any nearby device.
- Night Lights: This is a new feature that lets you control the brightness of your computer display screen.
Microsoft has removed Apps & Features, Default apps, Offline maps, etc.
Personalization settings
Although most of the options are same, a couple of new options are included:
- Themes: Windows 7 like the Theme feature is back again in Windows 10 v1703. Microsoft removed that functionality from previous versions of Windows 10. However, now you can download your favorite themes from Windows Store. Apart from that, you see some options like Background, Color, Sounds, and Mouse cursor.
- Start: One additional option called “Show app list in Start menu” has been added in this section. The other options are same.
Apps settings
This is a completely new category added in the Settings panel of Windows 10 Creators Update. Here you will see the following options:
- Apps & Features: Here, you can manage app installation, block third-party apps from being installed, manage installed apps, etc.
- Default apps: This section of Settings panel will let you manage default apps in Windows 10. You can change or assign your favorite app as your default file opener.
- Offline Maps: Offline maps has been moved from “System” to “Apps” section of Settings panel.
- Apps for websites: Another feature from “System” panel is moved to “Apps” section. You can manage the website that can be opened by an app here.
Accounts Settings
- Dynamic Lock: This feature helps you lock Windows 10 automatically when you step away
Gaming settings
This is another new category included in the Settings panel. These following features are new in this category.
- Game bar: It helps users to record games, screenshots, and live stream the game.
- Game DVR: It assists Windows 10 users to control how your machine is capturing your game.
- Broadcasting: as the name suggests, this option helps users to control how your game appears when you live stream it.
- Game Mode: this is one of the best options since it helps users to optimize your computer for a particular game so that you can get the best performance while playing.
Ease of Access settings
- One new feature is included in the Narrator section called Braille. This is currently under development. It helps users to communicate with a braille display. However, it requires a third-party software that is available in the Windows Store. It does support more than 40 languages.
- You can find Audio options in Other options. This helps users to enable to disable Mono audio.
Privacy settings
- Now you can directly turn on speech services and typing suggestions. This option is now included in Speech, inking, & typing
- Tasks: This is a whole new sub-category listed in the Settings panel. You can add tasks, manage apps which are using Tasks, and much more.
- Feedback & diagnostics: In this section, you can find a new option called Diagnostic and usage data. You can manage what data and how much data is sent send to Microsoft to provide Tailored Experiences.
- App diagnostics: It helps users to allow apps to control your diagnostic information.
Update & security settings
- Troubleshoot: This option will aid you to fix common problems related to internet connections, audio, printer, Windows Update, Blue Screen, Bluetooth, hardware, HomeGroup, keyboard, power, network adapter, audio recording, etc.
- Find my device: This is another new setting available in Windows 10 V1703 Settings app. You can find your lost device, and track a lost laptop and much more. Also, you can turn off this functionality.
- Windows Defender Security Center: From here you can manage all your security settings.
These are new features included in Windows 10 v1703 Settings app. Microsoft has also changed some icons – like the Windows Update icon.
If you are an IT admin wanting to restrict access to Windows 10 Settings page then this post will show you how to configure Windows 10 Settings visibility to hide all or select settings.
Related reading:
- Pin to Start any Windows 10 Setting,
- Windows 10 Settings Search is not working.