
Having a hard time with blurry text in windows 10? Don’t you worry, today I have one simplest solution which will resolve this issue with just one restart of your system.
Windows 10 is undoubtedly a most advanced personal computer operating system developed by Microsoft so far. It follows Windows 8.1 Metro interface but offers a much more enhanced and improved user experience.
But there are certain features and compatibility options which users wish they shouldn’t have changed. One among those features is DPI Scaling.
If you have a full HD monitor or screen with 1920 X 1080 resolution or higher then you will observe that all the icons and texts become so small that they are really hard to read unless you scale them up. Now in that case if you try to perform DPI Scaling in Windows 10 then it will usually lead to blurry fonts. And now things become more complicated as you can’t read the text anymore because everything becomes so much blurry.
So whats the solutions. Well, their’s one (might be more) and I have discussed it below.
Once you try to scale the DPI to 125% or try to set any custom DPI, you will start facing this problem.
The worst part is that it’s not just limited to system application, but it also makes your internet browsing a nightmare because now you won’t be able to read any paragraph without having a headache.
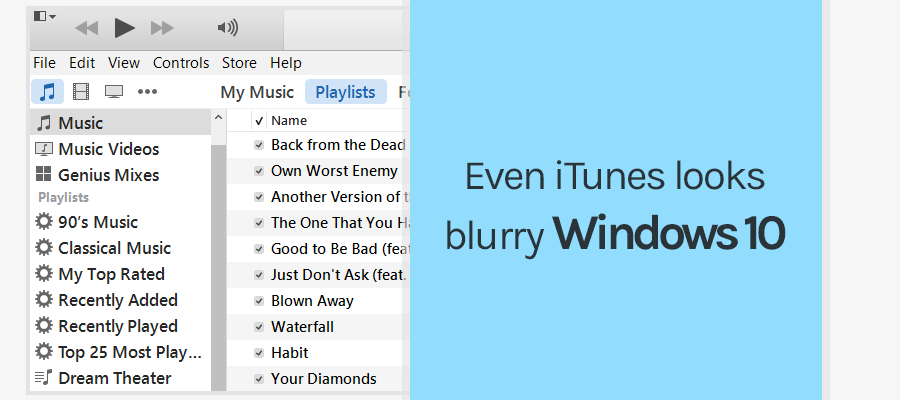
Even applications like iTunes looks blurry windows 10 which are designed to look great on 300PPI screens ( in case you don’t know I am talking about Mac systems ).
Blurry or fuzzy text are not only hard to read, but they also cause a headache when you try to concentrate too much in order to understand what’s actually written.
Solution 1: Manually fix fuzzy windows 10 fonts
This solution requires a bit of manual work, and you will have to repeat it individually for all those applications in which you see blurred text.
For example, I was facing a bit of problem with Advanced System care 10.3 pro software. Whenever I used to open it, everything including the notifications and Scan button seemed to be too much fuzzy. And so I followed the following steps, and you should also follow them one by one.
1. Right click on the application in which you are facing issues.
2. Select “Properties” from the popup menu.
3. Click on “Compatibility” tab.
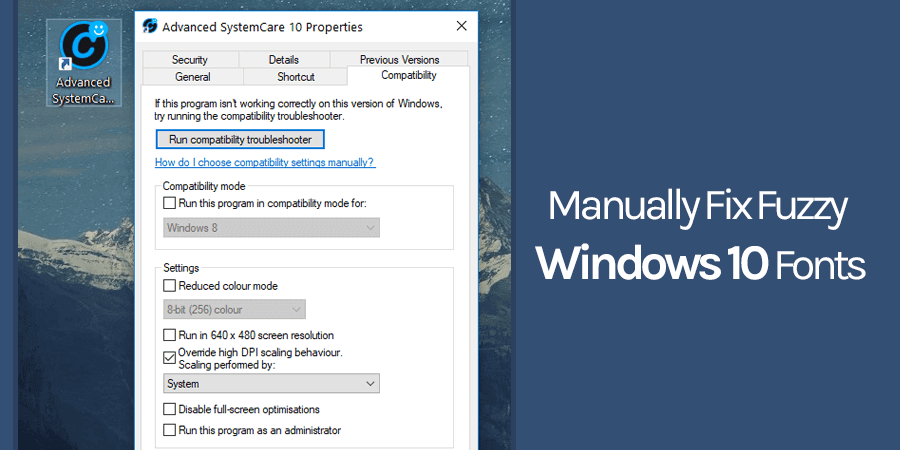
4. Select “Override high DPI scaling behavior.
5. Select “System” from the options provided in “Scaling performed by” section.
6. Click on “Apply” button and then on “OK.”
Now just restart your system, and everything should be fine for that application ( I didn’t need to restart my system though ). If you face the same problem with other application then simply repeat the steps.
Solution 2: Using XPE Windows 10 DPI Fix Application
This small but really useful application is what you need if you want to fix all sorts of font issues in your system. Once you install this application, it will attach itself in Windows boot directory and will load everything system starts. This might add few extra millisecond in your boot time but trust me its worth the wait.
1. Download XPE Windows 10 DPI Fix and install it. In case you are not able to install it, right-click on the setup file and select “Run as Administrator.”
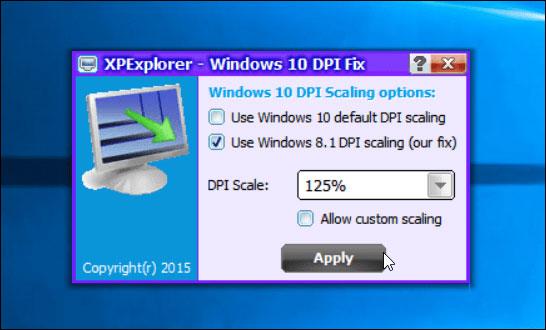
2. From the provided options you need to select “Use Windows 8.1 DPI scaling (our fix)” option.

3. From the “DPI Scale:” drop down menu you need to select the percentage your want to choose. Most of the times users usually select 125%.
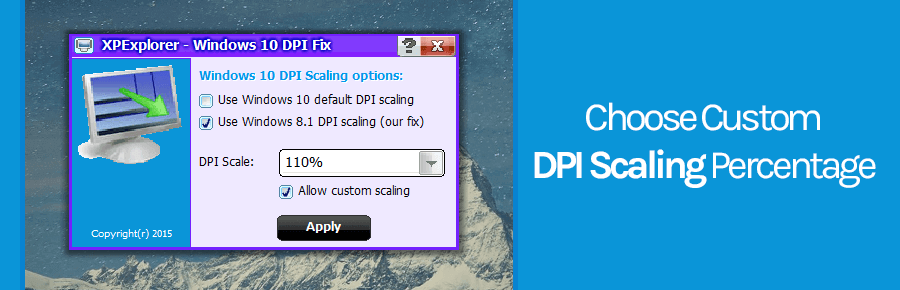
In case you want custom scaling, then you need first to select the “Allow custom scaling” option. After that from the drop-down, you can select anything between 101% to 200%.
Once you are done with all these 3 steps, just click on “Apply” button. You get now get a popup which asks you to restart the system to make the changes.
So go ahead and reboot your system. And when you will log in to your system, I am 100% sure that you will start loving your Windows 10 again.
XPExplorer — Windows 10 DPI Fix is a small application used to improve the system scaling mechanism. If you have encountered blurred text and unreadable fonts in your system, you can use this small program to fix the problem. The application is extremely easy to use, just download it and then run.
Instead of the default method, which may display some fonts incorrectly, the user may use the method known from Windows 8.1, and then choose the level of scaling: 100%, 125%, 150%, 175% and even 200%. In addition, the application allows you to set intermediate values, although there is no guarantee that all applications will be matched to it.
After approving the changes, the computer must be restarted. From this moment on, the system uses a modified scaling, which should display all fonts correctly, also in the system starter windows (e.g. device manager).
If necessary, you can restore the default scaling at any time.
The Windows DPI Scaling fix by XPExplorer fixes Windows 10’s introduced a type of DPI Scaling that can make high resolutions frustrating on smaller screens. Gaming laptops are a notable example of DPI problems. Windows can appear blurry instead of crisp-clean as it should be. Say no more to blurry Windows! Now the DPI fix will remove all the problems! Windows 10 DPI Scaling Fix is a simple solution to blurry Windows!
Features:
-Windows 8.1 style DPI
-Customizable zoom available
-Custom scaling
-Blurry Windows 10 Screen Fix
-Crisp-clear display
Requirements:
Windows 10
Notes:
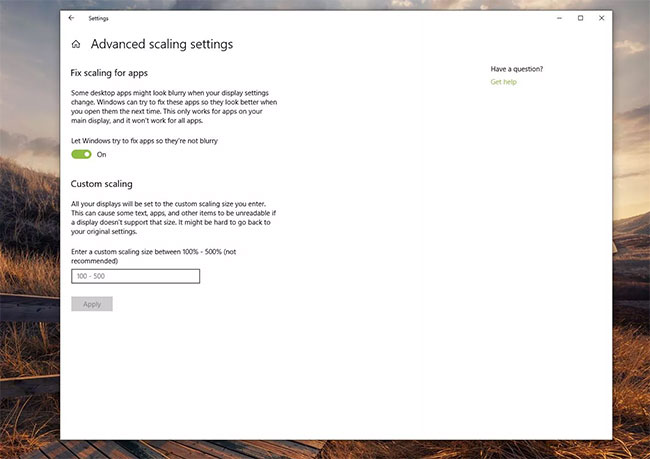
-If you are using Windows 10 Creator’s Update, then you may not need this patch. Instead, open settings, click system, display, then click «Advanced scaling settings».
-If the Creator’s Update fails, then you may have to use this patch instead.
Screenshots:
ОС Windows настроена на автоматическое определение размера монитора и отображение рабочего стола с соответствующим уровнем масштабирования. Однако, если вы захотите изменить стандартные настройки и изменить стандартное масштабирование DPI, некоторые окна могут отображаться нечетко, особенно на широкоформатных экранах с высоким разрешением. Вместо того чтобы экспериментировать с различными настройками и выходить и входить в систему для применения изменений, можно воспользоваться утилитой Windows 10 DPI Fix.Это небольшое приложение (твик) предназначено для приведения рабочего стола в нормальный вид независимо от разрешения дисплея. В главном окне программы есть две опции: масштабирование DPI в Windows 8.1 и переключение на стандартное масштабирование дисплея в Windows 10. Достаточно отметить нужный вариант и нажать кнопку «Применить». Для вступления изменений в силу требуется перезагрузка компьютера (для применения масштабирования DPI по умолчанию в Windows 10).
Утилита Windows 10 DPI Fix пригодится пользователям с широкоформатными экранами высокого разрешения (1920х1080 и выше).
Цель программы — предоставить простой способ перехода от стандартного метода масштабирования DPI в Windows 10 к тому, который используется в Windows Vista, 7, 8 и 8.1. С ее помощью на экране не будет размытого текста.
Скачать бесплатно:
- Windows10_DPI_FIX 1 Mb
| Версия: | 2.2 |
| Размер: | 1 Mb |
| Платформа: | Windows 10 32/64 bit |
- How to fix blurry, blurred text in Windows 10
- Explore System Configuration Utility
The obvious sign of blurred text is that the Windows 10 fonts are blurred, while the rest of the screen, like images and other parts of the user interface, appears normal. It is usually not difficult to fix this problem. There are several troubleshooting steps you can perform in Windows Settings, and if the problem persists, you can try a free utility called Windows 10 DPI Fix .
Cause blurry text on Windows 10
Blurred text errors in Windows 10 occur most often when using large, high-resolution screens, such as 4K UHD displays. This is because Windows is designed to expand the text size on high-resolution screens, making the text easier to read. However, some people complain that the size expansion technique used by Windows 10 can sometimes cause blurry text.
How to fix blurry text in Windows 10?
1. Change DPI scaling in Windows Settings
If you have a high-resolution screen, Windows may have automatically set the DPI to 125% or 150%. Changing that value may solve the problem. For example, if it is 125%, you can try increasing it to 150% and see if the text is sharper.
2. Turn off DPI scaling
If changing the DPI doesn’t help, you can turn this feature off completely by setting it to 100% in Display Settings. When you set DPI to 100%, the text is no longer blurry. Unfortunately, the text is now too small to read comfortably.
3. If only certain programs experience blurry text, you can change the display rate for that particular program only.
Open Advanced scaling settings for the problematic program and disable the Let Windows try to fix apps option so they’re not blurry . Alternatively, you can enter a custom scale value to make the text big enough to read if needed.
4. If you have multiple monitors connected to the computer, one or both monitors may experience blurry text, if the two monitors are set at different resolutions.
The easiest way to solve this problem is not to simultaneously use different sized screens and make sure they are all set at the same resolution.
5. Install and run Windows 10 DPI Fix.
This free third-party utility for Windows 10 uses the method used by older versions of Windows (such as Windows 8). Some users find this method to work better for some Windows configurations. If other troubleshooting steps don’t work, install Windows 10 DPI Fix at:
http://windows10-dpi-fix.xpexplorer.com/
Select Use Windows 8.1 DPI scaling and click Apply .
6. If necessary, you can return to the default Windows 10 DPI scaling installation.
Start Windows 10 DPI Fix, select Use Windows 10 default DPI scaling and click Apply .
5 stars4 stars3 stars2 stars1 star5 ★ | 1 Vote
You should read it
- 10 ways to open Bluetooth File Transfer utility on Windows 11
- How to use Windows Defender increases security when surfing the web
- Which system cleanup utility should be used for Windows?
- Cut, merge video clips with the utility available in Windows
- DevToys — a great set of utilities for Windows developers
- About PowerShell
- Use the Backup utility in Windows XP
- Explore Mac’s Network Utility
May be interested
- How to unlink a Windows 10 license from a Microsoft account

when you sell or give away computers to others, you may want to unlink your windows 10 license from your microsoft account. in this tutorial, tipsmake.com will show you how to do that.
- Download the Indexer Diagnostic Tool for Windows 10
the indexer diagnostic tool is a new utility developed by microsoft to help windows 10 users find and fix search problems.
- Turn on / off auto-arrange in folders in Windows 10
in previous versions of windows, you could arrange icons inside folders freely. however, this option has been removed from windows 7 and all other versions that appear after windows 7.
- How to display the full path in File Explorer on Windows 10
in this tutorial, tipsmake.com will guide you through the steps to display the actual full path for the current location in the file explorer title bar on windows 10.
- How to reset Windows Update on Windows 10
you may sometimes have problems with windows update. this guide will show you how to completely reset windows update components and policies to default in windows 10.
- How to add / remove ‘Display brightness’ from Power Options in Windows
this tutorial will show you how to add or remove display brightness settings in the display section of power options on windows 7, windows 8 and windows 10.


