
Last Updated :
30 Aug, 2024
One effective technique to handle data without depending on third-party software is to use the Command Prompt (CMD) on Windows to compress and extract files and directories. To use CMD to compress files and directories, you must utilize the integrated 7z command-line tool. If you work with large files on your Windows computer, then you need to know how to extract files and folders using the command prompt on Windows. You can manage your documents using the command prompt in just simple steps.
In this article, we will show you how to use basic command prompt commands to compress or extract files and folders. This method also helps in improving the efficiency of file transfer and also saves disk space. Now, follow the below methods step-by-step to Compress or Extract files and folders using CMD.
How to Compress or Extract files and folders using CMD?
Although it is mainly used for NTFS file compression, Windows comes with an integrated application called Compact that allows you to compress files and folders. On the other hand, Windows 10 and later versions of Windows allow you to use the Compact command to create ZIP files. Here are some straightforward ways to compress and extract files and folders using the Command Prompt on Windows, complete with a step-by-step guide.
Method 1: Using Compact Command
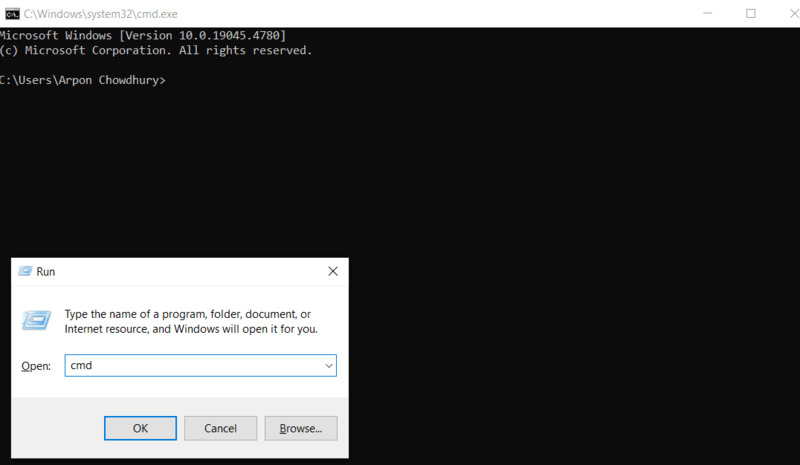
Step 1: To compress files Click ‘Win + R‘, type ‘cmd’ in the open box, and then press Enter.
Step 2: Next, change the directory to the target location using the cd command:
cd C:\Users\YourUsername\Documents
Step 3: After you have navigated to the directory where compression is needed, type the following command to compress a file:
compact /c filename.ext
Replace filename.ext with the name of the file, you want to compress.
To compress an entire folder and its subfolders:
compact /c /s:directoryname
Replace directoryname with the name of the folder you want to compress.
Method 2: Creating a Compressed ZIP File Using Compress Command
Step 1: Open Command Prompt as Administrator.
Step 2: Use the Makecab Command:
First, list all files into a directive file:
dir /b /s *.* > list.txt
Step 3: Then compress the files listed in list.txt:
makecab /f list.txt
How to Extract Files and Folders?
Now, let’s check out two different methods on how to extract any file and folder using the command prompt in no time.
Method 1: Using Expand Command
Step 1: Search for Command Prompt by either clicking on the Start menu or pressing Win + R. Type cmd, and then hit the Enter key.
Step 2: Use Expand Command:
Navigate to the location of your compressed file (.cab), Use the cd command to navigate:
cd C:\Path\To\Your\File
from there, you can make use of Expand Command.
expand filename.cab -F:* C:\DestinationFolder
Replace filename.cab with the name of your compressed file and C:\DestinationFolder with the path where you want the files to be extracted.
Method 2: Extracting ZIP Files using PowerShell
Step 1: To launch PowerShell, type that in the Start menu.
Step 2: Use the cd command to navigate to the location of the file:
cd C:\Path\To\Your\File
Step 3: Extract the ZIP file:
Expand-Archive -Path "C:\path\to\your\file.zip" -DestinationPath "C:\path\to\extract\to"
Replace "C:\path\to\your\file.zip" with the path to your ZIP file and "C:\path\to\extract\to" with the path where you want the files to be extracted.
These methods provide you with basic skills for compression and extraction using Command Prompt and PowerShell for files on Windows.
Conclusion
To put it simply, using the Command Prompt in Windows for file/folder compression or deletion is straightforward and efficient. This strategy is particularly valuable for handling large data sets economically. If you learn just a handful of basic commands like ‘’compact” and ”expand’’, you can reduce volumes of disk space and enhance your file organization. Employing these commands consistently will enhance your expertise and enable you to exploit all the capabilities your Windows system offers.
Also Read
- How to Unzip Files on Windows and Mac?
- How to Compress Files in Linux | Tar Command
- How to compress file in Linux | Compress Command
In the past it was not possible to create Zip files and Unzip archives in Windows without installing third-party programs like WinZip and 7-Zip.
But now Windows has a built-in capability to Zip files and folders and Unzip archives from the command line using PowerShell.
Starting from Windows 8 with PowerShell 3.0 and .NET Framework 4.5 installed by default, it is possible to use a kind of zip and unzip commands from the command line.
Cool Tip: Download a file using PowerShell! Read more →
Zip/Unzip From The Command Line In Windows
Depending on the version of PowerShell there are different ways to Zip files and folders and Unzip archives in Windows from the command line.
To determine a version of PowerShell on your machine, execute:
PS C:\> $PSVersionTable.PSVersion
PowerShell 5.0 (Windows 10) and greater
Starting from PowerShell 5.0 (Windows 10), it is possible to Zip files and folders and Unzip archives in Windows using Compress-Archive and Expand-Archive PowerShell commands.
Zip a file or a folder from the command line in Windows:
PS C:\> Compress-Archive -Path 'C:\input' -DestinationPath 'C:\output.zip'
Zip all files in a folder:
PS C:\> Compress-Archive -Path 'C:\folder\*' -DestinationPath 'C:\output.zip'
Unzip an archive from the command line in Windows:
PS C:\> Expand-Archive -Path 'C:\input.zip' -DestinationPath 'C:\output'
PowerShell 3.0 (Windows  and greater
 and greater
Starting from PowerShell 3.0 (Windows 8), it is possible to Zip folders and Unzip archives in Windows from the command line using the special methods in PowerShell.
Zip all files in a folder from the command line in Windows:
PS C:\> Add-Type -A 'System.IO.Compression.FileSystem';
[IO.Compression.ZipFile]::CreateFromDirectory('C:\folder', 'C:\output.zip')
Unzip an archive from the command line in Windows:
PS C:\> Add-Type -A 'System.IO.Compression.FileSystem';
[IO.Compression.ZipFile]::ExtractToDirectory('C:\input.zip', 'C:\output')
Was it useful? Share this post with the world!
Comprehensive Tutorial on Zipping in Windows Command Line 📦
In today’s fast-paced digital world, managing your files efficiently is a must. Whether you need to compress a single file, multiple files, or an entire directory, using the Windows command line can be a powerful way to get the job done quickly. This guide walks you through how to zip in Windows command line, including zipping files, folders, and directories. We’ll also recommend the popular tool 7-Zip for those who want more advanced features.
1. Using PowerShell’s Compress-Archive Command 🛠️
For Windows 10 and later, PowerShell includes a built-in command called Compress-Archive. This command allows you to zip files and folders without needing third-party software.
a. Zip a Single File
To zip a single file, open PowerShell and run:
Compress-Archive -Path "C:\Path\To\YourFile.txt" -DestinationPath "C:\Path\To\Archive.zip"
This command takes YourFile.txt and compresses it into Archive.zip.
b. Zip Multiple Files
To zip multiple files, list them using a comma-separated array:
Compress-Archive -Path "C:\Path\To\File1.txt", "C:\Path\To\File2.txt" -DestinationPath "C:\Path\To\FilesArchive.zip"
c. Zip a Folder or Directory
Compressing an entire folder is just as simple:
Compress-Archive -Path "C:\Path\To\YourFolder" -DestinationPath "C:\Path\To\FolderArchive.zip"
This command zips the entire contents of YourFolder into FolderArchive.zip.
2. Using 7-Zip from the Command Line 🔧
For those who require additional compression options or support for various archive formats, 7-Zip is a top recommendation. 7-Zip is a free, open-source file archiver with high compression ratios and a powerful command-line interface.
a. Installing 7-Zip
- Download 7-Zip from the official website.
- Install it on your system (default installation path is usually
C:\Program Files\7-Zip\7z.exe).
b. Using 7-Zip to Zip Files and Folders
Open the Command Prompt and navigate to the directory containing the files or folders you wish to zip. Here are some common commands:
- Zip a Single File:
cmd

  "C:\Program Files\7-Zip\7z.exe" a -tzip Archive.zip "YourFile.txt"
- Zip Multiple Files:
cmd

  "C:\Program Files\7-Zip\7z.exe" a -tzip FilesArchive.zip "File1.txt" "File2.txt"
- Zip an Entire Folder:
cmd

  "C:\Program Files\7-Zip\7z.exe" a -tzip FolderArchive.zip "YourFolder\*"
Explanation of the Command Options:
a: Add files to archive-tzip: Specify the archive type (ZIP in this case)Archive.zip: The name of the output archive"YourFolder\*": Includes all files within the folder
3. Comparison Table: PowerShell vs. 7-Zip
| Feature | PowerShell Compress-Archive | 7-Zip Command Line |
|---|---|---|
| Ease of Use | ✅ Very Easy | ✅ Easy with more options |
| Built-In | ✅ Included in Windows 10+ | ❌ Requires separate installation |
| Supported Formats | ❌ ZIP only | ✅ ZIP, 7z, TAR, GZIP, etc. |
| Advanced Options | ❌ Limited | ✅ Extensive (encryption, splits, etc.) |
Table Note: The check icons (✅) indicate the strengths of each method, so choose the one that best fits your needs.
4. Best Practices and Tips for Zipping Files
- Always Verify Paths: Ensure that the file or directory paths are correct to avoid errors.
- Use Meaningful Archive Names: This helps in keeping your files organized and easily identifiable.
- Test the Archive: After compression, try extracting the archive to ensure that all files are intact.
- Automate with Scripts: Consider writing batch scripts or PowerShell scripts to automate regular archiving tasks.
Final Thoughts 🎯
Whether you choose the simplicity of PowerShell’s Compress-Archive or the powerful features of 7-Zip, zipping files and folders via the Windows command line is a valuable skill for efficient file management. Experiment with both methods to see which works best for your workflow, and enjoy the flexibility that command line tools bring to your daily tasks.
Happy zipping, and may your archives always be compact and secure! 🚀
Sign in to your MUO account

Are you running out of space on your Windows PC? The best thing you can do to free up some space is to compress big files through zipping. There are plenty of third-party tools that can come in handy in this situation.
However, if you prefer to use Command Prompt or Windows PowerShell over anything else, there are commands you can use in these utilities to zip or unzip files. So, let’s check out how to zip or unzip files using Command Prompt and Windows PowerShell.
How to Zip Files Using Command Prompt
You can zip files through Command Prompt using the tar command. It’s a command line tool that helps you to extract files and create archives. However, this command only works in Windows 10 or later.
Here’s how to zip files using Command Prompt:
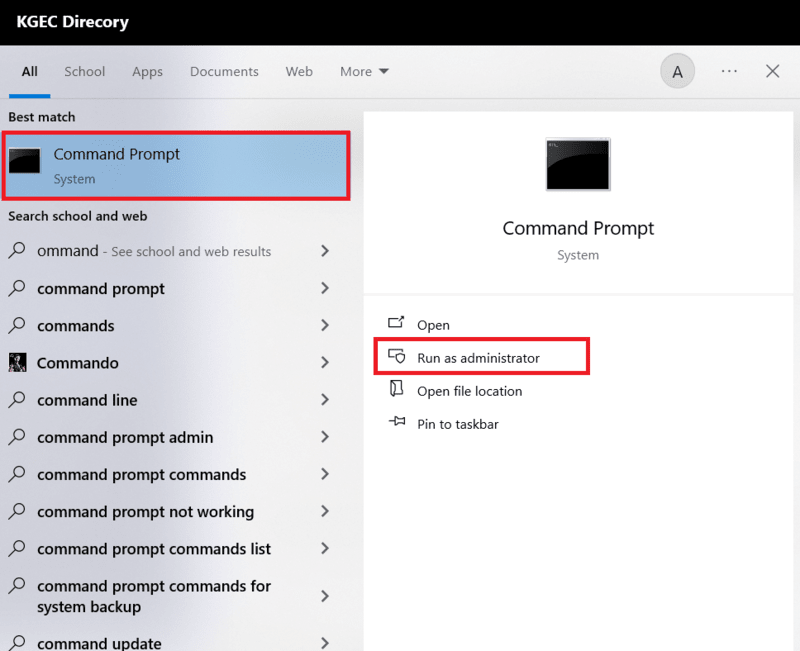
- Open the Start Menu by pressing the Win key.
- In the search bar, type Command Prompt and Run as administrator from the right pane.
-
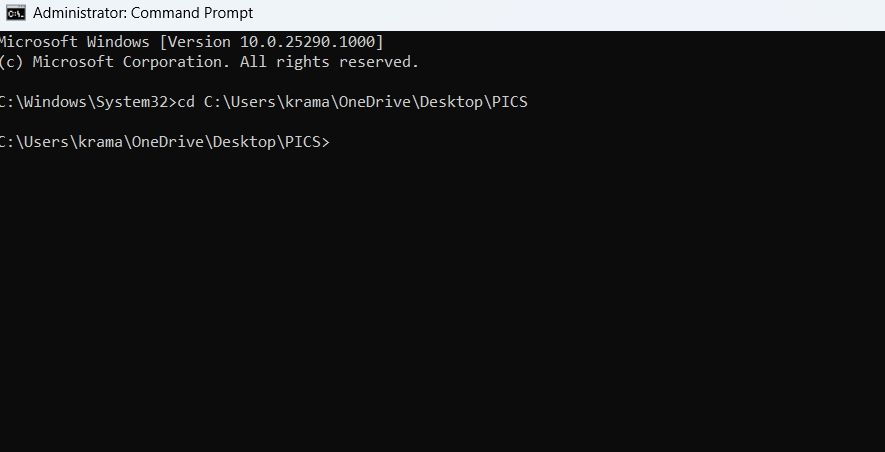
In the console, type the following command and press Enter. Replace ‘Place’ with the location of the file.
cd Place
-
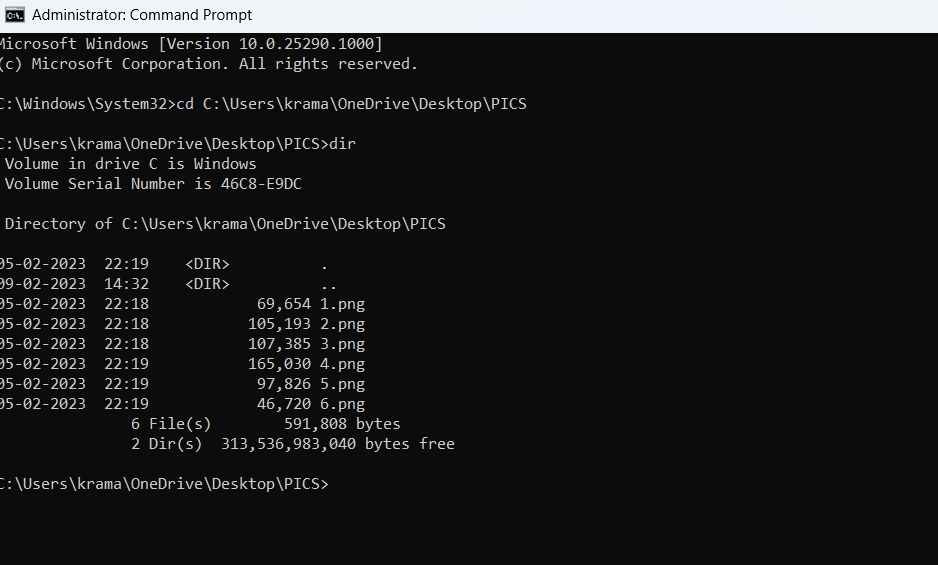
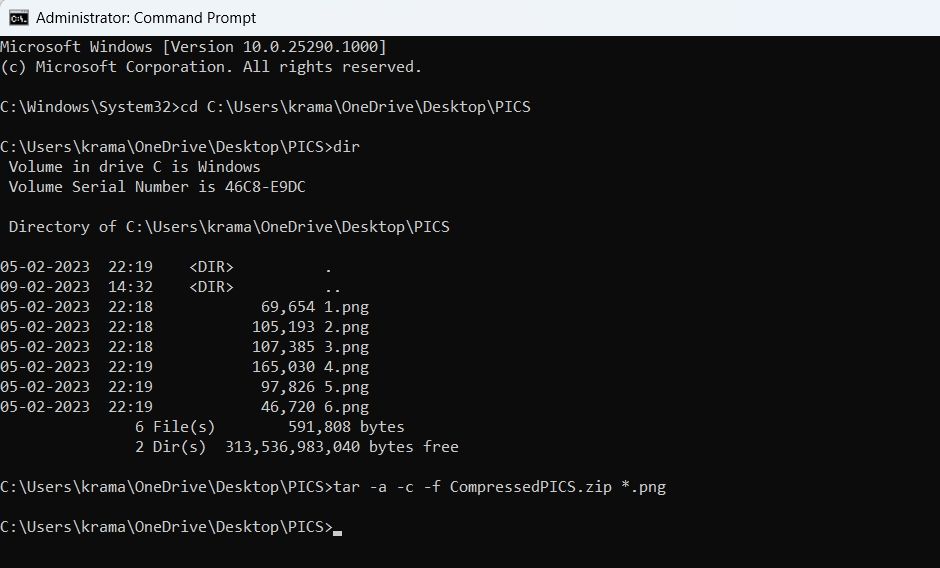
Type dir and press Enter. It’ll show the files inside the selected folder.

-
To zip all the files inside the selected folder, type the following command and press Enter. Replace ‘Compressed‘ with the name you want to give your folder where the zip file will be stored. Also, replace ‘FileExt‘ with the extension of the file you’re zipping.
tar -a -c -f Compressed.zip *.FileExt
-
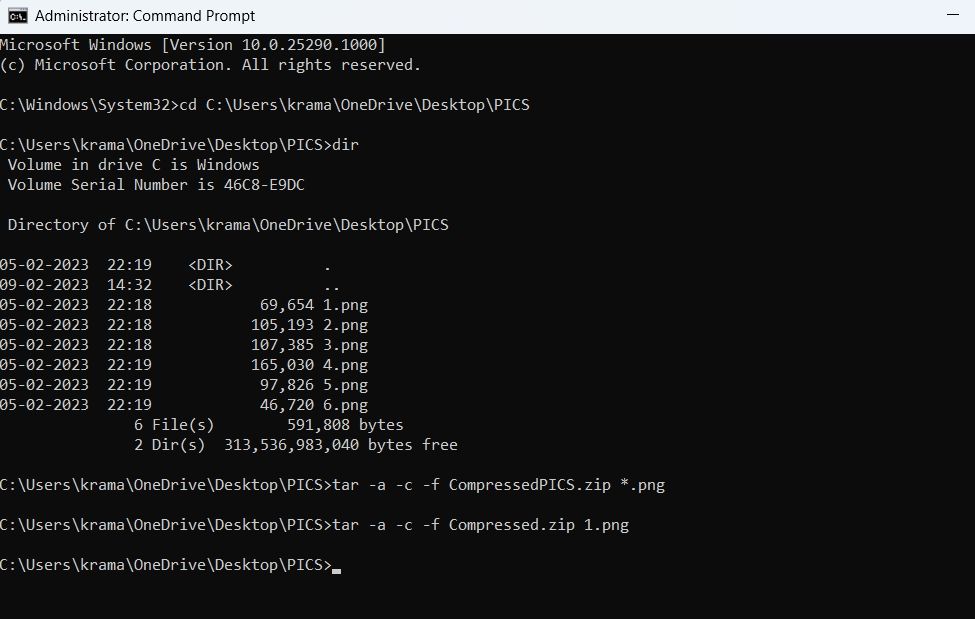
To zip a single file, execute the following command. Again, replace ‘Compressed‘ with the name you want to give your folder where the zip file will be stored, ‘FileExt‘ with your file’s extension, and ‘FileName‘ with the name of the file you want to zip.
tar -a -c -f Compressed.zip FileName.FileExt
How to Zip Files Using Windows PowerShell
There are several viable ways to create zip files on Windows. One of these is through Windows PowerShell. However, the tar command doesn’t work in Windows PowerShell; we’ll use another command to get the work done.
Here’s how to zip files using Windows PowerShell:
- Open the Start Menu, type Windows PowerShell, and choose Run as administrator from the right pane.
-
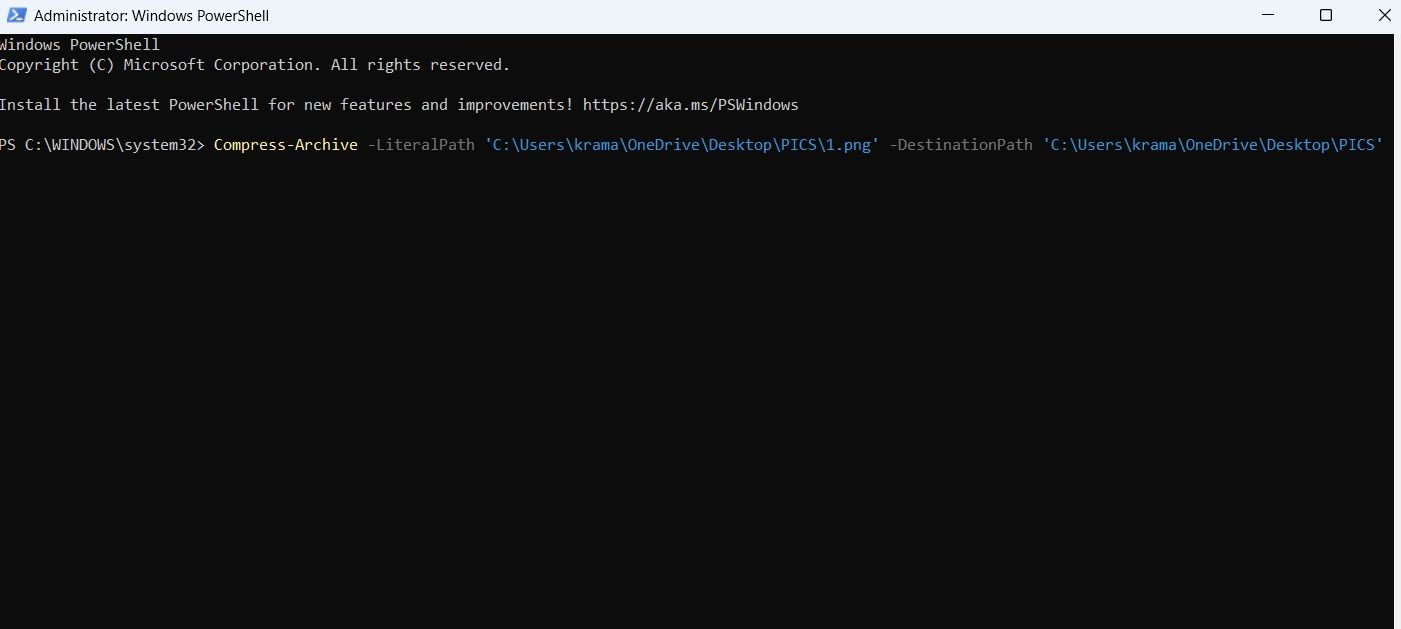
In the console, type the following command and press Enter. Ensure to replace file destination and target location with the location of the file and the place where you want the file to be zipped, respectively. Also, replace file name with the name of the file you want to zip and destination name with the destination folder name.
Compress-Archive -LiteralPath 'file destination\file name' -DestinationPath 'target location\destination name'
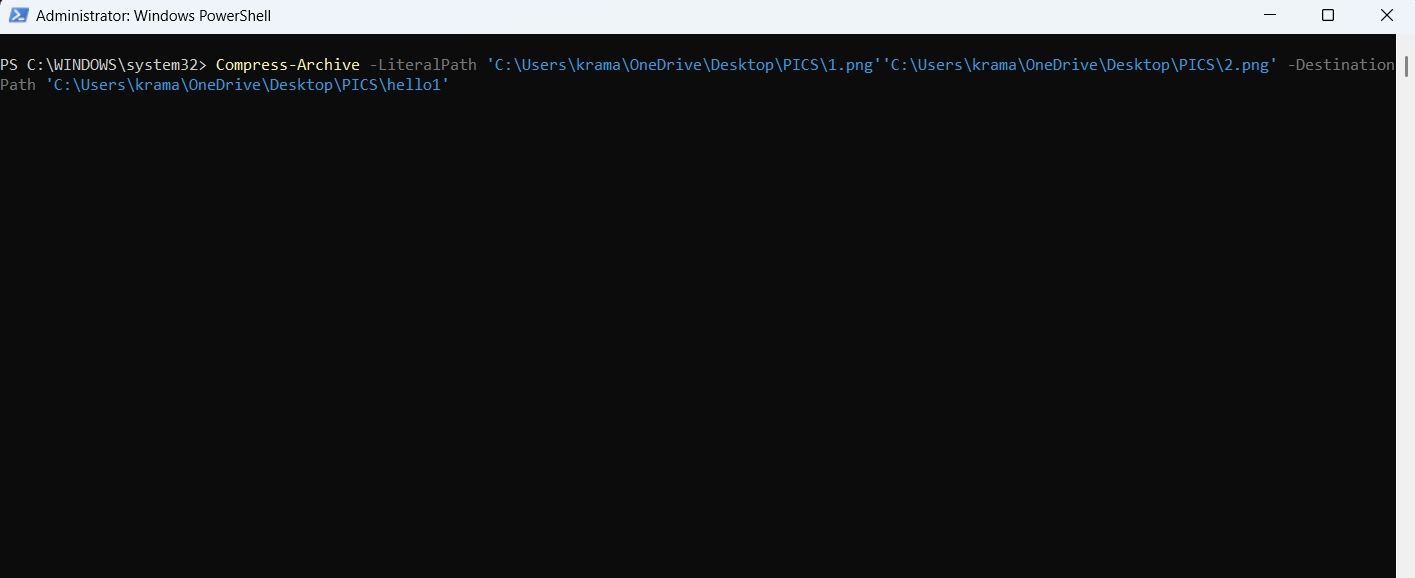
If you want to zip multiple files, execute the following command. Replace file destination and file destination 1 with the location of the first and second files, respectively. And replace file name and file name 2 with the first and second file names.
Compress-Archive -LiteralPath 'file destination\file name', 'file destination 1\file name 2 -DestinationPath 'target location\destination name'
How to Unzip Files Using Command Prompt
There may be situations where you want to unzip files on your Windows computer. Fortunately, you can do that as well using Command Prompt. Here’s how:
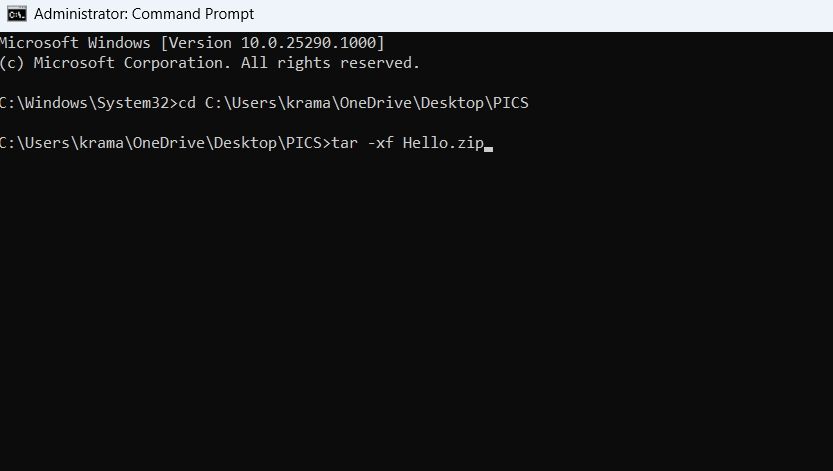
- Launch Command Prompt with admin privileges.
- Use the cd command to head toward the zip file’s location.
-
Type the following command and press Enter. Replace ‘Name‘ with the name of the zip file.
tar -xf Name.zip
You’ve successfully unzipped the file.
How to Unzip Files Using Windows PowerShell
Windows PowerShell lets you quickly unzip files on your computer. Here’s how to do that:
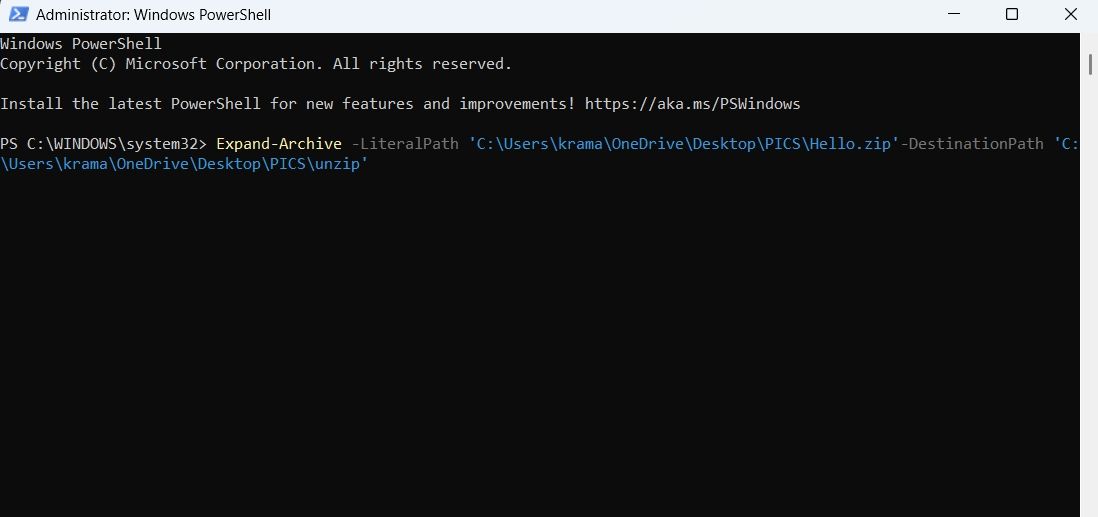
- Open Windows PowerShell with admin rights.
-
Type the following command and press Enter. Make sure to replace <file destination> and <target location> with the location of the zip file and the place where you want the file to be unzipped, respectively.
Expand-Archive -LiteralPath <file destination> -DestinationPath <target location>
Save Up Space on Windows 11 by Zipping Your Files
As a Windows user, you will always come across situations where you want to zip or unzip files. However, if you don’t want to use a third-party tool, you can use Command Prompt and Windows PowerShell to quickly zip and unzip files on Windows using the above methods.
Meanwhile, you might be interested in learning a few important Command Prompt commands.
In today’s fast-paced world, time is key and when it comes to sharing files over the internet, you can get irritated because you have to wait. But what if I tell you that you can reduce the size of your files without compromising their integrity? Yes! You can do it using the “Zipping” method.
The “Zipping” method refers to creating the compressed files in the “.zip” format. In Windows, you can utilize multiple methods to create a “.zip” file with reduced size to save disk space and bandwidth while sharing.
Today’s guide explores the methods to “Zip” or “Unzip” files using the Windows Command Line.
Content Overview
By following this guide, you will learn:
- Zip and Unzip Files Via the Command Prompt
- Zip and Unzip Files Via the Windows PowerShell
Let’s dive into the details of the above.
Zip and Unzip Files Via the Command Prompt
For zipping and unzipping files via the Command Prompt, follow these approaches:
- The “tar” Command
- The “7zip” Utility
Zip and Unzip Files Using the “tar” Command on Windows
The “tar” is originally a *nix command-line utility, but now in the latest versions of Windows, it is officially supported. The use of the “tar” command to zip or unzip files in Windows Command Line is as follows:
Zip Files Using the “tar” Command as follows:
tar -c -f ZipFileName.zip File-To-ZipHere,
- The “tar” invokes the “tar” command.
- The “-c” flag stands for “Create” which means creating the archive.
- The “-f” flag specifies the name of the output archive.
Below is the execution of the command, but first you must navigate to the specified directory and list files using the following commands:
cd <Path to the Specified Directory>
dir
Now use the following command to create a “.zip” file for the “file.txt”:
tar -c -f files.zip file.txt
Unzip Files Using the “tar” Command
To unzip the files using the “tar” command on Windows, run the following command and replace files.zip with the name or the path to the zipped file you want to extract:
tar -xf files.zip
dir
Zip and Unzip Files Using the “7zip” Utility on Windows
The “7zip” is a popular and open-source cross-platform file management utility that lets you create and extract zip files. To use it on Windows, execute the following command in Windows PowerShell to install Chocolatey – A PowerShell utility to install and manage Windows apps:
Set-ExecutionPolicy Bypass -Scope Process -Force; [System.Net.ServicePointManager]::SecurityProtocol = [System.Net.ServicePointManager]::SecurityProtocol -bor 3072; iex ((New-Object System.Net.WebClient).DownloadString('https://community.chocolatey.org/install.ps1'))After installing the “Chocolatey” use the below-mentioned command to install “7zip”:
choco install 7zip.install -y
Now to create a zip file of all the text files in the navigated directory using the “7zip”, execute this command:
7z a -t7z files.7z *.txt
Note: You can remove the * from the above command and insert a file name as well.
For unzipping the files using the “7zip”, you need to execute the below command and replace “files.7z” with the file’s name you want to unzip:
7z e files.7z
Note: You can use the “7zip” and “tar” in Windows PowerShell in the same way as the Command Prompt.
Zip and Unzip Files Via the Windows PowerShell
We have already discussed zipping and unzipping the files using the Command Prompt (the same can be used in Windows PowerShell). However, in Windows PowerShell, you can use the “Compress-Archive” cmdlet to zip and “Expand-Archive” to unzip the files.
The “Compress-Archive” is used to create the zip files, as illustrated in the below command:
$compress = @{
>>   Path = "C:\Users\Ali\Documents"
>> CompressionLevel = "Fastest" >> DestinationPath = "C:\Archives\Draft.zip" >> } >> Compress-Archive @compress PS C:\WINDOWS\system32> 
Now check the contents of the directory in which the zipped file is stored:
dir C:\Archives
To unzip the files using the “Expand-Archive” cmdlet, run the following command:
Expand-Archive -Path C:\Archives\Draft.zip -DestinationPath C:\Users\Ali\Documents
That’s all for this post to zip and unzip files in Windows Command Line.
Final Words
To zip and unzip files in Windows Command Line, use the “tar” or “7zip” utilities in either Command Prompt or Windows PowerShell. Additionally, you can use the “Compress-Archive” cmdlet to create a zipped file and “Expand-Archive” to unzip it. This guide has discussed the methods to zip and unzip files using the Windows PowerShell and Command Prompt.