
VMDK image for VMware products e.g. VMware Workstation containing an installed copy of Windows XP Professional (including SP3 and all further official updates) — tested with VMware Workstation 17.5.0 with the virtual machine set up to have 2 GB RAM, 1 processor, operating system set to Windows XP Professional, IDE hard drive.
- Addeddate
- 2024-01-27 23:50:52
- Identifier
- windows-xp-professional-vmdk
- Scanner
- Internet Archive HTML5 Uploader 1.7.0
comment
Reviews
There are no reviews yet. Be the first one to
write a review.
Do you want to install and run Windows XP on a new virtual machine using VMware Workstation 17 Pro virtualization software on Windows 10 & 11 operating systems? In this article, I will walk you through the process of installing Windows XP Professional 64-bit SP1 on a virtual computer.
Before I forget, Microsoft has ended support for Windows XP. Despite this, there are still situations when it is necessary to run this legacy operating system, especially for managing automation machines or other tasks. I’ll show you how to create a new virtual machine for XP. Next, I will walk through the entire installation process, from configuring hardware compatibility to selecting the virtual disk type. As a result, you will have your virtual Windows XP running on your PC!
How to Set Up Windows XP Professional 64 Bit SP1 on Windows 10 using VMware Workstation 17
As you know, Windows XP was a popular operating system at the time. Microsoft ended its support for XP entirely in 2014. Therefore, it would be logical to use an up-to-date operating system such as Windows 10 on your host computer.
However, since automation machines used in some institutions or organizations were produced on an old date, they need Windows XP or an older operating system to be managed. In case of such need, it is recommended that systems such as XP run on desktop or laptop computers with old hardware.
Suppose you do not have an old computer, of course. In that case, you can use old operating systems on virtual machines by using virtualization software such as VMware on your current computer.
Or suppose you still want to use Windows XP even though it is an old system, as we mentioned, after installing a virtualization program such as VMware, VirtualBox, or Hyper-V on your Windows 10 computer. In that case, you can build this system on the virtual machine.
Host & VM Requirements for Windows XP
You must have some requirements to run Windows XP using VMware Workstation 17 Pro on your actual PC. In particular, these depend on the hardware capabilities of the host computer. However, you should know the specific needs of the virtual machine. However, for a perfect VM, here are the general rules you should consider:
Host Requirements:
- Processor: VMware Workstation 17 Pro requires a 64-bit x86 processor clocked at least 1.3 GHz. However, you would be better off using a modern multi-core processor with a higher clock speed.
- RAM: I recommend at least 4 GB RAM. However, allocating more RAM increases performance significantly.
- Storage: You need enough free disk space for VMware Workstation and virtual machines. You should also have extra space for VM files and XP files.
Virtual Machine Requirements:
- Processor: You can run your Windows XP system on a single-core processor. However, you can increase itPowerer by allocating more than one core.
- RAM: I recommend allocating at least 1 GB of RAM. You can also determine the RAM allocation yourself for better performance.
- Disk Space: Allocate enough virtual disk space for Windows XP according to the work you will do.
- Graphics: VMware Workstation 17 Pro supports 3D graphics acceleration. However, you need to adjust the graphics settings according to XP.
As a result, specific system requirements vary depending on the intended use. However, while you are running XP in a virtual environment, pay attention to the compatibility of your host PC’s hardware with VMware. Plus, I recommend sticking to the recommended settings for optimal performance.
How to Create a New Virtual Machine for Windows XP
Before proceeding with the installation steps, you need to install the VMware virtualization program on your computer. After installation, download the XP ISO file to your host computer by clicking the button below and create a new VM by following the steps below.
Windows XP Pro x86/x64 SP1 ISO + SP2 Installer
Step 1
After installing VMware Workstation 17 Pro on your computer, run the program and press Create a New Virtual Machine on the homepage to set up a new virtual machine. When the VM wizard opens, tick Custom (Advanced) and click the Next button.

Step 2
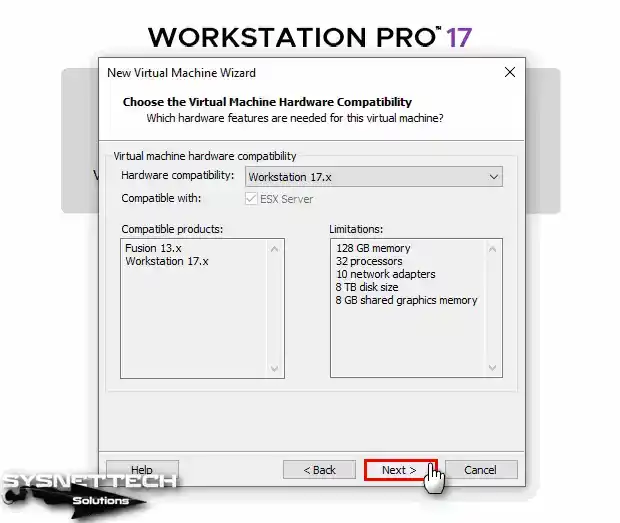
In the Choose the Hardware Compatibility window, select the latest version of the Workstation program you are using. In this window, you will see the version of Workstation Pro currently installed on your computer.
If you are installing on an older version, you will not be able to select 17.x, so update Workstation Pro. Next, choose Workstation 17.x for VMware virtual machine compatibility, and then hit the Next button.
Step 3
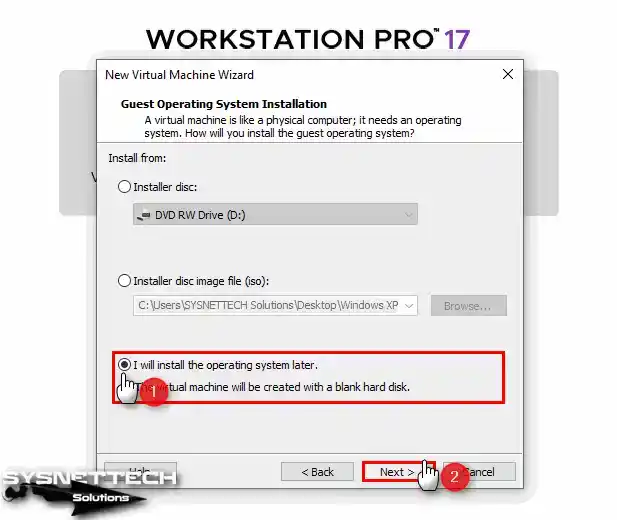
When installing a new virtual machine, I recommend choosing the “I will install the operating system later” option. This allows you to adjust advanced settings that better align with the intended operating system before installation. So, as soon as you make this selection, proceed by clicking the “Next” button.
Step 4
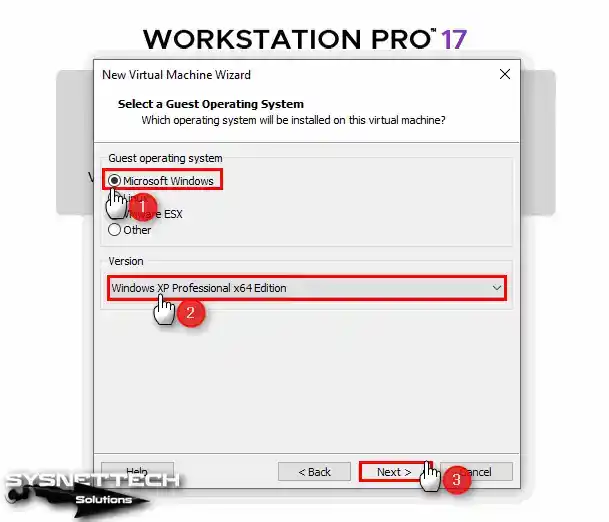
When installing XP on a virtual machine, start by selecting the “Microsoft Windows” option in the Select a Guest Operating System window. Then, select “Windows XP Professional” from the Version section.
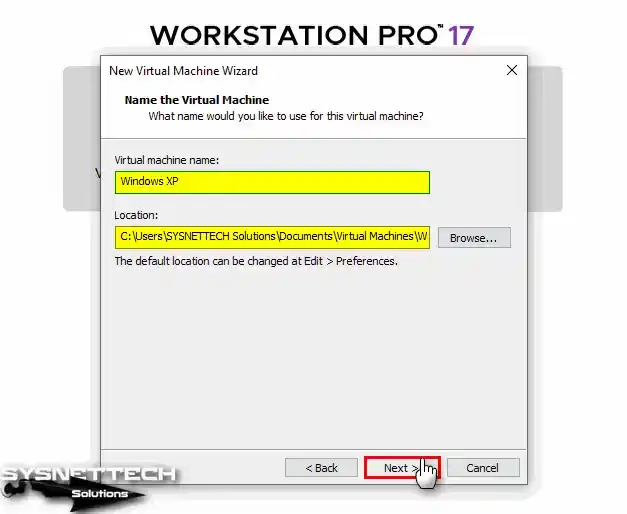
Step 5
In the “Name the Virtual Machine” section, type the name of the operating system you will install. In the Location section, if you want to store the virtual machine on a USB 3.0 or 3.1 external disk, configure the relevant location.
To change the installation location of the VM, press the Browse button in this window and select the relevant location in the window that opens.
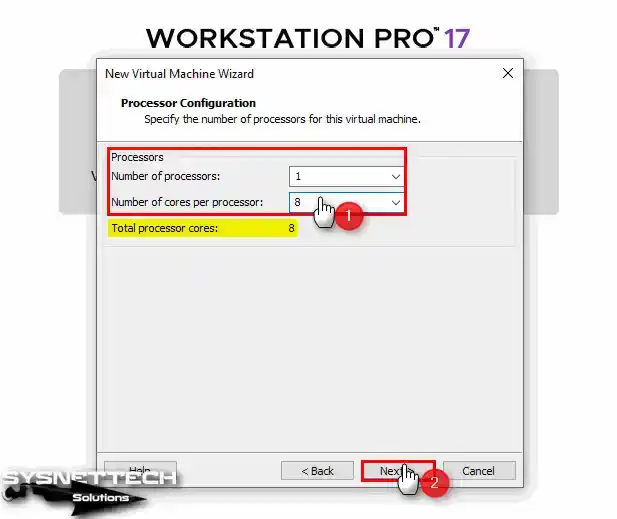
Step 6
In the Processor Configuration window, configure the number of processors and cores for XP depending on the hardware features of your computer.
If you have a fast PC and want to install it faster, you can configure 1 processor and 8 core values for the virtual machine.
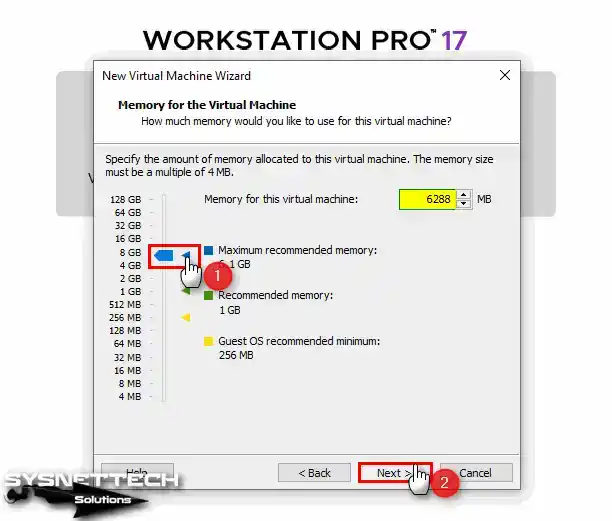
Step 7
Likewise, you can assign a 4 GB RAM size to the virtual computer or choose the maximum memory size according to the RAM capacity of your physical computer.
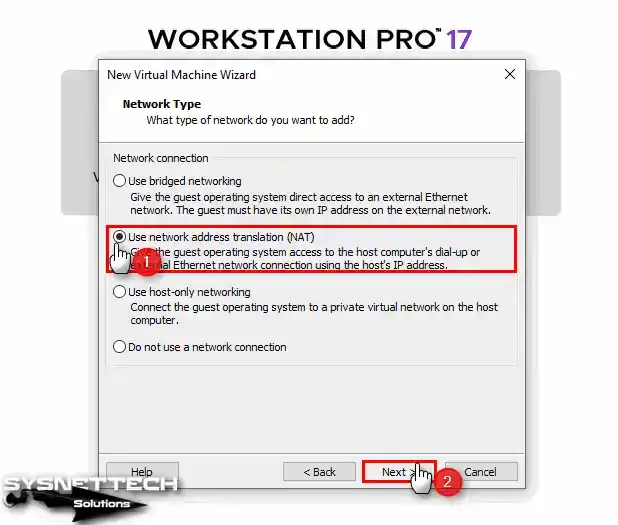
Step 8
If you want to connect to the Internet after installing the virtual operating system, select Bridged or NAT in the Network Type window.
Step 9
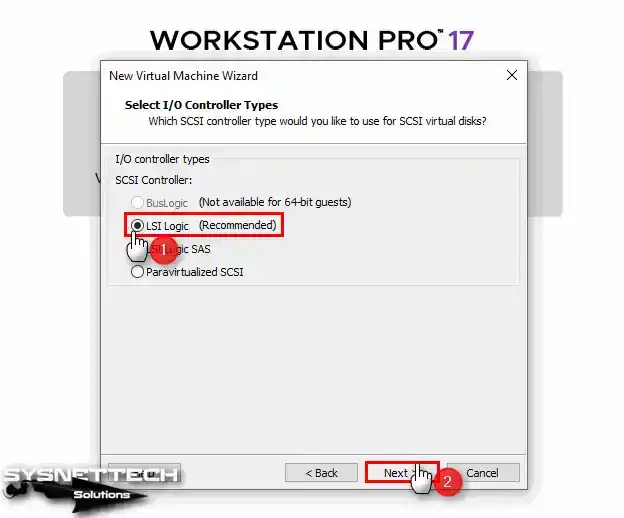
Once you’ve chosen the default LSI Logic option in the I/O Controller window, click Next to continue.
Step 10
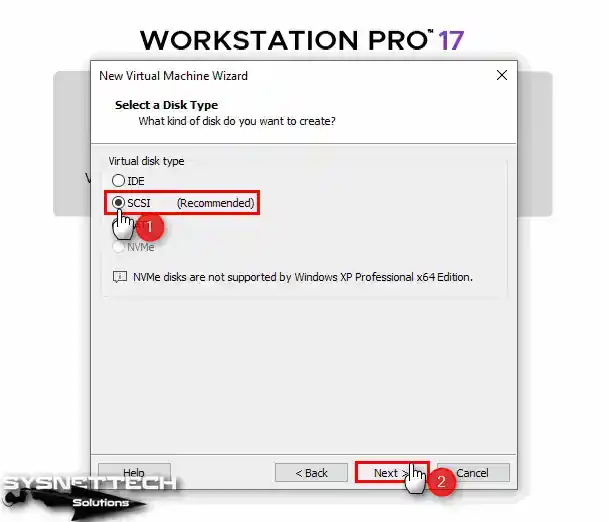
In the Select a Disk Type window, select which disk controller you want to install the virtual system with. Here, you need to select the SCSI disk type that is selected by default. Because Microsoft has ended its support for XP, the SATA disk structure is not supported. Still, some hosts provide SATA type and USB 3.0 support.
You may also see the warning that XP cannot be installed on the NVMe disk. NVMe is supported by current operating systems as it is a new disk controller.
Step 11
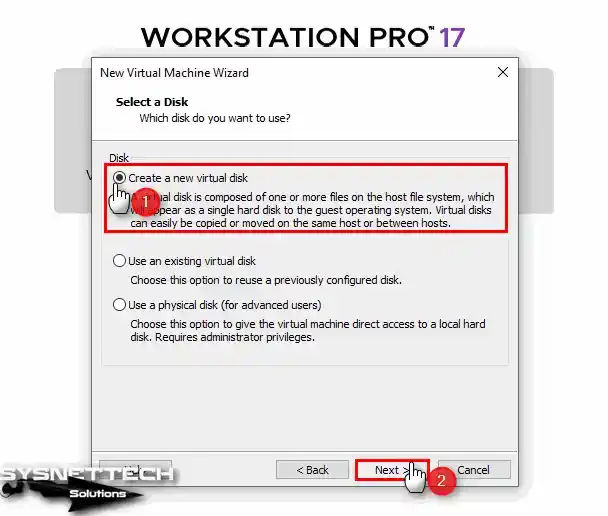
In the Select a Disk window, you can add the system disk you installed earlier or create a new virtual disk here. Additionally, you can use a physical disk in the VM.
For a clean system installation, select Create a new virtual disk and press Next.
Step 12
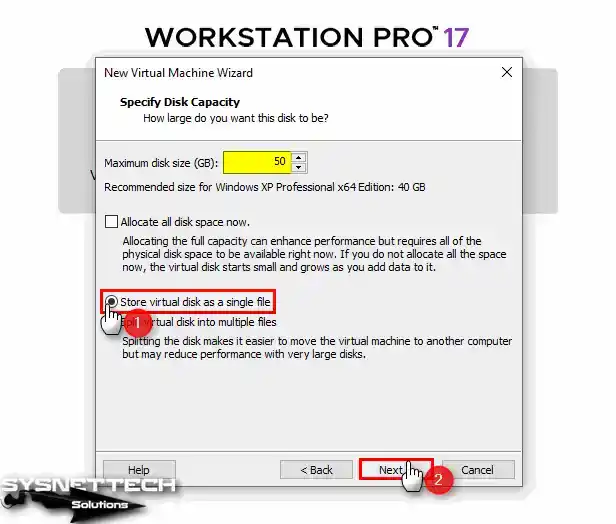
When setting up a virtual machine for Windows XP Professional, it is usually sufficient to allocate a virtual disk of 40 GB in size. However, virtual machines are different for basic tasks and professional work. Therefore, I recommend that you consider the disk size to be 20 GB or 50 GB for advanced tasks.
Make sure to back up the virtual machine disk file in a single file format. So, check that you have ticked the ‘Store virtual disk as single file’ option.
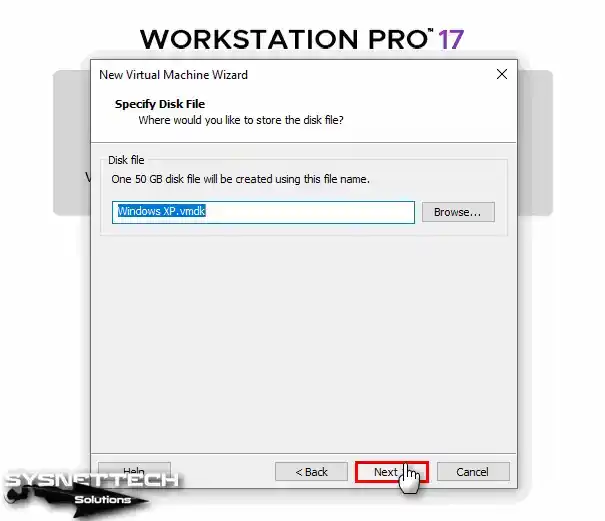
Step 13
You can change the name and location of the WinXP virtual machine disk file in the Specify Disk File window. However, since you will be installing it on an external disk, the disk name refers to the name that will be stored in the installation location.
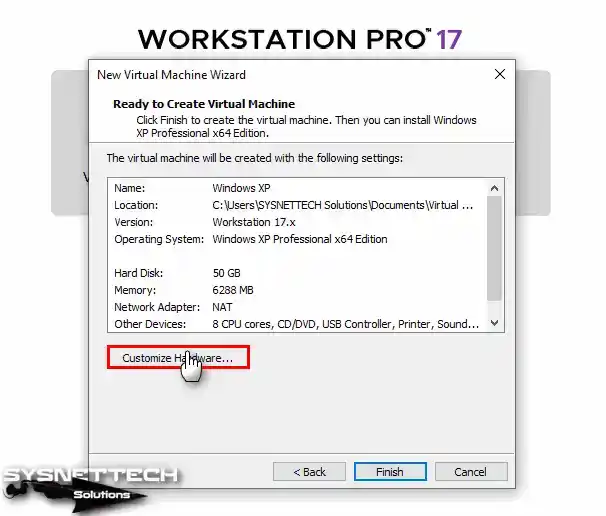
Step 14
At the final stage of the virtual machine setup, hit the Customize Hardware button to add the ISO to the VM and enable virtualization.
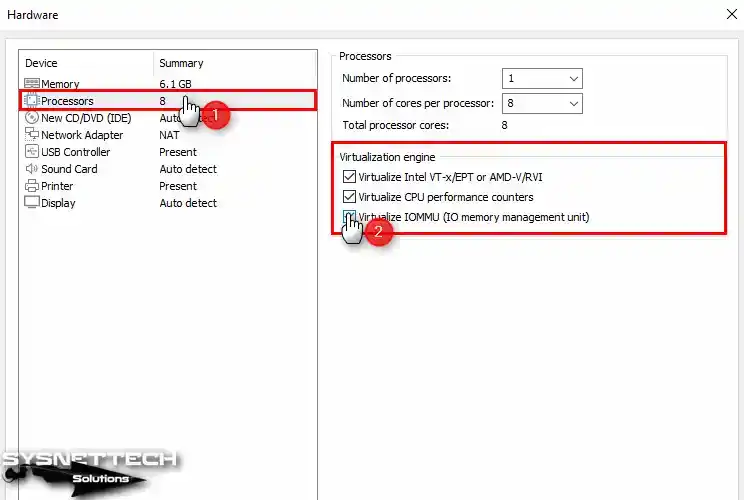
Step 15
In the Hardware settings window, choose Processors and tick all the options in the Virtualization Engine section.
- Virtualize Intel VT-x/EPT or AMD-V/RVI
- Virtualize CPU Performance Counters
- Virtualize IOMMU (IO Memory Management Unit)
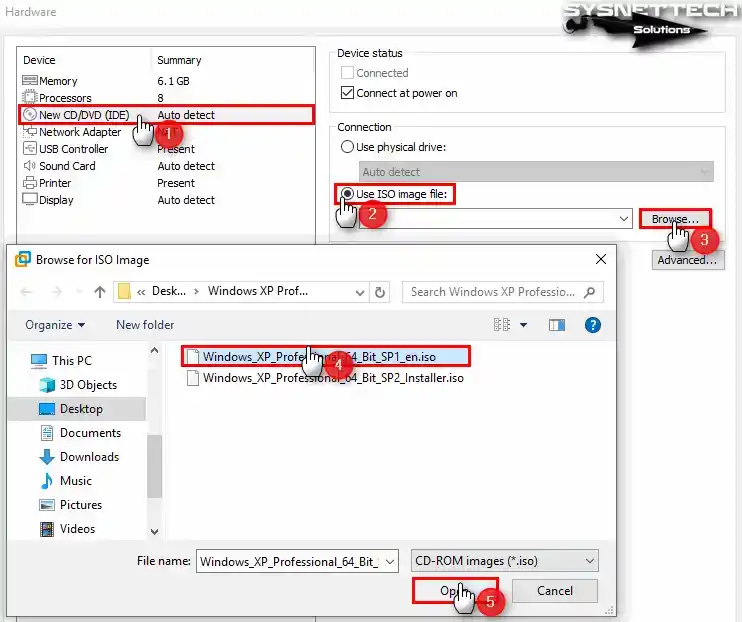
Step 16
Choose the CD/DVD device to add the ISO file to the virtual computer, and then select the Use ISO image file option and click the Browse button.
Select the Windows XP SP1 ISO file you downloaded to your host computer and press the Open button.
Step 17
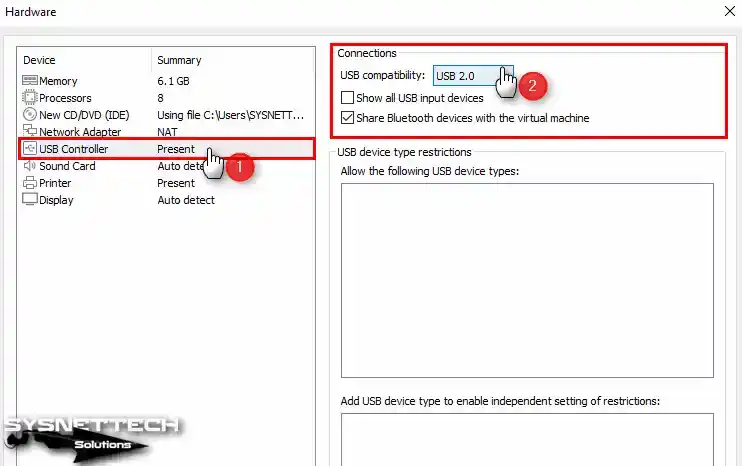
Select USB 2.0 compatibility from the USB Controller device settings.
Step 18
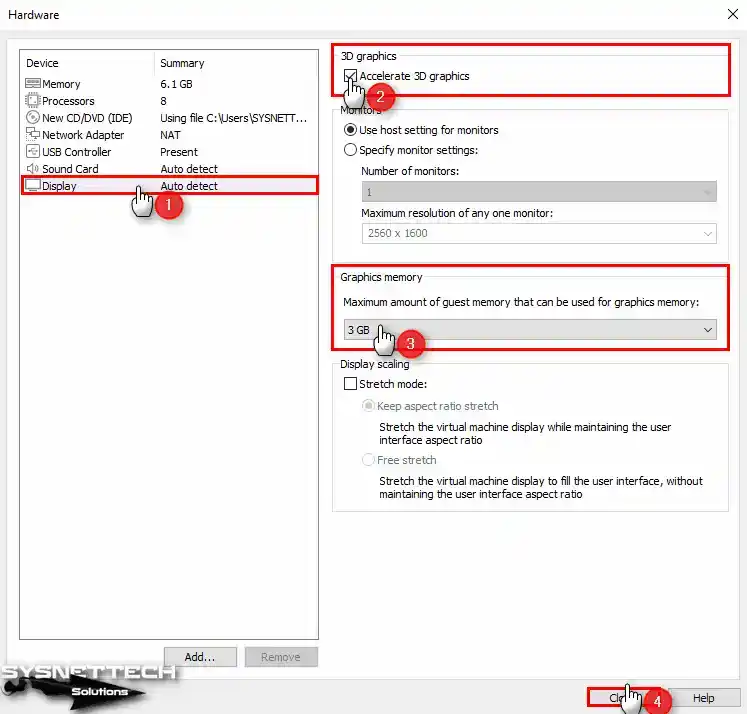
After clicking on the Display device, enable 3D graphics acceleration and configure the Graphics Memory size to a value that your host can support.
Step 19
After completing the necessary preparations, hit the Close button to close the hardware settings of the virtual computer.
Step 20
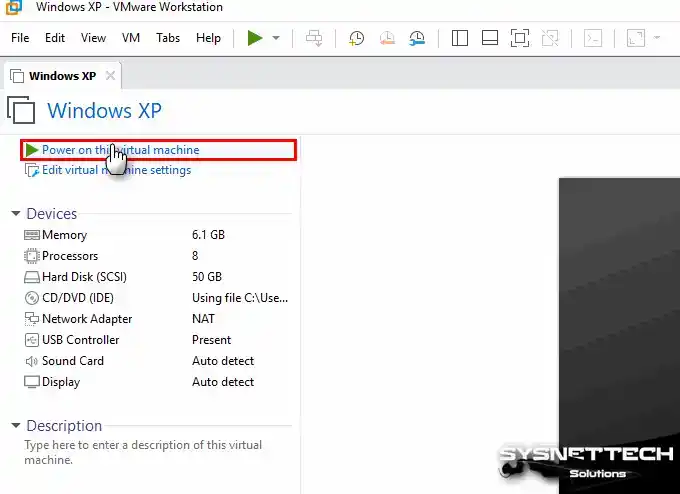
You can start installing the virtual XP system now by clicking the Power button on this virtual machine.
After you install and configure a new virtual machine (VM) for Windows XP, the setup wizard will start automatically when you start the VM. Alternatively, you can install XP on a physical computer by following the steps below.
Steps:
Step 1
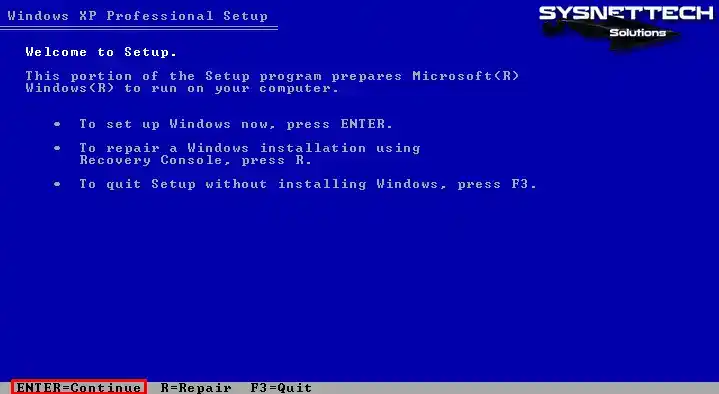
Suppose you do not have an ISO file with SATA drivers integrated when the Windows Setup wizard opens. In that case, you can press the F6 key to install the relevant drivers in this step.
If you have a computer with Windows XP installed, you can Repair your system on this screen. Otherwise, press Enter to install from scratch.
Step 2
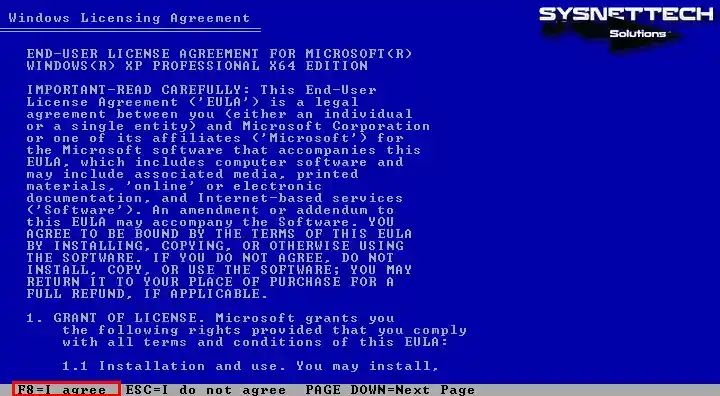
Please review the license agreement carefully before proceeding with the installation of the Windows XP Professional system. After reading the agreement, you can press F8 to indicate your acceptance.
Step 3
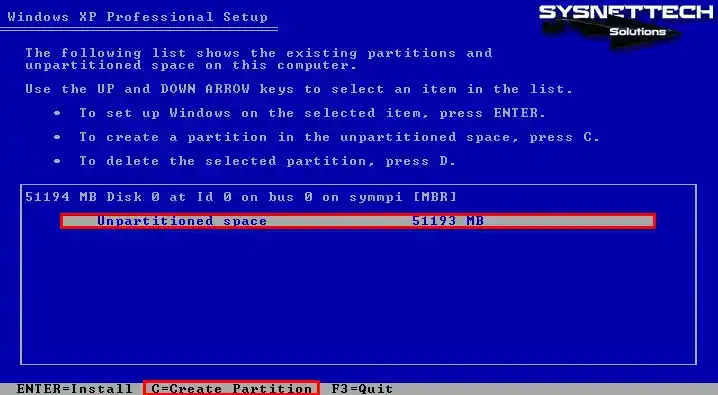
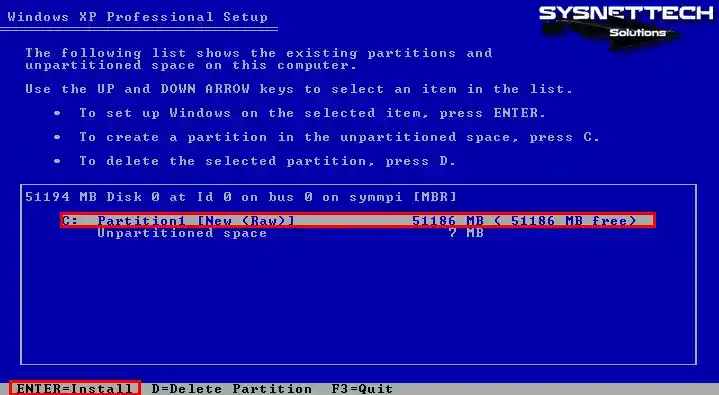
Now, press C to partition the XP virtual disk. If you want to start the installation immediately, press ENTER.
Step 4
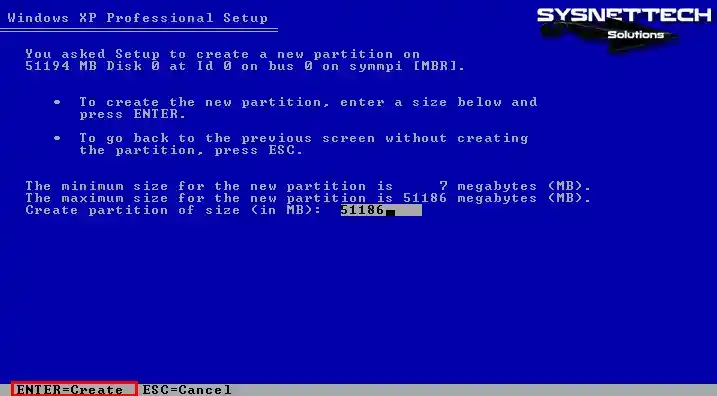
Press Enter to create the entire HDD size you have assigned for the Virtual PC.
Step 5
Press Enter to install XP on the C Partition you created.
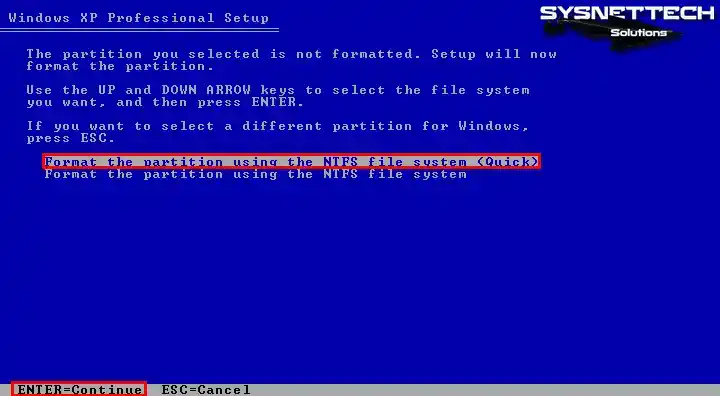
Step 6
Remember to use the NTFS format for your virtual disk. It’s essential for keeping your physical PC’s hard drive healthy and working well over time. Regular formatting can help your hard drive last longer and run better.
Step 7
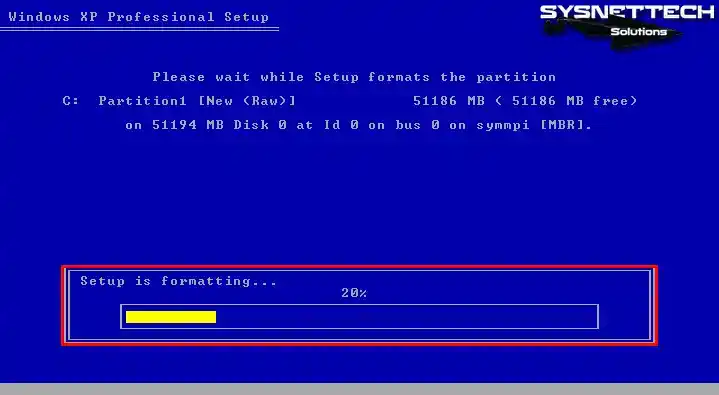
Wait while the Setup formats the virtual disk.
Step 8
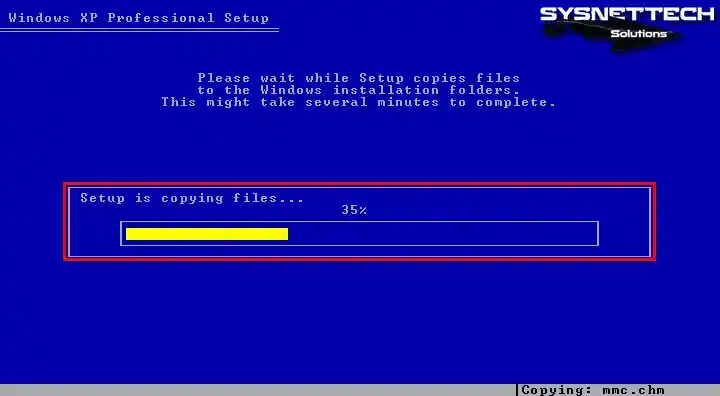
Wait while Setup copies the necessary files for the XP system.
Step 9
After the first stage of the installation wizard is completed successfully, press Enter to restart the virtual system or wait for the timer to expire.
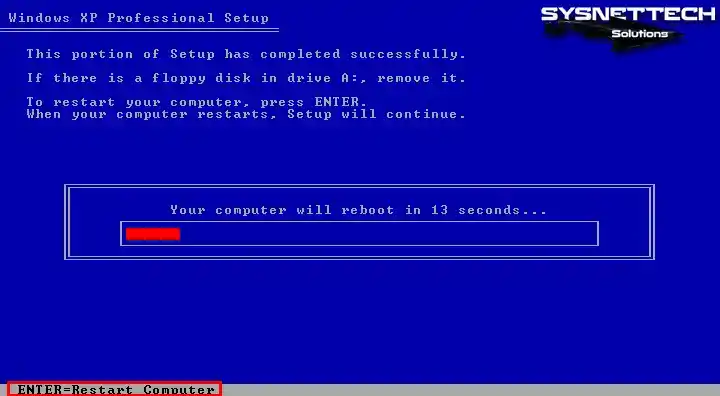
Step 10
Setup will continue when Windows XP restarts.

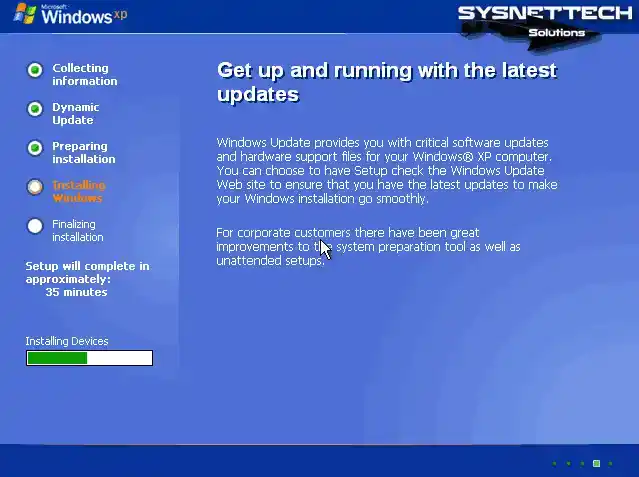
Step 11
Wait while Setup installs and prepares the necessary devices for installation.
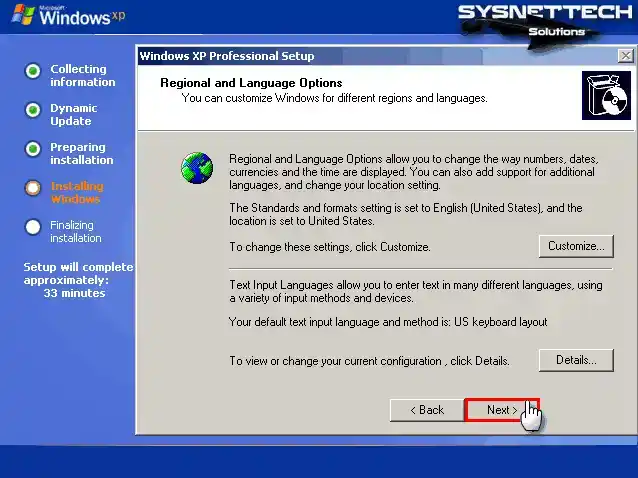
Step 12
When the window for Regional and Language Options opens, you can set your country and time zone by clicking Customize. Thus, to pick your keyboard layout, choose Details.
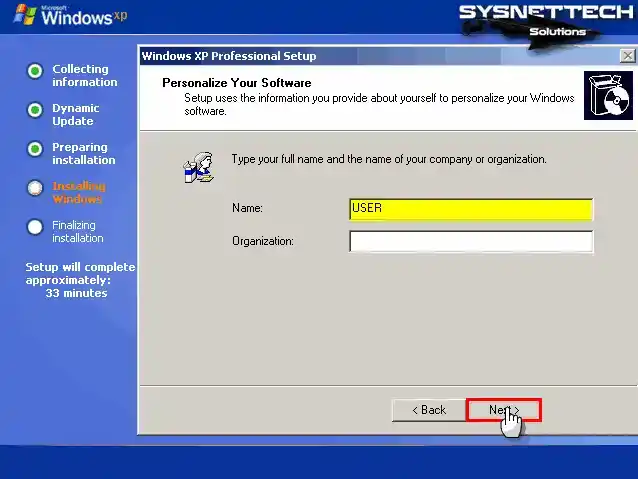
Step 13
In the Personalize Your Software screen, type a name for your user account. If you’re part of an organization, type its name too, then proceed with the Next button.
Step 14
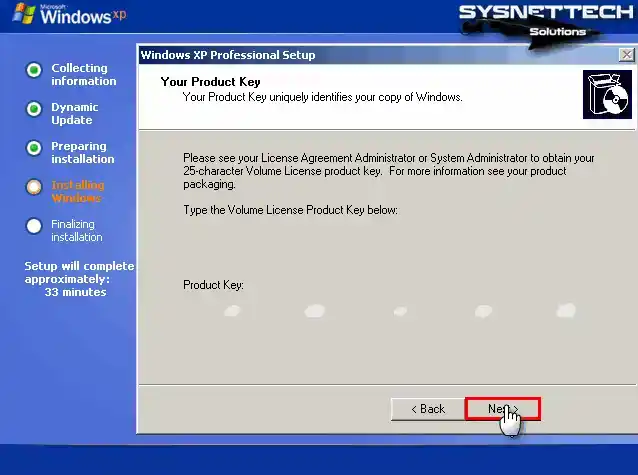
In the Your Product Key window, enter the installation key for Windows XP Pro 64 Bit Service Pack 1 and continue.
Step 15
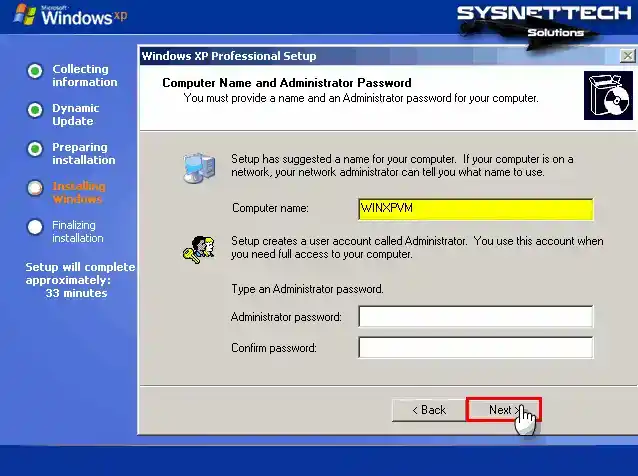
In the Computer Name and Administrator Password area, type a name for your virtual PC. If you want to set a password for the admin account, type it and press Next.
Step 16
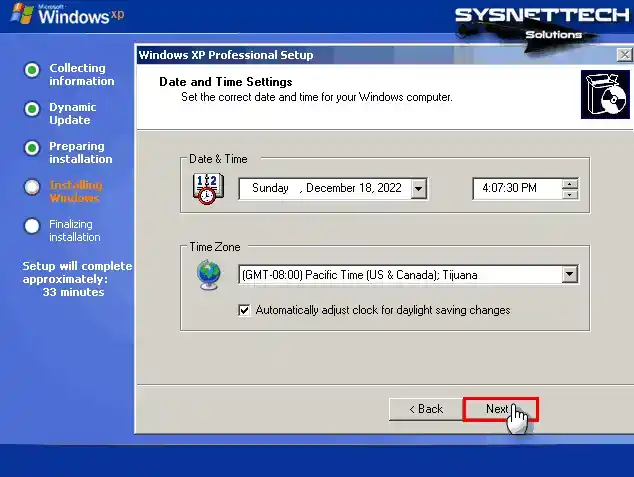
In the Date and Time Settings area, set your time zone and installation date to match your location, then hit Next.
Step 17
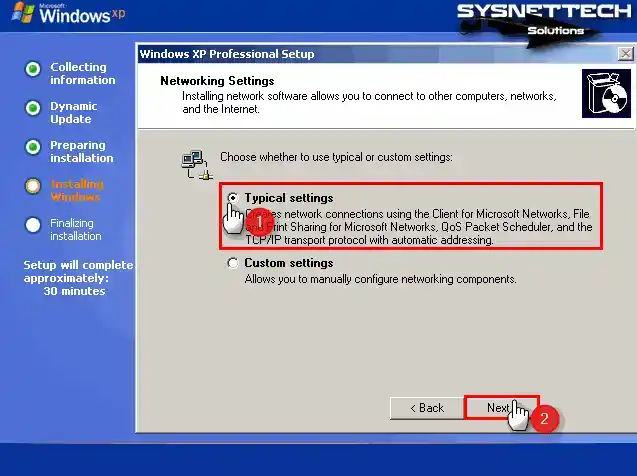
In the Networking Settings window, if you’re not using the VM in a domain, choose the default option “Typical Settings.”
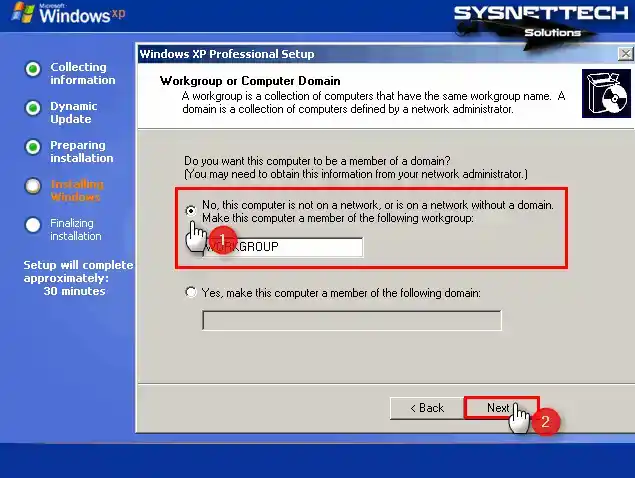
Step 18
In the Workgroup or Computer Domain screen, if you’re not using the VM in a domain, choose “Workgroup.”
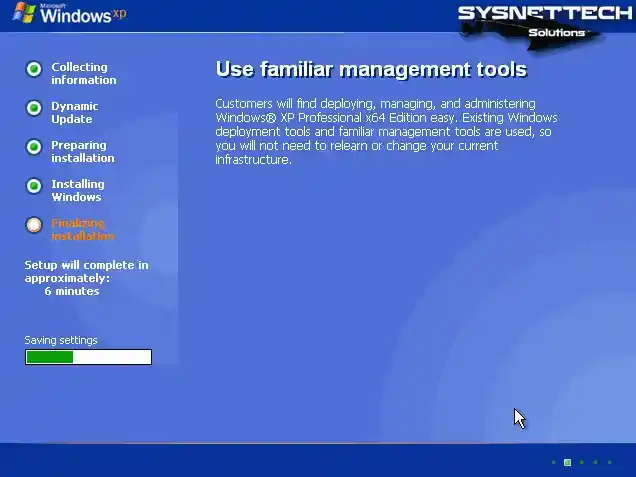
Step 19
Wait while the setup wizard configures the remaining settings.
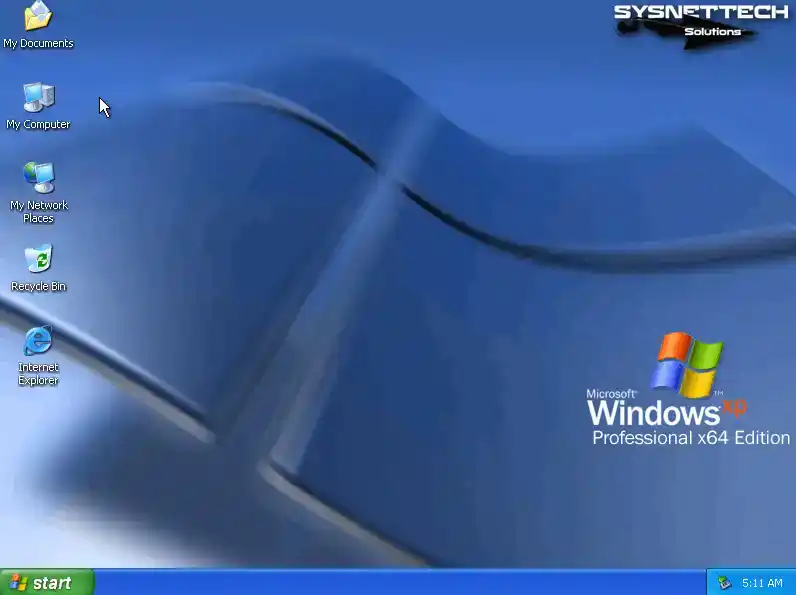
Step 20
After the installation is complete, your Windows XP desktop screen will be ready.
How to Install VMware Tools
After installing Windows XP with VMware, you can build the drivers for devices that are not installed in your virtual system by installing VM Tools on the virtual machine. You can use the Shared Folder feature to transfer or send files between the host and the guest VM. Because of that, adjust the screen resolution to full screen for a better view.
Step 1
First, right-click on My Computer in the guest XP, then choose Manage. Next, hit Device Manager to see a list of drivers that may not be installed, as shown in the image below.

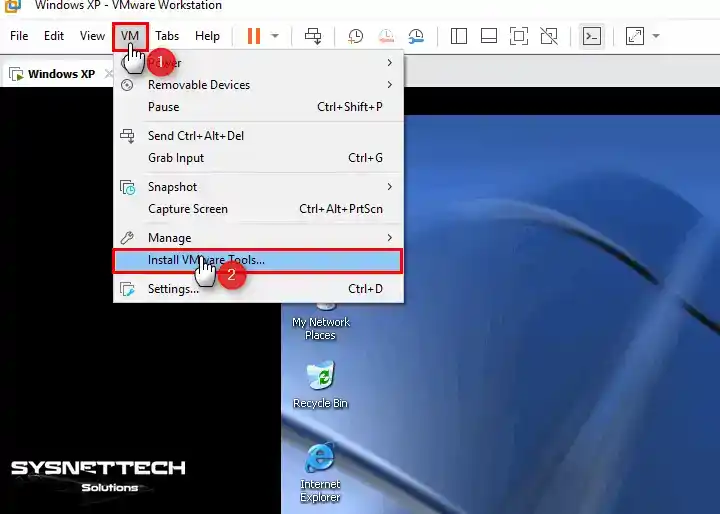
Step 2
Press VM / Install VMware Tools from the tool menu to install the drivers for the virtual PC.
Step 3
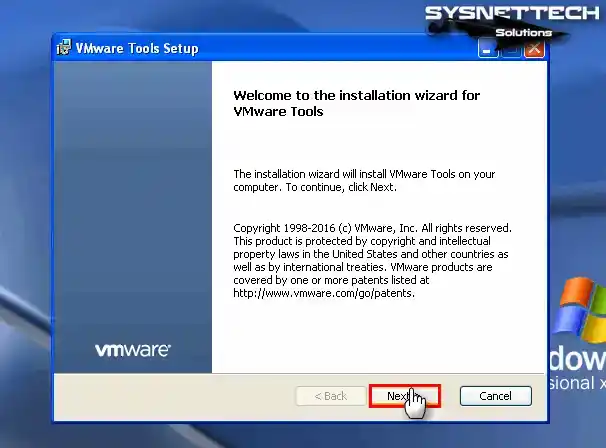
Wait while VMware Tools prepares for installation on the virtual PC. When the installation wizard opens, click Next to go to the next step.
Step 4
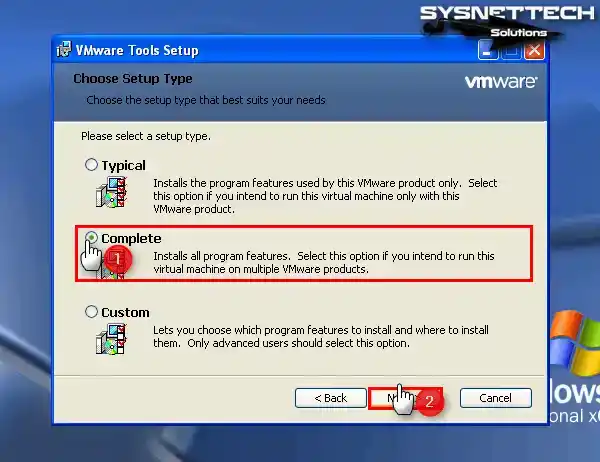
In the Choose Setup Type window, if you plan to use the virtual machine with other VMware products later on, choose Complete and click Next.
Step 5
Click the Install button to start installing all the features of the virtual machine utility.

Step 6
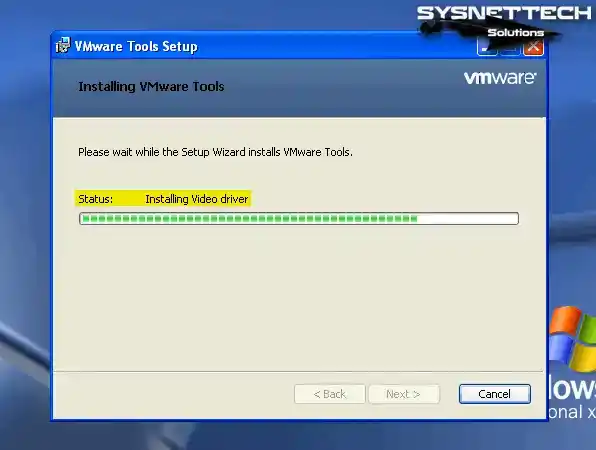
Wait while the video and other hardware drivers of your virtual system are installed.
Step 7
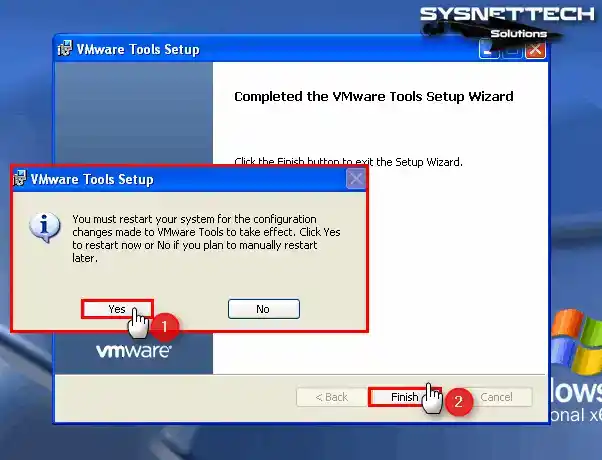
Click Yes to restart your virtual computer and check if the drivers are installed. When you view the Device Manager again, you can now see that drivers such as VMware SVGA II are installed in your virtual system.
Step 8
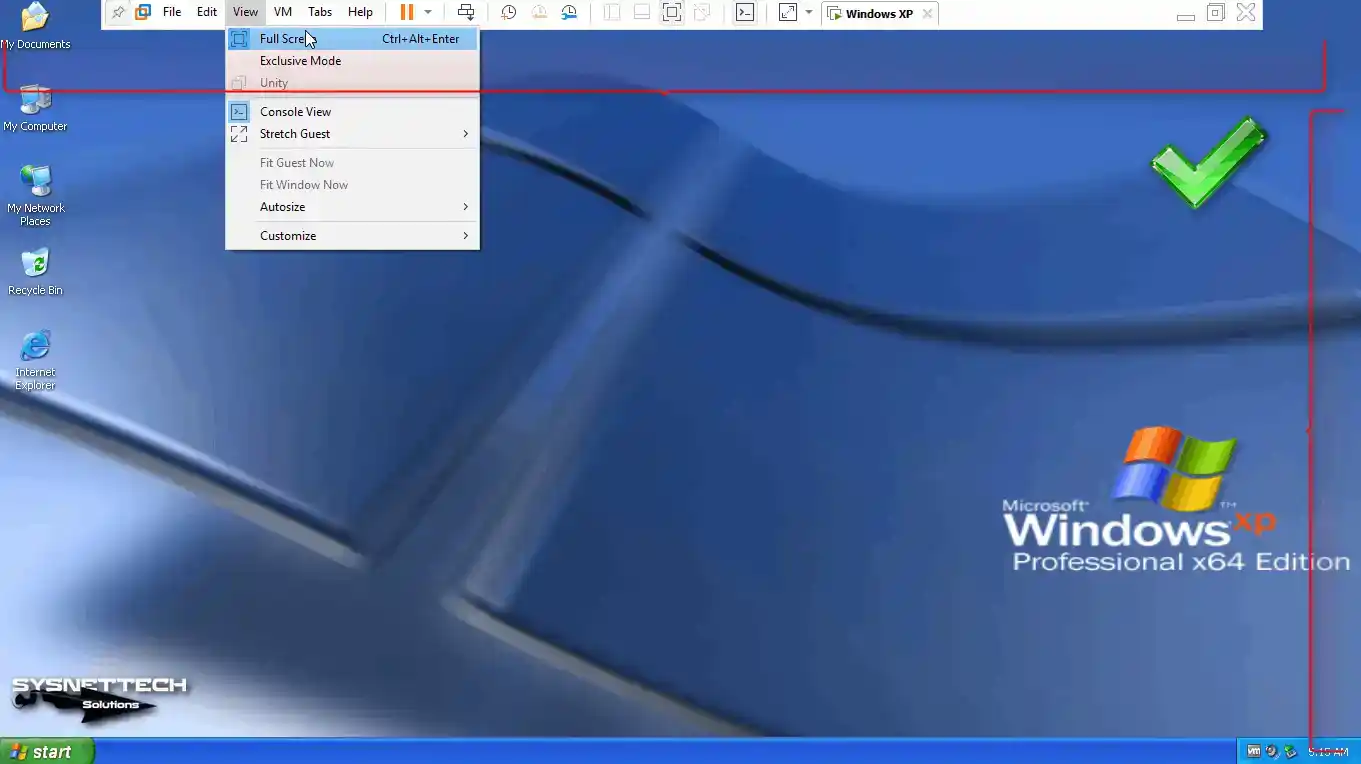
Click View / Full Screen from the Workstation tool menu and check that your virtual PC is adapted to full-screen mode.
Step 9
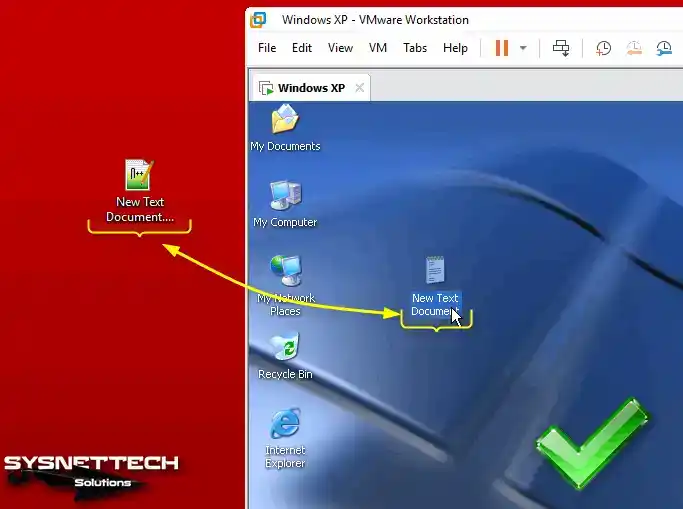
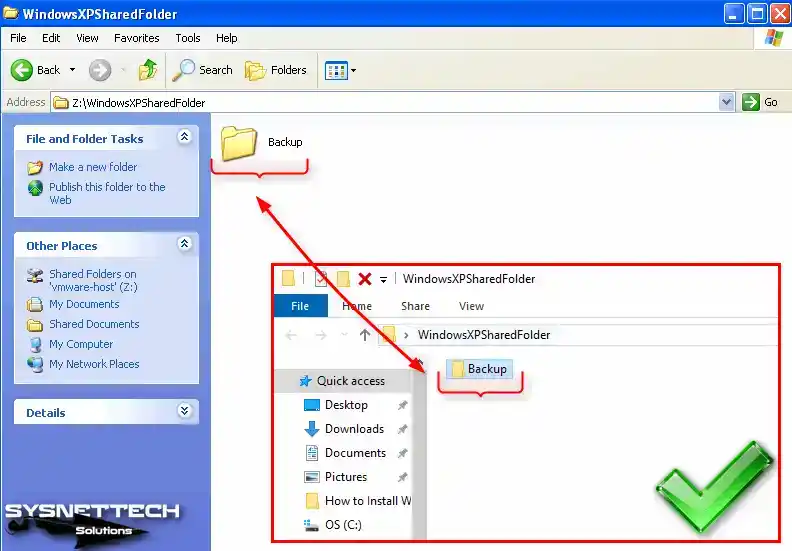
Make a new text document on your host OS. Then, try dragging and dropping it into the XP virtual OS. You’ll see that the file transfers over successfully.
Also, open the Internet Explorer browser and visit Google, and you can see that the Internet connection is working fine.
How to Configure Shared Folder
Creating a shared folder in virtual machines makes it easy to transfer files between the PC and the VM. When you drag and drop a file, it might take some time. However, using the Shared Folder feature makes the process faster, especially for files of the same size.
Step 1
Click VM / Settings from the Workstation Pro menu to open the properties of the virtual machine you have installed.
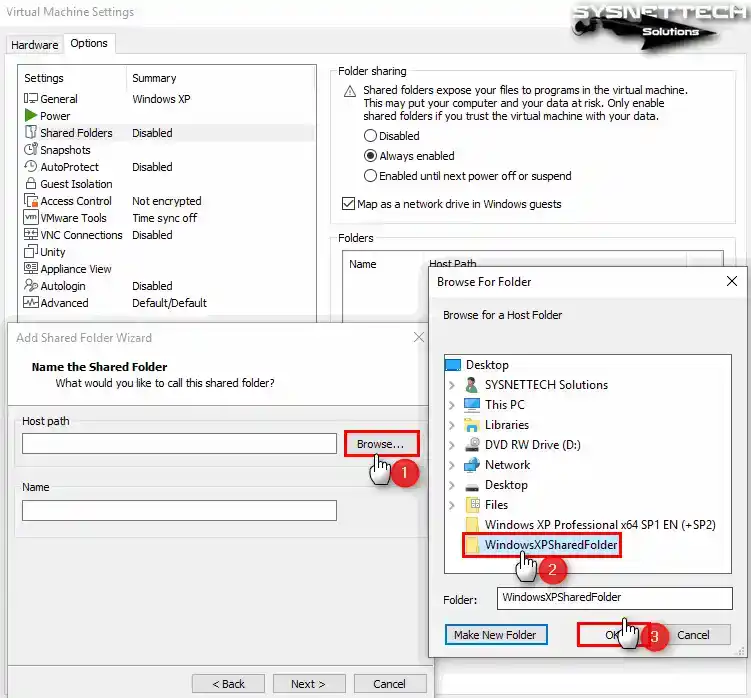
When the Virtual Machine Settings window opens, click the Options tab and then click Shared Folders. In the Folder Sharing section, check Always Enabled to enable this feature, and also select “Map as a network drive in Windows Guests” to configure it as a network drive, and then click the Add button.
When the Shared Folder Wizard opens, click Next directly.

Step 2
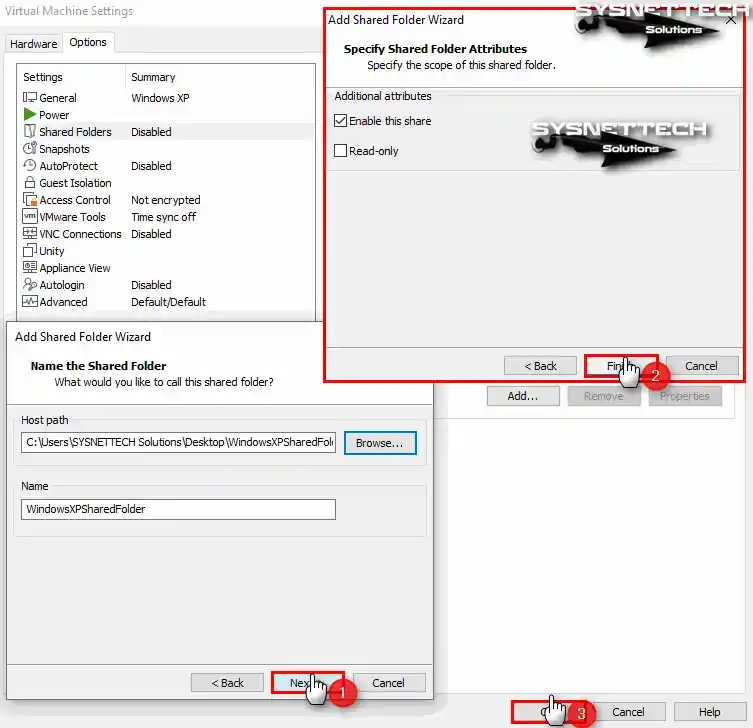
In this window, select the folder you want to share, type a name, and click Next.
Step 3
In order to make the folder you added available for sharing in the folder properties window, enable sharing by ticking “Enable this share” and click Finish.
After editing the path of the shared folder, close the VM settings.
Step 4
When you look at the Shared Folder on my computer, check that it works in the Network Drives section.
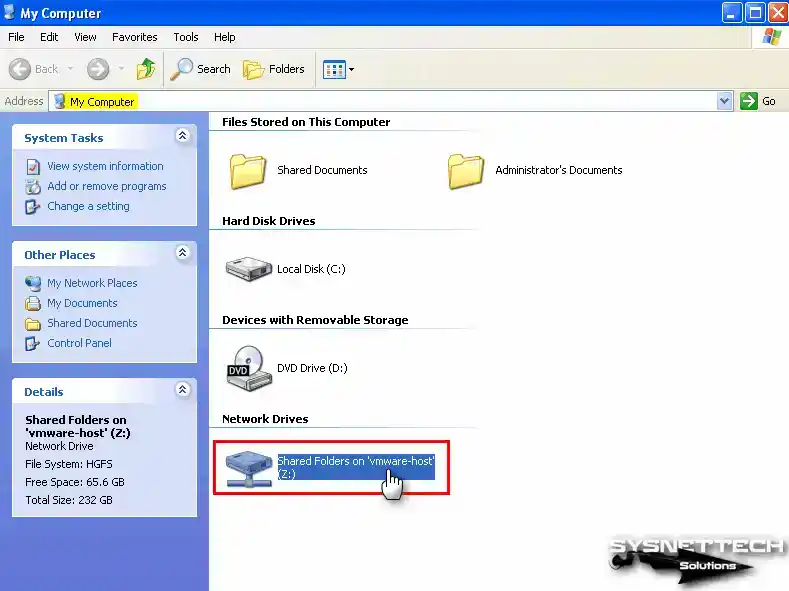
Step 5
When you open the folder attached as a network drive, you can see that you can access the related files.
Additionally, click Add a Network Place from the options under Network Tasks to add the shared folder to My Network Places. Click Next when the add network location wizard opens.
Double-click on Choose another network location or click Next when the relevant option is selected. Open the vmware-host content by clicking the Browse button in the Internet or Network Address section, select Shared Folders, and click OK.
To access Shared Folders over the network, click Next after selecting the location. At this point, click Finish to close The Add Network Place Wizard.
Click My Network Places and check the location you added in the Local Network window. You can see that you can access the files when you view the Shared Folder content over the network.
How to Use USB Flash Memory
Instead of using the Shared Folder feature to transfer files, a faster solution is the use of USB flash memory.
Step 1
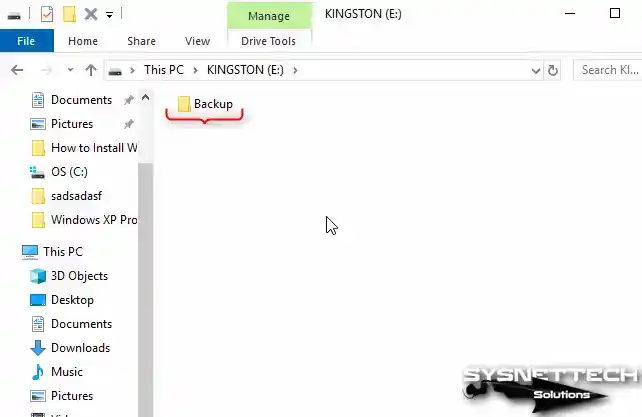
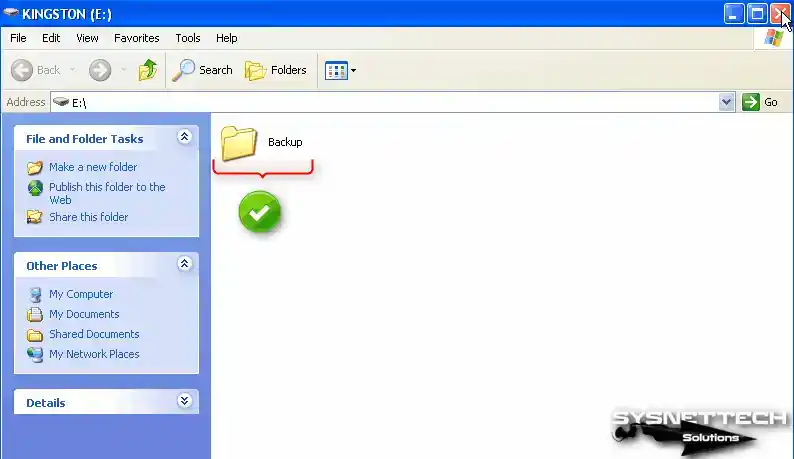
Insert a flash memory into one of the free USB ports of your host computer and create a folder named Backup, for example.
Step 2
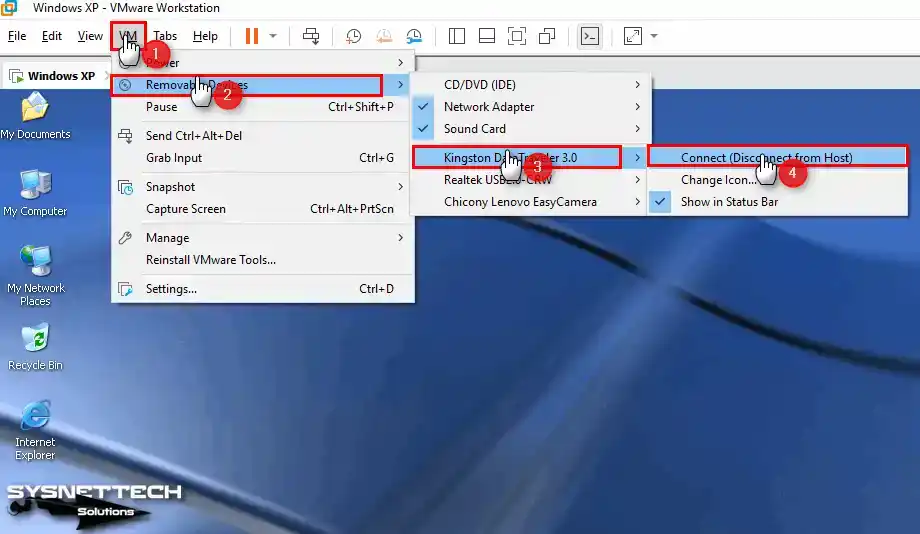
To connect the USB disk to the virtual machine, click VM / Removable Devices / Name of your USB / Connect from the tool menu.
Step 3
When USB drivers are automatically installed in your virtual system, you can access your USB and see the folders and files you have created.
How to Install & Upgrade Windows XP SP2 Software Package from SP1 to SP2
To upgrade Windows XP 64-bit from SP1 to SP2, you can install an ISO file that includes SP2 files or install the SP2 software package from scratch.
Step 1
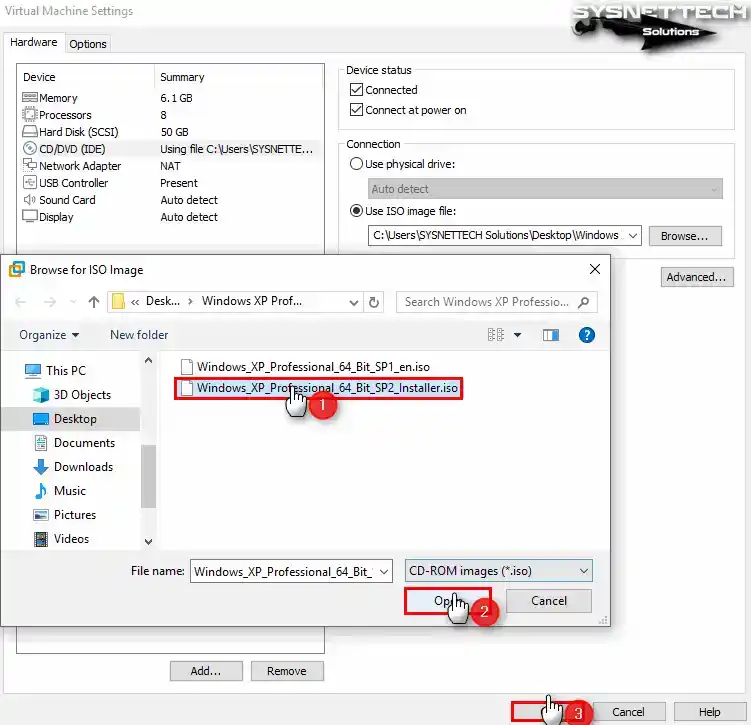
To add the Microsoft Windows XP SP2 ISO image to the guest machine, right-click on the DVD drive and choose Settings. With the CD/DVD device selected, choose the Browse button to add the SP2 ISO location to the Use ISO Image File section.
Select the Windows XP SP2 Installer.iso file and hit the Open button. To enable the DVD device, check the Device Status option and press the OK button to close the window.
Step 2
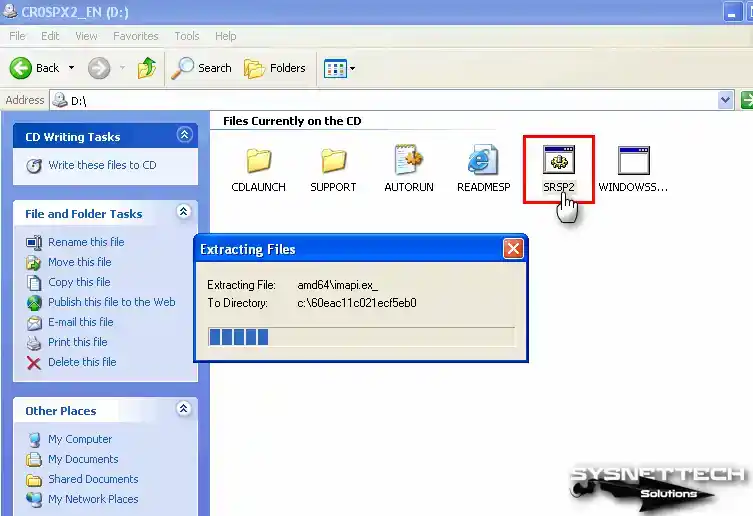
When the Service Pack 2 ISO image is automatically mounted to the system, you will automatically see the Readme page. Close the Readme.HTM webpage and open My Computer. To view the contents of the ISO image mounted in the Removable Storage section, press the right button and then choose Open.
Right-click / Open the SRSP2 file in the CD/DVD media to start the installation.
Step 3
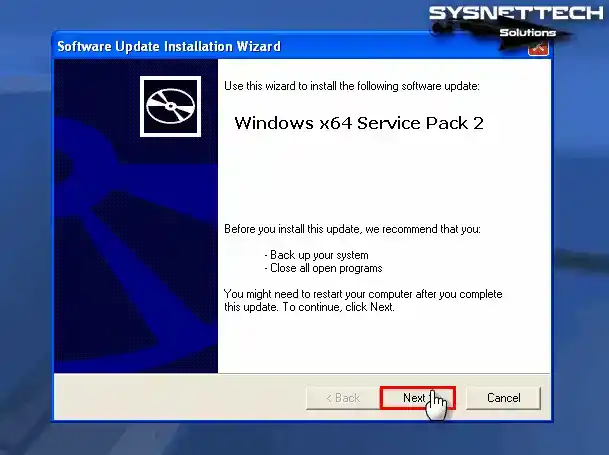
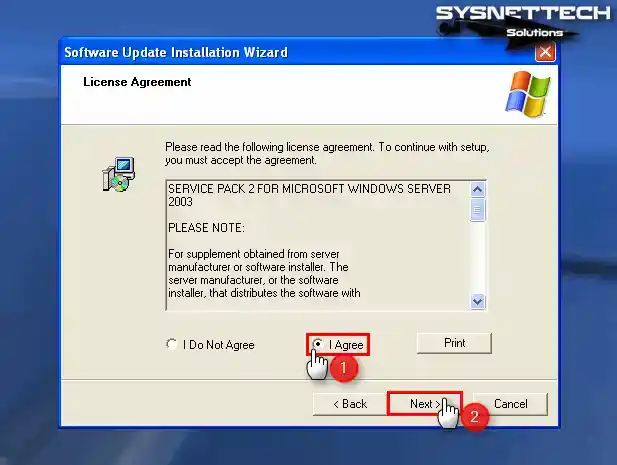
Proceed by clicking on the Next button within the Windows x64 Service Pack 2 installation wizard.
Step 4
Check “I Agree” to accept the Service Pack 2 license agreement and press Next.
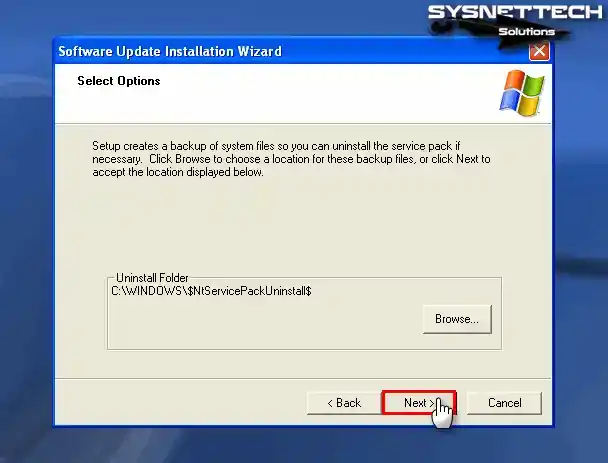
Step 5
Proceed in the Select Options window without changing the Uninstall Folder location.
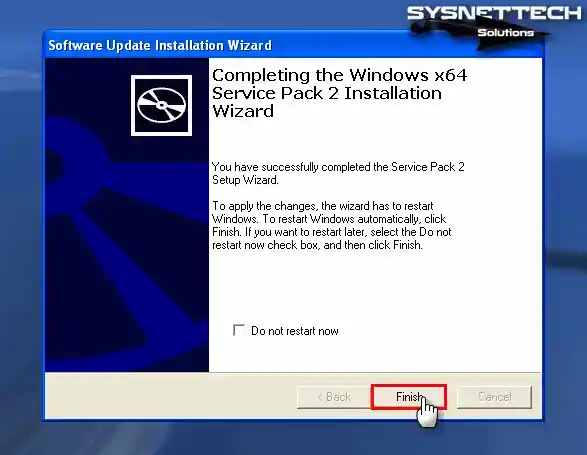
Step 6
Wait while Windows XP Service Pack 2 is being installed. The system update period may take some time, so do not do anything on your system.
After installing Service Pack 2, restart your virtual system by clicking the Finish button.
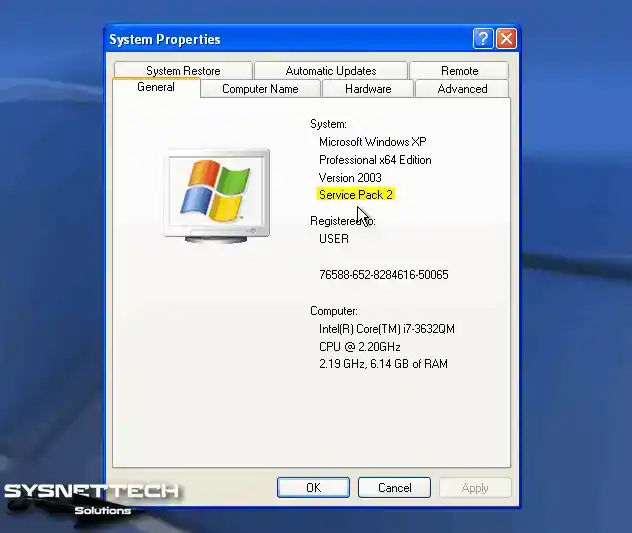
Step 7
After right-clicking on my computer, press System Properties, and you can check the Service Pack version in the system section of the window that opens.
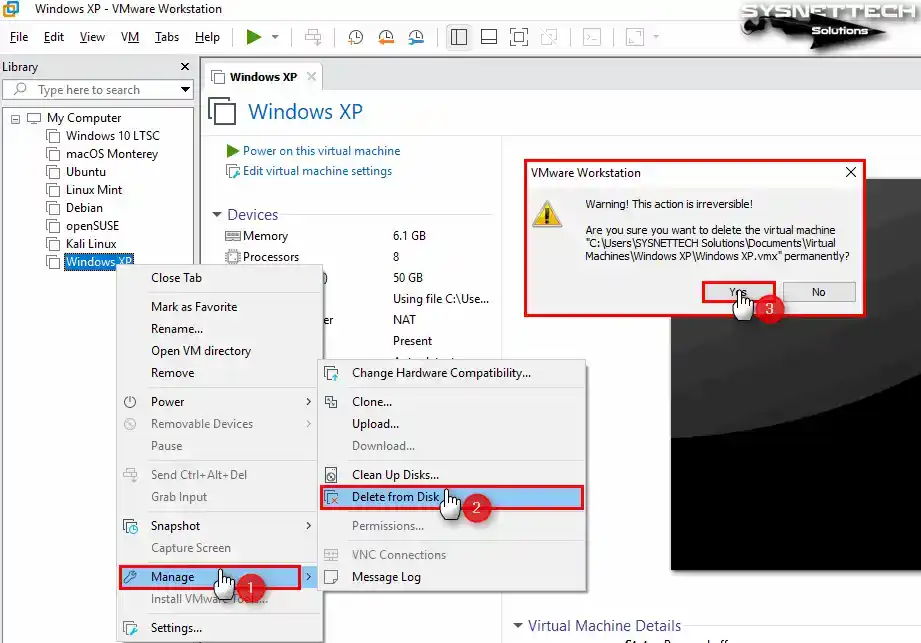
How to Delete the Windows XP Virtual Machine
Suppose you decide not to use the guest machines that you have prepared with VMware on your physical computer. In that case, we recommend that you completely delete the VM files from your host disk.
Right-click on your guest system from the left panel of Workstation Pro, then choose Manage / Delete From Disk. As soon as you select Yes in the warning window that opens, all VM files will be deleted entirely from your host disk.
Video
Installing Old Versions
You can easily install and use Windows XP operating system on 12, 14, 15, or 16 versions of Workstation Pro.
| Workstation Pro | YouTube Video | Slide |
|---|---|---|
| 12 Pro | Watch | – |
| 14 Pro | Watch | – |
| 15 Pro | Watch | View |
| 16 Pro | Watch | View |
| 17 Pro (New) | Watch | – |
Frequently Asked Questions (FAQ)
- Is Windows XP compatible with VMware Workstation?
Yes, VMware software supports Windows XP as a guest operating system. This is valid for both new and old versions. Thus, you can install this system without any compatibility issues with virtualization software.
- How do I install Windows XP on a virtual machine?
As soon as you prepare your virtual PC, first obtain the ISO image to install XP. Immediately afterward, connect this image file from your VM’s CD/DVD hardware. Afterward, you can achieve success by following the XP installation instructions. You can complete the process by entering the product key during installation.
- Do I need to install VMware Tools for Windows XP?
Yes, you should definitely install VMware Tools on your XP guest system because VMware Tools installs essential system drivers and utilities. Thus, you increase your VM performance and have better graphics.
- Are there any special settings I need to configure for the XP virtual machine?
Once your virtual system is installed, you can customize the network connection, screen resolution, and other virtual hardware. You can achieve maximum performance by adjusting these settings according to your host PC. In short, you can handle these by accessing the virtual machine settings from within the Workstation.
Conclusion
As a result, you can set up a virtual machine that will run Windows XP on a modern computer. Thus, you get a practical and effective solution for managing legacy systems. With the detailed steps I provide, you can safely create a virtual environment that meets XP’s specific requirements.
With this approach, you ensure the continued availability of legacy software while retaining the advantages of the current operating system. Additionally, you can seamlessly bridge the gap between legacy and modern computing environments by leveraging virtualization technologies such as VMware Workstation 17 Pro.
How to setup (install) a Windows XP virtual machine using VMware Workstation Pro.
Windows XP was a terrific operating system but now it’s just too old and out of date to be used safely on the Internet (assuming it’ll work at all). But many of us still have software that won’t run on modern versions of Windows.
So for this guide, I’ll show you how to install Windows XP as a virtual machine on your current computer.
- What You’ll Need To Install A Windows XP VM.
- How To Download A Windows XP ISO Image File.
- How To Create A Windows XP VM In Workstation Pro.
- Install From A Disc Or An ISO Image.
- Name And Save Location For The VM.
- XP Virtual Hard Disk Capacity.
- Final Settings.
- Setup A Windows XP VM.
- Regional And Language Options.
- XP Setup.
- Network Settings.
- Welcome To Windows XP.
- Enter A Username.
- VMware Tools For Legacy Operating Systems.
What You’ll Need To Install A Windows XP VM.
To install a Windows XP VM you’ll need to have a few things setup and ready.
- Virtualisation Enabled. You’ll need to have virtualisation enabled on your computer CPU. Either Intel VTx or AMD V/RVI. Usually it’ll be enabled by default, but it isn’t always so you should check your UEFI/BIOS. You can click this link if you’re not sure How To Enable Virtualisation On A PC.
- A Windows XP ISO Image or CD. If you have an old Windows XP installation CD, then that’s great, you can use that. If not, then you’ll need to have an ISO image file of XP. I’ll show you how to get one below if you don’t have either.
- VMware Workstation Pro installed on your PC. Workstation Pro is the software that runs your victual machines. It’s free to use on a home computer, but you’ll need to register for an account. How To Download VMware Workstation Pro For Free.
How To Download A Windows XP ISO Image File.
If you have a genuine Windows XP CD then you should use that to setup your virtual machine. You can be certain that it hasn’t been tampered with.
General Advice About Downloading Windows ISO files.
Generally speaking, I don’t advise downloading any Windows ISO file from anywhere other than Microsoft. You simply don’t know what, if anything, has been added to the file.
However you can’t download XP from Microsoft anymore. So if you don’t have a genuine CD, you’re out of luck. You simply have to look elsewhere.
I’ve tried out this ISO and it seems to be fine. But I certainly can’t guarantee it.
How To Create A Windows XP VM In Workstation Pro.
If you’re going to use a Windows XP CD to install the virtual machine, load it into your CD/DVD drive. Close any autoplay windows that appear.
Start VMware Workstation Pro then click the Create a New Virtual Machine button.
The New Virtual Machine Wizard will open. Select Typical (recommended) and then click the Next button.
Install From A Disc Or An ISO Image.
Workstation Pro can create a new virtual machine from either a CD, or from an ISO image file.
- If you’re installing from a CD, then Workstation Pro will auto detect it and identify it as a Windows XP disc. Click the Next button.
- To install XP from an ISO image, select “Installer disc image file (ISO)”. Then click the Browse button to navigate to and select your ISO file.
- When you’ve loaded the XP ISO file, click the Next button.
Name And Save Location For The VM.
You can give your XP virtual machine a name if you want to. Naming VMs is handy if you intend to install more than one. It helps to identify them later.
By default Workstation Pro will save all the virtual machine files in Documents\Virtual Machines folder. But you can change that location if you wish.
Name the new VM and change the save location or accept the defaults.
Click the Next button to continue.
XP Virtual Hard Disk Capacity.
The new virtual machine will need to have a virtual hard drive to install an operating system onto..
On this screen you can set the maximum size of the drive. By default Workstation Pro will set it to 40GB, but you can change that if you want to.
You can also choose to store the virtual disk as either a single file or split into multiple files.
Personally I find that storing as a single file works best, but it’s entirely up to you.
Final Settings.
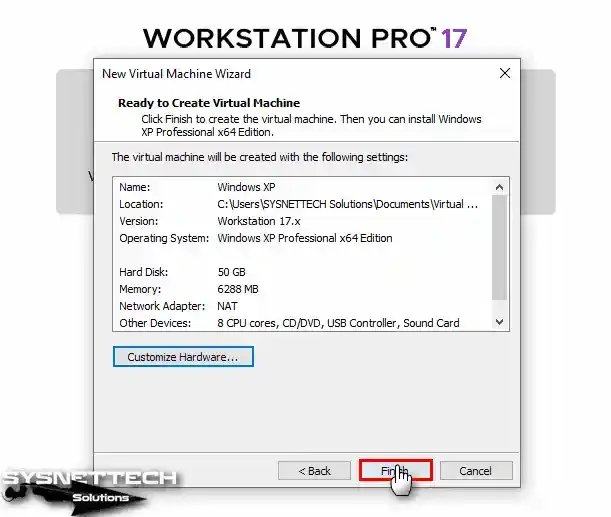
Then the Ready to Create Virtual Machine page will open. This is really just a final confirmation of your XP virtual machine settings.
You’ll notice that Workstation Pro has assigned 512 MB of RAM (memory) to the virtual machine.
Windows XP doesn’t require anywhere as much RAM as later versions of Windows and will work quite well on 512 MB. But I’d give it a little more (assuming your host computer has enough to spare).
- To accept all the default settings for your XP virtual machine, click the Finish button.
- If you want to make any changes, click the Customize Hardware button.
- Make any required changes and then click the Close button, then click the Finish button.
Setup A Windows XP VM.
After clicking the Finish button, Workstation Pro will create the virtual hardware for your virtual machine. Once that’s done, it’ll boot the virtual computer from either the Windows XP CD or ISO image file.
Installing Windows XP (or any other operating system) onto a virtual machine is exactly the same as installing on to a “real” computer. So if you’re familiar with installing XP, you can skip this section and move to VMware Tools.
For those that need a little more guidance, here’s a complete step by step tutorial for installing Windows XP.
Guest And Host Keyboard and Mouse .
The virtual machine (guest) has to share the keyboard and mouse with the host (physical) computer.
To direct (or send) keystroke and mouse clicks to the guest (virtual machine), you need to left click onto the guest window.
To return mouse and keyboard control to the host (real) computer, press CTRL and Alt keys at the same time.
Windows XP will be installed onto the virtual hard disk that you created earlier using Workstation Pro. Even so, the disk still needs to be formatted.
Use the up and down arrows on your keyboard, select “Format the partition using the NTFS file system (Quick)”. Then press Enter.
You’ll see the disk format progress indicator appear. It won’t take long to do. Then the setup will gather the files it needs.
Regional And Language Options.
Before you can install Windows XP, you’ll need to set your regional and language options. By default English (United States) will be selected.
- To change your region, click the Customise button.
- Use the drop down arrowheads to change both the time and currency settings and the Location settings. Click OK when ready.
- Then click the Details button.
- Open the drop down menu and select your desired input language. Click OK. Then click the Next button to proceed.
XP Setup.
- Enter your username and click Next.
- Type in the Windows XP product key.
- You can set a password for the Administrator account, but I wouldn’t do that here. You can add passwords later. Just leave the box blank and click Next.
- Select your Time Zone from the drop down menu and click Next.
Network Settings.
Although you’re installing Windows XP as a virtual machine, the setup program doesn’t know that. It installs as if it were installing on to a physical computer.
For the Network settings, select Typical Settings. Then select Workgroup and click the Next button.
Welcome To Windows XP.
After a few restarts you’re nearly there.
- Welcome to Microsoft Windows. Click the Next button.
- Windows XP updates have been turned off by Microsoft so there’s no point in enabling updates. Select Not Right Now and click Next.
- Even though this is a virtual computer, you probably don’t want Windows XP going anywhere near the Internet. Click the Skip button.
- Finally select No, Not At This Time, when asked to register with Microsoft.
Enter A Username.
Enter a username for your account.
You can add up to 5 users here if you want to. And you can always create more user accounts once Windows XP is up and running.
This is the last step before booting into the desktop.
VMware Tools is basically a set of drivers for virtual machines. They need to be installed directly on to the VM in much the same way that drivers need to be installed onto physical (real) computers.
However the necessary tools are no longer supplied with the latest version of Workstation Pro. As with everything else, time moves on and they have been removed from the standard download.
Summary.
Running Windows XP inside a virtual machine is probably the best way to use it. It’ll work great for running older software, which you can install and use just as you would have on you’re old PC.
But if you were looking to explorer the internet, then I’d think again. There are better alternatives. Use a Linux distro.
Most of them are free and for browsing the ‘net, well there isn’t that much difference between Linux and Windows since you’re really only using a browser.
Related Posts.
Stay Informed. Stay In Touch.
Now that you’ve found me, keep in touch. I publish new articles and update older ones constantly.
Let me send you a monthly email with all the latest guides for you to see if there’s anything you’re interested in.
At Home Computer
Signup for the At Home Computer Newsletter.
Support this website and keep up to date with all the new articles.
Although you can virtualize many operating systems (including older versions of Windows), sometimes the drivers (VMware Tools) are not available natively on VMware ESXi 6.7.
This is particularly the case for Windows XP which is supported as a guest operating system on VMware ESXi 6.7, but for which VMware Tools are not available by default.
Important : no longer use Windows XP in business. Indeed, since its support has been stopped since 2014, Windows XP is therefore vulnerable to hacker attacks.
So this should only be used at home if you absolutely need Windows XP to reinstall an old program.
- Create a Windows XP virtual machine
- Install Windows XP
- Unable to install VMware Tools on Windows XP
- Download VMware Tools for Windows XP
- Install VMware Tools on Windows XP
1. Create a Windows XP virtual machine
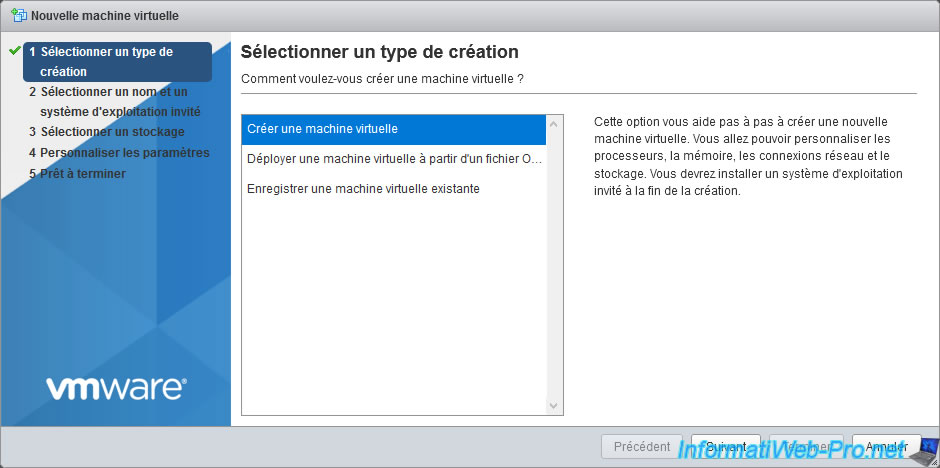
To start, go to «Virtual Machines» and click on : Create / Register VM.

Select «Create a new virtual machine» and click Next.
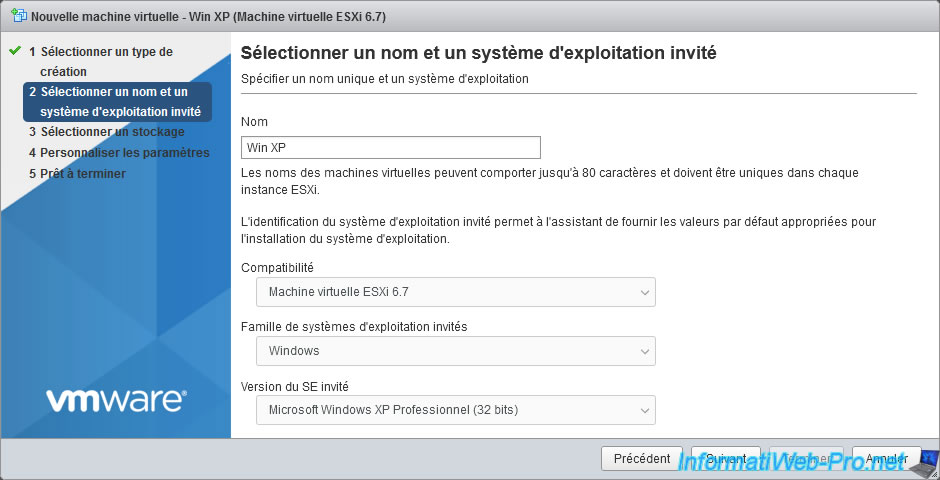
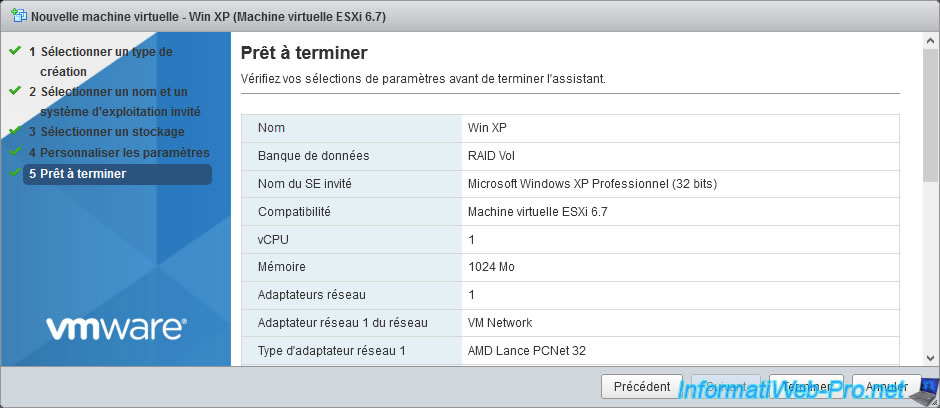
Provide a name for your virtual machine and select the guest operating system (guest OS) : Microsoft Windows XP Professional (32-bit).
Since it’s offered, it proves that it’s supported by this version of VMware ESXi.
For virtual hardware, there is nothing special to do.
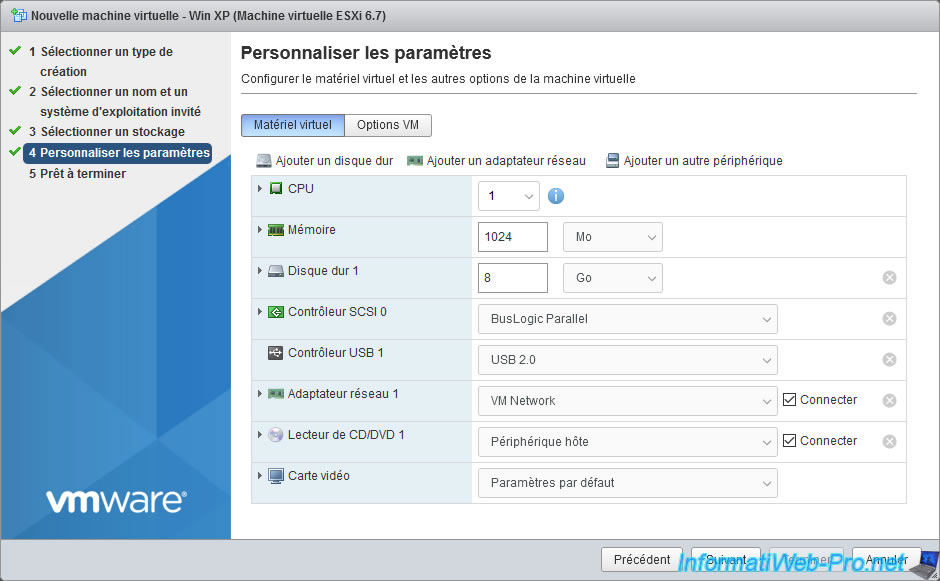
Simply insert the Windows XP installation CD ISO file into your virtual machine’s CD/DVD drive and click Next.

Click Finish.
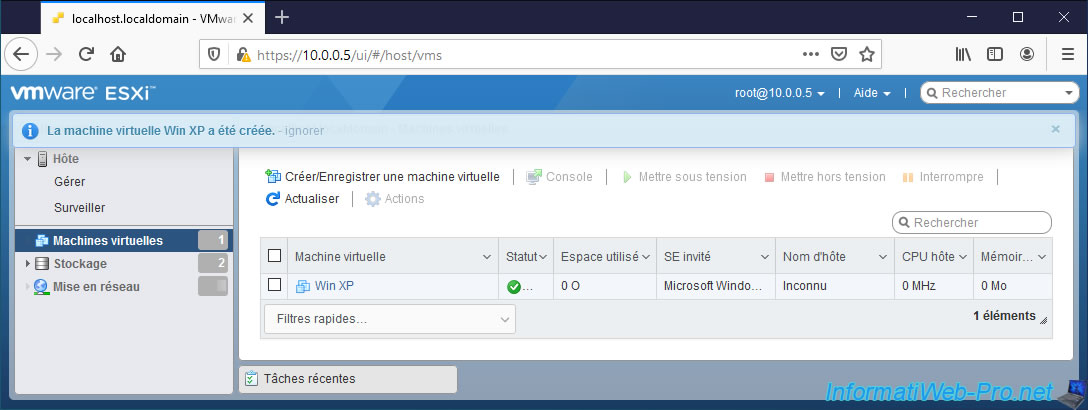
The «Windows XP» virtual machine has been created.
2. Install Windows XP
Start your virtual machine.
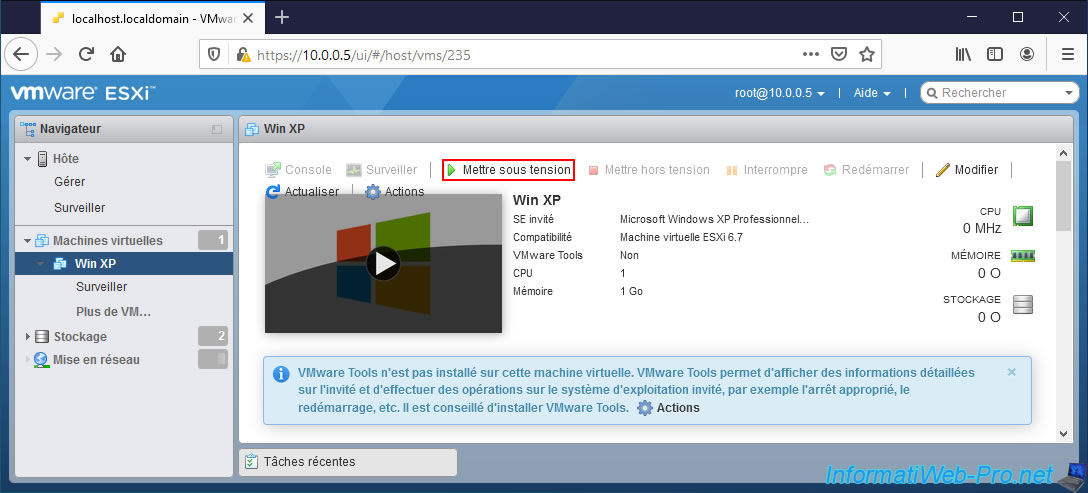
The Windows XP installation wizard will appear in your virtual machine.

Install Windows XP normally.
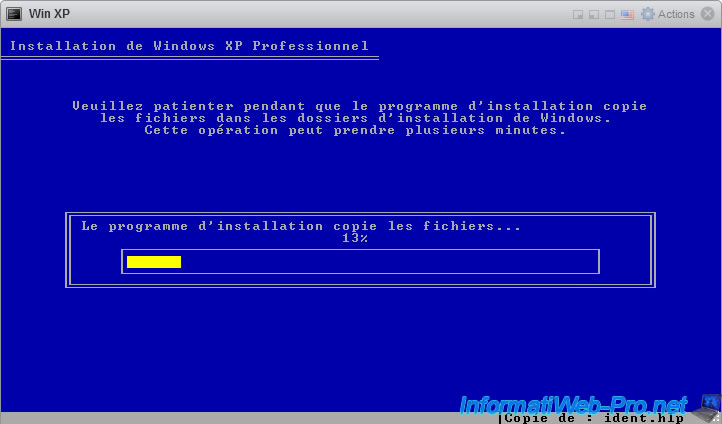
Windows XP is installed.
3. Unable to install VMware Tools on Windows XP
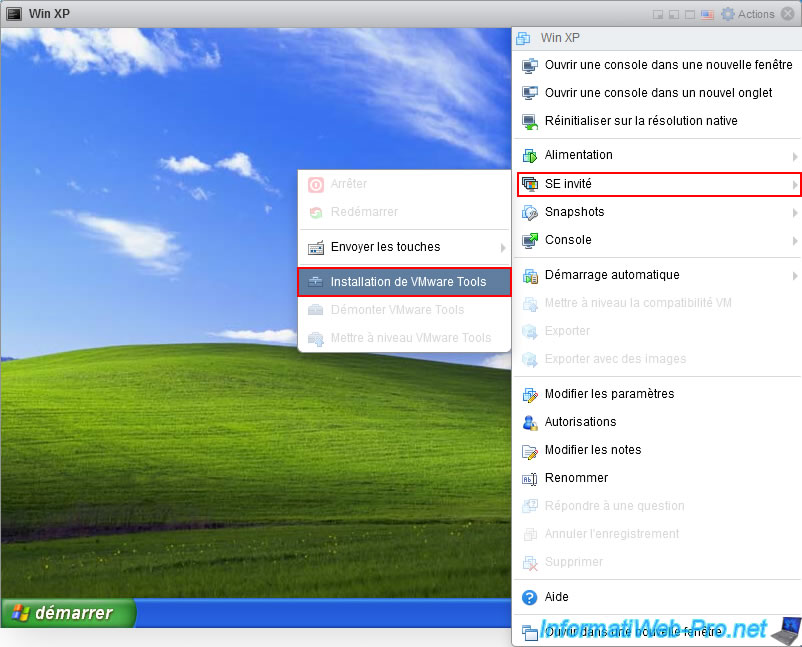
Click : Actions -> Guest OS -> Install VMware Tools.
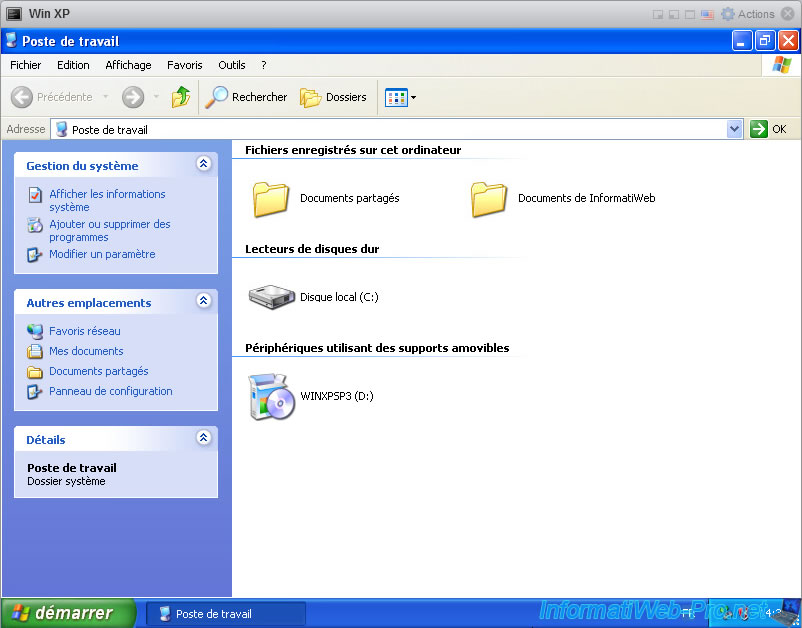
If you open the Windows XP file explorer, you will notice that the VMware Tools CD has not been inserted into your VM’s virtual CD/DVD drive.
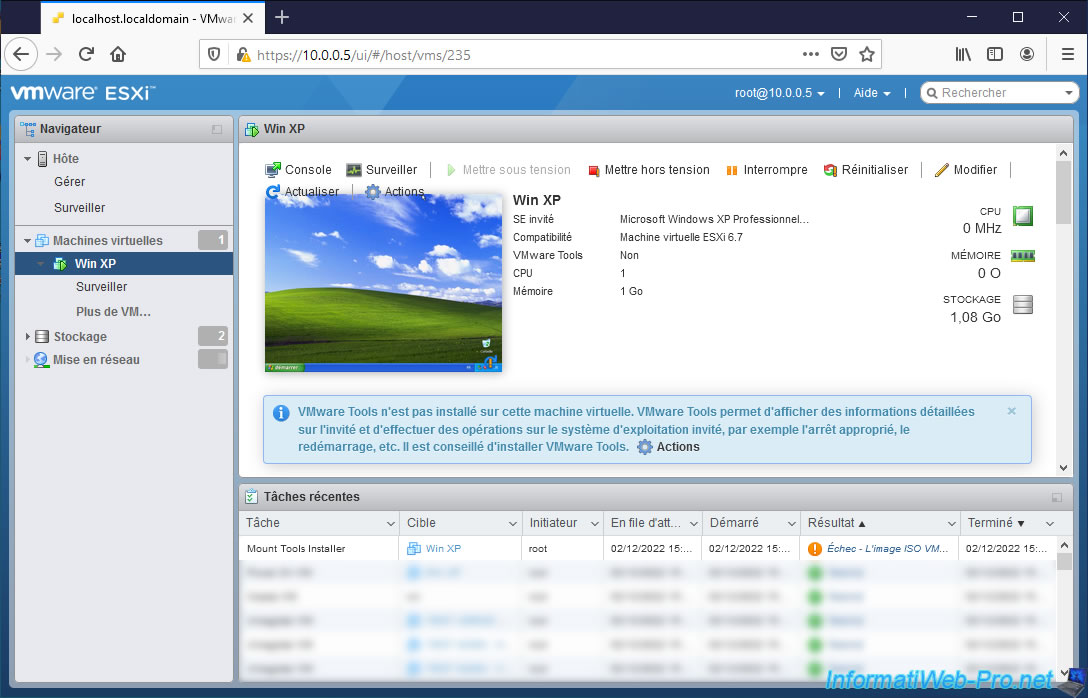
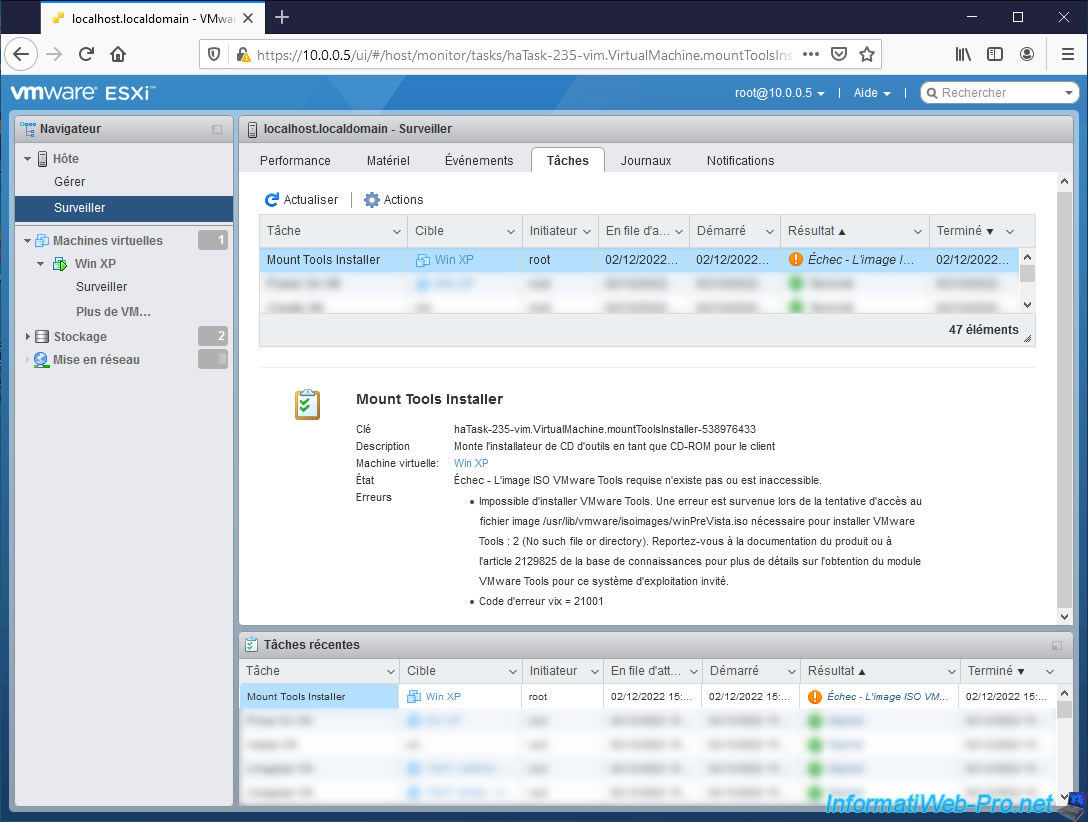
Indeed, if you look in the recent tasks of your VMware ESXi hypervisor, you will notice that the «Mount Tools Installer» task failed.
Click on the «Failed — The required VMware Tools ISO…» result that appears.
You will arrive in the «Host -> Monitor -> Tasks» section of your VMware ESXi hypervisor where you can see the complete error :
Plain Text
Failed - The required VMware Tools ISO image does not exist or is inaccessible.

Unable to install VMware Tools. An error occurred while trying to access image file "/usr/lib/vmware/isoimages/winPreVista.iso" needed to install VMware Tools: 2 (No such file or directory). Please refer the product documentation or KB article 2129825 for details about how to get VMware Tools package for this guest operating system.
vix error code = 21001
4. Download VMware Tools for Windows XP
To get the latest version of VMware Tools available for Windows XP, simply download VMware Tools version 10.0.12.
Indeed, as indicated on VMware’s «VMware Tools support for Windows 2000, Windows XP, and Windows Server 2003 (81466)» page, this is the latest version of VMware Tools available for Windows XP.
As you can see, VMware Tools are available in «.zip» format and «.tar.gz» format.
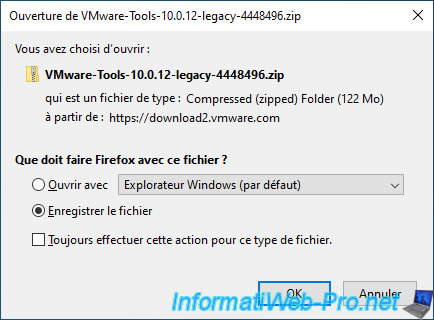
Download the «.zip» version if you are on Windows or download the «.tar.gz» version if you are on Linux.
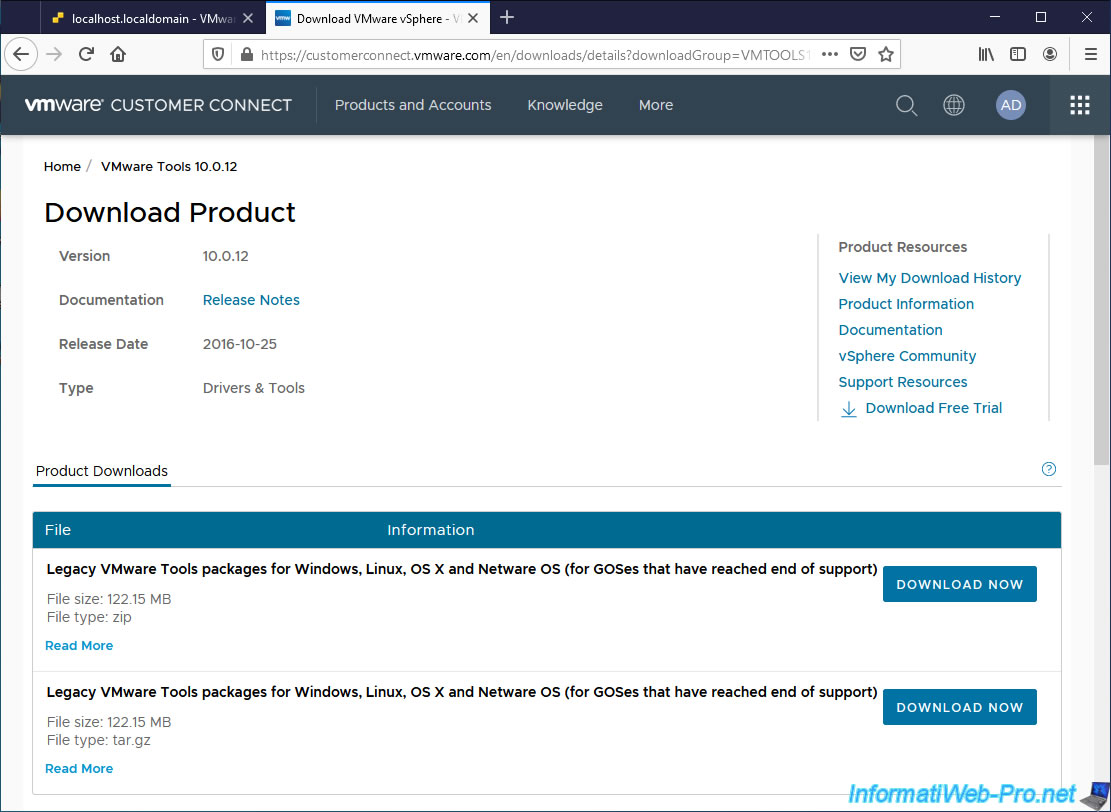
The proposed file will be «VMware-Tools-10.0.12-legacy-4448496.zip».
Unzip the downloaded zip file and you will find 2 folders : floppies and vmtools.
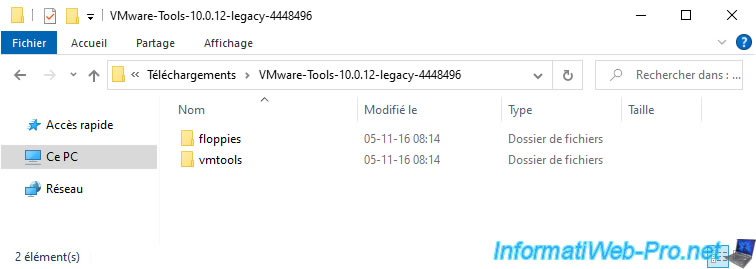
In the «floppies» folder, you will find the old floppies for VMware’s paravirtual SCSI (PVSCSI) controller driver.
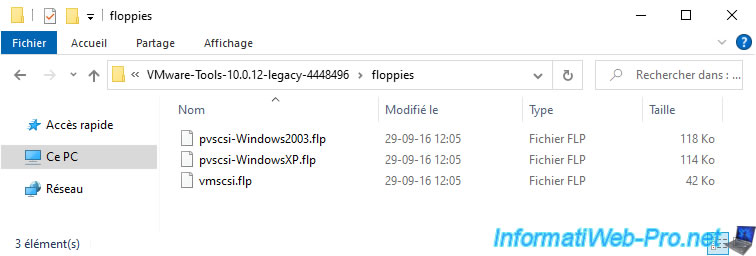
In the «vmtools» folder, you will find the «winPreVista.iso» file that VMware ESXi told you was missing.

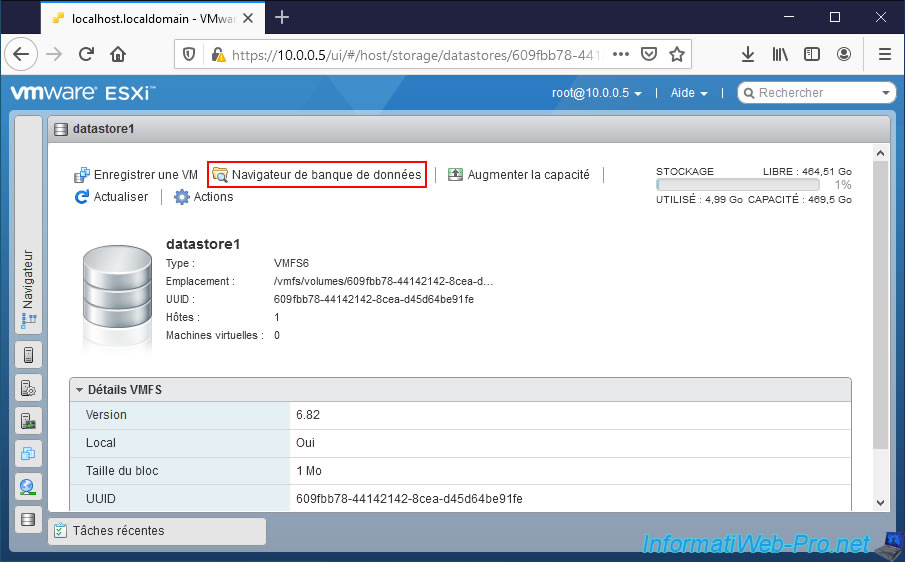
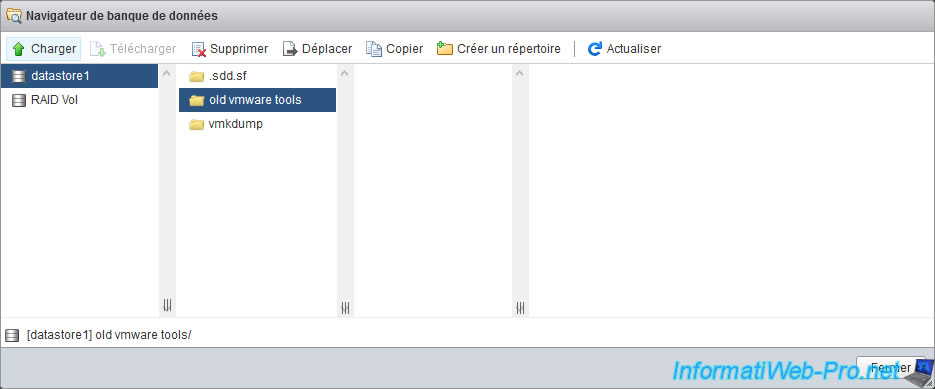
Go to the «Storage» section of your VMware ESXi hypervisor, select a datastore (for example : datastore1) and click on : Datastore browser.
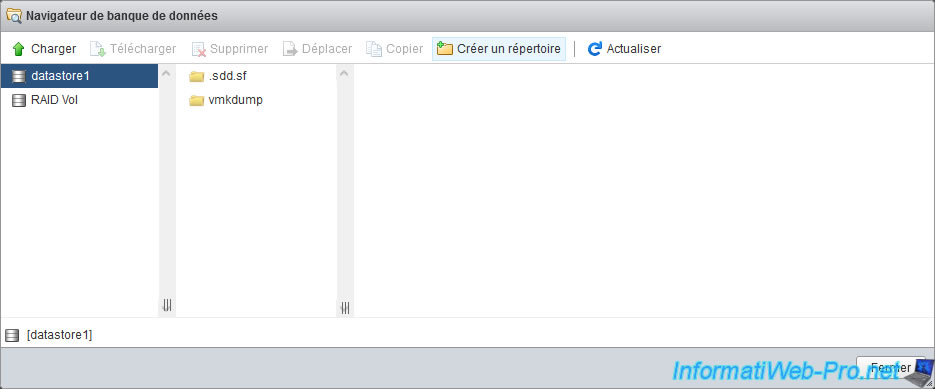
In the datastore browser that appears, click on : Create directory.
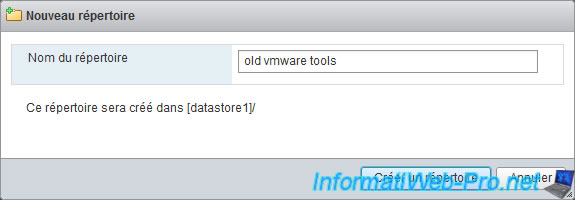
Indicate «old vmware tools» (for example) and click on : Create directory.
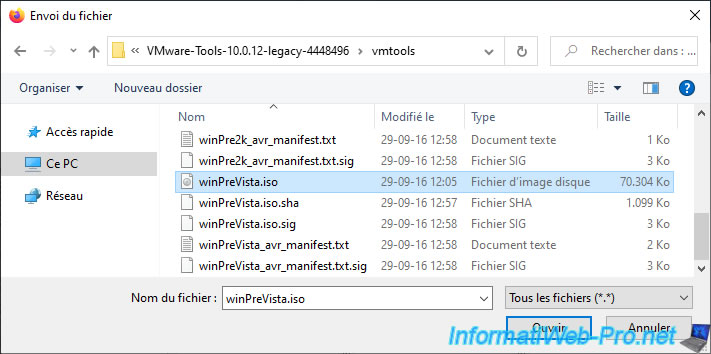
Select the «old vmware tools» folder that you just created and click on : Load.
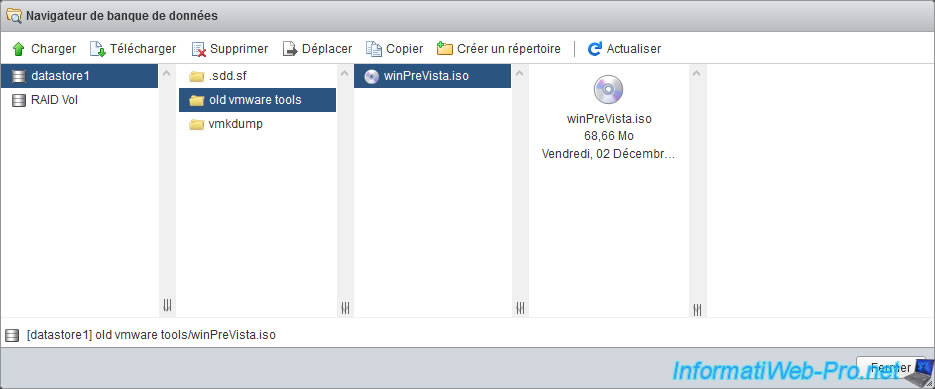
Select the «winPreVista.iso» file from VMware Tools v10.0.12 and click Open.
The sent «winPreVista.iso» file appears.
This article shows how to install Windows XP on a new virtual machine using VMware Workstation 16 Pro on Windows 10.
Microsoft ended support on April 8, 2014, 12 years after Windows XP was released. XP was the most widely used operating system, but thanks to advancing technology, the following operating system version, Windows 7, has been transitioned.
Today, many users continue to use the Windows XP system. However, it is not recommended to use this system due to the incompatibility of some new computer hardware. Because NVMe disks, which are a new disk type, do not support the XP system.
However, if you want to install and try XP, you will either need a computer with old hardware, or you will need to install it with virtual machine software on your current computer.
You can watch this video or follow the steps below to install Windows XP on the virtual machine on your Windows 10 computer.
Step 1: Check out our VMware 16 Pro installation video tutorial to run a virtual computer on your Windows 10 computer.
Video ➦ https://www.youtube.com/watch?v=AMo77WFIZD4
Step 2: After installing VMware Pro, download the Windows XP 64 Bit SP1 Professional ISO file used in this article from the link below.
➦
Step 3: Run the VMware virtualization program after downloading the Microsoft XP ISO file to your computer.
Step 4: Click Create a New Virtual Machine from Workstation Pro’s homepage options.
Step 5: Click Next with the Custom (Advanced) option selected in the New Virtual Machine Wizard window.
Step 6: In the VMware Hardware Compatibility window, select the version of Workstation (16. x) installed on your computer, then click the Next button.
Step 7: In the Guest Operating System window, select the I will install the operating system later, and click Next.
Step 8: Select “Windows XP Professional x64 Edition” in the Guest Operating System window and click Next.
Step 9: In the Name and Platform window, type a name for your virtual machine, choose an external hard drive for the installation location, or configure the selected area by default.
Step 10: In the Firmware Type window, select BIOS since XP does not support UEFI and continue.
Step 11: Specify one processor and four core count for the XP virtual machine in the Processor window. You can increase the values here if your host’s processor hardware is the new generation.
Step 12: In the Memory window, set a minimum value of 4 GB RAM for Windows XP to run more smoothly.
Step 13: In the Network Type window, select the NAT adapter to use a different IP block from your host’s IP block and click Next.
Step 14: In the I/O Controller Types window, select the default option LSI Logic and click Next.
Step 15: Select SCSI in the Select a Disk Type window and continue. Because the XP system does not support the SATA disk type in the virtual machine.
Step 16: In the Select a Disk window, select Create a New Virtual Disk and click Next to create a new disk for a clean install.
Step 17: In the Specify Disk Capacity window, configure the size of the virtual disk for XP and check the Store virtual disk option to back up as a single file type instead of multiple files on your host and continue.
Step 18: After creating a new virtual machine for WinXP, add the ISO file you downloaded to your computer and virtual device.
Step 19: Run the VM by clicking the Power on this virtual machine button, and when you encounter the Windows XP installation screen, install it as if you were installing it on a physical computer.
Step 20: After installing Windows XP, click on VM / Install VMware Tools from the menu. When the installation wizard opens, click Next and then complete the installation by selecting the installation type as Complete and restart your VM.
Step 21: After installing VMware Tools, you can transfer files between your host and your virtual machine, use the host’s hardware, or create a Shared Folder.