
Updated May 2025: Stop error messages and fix your computer problem with this tool. Get it now at this link
- Download and install the software.
- It will scan your computer for problems.
- The tool will then fix the issues that were found.
Windows 10/8.1 / 7 / Vista / XP users often face an error while upgrading or installing Windows. This happens because there are some issues related to the operating system. In such cases, you might see the following error messages:
0x80004005 – “This application cannot start because windows could not find some required file.”
0x800705b4 – “The requested operation requires elevation.”
0x8030002F – “An unexpected error occurred during the setup phase.”
0x00000057 – “A recent hardware change or software update might be the reason for this error.”
0x0000001E – “The program is missing one or more dependencies.”
0x000003F6 – “One or more programs are preventing windows from starting correctly.”
Solution 1. Turn off any other antivirus software
To repair a corrupt Windows registry, it is necessary to use a professional tool like Reimage. This program allows you to scan the entire hard disk and find out what went wrong. It will detect problems such as missing and broken components, invalid entries, redundant data, etc. In addition, it will help you to restore damaged files, lost folders, and even lost partitions. You can download Reimage now for free and try the demo version.
The main advantage of this program is that it fixes errors automatically without asking you any questions. If you want to do things manually, you can always start the manual recovery process. However, we recommend trying the automated method because it requires less effort. If you are unsure about how to proceed, please consult our article titled “How to Repair Registry?”
If you think that your PC is infected with malware, you should run a full anti-malware scan. Malicious software usually modifies system settings and creates hidden processes that prevent regular apps from running properly. We suggest downloading SpyHunter Anti-Malware Free Edition. It offers real-time protection against viruses, spyware, adware, and potentially unwanted applications.
Solution 2. Fix System Files That Are Broken
If you are looking for a way to repair corrupted system files without paying hundreds of dollars for professional help, we have good news for you. You don’t need to spend money on expensive software solutions or pay someone to do it for you. In fact, there is a free solution that works just like a pro tool. It allows you to scan your entire hard disk for errors, locate and fix corrupted system files, clean registry entries, recover deleted files, defragment disks, optimize drives, and much more.
The program is called Reimage. This utility repairs damaged systems, optimizes PC performance, scans and diagnoses hardware problems, increases security settings, boosts RAM speed, and removes virus infections. All these features come together in one package, making it the best choice for every computer owner.
Reimage offers a 30-day trial version of the product. After purchasing the full version of the application, you’ll receive a serial number that unlocks the demo period. During the trial period, you can use the app to check how powerful it really is. If you’re satisfied with what you see, simply register the licensed copy of Reimage and start enjoying all its benefits.
What Is Reimage?
Reimage is a free system scanner that enables you to perform a deep scan of your Windows operating system. Its main advantage over similar tools is that it provides detailed information about detected issues. For example, it lists all the found errors, including file names, types, locations, and even MD5 checksums. It displays the list of scanned items and lets you select those you want to repair. Once you make the final decision, the program automatically starts fixing errors.
How Does Reimage Work?
Reimage uses multi-threading technology that divides the scanning process into several smaller tasks. These small jobs run simultaneously in different parts of your PC, allowing the program to work faster and smoother than traditional scanners. As soon as it finishes scanning, Reimage presents the results in a clear window where you can review everything that needs attention. When you find something suspicious, you can choose whether to investigate further.
Updated: May 2025
We highly recommend that you use this tool for your error. Furthermore, this tool detects and removes common computer errors, protects you from loss of files, malware, and hardware failures, and optimizes your device for maximum performance. This software will help you fix your PC problems and prevent others from happening again:
- Step 1 : Install PC Repair & Optimizer Tool (Windows 11, 10, 8, 7, XP, Vista).
- Step 2 : Click Start Scan to find out what issues are causing PC problems.
- Step 3 : Click on Repair All to correct all issues.
Solution 3. Check Disk
If you are having problems with Windows 7, it might be due to a damaged hard drive. You can check your disk for errors by running chkdsk /f. This command scans your entire hard drive and fixes any damage found. If there are no errors, make sure that your disk isn’t broken. Simply restart your PC and let it do its thing. If that doesn’t work, try reinstalling Windows.
Solution 4. Clean Boot
To fix a corrupted system, we recommend purchasing the licensed version of reImage. This will allow us to cleanly scan the disk, find every corrupt file and replace it with a healthy version from our servers. This method will ensure that your PC is running safely without having to worry about corrupt files, adware or malware that are slowing down your computer.
If you want to keep your personal files and settings, you do not have to format your hard drive. Simply backup your data from within Windows Explorer before starting the reimage cleanup. You can use the builtin tool “Windows Backup”. The free trial version of reImage does not contain some important features such as the ability to save your work and the option to schedule automatic backups. In addition, the free version cannot perform a deep scan of your entire disk. For example, it will not detect changes to the registry or hidden files.
Please note that reImage requires administrative privileges to run. Therefore, it is recommended that you logon as administrator before launching the application.
#disclaimer: We are not affiliated with CGSecurity.org.
Solution 5. Repair the Master Boot Record
The problem is caused by a virus infection. This virus corrupts the master boot record of your computer. You can use a free tool called “Reimage” to repair it. Download Reimage now and follow the instructions.
Solution 6. Perform a Clean Installation
The solution described here works for Windows 10 versions 1607 & 1703.
Microsoft has announced that it will be killing off the old MSConfig tool. This tool used to be included in every copy of Windows since XP SP2. It allowed users to easily change settings like startup items, desktop icons, fonts, etc.
This tool is no longer supported by Microsoft. You can still download it from the Internet Archive:
Repair your Errors automatically
uGetFix is a free tool that helps you repair common computer issues such as error messages, system freezes, slow performance, and startup or shutdown problems.
This program uses patented technologies to find and correct many different types of errors including:
* Corrupted files
* Missing and damaged DLLs
* Registry errors
* System file corruption
* Startup and shutdown problems
How do I fix Windows was unable to create a required installation directory?
Windows 10 was installed successfully. However, it appears that there are some problems with the boot configuration data file. This happens because Windows cannot find the correct location where you want to install the operating system. The problem occurs during the setup process. You see the error message “Windows was unable to create a necessary installation folder.” When you try to repair the installation, you receive the following error message: “The operation completed successfully.”
You must first rebuild the boot configuration data file, recreate the installation media, restart the installation process, and finally reinstall the operating system.
Rebuild the boot configuration data file:
1. Open Command Prompt as administrator.
2. Type bcdedit /set {current} persistent storage format bcdx86_64 and press Enter.
3. Press Ctrl+C to exit the command prompt.
RECOMMENATION: Click here for help with Windows errors.
Frequently Asked Questions
How do I fix my computer if it breaks down?
There are a few things you can try if you delete or damage files on your computer by accident. First, use Windows Explorer to look for any files or folders that are hidden (the file manager). Some of these files might be recoverable from within Windows. If not, you’ll need a CD/DVD burner or an external hard drive to copy them back onto your computer.
Does my operating system really need to be updated?
Yes! For programs like Word or Photoshop to work on your computer, it needs an operating system, or OS. If you don’t keep your OS up-to-date, your computer will stop working right.
The Error Code 0x8030002F occurs when you are trying to upgrade your Windows or when you are trying to install a fresh copy of Windows. This issue occurs when Windows think that the ISO file you are using has been tampered with or it’s modified by a third party. Windows will stop users from Installing modified versions of Windows for security purposes. It is definitely not recommended to use a Windows Image that isn’t original as it can be malicious.
After investigating this particular issue thoroughly, it turns out that there are several different underlying causes that might be responsible for the apparition of this error code. Here’s a list of potential culprits that might be responsible:
- Installation media is a modified version of Windows – The number one cause that will trigger this error is a situation where the user tries to upgrade to the latest version using a modified version of the Windows installation media. To resolve this problem, you will need to create a genuine copy of the installation media and use that instead.
- Corrupted HDD / SSD sectors – As it turns out, some kind of system file corruption can also trigger this error if the corruption affects the MBR or BCD files used during the upgrading process. In this case, running a CHKDSK scan should allow you to resolve the issue.
- Corrupted Boot Configuration data – If you’re only seeing this error while attempting to upgrade your Windows version to the latest, you should attempt to run a series of elevated CMD commands aimed at preparing the boot configuration data.
- System File Corruption – Under certain circumstances, some kind of system file corruption can cause this error when attempting to upgrade the Windows version to the latest. If this scenario is applicable, you can either go for a clean install or you can attempt to fix the corrupted system files with SFC and DISM scans.
Now that you are familiar with every potential culprit that might be responsible for this error, here’s a list of potential fixes that other affected users have successfully used to resolve this error code:
Install a Non-Modified Windows Version (if applicable)
One of the most common causes that might end up producing this error code is a situation where the user attempts to install or upgrade their current Windows version from a modified version of the installation media (DVD or flash drive).
You can expect to see the 0x8030002f if you have a genuine Windows 7 version and you want to upgrade to the latest version of Windows 10 with a modified installation media.
If this scenario is applicable and the installation media that you are trying to use is not genuine, the only way forward is to ensure that you are using genuine installation media.
If you’re looking for step by step instructions on creating compatible installation media (USB or DVD) for Windows 10 or Windows 7, use the following guides:
- Create a Windows 10 Bootable Installation media Using Rufus
- Creating a Windows 7 Installation Media using the Download Tool
If this scenario is not applicable to your particular situation as the installation media that you’re using is genuine, move down to the next potential fix below.
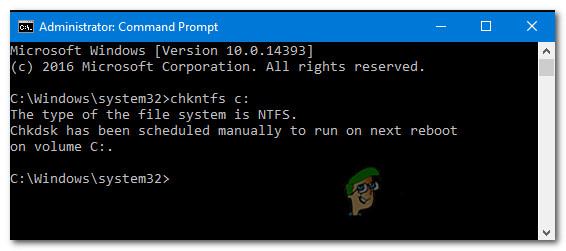
Deploy a CHKDSK scan
If you only see the 0x8030002f error while you attempt to upgrade an older Windows version to Windows 10 using compatible installation media, you’re most likely dealing with some kind of HDD / SSD sector corruption that is affecting the MBR or BCD files.
In case you find yourself in this particular scenario, you should go for a CHKDSK (Check Disk Scan) to ensure that no logical sectors are causing this behavior. If this is the source of the 0x8030002f error, CHKDSK will replace the corrupted logical sectors with unused healthy equivalents.
Note: CHKDSK comes pre-installed on every recent Windows version including Windows 7 and Windows 8.1
To deploy this scan, follow these instructions to deploy a CHKDSK scan from an elevated Command prompt.
Note: Should the utility discover some corrupted sectors that cannot be replaced, you can conclude that the drive is failing and you’ll need to look for a replacement as soon as possible.
If you already performed a CHKDSK scan and the same kind of issue is still occurring, move down to the next potential fix below.
Run SFC and DISM scans
Keep in mind that this 0x8030002f error is often associated with some kind of system file corruption, so your next step (if the first methods have failed) is to run a couple of built-in utilities that are capable of fixing the most common causes that will cause widespread system file corruption.
Running SFC (System File Checker) and DISM (Deployment Image Servicing and Management) scans in quick succession should allow you to fix the big majority of potential issues that might be triggering this error code.
The two built utilities share some similarities, but we recommend running both types of scans in quick succession in order to maximize your chance of fixing the issue without having to do a clean install or repair install.
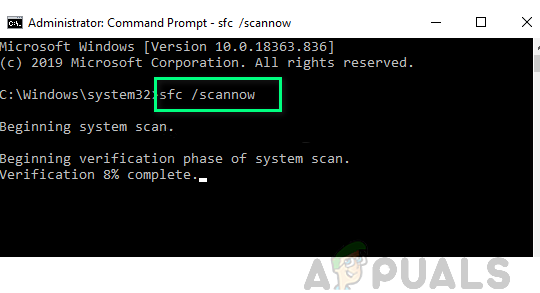
You should start with an SFC scan. This scan will use a local archive to replace corrupted Windows files with healthy equivalents – NO Internet Connection is required.
Note: After you start this operation, avoid closing the elevated CMD window or restarting/shutting down your computer. Doing this exposes your PC to the risk of additional local issues affecting your HDD / SSD.
Once the SFC scan is complete, reboot your computer and initiate a DISM scan once your computer boots back up.
Note: Different from an SFC scan, DISM requires a stable Internet connection to replace corrupted files with healthy equivalents. This is necessary because instead of using a local file archive like SFC, DISM uses a sub-component of Windows Update to download fresh copies untainted by corruption.
After the DISM scan is complete, restart your computer one final time and see if the problem is fixed once the next startup is complete.
If the same problem is still occurring, move down to the next potential fix below.
Repair the Boot Configuration data
If you see this error while attempting to upgrade your Windows version to the latest and every other potential fix above has failed in your case, you should investigate is a potential corruption that might be affecting the MBR files or boot configuration data.
Use the Boot Configuration Data (BCD) utility to locate the Windows boot files on all disks and add them back to the boot list so that the booting sequence can locate them during startup. This fix is especially helpful in situations where you are dual-booting.
IMPORTANT: This method will require a compatible installation of Windows installation media. In case you don’t have one at the ready, you can create the Windows installation media from scratch and load it on a USB drive.
After you ensured that you meet all the requirements, follow the instructions below:
- Start simple by plugging in the USB stick containing the installation media before starting your computer normally via the power button.
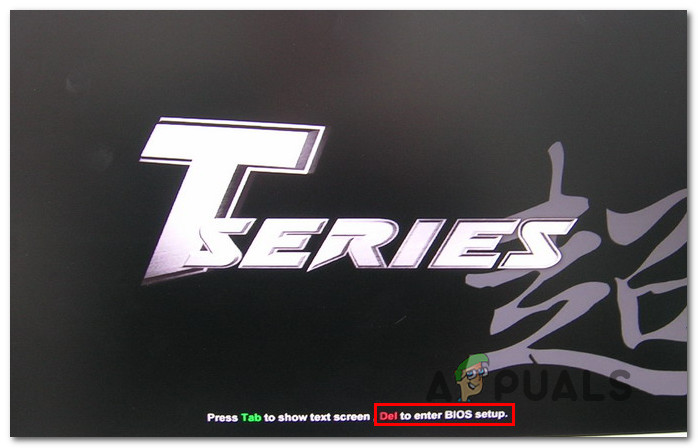
- Next, access the Setup key by pressing the correspondent button depending on your motherboard manufacturer.

Accessing the Boot menu Note: The setup key will be different from manufacturer to manufacturer. In most cases, the Setup key is either one of the F keys (F2, F4, F6, F8), or the Esc key. In case you’re having trouble accessing the Setup menu, search online for specific instructions on accessing it.
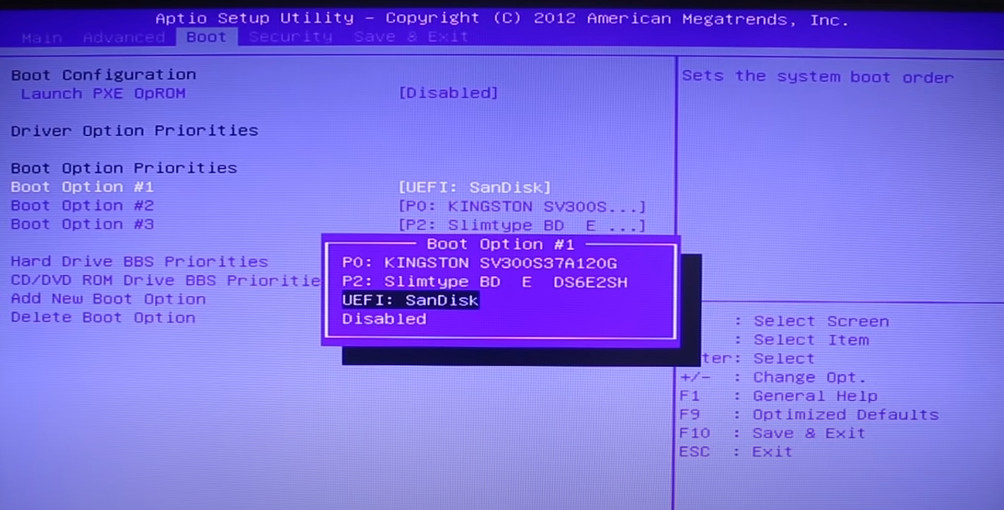
- At the Setup menu, access the Boot tab and make sure to set the USB stick containing the installation media as the first boot option.

Changing the Boot order - Save the changes and reboot your computer to allow it to boot from the installation media.
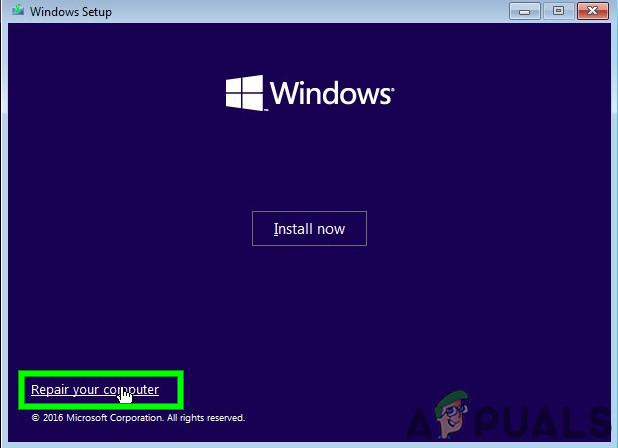
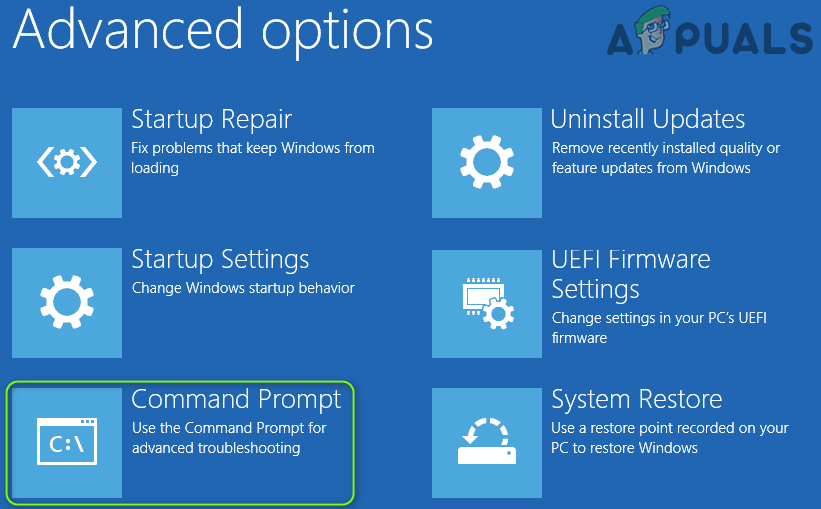
- After you successfully boot from the installation media, select Repair your computer from the bottom-right corner of the screen.

Repairing your computer - Once the Recovery menu loads, access the Troubleshoot menu and click on Command Prompt from the list of available options.
Note: You can also boot from the Recovery menu (without booting from the installation media) by forcing 3 consecutive system interruptions during the startup procedure.
Opening an elevated Command Prompt - Next, type the following command and press Enter to fix the MBR dependencies associated with your Windows installation:
bootrec /fixmbr
- After the first command is processed successfully, type the following command and press Enter to fix the Boot Configuration Data associated with your Windows installation:
bootrec /fixboot
Note: If you get the ‘Access is denied’ error while inputting one of the 2 commands above, follow these instructions to fix the bootrec access problem.
- After the FixBoot command is processed, type the following command and press Enter to scan all your disks for the Windows installation media:
bootrec /scanos
Note: This operation can take over 10 minutes depending on the size of your partitions. Don’t close this window until the operation is complete.
- After the operation is finally completed successfully, type the following command to effectively rebuild the BCD configuration data:
bootrec /rebuildbcd
- When asked to confirm, go ahead and type Y before pressing Enter to confirm and start the operation.
Fixing the Bootrec data
- Finally, type ‘exit’ and press ENTER to effectively leave the elevated CMD prompt.
- Repeat the Windows installation/upgrading process that was previously causing the 0x8030002f to see if the problem is now fixed.
Kamil Anwar
Kamil is a certified MCITP, CCNA (W), CCNA (S) and a former British Computer Society Member with over 9 years of experience Configuring, Deploying and Managing Switches, Firewalls and Domain Controllers also an old-school still active on FreeNode.
-
Home
-
News
- A Step-by-Step Guide to Fix Windows Error Code 0x8030002F
A Step-by-Step Guide to Fix Windows Error Code 0x8030002F
By Alin |
Last Updated
Some users reported that they encountered the error code 0x8030002f when trying to upgrade Windows or install Windows. How to fix this issue? You can find the answers in this post of MiniTool Partition Wizard.
What Causes the 0x8030002f Error
There are various factors that can cause the error code 0x8030002f. Here, we summarize some possible causes, such as:
- Corrupted system files
- Installation media is a modified version of Windows
- Hard drive errors
- Corrupted Boot Configuration data
- …
How to solve the 0x8030002f error? Fortunately, there are some possible methods that you can try to fix this issue.
Method 1. Run SFC and DISM
SFC (System File Checker) and DISM (Deployment Image Servicing and Management) are two built-in tools that can scan and repair any corrupted or missing system files that may cause the error. To run these tools, follow these steps:
Step 1. Press Win + R to open the Run dialog box. Then type cmd and press Ctrl + Shift + Enter to run Command Prompt as administrator.
Step 2. In the Command Prompt window, type sfc /scannow and press Enter.
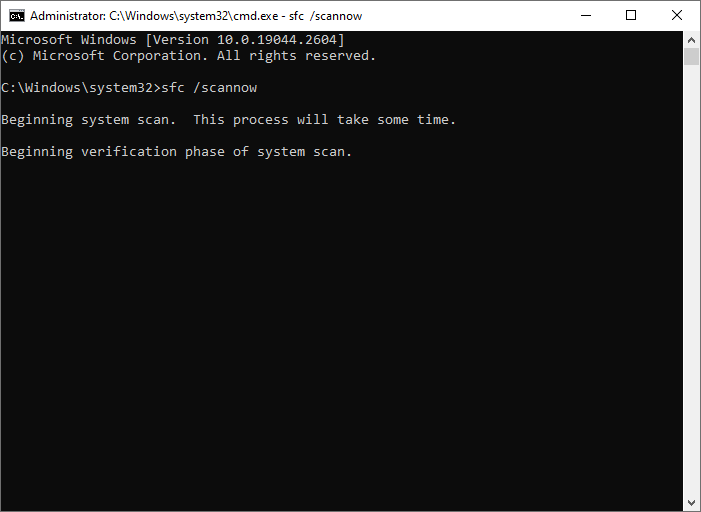
Step 3. After the process is done, restart your PC. If the issue still exists, run Command Prompt as administrator again.
Step 4. Then type the following commands and press Enter after each line.
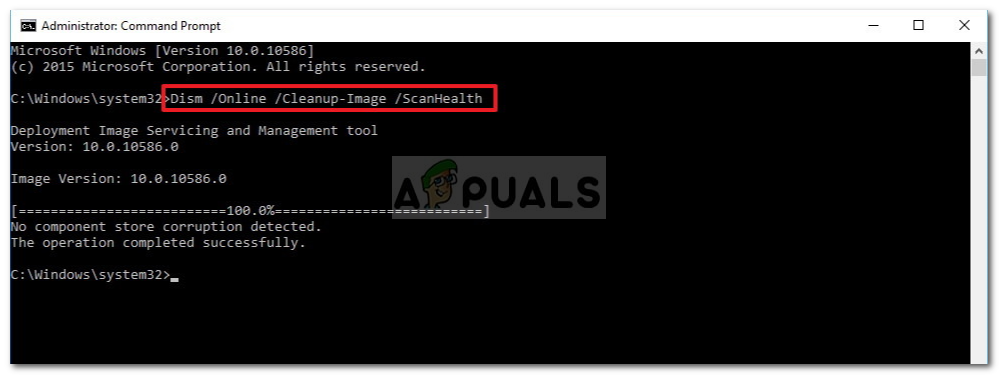
- DISM /Online /Cleanup-Image /CheckHealth
- DISM /Online /Cleanup-Image /ScanHealth
- DISM /Online /Cleanup-Image /RestoreHealth
Step 5. Once the process completes, restart your device and check if the issue is fixed.
Method 2. Check Your Disk
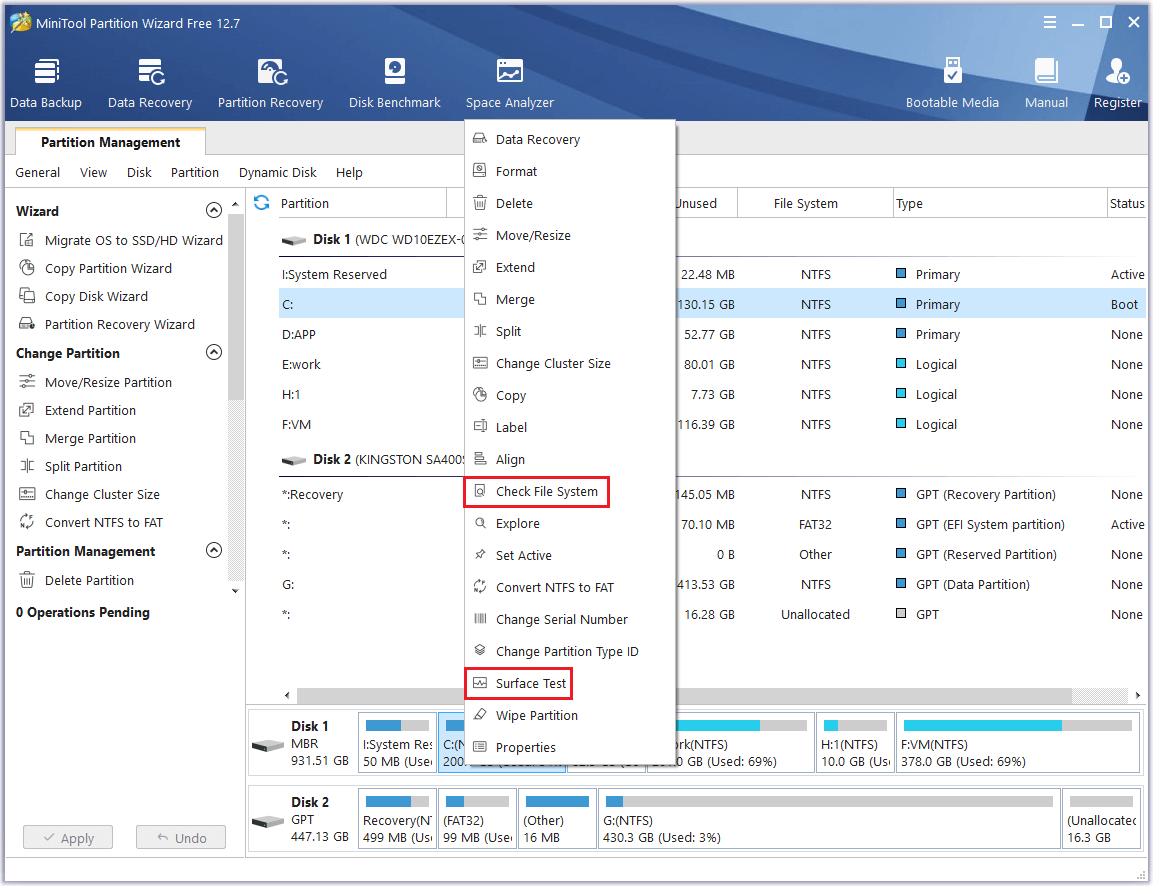
Sometimes, the 0x8030002f error can be caused by bad sectors or errors on your hard drive that affect the installation media or the system files. To fix this, you can run MiniTool Partition Wizard to check file system errors and bad sectors. It’s a powerful tool that can help you manage your partitions and disks easily and safely.
Download and install MiniTool Partition Wizard on your PC, and then launch it to enter its main interface. Then right-click the partition to be checked, and select Check File System to check file system errors or Surface Test to check bad sectors. You can follow the on-screen instructions to complete the process or see this guide.
MiniTool Partition Wizard FreeClick to Download100%Clean & Safe
Method 3. Repair MBR
The error code 0x8030002f may be caused by a corrupted Master Boot Record (MBR). To repair the MBR, you need to boot your computer into the Windows Recovery Environment and run some commands in the Command Prompt. To do that, follow these steps:
Step 1. Boot your PC into Windows Recovery Mode.
Step 2. After entering WinRE, click Troubleshoot > Advanced options > Command Prompt.
Step 3. Then type the following commands and press Enter after each one.
- bootrec /fixmbr
- bootrec /fixboot
- bootrec /rebuildbcd
Step 4. Once done, close the Command Prompt and restart your computer.
Method 4. Perform a Clean Install of Windows
If none of the above methods work, you can try fixing the 0x8030002f error by performing a clean install of Windows. It will erase everything on your hard drive and install a fresh copy of Windows. It’s recommended that you make a backup before proceeding.
To perform a clean install of Windows, you need to create a bootable installation media using the Media Creation Tool and then boot your computer from it. Then, you can follow the on-screen instructions to install Windows on your computer. You can refer to this guide.
In addition to the above methods, you can try performing a clean boot or temporarily disabling antivirus software to fix the error code 0x8030002f.
Conclusion
Now, this post comes to an end. Do you have any suggestions or other nice solutions to the Windows error code 0x8030002f? You can feel free to share them with us in the following comment part.
About The Author
Position: Columnist
Alin is a new member of MiniTool. Her articles are mainly about disk & partition management, data recovery, and hard disk issues. She is enthusiastic about acquiring computer knowledge and helping users to solve problems with computers. To provide more useful and professional solutions, she will keep learning and know more computer knowledge.
ralle990
New Member
- Joined
- Nov 25, 2009
- Messages
- 4
- Thread Author
-
-
#1
Hi, tried to install my new Windows 7 on my PC here today but instead got the message:
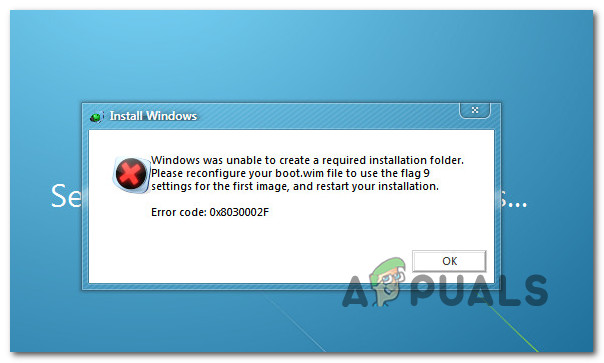
Windows was unable to create a required installation folder.
Please reconfigure your boot.wim file to use the flag of 9 settings for the first image, and restart your installation.
Error code: 0x8030002F
Someone who knows what I can do, perhaps. have had the same problem?
Thanks in advance
PS. Is Windows Vista Ultimate on it now.
kemical
Windows Forum Admin
Staff member
Premium Supporter
- Joined
- Aug 28, 2007
- Messages
- 36,176
-
-
#2
Do you get this message when trying to upgrade or clean install? If it’s while your upgrading try changing your boot order to cd first and do a clean install.
Jayel187
New Member
- Joined
- Jul 21, 2012
- Messages
- 2
-
-
#3
I tried to format my laptop but Windows was unable to create a required installation folder.
Please reconfigure your boot.wim file to use the flag of 9 settings for the first image, and restart your installation.
Error code: 0x8030002F
I am using a Toshiba sattelite. The original operating system was windows professional but i changed it to windows ultimate. Now i am having to many problems with this OS that is why i want to put it back to its original OS but this error keeps popping out.
I also tried the boot thing but it didn’t work.
What should i do?
Ошибка 0x8030002f при установке Windows принадлежит к классу ошибок, которые говорят о проблемах при копировании установочных файлов. Вызвана она может быть физическими проблемами с жестким диском или внешним носителем информации, отсутствием или повреждением файлов установщика, нехваткой места на жестком диске.
Как устранить ошибку 0x8030002f?
Перед установкой протестируйте жесткий диск на битые сектора и проведите дефрагментацию. Если битых секторов слишком много, то такой винчестер подлежит замене. Чтобы исключить повторное появление ошибки лучше использовать установку «с нуля». Это включает форматирование жесткого диска и выбор файловой системы. Но если вам важно сохранить старую информацию, то обязательно удалите все лишние данные, чтобы освободить место для новой ОС.
Проблема с установкой Windows также может быть вызвана внешним носителем и качеством ISO образа. Для записи образа установщика воспользуйтесь специальными программами. Они подберут оптимальный метод записи для флешки, внешнего HDD или DVD диска, и проверят правильность копирования файлов по хэш-сумме. Если ошибка при установке все еще сохраняется, то попробуйте записать другой образ или сменить носитель информации.