
Download VirtualBox for Linux Hosts
Note: The package architecture has to match the Linux kernel architecture, that is, if you are running a 64-bit kernel, install the appropriate AMD64 package (it does not matter if you have an Intel or an AMD CPU). Mixed installations (e.g. Debian/Lenny ships an AMD64 kernel with 32-bit packages) are not supported. To install VirtualBox anyway you need to setup a 64-bit chroot environment.
The VirtualBox base package binaries are released under the terms of the GPL version 3.
Please choose the appropriate package for your Linux distribution.
VirtualBox 7.1.8 for Linux
- Oracle Linux 9 / Red Hat Enterprise Linux 9
- Oracle Linux 8 / Red Hat Enterprise Linux 8
- Ubuntu 24.10
- Ubuntu 24.04
- Ubuntu 22.04
- Ubuntu 20.04
- Debian 12
- Debian 11
- openSUSE 15.3 / 15.4 / 15.5 / 15.6
- Fedora 40 / 41
- Fedora 36 / 37 / 38 / 39
- All distributions (built on EL7 and therefore not requiring recent system libraries)
You might want to compare the checksums to verify the integrity of downloaded packages.
The SHA256 checksums should be favored as the MD5 algorithm must be treated as insecure!
SHA256 checksums MD5 checksums
Oracle Linux
Users of Oracle Linux 7, 8 and 9 can use the Oracle Linux yum repository and enable the ol7_developer channel for Oracle Linux 7, the ol8_developer channel for Oracle Linux 8, or the ol9_developer channel for Oracle Linux 9.
This can be done with
yum install oraclelinux-developer-release-*
After that, do
yum install VirtualBox-7.0
to get the latest maintenance release of VirtualBox 7.0.x installed.
Debian-based Linux distributions
Add the following line to your /etc/apt/sources.list. For Debian 11 and older, replace ‘<mydist>‘ with ‘bullseye‘, ‘buster‘, or ‘stretch‘. For Ubuntu 22.04 and older, ‘replace ‘<mydist>‘ with ‘jammy‘, ‘eoan‘, ‘bionic‘, ‘xenial‘,
deb [arch=amd64 signed-by=/usr/share/keyrings/oracle-virtualbox-2016.gpg] https://download.virtualbox.org/virtualbox/debian <mydist> contrib
The Oracle public key for verifying the signatures can be downloaded here. You can add these keys with
sudo gpg --yes --output /usr/share/keyrings/oracle-virtualbox-2016.gpg --dearmor oracle_vbox_2016.asc
or combine downloading and registering:
wget -O- https://www.virtualbox.org/download/oracle_vbox_2016.asc | sudo gpg --yes --output /usr/share/keyrings/oracle-virtualbox-2016.gpg --dearmor
The key fingerprint for oracle_vbox_2016.asc is
B9F8 D658 297A F3EF C18D  5CDF A2F6 83C5 2980 AECF
Oracle Corporation (VirtualBox archive signing key) <info@virtualbox.org>
To install VirtualBox, do
sudo apt-get update
sudo apt-get install virtualbox-7.1
Replace virtualbox-7.1 by virtualbox-7.0 to install the latest VirtualBox 7.0 build.
What to do when experiencing The following signatures were invalid: BADSIG … when refreshing the packages from the repository?
# sudo -s -H
# apt-get clean
# rm /var/lib/apt/lists/*
# rm /var/lib/apt/lists/partial/*
# apt-get clean
# apt-get update
If you previously added the Oracle key(s) to your default keyring (now considered insecure), remove them again with:
sudo apt-key remove 5CDFA2F683C52980AECF
sudo apt-key remove D9C954422A4B98AB5139
(As of VirtualBox 3.2, the signing key was changed. The old Sun public key for apt-secure can be downloaded here. Likewise, the Oracle public key for distributions older than Debian 8 and Ubuntu 16.04 can be downloaded here.)
RPM-based Linux distributions
We provide a yum/dnf-style repository for Oracle Linux/Fedora/RHEL/openSUSE. All .rpm packages are signed. The Oracle public key for rpm can be downloaded here. You can add this key (not normally necessary, see below!) with
sudo rpm --import oracle_vbox_2016.asc
or combine downloading and registering:
wget -q https://www.virtualbox.org/download/oracle_vbox_2016.asc -O- | rpm --import -
The key fingerprint is
B9F8 D658 297A F3EF C18D  5CDF A2F6 83C5 2980 AECF
Oracle Corporation (VirtualBox archive signing key) <info@virtualbox.org>
After importing the public key, the package signature can be checked with
rpm --checksig PACKAGE_NAME
Note that importing the key is not necessary for yum users (Oracle Linux/Fedora/RHEL/CentOS) when using one of the virtualbox.repo files from below as yum downloads and imports the public key automatically! Zypper users should run
zypper refresh
(As of VirtualBox 6.1.44/7.0.8, the same signing key as for Debian packages since 2016 is used. The Oracle public key for older rpm packages and not updated repositories can be downloaded here.)
The package signature is checked by yum/dnf/zypper as well:
- Users of Oracle Linux / RHEL can add the Oracle Linux repo file to /etc/yum.repos.d/.
- Users of Fedora can add the Fedora repo file to /etc/yum.repos.d/.
- Users of openSUSE can add the openSUSE repo file to /etc/zypp/repos.d/.
Я регулярно призываю людей использовать Linux, и когда я даю им повод переключиться, я всегда упоминаю, что они могут использовать Windows и Linux вместе, если они пока «боятся Linux».
Один из способов использовать две системы вместе — это двойная загрузка Windows и Linux. Этот способ хорошо работает, за исключением того, что нужно переключаться между операционными системами путем перезагрузки системы, что несколько неудобно.
Если, как и я, вы редко пользуетесь Windows и не хотите беспокоить себя двойной загрузкой Ubuntu и Windows 10, я предлагаю установить Windows 10 внутри Linux, создав виртуальную машину. В одном из предыдущих учебников я показывал вам, как устанавливать VMWare на Ubuntu, но в данном случае мы будем использовать Oracle VirtualBox для создания виртуальных машин и установки на них Windows 10.
Что такое VirtualBox и каковы его преимущества?
VirtualBox — это программное обеспечение с открытым исходным кодом от Oracle для создания виртуальных машин. С помощью виртуальной машины Вы можете запустить операционную систему, подобно приложению, внутри текущей операционной системы. Это как компьютер внутри компьютера.
Они называются виртуальными машинами, потому что в основном эмулируют другие операционные системы, но на самом деле они не взаимодействуют с компьютерной системой, как это делала бы настоящая операционная система.
Суть в том, что с программным обеспечением для виртуальных машин вы можете использовать Windows как приложение внутри Linux. В отличие от обычных приложений, она будет потреблять много оперативной памяти. Но таким образом, вы можете использовать Windows-специфическое программное обеспечение и программы внутри Linux без необходимости полной установки Windows.
Установка Windows 10 в VirtualBox в системах Ubuntu и Linux Mint
Перед установкой Windows 10 в VirtualBox посмотрим, что вам нужно:
- Интернет-соединение с хорошей скоростью или Windows 10 ISO, который вы уже скачали.
- Минимум 4 ГБ оперативной памяти. Чем больше у вас оперативной памяти, тем лучше.
- Около 20 ГБ бесплатной памяти для установки Windows 10.
После того, как вы убедились, что у вас есть все необходимые условия, давайте посмотрим, как это сделать.
Шаг 1: Загрузка Windows 10 ISO
Прежде всего, вам нужно загрузить Windows 10 ISO. Вы можете загрузить Windows 10 32-битной или 64-битной версии, в зависимости от вашей системы. Перейдите по ссылке ниже и выберите, какую версию Windows 10 вы хотите загрузить:
Скачать Windows 10 ISO
Перед загрузкой ISO вам нужно будет выбрать редакцию и язык, а затем выбрать 32-битную или 64-битную систему.
Шаг 2: установка VirtualBox на Ubuntu и Linux Mint
Установить VirtualBox на Ubuntu очень просто. Все, что вам нужно сделать, это воспользоваться командой, приведенной ниже:
sudo apt install virtualboxШаг 3: Установка Windows 10 в VirtualBox
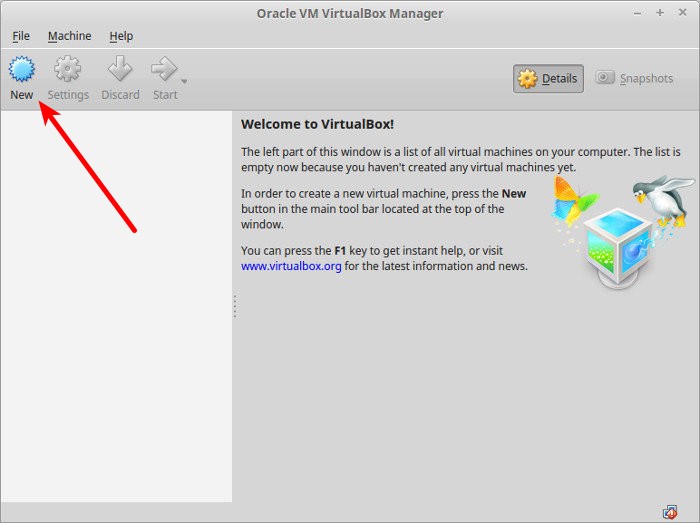
Запустите VirtualBox. Вы должны увидеть экран, как показано ниже.
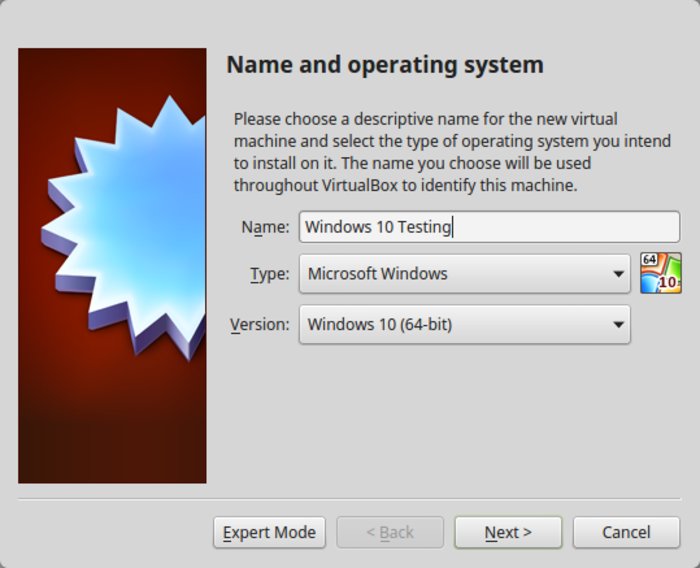
Можете назвать виртуальную машину как пожелаете. Также выберите операционную систему и версию. В данном случае я выбрал Windows 10 64-битную версию.
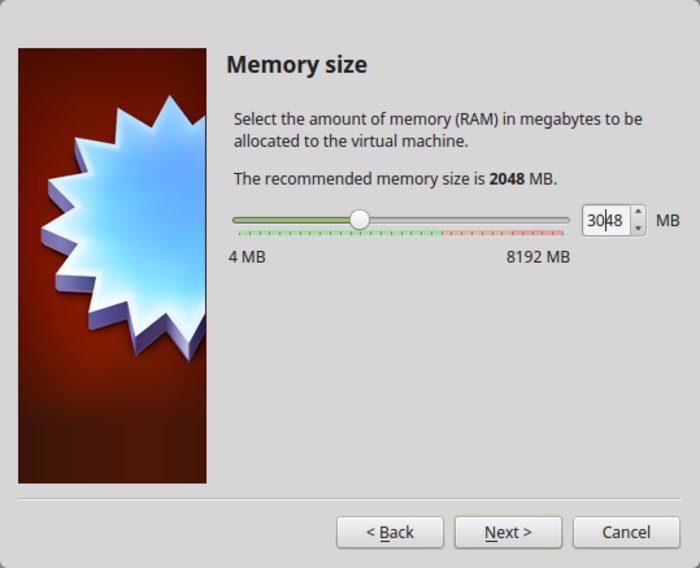
Выберите размер оперативной памяти. Рекомендуемый объем оперативной памяти для 64-битной Windows 10 — 2 ГБ, для 32-битной Windows 10 — 1 ГБ. Но я предлагаю использовать немного больше для более плавной работы.
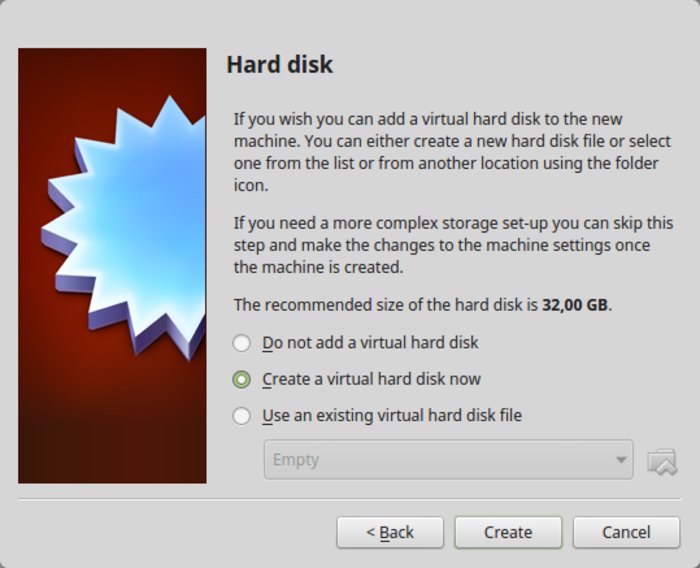
Далее размер виртуальной машины. Если у вас есть свободное место, выберите рекомендуемый размер, в противном случае сделайте его немного больше, чем рекомендуемый размер.
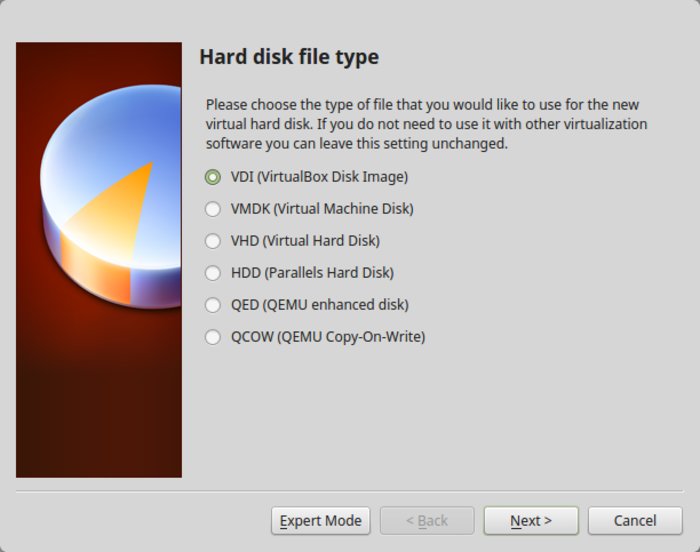
Для форматирования, выберите формат диска VDI.
Смущаетесь по поводу динамического или фиксированного размера? Если вы выберете динамический, то установленная ВМ вырастет за пределы выделенного ей размера со временем. Если вы не собираетесь широко использовать Windows, я предлагаю использовать фиксированный размер.
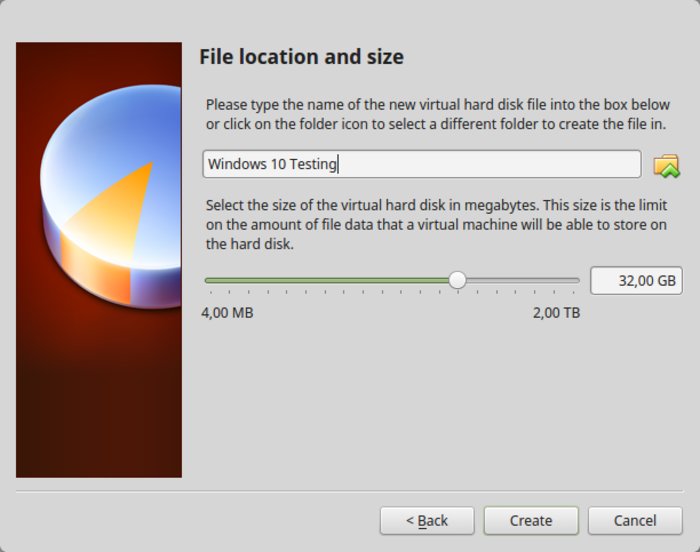
Теперь пришло время закончить с натройкой. Вы можете выбрать, где создать виртуальный диск. Местоположение по умолчанию (домашний каталог) работает нормально.
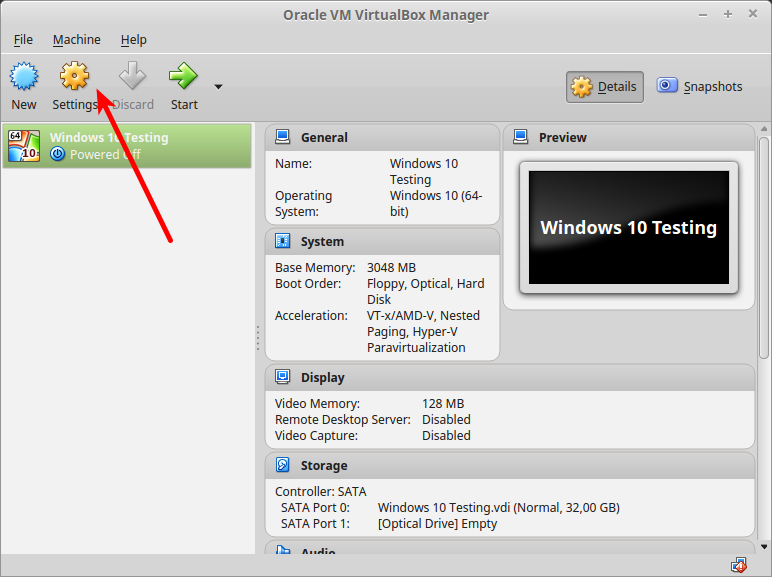
Теперь вы должны вернуться к начальному экрану. Но подождите, мы ведь еще не использовали наш Windows 10 ISO, не так ли? Пришло время использовать образ ISO. Нажмите «Настройки».
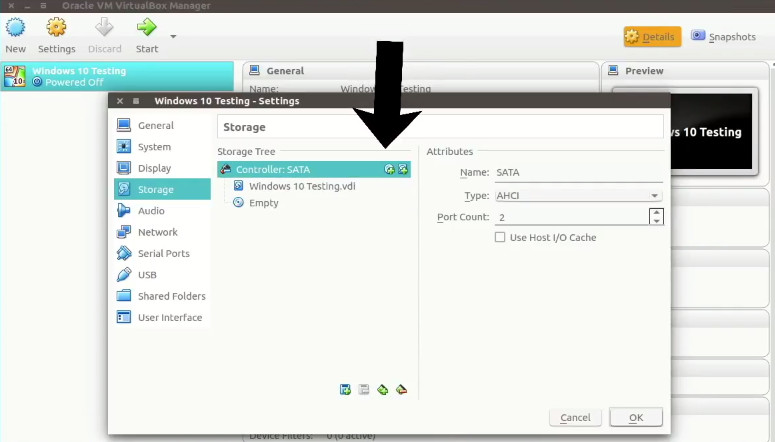
Здесь, перейдите в Storage и добавьте новый оптический привод. Я добавил этот скриншот позже, потому что некоторым читателям было трудно его найти.
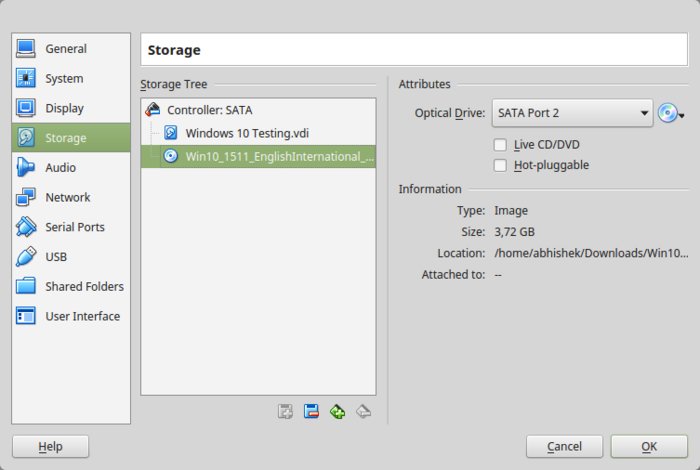
Нажмите кнопку Выбор диска и укажите на Windows 10 ISO.
Теперь вы должны увидеть Windows 10 ISO в списке в разделе Хранилище. Нажмите OK.
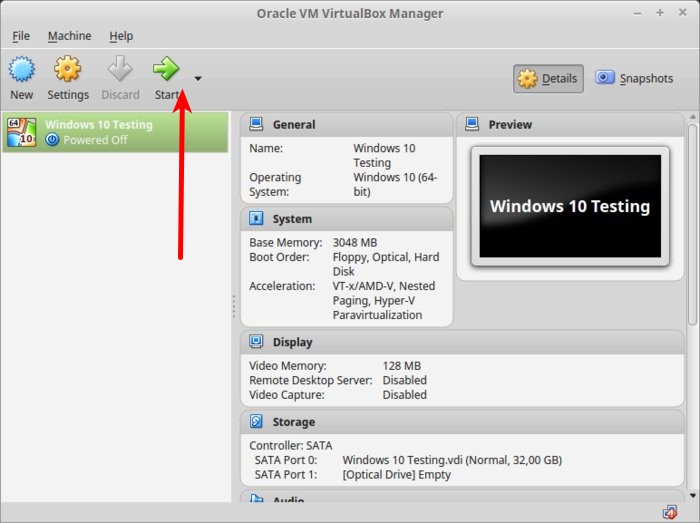
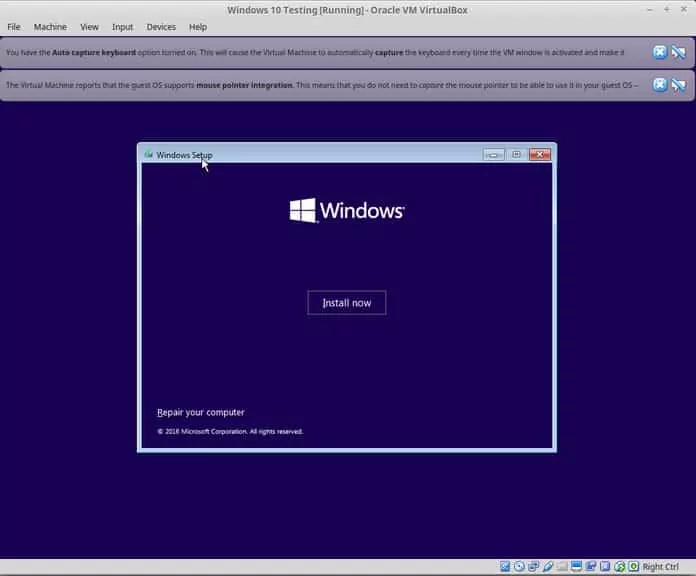
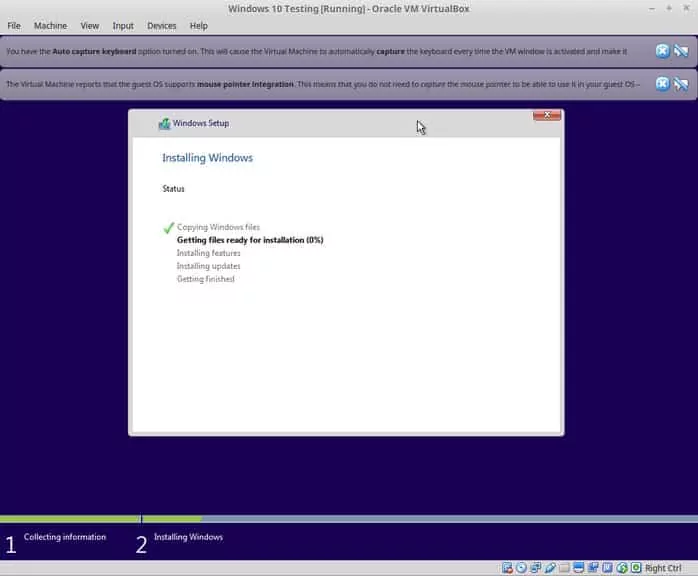
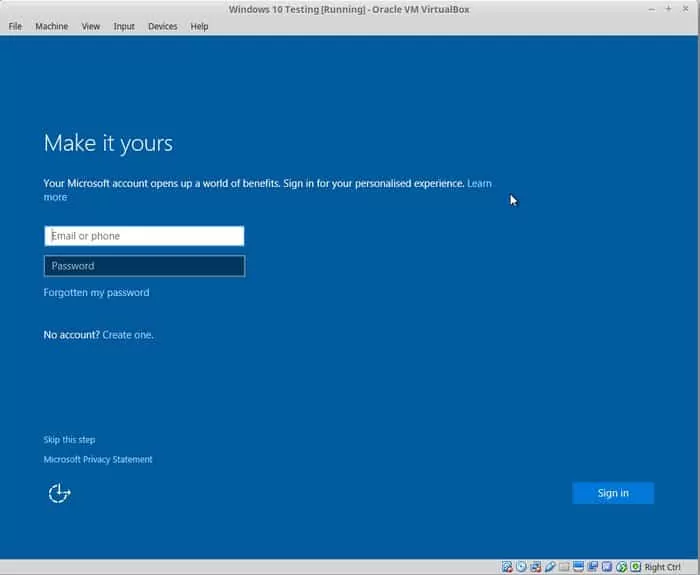
Теперь Вы должны вернуться к главному экрану Oracle VirtualBox. Теперь все готово. Следующий шаг — установка Windows 10. Нажмите на кнопку Начать с главного экрана:
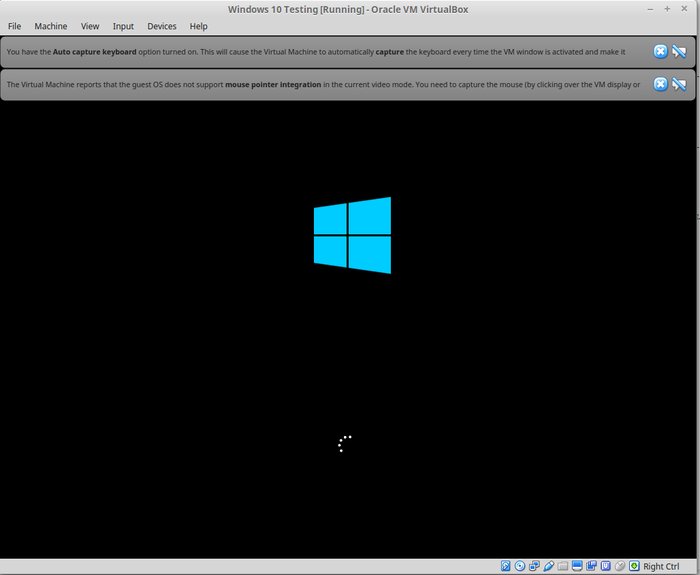
Вуаля! Теперь вы должны увидеть знакомый экран загрузки Windows:
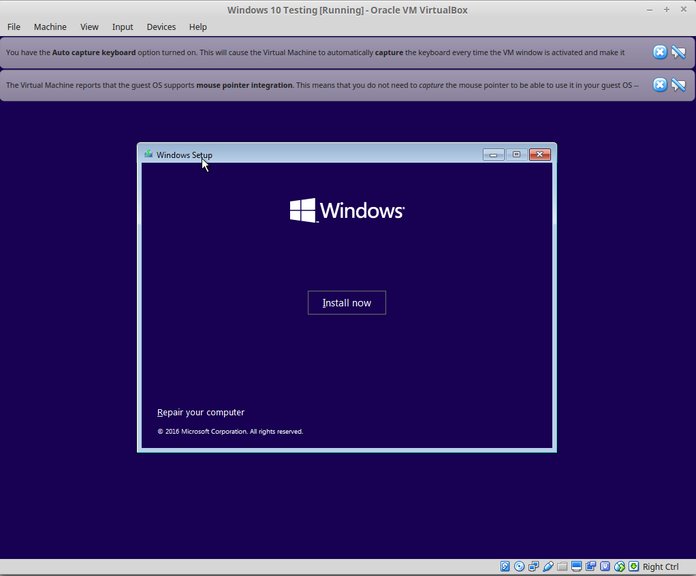
Через пару секунд вы должны увидеть опцию установки Windows:
Примечание: В этот момент, если вы видите логотип Windows на черном фоне и он никогда не начинает установку, вам, возможно, придется немного подправить настройки.
Как отмечает Ларри из редакции FOSS: «Похоже, что существует несовместимость между Virtualbox и Windows 10 1703. Виртуальная машина, которая прекрасно работает под управлением Windows 10 1607, не сможет загрузить Windows 10 1703 -UNLESS — задан следующий параметр: В разделе System — Acceleration вы должны установить параметр Paravirtualization в None и затем перезагрузить».
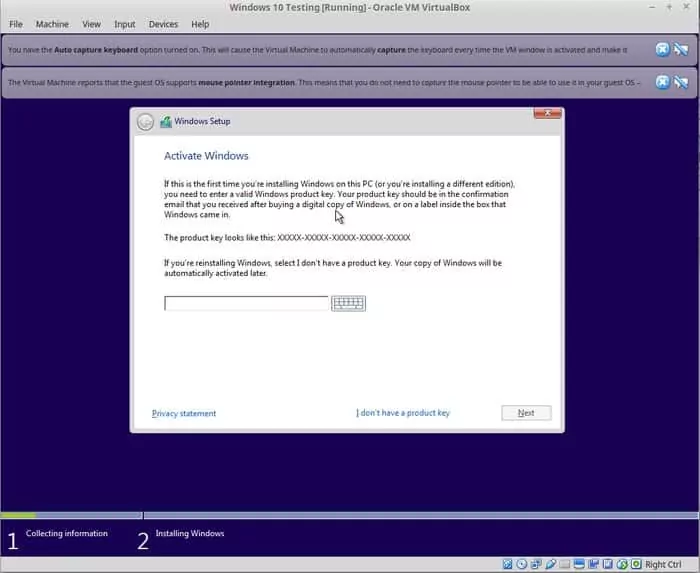
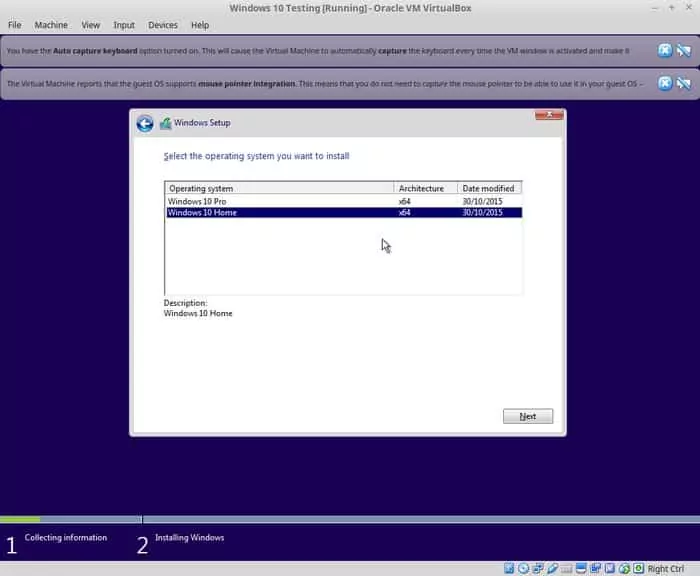
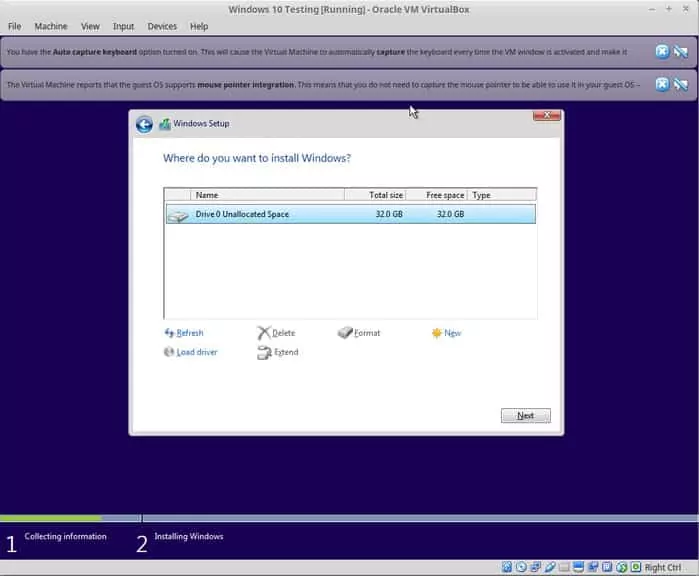
Думаю, дальше вы сможете справиться со всем, поскольку установка Windows — это всего лишь вопрос нескольких щелчков мыши. Для вашего удобства я добавил скриншоты в галерею. Нажмите на изображения, чтобы увеличить их, если вам что-то не видно.
После успешной установки Windows 10 вы обнаружите, что подключение к Интернету также используется совместно с виртуальной Windows: нет необходимости в дальнейшей настройке. Вот он — FOSS в браузере Edge в Windows 10 внутри вашей виртуальной машины.
Когда вы закончите использовать виртуальную Windows, вы можете вернуться к главному экрану и отключить ее оттуда:
Чтобы снова запустить виртуальную ОС, просто щелкните Start (зеленая стрелка) на главном экране VirtualBox еще раз. Вот так. Подробнее об использовании виртуальных операционных систем позже. Я думаю, что для начала это руководство даст вам хорошее представление о том, как установить Windows в Ubuntu или Linux Mint  .
.
Как вам?
Помогло ли это учебное пособие по установке Windows в системах Linux с помощью VirtualBox? Если у Вас есть вопросы или предложения, не стесняйтесь оставлять комментарии.
Новости Ubuntu Linux в Telegram
Телеграм канал об Ubuntu и Linux! 🐧 Здесь вы найдёте свежие новости, полезные советы, инструкции, а также обсуждения новых функций и обновлений. Подписывайтесь, чтобы изучать Linux, оптимизировать систему и делиться опытом.

I regularly encourage people to use Linux, and when I give them reasons to switch, I always mention that they can use Windows and Linux together if they’re ‘scared of Linux’.
One way to use the two systems together is to dual boot Windows and Linux. It works well, except you have to switch between the operating systems by restarting them. This is somewhat inconvenient.
If, like me, you’re an infrequent user of Windows and don’t want to trouble yourself with dual booting Ubuntu and Windows 10, I suggest installing Windows 10 inside Linux by creating a virtual machine.
In an earlier tutorial, I showed you how to install VMWare on Ubuntu, but in this one, we’ll be using Oracle VirtualBox to create virtual machines and installing Windows 10 on them.
What is VirtualBox and what are its advantages?
VirtualBox is open-source virtualization software from Oracle for creating virtual machines. With a virtual machine, you can run an operating system like an application inside your current operating system. It’s like a computer inside a computer.
These are called virtual machines because they’re basically emulating other operating systems, but they’re not really interacting with the computer system like a true operating system would.
The bottom line is that with virtual machine software, you can use Windows like an application inside Linux. Unlike regular applications, it will consume lots of RAM. But this way, you can use Windows-specific software and programs inside Linux without needing to install Windows fully.
Install Windows 10 in VirtualBox on Ubuntu and Linux Mint
Before installing Windows 10 in VirtualBox, let’s see what you need first:
- An internet connection with good speed, or a Windows 10 ISO that you’ve already downloaded.
- At least 4 GB of RAM. The more RAM you’ve got, the better.
- Around 20 GB of free storage for installing Windows 10.
Once you’ve made sure you have the prerequisites, let’s see how to do it. If you prefer, you can watch this tutorial as a video. Do subscribe to our YouTube channel for more Linux tutorials:
Step 1: Download Windows 10 ISO
First and foremost, you need to download a Windows 10 ISO. You can download Windows 10 32-bit or 64-bit, depending on your system. Go to the link below and choose which version of Windows 10 you’d like to download:
You’ll have to choose the edition and language and then pick between a 32-bit or 64-bit system before you download the ISO.
Step 2: Install VirtualBox on Ubuntu and Linux Mint
It’s very easy to install VirtualBox on Ubuntu. All you need to do is to use the command below:
sudo apt install virtualboxStep 3: Install Windows 10 in VirtualBox
Start VirtualBox. You should see a screen like the one below.
Name the VM anything you like. Also select the operating system and version. In this case I’ve chosen Windows 10 and 64-bit.
Choose the RAM size. The recommended RAM size for 64-bit Windows 10 is 2 GB, while for 32-bit Windows 10 it’s 1 GB. But I suggest you have a little more than that for a smoother experience.
Next is the size for the virtual machine. If you’re crunched on space choose the recommended size, otherwise make it a little more than the recommended size.
For the format, go ahead with the VDI format.
Confused about the dynamic or fixed size? If you choose dynamic, the installed VM will grow beyond its allocated size later. If you won’t use Windows extensively, I suggest you go with the fixed size.

Now it’s time to finalize the installation size. You can choose where to create the virtual disk. The default location (Home directory) works fine.
You should now be back at the start screen. But wait, we haven’t used our Windows 10 ISO yet, have we? Now’s the time to actually use the ISO. Click on Settings.
In here, go to Storage and add a new optical drive. I added this screenshot later because a few readers had difficulties finding it.
Click Choose disk and point to the Windows 10 ISO.
Now you should see the Windows 10 ISO listed under Storage. Press OK.
You should now be back at the main screen of Oracle VirtualBox. Now everything is ready. The next step is to install Windows 10. Click on Start from the main screen:
Voila!! You should see the familiar Windows boot screen:
A couple of seconds later, you should see the option to install Windows:
🚧
At this point, if you see the Windows logo with a black background and it never starts to install, you may have to perform a little tweak.
As It’s FOSS reader Larry points out, “There seems to be an incompatibility between Virtualbox and Windows 10 1703. A virtual machine that runs W10 1607 fine will fail to boot W10 1703 -UNLESS- the following parameter is set: Under System – Acceleration you must set Paravirtualization to None and then reboot.”
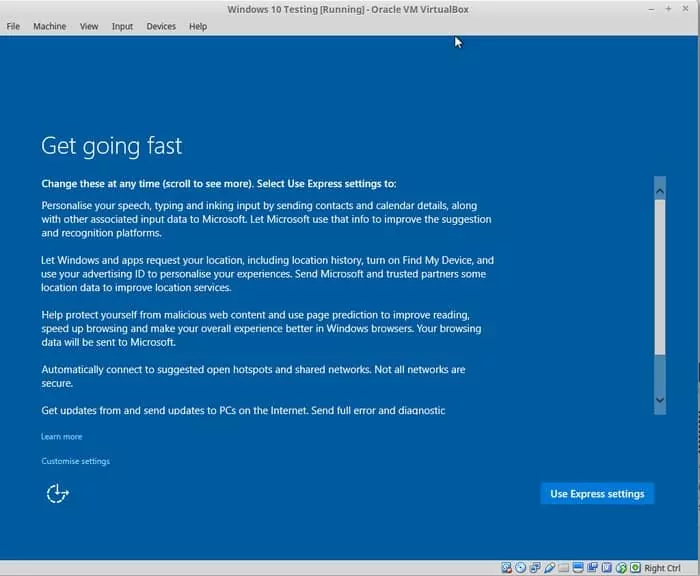
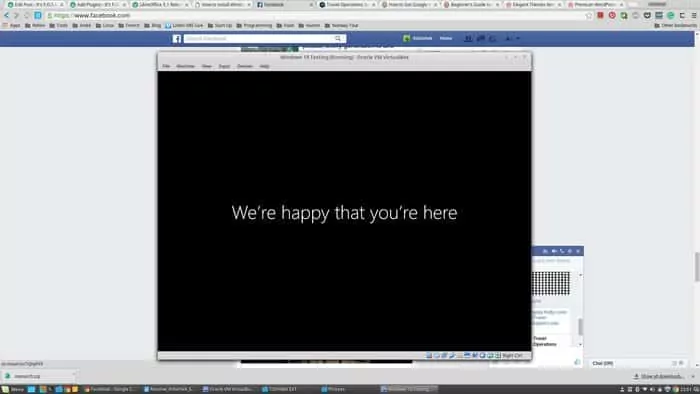
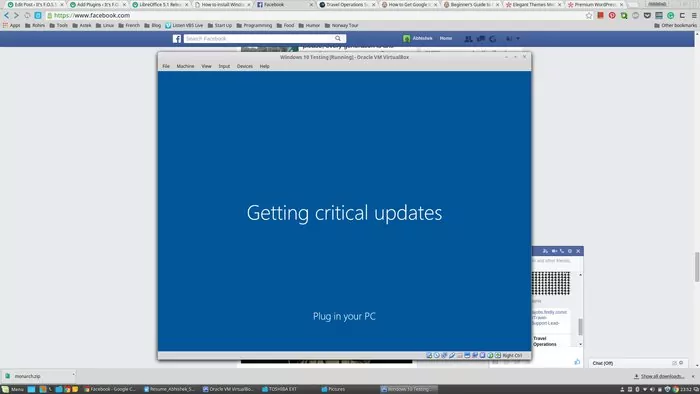
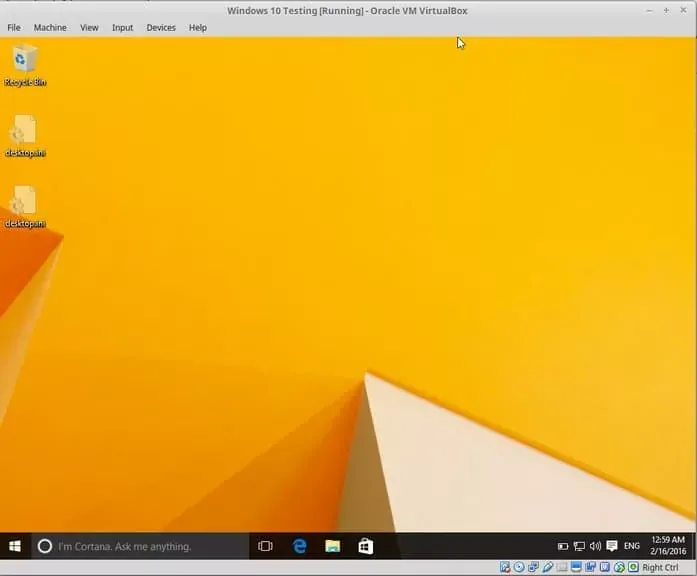
I think you can handle things from here, as installing Windows is just a matter of a few clicks. For your convenience, I’ve added the screenshots in a gallery. Click on the images to enlarge them if you need any hints.


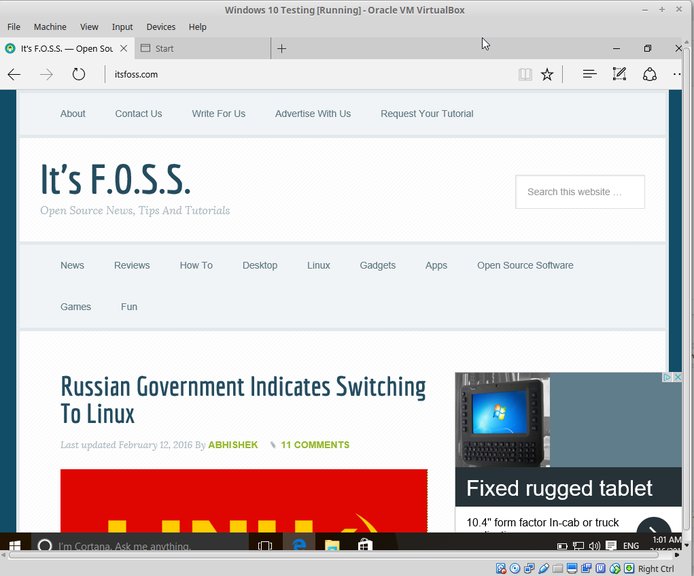
Once you’ve successfully installed Windows 10, you’ll find that the internet connection is shared with the virtual Windows as well: no need for further configuration. Here’s It’s FOSS on the Edge browser in Windows 10 inside a VM.
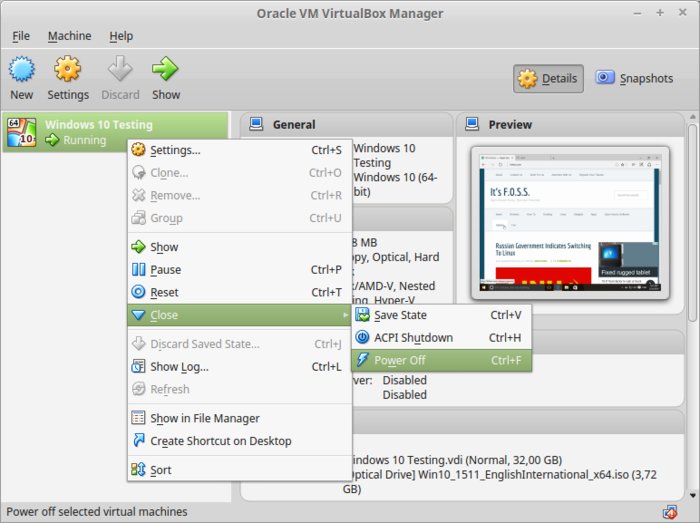
When you’re done using the virtual Windows, you can go back to the main screen and switch off the virtual machine from there:
To start the virtual OS again, just click on Start (green arrow) on the main screen of VirtualBox again. That’s it. More on using virtual operating systems later. I think this gives you a good idea of how to install Windows in Ubuntu or Linux Mint to begin with
In a related post, you can learn how to create a bootable Windows USB in Linux.
Your take?
Did this tutorial help you install Windows on Linux using VirtualBox? If you have questions or suggestions, feel free to drop a comment.
Бывают случаи, когда необходимо запустить Windows-программу, находясь в Linux. Конечно, есть WINE, но, к великому сожалению, он пока поддерживает не все приложения Windows. Например, для запуска Webmoney Keeper Classic придется-таки обзавестись Операционной Системой Windows. Но если устанавливать ее на отдельный раздел, придется перезагружаться в нее каждый раз, когда это требуется. Есть и другой способ — установить виртуальную машину, а уже в ней запускать Windows или любую другую Операционную Систему. В данной статье будет описан способ установки Windows в виртуальной машине Oracle VirtualBox (бывший Sun VirtualBox).
Итак, начнем!
Установим VirtualBox:
sudo apt-get install virtualboxМожно также скачать последнюю версию VirtualBox отсюда, потому как в репозиториях обычно находится не самая свежая версия. Скачали? Устанавливаем.
Теперь запускаем установленный VirtualBox из списка программ, в появившемся окне программы нажимаем кнопку «Создать». Выбираем Операционную Систему и ее версию, выделяем необходимое количество ОЗУ (Оперативной Памяти) и места на диске. После создания новой виртуальной машины заходим в ее «Свойства», на вкладке «Дисплей» указываем необходимое количество Видео памяти (можно указать максимально возможное), на вкладке «Носители» выбираем пустой IDE-контроллер, то есть CD-ROM, и справа нажимаем на маленкий значок «Открыть менеджер виртуальных носителей», далее жмем «Добавить» и выбираем iso-образ с Windows. Сохраняем настройки нажатием на кнопку «OK» и стартуем виртуальную машину нажатием на кнопку «Старт».
Далее выполняется обычная установка Windows. Для захвата указателя мыши в окно виртуальной машины придется воспользоваться нажатием правого CTRL (по умолчанию), после установки системы зайдите в меню «Устройства» и выберите пункт «Установить дополнения гостевой ОС…», после этого указатель мыши будет захватываться автоматически, и разрешение экрана будет автоматически подгоняться под разрешение монитора.
Вот так выглядит установленная в виртуальной машине Oracle VirualBox Операционная Система Windows XP:
Если у вас остались какие-либо вопросы по данной теме, смело задавайте их в комментариях 
I use VirtualBox frequently to create virtual machines for testing new versions of Fedora, new application programs, and lots of administrative tools like Ansible. I have even used VirtualBox to test the creation of a Windows guest host.
Never have I ever used Windows as my primary operating system on any of my personal computers or even in a VM to perform some obscure task that cannot be done with Linux. I do, however, volunteer for an organization that uses one financial program that requires Windows. This program runs on the office manager’s computer on Windows 10 Pro, which came preinstalled.
This financial application is not special, and a better Linux program could easily replace it, but I’ve found that many accountants and treasurers are extremely reluctant to make changes, so I’ve not yet been able to convince those in our organization to migrate.
This set of circumstances, along with a recent security scare, made it highly desirable to convert the host running Windows to Fedora and to run Windows and the accounting program in a VM on that host.
It is important to understand that I have an extreme dislike for Windows for multiple reasons. The primary ones that apply to this case are that I would hate to pay for another Windows license – Windows 10 Pro costs about $200 – to install it on a new VM. Also, Windows 10 requires enough information when setting it up on a new system or after an installation to enable crackers to steal one’s identity, should the Microsoft database be breached. No one should need to provide their name, phone number, and birth date in order to register software.
Getting started
The physical computer already had a 240GB NVMe m.2 storage device installed in the only available m.2 slot on the motherboard. I decided to install a new SATA SSD in the host and use the existing SSD with Windows on it as the storage device for the Windows VM. Kingston has an excellent overview of various SSD devices, form factors, and interfaces on its web site.
That approach meant that I wouldn’t need to do a completely new installation of Windows or any of the existing application software. It also meant that the office manager who works at this computer would use Linux for all normal activities such as email, web access, document and spreadsheet creation with LibreOffice. This approach increases the host’s security profile. The only time that the Windows VM would be used is to run the accounting program.
Back it up first
Before I did anything else, I created a backup ISO image of the entire NVMe storage device. I made a partition on a 500GB external USB storage drive, created an ext4 filesystem on it, and then mounted that partition on /mnt. I used the dd command to create the image.
I installed the new 500GB SATA SSD in the host and installed the Fedora 32 Xfce spin on it from a Live USB. At the initial reboot after installation, both the Linux and Windows drives were available on the GRUB2 boot menu. At this point, the host could be dual-booted between Linux and Windows.
Looking for help in all the internet places
Now I needed some information on creating a VM that uses a physical hard drive or SSD as its storage device. I quickly discovered a lot of information about how to do this in the VirtualBox documentation and the internet in general. Although the VirtualBox documentation helped me to get started, it is not complete, leaving out some critical information. Most of the other information I found on the internet is also quite incomplete.
With some critical help from one of our Opensource.com Correspondents, Joshua Holm, I was able to break through the cruft and make this work in a repeatable procedure.
Making it work
This procedure is actually fairly simple, although one arcane hack is required to make it work. The Windows and Linux operating systems were already in place by the time I was ready for this step.
First, I installed the most recent version of VirtualBox on the Linux host. VirtualBox can be installed from many distributions’ software repositories, directly from the Oracle VirtualBox repository, or by downloading the desired package file from the VirtualBox web site and installing locally. I chose to download the AMD64 version, which is actually an installer and not a package. I use this version to circumvent a problem that is not related to this particular project.
The installation procedure always creates a vboxusers group in /etc/group. I added the users intended to run this VM to the vboxusers and disk groups in /etc/group. It is important to add the same users to the disk group because VirtualBox runs as the user who launched it and also requires direct access to the /dev/sdx device special file to work in this scenario. Adding users to the disk group provides that level of access, which they would not otherwise have.
I then created a directory to store the VMs and gave it ownership of root.vboxusers and 775 permissions. I used /vms for the directory, but it could be anything you want. By default, VirtualBox creates new virtual machines in a subdirectory of the user creating the VM. That would make it impossible to share access to the VM among multiple users without creating a massive security vulnerability. Placing the VM directory in an accessible location allows sharing the VMs.
I started the VirtualBox Manager as a non-root user. I then used the VirtualBox Preferences ==> General menu to set the Default Machine Folder to the directory /vms.
I created the VM without a virtual disk. The Type should be Windows, and the Version should be set to Windows 10 64-bit. Set a reasonable amount of RAM for the VM, but this can be changed later so long as the VM is off. On the Hard disk page of the installation, I chose the «Do not add a virtual hard disk» and clicked on Create. The new VM appeared in the VirtualBox Manager window. This procedure also created the /vms/Test1 directory.
I did this using the Advanced menu and performed all of the configurations on a single page, as seen in Figure 1. The Guided Mode obtains the same information but requires more clicks to go through a window for each configuration item. It does provide a little more in the way of help text, but I did not need that.
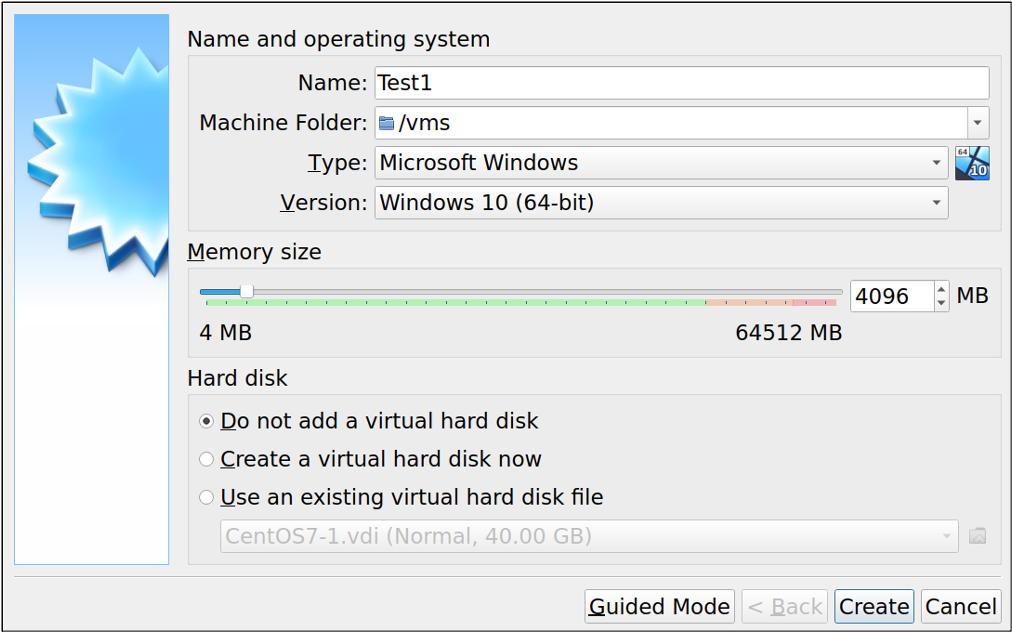
Figure 1: Create a new virtual machine but do not add a hard disk.
Then I needed to know which device was assigned by Linux to the raw Windows drive. As root in a terminal session, use the lshw command to discover the device assignment for the Windows disk. In this case, the device that represents the entire storage device is /dev/sdb.
# lshw -short -class disk,volume
H/W path           Device      Class          Description
=========================================================
/0/100/17/0        /dev/sda    disk           500GB CT500MX500SSD1
/0/100/17/0/1                  volume         2047MiB Windows FAT volume
/0/100/17/0/2      /dev/sda2   volume         4GiB EXT4 volume
/0/100/17/0/3      /dev/sda3   volume         459GiB LVM Physical Volume
/0/100/17/1        /dev/cdrom  disk           DVD+-RW DU-8A5LH
/0/100/17/0.0.0    /dev/sdb    disk           256GB TOSHIBA KSG60ZMV
/0/100/17/0.0.0/1  /dev/sdb1   volume         649MiB Windows FAT volume
/0/100/17/0.0.0/2  /dev/sdb2   volume         127MiB reserved partition
/0/100/17/0.0.0/3  /dev/sdb3   volume         236GiB Windows NTFS volume
/0/100/17/0.0.0/4  /dev/sdb4   volume         989MiB Windows NTFS volume
[root@office1 etc]#
Instead of a virtual storage device located in the /vms/Test1 directory, VirtualBox needs to have a way to identify the physical hard drive from which it is to boot. This identification is accomplished by creating a *.vmdk file, which points to the raw physical disk that will be used as the storage device for the VM. As a non-root user, I created a vmdk file that points to the entire Windows device, /dev/sdb.
$ VBoxManage internalcommands createrawvmdk -filename /vms/Test1/Test1.vmdk -rawdisk /dev/sdb
RAW host disk access VMDK file /vms/Test1/Test1.vmdk created successfully.
I then used the VirtualBox Manager File ==> Virtual Media Manager dialog to add the vmdk disk to the available hard disks. I clicked on Add, and the default /vms location was displayed in the file management dialog. I selected the Test1 directory and then the Test1.vmdk file. I then clicked Open, and the Test1.vmdk file was displayed in the list of available hard drives. I selected it and clicked on Close.
The next step was to add this vmdk disk to the storage devices for our VM. In the settings menu for the Test1 VM, I selected Storage and clicked on the icon to add a hard disk. This opened a dialog that showed the Test1vmdk virtual disk file in a list entitled Not attached. I selected this file and clicked on the Choose button. This device is now displayed in the list of storage devices connected to the Test1 VM. The only other storage device on this VM is an empty CD/DVD-ROM drive.
I clicked on OK to complete the addition of this device to the VM.
There was one more item to configure before the new VM would work. Using the VirtualBox Manager Settings dialog for the Test1 VM, I navigated to the System ==> Motherboard page and placed a check in the box for Enable EFI. If you do not do this, VirtualBox will generate an error stating that it cannot find a bootable medium when you attempt to boot this VM.
The virtual machine now boots from the raw Windows 10 hard drive. However, I could not log in because I did not have a regular account on this system, and I also did not have access to the password for the Windows administrator account.
Unlocking the drive
No, this section is not about breaking the encryption of the hard drive. Rather, it is about bypassing the password for one of the many Windows administrator accounts, which no one at the organization had.
Even though I could boot the Windows VM, I could not log in because I had no account on that host and asking people for their passwords is a horrible security breach. Nevertheless, I needed to log in to the VM to install the VirtualBox Guest Additions, which would provide seamless capture and release of the mouse pointer, allow me to resize the VM to be larger than 1024×768, and perform normal maintenance in the future.
This is a perfect use case for the Linux capability to change user passwords. Even though I am accessing the previous administrator’s account to start, in this case, he will no longer support this system, and I won’t be able to discern his password or the patterns he uses to generate them. I will simply clear the password for the previous sysadmin.
There is a very nice open source software tool specifically for this task. On the Linux host, I installed chntpw, which probably stands for something like, «Change NT PassWord.»
# dnf -y install chntpwI powered off the VM and then mounted the /dev/sdb3 partition on /mnt. I determined that /dev/sdb3 is the correct partition because it is the first large NTFS partition I saw in the output from the lshw command I performed previously. Be sure not to mount the partition while the VM is running; that could cause significant corruption of the data on the VM storage device. Note that the correct partition might be different on other hosts.
Navigate to the /mnt/Windows/System32/config directory. The chntpw utility program does not work if that is not the present working directory (PWD). Start the program.
# chntpw -i SAM
chntpw version 1.00 140201, (c) Petter N Hagen
Hive <SAM> name (from header): <\SystemRoot\System32\Config\SAM>
ROOT KEY at offset: 0x001020 * Subkey indexing type is: 686c <lh>
File size 131072 [20000] bytes, containing 11 pages (+ 1 headerpage)
Used for data: 367/44720 blocks/bytes, unused: 14/24560 blocks/bytes.

<>========<> chntpw Main Interactive Menu <>========<>

Loaded hives: <SAM>

  1 - Edit user data and passwords
  2 - List groups
      - - -
  9 - Registry editor, now with full write support!
  q - Quit (you will be asked if there is something to save)


What to do? [1] ->
The chntpw command uses a TUI (Text User Interface), which provides a set of menu options. When one of the primary menu items is chosen, a secondary menu is usually displayed. Following the clear menu names, I first chose menu item 1.
What to do? [1] -> 1


===== chntpw Edit User Info & Passwords ====

| RID -|---------- Username ------------| Admin? |- Lock? --|
| 01f4 | Administrator                  | ADMIN  | dis/lock |
| 03ec | john                           | ADMIN  | dis/lock |
| 01f7 | DefaultAccount                 |        | dis/lock |
| 01f5 | Guest                          |        | dis/lock |
| 01f8 | WDAGUtilityAccount             |        | dis/lock |

Please enter user number (RID) or 0 to exit: [3e9]
Next, I selected our admin account, john, by typing the RID at the prompt. This displays information about the user and offers additional menu items to manage the account.
Please enter user number (RID) or 0 to exit: [3e9] 03eb
================= USER EDIT ====================

RID     : 1003 [03eb]
Username: john
fullname:
comment :
homedir :

00000221 = Users (which has 4 members)
00000220 = Administrators (which has 5 members)

Account bits: 0x0214 =
[ ] Disabled        | [ ] Homedir req.    | [ ] Passwd not req. |
[ ] Temp. duplicate | [X] Normal account  | [ ] NMS account     |
[ ] Domain trust ac | [ ] Wks trust act.  | [ ] Srv trust act   |
[X] Pwd don't expir | [ ] Auto lockout    | [ ] (unknown 0x08)  |
[ ] (unknown 0x10)  | [ ] (unknown 0x20)  | [ ] (unknown 0x40)  |

Failed login count: 0, while max tries is: 0
Total  login count: 47

- - - - User Edit Menu:
 1 - Clear (blank) user password
 2 - Unlock and enable user account [probably locked now]
 3 - Promote user (make user an administrator)
 4 - Add user to a group
 5 - Remove user from a group
 q - Quit editing user, back to user select
Select: [q] > 2
At this point, I chose menu item 2, «Unlock and enable user account,» which deletes the password and enables me to log in without a password. By the way – this is an automatic login. I then exited the program. Be sure to unmount /mnt before proceeding.
I know, I know, but why not! I have already bypassed security on this drive and host, so it matters not one iota. At this point, I did log in to the old administrative account and created a new account for myself with a secure password. I then logged in as myself and deleted the old admin account so that no one else could use it.
There are also instructions on the internet for using the Windows Administrator account (01f4 in the list above). I could have deleted or changed the password on that account had there not been an organizational admin account in place. Note also that this procedure can be performed from a live USB running on the target host.
Reactivating Windows
So I now had the Windows SSD running as a VM on my Fedora host. However, in a frustrating turn of events, after running for a few hours, Windows displayed a warning message indicating that I needed to «Activate Windows.»
After following many more dead-end web pages, I finally gave up on trying to reactivate using an existing code because it appeared to have been somehow destroyed. Finally, when attempting to follow one of the on-line virtual support chat sessions, the virtual «Get help» application indicated that my instance of Windows 10 Pro was already activated. How can this be the case? It kept wanting me to activate it, yet when I tried, it said it was already activated.
Or not
By the time I had spent several hours over three days doing research and experimentation, I decided to go back to booting the original SSD into Windows and come back to this at a later date. But then Windows – even when booted from the original storage device – demanded to be reactivated.
Searching the Microsoft support site was unhelpful. After having to fuss with the same automated support as before, I called the phone number provided only to be told by an automated response system that all support for Windows 10 Pro was only provided by internet. By now, I was nearly a day late in getting the computer running and installed back at the office.
Back to the future
I finally sucked it up, purchased a copy of Windows 10 Home – for about $120 – and created a VM with a virtual storage device on which to install it.
I copied a large number of document and spreadsheet files to the office manager’s home directory. I reinstalled the one Windows program we need and verified with the office manager that it worked and the data was all there.
Final thoughts
So my objective was met, literally a day late and about $120 short, but using a more standard approach. I am still making a few adjustments to permissions and restoring the Thunderbird address book; I have some CSV backups to work from, but the *.mab files contain very little information on the Windows drive. I even used the Linux find command to locate all the ones on the original storage device.
I went down a number of rabbit holes and had to extract myself and start over each time. I ran into problems that were not directly related to this project, but that affected my work on it. Those problems included interesting things like mounting the Windows partition on /mnt on my Linux box and getting a message that the partition had been improperly closed by Windows (yes – on my Linux host) and that it had fixed the inconsistency. Not even Windows could do that after multiple reboots through its so-called «recovery» mode.
Perhaps you noticed some clues in the output data from the chntpw utility. I cut out some of the other user accounts that were displayed on my host for security reasons, but I saw from that information that all of the users were admins. Needless to say, I changed that. I am still surprised by the poor administrative practices I encounter, but I guess I should not be.
In the end, I was forced to purchase a license, but one that was at least a bit less expensive than the original. One thing I know is that the Linux piece of this worked perfectly once I had found all the necessary information. The issue was dealing with Windows activation. Some of you may have been successful at getting Windows reactivated. If so, I would still like to know how you did it, so please add your experience to the comments.
This is yet another reason I dislike Windows and only ever use Linux on my own systems. It is also one of the reasons I am converting all of the organization’s computers to Linux. It just takes time and convincing. We only have this one accounting program left, and I need to work with the treasurer to find one that works for her. I understand this – I like my own tools, and I need them to work in a way that is best for me.