
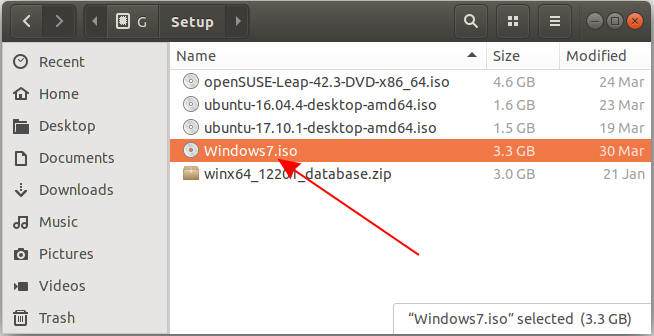
1. Download Windows 7 Iso
First of all, you need to download a Windows 7 Installer with Iso, and Bootable formats. If you have a copyright CD Key, you can download directly from a website of Microsoft:
- https://www.microsoft.com/en-us/software-download/windows7
If you have no copyright CD Key, let’s seek a site to be able to download a Windows7 Iso installer, for instance, the following website:
OK, I have a Windows 7 installer with Iso format here:
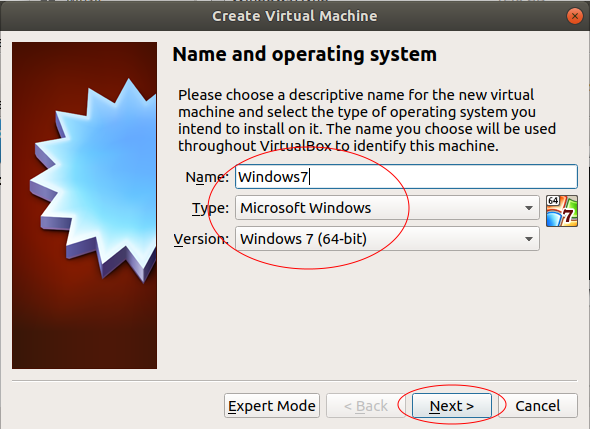
2. Declare Windows 7 virtual machine
First, you need to open the VirtualBox, select New to create a new virtual machine.

Enter the name of virtual machine, herein called «Windows7» by me
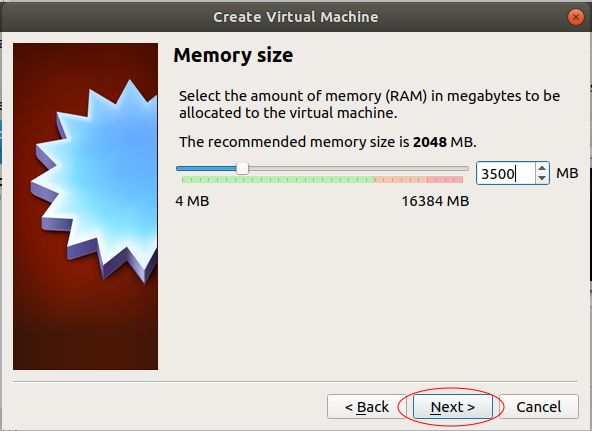
Choose the number of RAMs to be provided to the virtual machine.
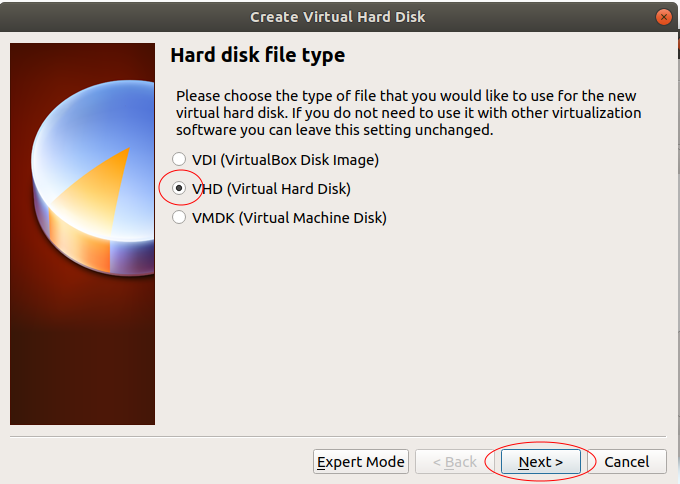
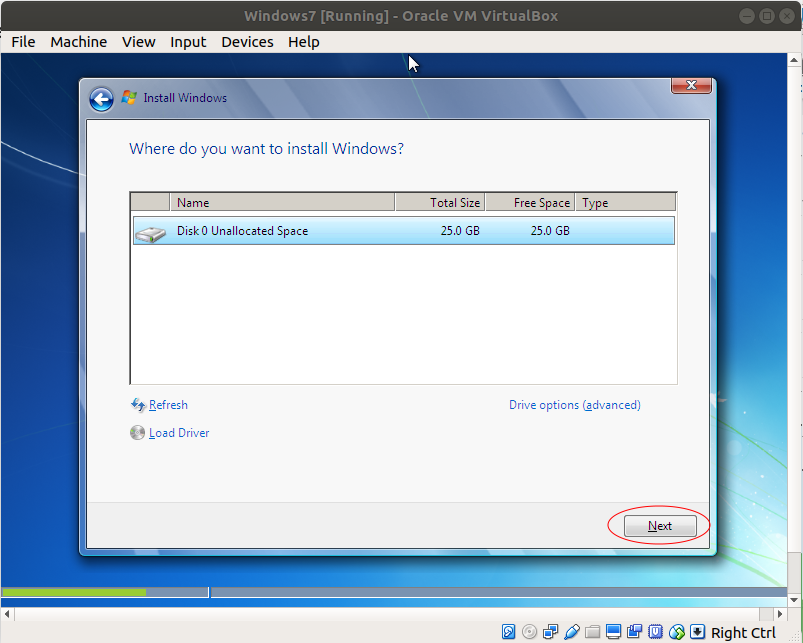
Next, create a virtual hard disk for your virtual machine.
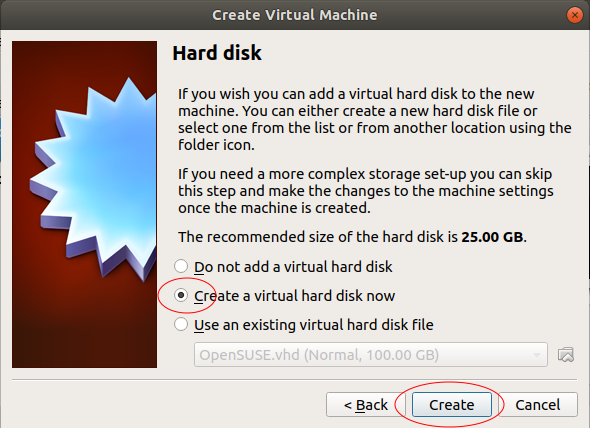
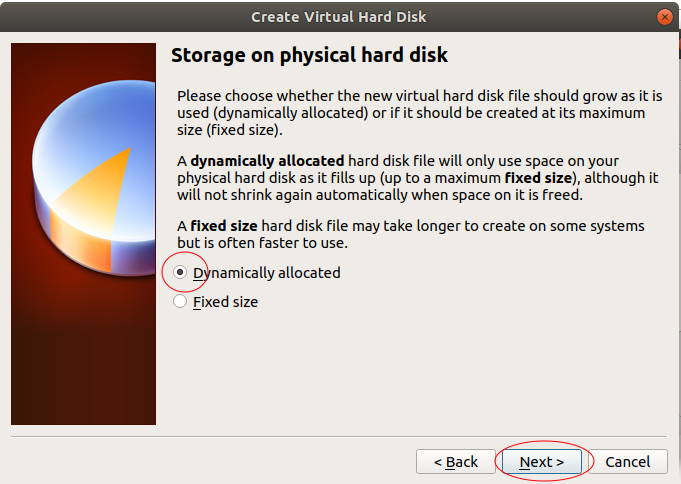
Select the position where your virtual disk file will be created and designate the size of your virtual disk.

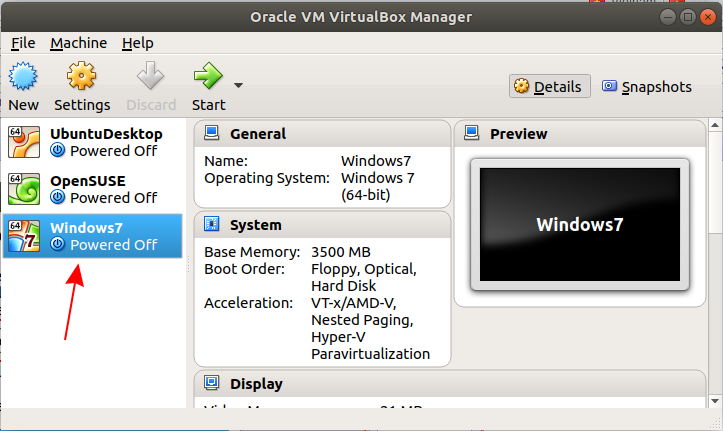
A Windows 7 virtual machine is created and you can see it on the VirtualBox Manager window. It is noted that your virtual machine just created is not installed operating system, therefore, you need to install an operating system for it.
3. Install operating system
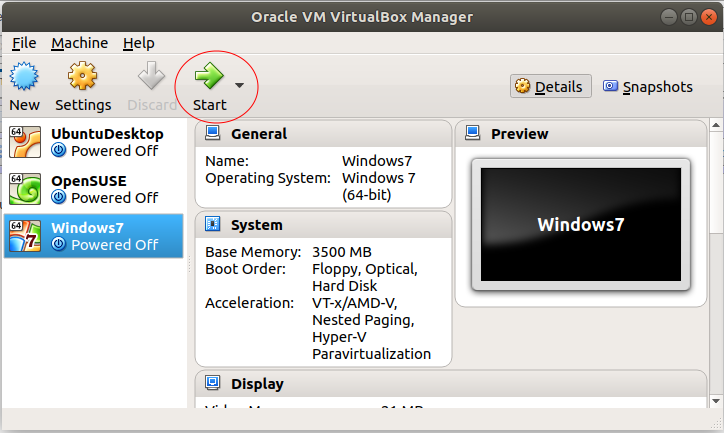
In the above step, you have just declared a virtual machine on the VirtualBox. Now, you need to install an operating system for it.
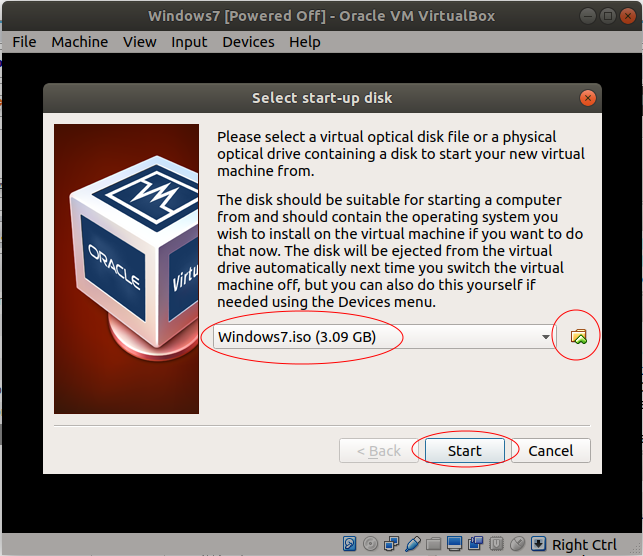
Press «Start»:
The VirtualBox will ask you where the ISO file downloaded by you in the previous step is.
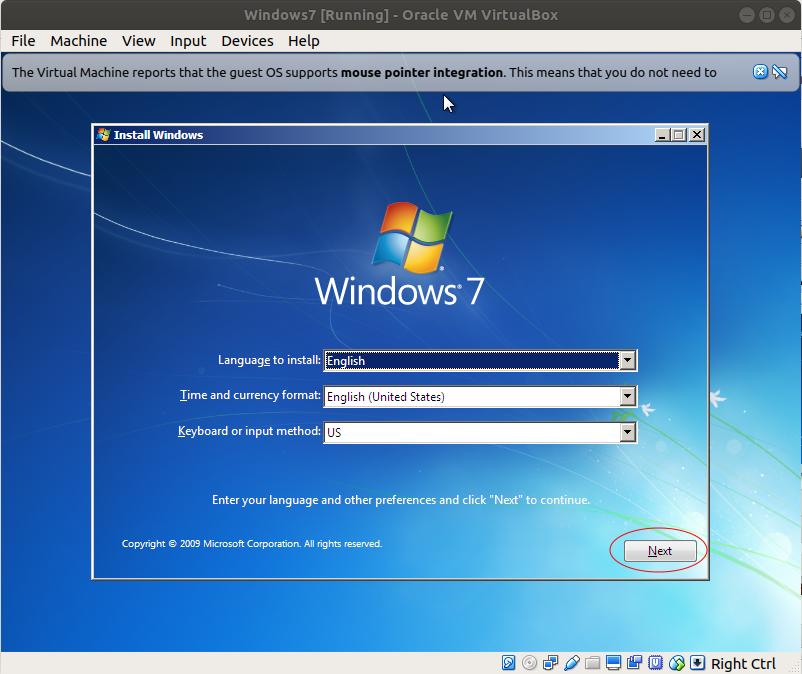
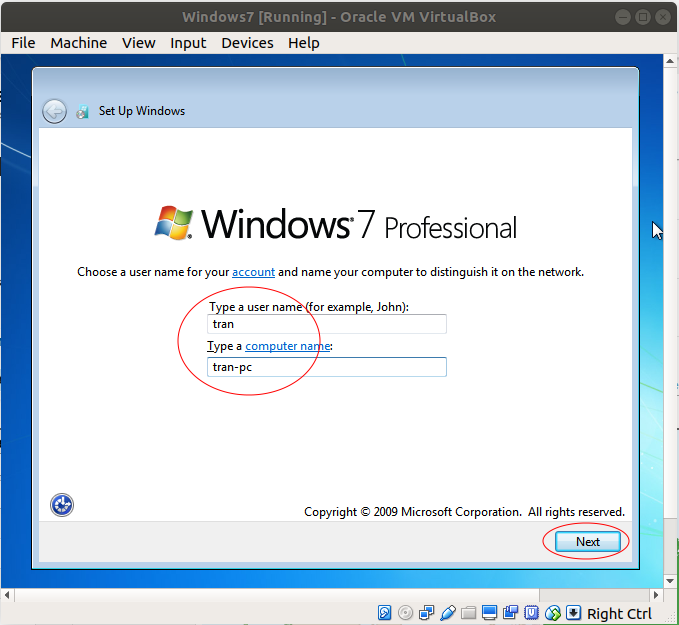
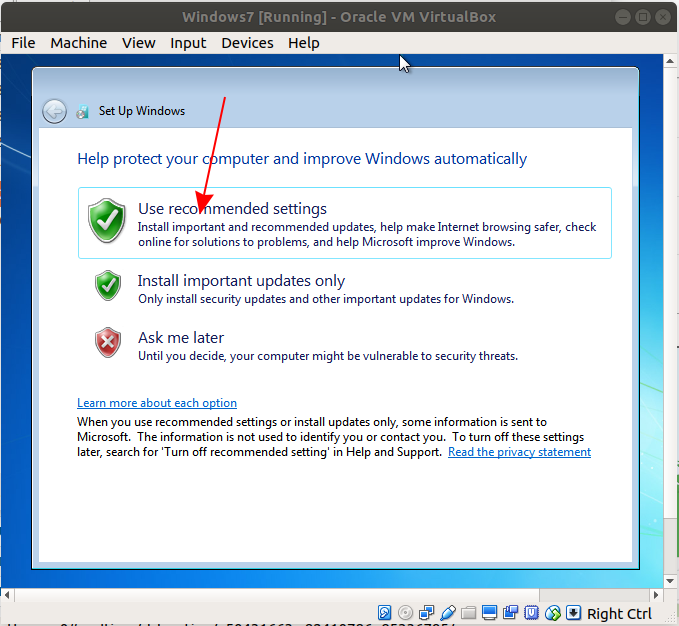
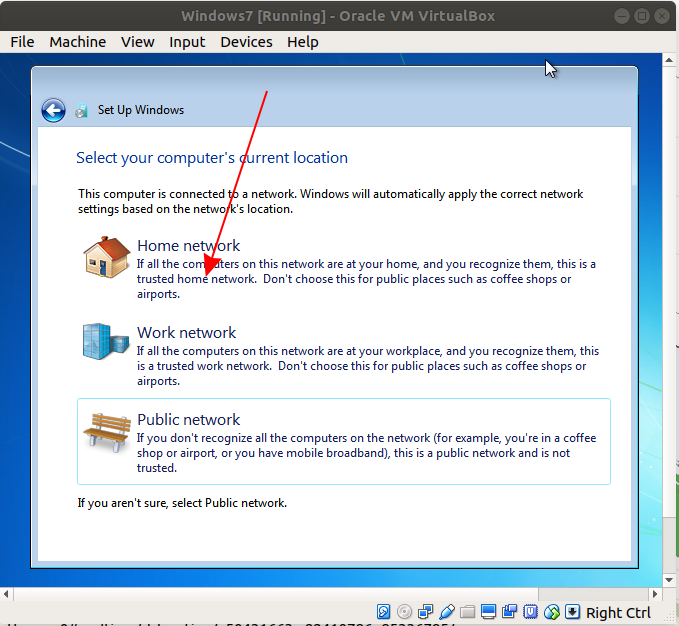
OK, at this time, the operating system starts being installed. If you are familiar with the installation of windows operating system, this is very simple.

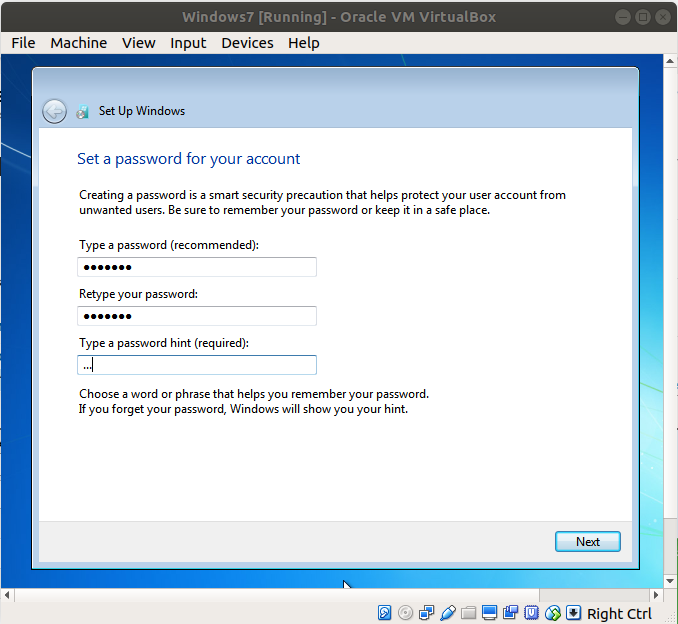
Enter password and hint. Your hinted information helps you remember the password if you forget it in the future.
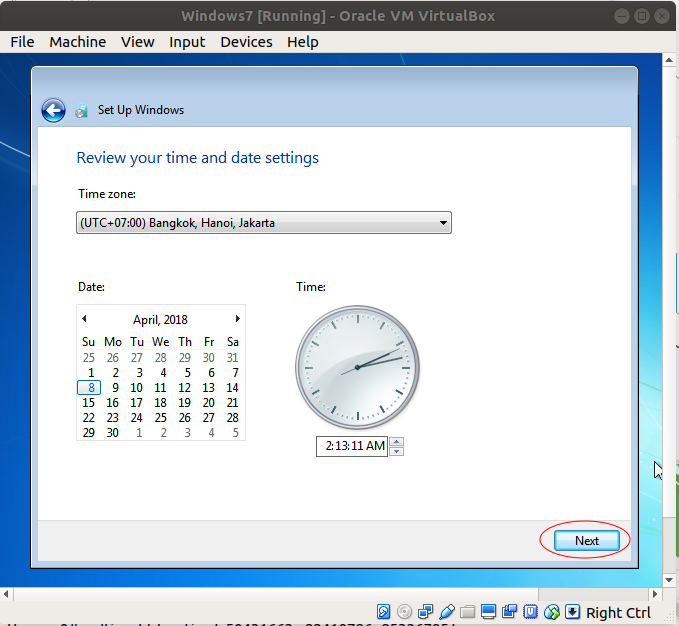
Select time and time zone:
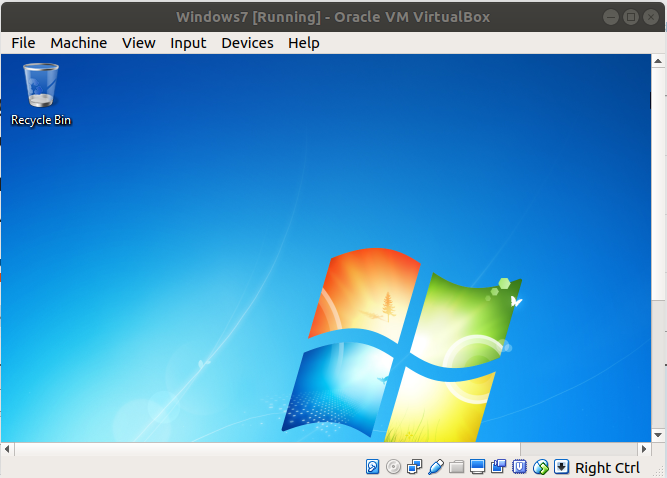
OK Hệ điều hành đã cài đặt xong!
4. Install additional tools
In the above step, you have installed a virtual machine successfully. In fact, you need copy & paste the files between the virtual machine and your computer, therefore, you need to install additional software.
Задача: Как на Hyper-V on Server 2012 R2 Std установить виртуальную машину с осью Windows 7 x64
Давненько я не работал в виртуализации, базирующейся на Windows в частности Hyper-V, все больше на VMware. В этой организации у меня план — это перенести виртуальные машины из Hyper-V в ESXi и сделать это как можно безболезненно. Сейчас я хочу вспомнить как создается виртуальная машина под Hyper-V через Hyper-V Manager (Version 6.3.9600.16384)
Шаг №1: Подключаюсь по RDP к системе, на которой поднята роль Hyper-V с правами Domain Admins
on logon srv-virtual01 (Login: aolloadm, Group: Domain Admins)
Шаг №2: Запускаю оснастку Hyper-V Manager
Win + X - Control Panel - Administrative Tools - Hyper-V Manager и вижу все виртуальные машины которые есть
Шаг №3: Создаю виртуальную машину через оснастку Hyper-V Manager
(Actions) SRV-VIRTUAL01 - New - Virtual Machine…
Do not show this page again:отмечаем галочкой
нажимаем Next
(Specify Name and Location)
Name: srv-w7x64aStore the virtual machine in a different location:отмечаюLocation: D:\Hyper-V\VM conf\
нажимаем Next
(Specify Generation)
Choose the generation of this virtual machine:выбираюGeneration 2
нажимаем Next
(Assign Memory)
Startup memory: 4096 MB
нажимаем Next
(Configure Networking)
Connection:выбираюHyper-V
нажимаем Next
(Connect Virtual Hard Disk) выбираю Create a virtual hard disk
Name: srv-w7x64a.vhdxLocation: D:\Hyper-V\VHD\Size: 50 Gb
нажимаем Next
(Installation Options) выбираю Install an operating system from a bootable image file
Image file (.iso): C:\soft\нажимаю наBrowse…и выбираюSW_DVD5_Win_Pro_7w_SP1_64BIT_Russian_-2_MLF_X17-59431.isoи нажимаюOpen
нажимаем Next
(Summary) нажимаем Finish
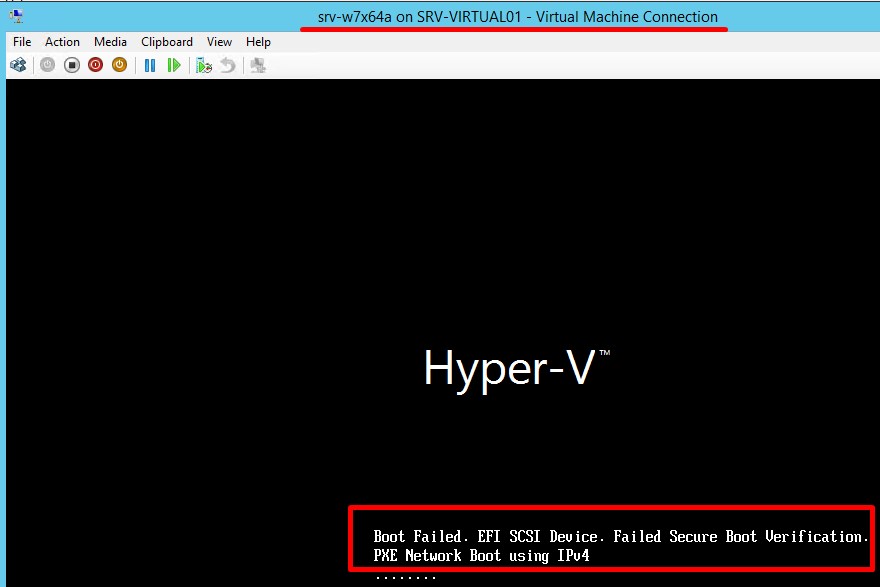
Шаг №4: Через правый клик мышью на VM выбираю Start, а потом Connect
и я получаю
анализ какую генерацию для создаваемой виртуальной машины выбирать вышел на таблицу
(https://learn.microsoft.com/ru-ru/windows-server/virtualization/hyper-v/plan/should-i-create-a-generation-1-or-2-virtual-machine-in-hyper-v#windows-guest-operating-system-support)
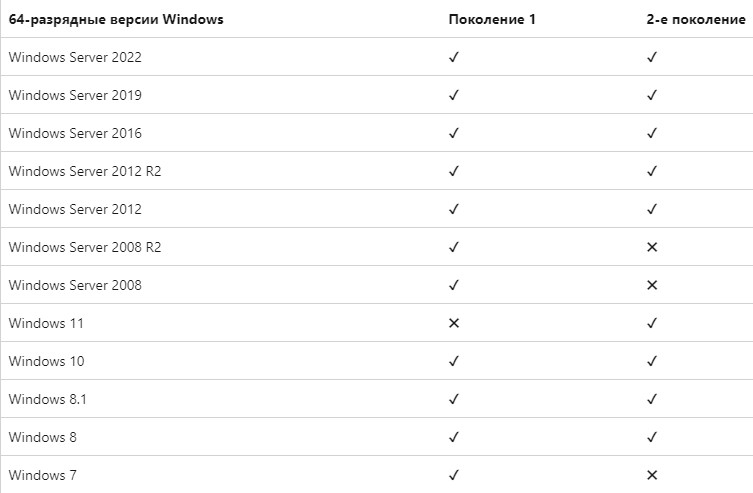
в следующей таблице показано, какие 64-разрядные версии Windows можно использовать в качестве гостевой операционной системы для виртуальных машин поколения 1 и 2.
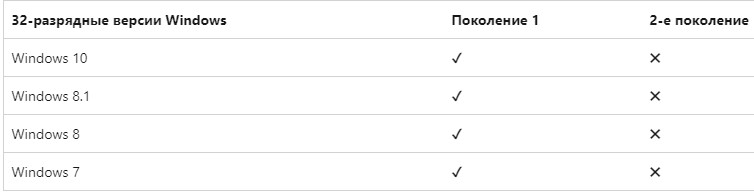
в следующей таблице показано, какие 32-разрядные версии Windows можно использовать в качестве гостевой операционной системы для виртуальных машин поколения 1 и 2.
Итого, с учетом данных выше, переделываю виртуальную машину на Generation 1, запускаю, подключаюсь и в окне наблюдаю привычный процесс инсталляции операционной системы (проделываю вручную)

Важно, что установщик видит диск

у меня наследие от предыдущего системного администратора в виде тормоза сервера (S5000VSA, RAM = 20Gb (667MHz из 8 слотов), CPU = 1 (Intel Xeon CPU E5420 @ 2.50GHz) на котором развернуто самое главное в компании: Домен контроллер, Шлюз Remote Desktop Gateway. Я хочу это вынести на мощное железо.
Итого система установлена.
Шаг №5: Устанавливаю в систему Integration Services Setup disk:
При открытой консоли виртуальной машины srv-w7x64a, нажимаю Action — и выбираю Insert Integration Services Setup Disk, открываю "Мой компьютер" — и через правый клик на носителе выбираю "Install Hyper-V Integration Services" (D:\support\x64\setup.exe), проследовав за шагами мастера получаю сообщение об установленной версии Hyper-V

Нажимаю OK, увы не все так хорошо, опять ошибка
"An error has occurred: One of the update processes returned error code -2146762487"

Увы, побороть ошибку я пока не смог, а может и не нужно.
Шаг №6: Скачиваю пакет KB3063109 для Windows 7 x64, распаковываю его внутри развернутой виртуальной машины и устанавливаю устройства указав распакованный каталог:
Win + R -> cmd.exe
bcdedit.exe /set loadoptions DDISABLE_INTEGRITY_CHECKS

bcdedit.exe /set TESTSIGNING ON

shutdown /r /t 3
и после успешно из распакованного архива установил некоторые драйвера.
И вот теперь по сути я успешно установил Windows 7 x64 как виртуальную машину на Hyper-V и могу использовать.
Пока на этом все. С уважением автор блога Олло Александр aka ekzorchik.
Item Preview

Screenshot 2023-12-26 124543.png
Screenshot 2023-12-26 205431.png
1,551
Views
2
Favorites
2
Reviews
DOWNLOAD OPTIONS
Uploaded by
Windows72010
on
SIMILAR ITEMS (based on metadata)
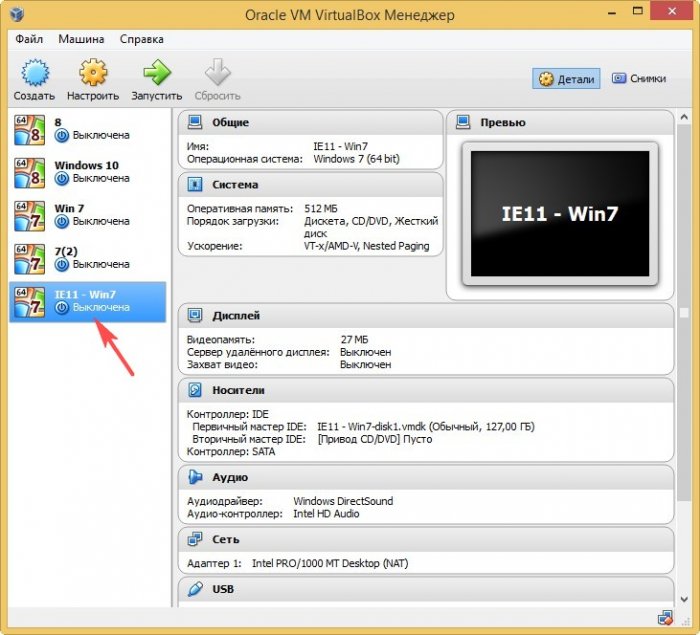
Привет друзья, буквально на днях я написал подробную статью Как скачать готовую виртуальную машину с Windows 10, судя по Вашим письмам данная тема всем показалась интересной и сегодня я её продолжу. Если Вы имели хоть раз в жизни дело с популярной виртуальной машиной VirtualBox, то знаете, что для работы сначала необходимо скачать и установить VirtualBox в операционную систему, затем настроить соответствующим образом саму виртуальную машину, потом найти в сети дистрибутив необходимой операционной системы Windows XP, Vista, 7, 8, 8.1, 10 и установить эту операционную систему на VirtualBox.
Сегодня мы сократим это приключение до минимума! Мы установим себе на компьютер VirtualBox, затем скачаем файл готовой виртуальной машины с Windows 7 и запустим его, запустится готовая виртуальная машина с уже установленной версией Windows 7.
Как скачать готовую виртуальную машину с Windows 7
Переходим по ссылке на сайт — modern.ie, на нём можно скачать готовые виртуальные машины с Windows XP, Vista, 7, 8, 8.1, 10.
на английском:
Выбираем Windows 7.

Затем выбираем версию виртуальной машины VirtualBox и жмём на кнопку Download Zip Archive (single-file)

и файл готовой виртуальной машины с Windows 7 скачивается нам на компьютер в архиве.
Извлекаем файл виртуальной машины Windows 7 из архива.
Щёлкаем на нём правой мышью и выбираем Открыть с помощью
Продолжить использовать Oracle VM VirtualBox Manager
Указываем параметры импорта будущей виртуальной машины. Можно ничего не менять. Жмём Импорт

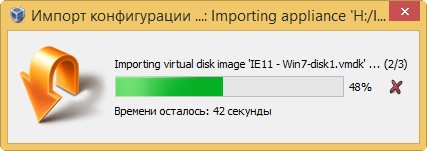
Происходит Импорт конфигурации
Проверить
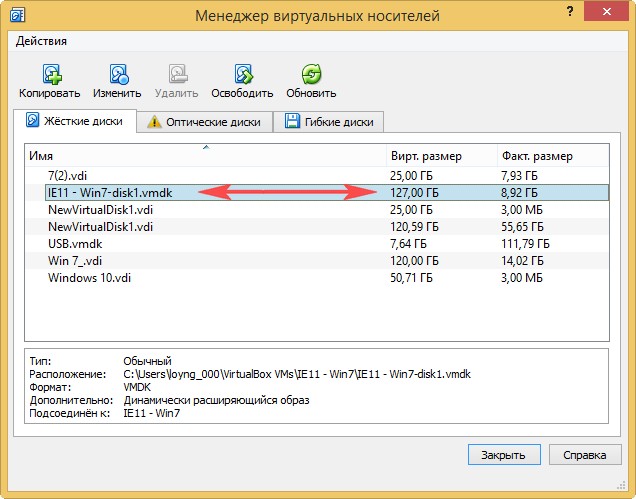
В менеджере виртуальных носителей появляется новый виртуальный жёсткий диск
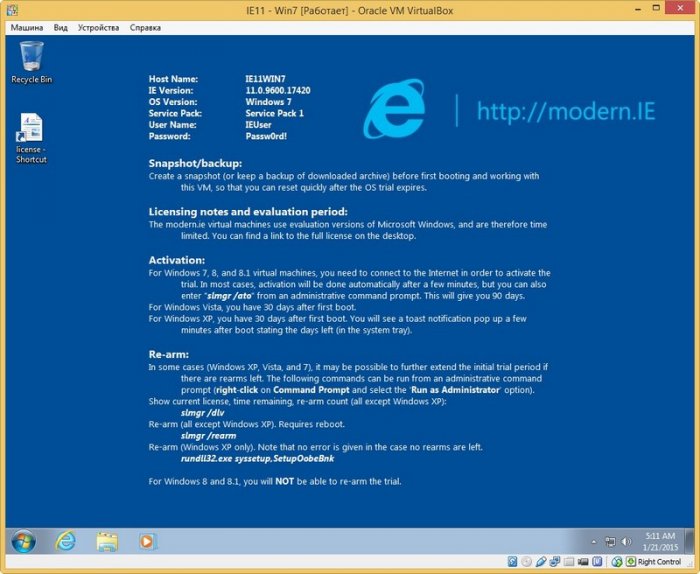
Запускаем новую виртуальную машину
Запускается Windows 7 на английском языке, который мы запросто можем сменить на русский. Во первых Вы можете русифицировать Windows 7 по этой статье, а во вторых сменить интерфейс Windows 7 можно с помощью Центра обновления Windows. Такой способ я Вам ни разу не показывал, так что смотрите, пригодится.
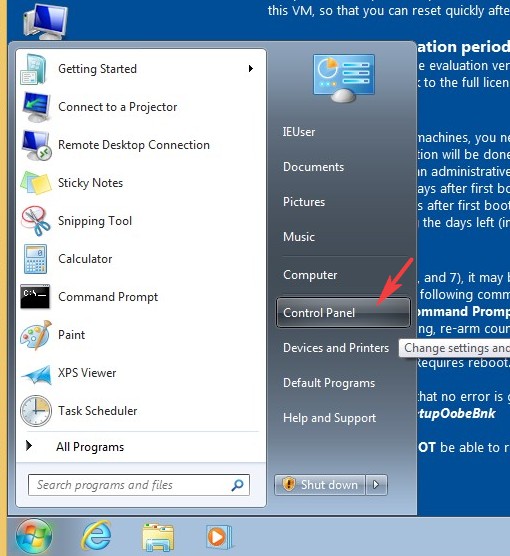
Щёлкаем на меню Пуск левой мышью и выбираем Control Panel
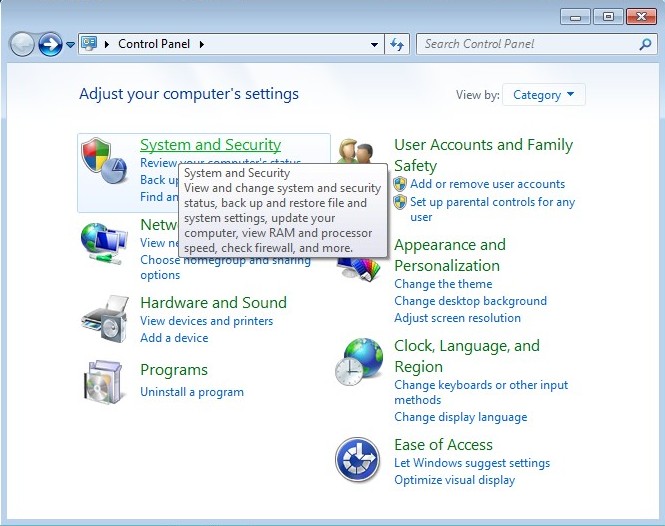
System and Security
Windows Update
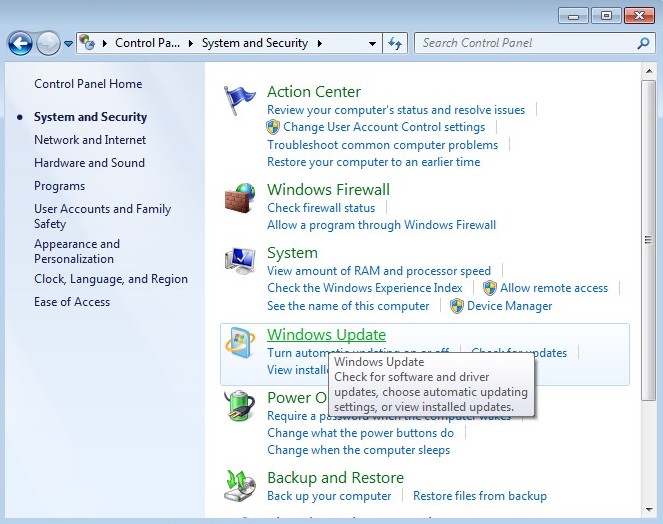
Щёлкните по надписи Необязательные обновления (Optional updates)
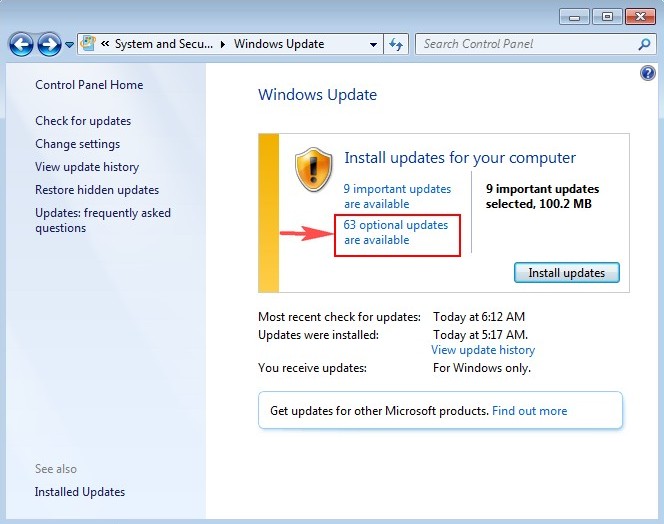
Возникает список Windows Languages Packs. Отмечаем галочкой Русский язык и жмём ОК
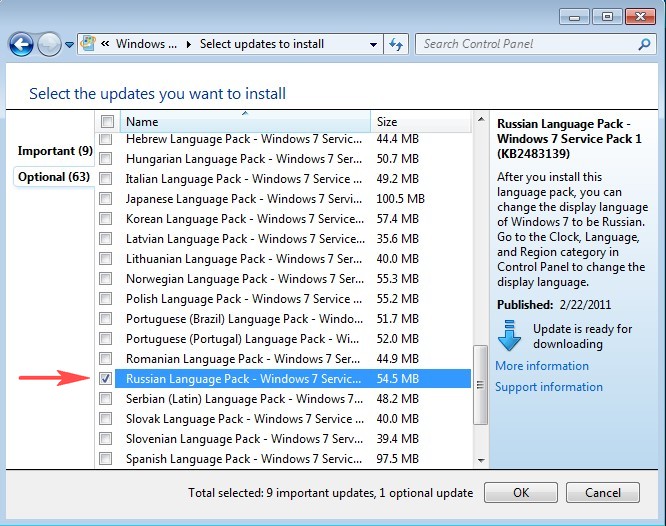
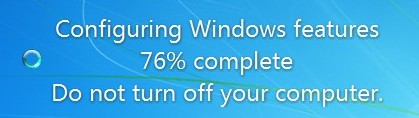
Нажмём кнопку Install updates (Начать установку) и Windows загрузит, а затем установит выбранный язык.

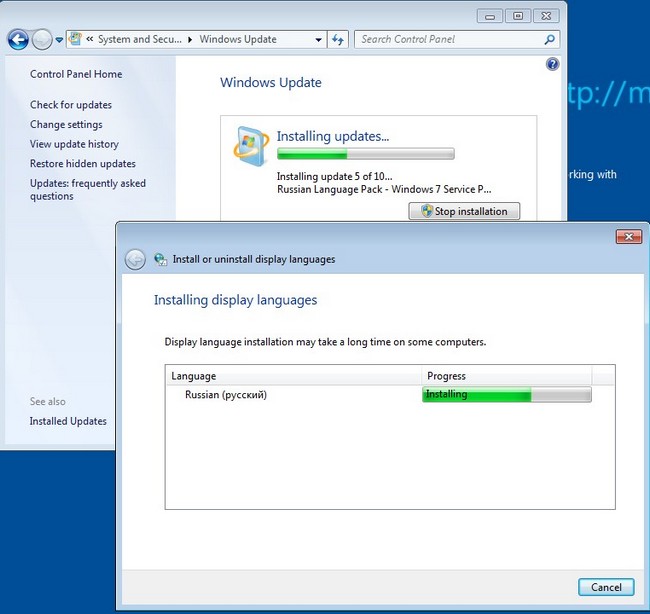
После скачивания обновлений компьютер перезагружается
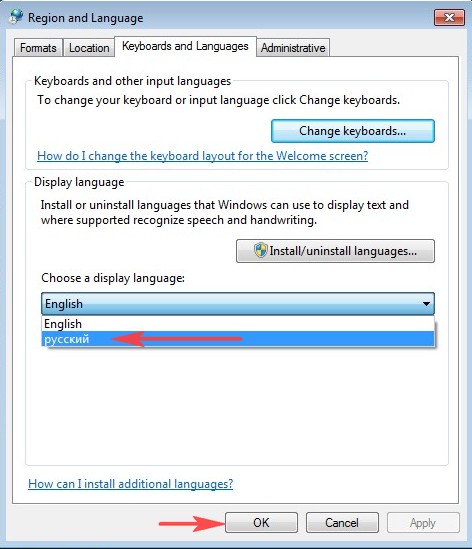
После перезагрузки опять щёлкаем левой мышью на меню Пуск и выбираем Control Panel
Change keyboards or other input methods (Смена раскладки клавиатуры или других способов ввода)
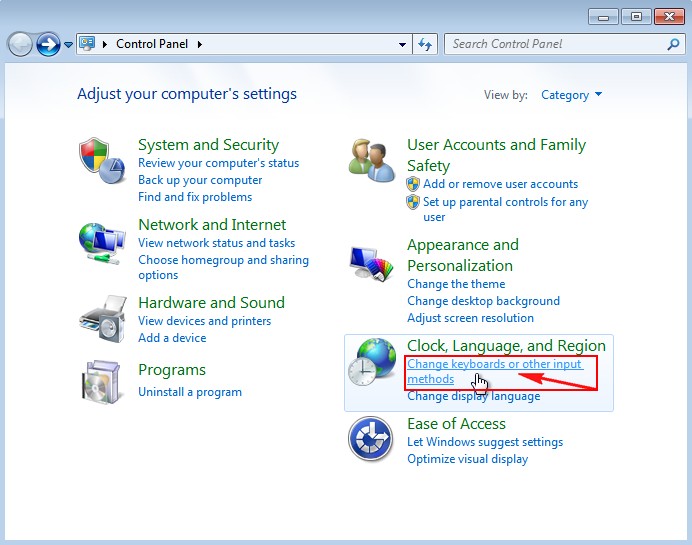
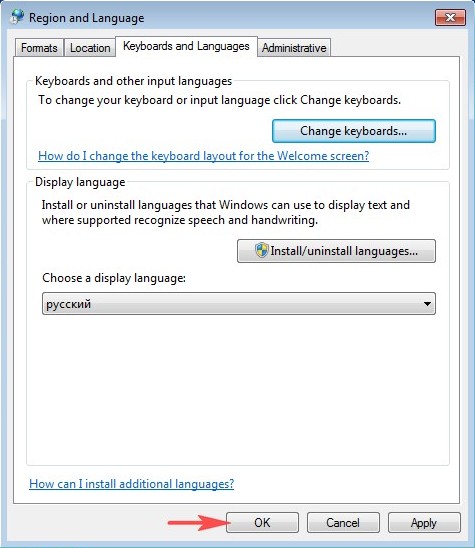
Выбираем Русский язык и жмём ОК.
Log off now
Вводим пароль Passw0rd!
0 это цифра.
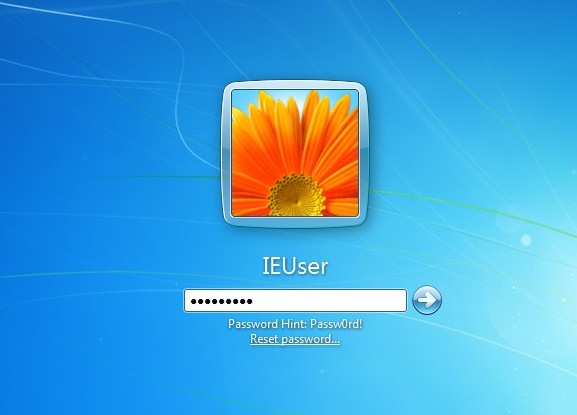
Windows 7 русифицирована.
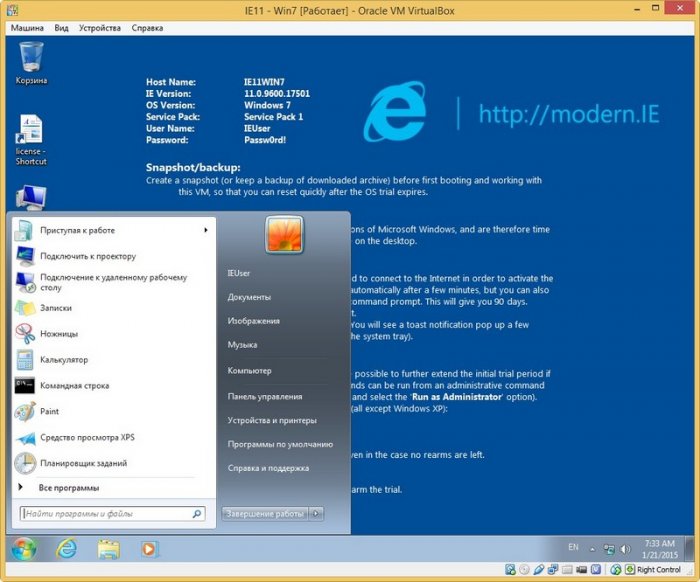
Here is the working VirtualBox image of Windows 7; you can download and use it in minutes. It will work on most of the host Operating Systems like Windows 10/11 or Linux and macOS as long as you have the Oracle VirtualBox software.
Windows 7 is an outdated OS from Microsoft now. It is highly not recommended to use in the production environment. For any specific reasons, you still need to use it as a virtual machine; the below pre-installed image will make your life easy.
About this Windows 7 Pre-Installed VirtualBox Image:
- This image has Windows 7 ultimate OS type.
- You do not need to activate the Windows from the control panel.
- VirtualBox guest additionals are installed to provide better performance and multiple screen resolutions.
- The administrator account doesn’t have a password.
How to Use Windows 7 VirtualBox Image on Windows host
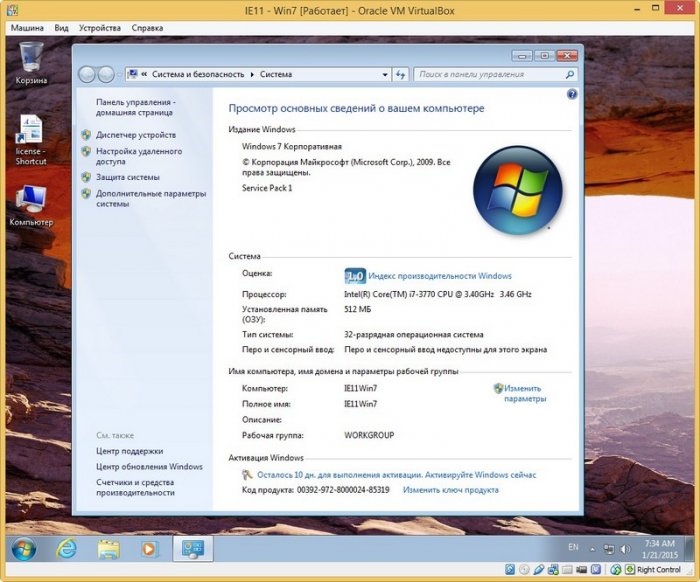
- Make sure your host computer has enough hardware resources. You should be able to allocate a minimum of 2GB RAM and 2 processor cores and have free disk space of 50GB.
- Download and install the latest Oracle VirtualBox.
- Download the pre-installed image of Windows 7 from our official link.
- You need to have the 7Zip program to extract the content. The downloaded zip file has the virtual hard disk file of the virtual machine. Since it doesn’t have the configuration file, we need to create a new VM and attach the extracted VDI file.
- Create a new virtual machine and select Windows 7 as the guest VM.
- In the disk creation screen, select the existing disk option and browse the extracted VDI file.
- Other steps are usual and straightforward in VirtualBox.
- Once you power on the VM, it should boot without any issues. The Windows 7 virtual machine will be ready in 2 minutes.

The above steps are identical if you are going to use this pre-installed image on Linux or macOS computers.
Read Also: Windows XP VirtualBox VDI Image
Important Settings/Steps
- If the virtual machine performs slow, you can increase the RAM and processor core numbers. It worked fine for me with 2GB RAM and 2 Processor cores.
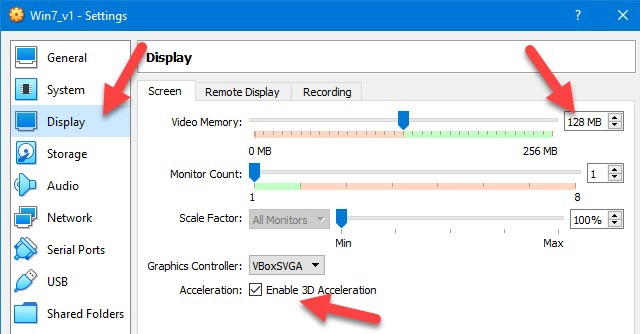
- To get the full screen and other display enhancements by VirtualBox guest additions, you need to increase the video memory (to 128MB) and enable 3D acceleration. By default, these settings are not enabled. You need to change them while the virtual machine is powered off.
- If required, you need to run the Windows update or install the specific Windows 7 updates. This image doesn’t have any Windows updates.
- Always take a snapshot before you make any significant changes.
- It is highly recommended to set the admin password.
- Since Windows 7 is officially not supported by Microsoft anymore, do not use it as your regular Operating System.
We believe this Windows 7 pre-installed VirtualBox image is helpful in some way to use for testing, development or running any legacy applications and games.
If any of the above solutions did not fix the Windows PC issues, we recommend downloading the below PC repair tool to identify and solve any PC Issues.
Dinesh is the founder of Sysprobs and written more than 400 articles. Enthusiast in Microsoft and cloud technologies with more than 15 years of IT experience.