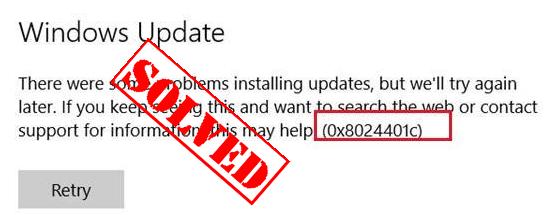
У одного из заказчиков столкнулись с проблемой обновлений новых ПК с Windows 10 1607 и Windows Server 2016 с внутреннего WSUS сервера (на Windows Server 2012 R2). Компьютеры Windows 10 появляются в консоли WSUS, но при запуске поиска обновлений, клиент очень долго пытается их найти и возвращает ошибку 0x8024401c.
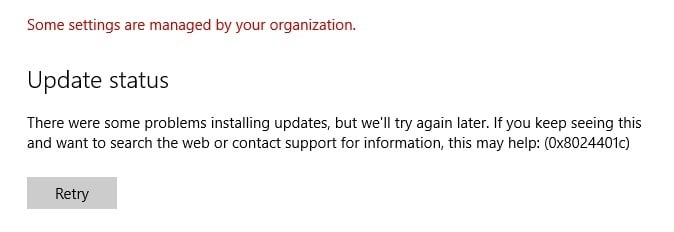
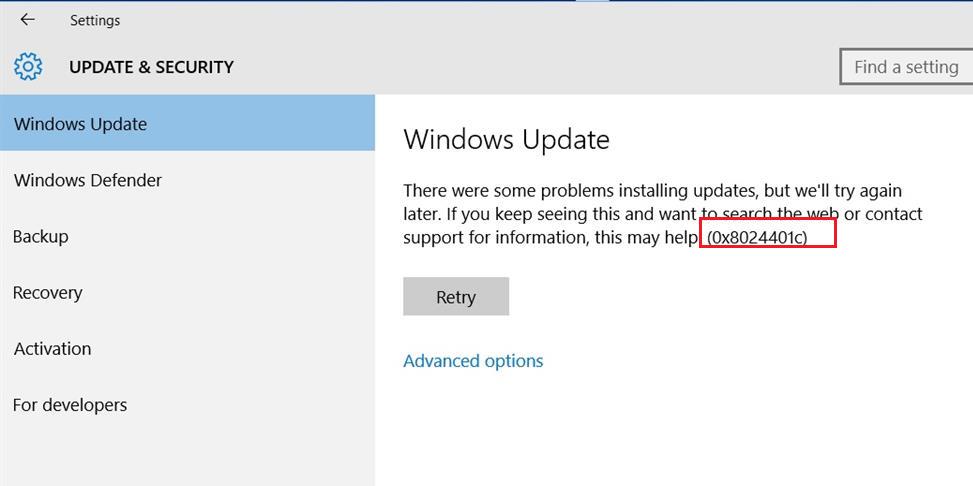
There were some problems installing updates, but we’ll try again later. If you keep seeing this and want to search the web or contact support for information, this may help: (0x8024401c)
Согласно списка кодов ошибок центра обновления Windows ошибка 0x8024401C означает превышение таймаута ответа от клиента: WU_E_PT_HTTP_STATUS_REQUEST_TIMEOUT — HTTP status 408 — the server timed out waiting for the request.
В новом журнале логов службы Windows Update Windows 10 при этом также периодически фиксируется ошибка, связанная с таймаутом ответа WSUS.
2017-05-30 14:11:24:870  816 1244 WS WARNING: There was an error communicating with the endpoint at 'http://msk-wsus:8530/ClientWebService/client.asmx'.
2017-05-30 14:11:24:870  816 1244 WS WARNING: There was an error receiving the HTTP reply.
2017-05-30 14:11:24:870  816 1244 WS WARNING: The operation did not complete within the time allotted.
2017-05-30 14:11:24:870  816 1244 WS WARNING: The operation timed out
Сама страница ‘
http://msk-wsus:8530/ClientWebService/client.asmx
‘ при этом с клиента доступна и открывается, т.е. возникает такое ощущение, что сервер WSUS или клиент просто не успевают выполнить некую операцию и клиент отваливается по таймауту. Возможно при инициирующем сканировании, новому клиенту WSUS прилетает слишком большой список обновлений, в результате чего достигаются некие лимиты рабочего процесса IIS.
Чтобы решить проблему с клиентами, мне пришлось сначала установить на сервере WSUS обновление KB3159706 (на сервере должен быть установлен Wndows Server 2012 R2 Update 1).
В статье KB3159706 (Update enables ESD decryption provision in WSUS in Windows Server 2012 and Windows Server 2012 R2) обратите внимание на ручные действия, которые нужно выполнить после установки обновления (иначе может перестать открываться консоль WSUS).
- Выполнить команду
"C:\Program Files\Update Services\Tools\wsusutil.exe" postinstall /servicing
- Проверить, установлен ли компонент.NET Framework 4.5 -> HTTP Activation (
Get-WindowsFeature -Name NET-WCF-HTTP-Activation45
), и если он отсутствует, установить: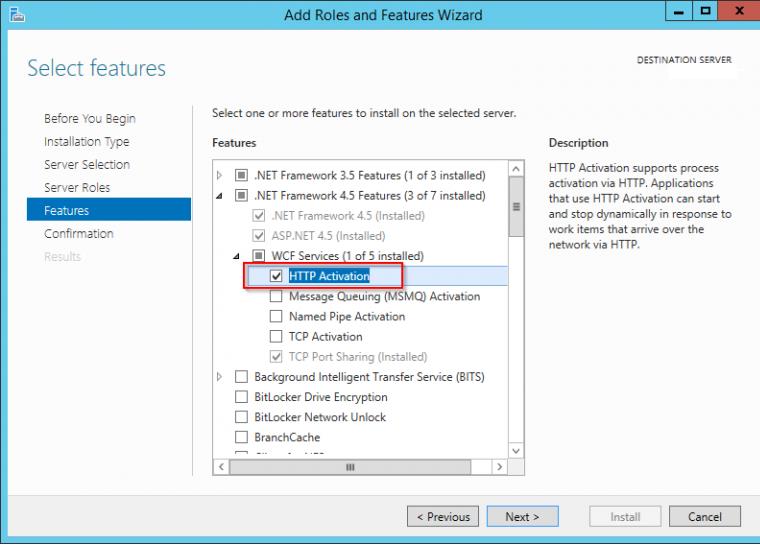

<httpRuntime maxRequestLength="4096" />на
<httpRuntime maxRequestLength="204800" executionTimeout="7200"/>
Get-Service -Name WsusService | Restart-Service -Verbose
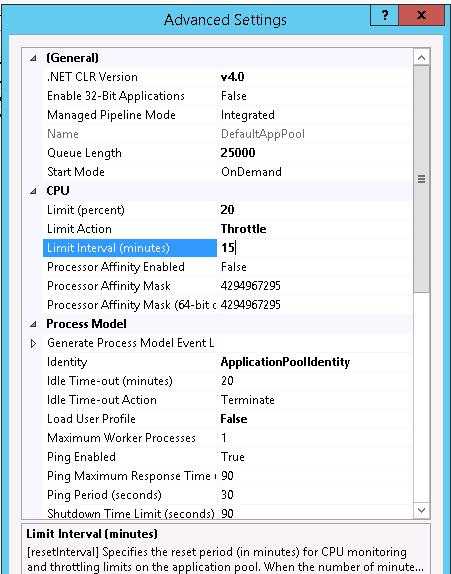
Далее с помощью консоли IIS Manager нужно внести следующие изменения в настройки пула WsusPool (Application Pools -> WsusPool -> Advanced settings)
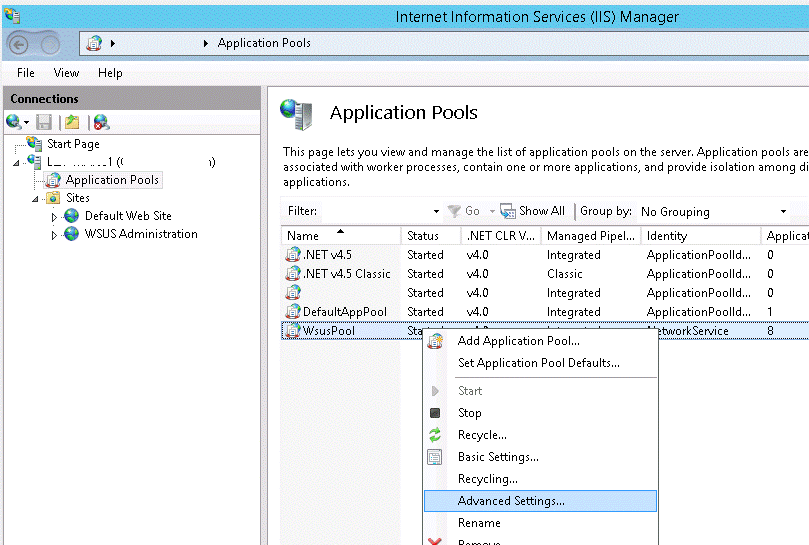
- Private Memory Limit (KB) – 0 (было 1258015, убирается лимит на использование памяти рабочим процессов WSUS, в результате служба может использовать более 1,2 Гб памяти)
- Queue Length — 25000 (увеличиваем длину очереди к пулу приложения с 10000)
- Limit Interval (minutes) — 15 (увеличиваем с 5 минут до 15 минут время для сброса счетчиков и выполнения CPU Throttling)
- Service Unavailable Response — TcpLevel (при старом значение HttpLevel клиенту возвращается ошибка HTTP 503, теперь соединение просто сбрасывается)
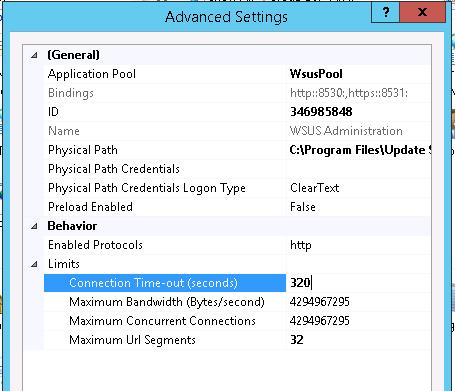
Затем в настройках сайта WSUS Administration -> Advanced settings нужно изменить значение Connection Time-out со 180 до 320.
Осталось перезапустить IIS:
IISReset
Теперь мы увеличили таймауты и ресурсы сервера, требуемые клиентам Windows 10 для поиска и проверки обновлений на сервере обновлений WSUS. На следующий день – все клиенты смогли обнаружить и установить все требуемые обновления.