
-
Home
-
News
- Fix Windows Update Error Code 0x80244017 [Tutorial]
Fix Windows Update Error Code 0x80244017 [Tutorial]
By Cecilia | Follow |
Last Updated
If you are bothered by the Windows update error 0x80244017, you come to the right place. This post from Partition Magic will analyze the causes that may trigger the error and provide some effective methods to fix the error.
Many Windows users update their systems from time to time because updating the system will improve the stability of the computer and fix some security issues on the computer. But in the latest Windows update, they encountered error code 0x80244017.
Have you encountered the same error? Do you know how to fix Windows update error 0x80244017? If you want to know the answer, please continue reading below to learn the cause of the error and several ways to troubleshoot it.
Before solving the update error, let’s first understand what caused the 0x80244017 error. After investigating a large number of user reports and posts, the update error may be caused by the following reasons:
- Unstable internet connection
- Interference from third-party security applications
- Corruption of system files
- Obstacles with Windows update service
- Insufficient disk space
Here are 5 ways to fix this Windows update error 0x80244017. Let’s dive in.
Way 1: Try Some Basic Methods
You can try these simple methods mentioned below to fix error 0x80244017.
- Check your internet connection
- Disable third-party antivirus
- Reset the Windows update components
- Use media creation tool
Way 2: Run Windows Update Troubleshooter
You can use Windows update troubleshooter to fix the 0x80244017 error. Here are the steps:
Step 1: Click the Start button and select Settings to open.
Step 2: Click Update & Security and then click Troubleshoot in the left panel. Then click Additional troubleshooters.
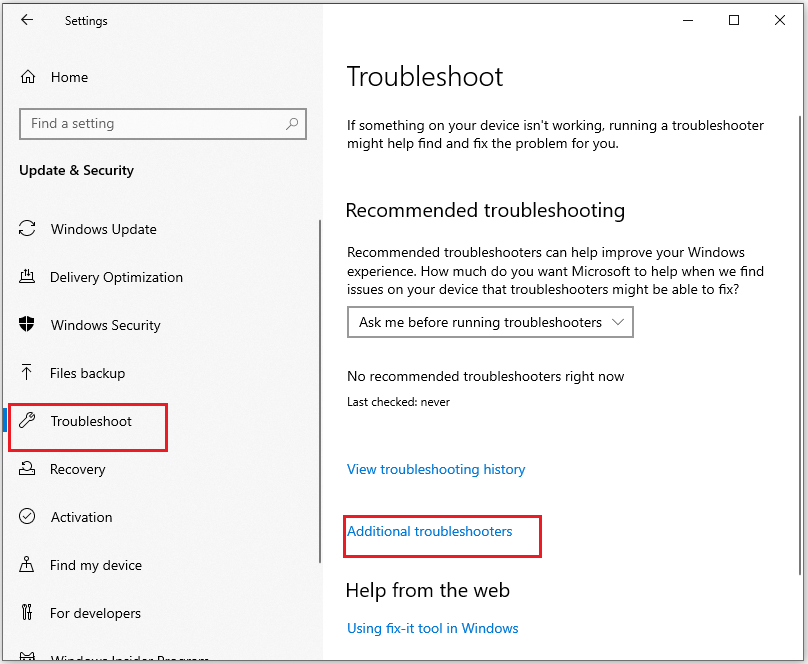
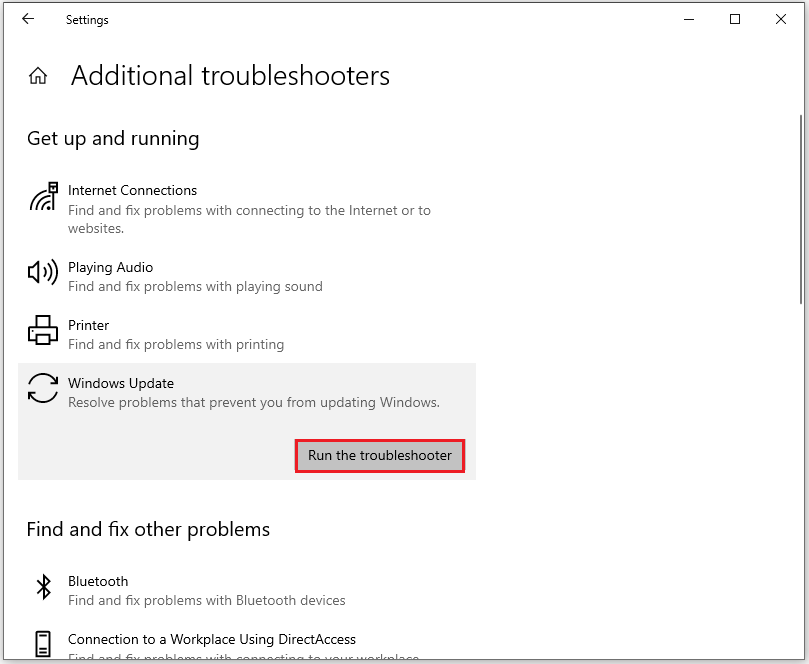
Step 3: Click Windows Update under Get up and running section. Then click Run the troubleshooter.
Way 3: Check Relevant Services
Windows update-related services play an important role in Windows updates. If any of these services are not configured to run, it is easy to encounter update errors during the update process. Specifically, you need to check the Windows update service, Cryptographic Services, and Background Intelligent Transfer Service (BITS).
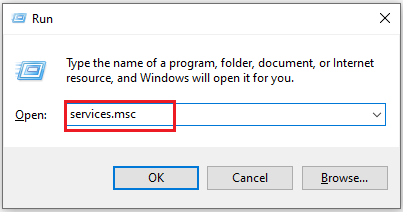
Step 1: Press the Windows logo key + R to open the Run window. Type “services.msc” and then press Enter.
Step 2: In the Services window, double-click Background Intelligent Transfer Service from the list. From the Startup type field, select Automatic from its drop-down menu. Finally, click Start.
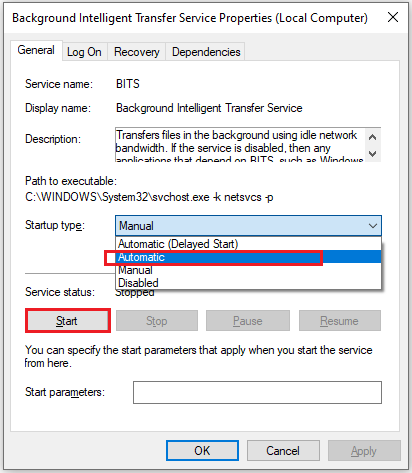
Step 3: Then, click Apply and OK to save the changes.
Step 4: Next, do the same operations with Windows update and Cryptographic Services.
Once done, restart your PC and check if you fixed the 0x80244017 update error successfully.
Way 4: Repair Corrupted System Files
Run SFC or DISM to scan and repair your system files. This method can be used to fix error code 0x80244017.
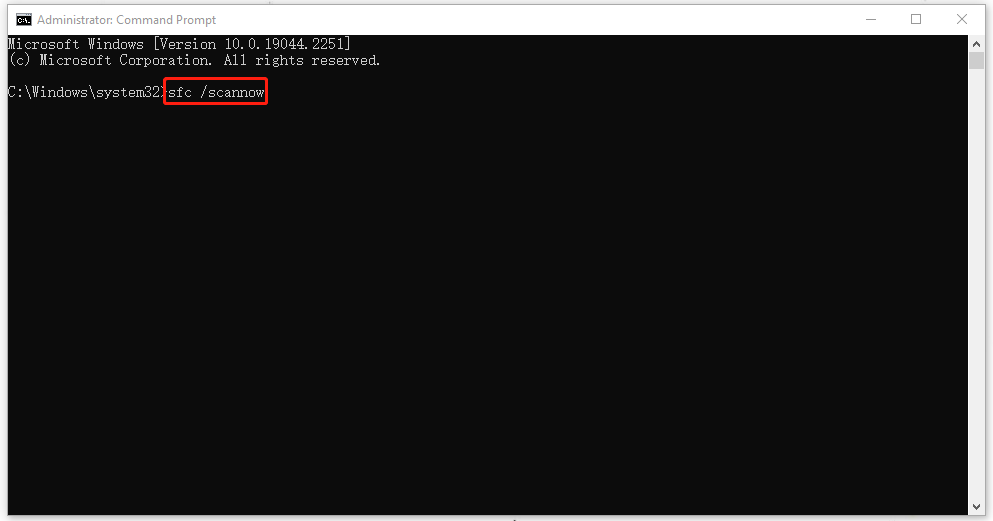
Step 1: Type cmd in the Run dialog box and then press the Ctrl + Shift + Enter key to open Command Prompt as administrator.
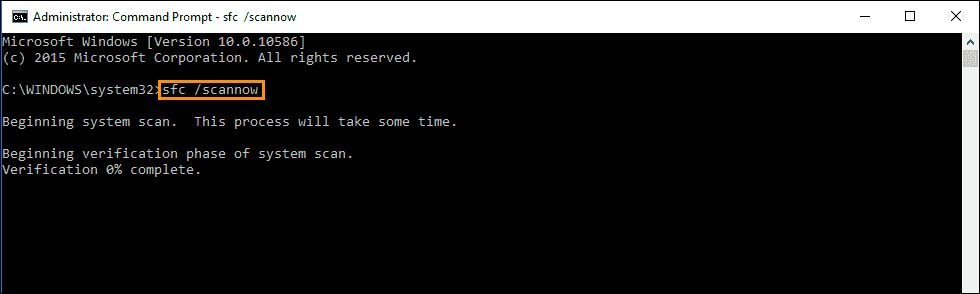
Step 2: Type the sfc /scannow command in the command prompt.
Step 3: When it finishes, you can try running the following command and press the Enter key after each:
- DISM /Online /Cleanup-Image /CheckHealth – this command is to perform a quick check for the DISM scan.
- DISM /Online /Cleanup-Image /ScanHealth – this command is to check your OS image with a more advanced scan.
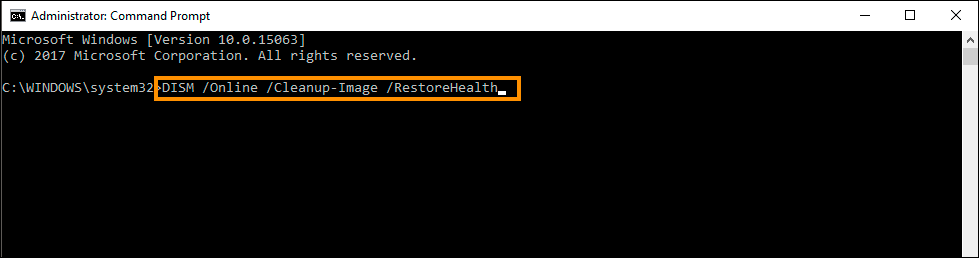
- DISM /Online /Cleanup-Image /RestoreHealth – this command is to fix any problems it finds automatically.
When it finishes, restart your computer and check if the error 0x80244017 gets fixed.
Way 5: Perform Disk Cleanup
Running Disk Cleanup is a good way to fix Windows update error 0x80244017. Because Disk Cleanup can easily remove unnecessary files on your computer and make more free space. Please follow the steps below:
Step 1: Type Disk Cleanup in the Search box and hit Enter.
Step 2: If your Windows is installed on drive C, pick it from the list and press OK.
Step 3: In the new pop-up window, you will see the kinds of files selected by default. It usually included Temporary Internet Files, Recycle Bin, Temporary Files, etc. Then click the Clean up system files option and click OK to start cleaning.
Bottom Line
This article mainly discusses the causes of Windows update error 0x80244017 and how to fix it. I hope this article helps you.
Have you ever had trouble managing partitions? Do you want to extend/delete/format partitions? If so, we highly recommend MiniTool Partition Wizard. It is a professional partition manager with a wide range of features, it can allow you to clone a hard drive, format fat32, recover data from hard drive, etc.
MiniTool Partition Wizard FreeClick to Download100%Clean & Safe
About The Author
Position: Columnist
Cecilia is a new member of MiniTool. She works as an English editor on the MiniTool team. She likes to learn articles about computers and is passionate about partition management and Windows operating systems. She is committed to allowing readers to use simple, efficient, and fast methods to solve the computer problems they encounter. To provide more professional solutions, she will continue to learn and master computer knowledge.
If Windows automatic updates keep failing because of error code 0x80244017 there’s more than likely a minor corruption somewhere on your system. This is quite a common occurrence and one that can happen for a range of different reasons. Sometimes it’s caused by user error but more often than not it’s the previous Windows update that installed preventing the next one from installing… It sounds stupid but it’s actually one of the most common reasons most problems occur on Windows, because of Windows itself.
Takeaways:
- What is causing Windows update error 0x80244017? Did you do something wrong?
- Learn how to fix Windows 11 update error 0x80244017 common troubleshooting steps.
Table of Contents
As we mentioned above Microsoft causes more issues on Windows 11 than anyone else so don’t take it personally when you get a problem! More than likely it wasn’t your fault! But you will sadly be the one who has to clean up the mess! So work through the steps below to solve the problem.
Clear Delivery Optimization Files on Windows 11.
If the problem is just an issue with data getting mixed up between updates you can clear the Delivery Optimisation folder to give the update process a clean slate to work from.
-
To do this go to Settings > System > Storage > Temporary Files > Delivery Optimization Files. Once you are in this location make sure Delivery Optimization Files is ticked then click Remove Files to clear out any leftover files.

Uninstall the Latest Windows 11 Update.
This option may not be available for everyone but If you still have the option to uninstall the latest Windows 11 update that was installed on your computer do that. If you aren’t sure how to check out the article linked below. Sadly you may not be able to use this step but you should check just in case as it is a good option.
How to uninstall a bad Windows 11 update. Rollback a Windows 11 update.
Manual Windows 11 Updates
If nothing so far has worked the best option is to manually update Windows 11 using the Microsoft Update Catalogue. Here you can find all the updates available for Windows 11. Simply visit the Microsoft Update Catalogue website and download the update you are currently having problems with. Don’t worry if you pick the wrong one, Windows won’t let you install it anyway. It will detect a conflict and cancel the installation. You can’t mess things up.
Use the SFC and DISM Corruption Fixers!
It’s time to crack out the specialty tools! These two tools when combined will scan, check, and fix any minor corruptions and missing files that may be causing update issues. They’ll take a little bit of time to run but usually give great results.
-
Type cmd in Windows search, right-click on Command Prompt, and select Run as administrator.
-
When UAC shows up, click Yes.
-
Copy and paste the following command, pressing Enter after:
sfc /scannow
-
Wait till the scan is finished. If Windows finds system file integrity violations, it will attempt to fix them. After this, use the set of the following commands, pressing Enter each time:
DISM /Online /Cleanup-Image /CheckHealth
DISM /Online /Cleanup-Image /ScanHealth
DISM /Online /Cleanup-Image /RestoreHealth
What is Causing Windows 11 Update error 0x80244017?
Annoyingly, just about every single update error that you come across on Windows 11 is caused by an update before it. While Microsoft likes to blame users and other things the reality is that some updates just don’t cooperate with the updates that came before them. As a result removing older updates and installing newer ones usually solves the problem. When that fails clearing old corrupted data is the best option.
Issue: Hello. I have noticed that the new Windows update is available so I attempted to install it. Only to see it fail a short while later during the installation process with an error code 0x80244017. It goes up to around 80% and then stops. Can you help me with this?
Solved Answer
Microsoft releases Windows updates every second or third Thursday of every month, a process that has been long known as Patch Tuesday. Some of these consist of new features, security patches, stability improvements, and more. Needless to say, each of these is important for all Windows users and should be installed rather sooner than later.
Despite the updates’ vital role in improving system security and stability, some users have encountered difficulties during installation, which usually come with an error code, 0x80244017 being among them. Updates failing to install can be particularly frustrating, as for some people, it does not resolve automatically.
To begin fixing the 0x80244017 error, one must first know where this problem might be coming from, and some of the reasons are:
- Corrupted system files.
- Lack of disk space.
- Buggy update components.
- Services not running
- Incorrectly installed update.
- Third-party security (or similar) applications.
- Internet connection issues.
There are several ways you can fix the 0x80244017 error on Windows 10 or 11. You should first run the Windows update troubleshooter and ensure you have adequate disk space. Checking the integrity of system files and temporarily disabling any potentially conflicting software can also facilitate a smoother update process. Additionally, ensuring a reliable internet connection is essential for successfully downloading and installing updates.
For those struggling with the technical aspects of resolving these issues, using a PC repair tool FortectMac Washing Machine X9 can provide a straightforward solution. These tools are adept at identifying and fixing underlying Windows problems that may hinder the update process, thereby bypassing the 0x80244017 error code and installing the updates smoothly.

Fix 1. Run Windows Update troubleshooter
The Windows Update troubleshooter is a built-in tool designed to identify and fix common issues preventing updates from installing. It works by scanning the system for update-related problems and applying fixes automatically.
- Type Troubleshoot in Windows search and hit Enter.
- Select Additional troubleshooters/Other troubleshooters.
- Find Windows Update from the list and select Run the troubleshooter/Run.
- Wait till the scan is finished – you will be provided with potential causes so you can proceed with fixes.
- If no suggestions were given, proceed with the solutions below.

Fix 2. Perform Disk Cleanup
Fix it now!
Fix it now!
To repair damaged system, you will have a 24hr Free Trial and the ability to purchase the licensed version of the Fortect Mac Washing Machine X9.
Disk Cleanup helps free up space on your hard drive by removing temporary files and system files that you no longer need. Adequate disk space is crucial for updates to download and install properly.
- Type Disk Cleanup in Windows search and hit Enter.
- If your Windows is installed on drive C, pick it from the list (it should be by default) and press OK.
- Click Clean up system files.
- Select your main disk again and click OK.
- Here, select the largest portions of the data used – these typically include Temporary Internet Files, Windows Update, Temporary Files, Recycle Bin, Delivery Optimization Files, and others.
- Click OK – the process should be finished shortly.

Fix 3. Check relevant services
Certain Windows services must be running for the update process to work correctly. Specifically, the Windows Update service and the Background Intelligent Transfer Service (BITS) are critical.
- Type in Services in Windows search and press Enter.
- Scroll down to locate Background Intelligent Transfer Service (BITS).
- If it is already running, right-click and pick Restart.
- If the service is not running, double-click it, select Automatic under the Startup type from the drop-down menu.
- Click Start, Apply, and OK.
- Perform the same steps with Windows update and Cryptographic services.

Fix 4. Check for corrupted files
Fix it now!
Fix it now!
To repair damaged system, you will have a 24hr Free Trial and the ability to purchase the licensed version of the Fortect Mac Washing Machine X9.
SFC and DISM scans can repair Windows system files, potentially resolving update installation issues.
- Type cmd in Windows search.
- Right-click on Command Prompt and pick Run as administrator.
- User Account Control will ask you whether you want to allow changes – click Yes.
- Copy and paste this command and hit Enter:
sfc /scannow - Wait for the scan to finish.
- As soon as it finishes, Windows will report whether integrity violations were found and if they could be fixed. Regardless of the outcome, use these commands next, pressing Enter after each:
Dism /Online /Cleanup-Image /CheckHealth
Dism /Online /Cleanup-Image /ScanHealth
Dism /Online /Cleanup-Image /RestoreHealth - Close down the Command Prompt and restart your device.

Fix 5. Disable third-party security (and similar) software
Third-party antivirus or security software can sometimes interfere with Windows Update. Temporarily disabling these can help.
- Open your security software application.
- Look for an option to disable protection.
- After disabling, try running Windows Update again.
Fix 6. Reset Windows update components
Fix it now!
Fix it now!
To repair damaged system, you will have a 24hr Free Trial and the ability to purchase the licensed version of the Fortect Mac Washing Machine X9.
Resetting Windows Update components can resolve issues by refreshing related services, files, and other elements involved in the update process.
- Open Command Prompt as administrator.
- When User Account Control shows up, click Yes.
- Stop the Windows Update Services by entering the following commands, one at a time, and pressing Enter after each:
net stop wuauserv
net stop cryptSvc
net stop msiserver
net stop bits - Rename the SoftwareDistribution and Catroot2 folders with the following commands:
ren C:\Windows\SoftwareDistribution SoftwareDistribution.old
ren C:\Windows\System32\catroot2 catroot2.old - Restart the services you stopped earlier with these commands:
net start wuauserv
net start cryptSvc
net start msiserver
net start bits - Close the Command Prompt window and try running the Windows Update again.

Fix 7. Install the update manually
If automatic updates fail, you can manually download and install the update from the Microsoft Update Catalog.
- Type in Updates in Windows search and press Enter.
- Select View update history.
- Find the update that failed with the 0x80244017 error and copy its KB number.
- Open your browser and go to Microsoft Update Catalog.
- Within the search bar, type in the KB number and clicks Search.
- Find the correct version of the update for your operating system (to check this, right-click on Start and pick System. Under Device specifications and check the System type) and click Download.
- Use on-screen guidelines to finish the installation process and restart your system.

Fix 8. Use Media Creation Tool
Fix it now!
Fix it now!
To repair damaged system, you will have a 24hr Free Trial and the ability to purchase the licensed version of the Fortect Mac Washing Machine X9.
Media Creation Tool can update your system to the latest version of Windows 10, potentially bypassing the problematic update.
- Visit the official Microsoft website and download Windows 10 installation media (Windows 11 version).
- Double-click the installer and click Yes when the User Account Control window shows up.
- Agree to the terms and click Next.
- Select Upgrade this PC now and click Next.
- Wait for Windows to download files.
- Agree to the terms once again and click Next.
- Before installing, ensure you are happy with your choices (otherwise, you can click the Change what to keep option).
- Click Install to begin the upgrade process.
Repair your Errors automatically
ugetfix.com team is trying to do its best to help users find the best solutions for eliminating their errors. If you don’t want to struggle with manual repair techniques, please use the automatic software. All recommended products have been tested and approved by our professionals. Tools that you can use to fix your error are listed bellow:
do it now!
Download Fix
Happiness
Guarantee
do it now!
Download Fix
Happiness
Guarantee
Compatible with Microsoft Windows
Compatible with OS X
Still having problems?
If you failed to fix your error using FortectMac Washing Machine X9, reach our support team for help. Please, let us know all details that you think we should know about your problem.
Fortect will diagnose your damaged PC. It will scan all System Files that have been damaged by security threats. Mac Washing Machine X9 will diagnose your damaged computer. It will scan all System Files and Registry Keys that have been damaged by security threats. To repair damaged system, you will have a 24hr Free Trial and the ability to purchase the licensed version of the Fortect malware removal tool. To repair damaged system, you have to purchase the licensed version of Mac Washing Machine X9 malware removal tool.
Access geo-restricted video content with a VPN
Private Internet Access is a VPN that can prevent your Internet Service Provider, the government, and third-parties from tracking your online and allow you to stay completely anonymous. The software provides dedicated servers for torrenting and streaming, ensuring optimal performance and not slowing you down. You can also bypass geo-restrictions and view such services as Netflix, BBC, Disney+, and other popular streaming services without limitations, regardless of where you are.
Don’t pay ransomware authors – use alternative data recovery options
Malware attacks, particularly ransomware, are by far the biggest danger to your pictures, videos, work, or school files. Since cybercriminals use a robust encryption algorithm to lock data, it can no longer be used until a ransom in bitcoin is paid. Instead of paying hackers, you should first try to use alternative recovery methods that could help you to retrieve at least some portion of the lost data. Otherwise, you could also lose your money, along with the files. One of the best tools that could restore at least some of the encrypted files – Data Recovery Pro.
Если обновлять Windows с помощью WSUS, то можно не получить желаемого, увидев ошибку с кодом 0x80244017. Она означает, что какой-то нюанс блокирует загрузку необходимых файлов апдейтов.
Как исправить ошибку 0x80244017
Решается неисправность следующими методами:
- Убедитесь в наличии прав. Аккаунты клиентских ПК должен иметь допуски на получении информации (Чтение) с сервера. Также в настройках IIS на WSUS нужно подключаться к сети под аккаунтом Администратора домена.
- Измените параметры подключения к серверу. Адрес WSUS переименуйте на http://grizzly, проверьте корректность DNS на сервере и клиенте таким образом, чтобы при подсоединении не применялся FQDN. Во многих случаях это устраняет ошибку 0x80244017.
Table of contents
- What Causes the 0x80240017 Error?
- Solution 1: Running the Windows Update Troubleshooter
- Solution 2: Resetting the Components of Windows Update
- Solution 3: Running the System File Checker
- Solution 4: Updating your Drivers
- Option 1: Via the built-in Device Manager in your PC
- Option 2: Going to the manufacturer’s website to get the latest drivers
- Option 3: Automating the process with the help of Auslogics Driver Updater
In most cases, updates are useful in fixing bugs and introducing new features. However, they are still vulnerable to errors and other issues.
You probably found this blog post because you wanted to know how to fix the Windows Update Error 0x80240017. Well, you’re in luck because we have several solutions for you. By the time you’re done reading this article, you will have an in-depth knowledge of what causes the 0x80240017 error. You will also be able to get rid of the problem without much effort.
What Causes the 0x80240017 Error?
So, you might ask, “Why do I get the Error 0x80240017 in Windows 10?” There are several reasons why this error code shows up. For one, you might have recently installed a third-party application or a Windows update which damaged the system files. It is possible that the installation was incomplete or that there were applications that were improperly deleted. Regardless of the cause of the problem, our solutions will allow you to fix the Windows Update Error 0x80240017.
Solution 1: Running the Windows Update Troubleshooter
One of the great things about Windows 10 is that it contains built-in troubleshooters for common issues people may encounter while using the OS. Since the Error 0x80240017 generally has something to do with Windows Update, the first solution you can try is running its troubleshooter. Here are the steps:
- On your keyboard, press
Windows Key+I. Doing this should open the Settings app. - Select Update & Security.
- Go to the left-pane menu, then click Troubleshoot.
- Now, go to the right pane and select Windows Update.
- Click the Run the Troubleshooter button.
- Wait for the troubleshooter to detect the existing issues on your computer. Follow the on-screen instructions to complete the repair process.
- Restart your PC, then try installing the updates again to see if the Error 0x80240017 is gone.
Solution 2: Resetting the Components of Windows Update
Windows Update is supposed to run automatically and discreetly in the background. If the Error 0x80240017 is keeping it from downloading and installing updates successfully, you can try resetting its components. To do that, you need to follow the instructions below:
- Go to your taskbar, then click the Search icon.
- Type
Command Promptinside the search box. - Right-click Command Prompt from the results, then select Run as Administrator.
- Run these commands at once:
net stop wuauserv
net stop cryptSvc
net stop bits
net stop msiserver
ren C:\Windows\SoftwareDistribution SoftwareDistribution.old
ren C:\Windows\System32\catroot2 catroot2.old
net start wuauserv
net start cryptSvc
net start bits
net start msiserver
pause
- Wait for the process to complete, then close Command Prompt.
- Try running Windows Update again, then check if the error is gone.
Solution 3: Running the System File Checker
As we’ve mentioned, the Error 0x80240017 shows up due to missing, damaged, or corrupted system files. In this case, running the System File Checker (SFC) will allow you to resolve the issue. An SFC scan should be able to detect and repair system-related issues. You can perform one by following the steps below:
- Go to your taskbar, then right-click the Windows icon.
- Select Command Prompt (Admin) or Windows PowerShell (Admin) from the options.
- Now, run the following command:
sfc /scannow
- Once the scan and repair processes are complete, close Command Prompt or Windows PowerShell.
- Restart your PC.
- Download and install the updates again to see if the Error 80240017 is gone.
Fix this issue quickly
You can try using a safe and totally free tool developed by the Auslogics team of experts.
A few simple steps to troubleshoot the issue:
Download the tiny Auslogics TroubleShooter tool.
Run the application (no installation is needed).
The app will check for the issue mentioned in the article. When the scan is done, check that this is the issue you were looking to solve and click ‘Apply now’ to apply the recommended fix.
You can use the app to troubleshoot other malfunctions for free by simply typing in a brief description of the issue your PC is experiencing. Or you can scan your PC for performance issues using the My Scanner tab.
Solution 4: Updating your Drivers
If there are outdated or missing drivers in your computer, Windows Update will not run successfully. As such, we recommend updating your drivers. There are three ways to do this:
- Via the built-in Device Manager in your PC
- Going to the manufacturer’s website to get the latest drivers
- Automating the process with the help of Auslogics Driver Updater.
Option 1: Via the built-in Device Manager in your PC
- Click the Search icon on your taskbar.
- In the search box, type
Device Manager, then pressEnter. - Expand the contents of the first category.
- Right-click the first device, then select Update Driver. Perform this step for all the devices under the category.
- Make sure that you update all the drivers under all the categories.
Option 2: Going to the manufacturer’s website to get the latest drivers
Even if you’ve updated all your drivers via the Device Manager, your system can still miss an update or two. Therefore, you need to go to the manufacturer’s website to get the latest version of the drivers. Keep in mind that you must do this for all the devices installed in your PC. Moreover, you need to ensure that you get the versions that are compatible with your system. Otherwise, you might end up with system instability issues.
Option 3: Automating the process with the help of Auslogics Driver Updater
As you can see, manually updating your drivers can be risky and time-consuming. Thankfully, there is an easier and more reliable option. You can use Auslogics Driver Updater to fix all your driver-related issues at once. After activating this tool, you simply need to click a button and it will automatically recognize your operating system version and processor type. After that, Auslogics Driver Updater will look for the latest manufacturer-recommended drivers for your computer. There is no need to worry about making mistakes and exerting too much effort because Auslogics Driver Updater will make the process more convenient.
Which of these solutions is the easiest to follow?
Join the discussion below and share your answer!