
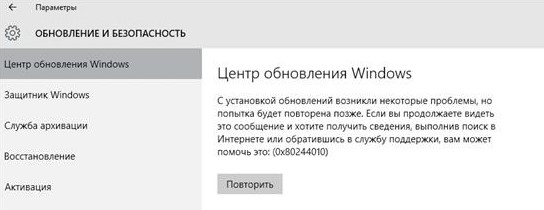
После установки нового сервера WSUS в сети нашей компании многие клиенты не смогли получить новые обновления с сервера с ошибкой 0x80244010. Как оказалось, эта ошибка характерна не только для компьютеров, обновляющихся с внутреннего сервера WSUS, но и для устройств, получающих обновления напрямую с Windows Update. Рассмотрим, основные способы исправления ошибки 0x80244010 и восстановления работоспособности системы обновлений.
Если вы увидели ошибку получения или установки обнволения в графической Control Panel или панели Settings, нужно открыть лог агента WindowsUpdate.log. В старых версиях Windows 7 и 8 это файл
%Windir%\WindowsUpdate.log
. В современных Windows 10/11 и Windows Server 2022/2019 вы можете сгенерировать файл WindowsUpdate.log с помощью PowerShell:
Get-WindowsUpdateLog -logpath C:\PS\Logs\WindowsUpdate.log
В моем случае в журнале обновлений обнаружились такие ошибки:
PT WARNING: Exceeded max server round trips: 0x80244010 PT WARNING: Sync of Updates: 0x80244010 PT WARNING: SyncServerUpdatesInternal failed: 0x80244010 Agent * WARNING: Failed to synchronize, error = 0x80244010 Agent * WARNING: Exit code = 0x80244010 Agent ********* Agent ** END ** Agent: Finding updates [CallerId = AutomaticUpdates] Agent ************* Agent WARNING: WU client failed Searching for update with error 0x80244010 AU >>## RESUMED ## AU: Search for updates [CallId = {128CCEAD-F84D-405E-9BC2-607D1694894B}]

AU # WARNING: Search callback failed, result = 0x80244010 AU # WARNING: Failed to find updates with error code 80244010
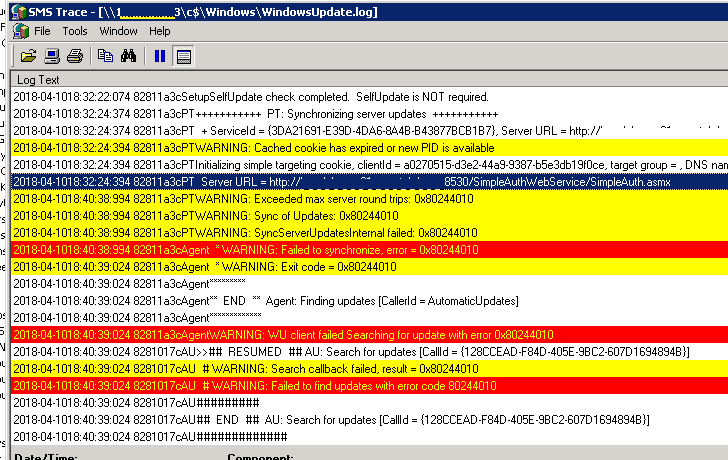
Обратите внимание на строку Exceeded max server round trips: 0x80244010. Эта ошибка говорит, что при обращении к серверу обновлений (в моем случае это WSUS) было превышено максимальное количество обращений. В результате чего сервер обновлений отключает клиента, который превысил лимит обращений (по умолчанию лимит — 200 обращений).
Также в Windows Update есть ограничение в 200 Кб на максимальный размер XML файла, который клиент получает с сервера в рамках одного обращения. Чем большее количество обновлений на сервере для клиента нужно проверить, тем больший размер XML файла. Если клиент не смог получить необходимые данные с сервера обновлений за 200 сессий, он временно отключается от сервера и возвращает ошибку.
Чаще всего такая ошибка возникает из-за плохого или нестабильного сетевого соединения с сервером обновлений, или когда клиенту нужно получить слишком большое количество обновлений (новый клиент сервера WSUS или компьютер, на котором давно не устанавливались обновлений).
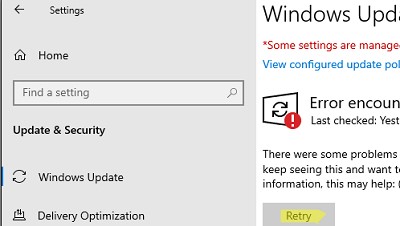
В большинстве случаев пользователю достаточно через несколько минут повторно нажать на кнопку Retry/ Check for Updates в панели управления или выполнить команду:
wuauclt.exe / detectnow
В большинстве случаев это решает проблему, но в том случае если клиентов в сети много, такой способ решения проблемы неприемлем.
По умолчанию клиент проверяет обновления на сервере каждые 22 часа. Вы можете изменить этот интервал с помощью параметров групповых политик компьютера. Откройте редактор локальной GPO (
gpedit.msc
) или отредактируйте доменные политику в консоли Group Policy Management Console (
gpmc.msc
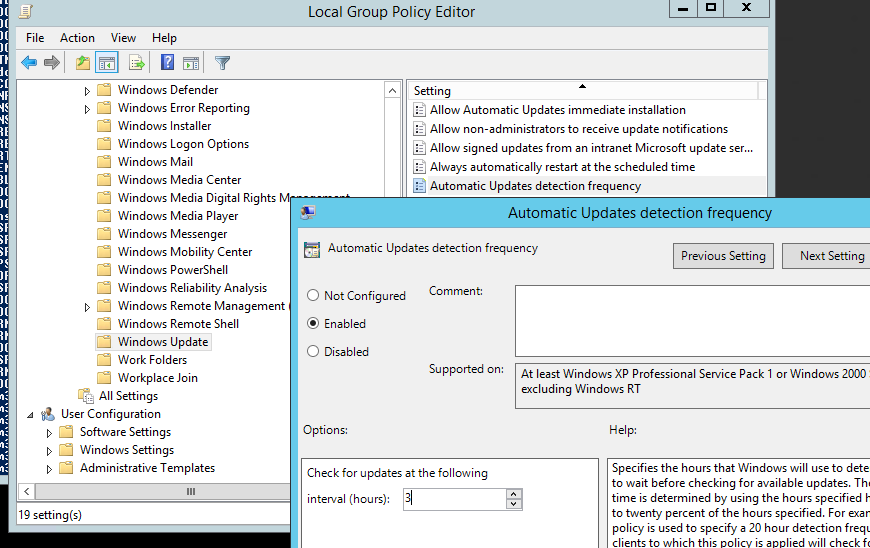
). Перейдите в раздел Computer Configuration -> Administrative Templates -> Windows Components -> Windows Update.
Включите параметр Automatic Update detection frequency и увеличьте частоту синхронизаций клиента с сервером обновлений до 3 часов.
Также можно на стороне сервера WSUS убрать ограничение на максимальный размер XML файла, который может скачать клиент с сервера. Для этого откройте SQL Server Management Studio и подключитесь к базе данных SUSDB. Выполните выполнить следующую команду T-SQL.
USE SUSDB
GO
Проверьте и запомните текущее значение:
select MaxXMLPerRequest from tbConfigurationC
Отключите ограничение:
UPDATE tbConfigurationC SET MaxXMLPerRequest = 0
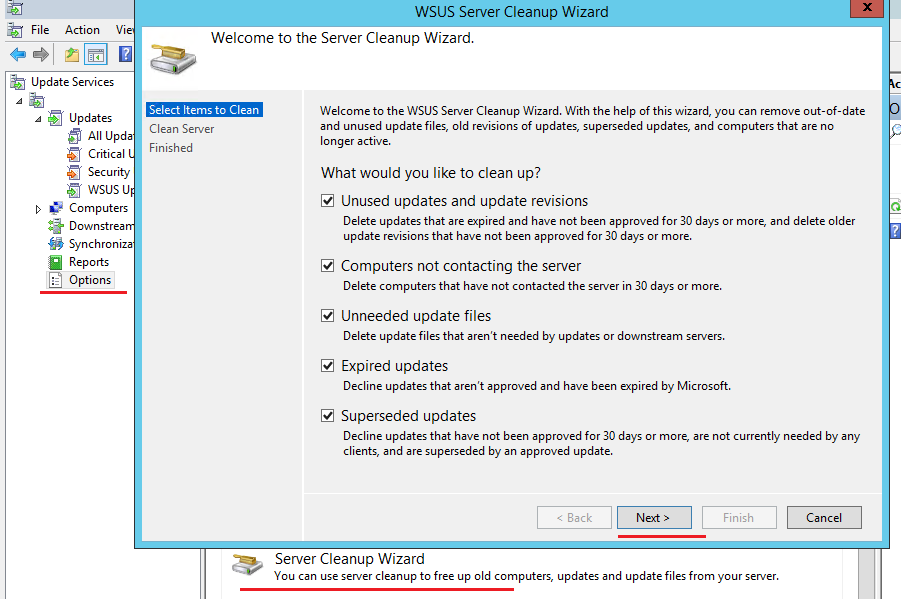
Чтобы не менять настройки в базе WSUS, можно выполнить очистку WSUS сервера с помощью встроенного мастера очистки (Консоль Update Service -> Options -> Server Cleanup Wizard -> все опции -> Next). Это удалит старые, неиспользуемые, и замененные обновления (особенно много мусора от обновлений MS Office), из-за которых может долго выполняться сканирование.
В результате такой операции, клиент Windows Update будет получать намного меньше мета-информации с WSUS сервера, и его взаимодействие должно уместиться в 200 сессий по 200кб.
Также попробуйте увеличить производительность пула WsusPool в IIS на сервере WSUS по рекомендация из стати Ошибка обновления Windows 80244022
WsusPool (Application Pools -> WsusPool -> Advanced settings):
- Private Memory Limit (KB) – 0 (убрать лимит 1.2 на использование RAM рабочим процессов WSUS)
- Queue Length — 25000 (увеличить длину очереди к пулу приложения с 10000)
- Limit Interval (minutes) — 15 (увеличить минут время для сброса счетчиков и выполнения CPU Throttling с 5 минут до 15)
- Service Unavailable Response — TcpLevel (при старом значение HttpLevel клиенту возвращается ошибка HTTP 503)
Отредактируйте файл config ( C:\Program Files\Update Services\WebServices\ClientWebService\web.config), заменив строку
httpRuntime maxRequestLength="4096"
на
httpRuntime maxRequestLength="204800" executionTimeout="7200"
Если все рассмотренные способы не помогли исправить ошибку обновления на клиенте, попробуйте полностью сбросить на нем настройки Windows Update и восстановить настройки по-умолчанию. После чего выполните несколько циклов поиска обновлений.
Windows Error 0x80244010 generally triggers while installing a new WSUS server for many of the Windows clients.
Our Server Administration Techs handles different issues that cause this error on a daily basis.
Today, let us discuss various methods to fix ‘Windows Error 0x80244010’ and restore Windows update subsystem functionality.
Windows Error 0x80244010 – Causes

After installing a new WSUS server, many Windows clients could not receive new updates, resulting in the error 0x80244010. This error is typical also for the devices that receive updates directly from Windows Update servers.
An Overview:
- Causes of Windows Error 0x80244010
- Reasons Behind System File Corruption
- Methods to troubleshoot Windows Error 0x80244010
Causes of Windows Error 0x80244010
Major causes of Windows Error 0x80244010 include:
-
Generic glitch
Generic glitch is quite common on Windows endpoint machines. Microsoft already has a selection of built-in repair strategies that are ready to deploy.
We can attempt to fix it by running the built-in Windows Update troubleshooter and by applying the fix that it recommends.
-
Corrupt File in the WU temp folders
Similarly, another scenario is a corrupt temp file in the SofwareDistribution or Catroot2folders. This may occur after a botched update or after an AV scan.
In this scenario, we can fix the issue by running a series of commands capable of resetting every WU component including the two temp folders.
-
The machine cannot update conventionally
Under certain circumstances, the WU component might not work automatically.
If the WU function is blocked at a system level, we can most likely fix the issue. Use the System Update Readiness tool to install the updates that are failing to install conventionally.
-
Disabled Detection Frequency policy
When the client exceeds the default number of allowed trips to the WSUS server, it encounters this issue on a Windows Server.
To fix this issue, we have to use the Local Group Policy editor to enable the Automatic Update detection policy and set a global updating interval.
-
System File Corruption
On the other hand, if the Windows Update troubleshooter isn’t able to fix the issue automatically, the affected system may have an underlying corruption issue that cannot resolve conventionally.
In this case, we can fix the issue by refreshing every Windows component with Clean install or Repair install (in-place repair).
First, to diagnose the problem, open the WindowsUpdate.log, which is located in %Windir% folder.
2018-10-04 16:10:28:661 121 2a2b2 PT WARNING: Exceeded max server round trips: 0x80244010 2018-10-04 16:10:28:661 121 2a2b2 PT WARNING: Sync of Updates: 0x80244010 2018-10-04 16:10:28:661 121 2a2b2 PT WARNING: SyncServerUpdatesInternal failed: 0x80244010 2018-10-04 16:10:28:661 121 2a2b2 Agent * WARNING: Failed to synchronize, error = 0x80244010 2018-10-04 16:10:29:042 282 2a2b2 Agent * WARNING: Exit code = 0x80244010 2018-10-04 16:10:29:042 282 2a2b2 Agent ********* 2018-10-04 16:10:29:042 282 2a2b2 Agent ** END ** Agent: Finding updates [CallerId = AutomaticUpdates] 2018-10-04 16:10:29:042 282 2a2b2 Agent ************* 2018-10-04 16:10:29:042 282 2a2b2 Agent WARNING: WU client failed Searching for update with error 0x80244010 2018-10-04 16:10:29:042 282 2221c AU >>## RESUMED ## AU: Search for updates [CallId = {128CCEAD-F84D-405E-9BC2-607D1694894B}] 2018-10-04 16:10:29:042 282 2221c AU # WARNING: Search callback failed, result = 0x80244010 2018-10-04 16:10:29:042 282 2221c AU # WARNING: Failed to find updates with error code 80244010
Make note of the error, “Exceeded max server round trips: 0x80244010″. It means that the maximum number of requests to the update server (WSUS) exceeds while scanning for updates.
This is also indicated by the Windows Update error code, according to the table (SUS_E_PT_EXCEEDED_MAX_SERVER_TRIPS).
The server disconnects a client that exceeds the maximum trip number. The trip limit in the Windows update receiving protocol is set as 200 trips by default.
Similarly, there is a limit on the maximum size of an XML file the client can download from the update server during a trip – 200 KB. The greater number of updates on the server, the larger the size of the downloading XML file.
If a client fails to obtain the necessary data in 200 trips, it disconnects from the server, resulting in error 0x80244010.
Let us now look into system file corruption in detail.
Reasons Behind System File Corruption
There are dozens of reasons why Windows files or system files might get corrupt, but among the most common are:
-
Unstable network connection:
As a rule, this occurs due to the poor or unstable network connection to the WSUS server or if a client wants to receive too many updates.
The easiest way is to click the ‘Try Again’ button on a client several times in the Windows Update section of the Control Panel or run the command:
Once we start the search for updates, wait for 15 minutes for the previous cycle of update search to finish.
In most cases, this can solve the problem, but if there are a lot of clients in the network, this method is not acceptable.
-
Unsynchronized updates
We can synchronize the updates using the group policy, “Automatic Update detection frequency”. Go to, Computer Configuration -> Administrative Templates -> Windows Components -> Windows Update.
Automatic Update detection frequency specifies the number of hours that Windows will wait before checking for available updates. The exact wait time is found by using the number of hours specified minus a random value between 0 and 20 percent of that number.
For example, if this policy is used to specify a 20-hour detection frequency, then all computers with this policy will check for updates anywhere between 16 and 20 hours.
If the status is set as Enabled, Automatic Updates will check for available updates at specific intervals.
Similarly, If the status is set as Disabled or Not Configured, Automatic Updates will check for available updates at the default interval of 22 hours.
We can also remove the limit on the maximum XML file size that the client can download from the WSUS server.
To do it, run the following command in WSUSDB database:
USE SUSDB GO UPDATE tbConfigurationC SET MaxXMLPerRequest = 0
If we do not want to change our WSUS database settings, clean up the WSUS server using the integrated Cleanup Wizard (Update Service console -> Options -> Server Cleanup Wizard -> all options -> Next). Then, remove old, not in use updates.
As a result, the Windows Update client will get less meta-information from the WSUS server, and the interaction will fit in 200 sessions of 200 KB each.
[Bobcares support techs rely on a systematic troubleshooting approach as much as we focus on the right tools for the job.]
Methods to troubleshoot Windows Error 0x80244010
Windows Error 0x80244010 and its solution involve various steps. Let’s have a detailed look into it:
-
Run the Windows Update troubleshooter
To launch the Windows Update troubleshooter on Windows 7 in order to fix the 80244010 error, follow the below steps:
- Press Windows key + R to open up a Run dialog box
- Type ‘control’ and press Enter to open up the classic Control Panel interface
- Once inside, use the search function in the top-right corner to search for ‘troubleshoot’
- Then, from the list of results, click on Troubleshooting to expand on the list of integrated troubleshooters
- In Troubleshoot computer problem screen, click on System and Security from the list of available options
- Click on ‘Windows Update’ under the ‘Windows category’
- After we successfully manage to open the troubleshooter, start by clicking on the Advanced button and checking the box along with Apply repairs automatically
- Once its done, click on Next to advance to the next menu.
- Wait for the initial scan to complete, then click on Apply this fix if the repair strategy is not done automatically.
- When prompted to restart, do so and see if the issue is resolved at the next system startup by attempting to use the Windows Update feature again.
-
Reset WU components
- Press Windows key + R to open up a Run dialog box
- Type ‘cmd‘ inside the text box and press ‘Ctrl + Shift + Enter’ to open up a Command Prompt
- In case you find the UAC (User Account Control), click Yes to grant admin access.
- Once inside, type the following commands and press ‘Enter’ after each one:
 net stop wuauserv
 net stop cryptSvc
 net stop bits
 net stop msiserver
- These successive commands will stop the Windows Update service, the MSI Installer, the Cryptographic service, and the BITS service.
- Run the following commands in the same CMD window and press Enter after each one to rename the two folders responsible for storing temporary WU files (SoftwareDistribution and Catroot2):
ren C:WindowsSoftwareDistribution SoftwareDistribution.old ren C:WindowsSystem32catroot2 Catroot2.old
- Renaming these two folders will force the Windows Update component to create new folders and prevent any corrupt files from affecting the updating operations
- After the two folders rename, run these final commands in quick succession (press Enter after each one) to start the same services that we disabled at step 2:
net start wuauserv net start cryptSvc net start bits net start msiserver
- Once the service restarts, repeat the action that was previously causing the Windows Update 80244010 error and see if the resolve it done.
-
Run the System Update Readiness Tool
- Visit the URL https://www.microsoft.com/en-us/download/details.aspx?id=20858 and download the latest version of the System Update Readiness Tool. Once it’s done, select the language and click the Download button for the latest version.
- Keep in mind that the download is quite large, so wait patiently.
- Once the download is complete, open the System Update Readiness Tool executable and wait for the initial scan to complete.
- We can see the utility downloading and installing the updates that were previously failing with the 80244010 error.
- After the operation is complete, restart your computer and see if the fix is done.
-
Enable the Detection Frequency policy
To set Automatic Update detection frequency, follow the steps given below:
- In the Group Policy Object Editor, expand Computer Configuration, expand Administrative Templates, expand Windows Components
- Then click ‘Windows Update’
- In the details pane, click Automatic Update detection frequency, click Enabled, and type the number of hours for the detection interval
- Click OK
- Refresh OS components
-
Clean install:
On one hand, this procedure is the easiest, but the disadvantage is that unless you back up your data, you will lose personal files. As opposed to a clean install, this procedure does not require compatible installation media.
-
Repair install (in-place upgrade):
Likewise, this procedure will require to use a compatible installation media. We will have to be technical, but the advantage is that the operation will only touch the Windows files. This means, all your personal files & settings will remain untouched.
If neither of the methods helps fix the update error, clear Windows Update temporary cache and try to search for updates several times.
-
Stop Windows Update service
- Click ‘Start’ and type for “services.msc”,
- In search results “services.msc” should show up. Open it,
- A new window will open containing all Windows services,
- Search for ‘Windows Update’
- Right-click on ‘Windows Update’ and click ‘Stop’.
-
Clear the Windows Update temporary cache folder
- Hold windows-key pressed and hit “R” key simultaneous,
- A small new window will appear,
- Type %windir%SoftwareDistributionDataStore in this new window and click OK,
- This will open Windows Explorer in the correct location,
- Delete all contents of this folder.
-
Start the Windows Update Service again
- Switch back to the windows Services,
- Locate Windows Update,
- Right-click on it and choose Start.
[Looking for assistance to fix windows errors? We are here for you!]
Conclusion
To conclude, WSUS Windows Error 0x80244010 can occurs due to several reasons including, generic glitch, corrupt file in the WU temp folders, system file corruption and so on. Today, we saw how our Support Engineers systematically troubleshoot the WSUS Windows Error 0x80244010.
PREVENT YOUR SERVER FROM CRASHING!
Never again lose customers to poor server speed! Let us help you.
Our server experts will monitor & maintain your server 24/7 so that it remains lightning fast and secure.
GET STARTED
var google_conversion_label = «owonCMyG5nEQ0aD71QM»;
When trying to update our computer, we encountered Windows Update Error Code 0x80244010. Due to this, we cannot download or install the latest version of Windows on our computer. In this post, we will see what you can do to resolve the issue.
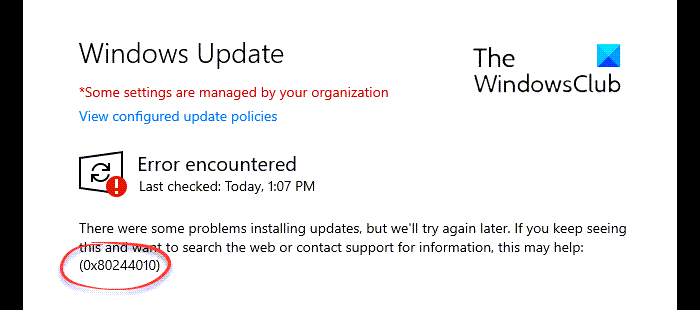
This error code occurs when the device exceeds the maximum number of requests to the update server, commonly the WSUS, during the update process. This limit is usually set to 200 requests. To resolve this, you may also consider checking network connections or adjusting the request settings on the update server.
If you encounter Windows Update Error Code 0x80244010, follow the below suggestions:
- Run the Windows Update troubleshooter
- Use the System File Checker tool
- Reset Windows Update components
- Clear the SoftwareDistribution folder
- Enable the Automatic Updates detection frequency policy setting.
Before you begin the steps, create a system restore point first. It will help you get back the changes if you ever need it in the future.
Now let us see them in detail.
1] Run the Windows Update troubleshooter
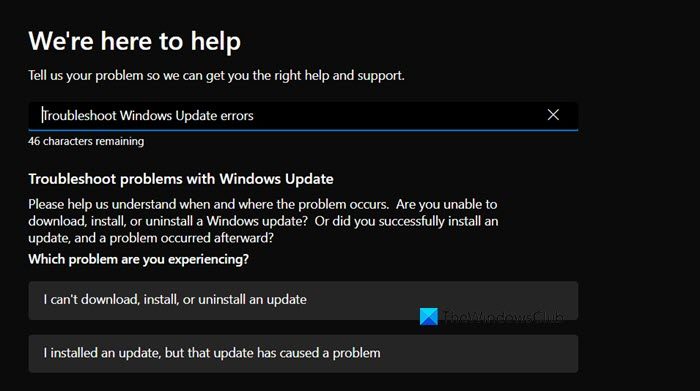
Windows Update troubleshooter is a built-in application that can certainly resolve most common Update problems on the device. Hence, it could be helpful for this issue. To run the troubleshooter, we can use the Get Help app. Open the Get Help app, in the search bar, type “Troubleshoot Windows Update errors” and then follow the on-screen instructions to resolve the issue.
Alternatively, you can run the troubleshooter from Windows Settings as well.
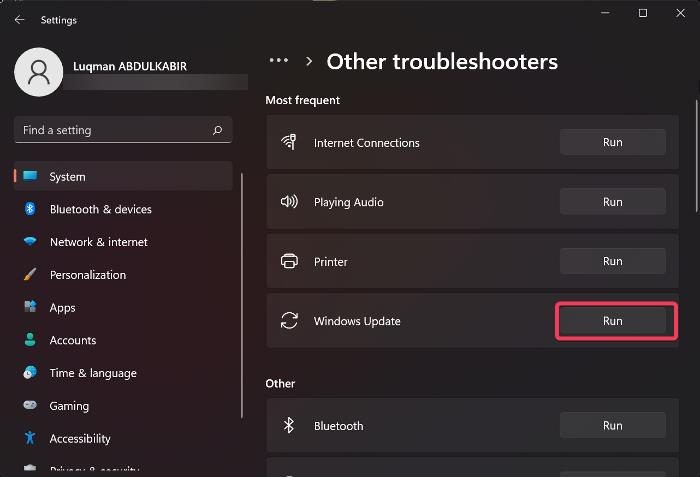
If you are on a Windows 11 computer, go to Settings > System > Troubleshoot > Other troubleshooter and then click on Run placed next to Windows Update.
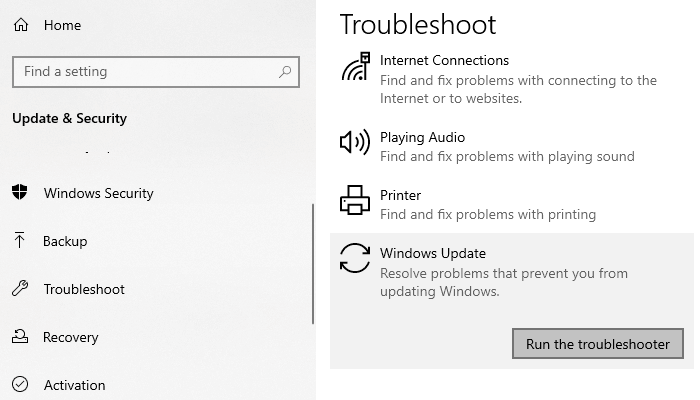
Windows 10 users, need to open the Windows Settings > Update & Security > Troubleshoot tab. Now move to the right pane, select Windows Update, and then hit the Run the troubleshooter button.
Apart from this, you can fix Windows Update errors by using the online Windows Update troubleshooter. Unfortunately, if it doesn’t work, move down to the next potential workaround.
2] Use the System File Checker tool
Sometimes this issue can also be caused due to corrupted or damaged Windows system files. So, there is the possibility that some system files might be missing. In this case, you need to run the System File Checker tool so that it can search the system for damaged system files and replace them if required.
So, you first need to run an elevated command prompt.
And once it opens, type the following text code:
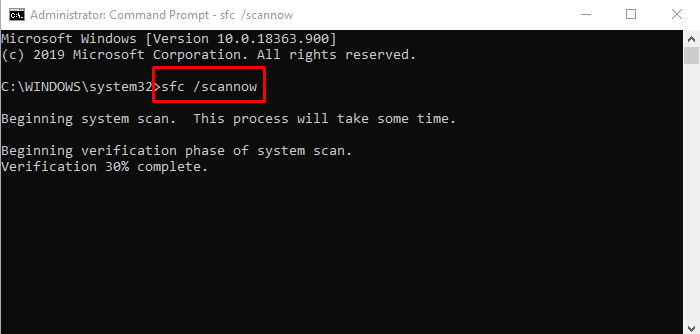
sfc /scannow
Now press Enter and wait for a while until it completes the SFC scanning process.
Once it completes, restart your device and then check if the problem is solved now.
3] Reset Windows Update components
Sometimes this type of error occurs due to having issues with the update cache, or some faulty Windows components. Users may normally confront such a situation when the services associated with the Windows Update stop functioning. To fix such an issue, you can reset the Windows Update to default Settings using the Reset Windows Update Components tool.
4] Clear the SoftwareDistribution folder
Clear the SoftwareDistribution folder and see if that works for you. Here is a quick way to do this:
First of all, right-click on the Start button and select the Run option from the menu list.
Type in services.msc in the text field and then hit the OK button. In the Services window, locate the Windows Update item from the list.
Once you find it, right-click on it and select the Properties option from the context menu.
On the General tab of the Windows Update Properties window, click on the drop-down menu of the Startup type and select Disabled.
Then click on the Stop button > Apply > OK.
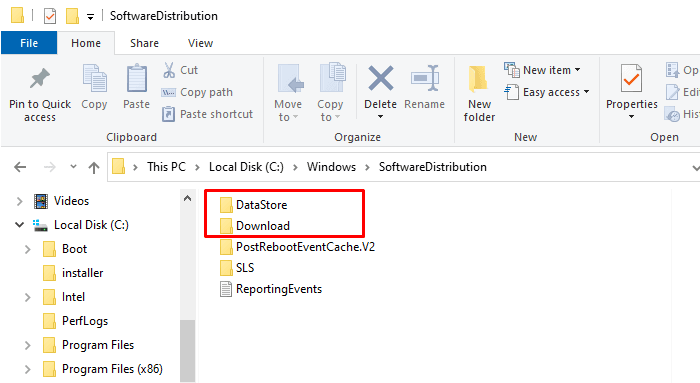
Now open the Windows Explorer (Win+E) and navigate to the path “C:\Windows\SoftwareDistribution”.
Here you will see the DataStore and Download folder. Open both folders one by one and delete every file and directory inside there.
Thereafter open the Services > Windows Update > Properties window as it is explained earlier.
On the General tab, go to the Startup type and select the Automatic option using the drop-down menu.
Now, click Start > Apply > OK to save the changes.
Once you complete the steps, close the window and look for the new Windows Updates.
5] Enable the Automatic Updates detection frequency Policy

Unfortunately, if none of the above methods work for you, then try to enable the Detection Frequency policy.
To do so, you first need to open the Group Policy Editor on your Windows device.
In the Local Group Policy Editor window, copy & paste the following path to the address box and then hit enter:
Computer Configuration > Administrative Templates > Windows Components > Windows Updates
When you’re on the location, switch to the right pane and search for the Automatic Update detection frequency policy. Once you find it, double-click on it.
In the Automatic Update detection frequency window, select the radio button next to the Enabled option.
Moving ahead to the Options section, you will see the default 22 in the interval text field. So, set here less value than the default one.
Now click on the Apply > OK.
We hope the above-mentioned method would help you to resolve this issue.
Related Post: Fix Error 0x8024a206 in Windows.
What is error 0x80244010 on Windows Update?
Windows Update Error Code 0x80244010 is caused when your system is unable to download or install the latest version of Windows. In order to resolve it, you should first of all reboot your computer and see if that helps. In case, that is to no avail, go ahead and follow the aforementioned solutions.
Read: Fix Windows Update error 0x80070BC9
How do I fix error code 0x8024402c?
Windows Update error code 0x8024402c occurs when your system is attempting to connect to Microsoft’s Windows Updates servers. In order to resolve it, we need to check and reconfigure the Proxy settings as well as set up Automatically Detect the connection settings. We recommend you check our guide on Windows Update error 80x024402c to know more.
Also Read: Fix 0x80248014 Windows Update Error.
After installing the latest Windows 10/11 update, you might encounter an error message indicating that the Windows update client failed to detect with error 0x80244010. This error occurs during the Windows Update process, leading the system to roll back or restore to the previous date and time.
The Windows Update error 0x80244010 can be quite frustrating, especially if you are using your computer frequently on a daily basis. In this article, we will discuss the problem, troubleshooting steps, solutions and all to make sure that your OS gets up-to-date with the latest security patches and various features/improvements from Microsoft. So, follow the simple methods below in order to fix problems installing updates in Windows 10/11 0x80244010.
What Is the Windows Update 0x80244010 Error?
Windows Updates are an important part of keeping your Windows PC or laptop up to date, but it’s not uncommon for things to go wrong and end up with errors such as 0x80244010.
According to affected Windows users, the problem installing updates Windows 10/11 0x80244010 error usually occurs after installing a new WSUS server in the network.Most of the time, they simply could not receive and install Windows updates. However, for some of them, the problem is accompanied by the error 0x80244010 code.
But what causes the error 0x80244010 on Windows Update? Here are some of the most common error 0x80244010 culprits:
- System Glitch – This usually occurs on Windows endpoint machines. And if a system glitch is a culprit, the good news is that Microsoft has built-in repair suggestions that can be deployed anytime. Users can just apply the recommended fixes to resolve the issue.
- Corrupted Files in the WU Temp Folder – Sometimes, corrupted files in the WU Temp folder can trigger the 0x80244010 error. Files in this folder may get corrupted after installing a faulty update or after running an antivirus scan. To fix this, users need to run several commands to reset WU components, including those in the Temp folder.
- Problems with Conventional Update Methods – At times, the WU component itself does not work automatically because the WU function has been blocked. To resolve this, you may use the System Update Readiness tool. This allows you to install updates that fail to install via conventional methods.
- Disabled Detection Frequency Policy – The WSUS server only allows a certain number of requests. When your requests exceed the limit, you can no longer install the Windows update. And as a result, you encounter the error message. In this case, you may use the Local Group Policy Editor to grant access to the Automatic Update detection policy and set a certain global update interval.
- Corrupted System Files – In the event that the Windows Update troubleshooter cannot resolve the 0x80244010 error automatically, it is possible that there is an underlying system file corruption issue. The usual fix for this situation is to refresh all Windows components via a Clean Install.
- Unstable Internet Connection – Windows updates and system files may get corrupted and cause the error 0x80244010 because of an unstable internet connection. The easiest way to fix this is just to try installing the error again and again or run a particular command via the Command Prompt window.
- Unsynchronized Updates – If updates are not synchronized, the error 0x80244010 may surface. To synchronize Windows updates, you may set the Windows Update detection policy frequency to automatic.
Ways Fix the Windows Update 0x80244010 Error Code on Windows 10/11
If you are facing the error code 0x80244010 on your Windows computer, then these fixes will help you resolve it without wasting anytime.
Fix #1: Restarting Your Computer
Windows updates are essential not only for your operating system but also for the security of your computer. If you’re receiving a 0x80244010 error code, it might be because you’re using a previous version of Windows while trying to upgrade.
To fix this problem, restart your computer and enter Safe Mode with Networking from the Power User Menu. Once there, type ms-settings:windowsupdate in Cortana and click Scan for Updates to complete that process. Hopefully, this resolves the 0x80244010 error.
Fix #2: Run the Windows Update Troubleshooter
This error is not as mysterious as it seems and can often be resolved by running the Windows Update Troubleshooter. The troubleshooter can help you repair update installation problems or other related errors with the Windows update process.
To run the troubleshooter, follow these steps:
- Go to Settings, then Apps & features.
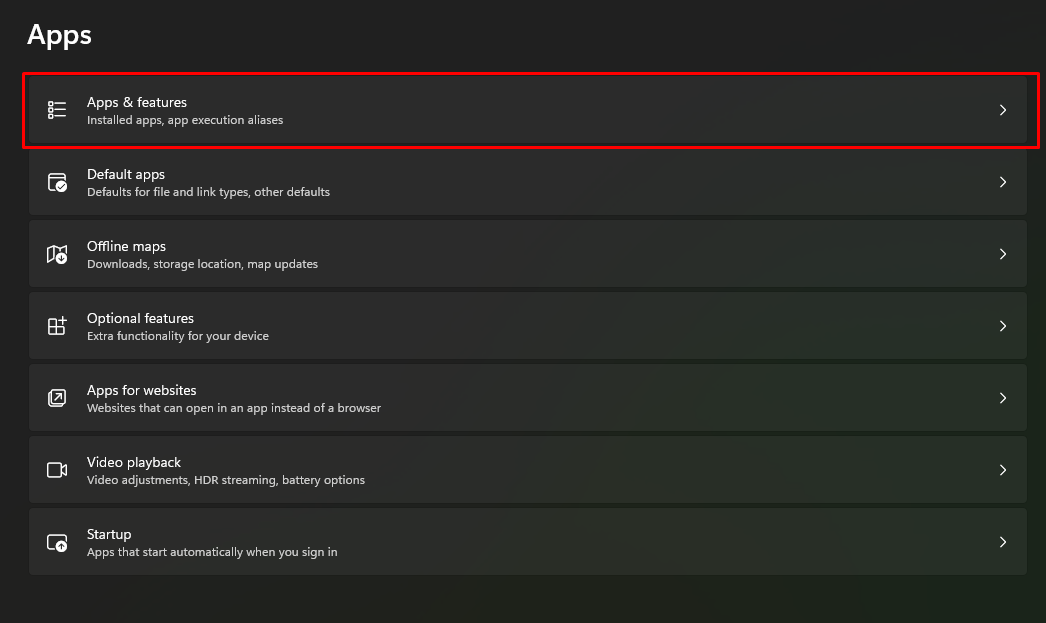
- Select Manage Optional Features.
- Turn on Use my sign-in info to automatically finish setting up your device after a Windows update or restart.
- Open Start Menu and enter Troubleshooting.
- Choose Troubleshooting Tools.
- Select Windows Update.
- When the troubleshooter opens, click Next.
- Click Scan Now. If there are any updates that need to be installed, your computer will start downloading them automatically for you.
Fix #3: Reset the Windows Update Components
When you get the Windows update error code 0x80244010, your Windows Update components may not be properly configured to sync updates.
To fix this problem, reset your components to default values. Here’s how:
- In order to reset your Windows Update components, first, uninstall the Microsoft Security Essentials program and any other third-party antivirus software that you may have installed.
- Next, open an Administrator Command Prompt window as an administrator by typing cmd in Search and pressing Enter or using the keyboard shortcut CTRL+SHIFT+ENTER (right-click and select Command Prompt (Admin)).
- Type or copy/paste the following commands one at a time and press Enter after each command:
- netshwinsock reset catalog
- netsh int ipv4 reset catalog
- netsh int ipv6 reset catalog
- netshwinsock set global mtu=9000 store=active
These commands will restore Windows Update components to their default values.
Fix #4: Use the System Update Readiness Tool
If you are running an old version of Windows, try using the System Update Readiness Tool from Microsoft. The tool scans your PC for missing, damaged, or out-of-date system files and provides online help for correcting them. This may solve your problem by installing Windows Updates that failed previously due to a virus or other corruption.
- Launch an elevated Command Prompt window by pressing the Start menu and typing cmd into the text field.
- Right-click on the top-most result and choose Command Prompt. Choose Run as Administrator.
- If asked for a password, input it and choose Allow.
- Input this command and hit Enter: DISM.exe /Online /Cleanup-image /Restorehealth.
Fix #5: Run System File Checker
Running the System File Checker utility sometimes works to resolve the error. Here’s how to use it:
- Press Win+R or hold down the Windows key and press R on your keyboard.
- Type cmd in and press Enter.
- Right-click on Command Prompt and select Run as Administrator from the list of options that appears.
- In the new window type sfc /scannow then hit Enter. The tool will start scanning for any corrupted files, let it finish its work before shutting down and restarting your PC.
- After the process is completed, you should notice a popup window confirming that no errors were found. If the system file checker finds a problem with a file (or set of files), it might ask you if you want to repair them; this process may take some time, depending on how much space is required to fix everything. Otherwise, just wait until your computer has fully booted up again, and everything is back to normal!
Fix #6: Reset TCP/IP Settings
Resetting TCP/IP Settings is a process in which you will change your computer’s IP address and default gateway back to their default values. Doing this should allow your computer to connect with Microsoft’s servers and receive updates once again. This can be done through Command Prompt or by following these steps:
- Click on Start in the bottom left-hand corner of your screen.
- Type command into the search bar in order to open up a Command Prompt window.
- Enter ipconfig /release at the prompt.
- Close out of the Command Prompt window when it says Successfully released all reserved local addresses.
- Open up another Command Prompt Window.
- Enter ipconfig /renew at the prompt.
- Close out of that Command Prompt Window when it says Successfully renewed DHCP lease.
- Restart your Windows 10/11 computer when prompted to do so.
Fix #7: Disable Proxy Server in Internet Options
Disabling your proxy server can also fix the 0x80244010 error.
First, you’ll need to open your Internet Options in your Control Panel. To do this, type Internet Options into your search bar, click Settings, and then click the tab that says Connections.
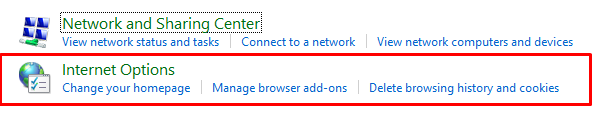
After you’re in Connections, there will be a button called LAN Settings which allows you to disable Proxy Server for connections that don’t go through the proxy server first. Make sure it’s unchecked and hit OK. Then restart your Windows 10/11 computer and try updating it again!
Fix #8: Uninstall and Reinstall the Network Adapter Driver
Uninstalling and reinstalling the network adapter driver has worked and resolved the error for some affected users. Hence, it’s something you may want to try as well.
To do this:
- Open Device Manager (Right-click This PC, Properties, and select Device Manager) and search for your Network Adapter driver.
- Right-click the found driver and select Uninstall.
- Restart your computer if you’re prompted. Wait for a minute or two until it has completely restarted and has gone back to normal (on Desktop).
- If the issue persists, right-click This PC again and choose Properties.
- In the window that pops up, go to Advanced System Settings>Hardware tab.
- Click on Device Installation Settings.
- Click the very first setting in this list: No, let me choose what is best for my computer. You should be taken to a list of drivers installed on your machine; find all associated devices connected via Ethernet and check any boxes before clicking OK.
Fix #9: Use a PC Repair Tool
You can also download a PC repair tool to fix your PC as if you were an expert! In most cases, this error is caused by third-party applications or viruses that have been partially removed from your computer. With this program, you can scan the entire computer, pinpoint all the infected files, delete them without worries, and then optimize your PC performance again.
Fix #10: Disable Firewall or Antivirus while Updating Windows OS
The Firewall or Antivirus could be your culprit. If you have one of these installed, they may be interrupting the installation process, causing you to see the error message.
Try disabling these temporarily while updating your system. When you restart your PC again, it should fix any errors related to starting up with Firewall or Antivirus installed. You can re-enable the protection when all updates are completed.
If you still see a failure with the same error code after trying this step, uninstall your antivirus or firewall completely before continuing.
Fix #11: Perform a Clean Install
This means reinstalling your operating system and drivers but keeping your files, apps, and settings. Doing this might not work for some people, so it’s always a good idea to make a backup before attempting a repair or reinstallation.
In order for this technique to work, you’ll need an external hard drive or USB stick that has enough free space so you can transfer your data from the computer. Once you’ve backed up your files, then do the following:
- Go to Settings > Update & Security > Recovery and click Restart Now.
- If prompted with Choose an option, select Troubleshoot.
- Select Advanced Options > Startup Settings.
- Press 5 to Enter Safe Mode and press Enter.
- Press F8 while in Safe Mode and boot into the Command Prompt.
- Type chkdsk without quotes and hit Enter.
- Type exit without quotes to exit the Command Prompt, type exit again without quotes, and press Enter one more time.
- Restart your computer as normal by clicking Restart Now.
Fix #12: Clear the Windows Update Temporary Cache
Lastly, try clearing your cache to fix the error. Here’s how:
Start by deleting temporary files manually. Click on Start at the bottom left of your screen and type Disk Cleanup into search. Then click on the icon that says Disk Cleanup.
- You will see a box pop up, saying Disk Cleanup Tool has found over XX gigabytes of junk files that can safely be deleted. Do you want to delete these files now?
- Select Yes!
- Select all three boxes and hit OK.
- Next, go to C:\Windows\SoftwareDistribution\Download where you will find a folder called Cache.
- Delete everything inside this folder.
- Now, go back to the Disk Cleanup window where we just cleared our cache, but this time select Temporary Files and Cookies (leave the other checkboxes unchecked).
- Hit OK.
- Restart your computer to make sure everything gets reset properly before we move on.
In Summary
When you are having a problem with downloading and installing new updates for your computer, there are a few things you can do to try and fix this problem. This includes what we have enumerated above, including restarting your computer to check for any new updates, checking your firewall to see if it’s blocking updates, or resetting Windows update components.
Restarting your computer should always be the first step in any update process because this clears up bugs and slows that are occurring in the background. Checking your firewall is also important because, many times, it will block the installation of a downloaded update due to security reasons. The next thing to do is reset Windows update components which could fix a broken component in windows update, including program files, windows services and more. If all else fails, you can always seek guidance from a licensed Windows technician.
Give us some love and rate our post!
Did you receive an error code 0x80244010 while attempting to download, install, or update a Windows device? This bug normally appears when you tap “Check for updates” inside the Windows update section. Moreover, this also prompts an error message that reads – “Code 80244010 Windows Update encountered an unknown error“.

What is Error 0x80244010? When does it occur?
The error 0x80244010 is an update-related issue and it primarily occurs when you are attempting to download and install the recent cumulative updates on your Windows PC. The most probable reasons that may invoke this issue are as follows –
- Internal glitches: Restart your computer and this error resolves on its own.
- Corrupt system files or folders: The presence of corrupt files or folders may invoke an update-related issue on your PC. This mostly happens when you are running a third-party antivirus program on your computer. To solve it, you must uninstall or at least disable running an external security app, and then perform an SFC scan on your PC.
- Corruption within the Windows Update components: Purge SoftwareDistribution and Catrrot2 folders and check if this update issue resolves afterward.
- The required services or processes are disabled by some policies: If that’s the case, you must re-configure such policies so that Windows Updates do happen without getting into some error codes.
Now that you know what may invoke an error 0x80244010 in Windows, let’s learn how to resolve this issue in the below section.
How to Fix Windows Update Error Code 80244010
Troubleshooting Windows Update, Running SFC scan, and Resetting Windows components are a few methods that can fix this error 0x80244010 on Windows 10. If not, go to the Update Catalog, download the pending update’s “.msi file” and apply it to your PC.
Note: There’s an in-built group policy in Windows that must remain enabled and running on your computer for updates to download and install automatically. This policy goes by the name “Detection Frequency Policy”. Check for this policy and re-enable it if you find it disabled or not running on your PC.
To solve the Update Error Code 0x80244010 in Windows 10, use the following workarounds –
Solutions List
- Troubleshoot Windows Update
- Run System File Checker Utility Program
- Scan for Malware using Microsoft Defender
- Reset Windows Update Components
- Manually Install Windows 10 Updates
- Modify Automatic Update detection frequency policy
1] Troubleshoot Windows Update
Windows includes a great utility program that can take care of any update-related issues. Before proceeding to any other fixes, you must give “Windows Update Troubleshooter” a try. Here’s how to run this tool –
- Open Windows Settings (using WinKey + I).
- Select Update & Security then Troubleshoot on the left column.
- Head over to the right pane and expand “Windows Update“.
Quick Note: If you are on version 2004, click “Additional troubleshooters” first then “Windows Update” on the upcoming screen.
- When the box expands, hit “Run the troubleshooter”.
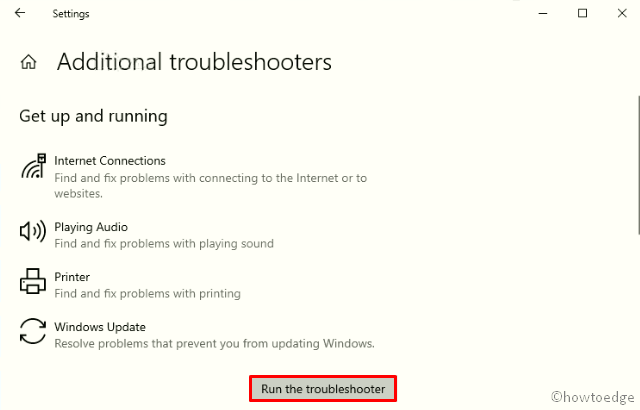
- Follow the on-screen instructions to troubleshoot Windows errors.
2] Run the System File Checker Utility Program
If the troubleshooter doesn’t solve the error 0x80244010, there may lie corrupt files inside Windows. To mitigate obsolete files or re-create missing files, you should run an SFC scan. Here’s how to proceed –
- Right-click anywhere on the Taskbar and click Task Manager.
- Go to the File Menu and hit Run new task.
- Type cmd near the blinking cursor and press Enter, just make sure to check the box beneath.
- On the elevated console, type
sfc /scannowand press the Enter key again.
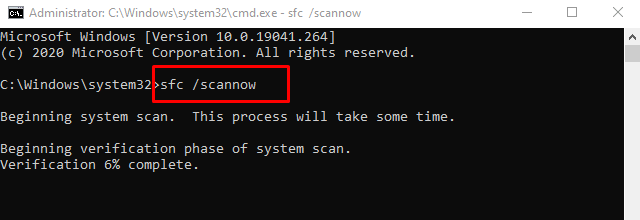
- This approximately takes 10-15 minutes to complete, so wait patiently.
- Once over, Restart the PC so as to make the above changes effective.
Sign back in and check whether you can now update your operating system or not. If still not, try the below fixes –
3] Scan for Malware using Microsoft Defender
Sometimes, the Error code 0x80244010 may occur simply due to some malware infection or virus attack. If that’s the case, open Windows Security and perform a full scan on the PC.
Tip: Windows users should definitely go for the Full system scan once a month to get rid of lurking viruses or trojans.
Third-party antivirus programs are of no use unless you have paid for using their services. If you have installed any such free application, either disable it or remove it completely.
4] Reset Windows Update Components
In case, the error code 0x80244010 still persists, this might be due to the corrupt Windows components. Resetting Windows Update components will surely repair the underlying causes and restore Windows OS back to normal. All you need is to follow the below guideline –
- Launch Command prompt as Admin – Type “CMD” in the search bar then right-click on the top result and choose Run as administrator.
- A UAC prompt will appear afterward, tap Yes to authorize the access.
- Next, execute the following codes one after another. Just make sure to press Enter at the end of each code.
net stop wuauserv net stop cryptSvc net stop bits net stop msiserver
- Doing so will stop certain basic services. Next, rename SoftwareDistribution and Catroot2 folders using the below two codes –
Ren C:\Windows\SoftwareDistribution SoftwareDistribution.old
Ren C:\Windows\System32\catroot2 Catroot2.old
- Now, restart the services that you have previously paused –
net start wuauserv
net start cryptSvc
net start bits
net start msiserver
- Restart Windows to make the changes effective from the next login.
- Sign back in and navigate to the following path –
Settings > Update & Security > Windows Update
- Hit the Check for Updates button and if there is any pending update, download and install the same.
5] Manually Install Windows 10 Updates
Many a time, such errors appear after installing a wrongly configured patch update. So, look back and remember if you had recently installed any updates or not. If yes, then roll back the lately installed cumulative update on your PC.
However, if not, you should manually download and install the recent security patch on your computer. To do this, you need to first find out the pending updates “KB” number. Here’s how to find this –
- Jointly press Win+I to open the Settings UI.
- Click Update & Security then Windows Update.
- Head over to the right pane and hit “View Update history”.
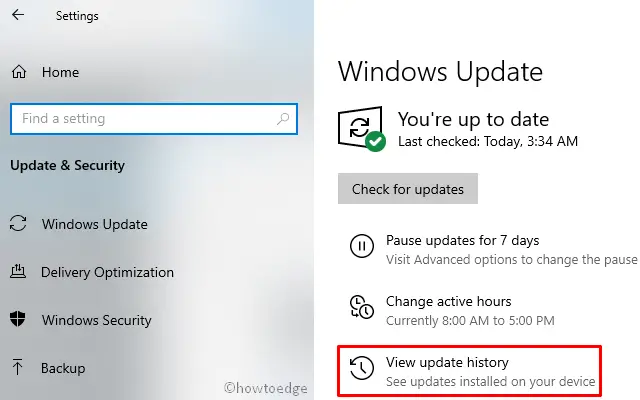
- On the next screen, you may find the list of failed updates.
- Note down the CU number and follow the next part –
Manually Install the Pending Updates
- Visit the Microsoft Update Catalog website and type the “KB” number noted above.
- This will present a list of well-matching results, choose one as per the system architecture.
- Click Download next to the update link and thereafter the top link on the upcoming window.
- When the download completes, click twice on the setup file to upgrade the operating system.
6] Modify Automatic Update detection frequency policy
If none of the above solutions fix the error code 0x80244010, you must try to enable the Detection Frequency policy. Here’s how to do this –
Note: Windows 10 Home users can’t do this as their PC lacks a great feature – Group Policy.
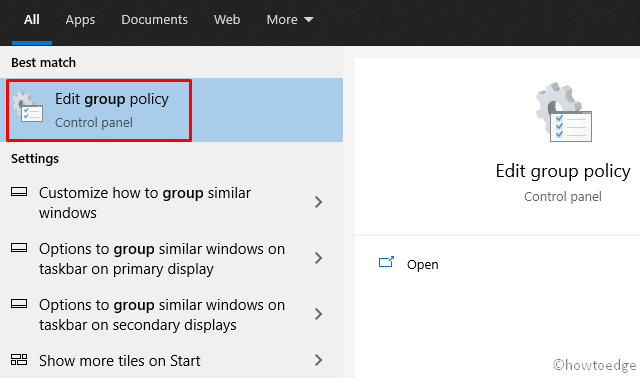
- Type “Group policy” on the search bar and click the best-matching result.
- On the Policy window, browse to the path –
Computer Configuration > Administrative Templates > Windows Components > Windows Updates.
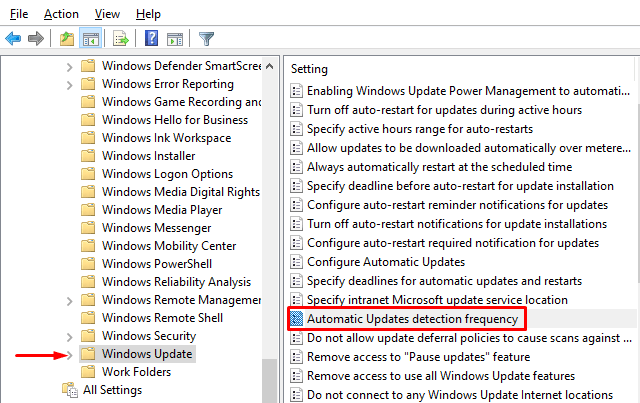
- Once you reach there, move right-side and look for the “Automatic Update detection frequency” policy.
- Double-click on this policy and this will open another window.
- Mark the circle left of the “Enabled” option and hit Apply then OK.
That’s it, I hope this article helps to fix the Error Code 0x80244010. If you have any queries or suggestions, write them down in the comment section.
How do I fix Error 0x80244010 in Windows?
Since this is an update-related issue, you may solve it simply by running the Windows Update Troubleshooter. In case the error occurs even after this, you may attempt the fixes discussed above. If all these solutions fail to resolve this issue on your Windows PC, you must manually download and install the pending update on your computer.