
Last Updated :
16 May, 2024
While working on Windows devices, we used to work on Windows File Explorer for working with files. On File Explorer of Windows, the creation of new files as well as deleting old ones is one of the easiest processes. However, if your File Explorer is not responding, then the process to Delete Folder using CMD can be an alternative.
The Windows Command Prompt is the command line tool that executes different tasks with the help of Windows Commands. Using CMD in Windows, the File Creation for Windows can also be executed. If you are having trouble Deleting Files or Folders on Windows directly by right-clicking, then you can Delete files using CMD.
This article is going to discuss the commands required to Remove Files & Folders using the UsingCommand Prompt of Windows.
Table of Content
- Methods to Delete Files and Folders Using Command Prompt
- Method 1: Delete Files or Folders on CMD using DEL Command
- Method 2: Delete Files or Folders on CMD using RMDIR Command
- Delete a Folder and Subfolders in Command Prompt
Methods to Delete Files and Folders Using Command Prompt
To Erase Windows Files or Folders using CMD, the following guidelines should be used properly. Let us start with the DEL Command Execution.
Method 1: Delete Files or Folders on CMD using DEL Command
Note: DEL Command is used to delete a file. Here, we will take our sample file “hello.txt” located on the desktop, and try to delete it using the del command in CMD. Follow the steps given below to delete the file:
Step 1: Change the Path of the Directory in CMD and set it to the path of the file. Type the following command and press Enter.
cd desktop
Step 2: Delete the file hello.txt with the following Windows Command.
del hello.txt

Method 2: Delete Files or Folders on CMD using RMDIR Command
Note: RMDIR Command is used to delete the entire folder or directory. Here, we will take our sample folder named “Tasks” placed on the desktop and try to delete it using RMDIR Command in CMD.
Step 1: Change the Directory’s Path in Command Prompt and set it to the path of the folder.
cd desktop
Step 2: Delete the folder Tasks with the following command.
rmdir tasks

From the above discussion, this should become clear that the Deletion of Windows Files using CMD is a matter of a few seconds. You have to just move inside the Windows Directory using the Windows CD Command. And then, as per your choice execute any one of the Windows File Deletion Commands in CMD.
Delete a Folder and Subfolders in Command Prompt
Step 1: Open Command Prompt.
Step 2: Navigate to the directory where the folder you want to delete is located using the cd command.
Command: cd <FolderName>
Step 3: To delete a single folder, use the following command.
Command: rmdir <FolderName>
Step 4: To delete a folder and all its subfolders and files, just include “/s” in between the rmdir and <folderName>, use the following command.
Command: rmdir /s <FolderName>
Step 5: Press Enter to execute the command.
Also Read
- Useful CMD commands for daily use in Windows OS
- CMD Commands to Gather Information of a System
- How to Show all the previously connected WiFi Networks using CMD in Windows?
Conclusion
In this article, we explored how to use Command Prompt in Windows to delete files and folders efficiently when facing issues with File Explorer. We discussed two methods: using the DEL command to delete files and the RMDIR command to delete folders. Additionally, we provided a step-by-step guide on how to delete folders and subfolders using Command Prompt.
Все способы:
- Полезные советы перед удалением папок через консоль
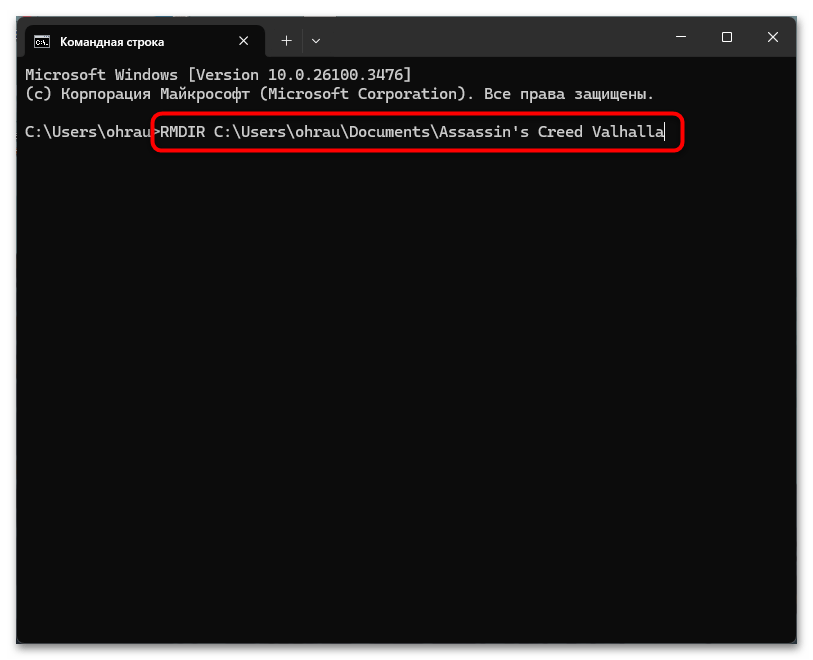
- Способ 1: Использование команды RMDIR (RD) для директорий
- Способ 2: Использование PowerShell и команды Remove-Item
- Способ 3: Удаление через PowerShell с использованием конвейеров
- Популярные условия для фильтрации папок в PowerShell
- Способ 4: Использование команды DELTREE в режиме совместимости
- Вопросы и ответы: 0
Полезные советы перед удалением папок через консоль
Работа с папками через консоль Windows требует некоторой подготовки и понимания основных принципов. Перед тем как начать удаление директорий, нужно правильно определить путь к нужным папкам и научиться ориентироваться в консольном интерфейсе. Многие пользователи обходят стороной «Командную строку», считая ее слишком сложной. Однако несколько базовых приемов значительно упростят взаимодействие с ней. Точное указание пути является фундаментальным элементом для выполнения любых операций с папками в «Командной строке». Неверно указанный путь приведет к ошибкам или, что гораздо хуже, к удалению не тех директорий, которые планировалось удалить. Следующие практические рекомендации помогут избежать распространенных ошибок и сделают процесс удаления папок более эффективным.
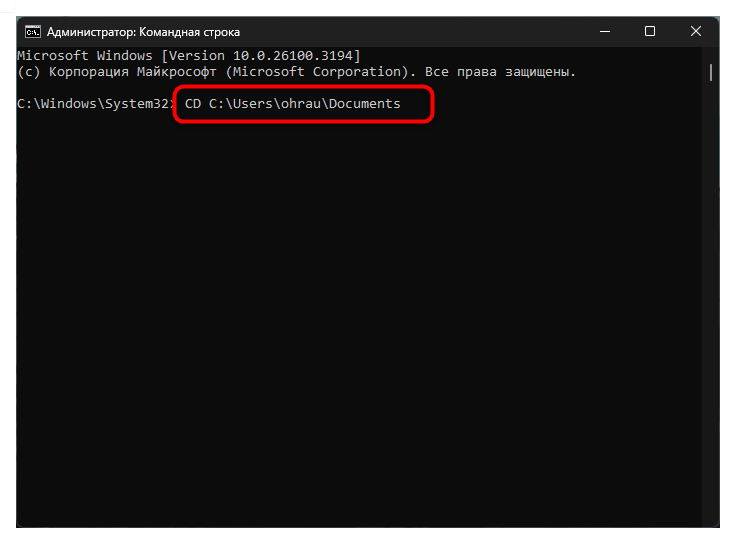
- Использование команды CD для навигации. Команда CD (Change Directory) дает возможность перемещаться между папками в файловой системе. Это устраняет необходимость постоянно вводить полный путь при каждой операции с папками. К примеру, введя команду
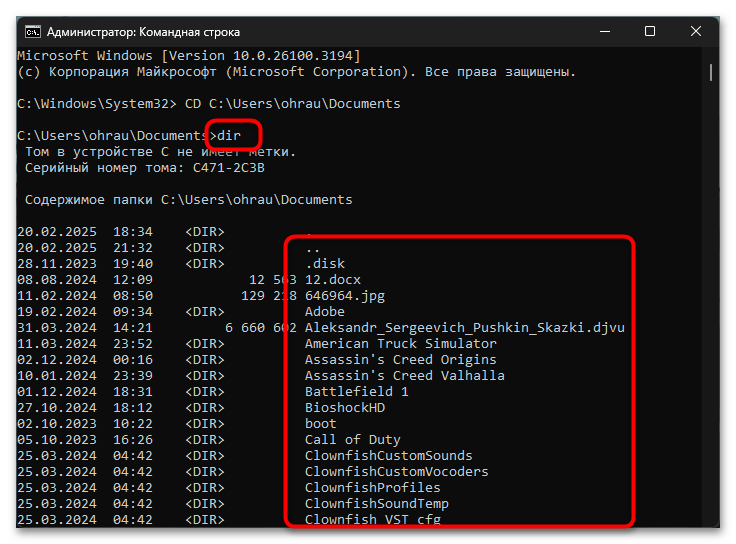
CD C:\Users\Username\Documents, вы перейдете в директорию Documents. После этого вы сможете выполнять операции с папками внутри нее, указывая только их имена без полного пути. Такой подход существенно сокращает объем ввода и минимизирует вероятность ошибок при написании пути. - Просмотр содержимого директории с помощью DIR. Перед тем как удалять папки, настоятельно рекомендуется проверить содержимое текущей директории с помощью команды DIR. Эта команда покажет полный список всех файлов и папок в текущем расположении. Такая предварительная проверка поможет убедиться, что вы находитесь в нужной директории, и точно определить названия папок, которые планируется удалить. Команда DIR также может использоваться с масками для фильтрации результатов, например
DIR /ADпокажет только папки в текущей директории. - Использование автодополнения с помощью клавиши Tab. Для ускорения ввода длинных путей к папкам и предотвращения опечаток, активно используйте клавишу Tab. Эта функция автоматически дополняет названия папок и файлов при вводе. Начните вводить путь или имя папки и нажмите Tab – система предложит возможные варианты завершения. Если нажать Tab повторно, можно переключаться между доступными вариантами. Эта функция особенно полезна при работе с папками, имеющими длинные или сложные названия с большим количеством символов.
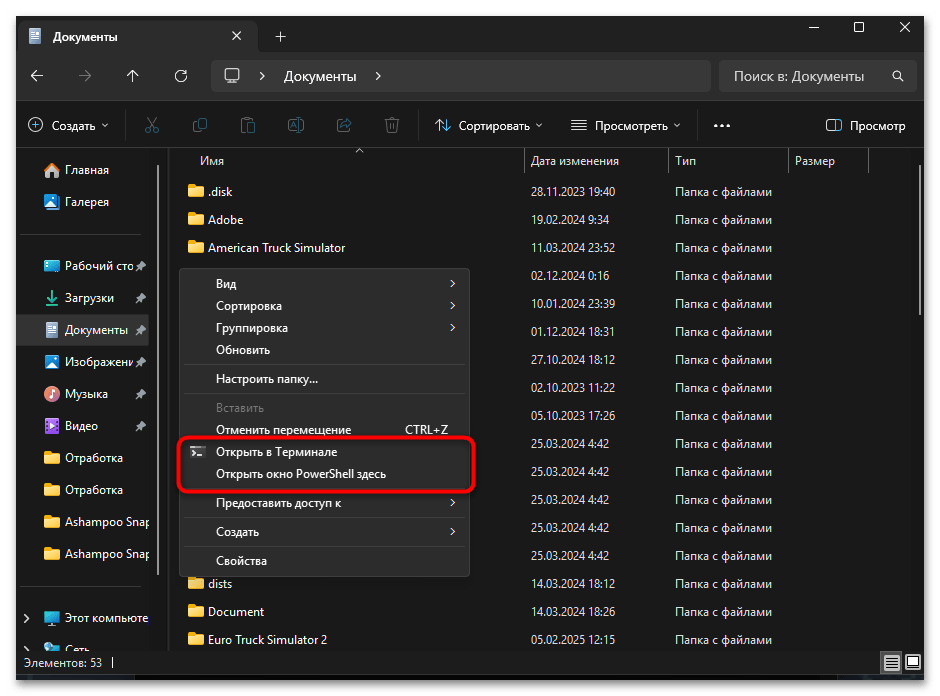
- Открытие «Командной строки» в определенной директории. Чтобы сразу открыть консоль в необходимой папке и избежать долгой навигации, воспользуйтесь проводником Windows. Перейдите к нужной директории в проводнике, после чего нажмите и удерживайте клавишу Shift, одновременно кликнув правой кнопкой мыши. В появившемся контекстном меню выберите пункт «Открыть окно командной строки здесь» или «Открыть окно PowerShell здесь». Этот прием позволяет мгновенно начать работу в требуемой директории без необходимости ручной навигации.
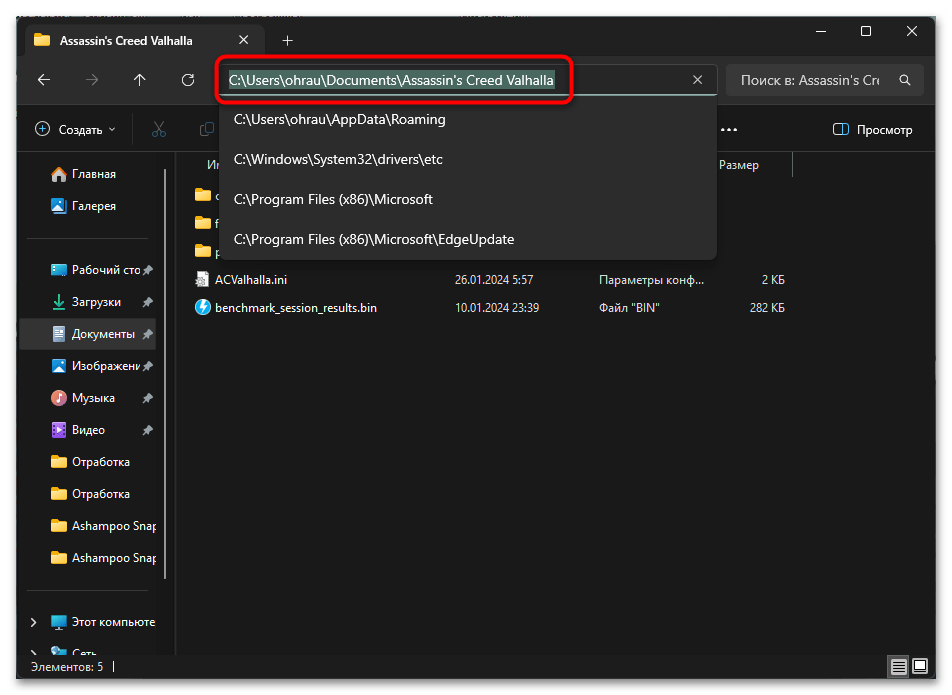
- Копирование пути из проводника Windows. Если вы сомневаетесь в точности пути к папке, скопируйте его напрямую из проводника Windows. Для этого перейдите к нужной директории в проводнике, щелкните в адресной строке для выделения пути и скопируйте его (Ctrl+C). Затем вставьте полученный путь в консоль (правый клик мыши или Ctrl+V в PowerShell). При вставке в классическую «Командную строку» может потребоваться заключить путь в кавычки, особенно если в нем содержатся пробелы или специальные символы.
Способ 1: Использование команды RMDIR (RD) для директорий
Удаление папок через консоль Windows является необходимым навыком для управления файловой системой без использования графического интерфейса. Существует специальная команда RMDIR (или сокращенно RD), разработанная именно для удаления директорий. Эта команда присутствует во всех версиях Windows и не требует установки дополнительного программного обеспечения. Изначально RMDIR создавалась для удаления только пустых директорий, однако при использовании определенных параметров она превращается в мощный инструмент для удаления целых структур папок со всем их содержимым. Это делает ее незаменимой при необходимости массовой очистки разделов жесткого диска или быстрой реорганизации файловой системы.
Для удаления папки с помощью RMDIR необходимо открыть «Командную строку» и ввести команду в следующем формате:
RMDIR путь_к_директории
или используя сокращенный вариант:
RD путь_к_директории
Команда RMDIR имеет два ключевых аргумента для работы с папками:
- /S. Этот параметр указывает на необходимость удаления не только самой директории, но и всех файлов и поддиректорий внутри нее. По сути, он превращает команду в инструмент для рекурсивного удаления целых ветвей файловой структуры. Если не использовать данный параметр, команда RMDIR сможет удалить только пустые директории и выдаст ошибку при попытке удалить папку, в которой есть файлы или другие папки. Поэтому при необходимости полного удаления непустой директории параметр /S является обязательным.
- /Q. Данный параметр отключает запрос подтверждения при удалении директории со всем ее содержимым. Обычно система запрашивает подтверждение в формате «Вы уверены (Y/N)?» перед удалением папки с файлами. Параметр /Q (от слова Quiet – тихий) позволяет пропустить этот запрос и выполнить удаление немедленно. Этот аргумент особенно полезен при автоматизации процессов или при необходимости удаления большого количества директорий. Однако его следует использовать с большой осторожностью, так как он устраняет последнюю защиту от случайного удаления важных данных.
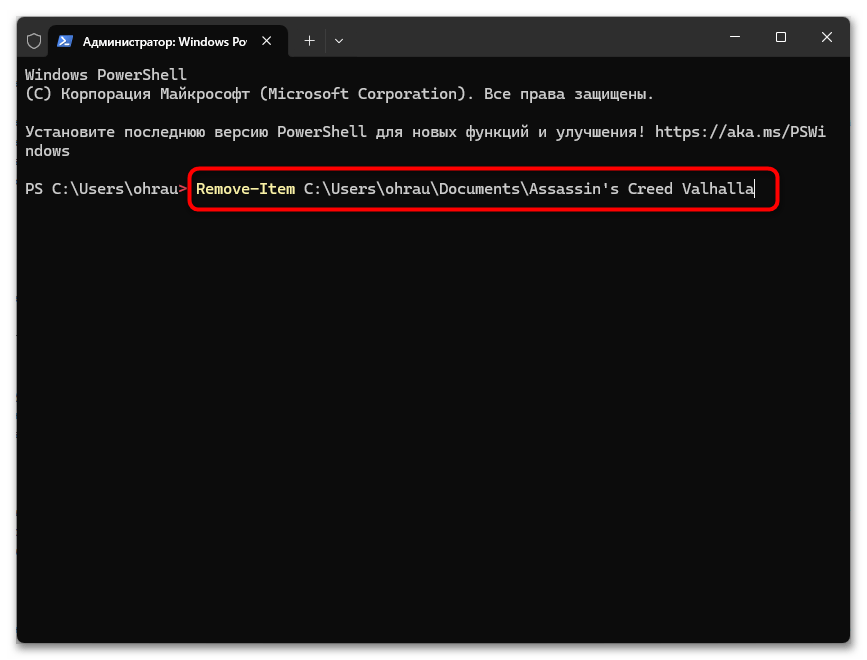
Способ 2: Использование PowerShell и команды Remove-Item
Консоль PowerShell представляет собой более современный и функциональный терминал, доступный во всех актуальных версиях Windows. PowerShell предлагает расширенные возможности по сравнению с традиционной «Командной строкой» и включает в себя универсальную команду Remove-Item для управления как файлами, так и директориями. Данная команда отличается более гибким набором параметров и возможностью интеграции с другими командами PowerShell через систему конвейеров. Remove-Item обеспечивает более тонкий контроль над процессом удаления папок и предоставляет дополнительные опции для работы с защищенными или системными директориями.
Remove-Item путь_к_директории
PowerShell также поддерживает сокращенный алиас для Remove-Item: rm путь_к_директории.
Команда Remove-Item имеет расширенный набор параметров для работы с директориями:
- -Recurse. Этот параметр позволяет рекурсивно удалять все содержимое директории, включая все вложенные файлы и поддиректории любой глубины вложенности. Функционально этот параметр аналогичен аргументу RMDIR /S, но интегрирован в экосистему PowerShell. Использование параметра -Recurse является обязательным, если необходимо удалить непустую директорию. Без него команда Remove-Item сможет удалить только пустые папки, аналогично базовой команде RMDIR.
- -Force. Обеспечивает принудительное удаление защищенных, скрытых и системных директорий, а также папок с особыми атрибутами. Данный параметр объединяет функциональность различных аргументов традиционной «Командной строки» и предоставляет более универсальный подход к преодолению ограничений доступа к директориям. Параметр -Force особенно полезен при необходимости удаления папок, созданных системой или другими программами с ограниченными правами доступа.
- -Confirm. Добавляет запрос подтверждения перед удалением каждого объекта, что обеспечивает дополнительный уровень контроля при массовом удалении. Использование данного параметра создает дополнительную защиту от случайного удаления важных папок и рекомендуется при выполнении операций с критически важными директориями или при работе в системных папках. Каждый раз перед удалением система будет запрашивать подтверждение, что позволяет более внимательно контролировать процесс.
- -WhatIf. Уникальный параметр PowerShell, который демонстрирует, какие действия будут выполнены при запуске команды, но не производит фактического удаления директорий. Данный режим позволяет безопасно моделировать результаты команды перед ее реальным выполнением, что особенно ценно при работе со сложными путями или при массовом рекурсивном удалении структур папок. Использование параметра -WhatIf помогает избежать непреднамеренного удаления важных директорий.
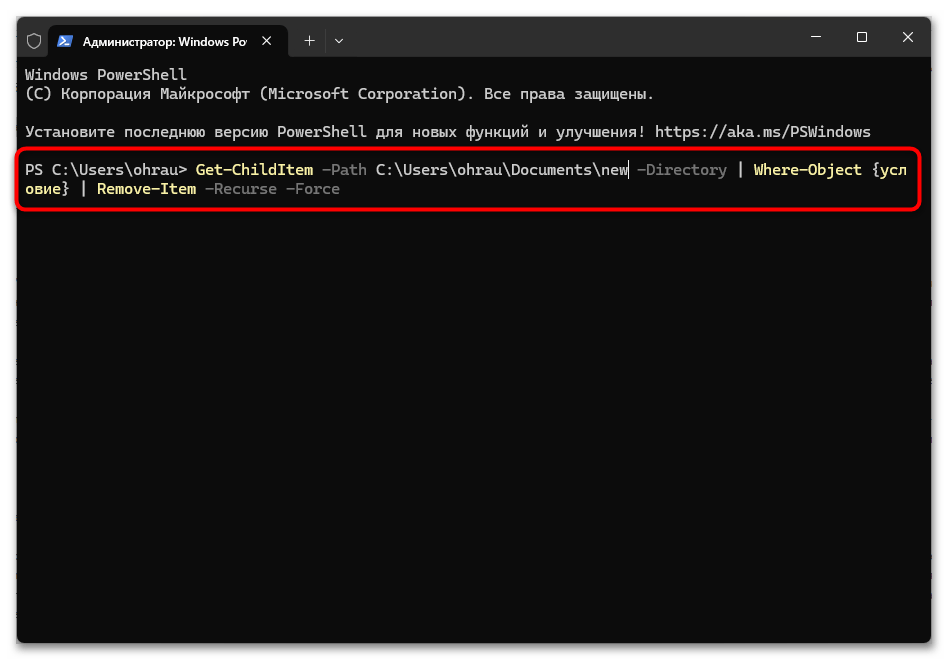
Способ 3: Удаление через PowerShell с использованием конвейеров
PowerShell предлагает продвинутый метод удаления директорий с использованием конвейеров (pipelines), который позволяет комбинировать несколько команд для более сложных операций с папками. Этот подход особенно полезен, когда необходимо выполнить выборочное удаление папок на основе определенных критериев, например, даты создания, размера или имени. Конвейеры в PowerShell предоставляют непревзойденную гибкость и возможность автоматизации процессов удаления директорий, которые невозможно достичь с помощью стандартной «Командной строки». Этот метод требует базового понимания принципов работы PowerShell, но предлагает значительные преимущества для опытных пользователей.
Get-ChildItem -Path путь -Directory | Where-Object {условие} | Remove-Item -Recurse -Force
Этот метод включает несколько ключевых компонентов PowerShell:
- Get-ChildItem. Команда для получения списка объектов (файлов и папок) в указанной директории. Параметр -Directory ограничивает вывод только папками, исключая файлы из рассмотрения. Эта команда является начальным этапом конвейера и подготавливает список папок для последующей фильтрации. Get-ChildItem имеет множество параметров для глубокого поиска и фильтрации, включая -Recurse для поиска во вложенных директориях.
- Where-Object. Позволяет фильтровать результаты по различным критериям, таким как имя папки, дата создания или изменения, размер и другие атрибуты. Например, можно выбрать только папки, созданные раньше определенной даты или имеющие определенное слово в названии. Эта часть конвейера обеспечивает точный отбор директорий для удаления на основе заданных условий.
- Remove-Item. Финальная команда в конвейере, которая удаляет отфильтрованные директории. Использование параметров -Recurse и -Force обеспечивает полное удаление папок вместе со всем содержимым и преодоление ограничений доступа. Эта команда получает на вход только те папки, которые прошли через фильтры предыдущих команд в конвейере.
Популярные условия для фильтрации папок в PowerShell
При использовании конструкции Where-Object в PowerShell правильно сформулированные условия играют ключевую роль в точном отборе папок для удаления. Условия фильтрации позволяют указать конкретные характеристики директорий, которые необходимо обработать. Это значительно снижает риск случайного удаления важных папок и повышает точность операций массового удаления. Ниже приведены наиболее востребованные условия, которые можно использовать в команде Where-Object для эффективной фильтрации папок перед их удалением.
- Фильтрация по имени папки. Позволяет выбрать папки, содержащие определенный текст в названии:
Where-Object { $_.Name -like "*backup*" }выберет все папки, в названии которых есть слово «backup». Для точного совпадения используйте оператор -eq:Where-Object { $_.Name -eq "temp" }. Можно также использовать регулярные выражения с оператором -match:Where-Object { $_.Name -match "^log_\d+" }для поиска папок, начинающихся с «log_» и содержащих цифры. - Фильтрация по дате создания. Позволяет отбирать папки, созданные в определенный период:
Where-Object { $_.CreationTime -lt (Get-Date).AddDays(-30) }выберет папки, созданные более 30 дней назад. Для выбора папок, созданных в конкретный день:Where-Object { $_.CreationTime.Date -eq (Get-Date "2024-01-15").Date }. Также можно указать диапазон дат:Where-Object { $_.CreationTime -ge (Get-Date "2024-01-01") -and $_.CreationTime -le (Get-Date "2024-01-31") }. - Фильтрация по дате изменения. Позволяет выбирать папки по дате последнего изменения:
Where-Object { $_.LastWriteTime -gt (Get-Date).AddMonths(-1) }выберет папки, измененные за последний месяц. Для выбора давно неиспользуемых папок:Where-Object { $_.LastWriteTime -lt (Get-Date).AddYears(-1) }найдет директории, не изменявшиеся более года. - Фильтрация по атрибутам. Позволяет выбирать папки с определенными атрибутами:
Where-Object { $_.Attributes -match "Hidden" }выберет все скрытые папки. Для поиска только обычных папок без специальных атрибутов:Where-Object { -not ($_.Attributes -match "System|Hidden|ReadOnly") }. Можно комбинировать несколько атрибутов:Where-Object { $_.Attributes -match "Hidden" -and $_.Attributes -match "ReadOnly" }. - Фильтрация по размеру. Для подсчета размера папок и выбора по размеру можно использовать:
Get-ChildItem -Directory | ForEach-Object { $size = (Get-ChildItem $_.FullName -Recurse | Measure-Object -Property Length -Sum).Sum; [PSCustomObject]@{Name=$_.Name; Size=$size} } | Where-Object { $_.Size -gt 1GB } | Select-Object Name, @{Name="SizeGB";Expression={$_.Size/1GB}} | ForEach-Object { Remove-Item (Join-Path -Path $путь -ChildPath $_.Name) -Recurse -Force }. Это позволит удалить папки размером более 1 ГБ. - Комбинированные условия. Можно объединять несколько условий с помощью логических операторов -and и -or:
Where-Object { $_.Name -like "*temp*" -and $_.LastWriteTime -lt (Get-Date).AddDays(-7) }выберет временные папки, не изменявшиеся более недели. Другой пример:Where-Object { ($_.Name -like "*backup*" -or $_.Name -like "*archive*") -and -not ($_.Attributes -match "System") }выберет все папки резервных копий и архивов, не являющиеся системными.
Способ 4: Использование команды DELTREE в режиме совместимости
Для пользователей, знакомых с более старыми версиями DOS и Windows, может быть интересна возможность использования классической команды DELTREE. Хотя эта команда официально не поддерживается в современных версиях Windows, существует возможность эмулировать ее работу через создание специального макроса или алиаса в системе. DELTREE была популярна в эпоху DOS и ранних версий Windows благодаря своей простоте и эффективности при удалении целых директорий. Основное преимущество DELTREE заключалось в том, что она изначально была предназначена для рекурсивного удаления папок со всем содержимым, не требуя дополнительных параметров, как в случае с RMDIR /S.
DOSKEY DELTREE=RMDIR /S /Q $*
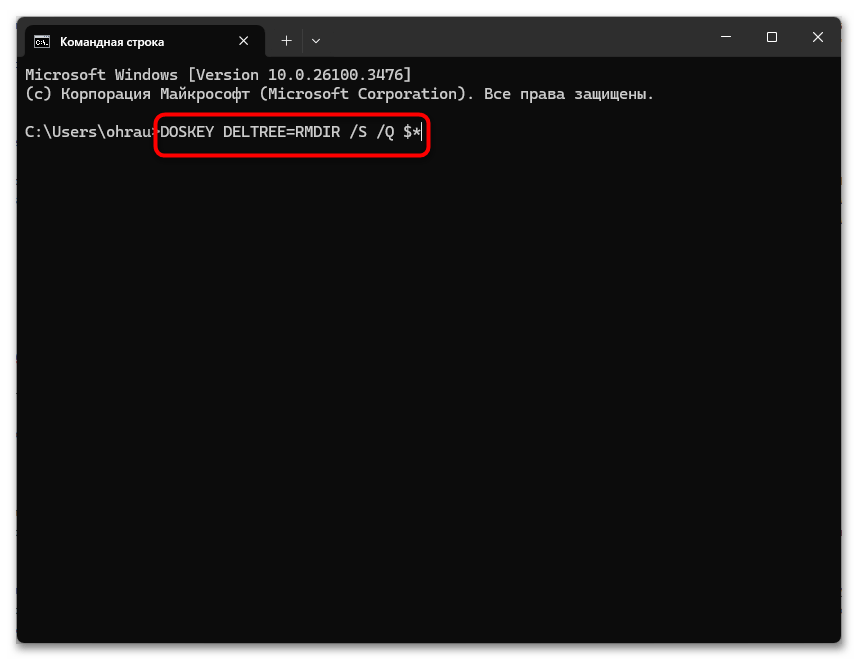
После создания этого алиаса можно использовать команду DELTREE следующим образом:
DELTREE путь_к_директории
Важные особенности использования DELTREE:
- Создание алиаса. Команда DOSKEY позволяет создать временный алиас DELTREE, который будет работать в текущей сессии «Командной строки». Чтобы сделать этот алиас постоянным, необходимо создать файл макросов и настроить автозагрузку этого файла при запуске консоли. Такой подход позволяет восстановить функциональность классической команды DOS в современных системах Windows.
- Автоматическое удаление. Созданный алиас DELTREE автоматически включает параметры /S и /Q для команды RMDIR, что обеспечивает рекурсивное удаление директорий без запроса подтверждения. Это делает команду более похожей на оригинальную DELTREE из DOS. Пользователю следует помнить, что такой алиас не запрашивает подтверждения, поэтому следует быть предельно внимательным при его использовании.
- Совместимость. Хотя этот метод эмулирует поведение классической команды DELTREE, важно понимать, что фактически выполняется команда RMDIR с параметрами. Поэтому все ограничения и особенности RMDIR также применимы к этому алиасу. Этот подход особенно полезен для пользователей, привыкших к синтаксису более старых операционных систем или при миграции скриптов с устаревших платформ.
Наша группа в TelegramПолезные советы и помощь

Sometimes it’s just faster to do things with the command line.
In this quick tutorial we’ll go over how to open Command Prompt, some basic commands and flags, and how to delete files and folders in Command Prompt.
If you’re already familiar with basic DOS commands, feel free to skip ahead.
How to open Command Prompt
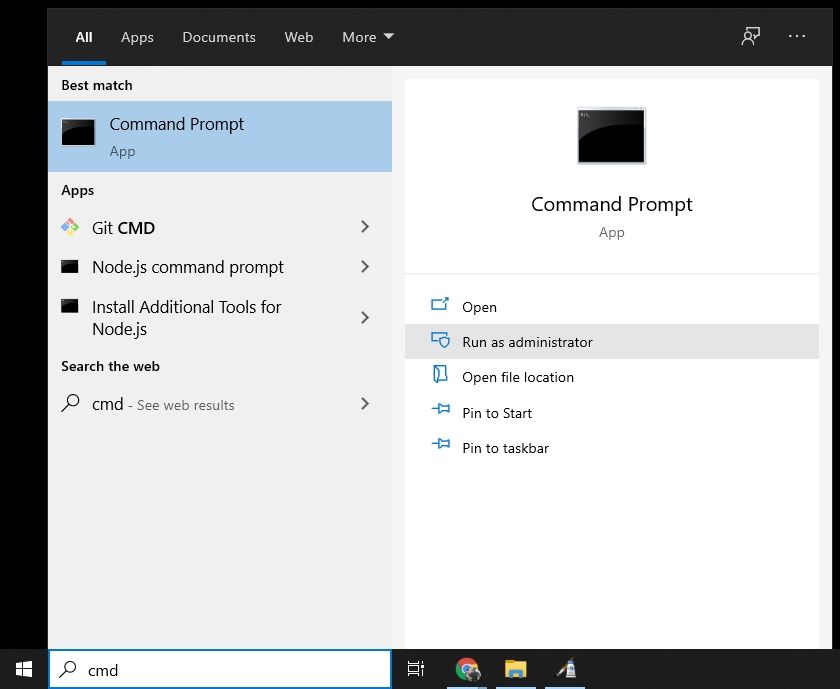
To open Command Prompt, press the Windows key, and type in «cmd».
Then, click on «Run as Administrator»:
After that, you’ll see a Command Prompt window with administrative privileges:
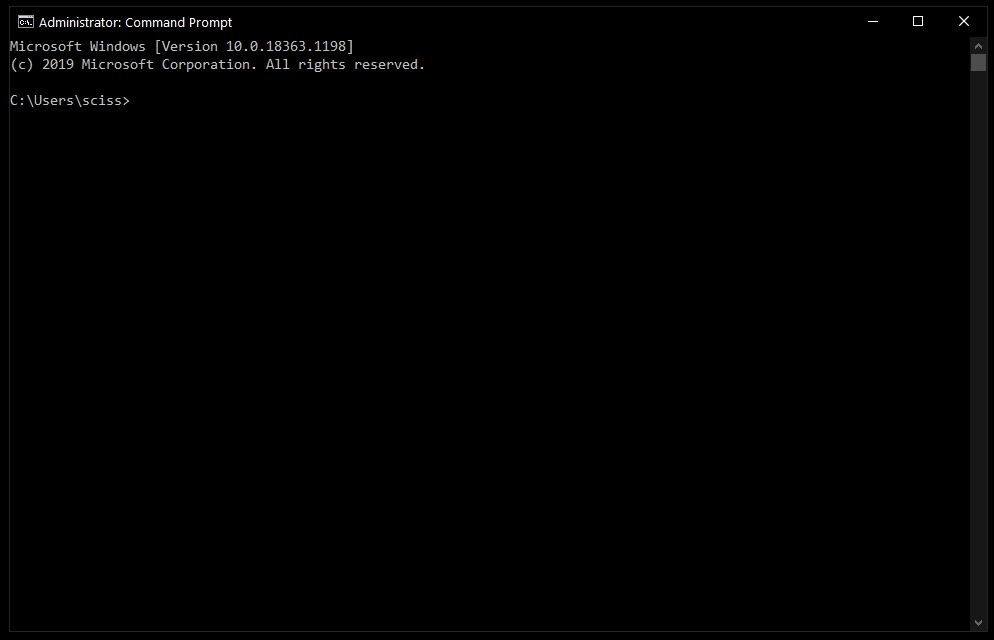
Screenshot of Command Prompt window
If you can’t open Command Prompt as an administrator, no worries. You can open a normal Command Prompt window by clicking «Open» instead of «Run as Administrator».
The only difference is that you may not be able to delete some protected files, which shouldn’t be a problem in most cases.
How to delete files with the del command
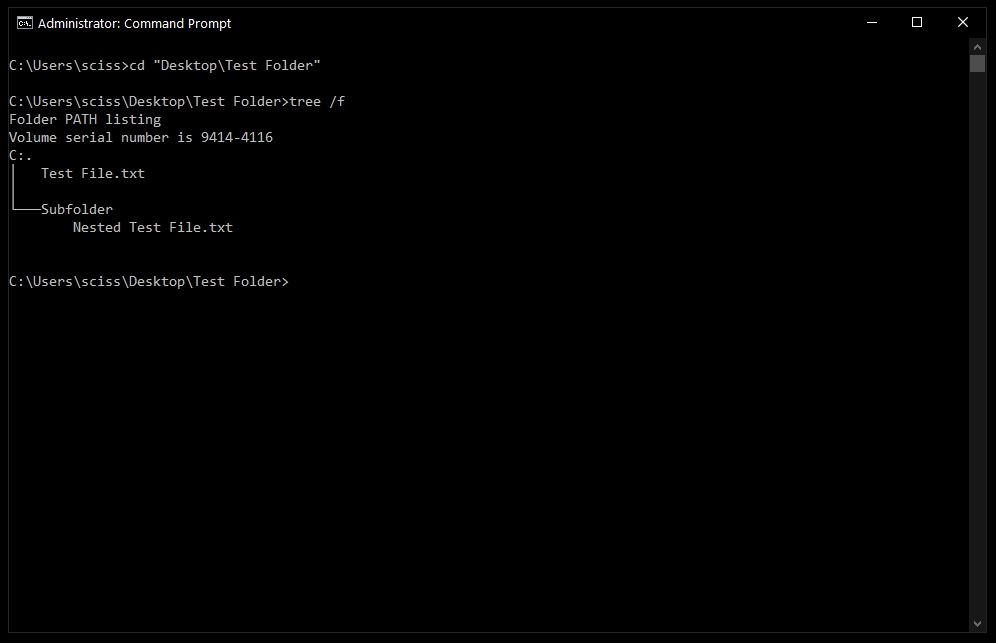
Now that Command Prompt is open, use cd to change directories to where your files are.
I’ve prepared a directory on the desktop called Test Folder. You can use the command tree /f to see a, well, tree, of all the nested files and folders:
To delete a file, use the following command: del "<filename>".
For example, to delete Test file.txt, just run del "Test File.txt".
There may be a prompt asking if you want to delete the file. If so, type «y» and hit enter.
Note: Any files deleted with the del command cannot be recovered. Be very careful where and how you use this command.
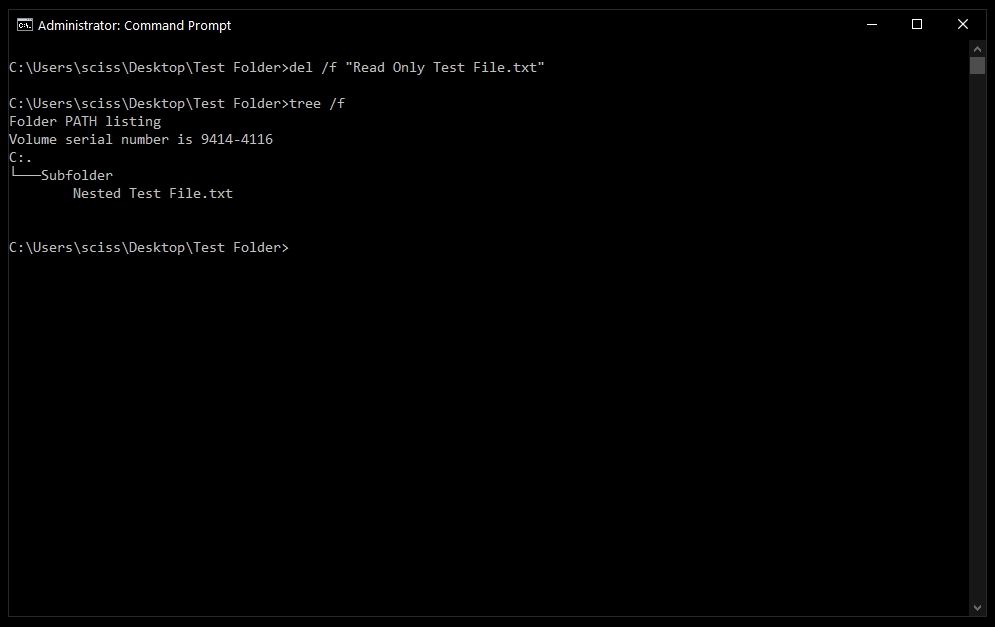
After that, you can run tree /f to confirm that your file was deleted:

Also, bonus tip – Command Prompt has basic autocompletion. So you could just type in del test, press the tab key, and Command Prompt will change it to del "Test File.txt".
How to force delete files with the del command
Sometimes files are marked as read only, and you’ll see the following error when you try to use the del command:
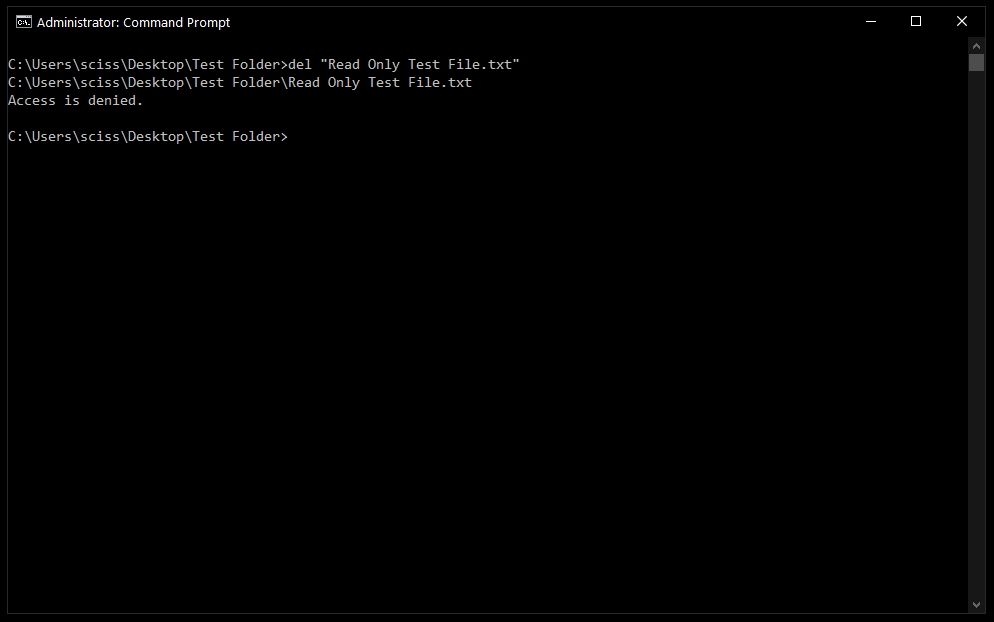
To get around this, use the /f flag to force delete the file. For example, del /f "Read Only Test File.txt":
How to delete folders with the rmdir command
To delete directories/folders, you’ll need to use the rmdir or rd command. Both commands work the same way, but let’s stick with rmdir since it’s a bit more expressive.
Also, I’ll use the terms directory and folder interchangeably for the rest of the tutorial. «Folder» is a newer term that became popular with early desktop GUIs, but folder and directory basically mean the same thing.
To remove a directory, just use the command rmdir <directory name>.
Note: Any directories deleted with the rmdir command cannot be recovered. Be very careful where and how you use this command.
In this case I want to remove a directory named Subfolder, so I’ll use the command rmdir Subfolder:
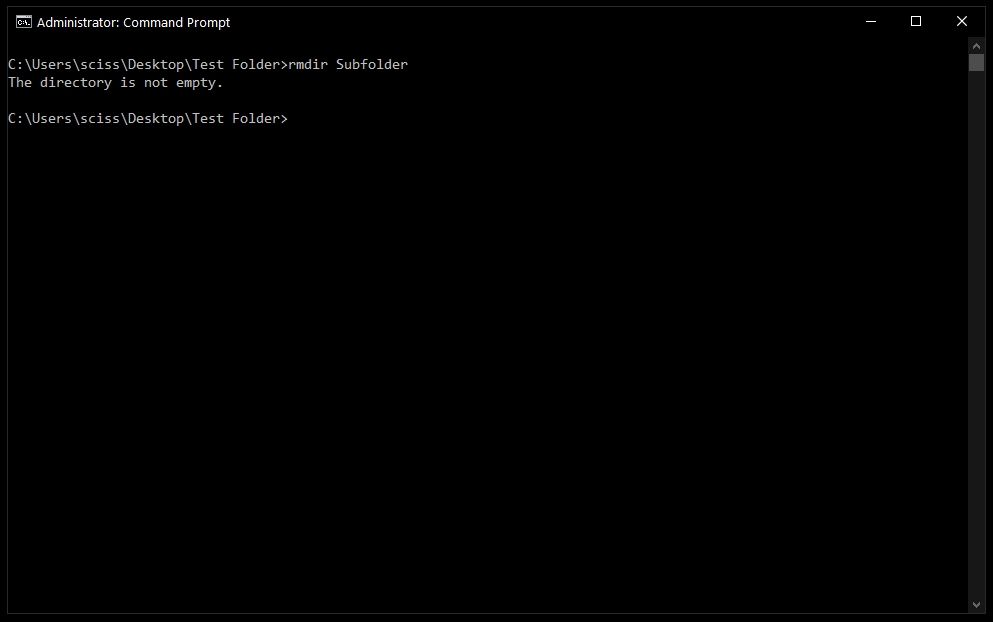
But, if you remember earlier, Subfolder has a file in it named Nested Test File.
You could cd into the Subfolder directory and remove the file, then come back with cd .. and run the rmdir Subfolder command again, but that would get tedious. And just imagine if there were a bunch of other nested files and directories!
Like with the del command, there’s a helpful flag we can use to make things much faster and easier.
How to use the /s flag with rmdir
To remove a directory, including all nested files and subdirectories, just use the /s flag:
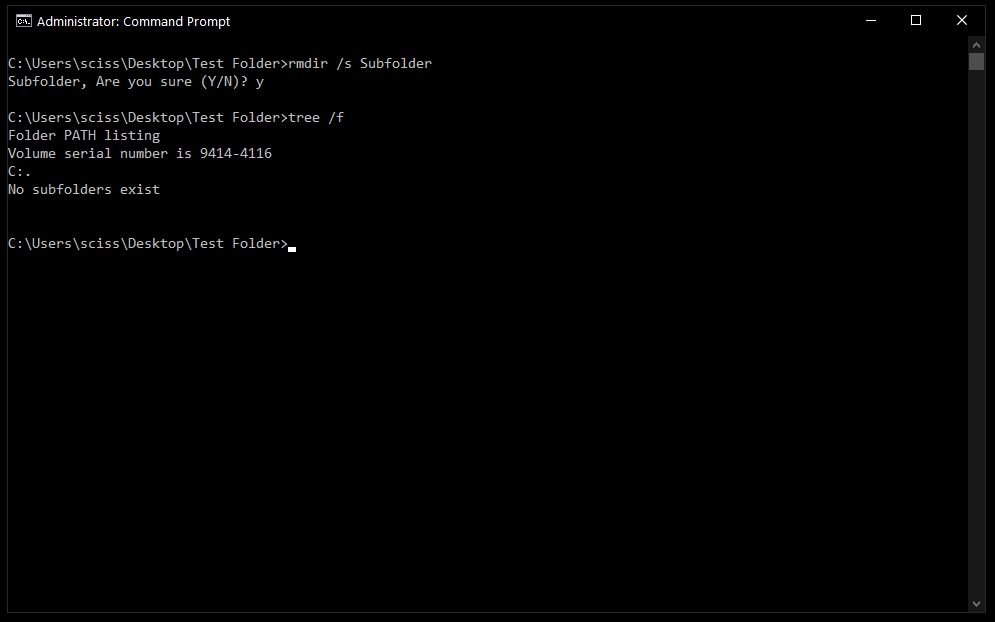
There will probably be a prompt asking if you want to remove that directory. If so, just type «y» and hit enter.
And that’s it! That should be everything you need to know to remove files and folders in the Windows Command Prompt.
All of these commands should work in PowerShell, which is basically Command Prompt version 2.0. Also, PowerShell has a bunch of cool aliases like ls and clear that should feel right at home if you’re familiar with the Mac/Linux command line.
Did these commands help you? Are there any other commands that you find useful? Either way, let me know over on Twitter.
Learn to code for free. freeCodeCamp’s open source curriculum has helped more than 40,000 people get jobs as developers. Get started
Программистам часто приходится работать в консоли — например, чтобы запустить тестирование проекта, закоммитить новый код на Github или отредактировать документ в vim. Всё это происходит так часто, что все основные действия с файлами становится быстрее и привычнее выполнять в консоли. Рассказываем и показываем основные команды, которые помогут ускорить работу в терминале под OS Windows.
Для начала нужно установить терминал или запустить командную строку, встроенную в Windows — для этого нажмите Win+R и введите cmd. Терминал часто встречается и прямо в редакторах кода, например, в Visual Studio Code.
Чтобы ввести команду в консоль, нужно напечатать её и нажать клавишу Enter.
Содержимое текущей папки — dir
Выводит список файлов и папок в текущей папке.
C:\content-server>dir
 Том в устройстве C имеет метку SYSTEM
 Серийный номер тома: 2C89-ED9D

 Содержимое папки C:\content-server

06.10.2020  00:41    <DIR>          .
06.10.2020  00:37    <DIR>          .circleci
16.07.2020  16:04               268 .editorconfig
16.07.2020  16:04                10 .eslintignore
16.07.2020  16:04               482 .eslintrc
06.10.2020  00:37    <DIR>          .github
16.07.2020  16:04                77 .gitignore
06.10.2020  00:41    <DIR>          assets
06.10.2020  00:41    <DIR>          gulp
16.07.2020  16:10               379 gulpfile.js
16.07.2020  16:10           296 320 package-lock.json
16.07.2020  16:10               751 package.json
16.07.2020  16:04               509 README.md
Открыть файл
Чтобы открыть файл в текущей папке, введите его полное имя с расширением. Например, blog.txt или setup.exe.
Перейти в другую папку — cd
Команда cd без аргументов выводит название текущей папки.
Перейти в папку внутри текущего каталога:
C:\content-server>cd assets
C:\content-server\assets>
Перейти на одну папку вверх:
C:\content-server\assets>cd ..
C:\content-server>
Перейти в папку на другом диске:
c:\content-server>cd /d d:/
d:\>
Чтобы просто изменить диск, введите c: или d:.
Создать папку — mkdir или md
Создаём пустую папку code внутри папки html:
d:\html>mkdir coded:\html>dir

 Содержимое папки d:\html

03.11.2020  19:23    <DIR>           .
03.11.2020  19:23    <DIR>           ..
03.11.2020  19:25    <DIR>           code
               0 файлов              0 байт
               3 папок  253 389 438 976 байт свободно
Создаём несколько пустых вложенных папок — для этого записываем их через косую черту:
d:\html>mkdir css\js
d:\html>dir
 Том в устройстве D имеет метку DATA
 Серийный номер тома: 0000-0000

 Содержимое папки d:\html

03.11.2020  19:23    <DIR>           .
03.11.2020  19:23    <DIR>           ..
03.11.2020  19:25    <DIR>           code
03.11.2020  19:29    <DIR>           css
Создаётся папка css, внутри которой находится папка js. Чтобы проверить это, используем команду tree. Она показывает дерево папок.
Удалить папку — rmdir или rd
Чтобы удалить конкретную папку в текущей, введите команду rmdir:
d:\html\css>rmdir js
При этом удалить можно только пустую папку. Если попытаться удалить папку, в которой что-то есть, увидим ошибку:
d:\html\css>d:\html>rmdir css
Папка не пуста.
Чтобы удалить дерево папок, используйте ключ /s. Тогда командная строка запросит подтверждение перед тем, как удалить всё.
d:\html>rmdir css /s
css, вы уверены [Y(да)/N(нет)]? y
Показать дерево папок — tree
В любом момент мы можем увидеть структуру папок. Для этого используется команда tree.
d:\html>tree
Структура папок тома DATA
Серийный номер тома: 0000-0000
D:.
├───code
└───css
    └───js
Если вы хотите посмотреть содержимое всего диска, введите tree в корне нужного диска. Получится красивая анимация, а если файлов много, то ещё и немного медитативная.
Удаление файла — del или erase
Команда для удаления одного или нескольких файлов.
d:\html>del blog.txt
Переименование файла — ren или rename
Последовательно вводим ren, старое и новое имя файла.
d:\html>dir
 Содержимое папки d:\html

03.11.2020  19:23    <DIR>            .
03.11.2020  19:23    <DIR>            ..
03.11.2020  19:59                 0 blag.txt

d:\html>ren blag.txt blog.txt

d:\html>dir
 Содержимое папки d:\html

03.11.2020  19:23    <DIR>            .
03.11.2020  19:23    <DIR>            ..
03.11.2020  19:59                 0 blog.txt
Команды одной строкой
Очистить консоль — cls.
Информация о системе — systeminfo.
d:\html>systeminfo

Имя узла:                         DESKTOP-6MHURG5
Название ОС:                      Майкрософт Windows 10 Pro
Версия ОС:                        10.0.20246 Н/Д построение 20246
Изготовитель ОС:                  Microsoft Corporation
Параметры ОС:                     Изолированная рабочая станция
Сборка ОС:                        Multiprocessor Free
Информация о сетевых настройках — ipconfig.
d:\html>ipconfig
Настройка протокола IP для Windows
Адаптер Ethernet Ethernet 2:

   Состояние среды. . . . . . . . : Среда передачи недоступна.
   DNS-суффикс подключения . . . . . :
Список запущенных процессов — tasklist.
c:\>tasklist

Имя образа                     PID Имя сессии          № сеанса       Память
========================= ======== ================ =========== ============
System Idle Process              0 Services                   0         8 КБ
System                           4 Services                   0     2 688 КБ
Secure System                   72 Services                   0    23 332 КБ
…
Справка по командам — help
Команда help без аргументов выводит список всех возможных команд. help вместе с именем команды выведет справку по этой команде.
d:\html>help tree
Графическое представление структуры папок или пути.

TREE [диск:][путь] [/F] [/A]

   /F   Вывод имён файлов в каждой папке.
   /A   Использовать символы ASCII вместо символов национальных алфавитов.
В этой статье приведены не все команды и не все их возможности, но вы всегда можете воспользоваться командой help и узнать о том, что ещё может командная строка.
👉🏻 Больше статей о фронтенде и работе в айти в телеграм-канале.
Подписаться
Материалы по теме
- 10 горячих клавиш VS Code, которые ускорят вашу работу
- Полезные команды для работы с Git
- Полезные команды для работы с Node. js
«Доктайп» — журнал о фронтенде. Читайте, слушайте и учитесь с нами.
ТелеграмПодкастБесплатные учебники
Some folders and files are impossible to delete using Windows Explorer. These include files with long paths, names or reserved names like CON, AUX, COM1, COM2, COM3, COM4, LPT1, LPT2, LPT3, PRN, NUL etc. You will get an Access Denied error message when you try to delete these files using Windows Explorer, even if you are an administrator.
Regardless of the reason, these can only be force deleted using command line only. This article explains using cmd to delete folder or file successfully.
Table of Contents
Before we begin
Here are some important things for you to understand before we dig into removing files and folders using Command Prompt and Windows PowerShell. These tips will help you understand the terms and some basic rules of the commands that will be used further in the article.
The most important thing to remember here is the syntax of the path and file/folder name. When typing file name, notice whether there is a gap (space) in it. For example, if the folder name has no space in it, it can be written as-is. However, if there is a gap in it, it will need to be written within parenthesis (“”). Here is an example:

Another thing to remember is that you might see different outcomes while removing folders that are already empty, and folders that have some content in them. Having said that, you will need to use the dedicated options in the command to remove content from within a folder along with the main folder itself. This is called a recursive action.
Furthermore, you must also know how to change your working directory when inside a Command Line Interface. Use the command cd to change your directory, followed by the correct syntax. Here are some examples:
One last thing that might come in handy is being able to view what content is available in the current working directory. This is especially helpful so that you type in the correct spelling of the target file or folder. To view the contents of the current working directory in Command Prompt and PowerShell, type in Dir.

Now that we have the basic knowledge, let us show you how you can delete files and folders using the command line on a Windows PC.
By default, there are 2 command-line interfaces built into Windows 10 – Command Prompt and Windows PowerShell. Both of these are going to be used to delete content from a computer.
How to remove files and folders using Command Prompt
Let us start with the very basic commands and work our way up from there for Command Prompt. We recommend that you use Command Prompt with administrative privileges so that you do not encounter any additional prompts that you already might have.
Del/Erase command in cmd
Del and Erase commands in Command Prompt are aliases of one another. Meaning, both perform the same function regardless of which one you use. These can be used to remove individual items (files) in the current working directory. Remember that it cannot be used to delete the directories (folders) themselves.
Use either of the following commands to do so:
Tip: Use the Tab button to automatically complete paths and file/folder names.
Del File/FolderName

Erase File/FolderName
Replace File/FolderName with the name of the item you wish to remove. Here is an example of us removing files from the working directory:

If you try to remove items from within a folder, whether empty or not, you will be prompted for a confirmation action, such as the one below:
In such a scenario, you will need to enter Y for yes and N for no to confirm. If you select yes, the items directly within the folder will be removed, but the directory (folder) will remain. However, the subdirectories within the folder will not be changed at all.
This problem can be resolved by using the /s switch. In order to remove all of the content within the folder and its subdirectories, you will need to add the recursive option in the command (/s). The slash followed by “s” signifies the recursive option. Refer to the example below to fully understand the concept:
We will be using the Del command here to recursively remove the text files within the folder “Final folder,” which also has a subdirectory named “Subfolder.” Subfolder also has 2 sample text files that we will be recursively removing with the following command:
Del /s "Final folder"
Here is its output:

As you can see in the image above, we had to enter “y” twice – once for each folder. with each confirmation, 2 text files were removed, as we had stated earlier in this example. However, if we use File Explorer, we can still see that both the directories – “Final folder” and “Subfolder” – are still there, but the content inside them is removed.
You can also make another tweak to the command so that it is executed silently and you will not be prompted for confirmation. Here is how:
Del /s /q "Final folder"
The /q illustrates that the action be taken quietly.

Rmdir /rd command in cmd
Similar to Del and Erase, rmdir and rd are also aliases for one another, which means to remove directory. These commands are used to remove the entire directory and subdirectories (recursively) including their contents. Use the command below to do so:
rmdir "New Folder"

The above command will remove the “New folder” only if it is empty. If a folder has subdirectories, you might get the following prompt:
In this case, we will need to apply the option for recursive deletion of items as we have done earlier with the Del command.
rmdir /s "Final folder"

Of course, this can also be performed with the /q option so that you are not prompted with a confirmation.
rmdir /s /q "Final folder"

Delete multiple files and folders
Up until now, we have completed the task of deleting single items per command. Now let’s see how you can remove multiple selective files or folders. Use the command below to do so:
For files:
Del "File1.txt" "File3.txt" "File5.txt"

For directories:
rd "Folder1" "Folder3" "Folder5"

Here is a before and after comparison of the directory where both of the above commands were executed:
You can also use an asterisk (*) concatenated with a file type or file name to perform bulk removal of files with the Del command. However, Microsoft has removed the support for the use of asterisks with rmdir so that users do not accidentally remove entire folders.
Here is an example of us removing all .txt files from our current working directory:
Del "*.txt"
Delete files and folders in any directory
We are working on removing content within the current working directory. However, you can also use the commands we have discussed till now to remove files and folders from any directory within your computer.
Simply put the complete path of the item you want to delete in enclosed parenthesis, and it shall be removed, as in the example below:
Check the existence of file or folder then remove using IF command
We have already discussed that you can view the contents of the working directory by typing in Dir in Command Prompt. However, you can apply an “if” condition in Command Prompt to remove an item if it exists. If it will not, the action would not be taken. Here is how:
if exist File/FolderName (rmdir /s/q File/FolderName)
Replace File/FolderName in both places with the name of the item (and extension if applicable) to be deleted. Here is an example:
if exist Desktop (rmdir /s/q Desktop)

How to remove files and folders using Windows PowerShell
The commands in Windows PowerShell to delete and remove content from your PC are very much similar to those of Command Prompt, with a few additional aliases. The overall functionality and logic are the same.
We recommend that you launch Windows PowerShell with administrative privileges before proceeding.
The main thing to note here is that unlike Command Prompt, all commands can be used for both purposes – removing individual files as well as complete directories. We ask you to be careful while using PowerShell to delete files and folders, as the directory itself is also removed.
The good thing is that you do not need to specify recursive action. If a directory has sub-directories, PowerShell will confirm whether you wish to continue with your deletion, which will also include all child objects (subdirectories).
Here is a list of all the commands/aliases that can be used in PowerShell to remove an item:
- Del
- Rm-dir
- remove-item
- Erase
- Rd
- Ri
- Rm
We tested all of these commands in our working directory and each of them was successful in deleting the folders as well as individual items, as can be seen below:

As can be seen above, the syntax of all the aliases is the same. You can use any of the commands below to delete an item using PowerShell:
Del File/FolderName
Rm-dir File/FolderName
remove-item File/FolderName
Erase File/FolderName
Rd File/FolderName
Ri File/FolderName
Rm File/FolderName
Delete multiple files and folders
You can also delete multiple selective files and folders just as we did while using Command Prompt. The only difference is that you will need to provide the complete path of each item, even if you are in the same working directory. Use the command below to do so:
Del "DriveLetter:\Path\ItemName", "DriveLetter:\Path\ItemName"
Remember to append the file type if the item is not a directory (.txt, .png, etc.), as we have done in the example below:
You can also use an asterisk (*) concatenated with a file type or file name to perform bulk removal of files with the Del command, as done in Command Prompt. Here is an example:
The command shown above will remove all.txt files in the directory “New folder.”
Delete files and folders in any directory
You can also remove an item in a different directory, just like we did in Command Prompt. Simply enter the complete path to the item in PowerShell, as we have done below:
Delete files and folders with complex and long paths using the command line
Sometimes you may encounter an error while trying to delete an item that may suggest that the path is too long, or the item cannot be deleted as it is buried too deep. Here is a neat trick you can apply using both Command Prompt and PowerShell to initially empty the folder, and then remove it using any of the methods above.
Use the command below to copy the contents of one folder (which is empty) into a folder that cannot be deleted. This will also make the destination folder empty, hence making it removable.
robocopy "D:\EmptyFolder" D:\FolderToRemove /MIR
In this scenario, the EmptyFolder is the source folder that we have deliberately kept empty to copy it to the target folder “FolderToRemove.”

You will now see that the folder that was previously unremovable is now empty. You can proceed to delete it using any of the methods discussed in this article.
Closing words
The command line is a blessing for Windows users. You can use any of these commands to remove even the most stubborn files and folders on your computer.
Let us know which solution worked for you in the comments section down below.