

Many people prefer to install Linux in dual boot mode with Windows. Some of them use Linux as their primary OS while some prefer Windows as their primary OS.
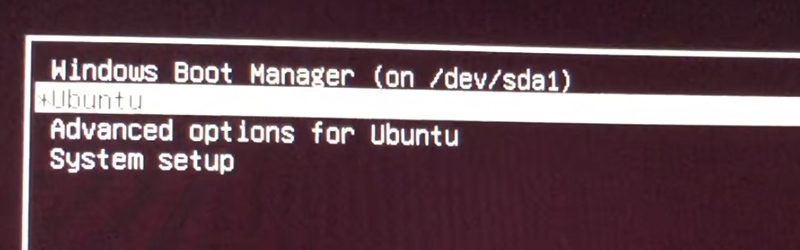
When you install Ubuntu or Linux Mint or elementary OS along with Windows in dual boot mode, Linux becomes the default OS. At the boot time, on the grub screen, if you do not choose Windows for login within 10 seconds (default Grub timeout), it boots up into the Linux.
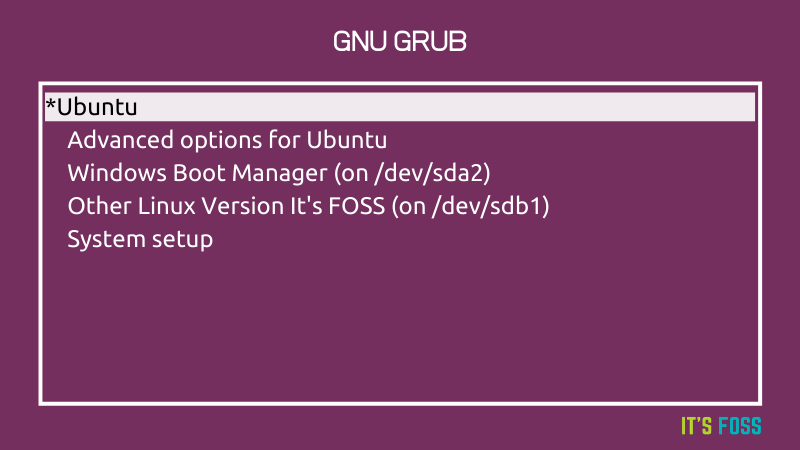
This grub behavior creates problem if you prefer to have Windows as your primary OS. You have to wait till the computer boots up and stay close to your computer to choose Windows for login.
This is inconvenient, I can understand. The good news is that you can customize grub to your liking.
In this tutorial, I’ll show you the graphical method to change the Grub boot order and make Windows default.
🚧
While Grub Customizer is an easy to use tool, it’s just a front end for changing the Grub config files. The changes you make are permanent.
GUI Method: Change Grub Boot Order with Grub Customizer
Grub Customizer is a graphical tool that allows you to customize server aspects of the Grub bootloader. You can reduce the grub boot time, change the background and change the boot order among several other things.
Let me show you how to use this tool.
Install Grub Customizer in Ubuntu-based distributions
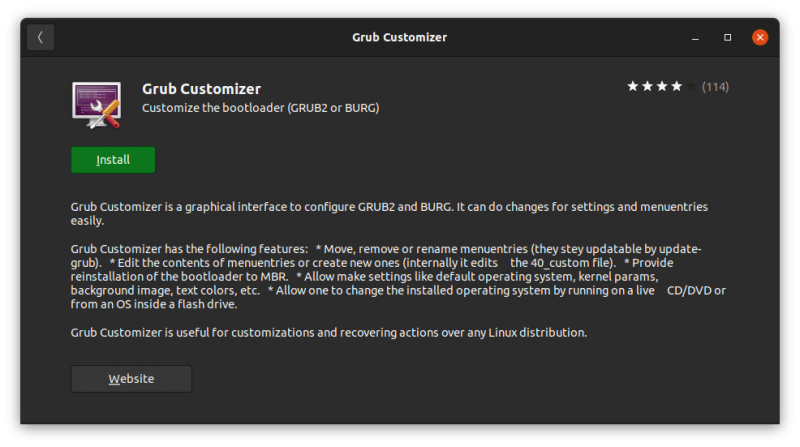
Starting with Ubuntu 20.04, it is available in the Universe repository. This means that you can easily install Grub Customizer on Ubuntu from the software center:
Or, use the apt command to install the package in terminal:
sudo apt install grub-customizerInstallation instructions for Ubuntu 18.04
For Ubuntu 18.04 and Linux Mint 19 series, you’ll have to use PPA. Open a terminal and use the following commands one by one:
sudo add-apt-repository ppa:danielrichter2007/grub-customizer
sudo apt update
sudo apt install grub-customizer
Using Grub Customizer
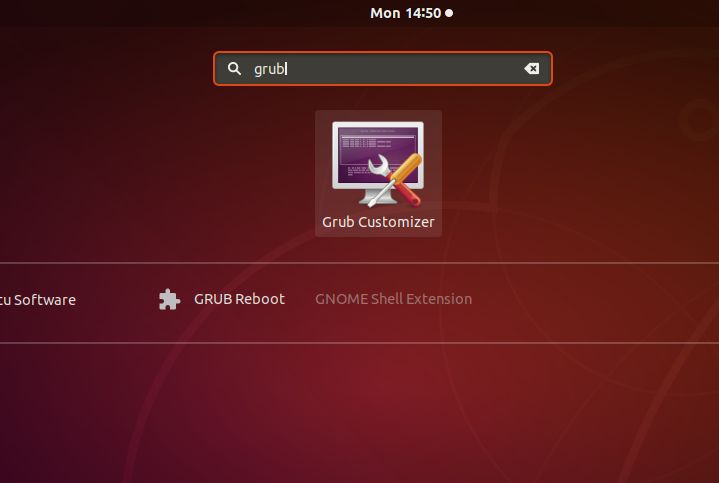
Once installed, search for Grub Customizer in the menu and open it.

It requires the admin password because you are dealing with an important configuration that requires root privileges. Enter your password.
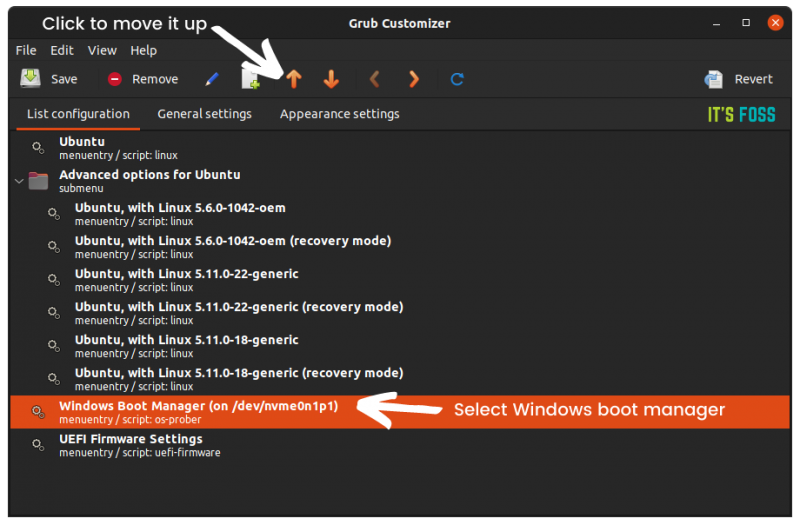
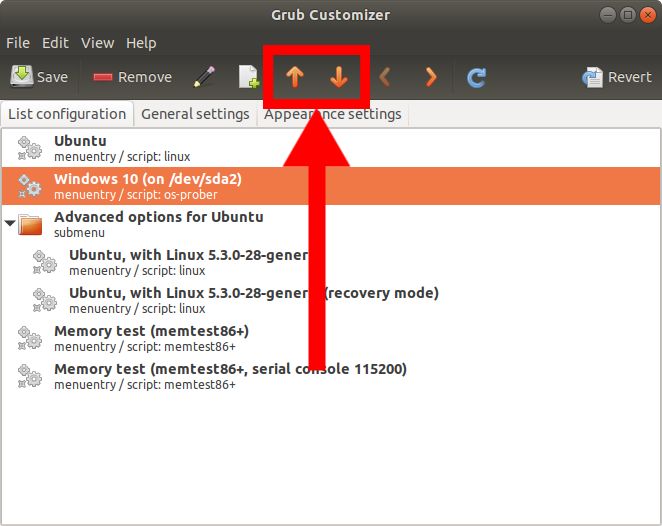
After that, you’ll see a screen where you can access the configuration. You can see that Windows lies at the bottom after so many Ubuntu options.
All you have to do is to move Windows over the first Ubuntu. You can use the arrow option from the top menu for this task.
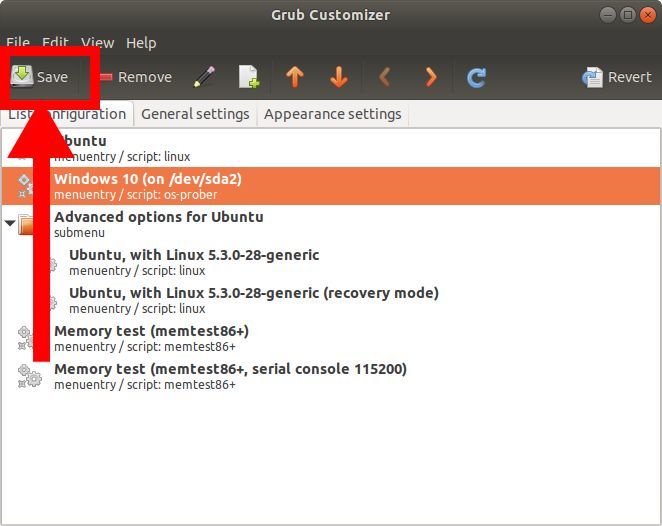
Once done, you should have Windows on the top of this list. At this point, you should save this configuration.
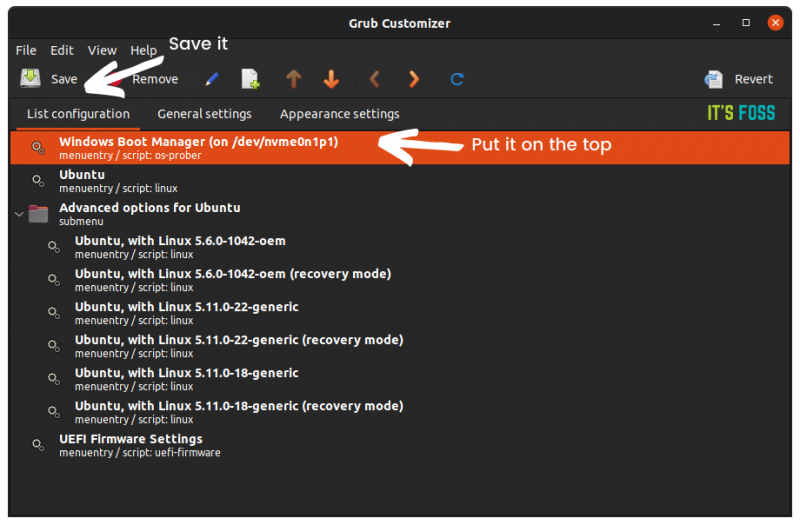
This will edit the Grub menu and you can see the changed boot order at the next restart.
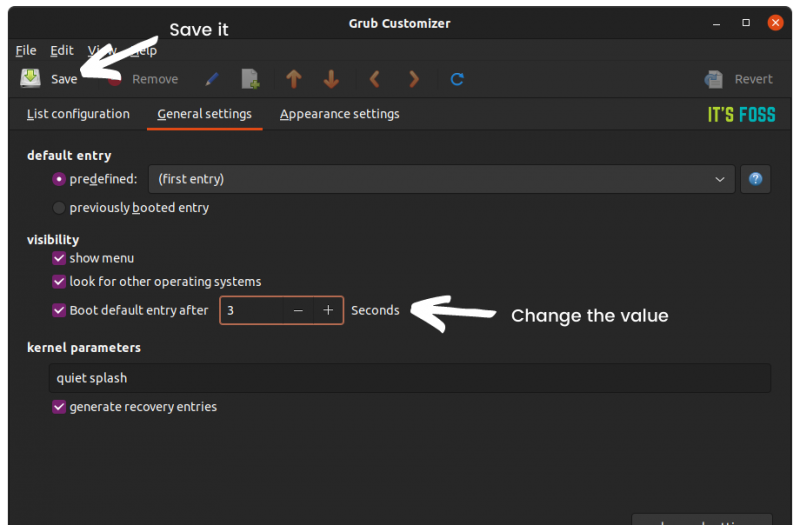
Bonus tip: Reduce the grub boot time
If you do not interact with the grub menu at the boot time, it takes 10 seconds to boot into the default operating system. You can use Grub Customizer and reduce this boot time to something of your choice like 3 seconds or 5 seconds.
You can do this from General Settings tab in Grub Customizer.
It’s an optional tip and will help you in reduce boot time (if you don’t manually press the enter key).
You can do some other grub customization as well with this wonderful tool.
I hope the tutorial helped you to change the grub boot order in Ubuntu and other Linux distribution and make Windows the default OS in your dual boot system. Grub Customizer is an amazingly simple tool for this task.
Questions, suggestions, a word of thanks are always welcome.
About the author
Abhishek Prakash
Created It’s FOSS 11 years ago to share my Linux adventures. Have a Master’s degree in Engineering and years of IT industry experience. Huge fan of Agatha Christie detective mysteries 🕵️♂️
By default, Ubuntu will always be the first entry on the boot menu if it’s installed last after another OS. Well, this doesn’t only happen with Ubuntu, but with all the other Operating Systems. The last installed will always appear first in the boot menu.

For this guide, we shall use Windows 10 and Ubuntu Linux however the same steps can be used for other versions of Windows and Linux.
Method 1: Change Boot Order on Windows 10
We shall use a program called EasyBCD which is used to tweak Boot configuration data. Don’t worry, it’s free software.
- Visit the EasyBCD website
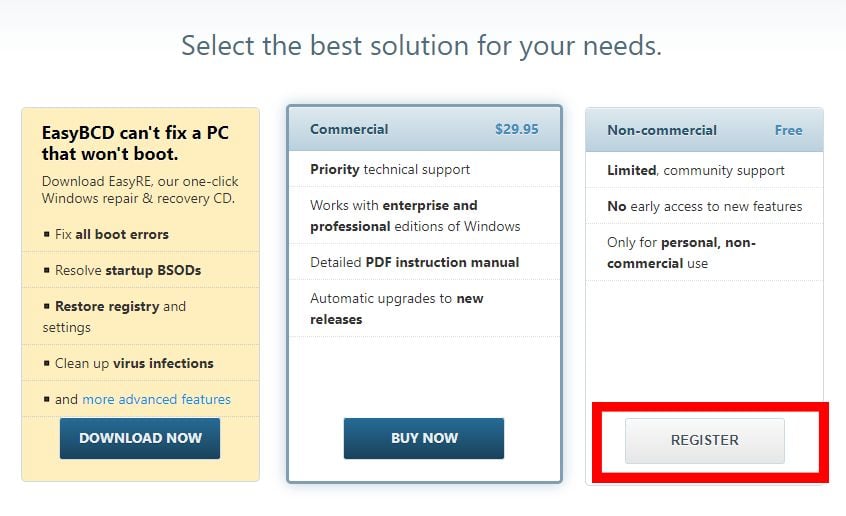
- Navigate to the download options section labeled “Select the best solution for your needs“
- Under the Non-Commercial section, click Register

Register for EasyBCD to continue to the download - Provide details to register and then click the Download button. The download will then start.
- Open the app when the download is complete. If prompted with a dialog showing “Do you want to allow this app to make changes to your device”, click Yes
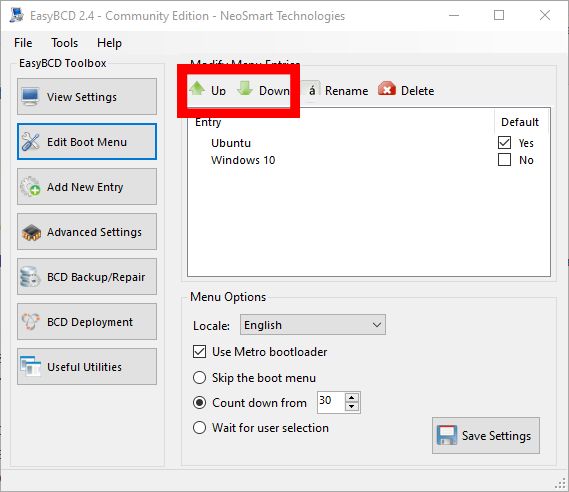
Allow EasyBCD to run - Navigate to Edit Boot Menu section from the left menu
- The left window will display the installed Operating Systems (If you don’t see your Operating Systems in the list, continue down to see how to add them) on your Computer.
- Click on an Operating System and then use the arrow icons at the top to move it to the desired position in the list. You can also use the checkboxes on the right of the Operating Systems to change the default Operating Systems

Edit Boot Menu - After tweaking the settings, click Save Settings in at the bottom right corner
If you didn’t see your Operating Systems in step 7, follow these steps to have it listed.
For Windows Operating System not listed:
- Navigate to the Add New Entry section
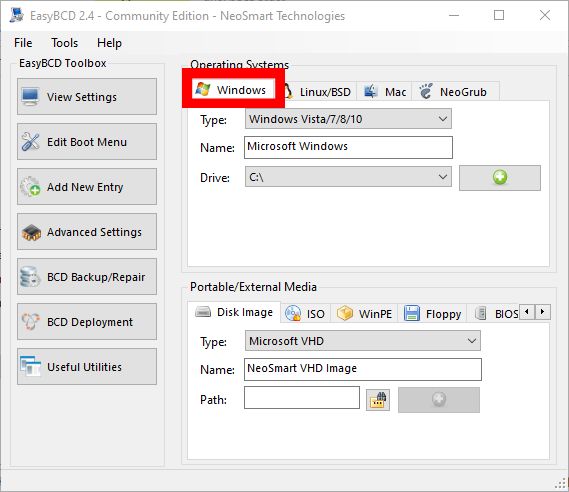
- In the Operating Systems section, click on the Windows section

Adding Windows to the boot menu - In the Type field, select Windows Vista/7/8/10
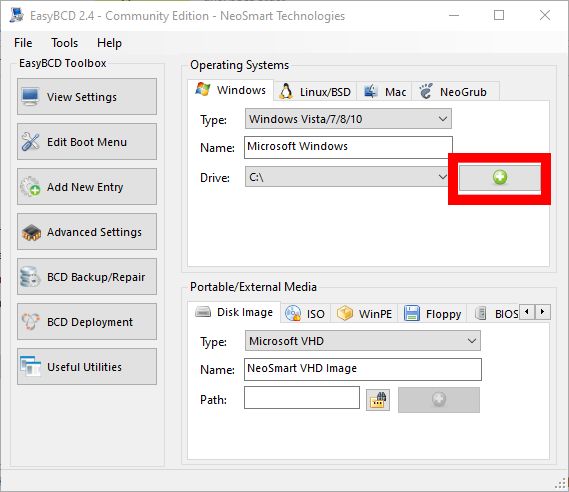
- Enter the Operating System name in the name section and select the drive with the Operating System. (Use Automatically locate and locate if the option is listed)
- Click the green plus icon at the bottom right corner to add the Operating System to the boot menu
Saving Windows to boot menu - You can then go back to editing the boot menu described in the first section
For Linux Operating System not listed:
- Navigate to the Add New Entry section
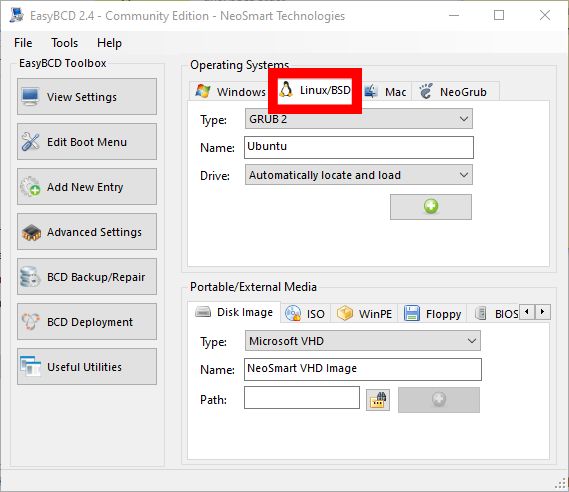
- Click on Linux/BSD in the Operating Systems sections
Adding Ubuntu to the boot menu - In the Type section, select GRUB 2, enter the Linux Distribution name in the name field
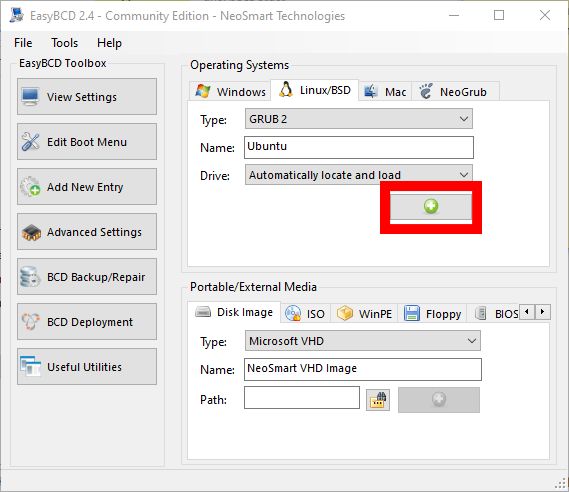
- Select Automatically locate and load in the Drive section
- Finally save these settings by clicking the green plus icon at the bottom right corner
Saving Ubuntu to the boot menu - Go back to the editing the boot menu in the first section
Method 2: Change Boot Order on Ubuntu
Changing Boot Order on Ubuntu requires editing the grub file. However, editing the grub file manually is not recommended since it may render the whole Operating System useless if done in the wrong way. Not to mention that system upgrades usually edit the grub which leaves chances for your manual settings to be overridden.
We shall use a program called Grub customizer that will do all the editing work to the grub file.
- Open the terminal by clicking Ctrl + alt + T or by searching it from the applications menu
- Since the program is not in the official Ubuntu repository, use the following command to add it to your repositories.
sudo add-repository ppa:danielrichter2001/grub-customizer
- Update your repositories reference with the following command
sudo apt update
- Then install Grub Customizer with the following command
sudo apt install grub-customizer
- When the installation is done, search for Grub Customizer from the applications menu and open it

Open Grub Customizer from the Apps menu - Select an Operating System from the list and then use the up and down arrow icons in the top menu to move the position of the OS to the desired position

Grub Customizer settings - After changing to the desired order, click on Save.
Save Grub Customizer settings
Kevin Arrows
Kevin Arrows is a highly experienced and knowledgeable technology specialist with over a decade of industry experience. He holds a Microsoft Certified Technology Specialist (MCTS) certification and has a deep passion for staying up-to-date on the latest tech developments. Kevin has written extensively on a wide range of tech-related topics, showcasing his expertise and knowledge in areas such as software development, cybersecurity, and cloud computing. His contributions to the tech field have been widely recognized and respected by his peers, and he is highly regarded for his ability to explain complex technical concepts in a clear and concise manner.
Set Default OS by Manually configuring Grub:
Using terminal
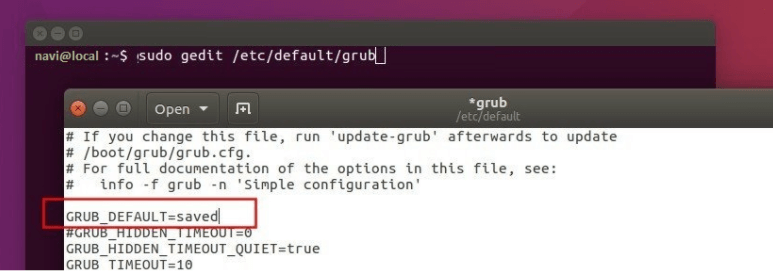
- Edit the configuration file via command:
# sudo gedit /etc/default/grub
Now, change the line GRUB_DEFAULT=0 to GRUB_DEFAULT=saved
and now save the file.
In Ubuntu, use the command below to edit the Grub configuration file:
# sudo nano /etc/default/grub
And save changes in this file. - To apply the configuration changes you need to run the Update grub command :
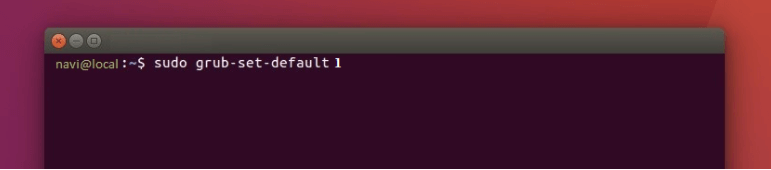
# sudo update-grub - Finally set a default boot OS simply using the below command:
# sudo grub-set-default NUMBER
Boot entries start from 0. If the Windows Boot Manager is the second entry, so the NUMBER is
People having good knowledge of Financial accounting can get an Accounting Certification Exams from StudySection to increase their chances of getting a job in this field. You can get a foundation level certification if you are new to Financial accounting or you can go for advanced level certification if you have expert level skills in Financial accounting.
GRUB (GRand Unified Bootloader) is the default bootloader for Linux Mint, Ubuntu, and a host of Linux Distributions. When we are dual-booting with Windows, Linux sets itself as the default boot choice. If we prefer Windows to be the default, though, or even some other Linux distribution or operating system, it’s quick easy to change the GRUB boot order.
Unblock any international website, browse anonymously, and download movies and Mp3 with complete safety with CyberGhost, just for $2.75 per month:
We have prepared this guide in Linux Mint 18.1 and Ubuntu 16.04 LTS. It should also work for earlier and later versions, and for most distributions based on Ubuntu/Debian.
How to change the GRUB boot order with GRUB Customizer
GRUB Customizer is an easy, GUI way to change the GRUB boot order, without having to edit system files manually.
To install it, we first need to add the repository. We open a terminal with ctrl+alt+T and type:
sudo add-apt-repository ppa:danielrichter2007/grub-customizer -y
If you ‘re new to Linux, remember that when we enter the password within the terminal, nothing will show as we type, no stars or dots. We just type the password and submit it with Enter. If you want to change this default behavior, check out our guide:
Show Stars when Typing the Linux Password at the Terminal
After the repository is successfully imported, we type:
sudo apt-get update && sudo apt-get install grub-customizer -y
At the end of the installation, we start GRUB customizer with:
sudo grub-customizer
After that, it’s only a matter of selecting the OS we prefer, and clicking the upwards arrow until it gets to the top.
Once on the top, we save the configuration.
On the next reboot, Windows is now the default operating system in the GRUB boot order.
Change GRUB boot order manually
If for whatever reason we can’t or don’t want to install GRUB customizer, we can change the GRUB boot order manually.
In fact, it is easier than installing GRUB customizer — but with a higher chance of breaking something in our system. So, we need to be extra careful with our every move.
Linux Mint
The Grub Customizer process was identical for Linux Mint and Ubuntu. However, this manual way has a small but important difference between the two distributions.
First, we open a terminal with ctrl+alt+T, and we type:
sudo nemo
Nemo is the file manager for Linux Mint. The equivalent of the Windows Explorer.
This will seem to open our home folder. The difference is that we opened the home folder as root. Running the file manager as root on Linux can be extremely dangerous; nothing will stop us from deleting an essential system file or folder by mistake.
On this home folder, we press ctrl+L and type /etc/grub.d/
The file 10_linux is the current default in the GRUB boot order. 30_os-prober_proxy is Windows.
We only need to rename 30_os-prober_proxy…
…to 09_os-prober_proxy
After that, we close Nemo, but not the terminal window. We press Ctrl+c to get the cursor back.
To apply the changes, we type:
sudo update-grub
On next reboot, Windows will be the default choice.
Easy as pie.
Ubuntu
The manual procedure to change the GRUB boot order on Ubuntu is almost identical with the one for Linux Mint. The only difference is that instead of «sudo nemo» we need to run:
sudo nautilus
The reason for this is because Ubuntu’s file manager is Nautilus, and not Nemo. After that, we navigate to /etc/grub.d/ and follow the exact same steps.
Did you have any problem changing the GRUB boot order?
If neither of the above ways worked for you, and you had any problem with changing the GRUB boot order, leave us a comment.
Support PCsteps
Do you want to support PCsteps, so we can post high quality articles throughout the week?
You can like our Facebook page, share this post with your friends, and select our affiliate links for your purchases on Amazon.com or Newegg.
If you prefer your purchases from China, we are affiliated with the largest international e-shops:
- Banggood
- Geekbuying
