
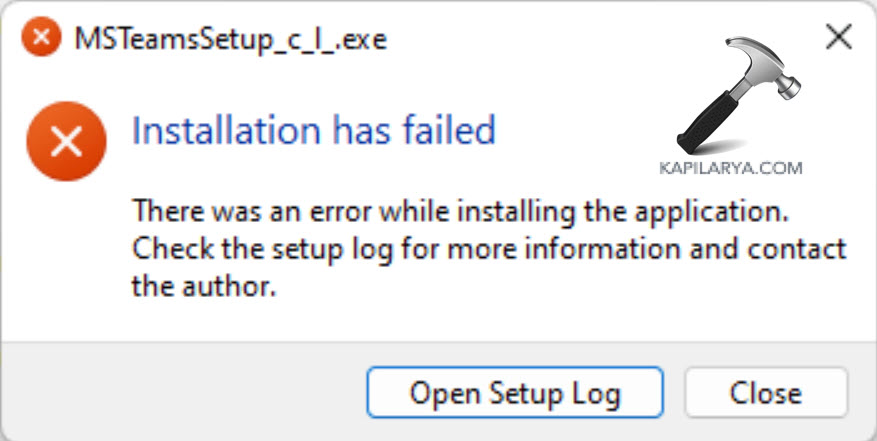
Installation errors become frustrating when you want to set up Microsoft Teams for work, school, or personal use. The Microsoft Teams installation has failed error emerges because of system conflicts and corrupted files, together with antivirus interference issues.
Hence, this guide provides the most effective step-by-step solutions to installing Microsoft Teams on Windows without any trouble.
Page Contents
The following section introduces common causes that lead to “Microsoft Teams installation has failed” errors before we explore potential solutions.
1. Antivirus or Firewall Interference
Third-party antivirus solutions together with firewalls can mistakenly interpret Microsoft Teams as harmful software thus blocking its installation. The installation process will fail when the installer gets flagged or quarantined by security systems.
2. Corrupted or Incomplete Installation Files
A corrupted or incomplete Microsoft Teams setup file often causes installation failure to occur.
3. Previous Microsoft Teams Installation Conflicts
Previous incomplete uninstallation of Microsoft Teams can generate files and registry entries that disrupt the installation of a new version.
4. Lack of Administrator Privileges
System settings need administrator privileges to correctly install software. The installation of Teams will not succeed when you attempt to install it with insufficient administrative privileges.
5. System Conflicts with Background Programs
The installation of Teams may fail when background applications such as Microsoft services or collaboration tools including Skype for Business run concurrently.
6. Issues with Windows Updates
Microsoft Teams needs particular Windows system components to operate properly therefore maintaining your system update status remains fundamental.
7. Low Disk Space
Insufficient storage on your system drive (usually C:) leads to installation problems or failures during the process. A successful Microsoft Teams installation needs sufficient empty storage space on the system.
Fix Microsoft Teams Installation has failed error
Fix 1: Disable Third-Party Antivirus Temporarily
Third-party antivirus tools mistakenly view Microsoft Teams as a potential security risk which prevents them from allowing its installation. To fix this-
1. Right-click on the antivirus icon in the taskbar.
2. Choose Pause protection or Disable temporarily from the antivirus options that differ by program type. Set a specific period for the protection pause either in minutes or until the system restarts.
3. You should obtain the newest Microsoft Teams setup by visiting the Microsoft Store. Return to your antivirus application after installation is finished to enable its protection features.
Fix 2: Clean Previous Installations
The problem can be resolved by completely removing all previous Teams installation files.
1. Open the Windows + R dialog box then enter the following command followed by pressing Enter.
appwiz.cpl

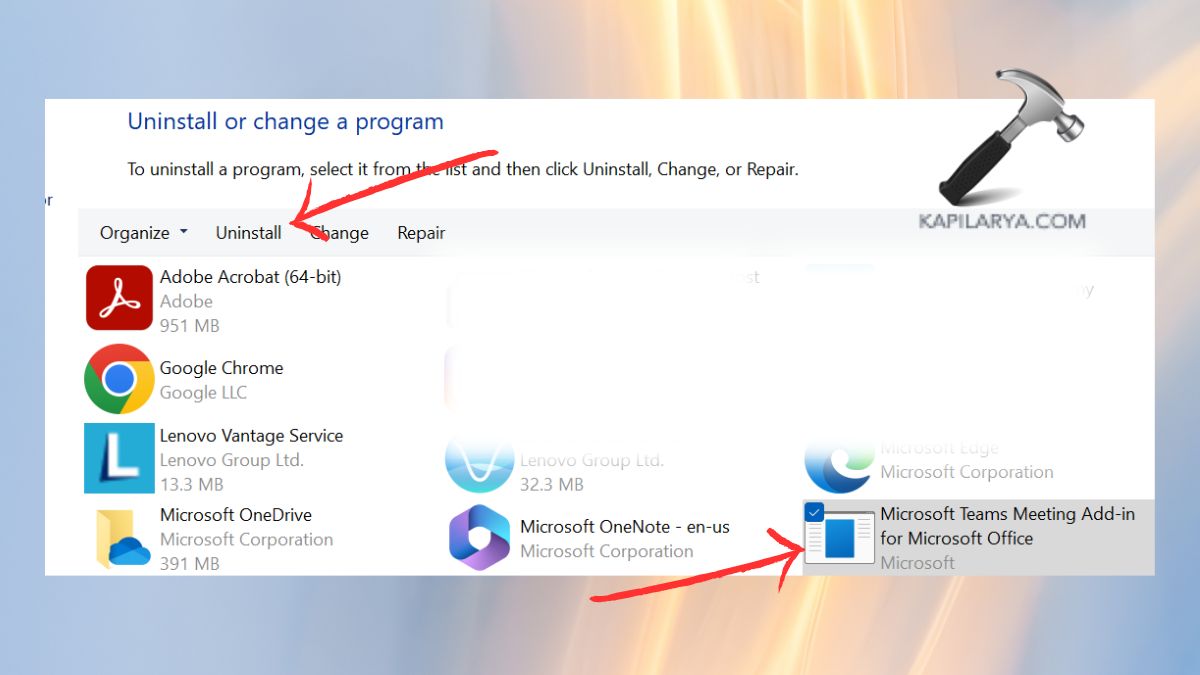
2. Right-click Microsoft Teams from the list and choose “Uninstall”.
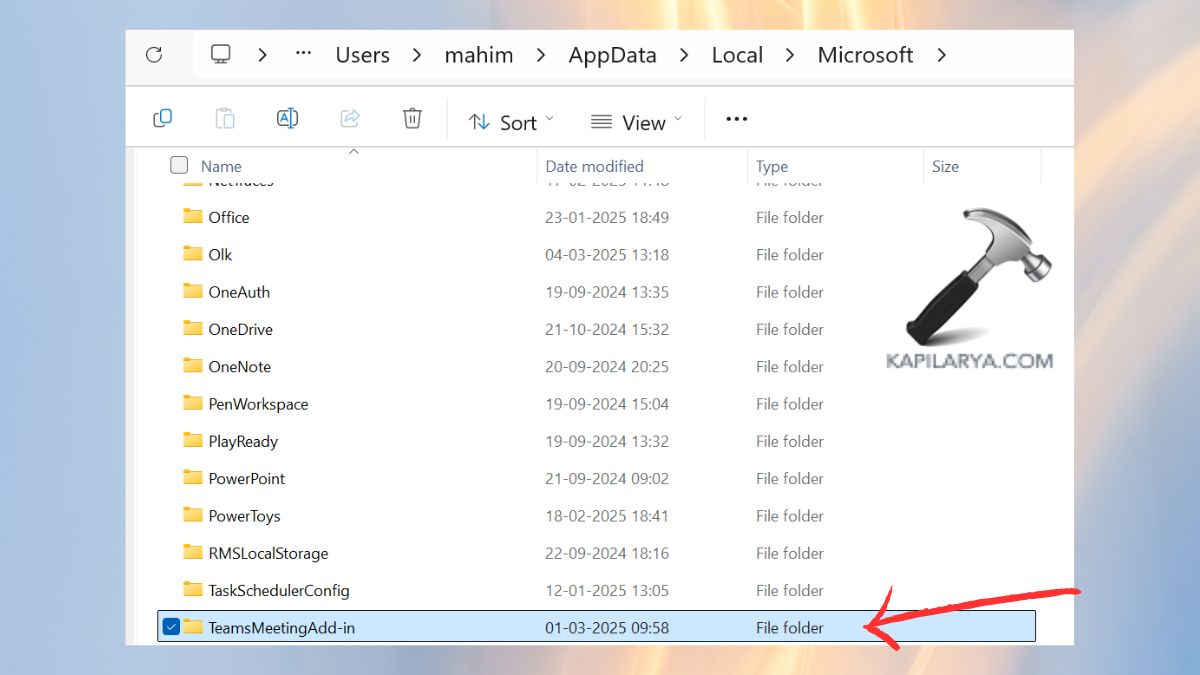
3. Open File Explorer (Windows + E). Navigate to-
C:\Users\YourUsername\AppData\Local\Microsoft\Teams
Delete the Teams folder.
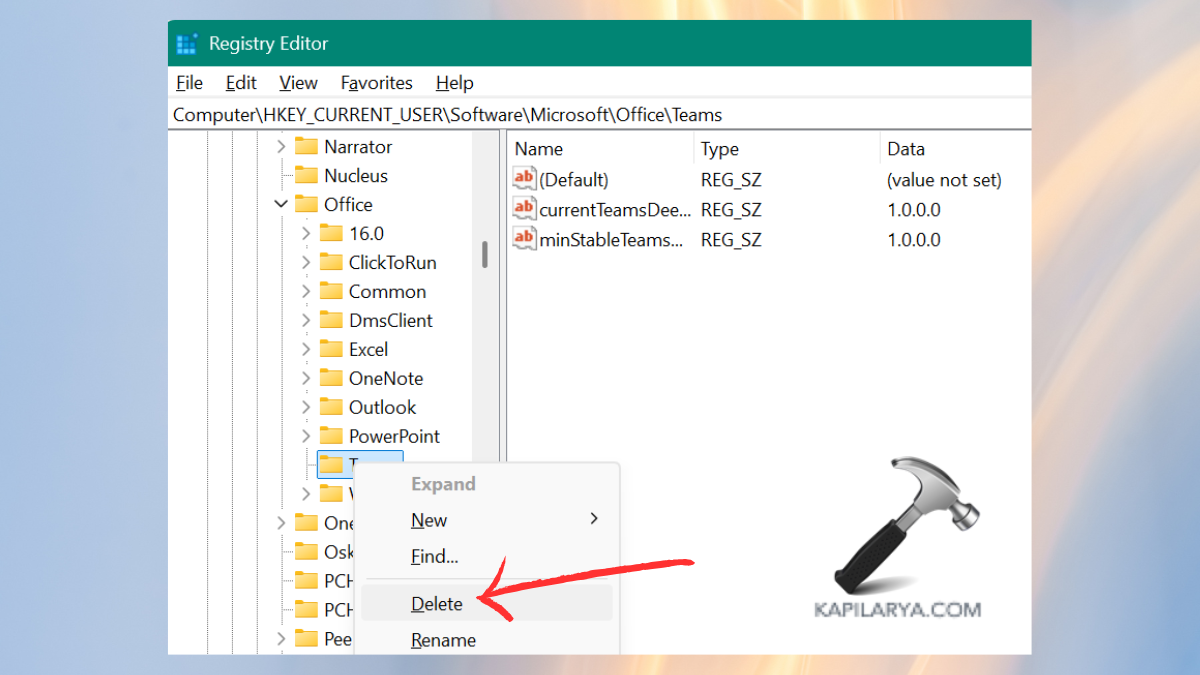
4. Open the Registry Editor app from the search console.

5. Navigate to the below path-
HKEY_CURRENT_USER\Software\Microsoft\Office\Teams
Delete the Teams registry folder. After restarting your system attempt to reinstall Microsoft Teams.
Fix 3: Run Installer as Administrator
Running the installer with administrative privileges can help bypass permission-related installation issues.
1. Navigate to the folder where the Microsoft Teams setup file is downloaded.
2. Right-click the setup file (Teams_windows_x64.exe or similar). Select Run as administrator.
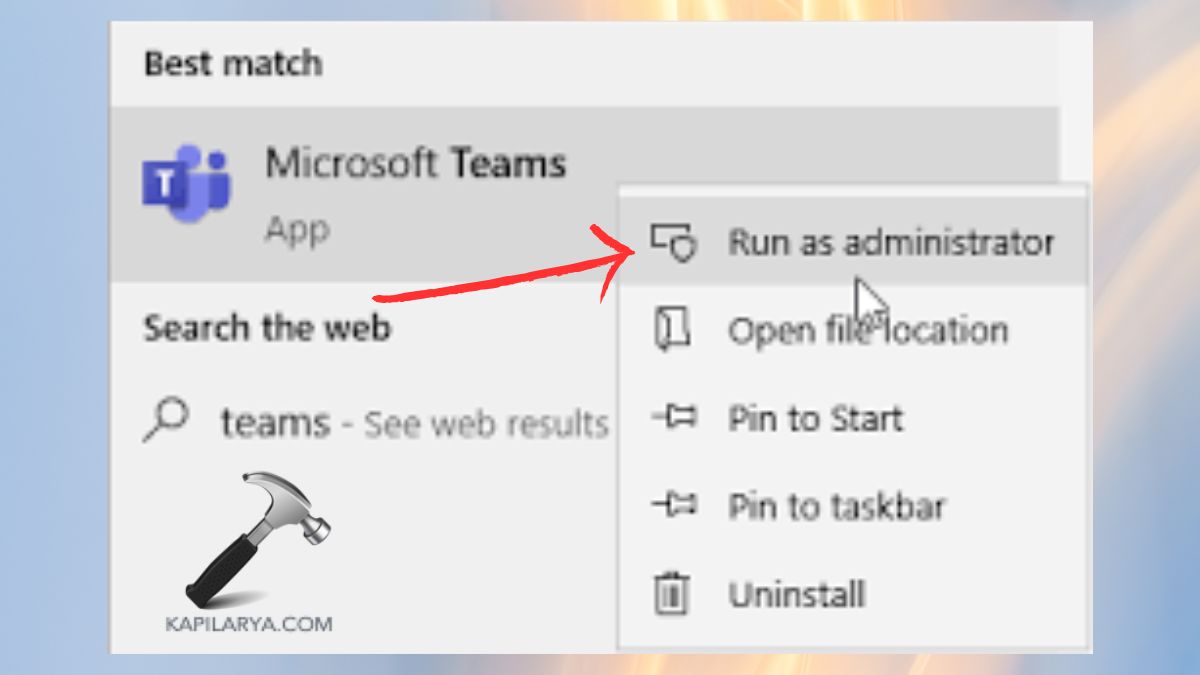
3. Proceed with the on-screen instructions to install Microsoft Teams. If the installation still fails, move to the next solution.
Fix 4: Perform a Clean Boot
A clean boot prevents conflicting software from disrupting Microsoft Teams installation.
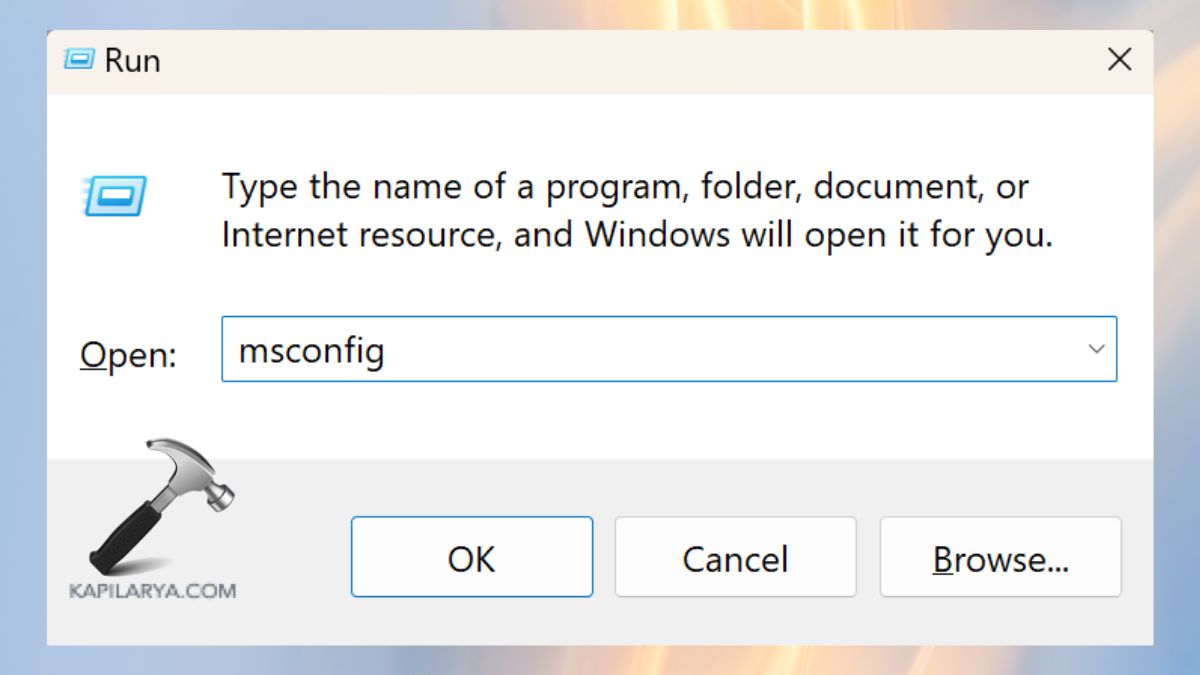
1. Open the Run dialog by pressing Windows + R then enter the below command and press Enter.
msconfig
2. Go to the Services tab. Select the option to “Hide all Microsoft services (to prevent disabling critical Windows services)” from the list. You can disable all third-party services by selecting “Disable all”.

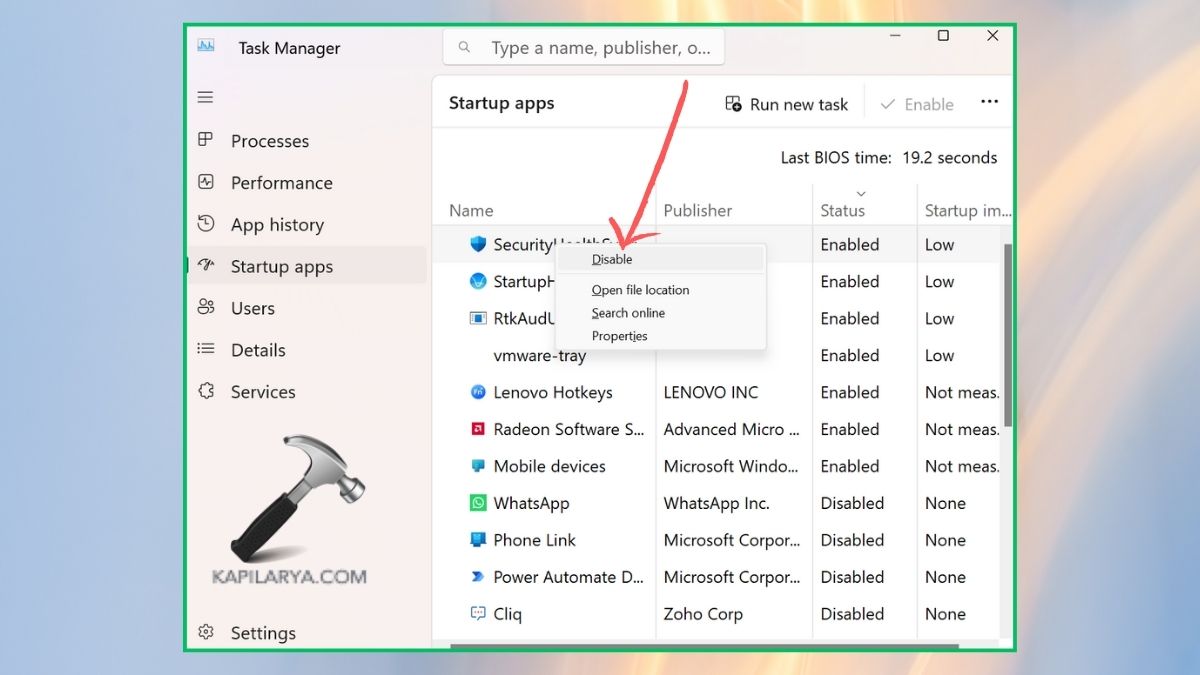
3. Open Task Manager (Ctrl + Shift + Esc) or search it from menu console. Go to the Startup tab.
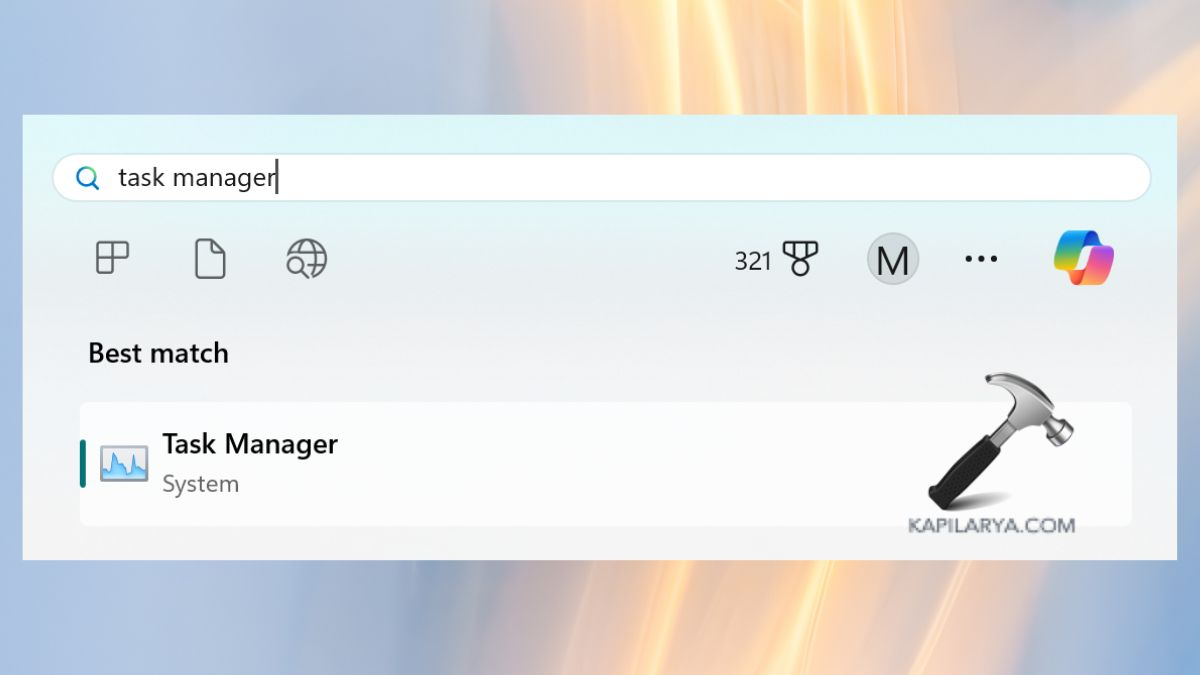
4. Use right-click to disable all startup programs that are not essential.
Restart your computer. Check if the installation problem with Microsoft Teams has been fixed by running the installer.
You can restore startup programs after successfully installing Teams through the reversal of these installation steps.
Fix 5: Use the MS Teams MSIX Version
Microsoft provides an MSIX version of Teams specifically designed to work with Windows 11 and contemporary Windows operating systems. The alternative version helps users overcome installation problems.
1. Users should access the Microsoft Teams MSIX download page (https://learn.microsoft.com/en-us/microsoftteams/new-teams-bulk-install-client) from the official website. Download the MSIX package by selecting it from the available options. Also, download the exe file.
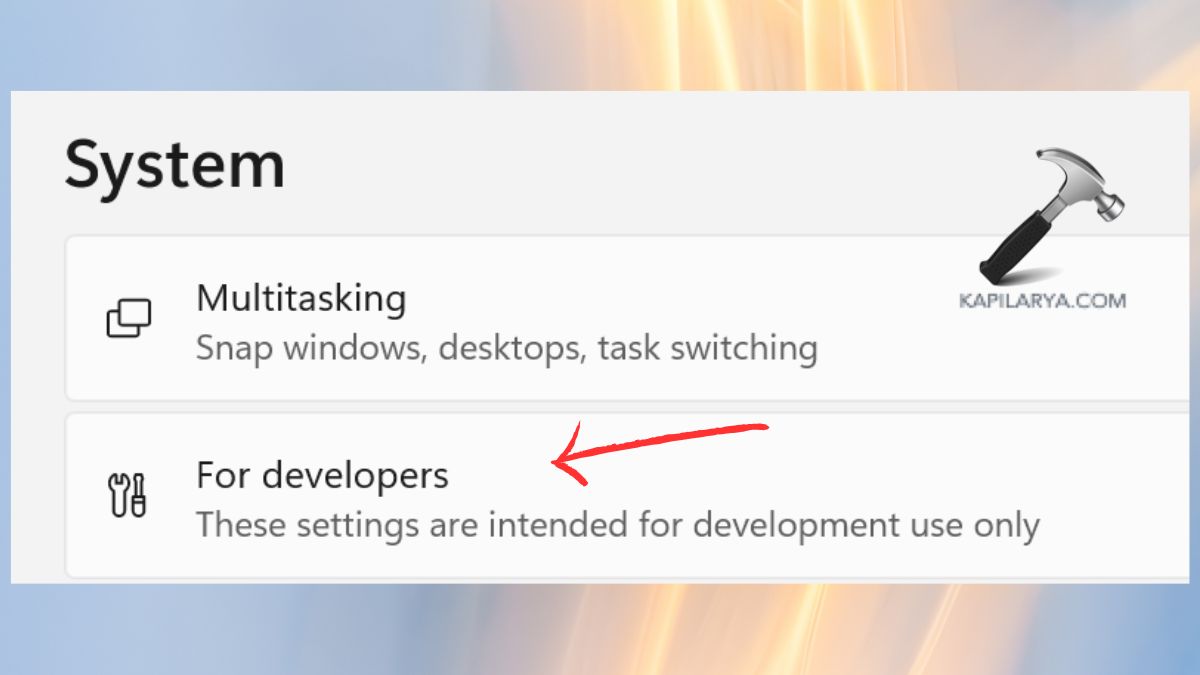
2. Users can access Settings by pressing Windows + I. Access System then select For Developers from the menu.
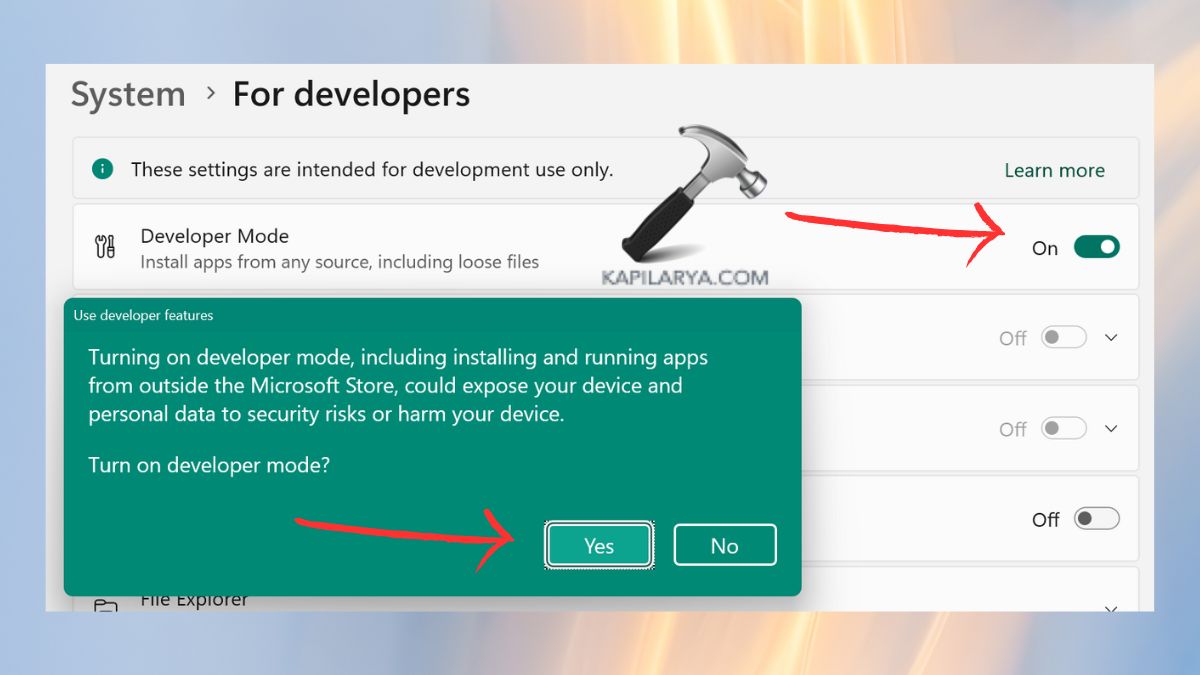
3. Turn on Developer Mode and tap “Yes”.
4. Double-click the downloaded MSIX file. The installation process requires users to follow the on-screen instructions.
Frequently Asked Questions (FAQs)
#1 Why is the Microsoft Teams app showing “Microsoft Teams Installation has failed error”?
The error typically appears because of these main factors:-
- Corrupt or incomplete installation files
- The installation process fails because antivirus or firewall software prevents it from happening.
- The absence of administrator privileges prevents users from installing the software.
- Conflicting previous Team installations.
- System compatibility issues alongside Windows updates that are missing can lead to this problem.
To fix this, the solutions described in this article will help you.
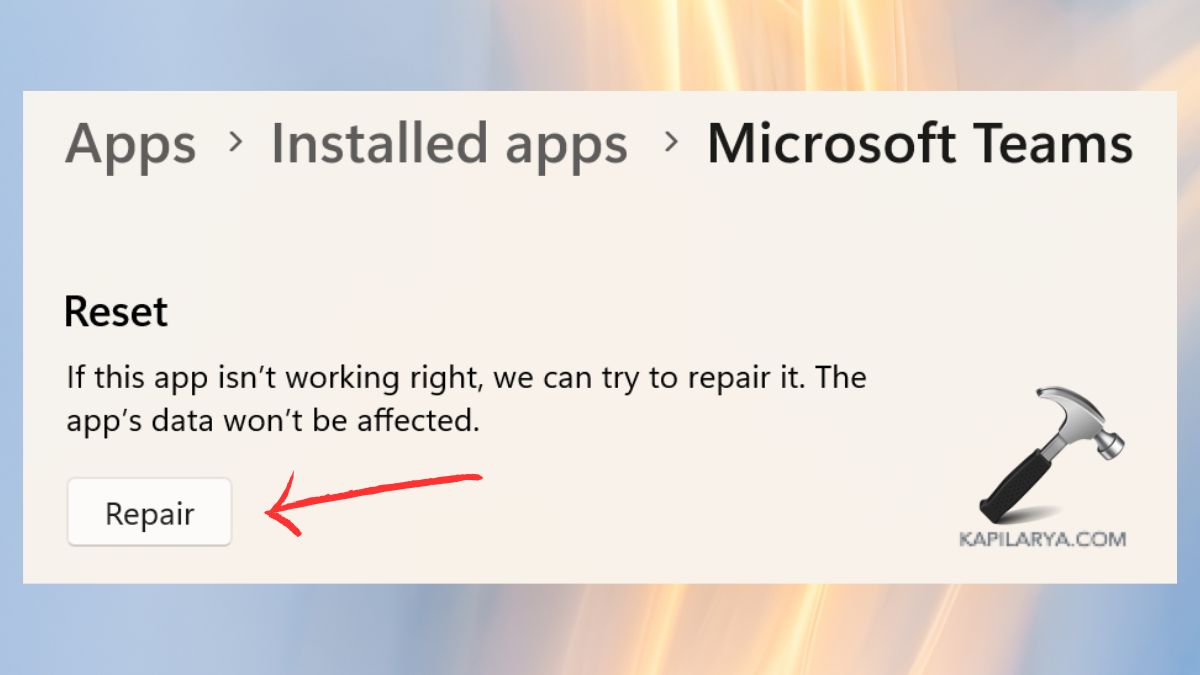
#2 How do I repair Microsoft Teams installation?
You can fix Microsoft Teams when it fails to work properly after installation, by performing these steps.
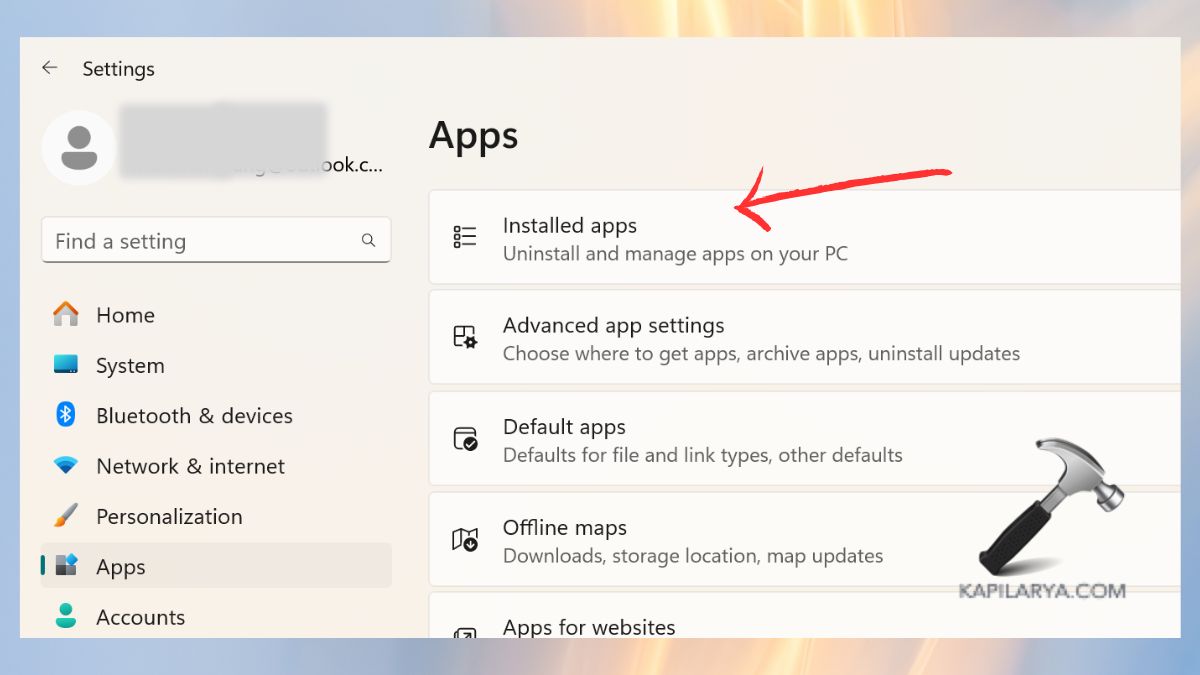
1. To access Settings users should press Windows + I. Go to Apps > Installed apps.
2. To access Advanced options for Microsoft Teams click the three dots next to its entry.

3. Tap the “Repair” option to fix issues without modifying any stored data.
#3 Can I use Microsoft Teams without installing it?
Yes! The Microsoft Teams Web Version operates without requiring users to install the application.
1. Open your browser to access https://teams.microsoft.com.
2. Login to your Microsoft account.
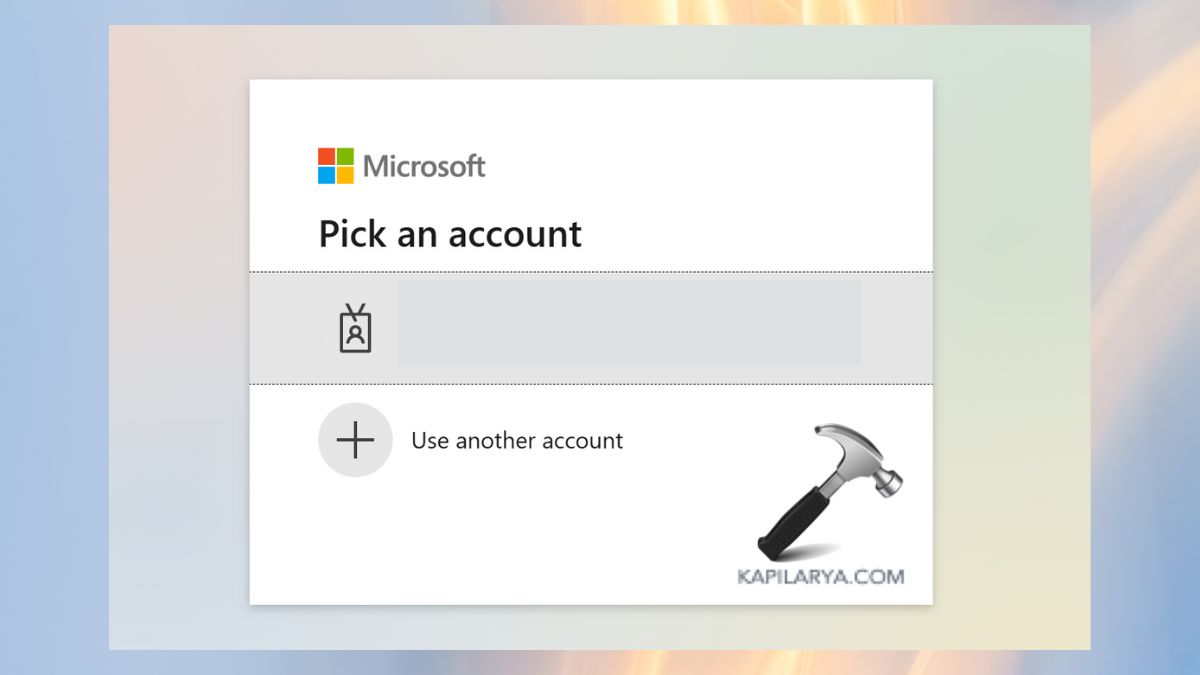
Users can access chats, meetings, and calls through the browser interface.
That’s it!
The Microsoft Teams error message “Installation has failed” typically occurs when the installation process is interrupted by antivirus software or other programs blocking it. This error indicates that the installer encountered an issue it couldn’t resolve automatically. Other potential causes include corrupted installation files or insufficient system permissions.

Regardless of the cause, we’ve compiled several proven methods to resolve this issue. Follow the steps below to troubleshoot the problem.
1. Disable Third-Party Antivirus Temporarily
Antivirus programs are designed to block viruses and potential threats to your computer. However, they can sometimes mistakenly flag legitimate installations as suspicious, preventing them from completing. Temporarily disabling your antivirus software can stop them from interfering with the installation process, allowing the Microsoft Teams setup to proceed without being blocked.
- Locate the antivirus icon in the system tray (bottom-right corner of the screen).
- Right-click on the icon and look for an option such as:
- Disable Protection
- Turn Off Antivirus
- Pause Protection
- Select a temporary duration (e.g., 10 minutes, 1 hour, or permanently) to disable the antivirus.

- Once done, try installing Microsoft Teams.

After completing the installation, ensure you re-enable your antivirus protection immediately to keep your system secure.
2. Run Installer as Administrator
Windows restricts installers from modifying system files or performing certain actions without proper permissions for security reasons. By running the Microsoft Teams installer as an administrator, you grant it the necessary privileges to create directories, install dependencies, and modify the registry without being blocked by system restrictions.
- Open File Explorer.
- Locate your installer where you downloaded it (usually in Downloads).
- Right-click on the MSTeamsSetup (or similar) setup file.
- Click on Run as administrator from the menu.

- If prompted, click on Yes to allow the installer to make changes.
- Proceed with the installation as usual and check if it completes without errors.
- If the installation succeeds, restart your computer to apply changes.

3. Use the MS Teams MSIX Version
The MSIX Version from the Microsoft Store provides an alternative installation method that bypasses common setup issues. This version is particularly useful if the standard installer fails. The MSIX package includes built-in security and dependency management, which helps reduce conflicts with antivirus software, missing system components, and permission restrictions.
Note: This method may not work on certain Windows versions, such as the LTSC (Long-Term Servicing Channel) edition of Windows 10. However, it should work seamlessly on other Windows versions.
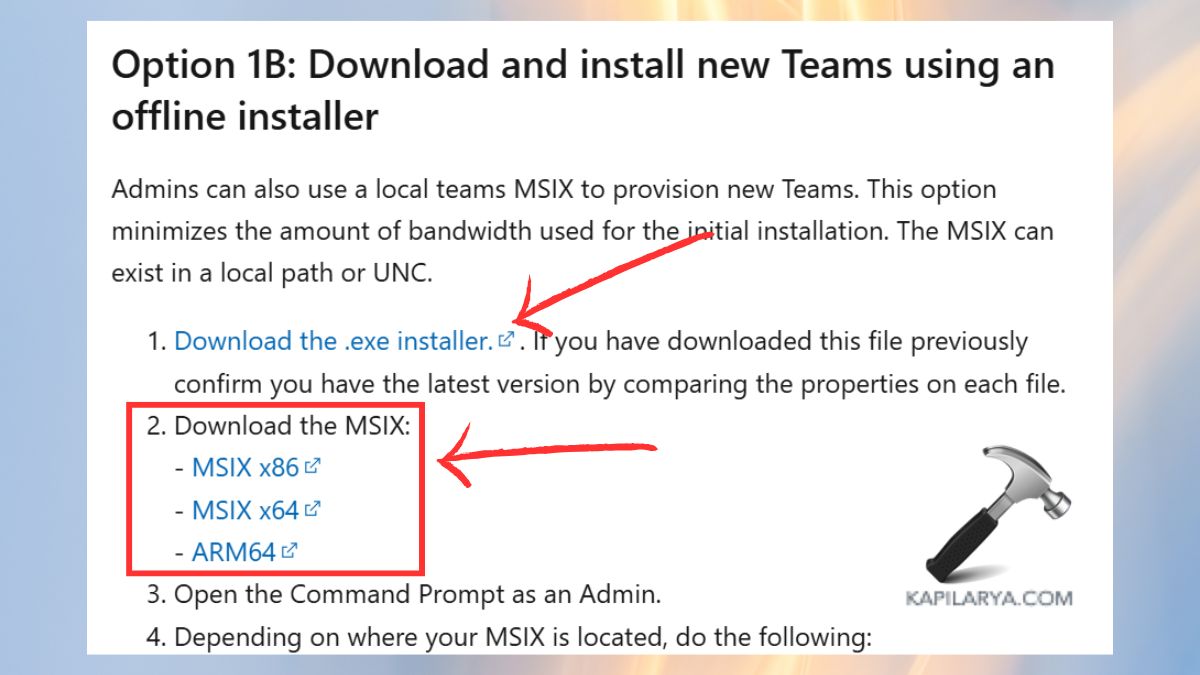
- Open your browser and navigate to “Bulk deploy the new Microsoft Teams client” page.
- Scroll down and locate Option 1B.
- Download the .exe installer provided in the link.
- Next, download the appropriate MSIX version for your system (i.e., MSIX x86 for 32-bit or MSIX x64 for 64-bit).

- Open the search bar, type cmd, right-click on it, and select Run as administrator.
- Depending on where your MSIX file is located, type the following commands in the Command Prompt:
cd "c:\path\to\downloadfolder"
.\teamsbootstrapper.exe -p -o "c:\path\to\teams.msix"


4. Clean Previous Installations
Residual files from previous or failed installations of Microsoft Teams can cause conflicts, preventing the new installation from completing successfully. These leftover files are often stored in directories like SquirrelTemp or as registry entries, which can interfere with the setup process. Removing these files can help resolve permission issues, eliminate potential corruption, and clear conflicting system paths.
Uninstall Microsoft Team
- Press the Windows + R keys to open the Run dialog box.
- Type appwiz.cpl and press Enter.
- Locate Microsoft Teams in the list of installed programs, right-click on it, and select Uninstall.
- Follow the on-screen instructions to complete the uninstallation process.
Delete Leftover Files
- Press the Windows + R keys to open the Run dialog box.
- Type %localappdata% and press Enter.
- Locate the Teams and SquirrelTemp folders.
- Right-click on both folders and select Delete.

- Once done, restart your computer.
- Now, try downloading and installing Microsoft Teams again.

5. Perform a Clean Boot
The installation of Microsoft Teams can fail if third-party services or background applications interfere with the process. Performing a clean boot starts Windows with only essential services and drivers, eliminating potential software conflicts and allowing the installation to proceed smoothly.
- Press Windows + R to open the Run dialog box.
- Type msconfig and press Enter.
- In the System Configuration window, navigate to the Services tab.
- Check the box for Hide all Microsoft services.

- Click Disable all to turn off all third-party services.
- Open Task Manager by pressing Ctrl + Shift + Esc.
- Go to the Startup tab, right-click on each enabled program, and select Disable.

- Close all windows and restart your computer to apply the clean boot settings.
- Finally, run the Teams installer as an administrator and check if the installation completes successfully.


Hamza Mohammad Anwar
Hamza Mohammad Anwar is an intermediate JavaScript web developer with a focus on developing high-performance applications using MERN technologies. His skill set includes expertise in ReactJS, MongoDB, Express NodeJS, and other related technologies. Hamza is also a Google IT Certified professional, which highlights his competence in IT support. As an avid problem-solver, he recreates errors on his computer to troubleshoot and find solutions to various technical issues.
Running into the “Microsoft Teams installation has failed” error on your Windows 10 or 11 PC? You’re not alone. This issue usually happens due to leftover files, permission issues, or missing dependencies like WebView2. Here’s a step-by-step guide to fix the problem and get Microsoft Teams installed properly.
1. Run the Installer as Administrator
Always run the Teams installer with admin rights to avoid permission errors.
- Right-click the Teams installer file.
- Select Run as administrator.
2. Uninstall Any Existing Teams Installation
Old or partial installs can block the new installation.
- Go to Settings > Apps > Installed Apps.
- Search for Microsoft Teams and Teams Machine-Wide Installer.
- Uninstall both if they appear.
- Restart your PC after uninstalling.
3. Clear the Teams Cache
Clearing the cache removes temporary files that might interfere.
- Press
Win + R, type%appdata%, and hit Enter. - Delete the Microsoft Teams folder.
- Restart your computer.
4. Delete Leftover Files from Program Files
Check for Teams folders under Program Files and remove them manually.
- Open File Explorer.
- Navigate to:
C:\Program Files (x86)\Microsoft\C:\Users\<your-username>\AppData\Local\Microsoft\
- Delete any folders named Teams or TeamsMeetingAdd-In.
5. Clean the Registry (Optional – Be Careful)
Orphaned registry entries can sometimes block installation.
⚠️ Only proceed if you’re comfortable using the Registry Editor.
- Press
Win + R, typeregedit, and press Enter. - Navigate to:
HKEY_CURRENT_USER\Software\Microsoft\Office\TeamsHKEY_LOCAL_MACHINE\Software\Microsoft\Office\Teams
- Delete any Teams-related folders.
- Close the Registry Editor and restart your PC.
6. Install WebView2 Runtime
Microsoft Teams depends on the WebView2 Runtime to run. If it’s missing, the installation might fail.
- Download it from the official Microsoft page:
Download WebView2 Runtime - Install it and restart your system.
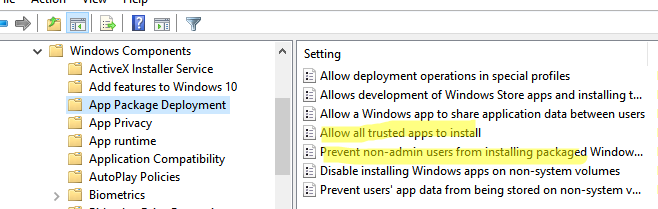
7. Check Group Policy Settings (Windows Pro and Enterprise)
Some Group Policy settings might block app installations.
- Press
Win + R, typegpedit.msc, and hit Enter. - Navigate to:
Computer Configuration > Administrative Templates > Windows Components > App Package Deployment - Make sure these policies are Not Configured:
- Prevent non-admin users from installing packaged Windows apps
- Allow all trusted apps to install
Still Not Working?
If none of these steps work:
- Try installing Teams using the offline installer from Microsoft’s official website.
- Check for pending Windows updates.
- Try installing in Safe Mode with Networking.
- Contact your IT admin if you’re on a managed device.
Bonus: Watch the Fix in Action
Here’s a helpful video tutorial that walks through the common solutions:
▶️ Fix Microsoft Teams Installation Has Failed Error (YouTube)
Недавно Microsoft представила новую версию MS Teams для Windows на базе WebView2. За счет перехода с Electron на WebView2 была существенно увеличена производительность Teams увеличилась (почти в два раза), а также снижено использование RAM (тоже почти в 2 раза). Однако при установке новой версии клиента Teams могут появиться ошибки:
Something went wrong and we couldn't install the new Teams. Please try again later.
Или
We’re sorry - We’ve run into an issue.
Администратор Microsoft 365 может включить для определенных пользователей Teams переключатель «Try the New Teams«.
Для этого нужно создать политику в Microsoft Teams admin center и назначить ее на пользователей. Или можно включить политику с помощью PowerShell модуля для Teams:
Connect-MicrosoftTeams
Set-CsTeamsUpdateManagementPolicy -identity DefaultTeamsPolicy -UseNewTeamsClient UserChoice
Если политика назначена, а переключатель отсутствует, попробуйте очистить папку
%appdata%/Microsoft/Teams
.
Для установки Teams вам нужно проверить, что на вашем компьютере установлен WebView2 Runtime. Откройте консоль PowerShell и выполните команду:
Get-Package -name *WebView2* |ft -AutoSize

Name Version Source ProviderName ---- ------- ------ ------------

Microsoft Edge WebView2 Runtime 111.0.1661.62 Programs
Среда выполнения WebView2 Runtime используется в том числе браузером Microsoft Edge. И если вы удалили MS Edge со своего компьютера, проверьте что это вы не удалили вместе с ним WebView2.
Вы можете установить WebView2 из командной строки с помощью встроенного менеджера пакетов WinGet:
winget install --id=Microsoft.EdgeWebView2Runtime -e
Проверьте, что в Windows отключены или не настроены следующие политики, которую препятствуют установке MSIX пакета Teams.
Воспользуйтесь командой gpresult или
rsop.msс
чтобы получить релуьтирующие настройки групповых политик на компьютере. Проверьте что следующе параметры в разделе Computer Configuration -> Windows Components -> App package Deployment не настроены или отключены:
- Prevent non-admins users from installing packaged Windows apps
- Allow all trusted apps to install
Этим GPO соответствуют следующе параметры в ветке реестра
HKEY_LOCAL_MACHINE\SOFTWARE\Policies\Microsoft\Windows\Appx
:
- BlockNonAdminUserInstall
- AllowAllTrustedApps
- AllowDevelopmentWithoutDevLicense
Например, если значение BlockNonAdminUserInstall = 1, измените его на 0, перезапустите классический клиент Teams и попробуйте установить новый Teams.
I’m betting that most people absolutely hate using Microsoft Teams for a range of different reasons but are forced to do work purposes. Apart from being clunky, unintuitive and outright dull it’s also got a done of problems hidden away inside of it, with the biggest and most common being installation error — “Installation has failed. There was an error while installing the application. Check the setup log for more information and contact the author.” This prevents you from doing anything else with Microsoft Teams, so follow along as we guide you through quite a few troubleshooting steps that should solve this problem.

Takeaways:
- Fixing Microsoft Teams error — “Installation has failed. There was an error while installing the application. Check the setup log for more information and contact the author.”
- Why can’t I install Microsoft Teams on Windows 11? Fixing installation has failed error.
Table of Contents
As with most Microsoft software and tools, there are quite a few different things that cause this error message 5 of the most common are listed below.
- Security software interference: Antivirus programs may block the installer from making necessary system changes.
- Corrupt or incomplete installation files: Failed or interrupted installations can leave behind problematic files.
- Insufficient user permissions: The installer may require elevated privileges to access system directories.
- Conflicts with existing installations: Residual files from previous installations can disrupt new setups.
- Windows Installer service issues: If this service isn’t functioning properly, software installations may fail.
Run the Teams Installer as Administrator
While it probably won’t solve your problem it only takes a second to do so try running your Teams installer with admin privileges.
- Locate the Microsoft Teams setup file.
- Right-click the file and select Run as administrator.
- Confirm any User Account Control (UAC) prompts.
- Follow the installation steps and check if the issue is resolved.
Uninstall Previous Versions of Teams
Make sure any older versions of Teams are completely removed before trying to install a new version of Teams. Microsoft Teams is super fragile and gets corrupted and confused very easily.
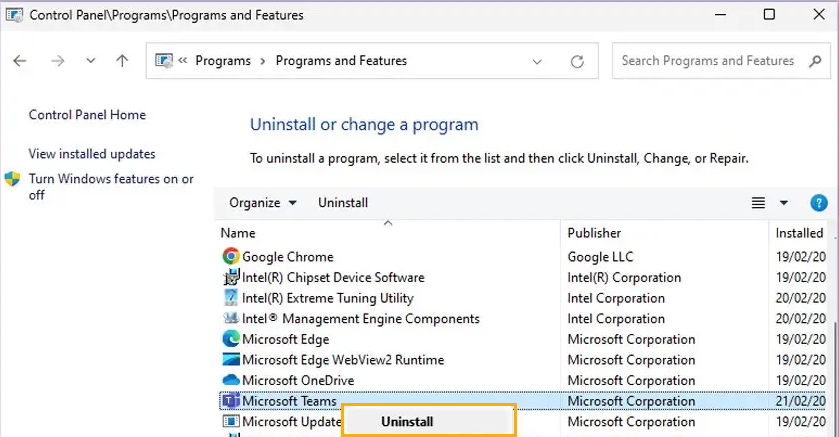
- Open Control Panel and navigate to Programs > Uninstall a Program.
- Locate Microsoft Teams, right-click, and select Uninstall.=
- Follow the prompts to remove the application.
- Open File Explorer with Win + E and enable hidden files under the View tab.
- Navigate to C:\Program Files\WindowsApps and delete or rename the Microsoft Teams folder.
- Type %AppData% in Windows search and press Enter.
- Delete the Teams folder.
- Restart your system and reinstall Teams.
Temporarily Disable Antivirus and Firewall
If you are using a third-party antivirus or firewall tool it could be causing problems so disable it/them then try to install Teams. If you are using Windows Defender you can skip this step as it won’t cause any issues with the installation.
- Temporarily disable your third-party security software.
- Open Control Panel > System and Security > Windows Defender Firewall.
- Select Allow an app or feature through Windows Defender Firewall.
- Click Change settings and enter your administrator password if prompted.
- Find Microsoft Teams and check both Private and Public boxes.
- Click OK to save your changes.
Clear Teams Installation Cache
Corrupt cache files can block the installation process.
- Close Microsoft Teams completely.
- Open File Explorer with Win + E and ensure hidden files are visible.
- Navigate to %appdata%\Microsoft\teams.
- Delete the contents of these folders:
application cache\cache
blob_storage
Cache
databases
GPUcache
IndexedDB
Local Storage
tmp
- Empty the Recycle Bin or use Shift + Del to permanently delete files.
- Restart your system and try installing Teams again.