
Download Windows Speedup Tool to fix errors and make PC run faster
Task Scheduler, the built-in utility from Microsoft lets you schedule any task to initiate automatically. For example, you can create a task for your monthly bills and schedule it and it will automatically open at the scheduled time. All these entries you make to create a task are stored in the Task Scheduler event log but you need to enable the history to check these entries. With just a few tweaks, you can easily enable, view, and clear the Task Scheduler history in your Windows 11/10 system.
With the Task Scheduler app, you can create and manage all your common tasks and your computer will automatically carry out those tasks at the time you specify. To view all your task entries stored in the app library, you need to enable the task history in the application.
To enable the task history, open the task scheduler app. Type ‘Task Scheduler’ in your Windows search box and open the application.
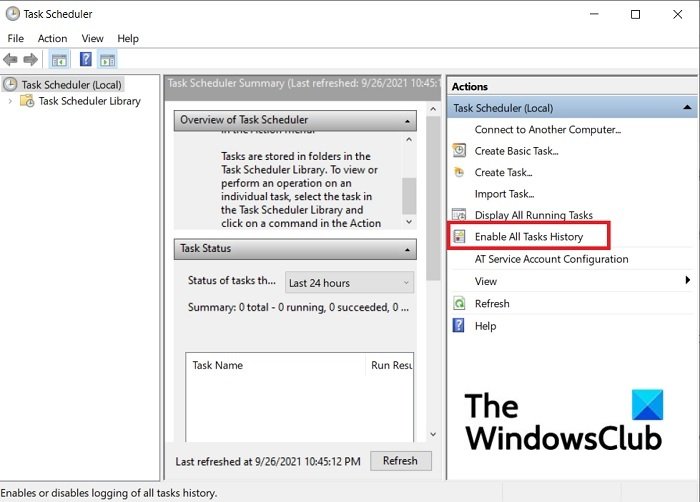
In the right panel, click on the tab see a tab saying, “Enable all task history”
How to view the Task History in the Task Scheduler
All your created and scheduled task entries are stored in the Task Scheduler Library.
Once you’ve enabled all the Task History, click on the Task Scheduler Library in the left panel and it will open a list of all your scheduled tasks.
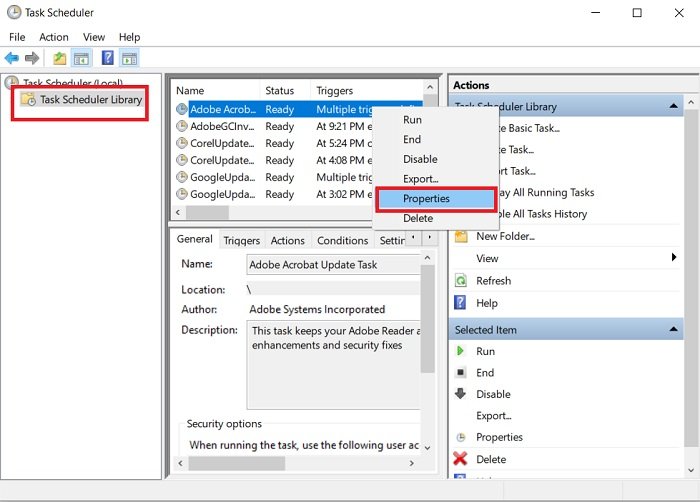
Go to any task, right-click and click on properties. This will open a new tab wherein you can check the History in detail.
Read: No permission to disable, create, run or change Task Scheduler task
How to delete Task History in the Task Scheduler
To delete your task history log in the Task Scheduler, you need to open the Event Viewer app on your Windows 10/11 PC.
Type Event Viewer in the Windows search box and launch it.
Go to the branch-
Event Viewer (Local)/Applications and Services Logs/Microsoft/Windows/TaskScheduler/Operational

Right-click the ‘Operational’ tab and click on Clear Log.
Does Task Scheduler work when the computer is sleeping?
Yes, the Task Scheduler works even when your computer is in sleep mode.
Can we schedule a task without waking up the PC?
Yes, you can schedule your tasks without waking up your PC.
- Launch the Task Scheduler and click on Create Task in the right panel.
- This will open a new window where you can create your task and schedule it.
- Under the Conditions tab, uncheck the box saying, “Wake the computer to run this task”.
Hope this helps.
Related: Task Scheduler not running or starting programs.
Shiwangi loves to dabble with and write about computers. Creating a System Restore Point first before installing new software, and being careful about any third-party offers while installing freeware is recommended.
This post describes enabling or disabling Task scheduler history in Windows 11.
The Task Scheduler service allows you to perform automated tasks on your computer. You can schedule any program conveniently based on your chosen event criteria.
By default, the Task Scheduler tasks history is disabled. Task Scheduler will show the “Last Run Time” for tasks only.
If you want to see the history for all tasks, you can enable Task Scheduler history. When enabled, you will see the history for all tasks as well as in Event Viewer under Event Viewer (Local) > Applications and Services Logs > Microsoft > Windows > TaskScheduler > Operational.
Below is how to enable or disable Task Scheduler history in Windows 11.
How to enable task scheduler history in Windows 11
As described above, Tash Scheduler shows “Last Run Time” only. If you want to see the history for all tasks, you can enable Task Scheduler history, and the steps below will show you how to do that.
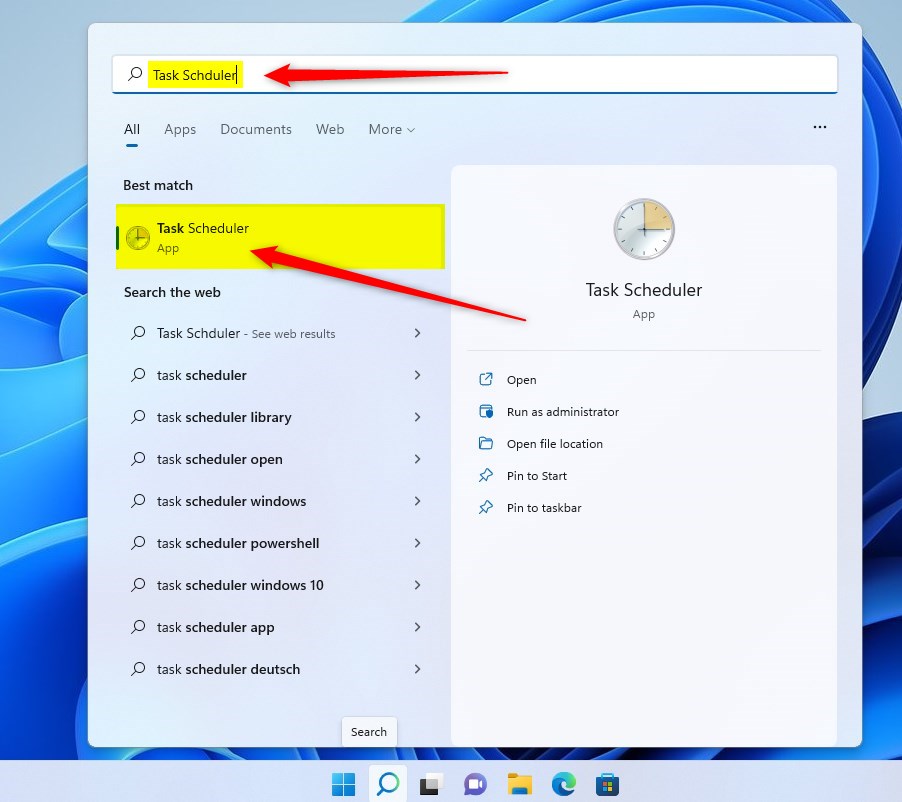
First, open Task Scheduler. Go to Start -> Search and type Task Scheduler. Then under Best match, select the Task Scheduler app.
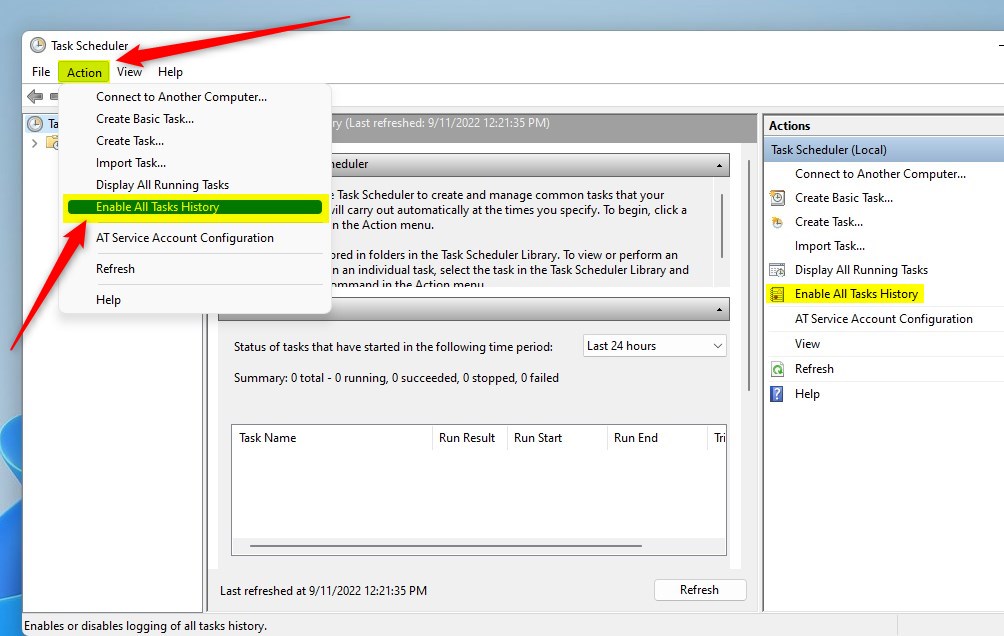
Once the Task Scheduler app opens, click the Action -> Enable All Tasks History command on the context menu.
Alternatively, click Enable All Tasks History on the right Actions panel as highlighted below.
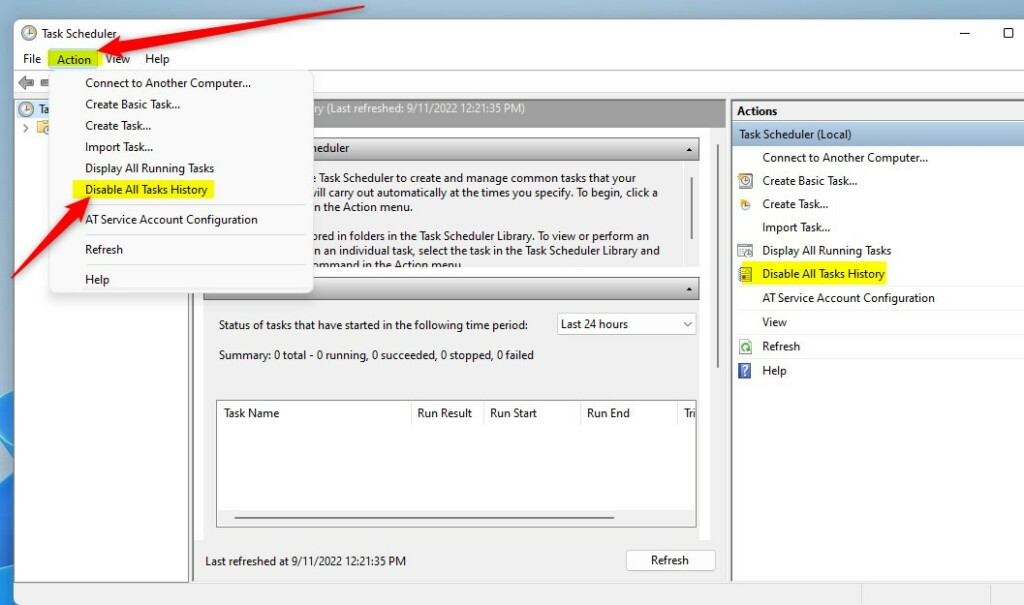
To disable, reverse the steps above and click Disable All Task History under the Action menu or Actions panel on the right.
The same actions above can be done in Windows PowerShell.
Open PowerShell as administrator, then run the commands below to Enable All Tasks History.
wevtutil set-log Microsoft-Windows-TaskScheduler/Operational /enabled:true
To disable it, run the commands below:
wevtutil set-log Microsoft-Windows-TaskScheduler/Operational /enabled:false
That should do it!
Conclusion
- Enabling task scheduler history in Windows 11 allows you to access the complete history of all tasks, enhancing your ability to monitor and manage automated processes on your computer.
- Disabling task scheduler history can help reduce unnecessary log clutter and streamline the monitoring of tasks for efficient system management.
- Whether enabling or disabling task scheduler history, following the provided steps will ensure you can customize the task scheduler settings according to your preferences and requirements.
On Windows 11 or 10, sometimes, you may need to see the history of tasks you created to confirm they’re working correctly, but only to find out that nothing has been recorded by default in the history tab. Only the “Last Run Time” information is available in the console.
If you want to log the task events on Windows 11 (or even on Windows 10), the Task Scheduler includes an option to enable history manually (but for all tasks).
This guide will teach you the steps to enable or disable history for tasks on Task Scheduler on Windows 11.
- Enable history on Task Scheduler
- Enable Task Scheduler history from Command Prompt
- View task history on Task Scheduler
To enable event history for Task Scheduler on Windows 11, use these steps:
-
Open Task Scheduler on Windows 11.
-
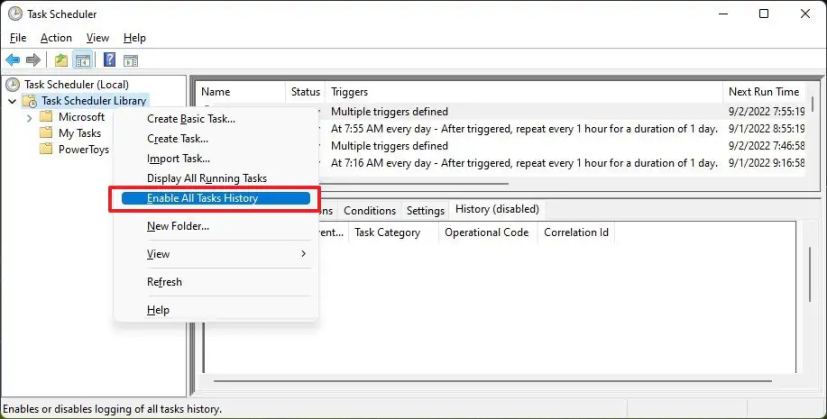
Right-click the Task Scheduler Library folder.
-
Select the “Enable All Tasks History” option to enable the feature.

-
(Optional) Select the “Disable All Tasks History” option to disable the feature.
Once you complete the steps, the next time a task runs, the events will be recorded in the “History” tab.
Enable Task Scheduler history from Command Prompt
Alternatively, you can enable the history feature of tasks from Command Prompt using the “wevtutil” tool.
To enable Task Scheduler history with command, use these steps:
-
Open Start.
-
Search for Command Prompt, right-click the top result, and select the Run as administrator option.
-
Type the following command to enable task history and press Enter:
wevtutil set-log Microsoft-Windows-TaskScheduler/Operational /enabled:true

-
Type the following command to confirm that the feature is enabled and press Enter:
wevtutil get-log Microsoft-Windows-TaskScheduler/Operational
-
(Optional) Type the following command to enable task history and press Enter:
wevtutil set-log Microsoft-Windows-TaskScheduler/Operational /enabled:false

After you complete the steps, Task Scheduler will enable history for all tasks.
When using the history feature, you cannot enable history for one task, it’ll turn on for all of them.
View task history on Task Scheduler
To view the history of a task, use these steps:
-
Open Task Scheduler.
-
Select the task on the right side.
-
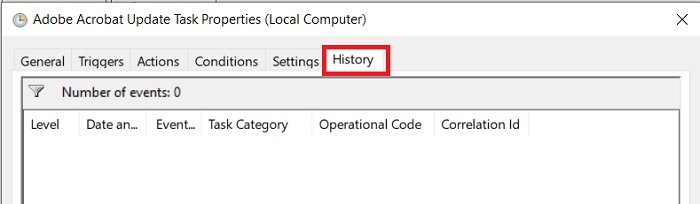
Click the History tab.

After you complete the steps, under the “History” tab, you will find the history of every time the task was run. The details include date and time, event identification, task category, operational code, and more.
Why You Can Trust Pureinfotech
The author combines expert insights with user-centric guidance, rigorously researching and testing to ensure you receive trustworthy, easy-to-follow tech guides. Review the publishing process.

This tutorial will show you how to enable or disable all tasks history in Task Scheduler in Windows 10 and Window 11.
The Task Scheduler service allows you to perform automated tasks on a chosen computer. With this service, you can schedule any program to run at a convenient time for you or when a specific event occurs. The Task Scheduler monitors the time or event criteria that you choose and then executes the task when those criteria are met.
Task Scheduler will show you the «Last Run Time» for tasks, but tasks history is disabled by default.
If needed, you can enable all tasks history to start seeing in Task Scheduler, and log in Event Viewer (eventvwr.msc) at the location below:
- Event Viewer (Local) > Applications and Services Logs > Microsoft > Windows > TaskScheduler > Operational
You must be signed in as an administrator to enable or disable all tasks history in Task Scheduler.
Contents
- Option One: Enable or Disable Task Scheduler History in Task Scheduler
- Option Two: Enable or Disable Task Scheduler History using Command
EXAMPLE: Enable or Disable All Tasks History in Task Scheduler

Option One
Enable or Disable Task Scheduler History in Task Scheduler
1 Open Task Scheduler (taskschd.msc).
2 In the right Actions pane, click/tap on Enable All Tasks History or Disable All Tasks History (default) for what you want. (see screenshots below)

Option Two
Enable or Disable Task Scheduler History using Command
1 Open Windows Terminal (Admin), and select either Windows PowerShell or Command Prompt.
2 Copy and paste the command below you want to use into Windows Terminal (Admin), and press Enter. (see screenshots below)
Enable All Tasks History
wevtutil set-log Microsoft-Windows-TaskScheduler/Operational /enabled:true
OR
Disable All Tasks History (default)
wevtutil set-log Microsoft-Windows-TaskScheduler/Operational /enabled:false
3 You can now close Windows Terminal (Admin) if you like.


That’s it,
Shawn Brink
Windows 11 has brought several enhancements and features to improve user experience. Among these improvements is the Task Scheduler, a powerful tool that allows users to automate various tasks on their computers. Understanding how to effectively manage Task Scheduler history is crucial for efficient system management. In this article, we will dive deep into how to enable, view, and clear Task Scheduler history in Windows 11.
What is Task Scheduler?
Task Scheduler is a built-in Windows tool that automates the execution of tasks at specific times or in response to certain events. It provides a way to run scripts or programs without manual intervention. For instance, you can schedule backups, system maintenance, or even software updates. Each task you create in Task Scheduler can generate a history log that allows you to track its performance, troubleshoot issues, and verify executions.
Enabling Task Scheduler History
By default, Task Scheduler history may be disabled in Windows 11, which means that any executions of tasks will not be logged. Enabling this feature is the first step towards effective task management. Here’s how you can enable Task Scheduler history:
Step 1: Open Task Scheduler
- Press the Windows Key: This opens up the Start menu.
- Type «Task Scheduler»: In the search box, type «Task Scheduler» and click on the application icon when it appears in the results.
Step 2: Enable History
- In the Task Scheduler window, navigate to the left-hand pane.
- Locate the «Task Scheduler (Local)»: Right-click on it.
- Select «Enable All Tasks History»: This option is available in the context menu. Click on it to enable task history.
Once you complete this step, new tasks will be recorded, and you can track their execution.
Viewing Task Scheduler History
Viewing the Task Scheduler history allows you to check when tasks were executed, whether they completed successfully, and any errors that might have occurred. Here’s how to view the task history in Windows 11:
Step 1: Open Task Scheduler
As previously mentioned, start by opening the Task Scheduler.
Step 2: Navigate to Task History
- Select a task from the list on the left pane or created in the Task Scheduler Library.
- Click on «History»: Once your task is selected, navigate to the bottom of the window and click on the «History» tab on the right-hand side. This will display the execution history of the selected task.
Step 3: Review Task History
You will see a series of logs indicating the following:
- Event ID: A unique identifier for the event.
- Date and Time: When the event occurred.
- Action: What the task did (e.g., “Started,” “Completed,” “Failed”).
- Result: The outcome of the task execution, including error codes if applicable.
By reviewing the task history, you can diagnose issues with tasks that haven’t executed correctly or ensure that scheduled tasks are running as planned.
Clearing Task Scheduler History
Over time, the Task Scheduler history can become bloated with old logs that consume space on your hard drive. Clearing out this history periodically will help maintain performance and keep the system organized. Here’s how you can clear the Task Scheduler history in Windows 11:
Step 1: Open Task Scheduler
Again, start by launching the Task Scheduler as you did before.
Step 2: Navigate to the Task
- In the left pane, locate the task whose history you intend to clear.
- Right-click on the task: Select the task that you wish to clear history for.
Step 3: Clear History
- In the context menu, click on «Clear»: This option will remove all logs associated with the selected task’s history.
- A confirmation dialog may appear; if so, confirm that you want to clear the history.
Step 4: Clear All Task History
If you’d like to clear the entire task history for all tasks, you can:
- Click on “Task Scheduler (Local)” in the left pane.
- Select «Action» from the top menu.
- Choose «Clear All Events» from the dropdown menu. Confirm your selection.
Note that clearing history cannot be undone. Hence, ensure you have recorded any important information before elimination.
Advanced Management of Task Scheduler History
To make the best use of Task Scheduler in Windows 11, here are some advanced management tips:
Scheduling Tasks for Efficiency
- Prioritize tasks based on their importance and required execution frequency.
- Combine tasks whenever possible. For example, you can create tasks that run in a sequence. Utilize batch scripts to execute multiple commands at once.
Error Management
- Monitor task failures closely by examining error codes in Task Scheduler history.
- Regularly update your tasks’ parameters to align with changes in the environment or applications that may affect their running.
Backup Task Scheduler Configuration
Maintain a backup of your Task Scheduler configuration for future recovery:
- Use the Export option to save task configurations.
- Save the resultant XML files in a secure location.
In cases of a system failure, you can import these files back into Task Scheduler, restoring your previously configured tasks.
Using PowerShell
For tech-savvy users or administrators, PowerShell offers a way to manage Task Scheduler tasks more efficiently. You can run scripts to enable, view, and clear task history without navigating through the GUI:
-
Enable Task History:
schtasks /change /TN "TaskName" /ENABLE -
View Task History:
Get-ScheduledTask | Get-ScheduledTaskInfo -
Clear Task History:
schtasks /delete /TN "TaskName" /F
PowerShell commands are powerful and allow for automation, making task management even easier.
Conclusion
Task Scheduler in Windows 11 is an indispensable feature for productivity and automation. By enabling, viewing, and clearing task history, users can maintain an organized system and prevent unnecessary clutter. The insights gained from the task history can help troubleshoot and optimize the execution of automated tasks.
Remember to periodically review your tasks and histories, enabling you to tweak scheduling as necessary for optimal performance. As you become more familiar with Task Scheduler, you’ll discover even more ways it can enhance your workflow in Windows 11.