
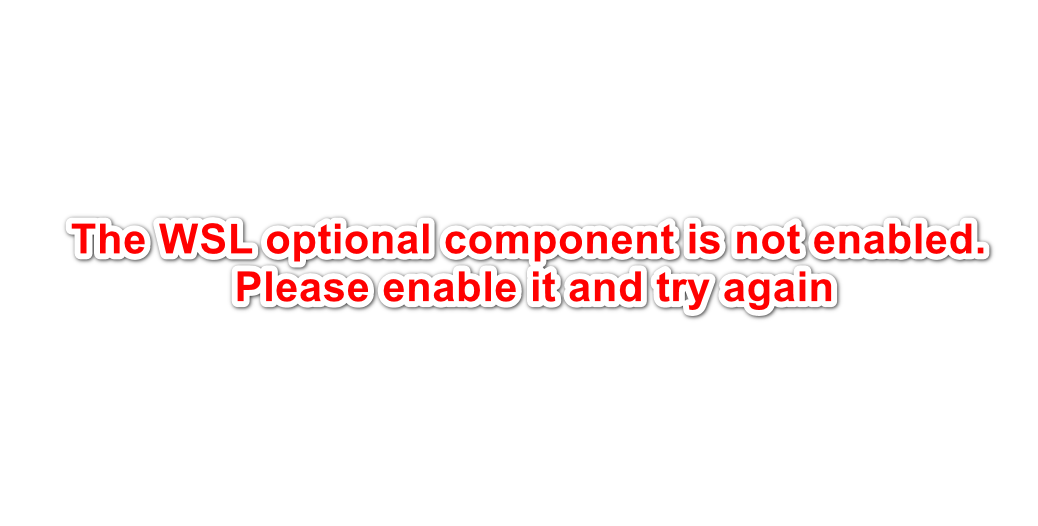
Ubuntu is a Linux based distribution that is totally free and open source. The program also provides support for Windows 10 and is used by a lot of people for software developing purposes. However, quite recently a lot of reports have been coming in where users are unable to use it and the Error “The WSL Optional Component is not Enabled. Please Enable it and Try Again” is seen while trying to do so.
What Causes “The WSL Optional Component is Not Enabled. Please Enable it and Try Again” Error on Ubuntu?
After receiving numerous reports from multiple users, we decided to investigate the issue and devised a set of solutions to fix eradicate it completely. Also, we looked into the reason due to which this issue is triggered and listed it as follows.
- Disabled Component: As the error message indicates, the error is triggered if the Windows Subsystem for Linux is disabled. Windows Subsystem for Linux is a very important feature and needs to be enabled in order for Ubuntu to work properly on Windows 10 because it provides all the important configurations and distributions needed for Ubuntu to run correctly.
Now that you have a basic understanding of the nature of the problem, we will move on towards the solutions. Make sure to implement the solutions carefully, in order to avoid conflict.
Method 1: Turning WSL ON Through Control Panel
There are a couple of methods which we can apply to rectify the problem. However, in this step, we will be taking the easiest route and enable WSL through the Control Panel. For that:
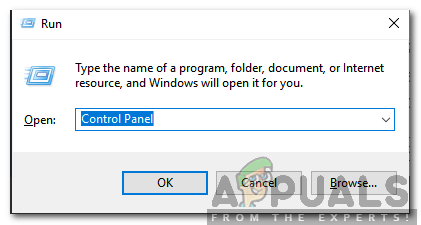
- Press “Windows” + “R” keys simultaneously to open the Run prompt.
- Type in “Control Panel” and press “Shift” + “Ctrl” + “Enter” to provide administrative privileges.

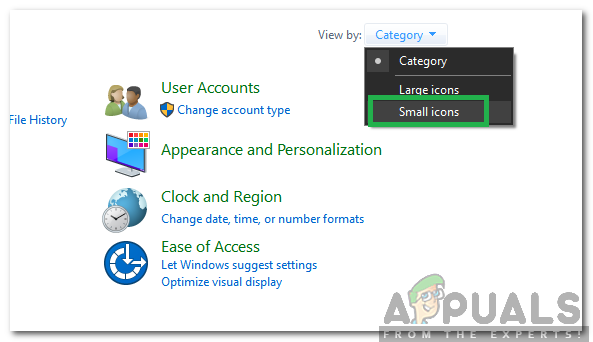
Typing in “Control Panel” and pressing “Shift” + “Ctrl” + “Enter” to provide administrative privileges - Click on the “View By” option and select “Small Icons“.

Clicking on “View By” and selecting “Small Icons” - Click on the “Programs and Features” option.
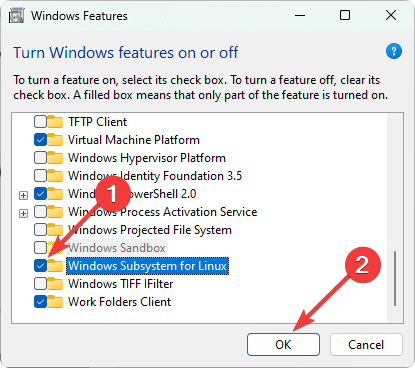
- Select the “Turn Windows Features On or OFF” option in the left pane.
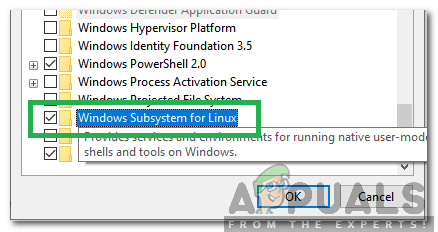
- Scroll down and select “Windows Subsystem for Linux“.

Checking the “Windows Subsystem for Linux” option” - Click on “OK” to enable the feature.
- Check to see if the issue persists.
Solution 2: Turning WSL ON Through PowerShell
We can also enable the WSL Feature by using the Command Prompt. Therefore, in this step, we will be implementing a command in the command prompt to enable the WSL Feature. For that:
- Press “Windows” + “R” keys simultaneously to open the Run prompt.
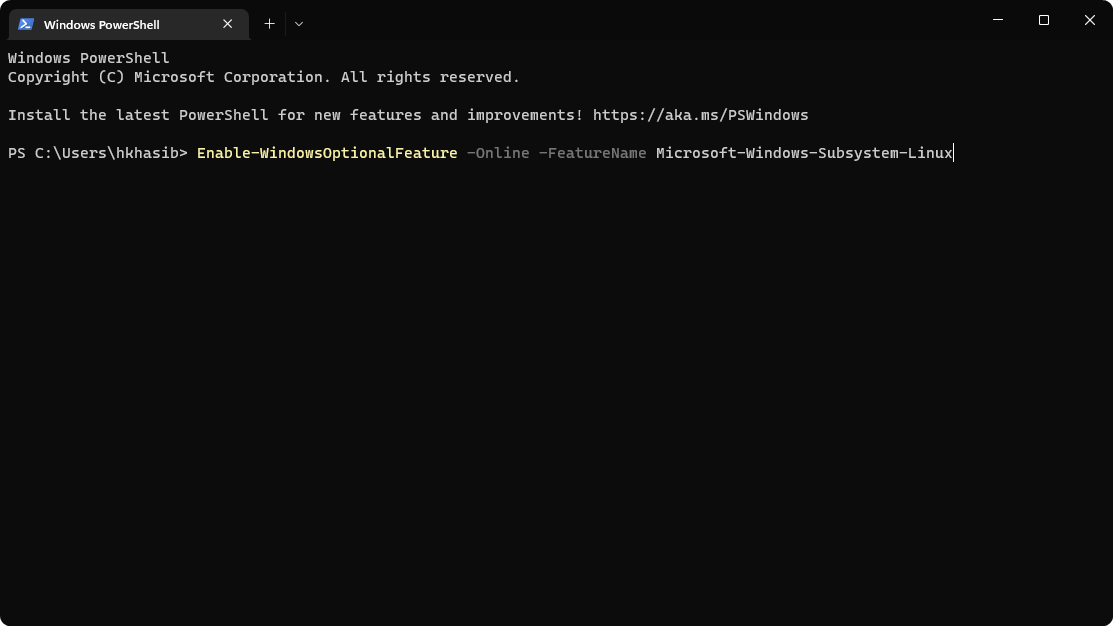
- Type in “Powershell” and press “Shift“+ “Ctrl” + “Enter” to provide administrative privileges.
- Type in the following command and press “Enter“.
Enable-WindowsOptionalFeature -Online -FeatureName Microsoft-Windows-Subsystem-Linux
- Wait for the command to be executed and check to see if the issue persists.

Enabling WSL

Kevin Arrows
Kevin Arrows is a highly experienced and knowledgeable technology specialist with over a decade of industry experience. He holds a Microsoft Certified Technology Specialist (MCTS) certification and has a deep passion for staying up-to-date on the latest tech developments. Kevin has written extensively on a wide range of tech-related topics, showcasing his expertise and knowledge in areas such as software development, cybersecurity, and cloud computing. His contributions to the tech field have been widely recognized and respected by his peers, and he is highly regarded for his ability to explain complex technical concepts in a clear and concise manner.
Readers help support Windows Report. We may get a commission if you buy through our links.
Read our disclosure page to find out how can you help Windows Report sustain the editorial team. Read more
Usually, when you try to run any software, service, or app that requires the Linux environment, you may get an error.
In most cases, if you install the Ubuntu app from the Microsoft Store and open it, this problem will appear. When it occurs, you get the following message: The Windows Subsystem for Linux optional component is not enabled. Please enable it and try again.
It also may show an error code 0x8007019e. But don’t worry, you can easily fix this problem if you take the proper steps.
Does the Windows Subsystem for Linux slow down a PC?
To make your development work much more pleasant, you may enable WSL. It does not hurt Windows performance.
Any services in the background take a few computing resources. The WSL is not different. However, according to the users, it doesn’t slow down the PC.
We have tested it by ourselves. Our research also has found that modern computers can easily handle Windows Subsystem for Linux without negatively affecting performance.
Moreover, it can be an essential feature for some users. So, you may need to turn it on, particularly when you face the error mentioned in this article.
How do I enable Windows Subsystem for Linux on Windows?
If you want to enable WSL on your PC, you can easily do it. But, before that, we suggest you do the following things:
- Update Windows to the latest version.
- Ensure you are using Windows 11 or 10, as other versions don’t support this feature.
Now, you can follow the methods mentioned below to enable Windows Subsystem for Linux.
1. Install the optional feature
- Press Win + I on the keyboard to open Windows Settings.
- Go to Apps and click on Optional features.

- Click on More Windows features to open the Windows Features window.
- Tick Windows Subsystem for Linux and click on OK.

- It will install the required components.
- Restart your PC after completing the process.


Alternatively, you also can search for the optionalfeatures on the Start Menu to find and open the Windows Features window. It can be necessary if you don’t find the exact options shown in the above steps.
After enabling the WSL, you can try to open the Ubuntu terminal or any other app or service that was showing the error. Hopefully, you will not see the same again.
2. Use the PowerShell command
- Open the Start Menu, type PowerShell, and hit Enter.
- Now, type the following command and press Enter to execute it:
Enable-WindowsOptionalFeature -Online -FeatureName Microsoft-Windows-Subsystem-Linux
- Wait for a while.
- Restart your PC after PowerShell installs the required features.
Now, verify if it has solved the problem or not. If PowerShell can successfully enable this optional feature, you can use the Ubuntu terminal or any other app that requires WSL without any error.
- D3dx11_42.dll Not Found: How to Fix it
- Windows 11 Shutdown After Inactivity: 4 Ways to Stop it
- Windows Shuts Down Instead of Restarting: 4 Ways to Fix it
- Error no Ace Condition 804 (0x324): Fix it With 4 Steps
- Windows 11 Shutdown But User Stays Logged in: How to Fix it
3. Enable Developer Mode
NOTE
If you are using the latest builds, enabling Developer Mode is no longer necessary. In case you are running an older build, perform the steps below to enable it.
- Open Windows Settings.
- Go to Privacy & security and click on For developers.
- Turn the Developer Mode by tweaking the appropriate switch.
- Click on Yes on the popup window.
- Restart your PC.


For more detailed steps, learn how to enable Windows 11 Developer Mode. If the Developer Mode is a requirement, try to enable the latest WSL again and see if it works.
This article has explained how to fix Windows Subsystem for Linux is not enabled. If you have any opinions or suggestions, feel free to let us know in the comments box.
Hasibul Kabir
Windows Software Expert
Hasibul Kabir is a Tech-Enthusiast Blogger, Web Developer & Hobbyist Game Developer. Writing about Technology, mainly Windows, Mac, iOS, etc., is his main focus, besides doing some computer science-related work.
He loves exploring new technology and presenting it with simple words to the audience. When not at work, Hasibul plays video games, explores nature, tastes delicious foods, or learns new things.
Windows Version
Microsoft Windows [version 10.0.22631.3880]
WSL Version
0.0.0.0
Are you using WSL 1 or WSL 2?
- WSL 2
- WSL 1
Kernel Version
No response
Distro Version
Ubuntu 20.04
Other Software
No response
Repro Steps
Ensure Windows Subsystem for Linux, Hyper-V, and virtualization are enabled in Windows Features.
Open PowerShell.
Attempt to install a WSL distribution using the command: wsl —install.
Observe the error message.
Expected Behavior
The WSL distribution should install without errors, as the necessary components are enabled.
Actual Behavior
An error message is displayed stating that «The Windows Subsystem for Linux optional component is not enabled» despite the component being enabled.
When I try wsl —status, I have an error:
wsl —status
Échec de l’exécution du serveur
Error code: Wsl/0x80080005
Antoher command is working :
wsl —set-default-version 2
Pour plus d’informations concernant les différences principales avec WSL 2, consultez https://aka.ms/wsl2
L’opération a réussi. (Success)


Diagnostic Logs
WslLogs-2024-08-07_19-23-18.zip
- How do I fix the Windows Subsystem for Linux optional component is not enabled?
- Do I have WSL 1 or 2?
- What can WSL 2 do?
- How do I know if WSL is installed?
- How do I run WSL?
How do I fix the Windows Subsystem for Linux optional component is not enabled?
The Windows Subsystem for Linux optional component is not enabled: Open Control Panel -> Programs and Features -> Turn Windows Feature on or off -> Check Windows Subsystem for Linux or using the PowerShell cmdlet mentioned at the beginning of this article.
Do I have WSL 1 or 2?
First of all, check the Windows 10 version and to check it, open the command prompt and type “ver”: The version can also be checked by typing “System Information” in the Windows search bar: If the build number is lower than “18917”, then you will have WSL 1 in your system.
What can WSL 2 do?
WSL 2 provides the benefits of WSL 1, including seamless integration between Windows and Linux, fast boot times, a small resource footprint, and requires no VM configuration or management. While WSL 2 does use a VM, it is managed and run behind the scenes, leaving you with the same user experience as WSL 1.
How do I know if WSL is installed?
Check WSL#
After restarting Windows, you can check that you have WSL enabled by opening a Command Prompt and typing ‘wsl’. WSL is enabled, but you haven’t installed a Linux distribution yet.
How do I run WSL?
To start using WSL, open up a PowerShell terminal and type wsl . If you’ve set up WSL correctly, you’ll enter a bash terminal running on the WSL distro of choice. From here, you can run any Linux commands you wish. Below you will find a reference to all of the options the wsl.exe provides when starting up.