
Provide feedback
Saved searches
Use saved searches to filter your results more quickly
Sign up
Appearance settings
Recently Microsoft added a list of new features to the well-received WSL (Windows Subsystem for Linux) named “WSL 2”. This new version of WSL enables features such as increased file IO performance and full system call compatibility and is not enabled by default.
In this guide, we will install, configure WSL2 on our Windows 10 workstation, as well as install a Linux distribution on it.
Prerequisites
To install WSL 2, you must be running Windows 10. The following versions and builds are supported:
- For x64 systems: Version 1903 or higher, with Build 18362 or higher.
- For ARM64 systems: Version 2004 or higher, with Build 19041 or higher.
- Builds lower than 18362 do not support WSL 2. Use the Windows Update Assistant to update your version of Windows.
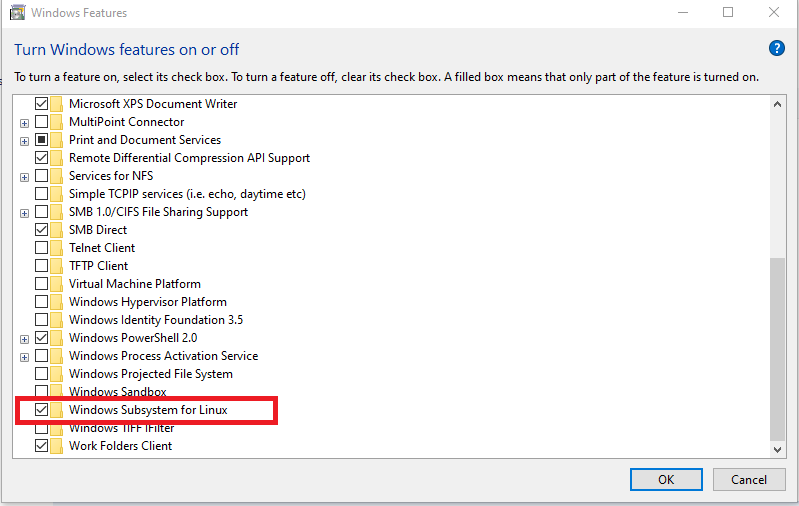
Step #1 — Enable the “Windows Subsystem for Linux” feature
To install WSL (any version) to Windows 10 we must first enable the “Windows Subsystem for Linux” feature in Windows 10. This can be done in two ways:
using Powershell
To enable the “Windows Subsystem for Linux” open Powershell and type the below command:
dism.exe /online /enable-feature /featurename:Microsoft-Windows-Subsystem-Linux /all /norestartusing GUI
Go to Control Panel -> Programs & Features -> Turn Windows features on or off, then find and enable “Windows Subsystem for Linux” like the below screenshot:
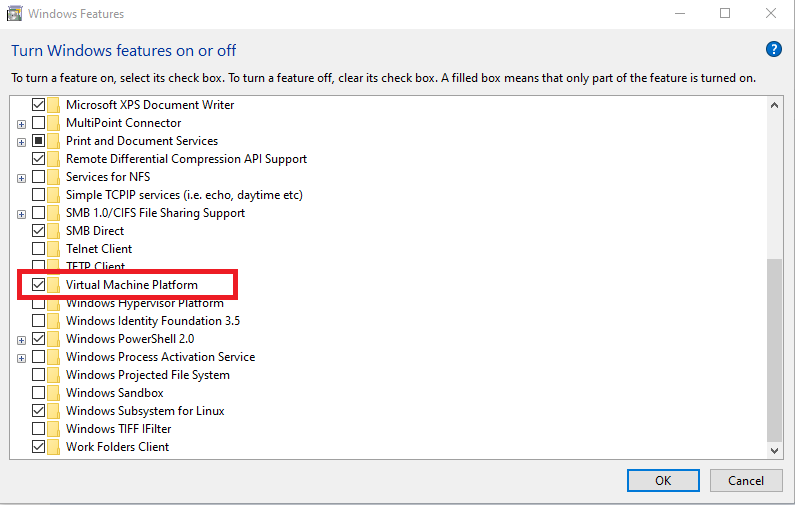
Step #2 — Enable the “Virtual Machine Platform” feature
Next, we need to enable the “Virtual Machine Platform” feature. This can be done in two ways:
Powershell
To enable the “Virtual Machine Platform” open Powershell and type the below command:
dism.exe /online /enable-feature /featurename:VirtualMachinePlatform /all /norestartGUI
Go to Control Panel -> Programs & Features -> Turn Windows features on or off, then find and enable “Virtual Machine Platform” like the below screenshot:
Step #3 — Download the “Linux kernel update” package
Microsoft provides the Linux kernel update package, which is needed to support the added feature set of WSL 2. You can find the package at the following links:
WSL2 Linux kernel update package for x64 machines
WSL2 Linux kernel update package for Arm64 machines
If you’re not sure what kind of machine you have, open Command Prompt or PowerShell and enter:
systeminfo | find "System Type".After downloading the package for your machine kind, run the update package downloaded in the previous step. (Double-click to run — you will be prompted for elevated permissions, select ‘yes’ to approve this installation.)
Once the installation is complete, restart your machine to complete the WSL install and update to WSL 2.
Step #4 — Set WSL 2 as your default version
As you can have both versions of WSL installed, it is always nice to set the default version of newly installed distributions to WSL2. To do so, open Powershell and type:
wsl --set-default-version 2This will ensure that the extra features are enabled on the Linux distributions you’re going to download and install in the future, but what about the already installed distros?
If you have recently updated WSL to WSL2, chances are your already installed distributions are using WSL 1 features. To check, open a Powershell window and type:
wsl --list --verboseThis will return with a list of installed distributions, along with the Version of WSL enabled on those. To update your installed distributions to the newer feature set, open a Powershell window and type:
wsl --set-version <distribution name> <versionNumber>Step #5 — Install your Linux distribution of choice
Now after we’ve set-up all the needed dependencies for WSL 2 and enabled its feature set by default it is time to download and use your distribution of choice.
The following lists all compatible and available distributions in the Microsoft store at the time of writing:
- Ubuntu 16.04 LTS
- Ubuntu 18.04 LTS
- Ubuntu 20.04 LTS
- openSUSE Leap 15.1
- SUSE Linux Enterprise Server 12 SP5
- SUSE Linux Enterprise Server 15 SP1
- Kali Linux
- Debian GNU/Linux
- Fedora Remix for WSL
- Pengwin
- Pengwin Enterprise
- Alpine WSL
To install any of those, go to the Win10 app store “Microsoft Store” and search for them. After you find your selected distribution, click on “Get” to start the download.
The first time you launch a newly installed Linux distribution, a console window will open and you’ll be asked to wait for a minute or two for files to de-compress and be stored on your PC. All future launches should take less than a second.
You will then need to create a user account and password for your new Linux distribution.
CONGRATULATIONS! You’ve successfully installed and set up a Linux distribution that is completely integrated with your Windows operating system!
Now if you like to test things out and restore the distribution to its original settings, you can uninstall it completely from the Settings -> Apps -> Apps & Features and re-install.
Thank you for reading! Be sure to share this post if you found it helpful and don’t hesitate to chat with me about it!
This post was first published on Stathis’ log book by Stathis Athanasiadis aka StatAth
WSL stands for Windows Subsystem for Linux. It is a compatibility layer developed by Microsoft that allows running a full-featured Linux environment directly on Windows operating systems. WSL enables users to execute Linux binaries and run Linux command-line tools and applications natively on Windows without the need for a separate virtual machine or dual-boot setup.
There are currently two versions of WSL available:
WSL 1: The initial version of WSL provides a compatibility layer to run native Linux binaries on Windows. It translates Linux system calls into Windows equivalents, allowing Linux command-line tools to run seamlessly. However, it does not provide a Linux kernel and has some limitations in terms of performance and compatibility with certain Linux applications.
WSL 2: The newer version of WSL, WSL 2, introduced significant improvements. It includes a lightweight virtual machine that runs a full Linux kernel. This architecture provides improved compatibility, performance, and support for running various Linux distributions. WSL 2 also enables features like full system call compatibility, improved file system performance, and the ability to run Docker containers natively.
With WSL, users can choose from a variety of Linux distributions available from the Microsoft Store, such as Ubuntu, Debian, Fedora, and more. Once installed, WSL integrates with the Windows command prompt, PowerShell, or other compatible terminals, allowing users to seamlessly switch between Windows and Linux environments.
WSL has gained popularity among developers, system administrators, and enthusiasts, as it provides a convenient way to leverage Linux tools and workflows directly within the Windows ecosystem. It enables developers to have a consistent development environment across different platforms and facilitates tasks such as web development, scripting, system administration, and cloud operations.
Microsoft dropped plenty of jaws way back when it launched the Windows Subsystem for Linux (WSL), a way to run actual Linux inside Windows without the need to set up a virtual machine. The project has seen a ton of support, and WSL 2 is the latest and greatest.
It takes things a little further and adds yet more awesomeness to the Linux experience on Windows 10 and Windows 11. WSL 2 uses a proper Linux kernel compared to the virtualized one from the first version, and it has significantly better performance.
More recent developments also reduce the reliance on the Microsoft Store for serving up distro images, and official support is inbound from the likes of Fedora and Arch Linux, too. But before all of that, let’s walk through how you get set up.
Simplified setup of WSL2 on Windows 10 and Windows 11
There is now an extremely simplified way to get WSL 2 up and running on your Windows 10 and Windows 11 PC. To get the very latest version using the simplified method you need to be running Windows 10 version 2004 or higher, or Windows 11.
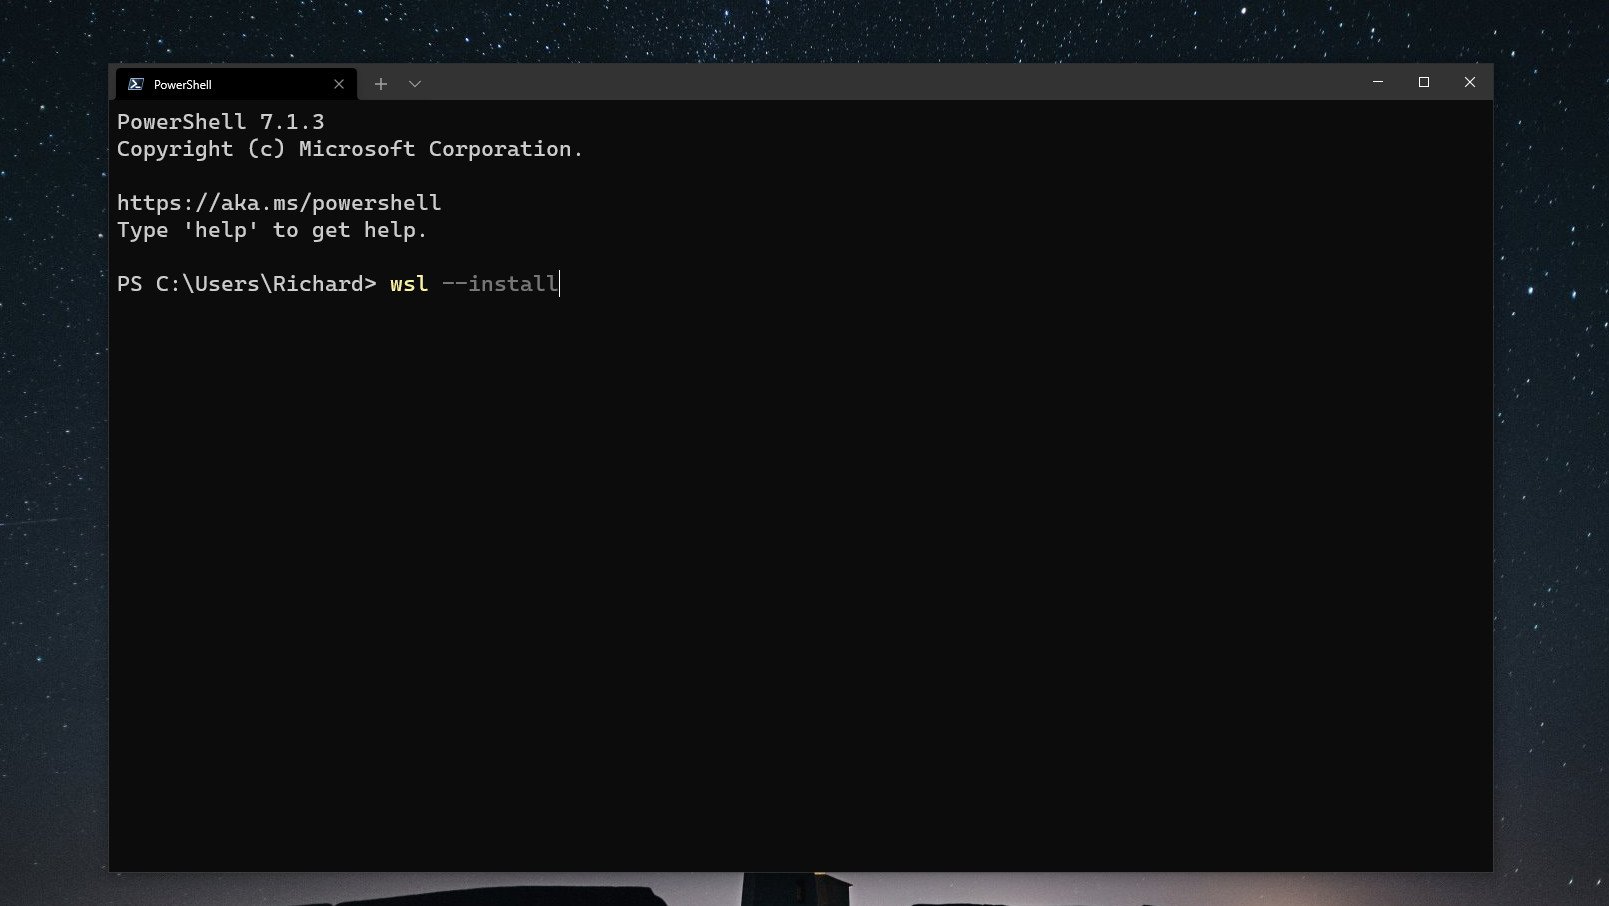
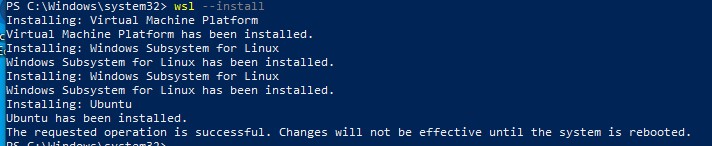
Once this is in place, open up PowerShell and enter this command:
wsl --installThat’s it. The setup process will begin, and you can relax until it’s finished. By default, WSL will enable all system features required and it will download and install Ubuntu. If you don’t want a distribution installed during setup, you can add the —no-distribution tag to the installation command.
Alternatively, if you want a non-Ubuntu distribution installed, you can add its name after the install command. For example, wsl —install Debian.
All the latest news, reviews, and guides for Windows and Xbox diehards.
WSL is also distributed through the Microsoft Store, and the simplified installation process will pull this version in. Alternatively, you can download it directly from its Microsoft Store listing.
You will also require the optional Windows Subsystem for Linux component if you wish to also use WSL 1 alongside WSL 2.
How to enable Windows Subsystem for Linux optional component for WSL 1
WSL 2 is now the standard, but if for any reason you also want to use WSL 1 alongside it, you’ll need the optional Windows Subsystem for Linux component enabling. Fortunately, you can do this in two ways. The first is by adding —enable-wsl1 to the install command used above.
But you can also enable the component at any time, even after you already have WSL 2 up and running. Open PowerShell as administrator and enter this command:
dism.exe /online /enable-feature /featurename:Microsoft-Windows-Subsystem-Linux /all /norestartEventually, you will need to reboot your PC, adding norestart means you won’t be immediately kicked out of whatever you’re doing. If you want to reboot immediately, simply omit this from the end of the command.
Setting WSL 2 for your Linux distros
The good thing about WSL 2 is that it doesn’t replace WSL 1. It just runs alongside it. This means you can run Linux installs with a combination of different versions. You’re able to set either as default, as well as setting a version specifically to each Linux distro you have on your PC.
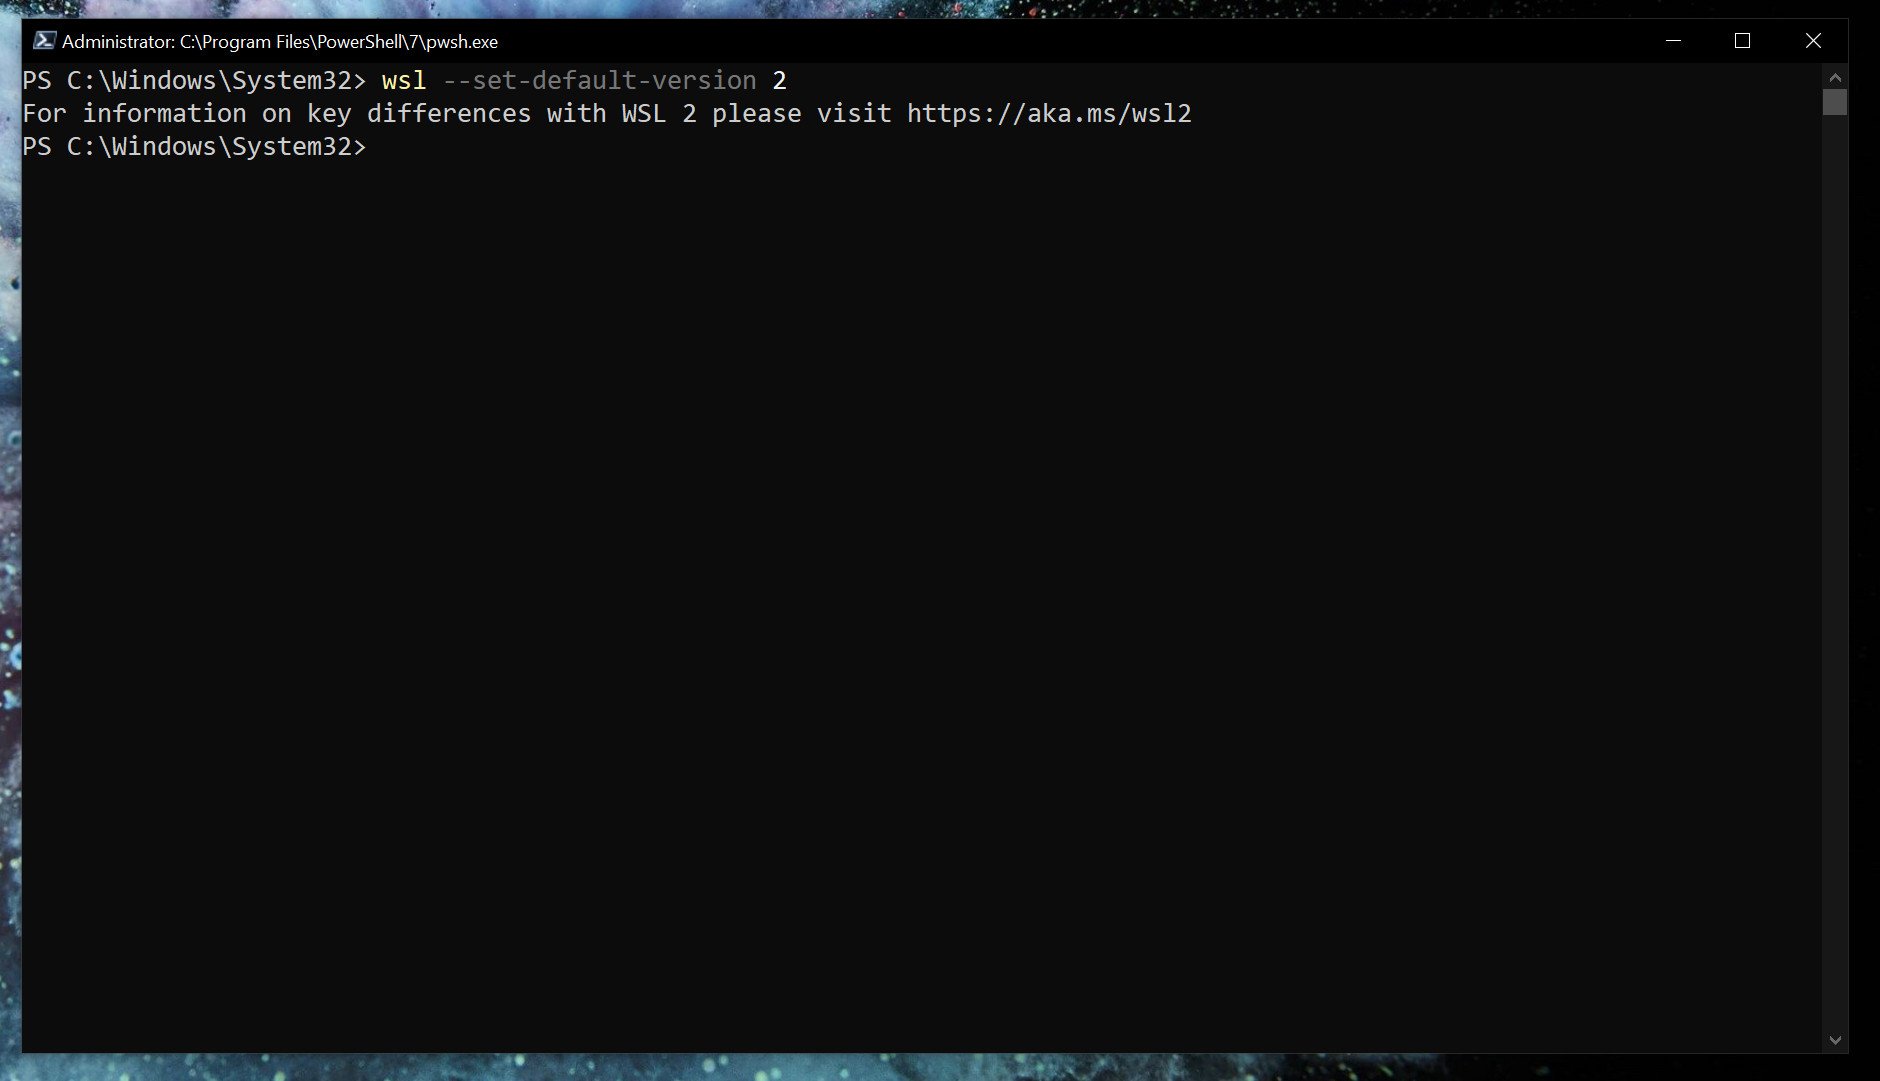
If you want everything to run on WSL 2 as soon as you install it, you can set it as the default version.
wsl --set-default-version 2Listing installed Linux distros and their WSL version
With WSL 2 set as default, any Linux installs after that will use it automatically. You can easily check which version of WSL your installed Linux distros are using.
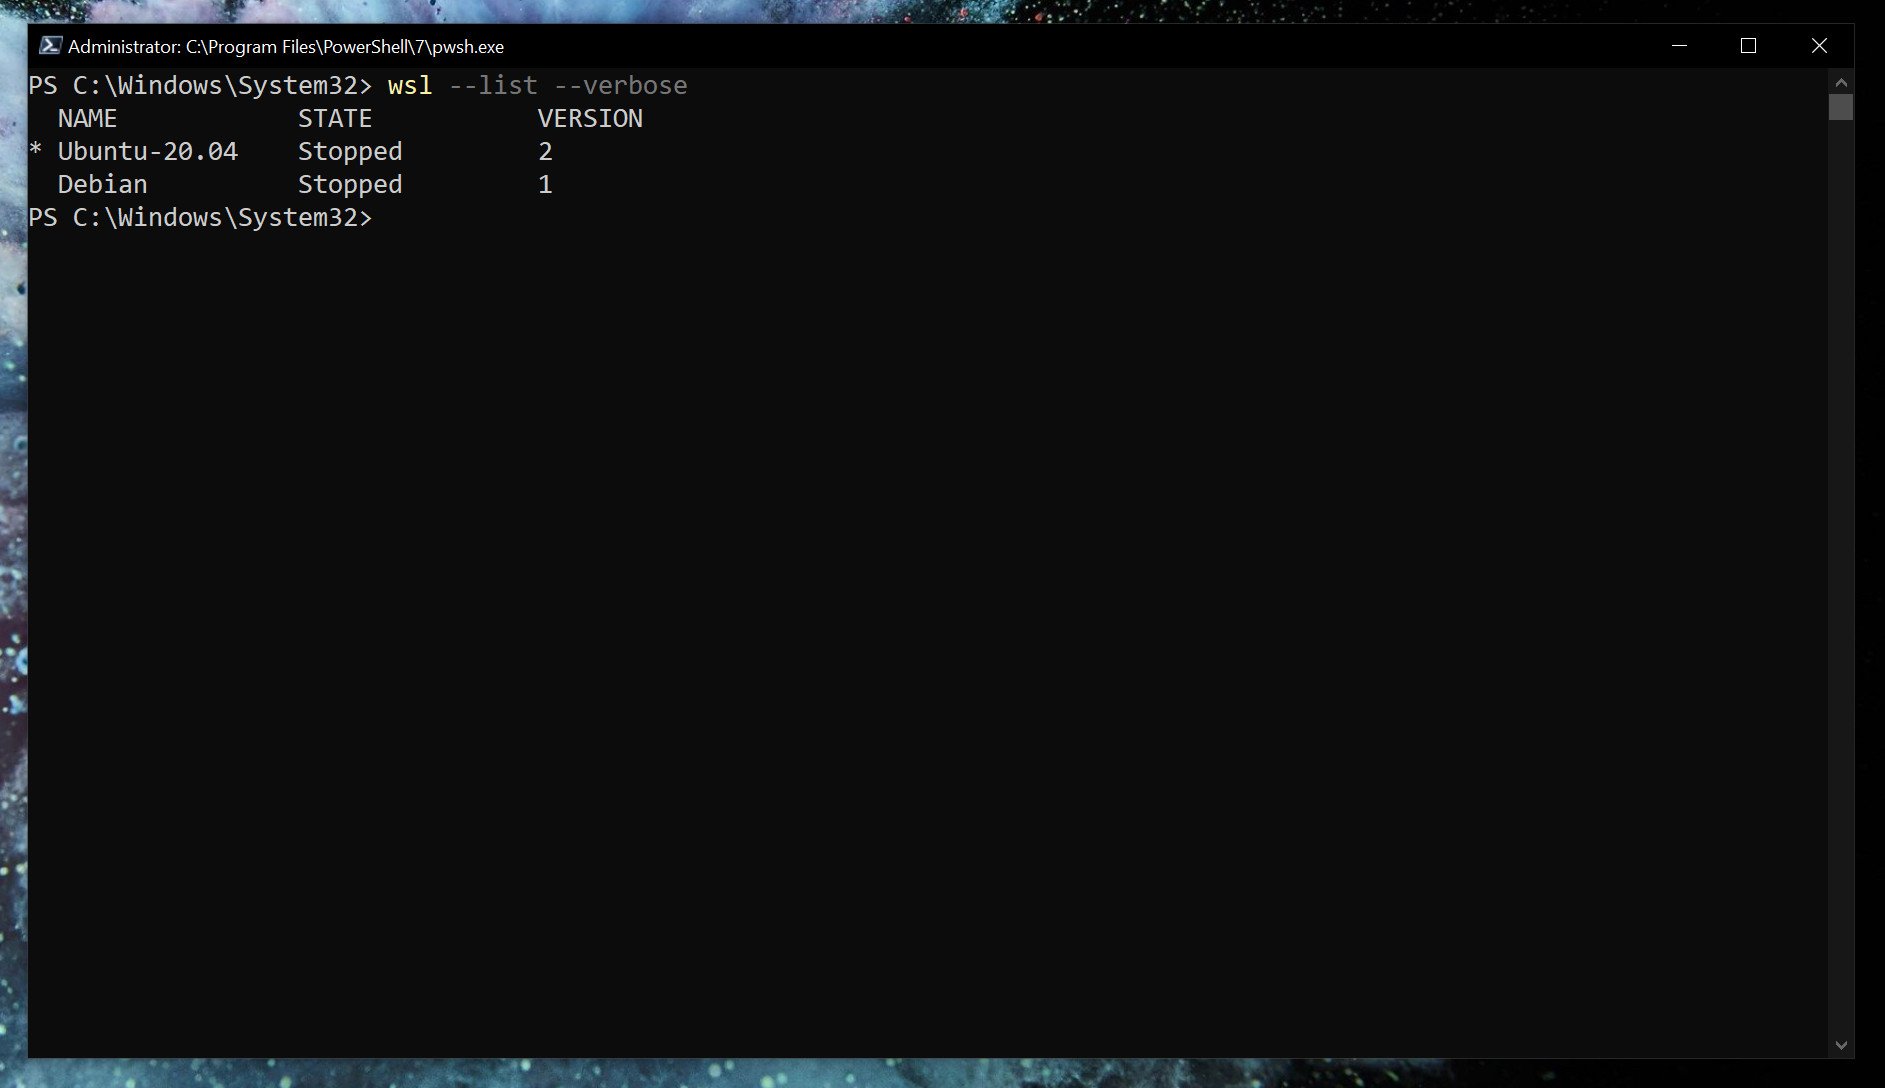
wsl --list --verbose Using the verbose flag will give you the breakdown of which version of WSL is attached to which Linux installation. Without it, you’ll simply get a list of the versions of Linux you have installed.
Changing the version of WSL per Linux installation
While setting WSL 2 as default will apply it to anything you install afterward. If you’re already set up, you’ll need to manually convert. Likewise, if you wish to go between versions 1 and 2 or run a mixture on your system, you can do that.
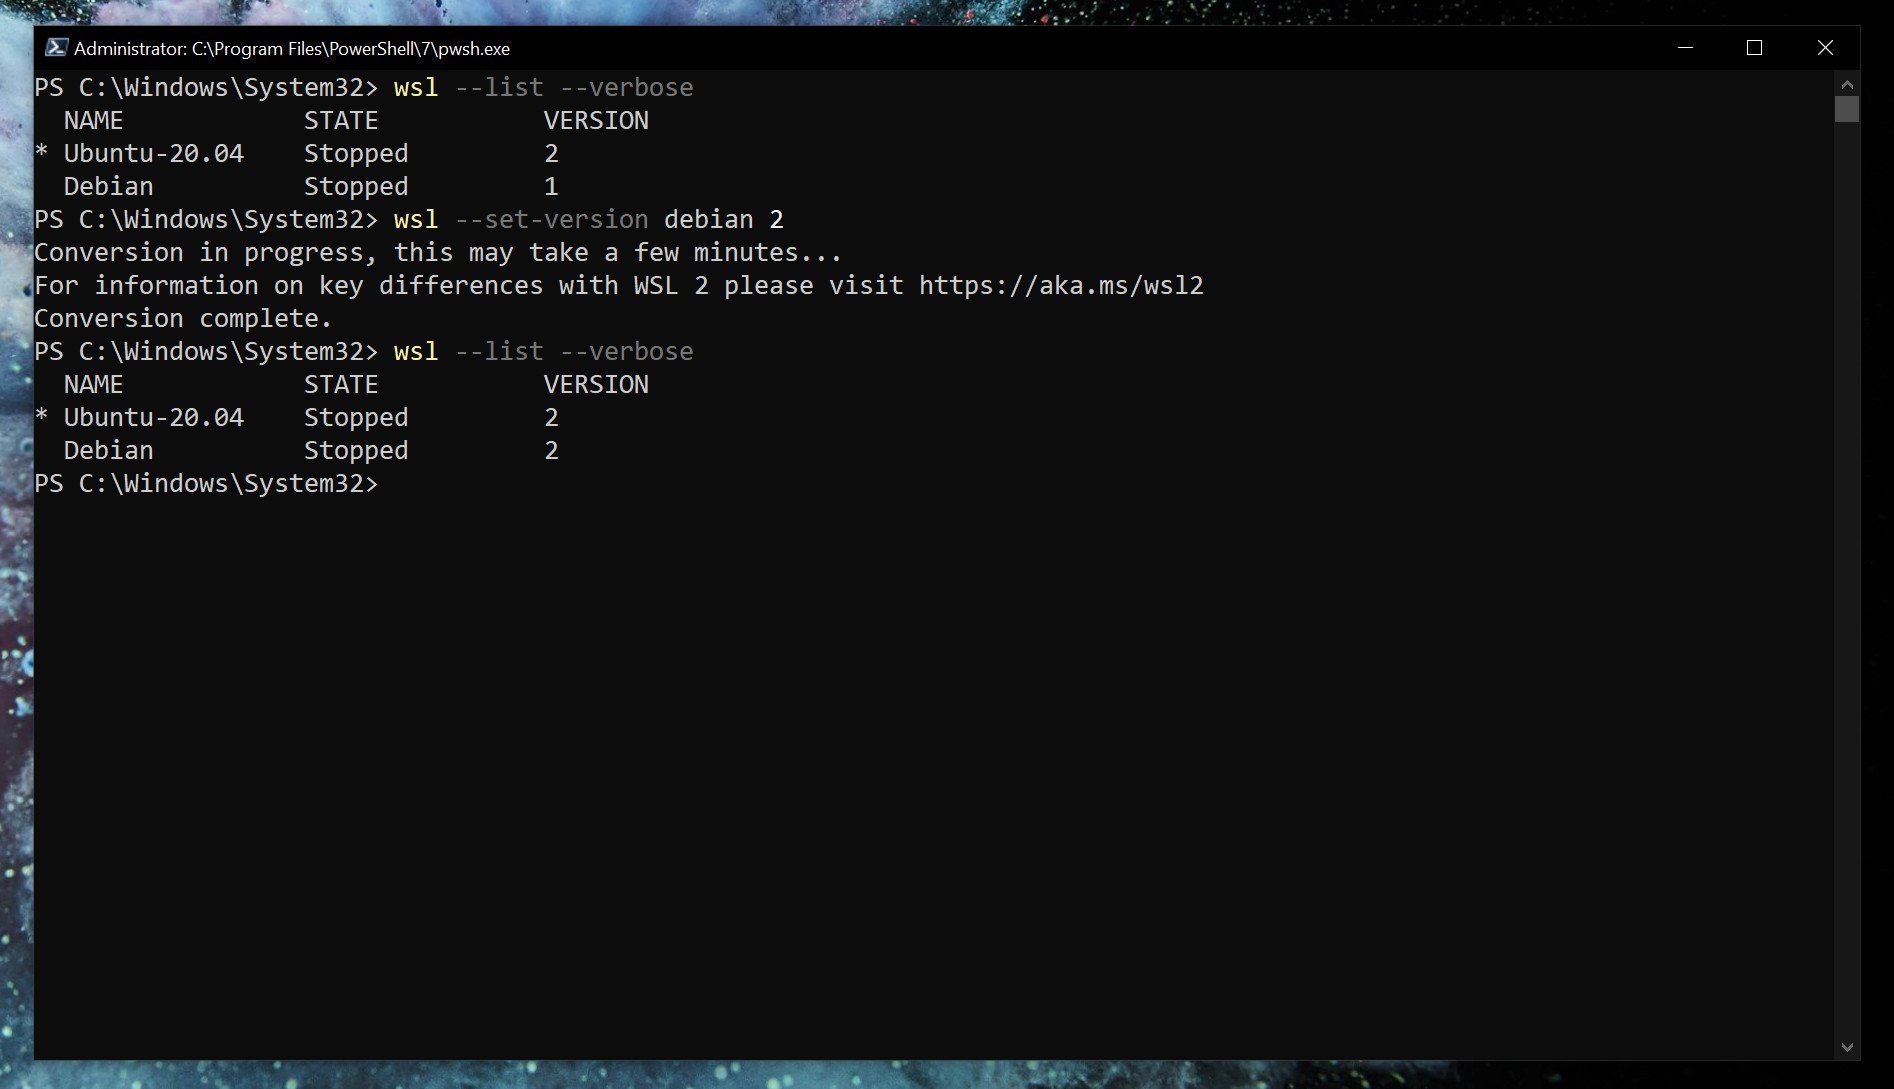
wsl --set-version <distribution name=""> <versionnumber></versionnumber></distribution>So, as an example, if you have a Debian installation on WSL that you need to convert to WSL 2, you’d enter
wsl --set-version debian 2Launch specific Linux installations in PowerShell
If you only have one version of Linux installed, simply typing
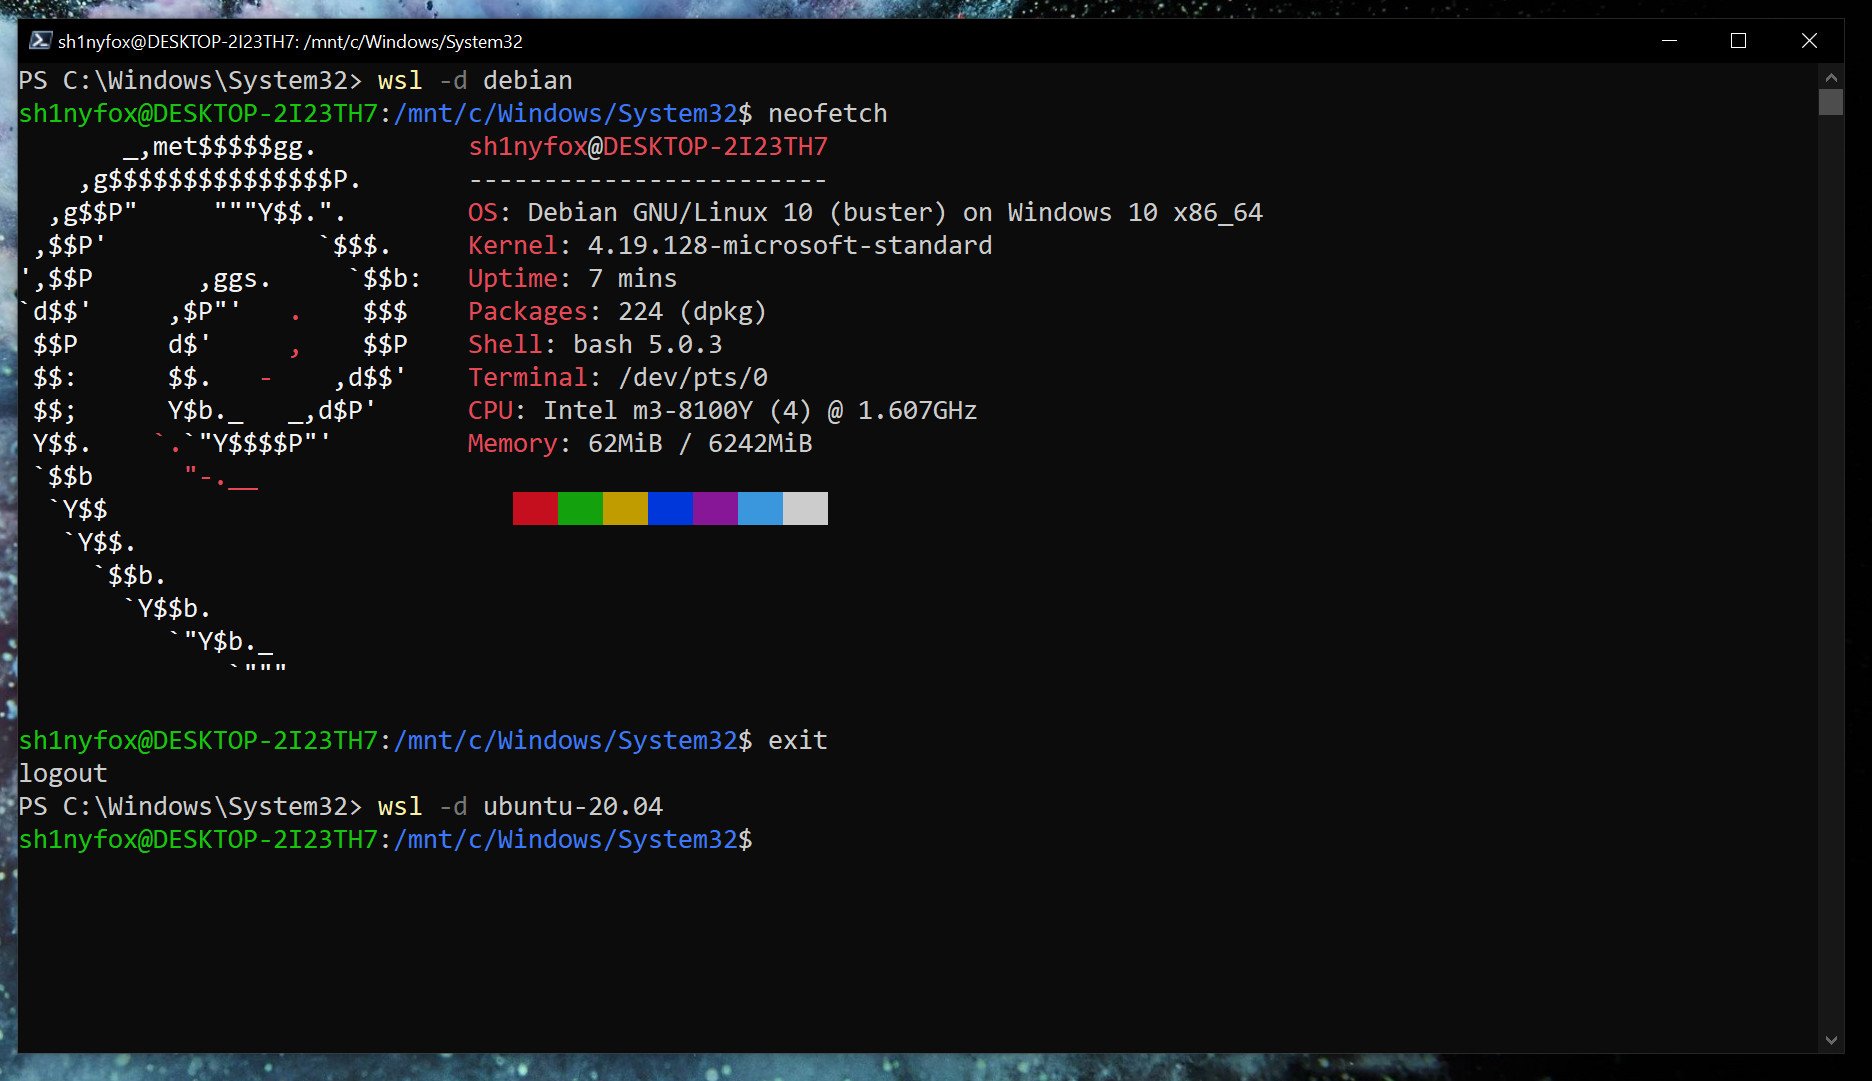
wslin PowerShell will launch you into the associated bash shell. But if you have multiple, you can launch a specific distro with this command.
wsl -d <distribution name=""></distribution>Once you’re done and want to go back to PowerShell, typing
exitwill take you back.
From here on out, you’re ready to go forth and install all the Linux you want. Our full guide will help you along the way, but once WSL 2 is set up how you like it, it just fades into the background.
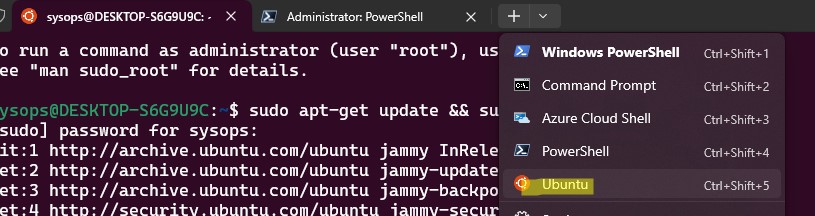
It’s also worth grabbing the Windows Terminal app from the Microsoft Store if you’re using WSL. While you can just use the standard terminal installed with each or launch through PowerShell as shown above, Windows Terminal has a neat, tabbed interface that lets you run multiple shells at once. Have PowerShell, Linux, Azure Cloud Shell, and even Command Prompt, all open together side-by-side in one window.
Среда Windows Subsystem for Linux (WSL) позволяет запускать нативные приложения, писать скрипты, выполнять команды и скрипты Linux непосредственно из Windows без использования эмуляторов или развертывания выделенных виртуальных машин. Актуальной версией среды является WSL 2, в которой используется полноценное ядро Linux (версия ядра 5.15) и обеспечивает полную совместимость с системными вызовами. Образ ядра Linux в WSL представляет собой легкую виртуальную машину, для запуска которой не нужно устанавливать полноценную роль Hyper-V.
Содержание:
- Как установить Windows Subsystem for Linux (WSL2)?
- WSL: Установка дистрибутива Linux в Windows
- Команды для управления WSL в Windows
- Использование Linux в среде WSL
Вы можете запустить WSL 2:
- Во всех версиях Windows 10, начиная с 1903, а также в Windows 11 и Windows Server 2022;
- В настройка BIOS/UEFI компьютера должна быть включена поддержка аппаратной виртуализации: Intel VT (Intel Virtualization Technology) или AMD-V (SVM Mode).
Как установить Windows Subsystem for Linux (WSL2)?
Компонент WSL по умолчанию отключен в Windows. Современных дистрибутивах Windows 10 и Windows 11 для установки среды WSL достаточно выполнить команду:
wsl --install
Этак команда автоматически включит все необходимые компоненты Windows, необходимые для работы WSL, установить обновление ядра Linux для WSL2, загрузит дистрибутив Ubuntu (по-умолчанию) и установит его в WSL.
Осталось перезагрузить компьютер, и вы можете запускать среду WSL!
Вы можете установить для WSL другой дистрибутив Linux. Выведите список доступных дистрибутивов:
wsl --list --online
Укажите имя дистрибутива Linux, который установить в WSL. Например:
wsl --install -d kali-linux

Если в BIOS/UEFI компьютера не включена виртуализация, при установке WSL вы получите ошибку:
Installation failed with error 0x80070003 or error 0x80370102” it means that Bios Level Virtualization is not enabled on your computer.
Вы можете установить WSL2 в Windows вручную. Для этого придется вручную последовательно выполнить все этапы, который команда wsl —install запускала автоматически:
- Установить WSL
- Включить компонент виртуалзации VirtualMachinePlatform
- Установить ядро WSL 2
- Скачать и установить дистрибутив Linux для WSL
Сначала установите следующие компоненты Windows:
Enable-WindowsOptionalFeature -Online -FeatureName Microsoft-Windows-Subsystem-Linux
Enable-WindowsOptionalFeature -Online -FeatureName VirtualMachinePlatform
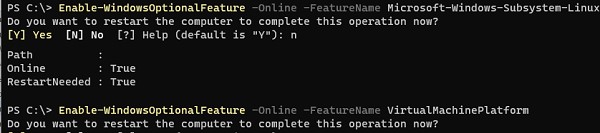
Перезагрузите компьютер.
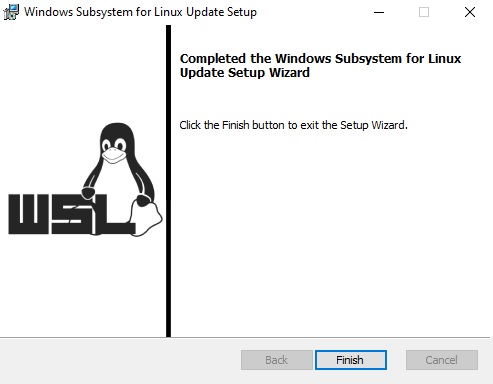
Скачаем и установим обновление ядра Linux для WSL2 (WSL2 Linux kernel update package for x64 machines — https://wslstorestorage.blob.core.windows.net/wslblob/wsl_update_x64.msi). Можете скачать пакет вручную или с помощью PowerShell:
Invoke-WebRequest -Uri https://wslstorestorage.blob.core.windows.net/wslblob/wsl_update_x64.msi -OutFile "$($env:userprofile)\Downloads\wsl_update_x64.msi" -UseBasicParsing
Invoke-Item "$($env:userprofile)\Downloads\wsl_update_x64.msi"
rm "$($env:userprofile)\Downloads\wsl_update_x64.msi"
Еще раз перезагрузите компьютер и назначьте версию WSL 2 в качестве среды по-умолчанию:
wsl --set-default-version 2

WSL: Установка дистрибутива Linux в Windows
После того, как ядро WSL установлено в Windows, вы можете установить один или несколько дистрибутивов Linux на компьютер.
Можно установить пакет с дистрибутивом Linux через Microsoft Store. Доступны следующие дистрибутивы:
- Ubuntu
- Debian
- Kali Linux
- OpenSUSE
- Oracle Linux
- SUSE Linux Enterprise Server
- Fedora
Найдите нужную версию дистрибутива в Store и установите ее, нажав кнопку Получить (Get).

Если у вас отключен Windows Store, вы хотите установить дистрибутив WSL в Core редакции Windows Server или вам нужно установить WSL на Изолированном от интернета компьютере (оффлайн), вы можете скачать дистрибутив Ubuntu с помощью PowerShell командлета Invoke-WebRequest:
Invoke-WebRequest https://aka.ms/wslubuntu2204 -OutFile ubuntu-2204.appx –UseBasicParsing
Установите пакет для WSL с помощью:
Add-AppxPackage .\ubuntu-2204.appx
После окончания установки появится окно, в котором вам будет предложено указать имя пользователя и пароль для вашего дистрибутива.
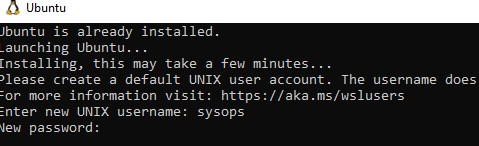
После установки вы можете в меню Пуск появится отдельная программа для запуска Linux.
Также вы можете запустить ваш Linux из отдельной вкладки Windows Terminal или с помощью команды
wsl
.
Команды для управления WSL в Windows
Рассмотрим основные команды для управления ядром и дистрибутивами Linux в WSL.
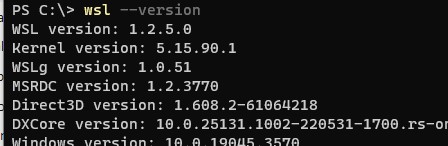
Проверить текущую версию ядра WSL:
wsl --version
Обновить ядро WSL вручную:
wsl --update
Откатится к предыдущему ядру WSL:
wsl --update rollback
Вывести список установленных версий Linux:
wsl --list
Вывести дистрибутив Linux, который используется по-умолчанию:
wsl --status
Дистрибутив Linux по-умолчанию в WSL можно изменить:
wsl --setdefault Ubuntu
Запустить определенный дистрибутив в WSL:
wsl -d kali-linux
Завершить среду WSL:
wsl --shutdown
Можно войти в WSL Ubuntu под root и сбросить пароль:
ubuntu config --default-user root
Passwd
Вернуть пользователя по умолчанию
ubuntu config --default-user your_username
Для настройки параметров WSL и дистрибутивов Linux используются конфиг файлы:
- wsl.conf – файл с настройками конкретного дистрибутива Linux (находится в директории /etc)
- .wslconfig – глобальные настройки WSL, которые применяются ко всем дистрибутовам (находится в профиле пользователя в
%UserProfile%
)
Например, если вы хотите ограничить использование оперативной памяти и CPU компьютера дистрибутивами Linux в WSL, создайте такой файл
%UserProfile%\.wslconfig
:
[wsl2]
memory=2GB
processors=2
Использование Linux в среде WSL
Дистрибутив Linux, установленный в WSL является полноценной операционной системой. Поэтому после установки рекомендуется выполнить обновление пакетов. Для Ubuntu выполните команду:
$ sudo apt-get update && sudo apt-get upgrade -y
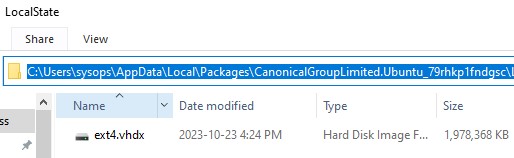
Файловая система вашего дистрибутива Linux хранится в профиле пользователя в виде VHDX файла. Например, виртуальный диск Ubuntu хранится в папке
%USERPROFILE%\AppData\Local\Packages\CanonicalGroupLimited.Ubuntu_79rhkp1fndgsc\LocalState
Файловая система Linux в WSL монтируется в виде сетевой папки прямо в проводник Windows.
Также для прямого доступа к файлам WSL из Windows можно использовать UNC путь. Например:
notepad \\wsl$\Ubuntu\sysops\home\1122.txt
В свою очередь локальные диски Windows монтируются в WSL в папку mnt. Вывести список файлов папок на диске C:
wsl
ls /mnt
ls/mnt/c

Другие примеры запуска Linux команд из Windows:
dir | wsl grep Sa
wsl ls ‑la > 123.txt
wsl ls ‑la /proc/cpuinfo
wsl ls ‑la “/mnt/c/Program Files”
Вы можете установить любые пакеты в Linux. Например, установите файловый менеджер Midnight Commander:
$ sudo apt-get install mc
В современной версии WSL 2 вы можете запускать из Windows любые приложения Linux с графическим интерфейсом (X11 и Wayland). Например, установите графический редактор:
$ sudo apt install gimp -y
Чтобы запустить его из Windows просто выполните команду:
wsl gimp