
Quick Answer
- Unfortunately, Windows is ending the support for Windows Subsystem for Android (Widely known as WSA) from 5th of March 2025 but if you are planning to use it till then and it’s not working for you here are some fixes that will help you to get it fixed.
- Windows Subsystem For Android is a support system that enables you to install Android applications directly on your Windows 11 PCs using Android App Stores such as Amazon Appstore, which is specifically built for Windows PCs.
- Windows Subsystem For Android is one tool from Microsoft that made it easy to run any apps on the Android platform on the Windows easily but what if it keeps crashing.
Windows Subsystem For Android is one tool from Microsoft that made it easy to run any apps on the Android platform on the Windows easily but what if it keeps crashing? Well if you are facing Windows Subsystem for Android Keeps Crashing on your Windows 11 PC then try these 12 Fixes that will help you out.
What Is Windows Subsystem for Android?
Windows Subsystem For Android is a support system that enables you to install Android applications directly on your Windows 11 PCs using Android App Stores such as Amazon Appstore, which is specifically built for Windows PCs.
Unfortunately, Windows is ending the support for Windows Subsystem for Android (Widely known as WSA) from 5th of March 2025 but if you are planning to use it till then and it’s not working for you here are some fixes that will help you to get it fixed.
How to Fix WSA Not Working On Windows 11?
Let’s take a look at 12 different fixes that will help you out if Windows Subsystem for Android is not working on your Windows 11 Computer.
Fix 1 – Update Windows Subsystem for Android
The easiest way to get WSA fixed is to update it. By updating it you will reset most of its parameters without resetting data and if there’s a bug in the software itself causing the issue most likely it will fix that as well.
Here’s how you can update the Windows Subsystem for Android:
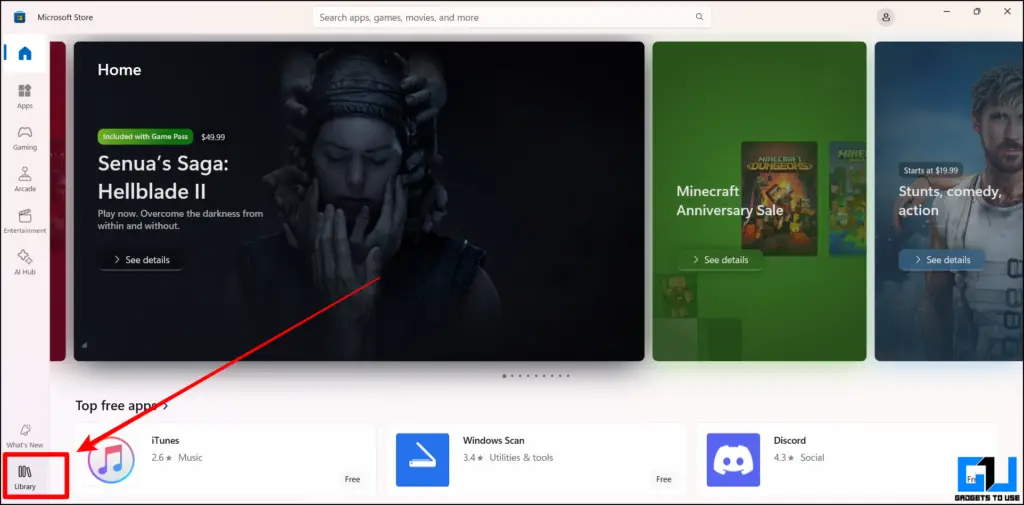
1. To Update the WSA on your Windows PC, first open your Microsoft App Store.
2. Click on the Library icon in the leftmost corner.
3. In the library click the Get Updates button located in the right corner.
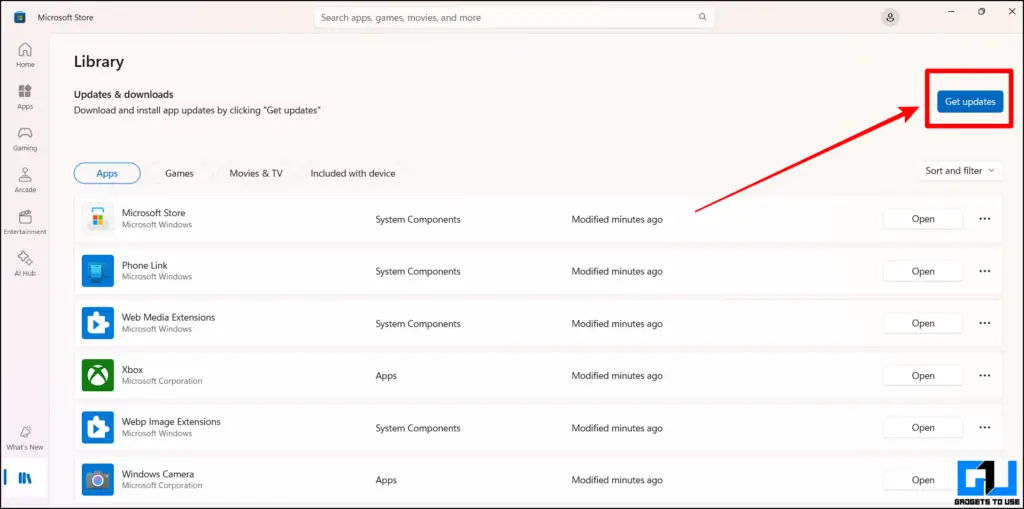
4. Once your Windows computer is done checking updates click on the Update button next to the WSA App in the app store.
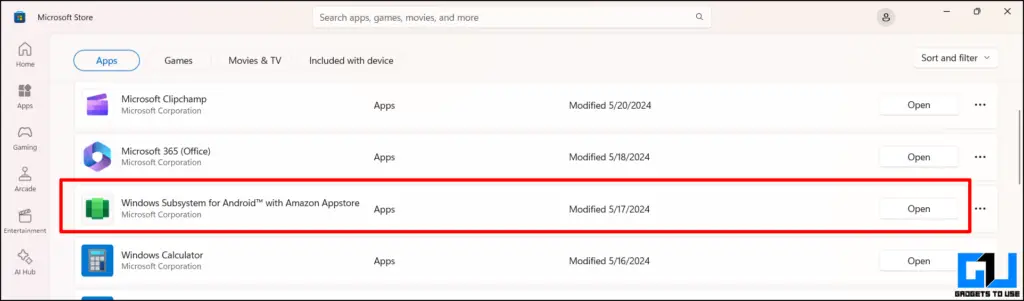
That’s all you need to do to Update Windows Subsystem for Android. This will mostly fix the issue with your WAS on a Windows 11 PC if not here are some more fixes that will help you out.
Fix 2 – Restart Windows Subsystem For Android
Another way to fix the WSA if it’s not working on your Windows PC is to restart it. Here’s how you can restart the Windows Subsystem for Android without restarting your PC.
1. Open the Windows Settings app by searching it or by clicking Ctrl+I on the keyboard.
2. Go to the Apps tab from left menu pane.
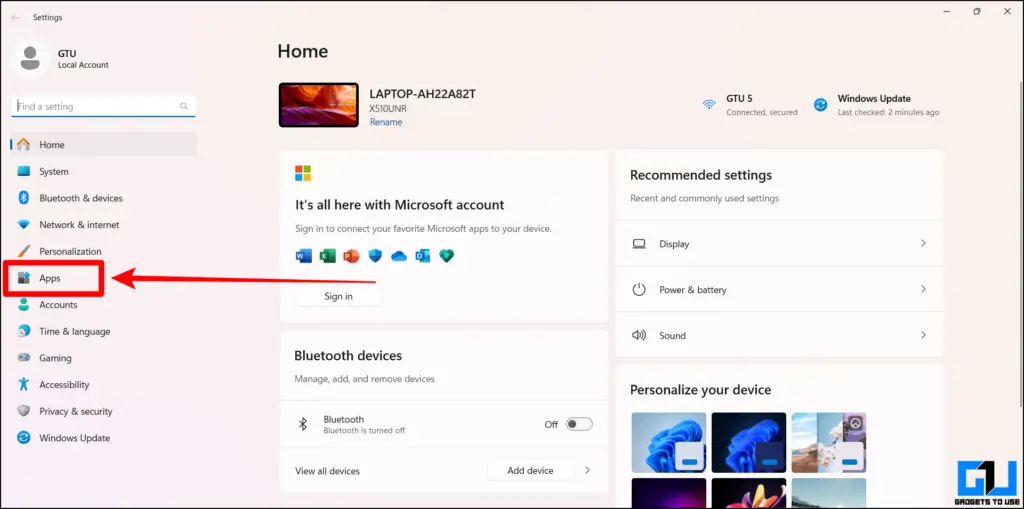
3. Select the Installed Apps menu and navigate to the Windows Subsystem For Android app.
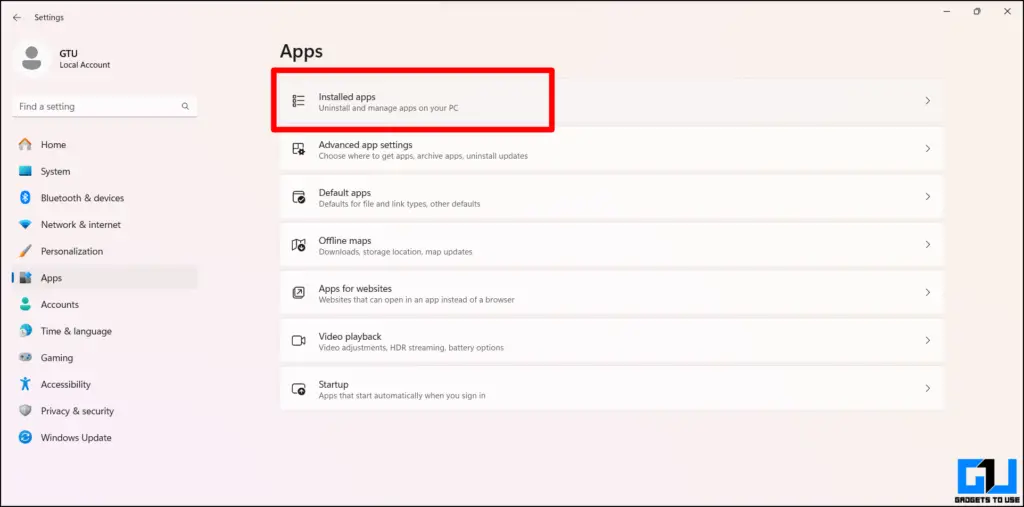
4. Click on the menu tab and select Advanced Options.

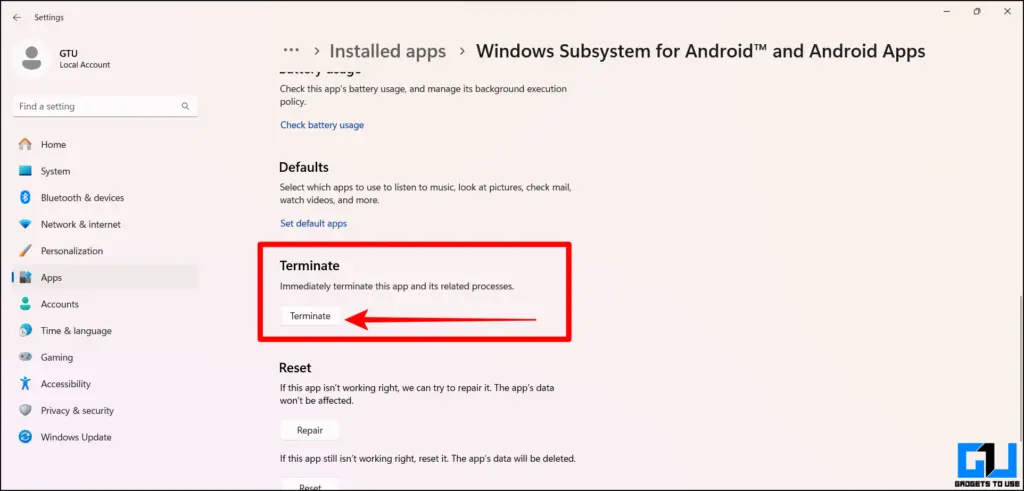
5. Click Terminate in the Advanced options.
If this won’t fix your problem, then the following are some more solutions you can try.
Fix 3 – Reset WSA Its Default Settings
If it’s still an issue to use the Windows Subsystem For Android resetting it might help you out. But there are two ways to reset WSA on your system.
One includes clearing all its data and the second one includes keeping it. Today we will check out both methods of resetting it.
How to Reset WSA to Default With Data Cleared:
1. Open the Windows Settings app by searching it or by clicking Ctrl+I on the keyboard.
2. Go to the Apps tab from the menu.
3. Select the Installed Apps menu and navigate to the Windows Subsystem For Android app.
4. Click on the menu tab and select Advanced Options.
5. Inside Advanced options, navigate to the Reset options.
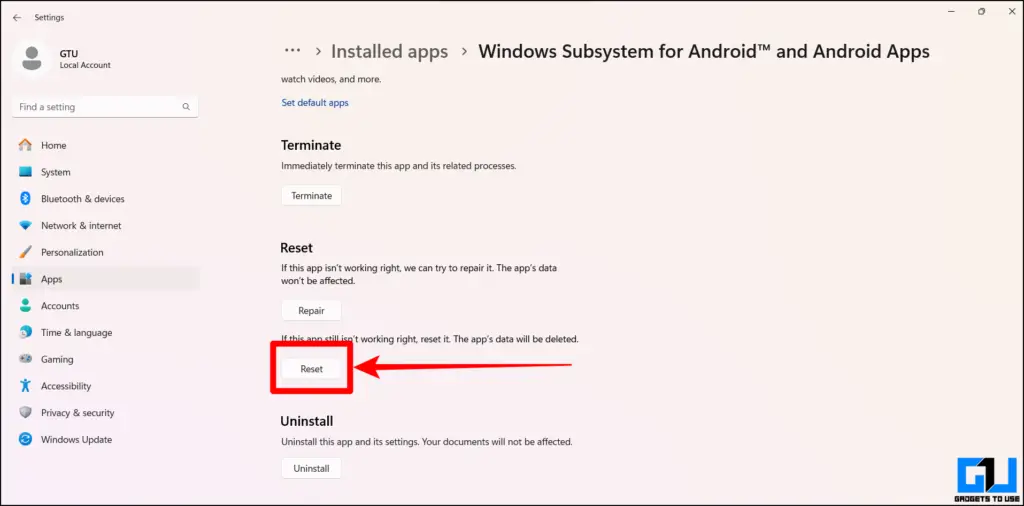
6. Now, to reset the WSA with complete data cleared, click on the Reset button.
Here, all your data will be cleared, and you will now be set back to the stage where you first opened it. But if you don’t want that to happen:
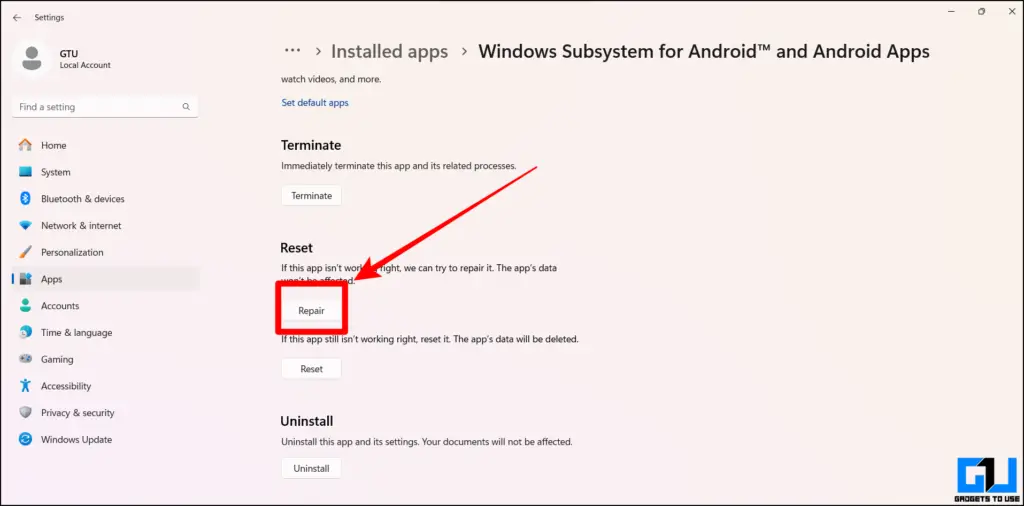
How To Reset WSA To Default Without Data Cleared:
Follow the steps from one to five mentioned above and then simply select the option Repair instead of Reset. Once that is done follow the onscreen on-screen instructions to repair the Windows Subsystem for Android.
Fix 4 – Edit The Windows Registry
Another way to fix the Windows Subsystem for Android not working on your PC is by editing the Windows Registry to get it to start working.
1. Click the Wind0ws+R keys on your keyboard simultaneously to open Run.
2. Enter Regedit and hit enter in Windows Run.
3. Now allow the Registry to be edited in order to open the editor.
4. Once you open the Registry editor, paste the following path into the navigation bar and hit enter.
HKLM\SYSTEM\CurrentControlSet\Services\FsDepends
5. Now, in the list of Registry, double click on the Registry called Start.
6. Here you will find that its set value data is 3, click on the value set it to 0, and click ok.
Done and done, once you restart your PC WSA should start working but if not, it’s not the end. Here are some more fixes that will help you get it working again.
5. Enable Hardware Virtualization
Windows Subsystem for Android may not work on your Windows PC if it does not have the Hardware Virtualization on on your Windows PC. If that is the case you can enable the Hardware virtualization easily on your Windows PC by following this guide.
Follow the steps mentioned in the given explainer to get WSA fixed on your PC and if that still doesn’t work move to the next fix.
Fix 6 – Remove Third-party Hypervisor App
There is a high chance that if you are using a third-party Hypervisor app on your Windows computer, it might conflict with the Windows Subsystem for Android. To fix that, here’s how you can remove the third-party Hypervisor apps from your Windows machine.
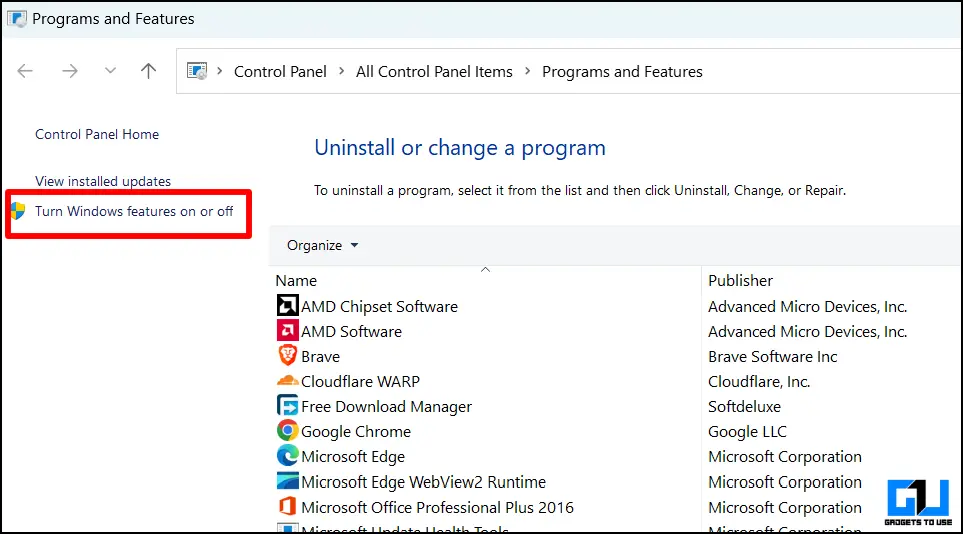
1. Open the Control Panel on your Windows PC.
2. Select the Programs and Features menu from the options.
3. Now click on Turn Windows features on or off.
4. Locate the third-party hypervisor apps then right-click it, and select Uninstall.
Once that is done just Restart your Windows PC and check if the WSA on your system starts working or not. If you are still facing hiccups there are more solutions you can try below.
Fix 7 – Enable Hyper V on Windows 11
In many cases, the Hyper-V Service is turned off in some regions by default, which might end up causing you trouble when using the Windows Subsystem for Android on your PC.
Let’s check out the easiest method to turn it on:
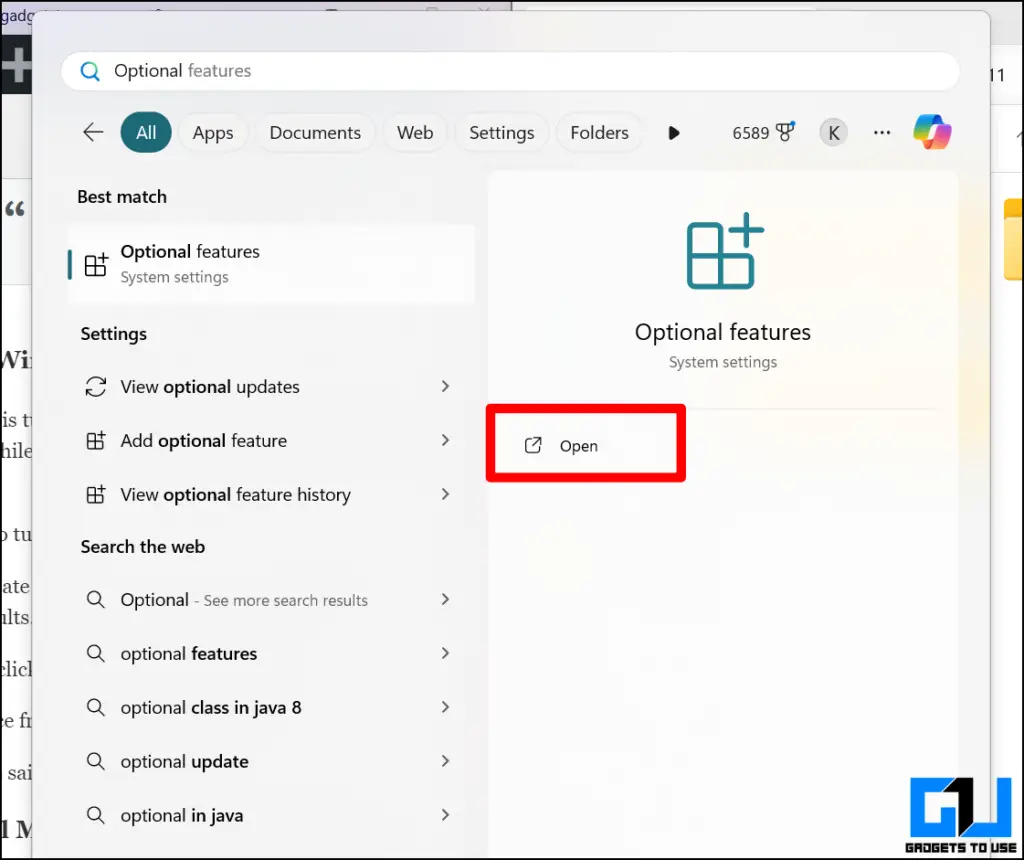
1. Click the Windows+S keys to initiate a search, look for the team Optional Features, and hit Open in the results.
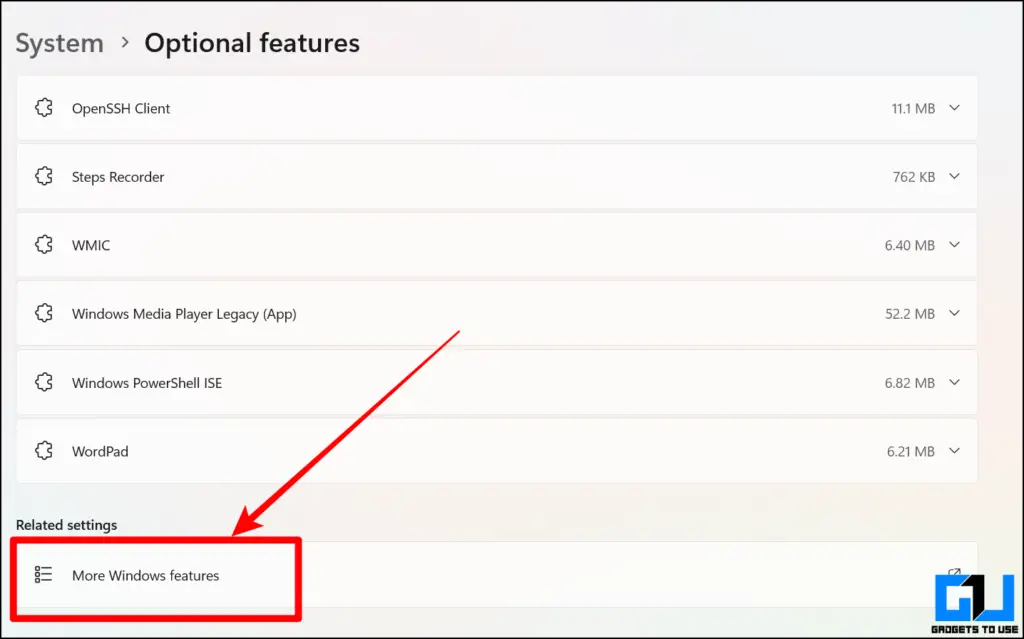
2. Navigate to the very bottom and click More Windows Features.
3. Now look for the Hyper-V service from the list and check it on.
4. Once done, click OK to apply the changes.
Fix 8 – Turn On The Virtual Machine Platform On Windows Computer
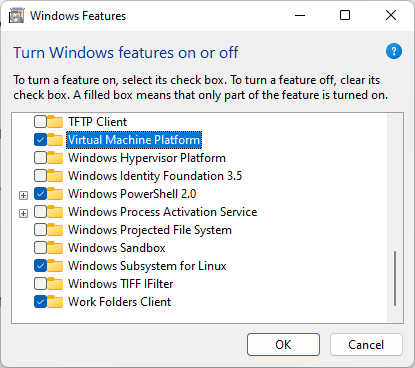
Now even after turning on the Hyper-V you are unable to access the WSA here is how you can toggle on the Virtual Machine Platform on your Windows 11 PC.
1. Open Windows Run by clicking the Windows+R key, enter appwiz.cpl, and hit enter.
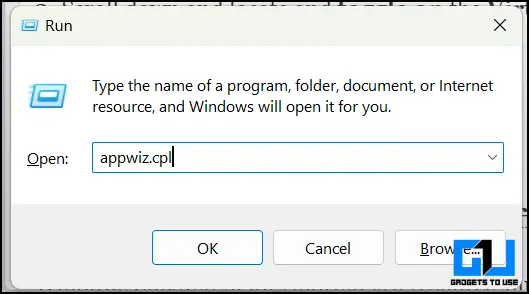
2. From the left side menu pane in the opened window, click Turn Windows Features on or off.
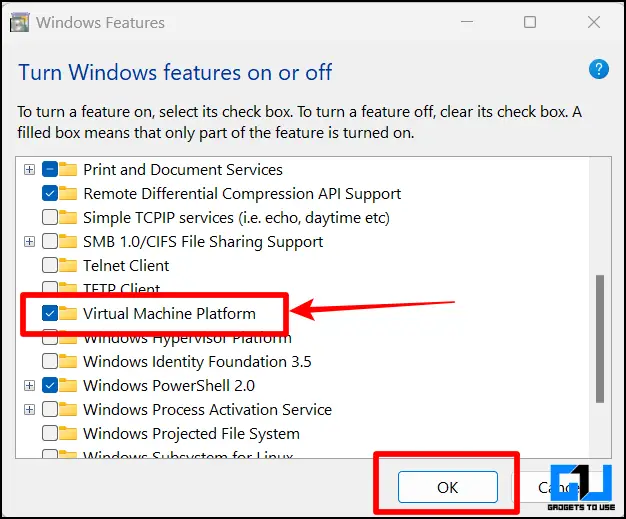
3. Scroll down and locate and toggle on the Virtual Machine Platform.
4. Click OK and restart your PC.
That’s everything you need to do in order to turn on the Virtual machine platform on any Windows 11 PC.
Fix 9 – Toggle Windows Defender Off Temporarily
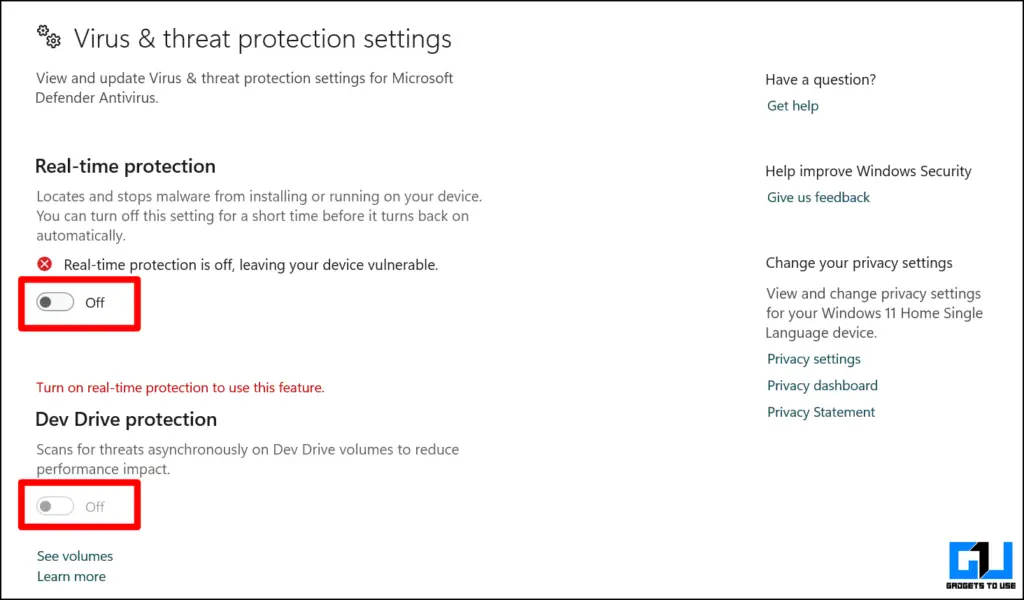
Windows Subsystem for Android is a resource-hungry background process that runs upon Windows startup for most of the time. In some cases, the Windows Defender built right into Windows 11 might end up killing it again and again thinking it might be a threat to your PC. and the best way to prevent it is to disable the Defender temporarily.
If you don’t know how to disable the Windows Defender Antivirus, look no further here’s how you can temporarily disable the Windows Defender Antivirus easily on your Windows 11 PC.
1. Click Windows+S Key to launch the search, look for the term Windows Security and click Open.

2. Now, click Virus and Threat Protection.

3. Click Manage Settings under Virus and Threat Protection Settings.
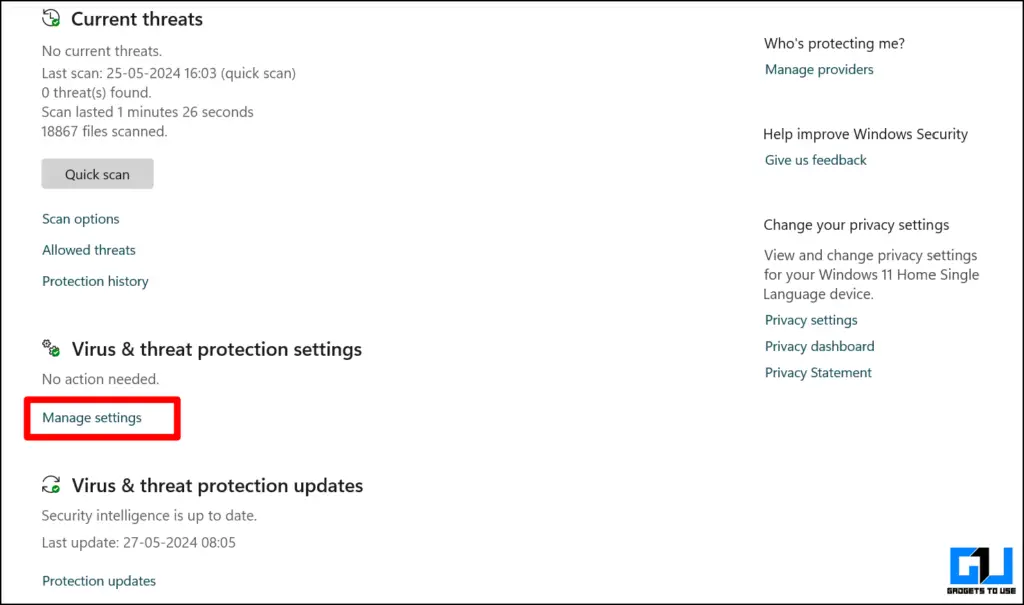
4. Turn off all the toggles under Virus and Threat Protection Settings.
Once that is done, restart your computer and check whether the WSA is now working on your Windows 11 PC. If the answer is still no, check whether the other solutions mentioned below work for you.
Fix 10 – Re-Install Windows Subsystem for Android on Windows
If the problem persists, then one of the best ways to fix the Windows Subsystem for Android is to uninstall and re-install it on your Windows PC.
1. Open the Settings app on your PC by clicking Windows+I keys together.
2. Go to App Settings on your PC.
3. Now navigate to Installed Apps settings.
4. Go to Windows Subsystem for Android and click Uninstall.
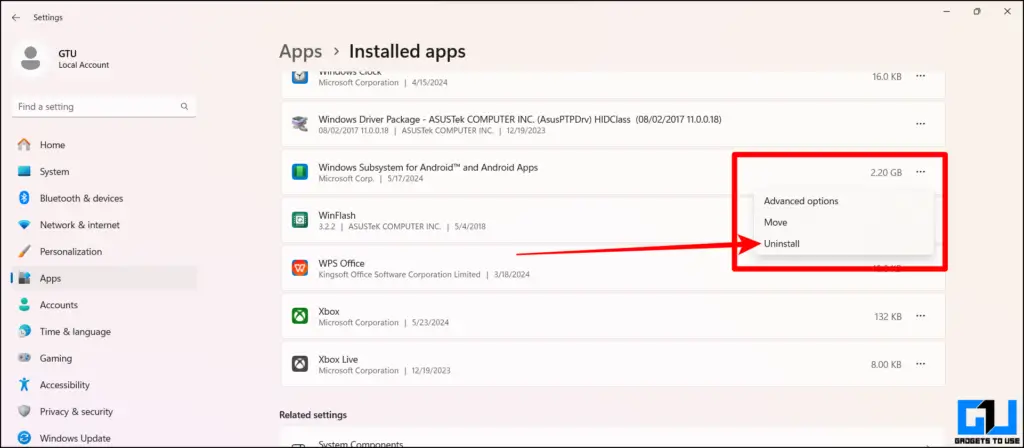
5. Once WSA is uninstalled go to WSA Download Page and install it back again.
Fix 11 – Rollback to the Previous Windows Update
There’s a high chance that your PC updated Windows in the background, which might have broken Windows Subsystem For Android’s functionality on your PC. If that’s the case, here’s how you can roll back to the previous Windows version.
1. Open Settings App by clicking the Windows+I key and go to the Windows Update.
2. Now go to the Update history tab and navigate to the Uninstall Update menu.
3. In the uninstall updates menu, locate the last Windows update and click uninstall.
Done and dusted. If the reason for WSA not working on your PC was the latest Windows Update then this should fix it.
Fix 12 – Disable VPN
If you are using any VPN on your devices then there is a chance that WSA will not work on your PC as the VPN will change the region you are in which conflicts with the WSA.
If that’s the case, simply disabling the VPN service on your VPN will fix the Windows Subsystem for Android not working on your PC.
FAQs
Q. Why Is My Windows Subsystem for Android Not Working On Windows 11?
There is more than just one reason why WSA is not working on your Windows PC. Try these mentioned 12 fixes to get your WSA to start working. Even if you make it work on your PC, Microsoft has announced that it will discontinue its support after the 5th of March,2025.
Q. How To Update The Windows Subsystem For Android On Windows 11?
You can update the WSA from right within the App or even from the Microsoft Store as mentioned in Fix 1.
Q. What Can Be Done If the Virtual Machine Platform Crashes With WSA On Windows 11?
You can first try restarting the computer, and if that still does not work, then try any of the fixes mentioned in the above explainer.
Q. Can Using a Proxy Server Cause Issues With the Windows Subsystem For Android?
Yes. Using a proxy server can cause the Widows Subsystem for Android to crash on your Windows 11 PC, as the Proxy Server can be associated with different regions that might not support the WSA.
Wrapping Up
Although it’s about to get shut down, Windows Subsystem for Android is one of the best tools introduced by Microsoft. It allows its users to use most of the Android Apps available on the platform without doing much tinkering. But there are times it keeps crashing. In such cases, we have got you covered with these twelve fixes that will help you resolve your issue. Stay tuned to GadgetsToUse for more such tips and tricks.
You May Also Like:
- 2 Ways to Set up a New Windows PC Without Microsoft Account
- 8 Ways to Fix TikTok Not Running on Windows, Mac, and Mobile
- 6 Ways to Remove a Keyboard Layout in Windows 10/11
- 7 Ways to Automatically Delete Old Files on Windows 11/10
You can also follow us for instant tech news at Google News or for tips and tricks, smartphones & gadgets reviews, join the GadgetsToUse Telegram Group, or subscribe to the GadgetsToUse Youtube Channel for the latest review videos.
Was this article helpful?
YesNo
Несколько дней назад Microsoft начала тестирование подсистемы Windows Subsystem for Android (WSA), которая позволяет запускать Android-приложения в Windows 11.
Сейчас функция доступна только участникам программы Windows Insider на канале Beta, что несколько удивительно, так как обычно все новшества вначале появляются на канале Dev. Но даже если вы используете канал Beta, то для установки подсистемы из Microsoft Store потребуется сменить регион на США в самой Windows 11.
Microsoft обещает, что инсайдеры на канале Dev также вскоре получат доступ к Windows Subsystem for Android, но какие-либо конкретные сроки не называются. Если вы не хотите ждать, то можете установить подсистему вручную. Для этого вам потребуются прямые руки и небольшие навыки работы в PowerShell.
Важно! Все действия вы делаете на свой страх и риск.
Благодарим aleks242007 и участников чата Community в Telegram за помощь в составлении инструкции.
Инструкция
Установка Windows Subsystem for Android
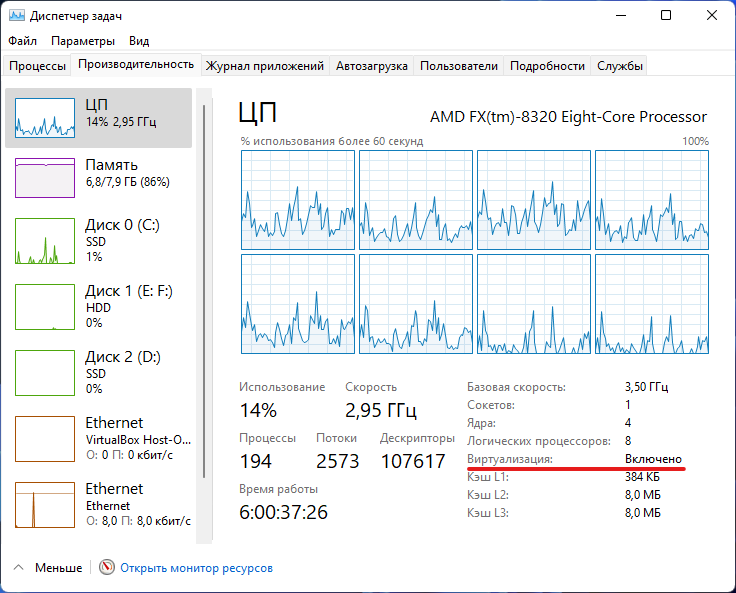
- Для начала убедитесь, что ваш компьютер поддерживает виртуализацию. Для этого откройте «Диспетчер задач», перейдите на вкладку «Производительность», выберите CPU и посмотрите текст под графиком. Там должно было указано: «Виртуализация: Включено».

- Если виртуализация отключена, то вам необходимо включить её в BIOS. У разных производителей настройка может располагаться в разных разделах и называться по-разному, так что можно поискать информацию в Google для вашего конкретного устройства.
- Если в BIOS настройка отсутствует или значение в «Диспетчере задач» не меняется, то вы вряд ли сможете запустить Windows Subsystem for Android на своём компьютере.
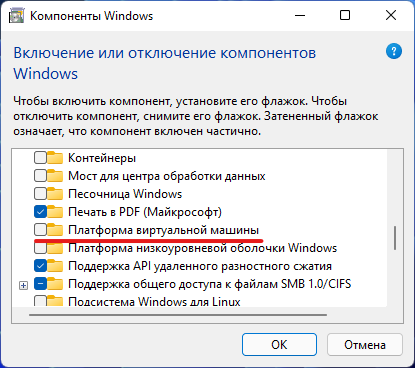
- Следом откройте меню «Пуск», введите в поле поиска «Включение или отключение компонентов Windows» и выберите соответствующий результат.
- В открывшемся окне установите галочку напротив пункта «Платформа виртуальной машины», нажмите «ОК», дождитесь применения изменений и перезагрузите ПК.
- Далее нам потребуется скачать установщик Windows Subsystem for Android в формате MSIXBUNDLE с сервера Microsoft Store:
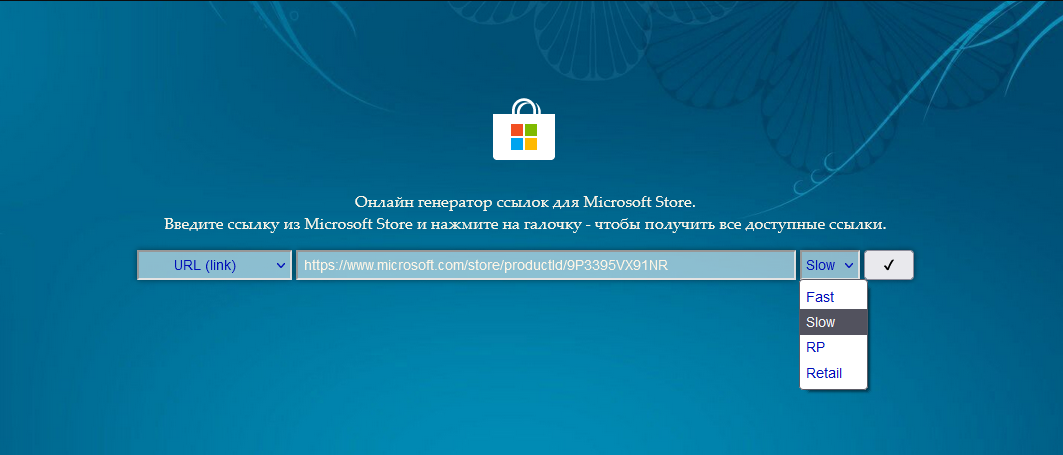
- Перейдите на сайт Microsoft Store — Generation Project (от rgadguard) по этой ссылке.
- В поле на сайте вставьте следующую ссылку:
https://www.microsoft.com/store/productId/9P3395VX91NR - Справа от поля в выпадающем меню выберите Slow и нажмите на галочку.
- В появившемся списке найдите файл с примерно таким названием (номер версии может отличаться):
MicrosoftCorporationII.WindowsSubsystemForAndroid_1.7.32815.0_neutral_~_8wekyb3d8bbwe.msixbundle - Нажмите на название этого файла и сохраните файл в любой папке на вашем компьютере. Обратите внимание, что файл должен быть в формате .MSIXBUNDLE. Если это не так, то просто смените расширение файла на нужное. Файл должен весить примерно 1,2 ГБ.
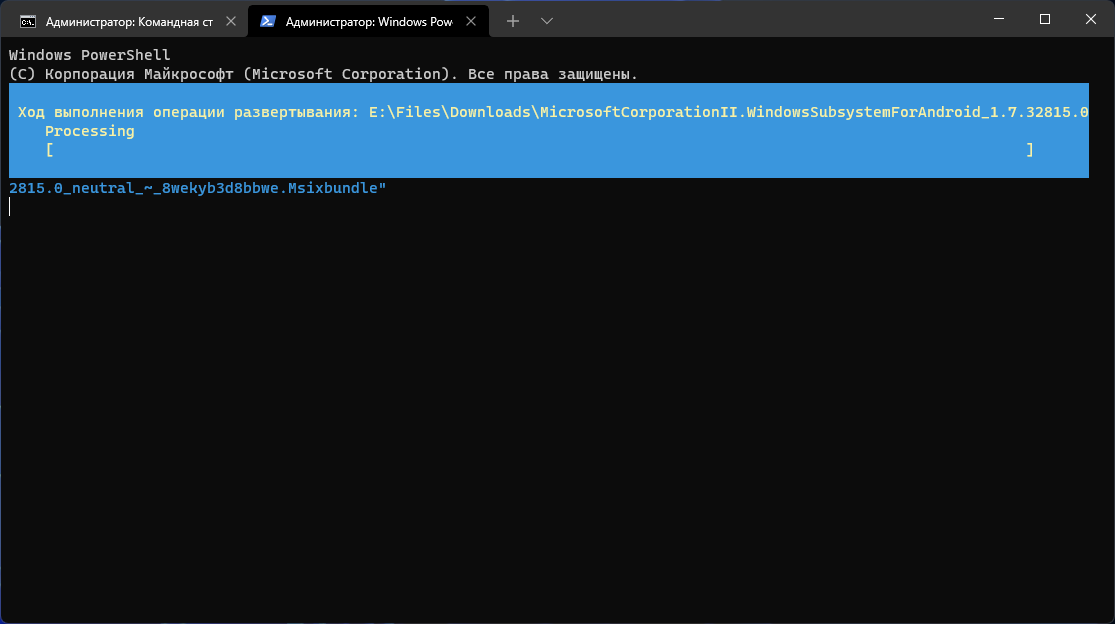
- Запустите PowerShell или Windows Terminal (нужна вкладка с PowerShell) от имени администратора.
- Введите в консоль следующую команду:
Add-AppxPackage -Path "C:\Users\user1\Desktop\MyApp.msix"- «C:\Users\user1\Desktop\MyApp.msix» — путь к файлу MSIXBUNDLE, сохранённому на шаге 4. Чтобы быстро его получить, вы можете нажать правой кнопкой мыши по файлу в «Проводнике» и выбрать пункт «Копировать как путь».
- Решение ошибки:
Add-AppxPackage: The ‘Add-AppxPackage’ command was found in the module ‘Appx’, but the module could not be loaded. For more information, run ‘Import-Module Appx’.
Если вы увидели такое сообщение в PowerShell, то введите следующую команду:
Import-Module Appx -UseWindowsPowerShellПосле этого вновь введите команду Add-AppxPackage из шага 6.
- Нажмите Enter и дождитесь завершения установки.
- Если всё прошло успешно, то в меню «Пуск» появится приложение под названием Windows Subsystem for Android.
Установка APK-файлов
Теперь подсистема Windows Subsystem for Android работает, однако с установкой приложений есть некоторые сложности. Как вы уже знаете, вместо Google Play здесь используется Amazon Appstore. Причём отображаются там лишь приложения, которые Microsoft и Amazon протестировали на работоспособность в подсистеме.
Правда воспользоваться Amazon Appstore всё равно не получится. Приложение не только требует учётную запись Amazon, но и проверяет ваше местоположение. Можно, конечно, подключить VPN, но есть ли в этом смысл?
К счастью, Windows Subsystem for Android поддерживает установку приложений с помощью APK-файлов. Вы можете воспользоваться либо утилитой WSATools, о которой мы рассказали в статье по этой ссылке, либо устанавливать вручную с помощью командной строки по инструкции ниже.
- Скачайте SDK Platform Tools для Windows с сайта Android, перейдя по этой ссылке.
- Извлеките папку
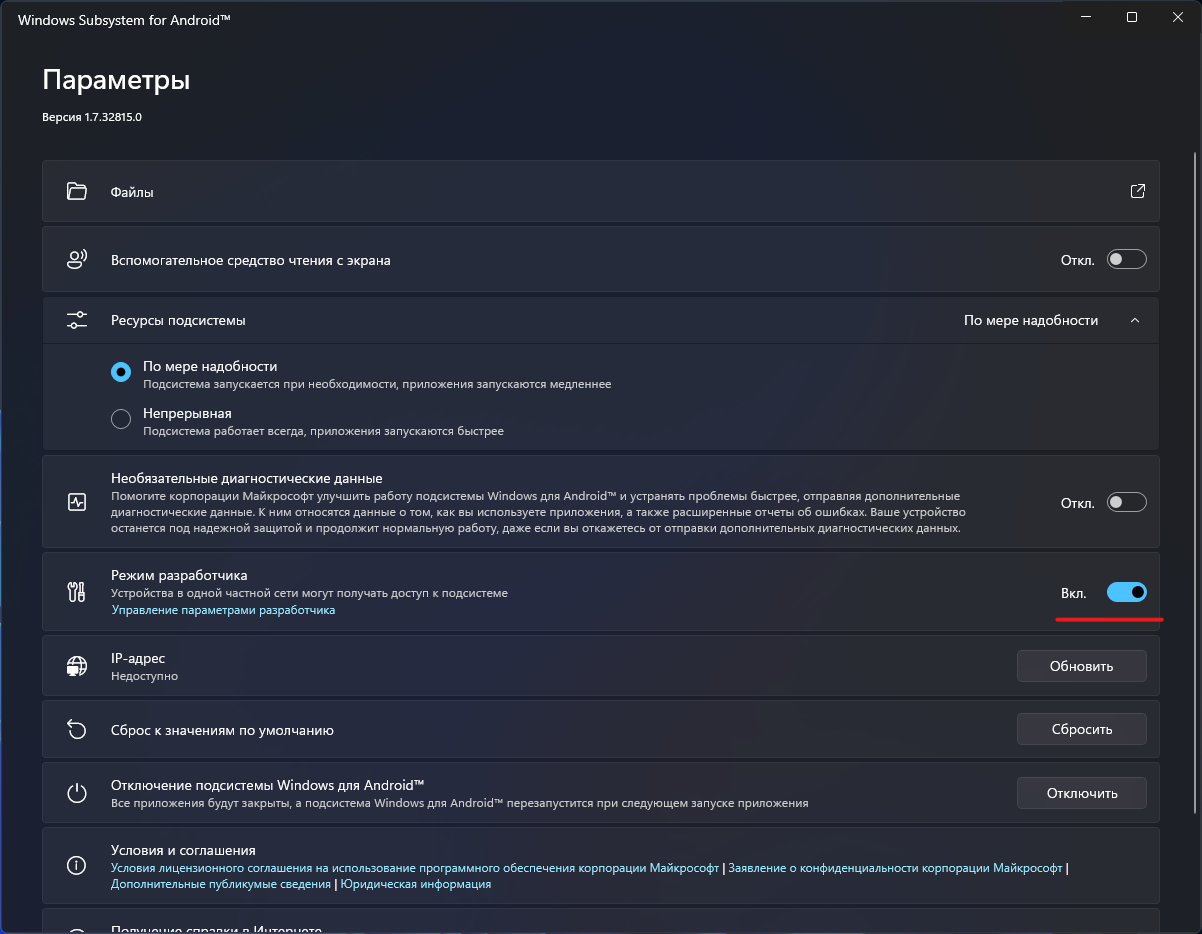
platform-tools, например, в корень диска C (рядом с папками Windows, Program Files и т. д.) - Откройте приложение Windows Subsystem for Android и включите «Режим разработчика».
- Нажмите на кнопку рядом с элементом «Файлы». Начнётся запуск подсистемы Windows Subsystem for Android.
- Нажмите на кнопку «Обновить» рядом с элементом «IP-адрес».
- В описании для элемента «Режим разработчика» появится IP-адрес, который мы будем использовать для подключения к подсистеме с помощью ADB.
- Откройте командную строку (или Windows Terminal) и перейдите в папку с установленным SDK Platform Tools, подставив нужный путь к папке:
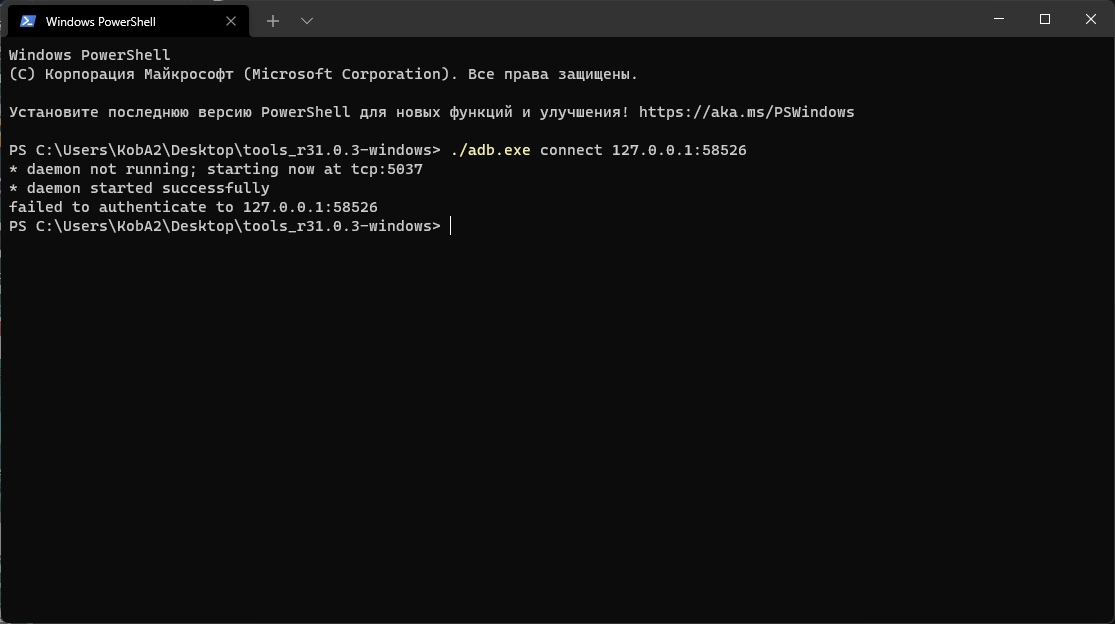
cd C:\platform-tools - Введите следующую команду, подставив в неё IP-адрес из предыдущего пункта:
adb.exe connect 127.0.0.1:58526Примечание. Если выполнять команды через PowerShell, то перед ADB следует прописать ./
- Убедитесь, что результат в командной строке примерно такой, как на скриншоте ниже:
- Скачайте APK-файл нужного Android-приложения, например, воспользовавшись сервисом APKMirror.
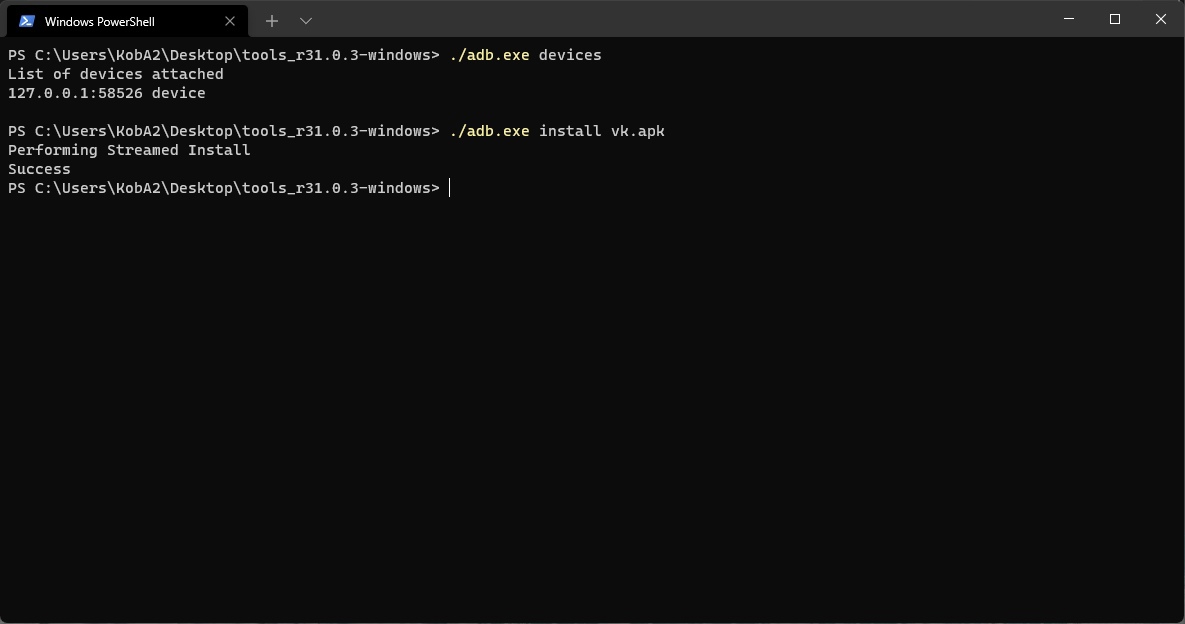
- В командной строке выполните следующую команду, подставив в неё путь к скачанному APK-файлу:
adb.exe install edge.apkЧтобы быстро скопировать путь к файлу, нажмите по нему правой кнопкой мыши и выберите «Копировать как путь». Затем вставьте его после adb.exe install и нажмите Enter.
- Дождитесь надписи «Success» в командной строке.
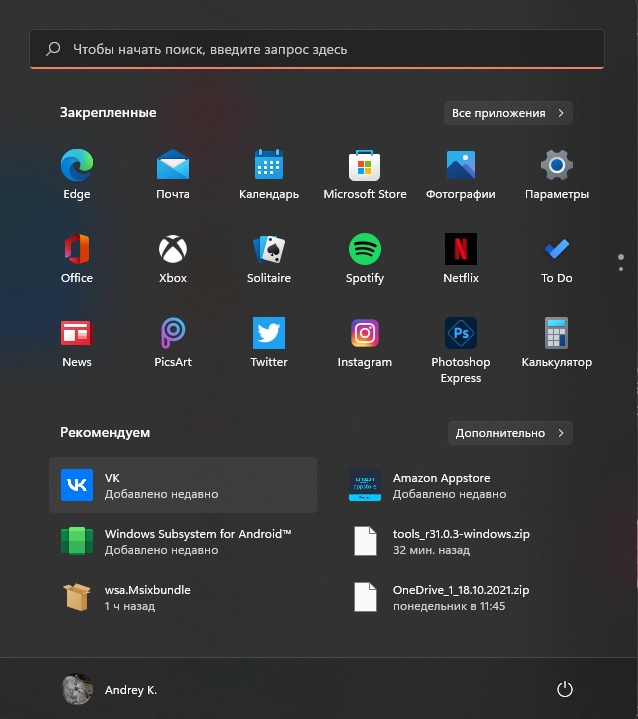
- Если всё прошло успешно, то ярлык установленного приложения должен появиться в меню «Пуск». Установленные приложения запускаются так же, как и приложения для Windows, то есть простым нажатием по иконке в меню «Пуск».
Поделиться впечатлениями о работе Windows Subsystem for Android и обсудить сценарии её использования вы можете в нашем чате в Telegram. Там же можете задавать вопросы, если возникли какие-либо сложности с установкой подсистемы или Android-приложений.
Поскольку далеко не все Android-приложения корректно работают в подсистеме, пользователи решили составить таблицу с информацией о работоспособности приложений в WSA. Найти и внести свой вклад вы можете на GitHub.
-
Home
-
News
- How to Fix Unable to Start Windows Subsystem for Android in Win11
By Vera | Follow |
Last Updated
If you run into the error message “unable to start Windows Subsystem for Android” when trying to start this environment, what should you do to fix the virtualization not enabled error in Windows 11? Read this post and you can find some useful solutions offered by MiniTool Solution to help you out.
Windows 11 Unable to Start Windows Subsystem for Android
In Windows 11, there is a feature called Virtualization that creates a virtualized environment so that you can run non-native applications on the system. This means all supported computers should be able to run Android apps natively in Windows 11 without installing a third-party emulator on the system.
Tip: Windows Subsystem for Android isn’t released to anyone except for Windows Insiders. If you want to run Android apps in Windows 11, you can follow the method in this post – How to Sideload Android Apps on Windows 11 via APK File.
But with the release of Windows Subsystem for Android to Insiders, you may get an error saying “unable to start Windows Subsystem for Android” when starting the environment.
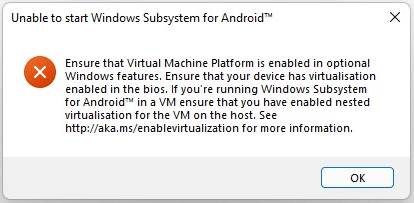
From the error window, you can know the reason is the virtualization problem. If you don’t enable virtualization in Windows 11, the Windows Subsystem for Android environment can’t be enabled to initialize. As a result, the error appears. To get rid of this issue, you can follow the methods below. It is easy to fix it and let’s go to see them.
How to Fix Virtualization Not Enabled Windows 11
Enable Virtual Machine Platform
When getting the above error, the first thing you should do is to ensure that Virtual Machine Platform is enabled. This is the given suggestion by Windows.
How to do this thing? The instructions are here:
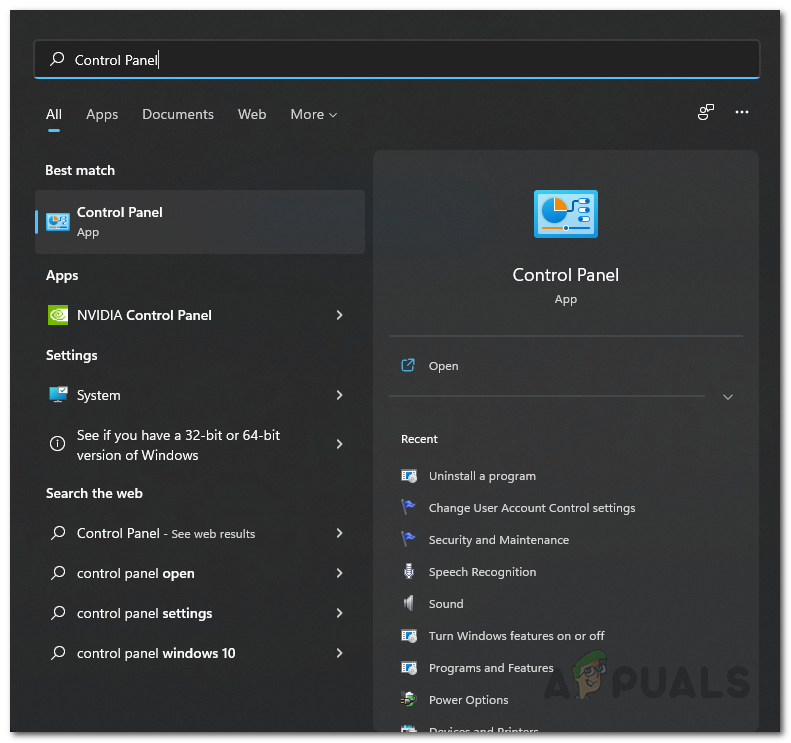
Step 1: Open Control Panel in Windows 11 and view all the items by Category.
Step 2: Click Programs and click the Turn Windows features on or off link.
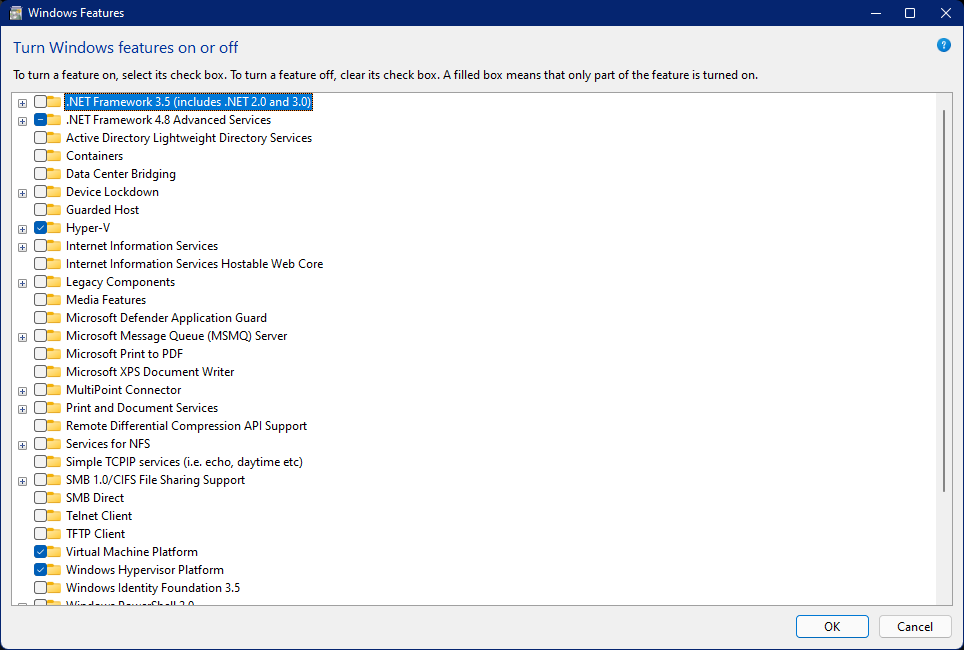
Step 3: In the Windows Features interface, scroll down to find Virtual Machine Platform and then tick the checkbox of this feature. Also, you can check Windows Hypervisor Platform.
Step 4: Next, click OK to save the change.
Step 5: Restart your computer and then see the error is removed.
Enable Virtualization in BIOS
In addition to enabling Virtual Machine Platform, you should also make sure virtualization is enabled in BIOS. To run Android apps, you must enable virtualization. How can you do this task? Follow the steps below.
Step 1: Boot your PC to the BIOS menu by pressing a specific key like DEL, F2, F10, or ESC during the reboot process.
Step 2: Locate the section for CPU configuration.
Step 3: Find the settings for Virtualization and the similar name may be Intel Virtualization Technology, SVM, AMD-V, Hyber-V, Vanderpool, or VT-X.
Step 4: Enable the option for Virtualization.
Step 5: Press F10 to save the changes and restart your computer.
Enable Nested Virtualization
If you install Windows 11 in a virtual machine to run Windows Subsystem for Android, you need to enable nested virtualization. Or else, the error “unable to start Windows Subsystem for Android” appears on Windows 11.
The way to enable nested virtualization is different depending on the hypervisor. For VirtualBox and VMware, you can easily find this option in the virtualization settings. For VirtualBox, enable Nested VT-x or AMD-V. For Hyper-V, you need to use a command-line way. Go to find the detailed wizards on the Internet.
After enabling nested virtualization, you can run Windows Subsystem for Android without any error.
About The Author
Position: Columnist
Vera is an editor of the MiniTool Team since 2016 who has more than 7 years’ writing experiences in the field of technical articles. Her articles mainly focus on disk & partition management, PC data recovery, video conversion, as well as PC backup & restore, helping users to solve some errors and issues when using their computers. In her spare times, she likes shopping, playing games and reading some articles.
Last active
May 13, 2025 19:54
-
Star
(175)
You must be signed in to star a gist -
Fork
(48)
You must be signed in to fork a gist
-
Clone this repository at <script src="https://gist.github.com/HimDek/eb8704e2da1d98240153165743960e17.js"></script>
- Save HimDek/eb8704e2da1d98240153165743960e17 to your computer and use it in GitHub Desktop.
Clone this repository at <script src="https://gist.github.com/HimDek/eb8704e2da1d98240153165743960e17.js"></script>
This Guide will show you how to Install Windows Subsystem for Android or WSA on any Edition of Windows 11 non Insider release.
Install Windows Subsystem for Android on Windows 11 non Insider
WSA or Windows Subsystem for Android is a Tool that allows Windows to run Android Apps directly without using any emulator. The problem is Windows Subsystem for Android is currently only available through preview via the Beta Channel of the Windows Insider Program. But if you follow this guide, you don’t have to be in Windows Insider Program to try it out. The only thing you need is Windows 11 installed and some patience.
Prerequisites:
- A Device with any version and Edition of Windows 11 installed.
- Internet Connection.
- Hyper-V enabled.
Enable Hyper-V:
- If Hyper-V is already enabled, click here to skip this part.
- If your Windows Edition is
Home, click here to know how to enable Hyper-V in Windows Home Edition. - If your Windows Edition is
Pro,EnterpriseorEducationfollow the bellow steps to enable Hyper-V:- Search for
Turn Windows features on or offin the Start Menu search bar and open it.
- In the Window, lookout for
Hyper-V,Virtual Machine PlatformandWindows Hypervisor Platform. Then check the check boxes before them and clickOK. This will also take some time and then a Restart is necessary. After this step, Hyper-V will be enabled.
- Search for
Follow these steps:
You might also like:
Install Android apps or apk files in Windows using Windows Subsystem for Android (No Emulator)
With the release of Windows Subsystem for Android, users have been encountering the “Unable to start Windows Subsystem for Android” error message while trying to start the environment. The reason that this problem occurs is very well explained in the error message as well which essentially is virtualization. If you do not have virtualization enabled on your Windows 11 operating system, the Windows Subsystem for Android environment will not be able to initialize and thus the error message occurs. You can fix this problem pretty simply by enabling virtualization on your computer which is what we are going to show you in this article so just follow through.

As it turns out, Microsoft recently made the Windows Subsystem for Android available to the Insider Preview users which, much like the working of the Windows Subsystem for Linux, allows you to run Android apps natively on your computer. This means that you do not have to install a third party emulator on your system in order to play an Android game or use any other Android app on your computer.
However, since the feature is just available in the Insiders Preview Beta channel, there also are not many options to choose from when it comes down to installing the applications. This is because Microsoft has limited the apps, for now, and only a selected group of applications are allowed to be installed via the Amazon Appstore. Luckily, you can sideload Android apps which allows you to essentially run any Android application on your computer using Windows Subsystem for Android. In addition to that, since this is based on the Windows Subsystem for Android, you are going to enable virtualization on your computer otherwise the error message mentioned above will appear. This can be pretty easily fixed, so let us get started with that without further delay.
Turn on Windows Virtual Machine Platform
As it turns out, the first thing that you should do when you encounter the error message in question is to make sure that you have the Virtual Machine Platform feature enabled on your computer. Windows has a bunch of optional features that come built-in that you can choose to install or turn on via the Windows Features window.
While some of these features are enabled by default when you install Windows, most of them are not which is quite obvious because not everyone is going to need them. Thus, if you do need a specific feature, you will have to turn it on manually which is pretty convenient and easy to do. To do this, follow the instructions given down below:
- First of all, open up the Control Panel by searching for it in the Start Menu.

Opening up Control Panel - Then, in the Control Panel window, click on the Programs option.

Control Panel - There, click on the Turn Windows Features on or off option.
Opening up Windows Features Window - This will bring up another window called Windows Features.
- Inside that window, from the list of features, look for Virtual Machine Platform and click on the checkbox to tick it.

Enabling Virtual Machine Platform - Then, click the OK button.
- Once you have done that, go ahead and restart your computer for the feature to be installed.
- After your system boots up, try using the Windows Subsystem for Android again to see if the error message still appears.


Enable Virtualization from BIOS
In addition to turning on the Virtual Machine Platform feature on your computer, you will also have to enable virtualization from BIOS. Since you are going to run Android applications, virtualization is pretty important as it allows programs to emulate hardware which then enables it to run other operating systems like Android.
If this case is applicable, you can enable virtualization pretty easily from the BIOS menu. The exact steps may vary a little depending on the manufacturer of your motherboard but the overall procedure remains the same. Follow the instructions down below to enable virtualization:
- First of all, go ahead and restart your computer.
- As your computer is booting up, you will have to boot into the BIOS menu. To do that, press the respective key for your motherboard which usually is DEL, F2, F10 or ESC.
- Once you have booted into BIOS, you will have to go to Advanced Mode. For that, press the F7 button on your keyboard to switch from EZ Mode.

Switching to Advanced Mode - After you are in Advanced Mode, switch to the Advanced tab given at the top.

Navigating to Advanced TAB - There, click on the CPU Configuration option.

Navigating to CPU Configuration - Now, if you are using an Intel CPU, you need to look for Intel Virtualization Technology. Once located, go ahead and switch it to Enabled.
- In case of AMD processors, you should be looking for SVM Mode which stands for Secure Virtual Machine. Once you have found it, switch it to Enabled.

Enabling SVM Mode - After that, press the F10 key on your keyboard to save the changes and restart your computer.
- Once your computer boots up, you should no longer be getting the error message in question.


Enable Nested Virtualization
Finally, if you have installed Windows 11 in a virtual machine to use the Windows Subsystem for Android, you will need to enable nested virtualization for the virtual machine on the host. As apparent from the name itself, nested virtualization essentially allows you to run virtual machine instances inside a virtual machine. It is basically a virtualception.
Now, the process of enabling nested virtualization may differ depending on the hypervisor that you are using. For VirtualBox and VMware, the procedure is pretty simple as you can find the option in the virtual machine settings. In case of VirtualBox, the option is called Nested VT-x/AMD-V while in case of VMware, you will be looking for nested virtualization. If you are using Hyper-V, you will have to take a command line approach but it is rather simple to do and you can find various guides on the internet. Once you have enabled nested virtualization, the error message should just go away.
Kamil Anwar
Kamil is a certified MCITP, CCNA (W), CCNA (S) and a former British Computer Society Member with over 9 years of experience Configuring, Deploying and Managing Switches, Firewalls and Domain Controllers also an old-school still active on FreeNode.