
Энтузиаст смог установить Google сервисы и приложения на WSA. Оригинал тут.
Я же попробую описать это в виде инструкции, и предоставить готовый архив, для тех кому лень вводить кучу команд в терминал или устанавливать WSL.
Внимание, после установки WSA, перестает запускаться эмулятор Android Studio. С этой проблемой еще не разобрался! И не говорите потом, что я вас не предупреждал 
Для ленивых — архив с готовой директорией для установки WSA. Распаковать строго в папку C:\WindowsSubsystemAndroid. После этого перейти к пункту Установка WSA с Google приложениями. То что ниже пропустить.
Как понятно из второго абзаца данной статьи, для установки WSA c Google сервисами и приложениями необходимо наличие установленной WSL. Если она не установлена, это не проблема, запускаем PowerShell от имени администратора и вводим команду
wsl –installОстальная установка интуитивно понятна и в комментариях не нуждается
Скачивание файлов:
-
Скачиваем WSA подробнее тут, в конце статьи в разделе UPD1 (далее файл_1)
-
Скачиваем репозиторий в виде архива .zip (далее файл_2)
-
Переходим на сайт opengapps , выбираем параметры platform: x86_64, android: 11, variant: pico и скачиваем архив. (далее файл_3)
Подготовка установочных файлов:
-
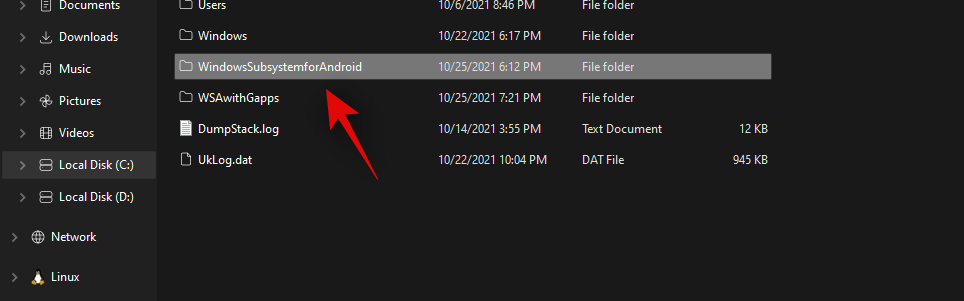
Создаем папку C:\WindowsSubsystemAndroid
-
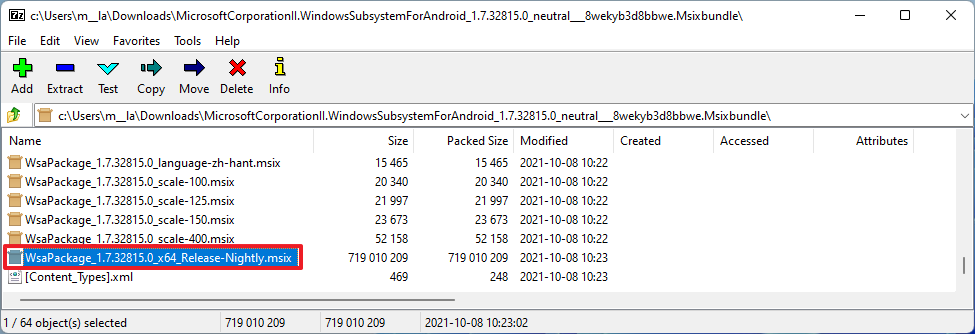
Открываем архиватором файл_1. Находим в архиве файл вида «WsaPackage_XXX_x64_Release-Nightly.msix» размер более 700мб, у меня находился в самом конце списка. И открываем этот файл так же архиватором
-
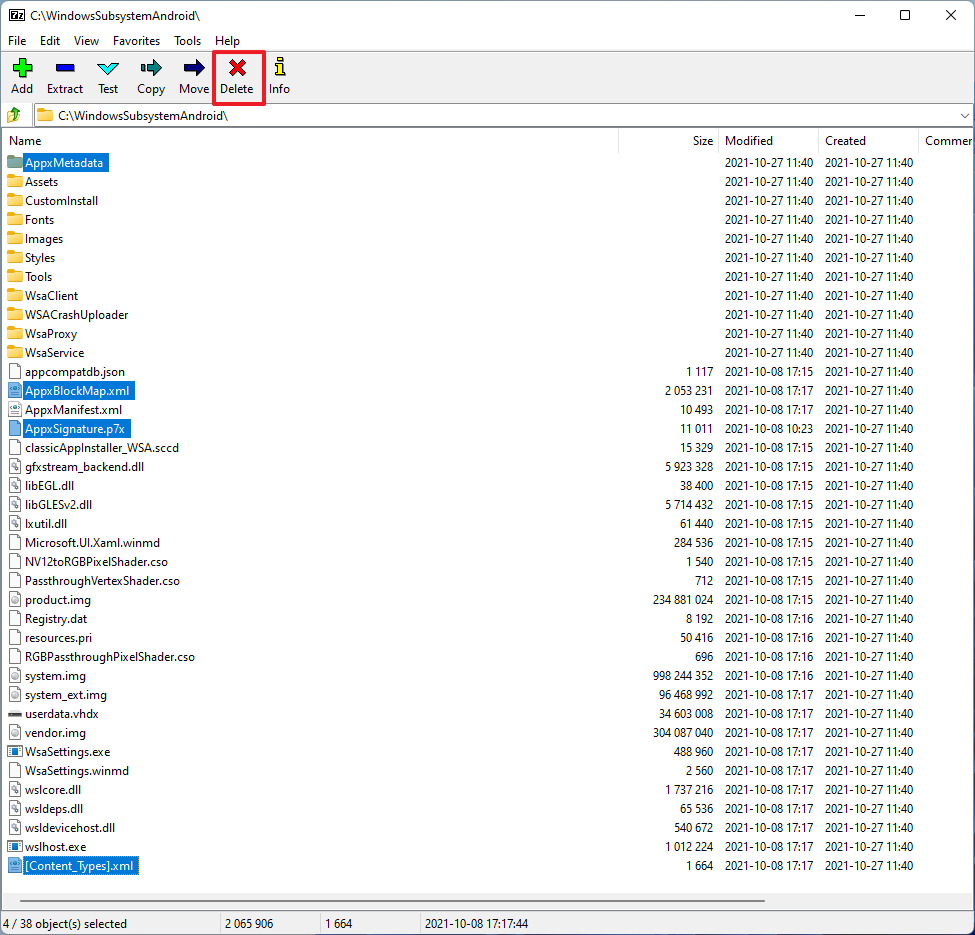
В открывшемся архиве выделяем все файлы и папки, снимаем выделение с папки AppxMetadata и файлов [Content_Types].xml AppxBlockMap.xml AppxSignature.p7x выделенное копируем и вставляем в папку C:\WindowsSubsystemAndroid
-
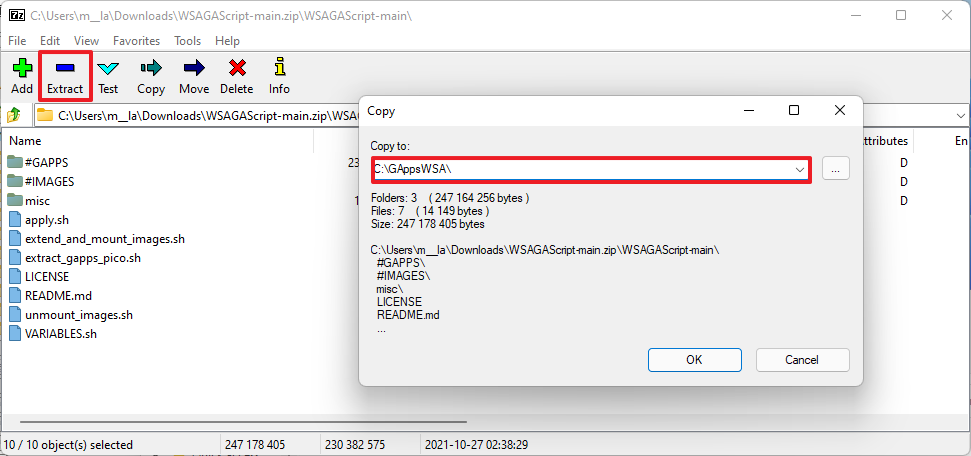
Создаем папку C:\GAppsWSA и разархивируем туда репозиторий файл_2 из пункта скачивания файлов
-
Переходим в директорию C:\GAppsWSA\#GAPPS и кладем туда архив файл_3. ВНИМАНИЕ, разархивировать не нужно!
-
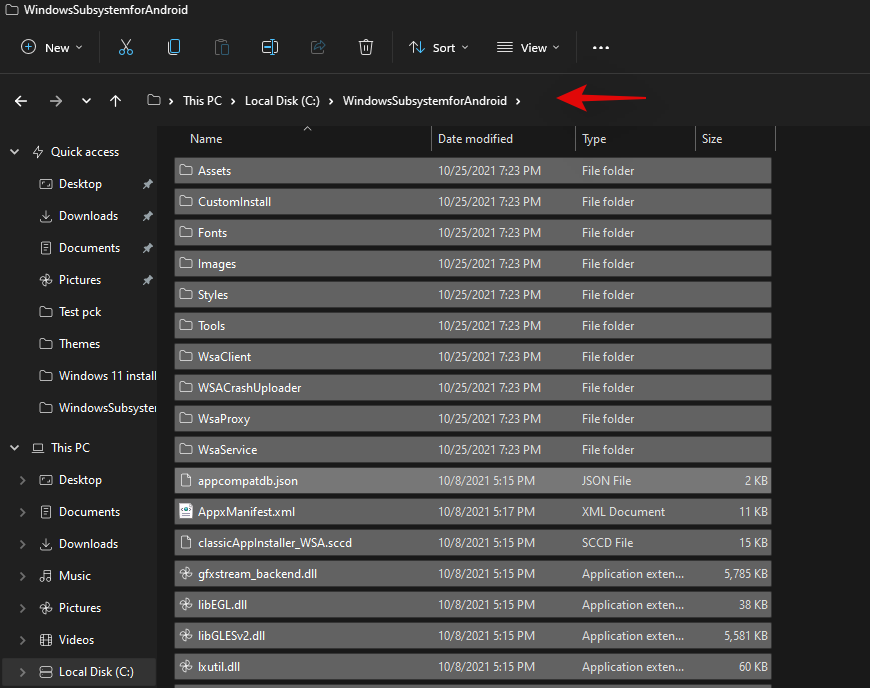
Переходим в директорию C:\WindowsSubsystemAndroid копируем из нее 4 файла: product.img vendor.img system_ext.img system.img в папку C:\GAppsWSA\#IMAGES
-
Открываем консоль WSL
-
Вводим команду:
sudo su -
Меняем в консоли директорию на C:\GAppsWSA (команды cd)
-
Выполняем команду
sudo apt-get update -
Выполняем команду
sudo apt-get install unzip lzip -
Выполняем команду
apt install lzip unzip -
Выполняем команду
apt install dos2unix -
Выполняем команду
dos2unix apply.sh -
Выполняем команду
dos2unix extend_and_mount_images.sh -
Выполняем команду
dos2unix extract_gapps_pico.sh -
Выполняем команду
dos2unix unmount_images.sh -
Выполняем команду
dos2unix VARIABLES.sh -
Выполняем команду
./extract_gapps_pico.sh -
Выполняем команду
./extend_and_mount_images.sh -
Выполняем команду
./apply.sh -
Выполняем команду
./unmount_images.sh -
Переходим в директорию C:\GAppsWSA\#IMAGES копируем из нее 4 файла product.img vendor.img system_ext.img system.img в папку C:\WindowsSubsystemAndroid
-
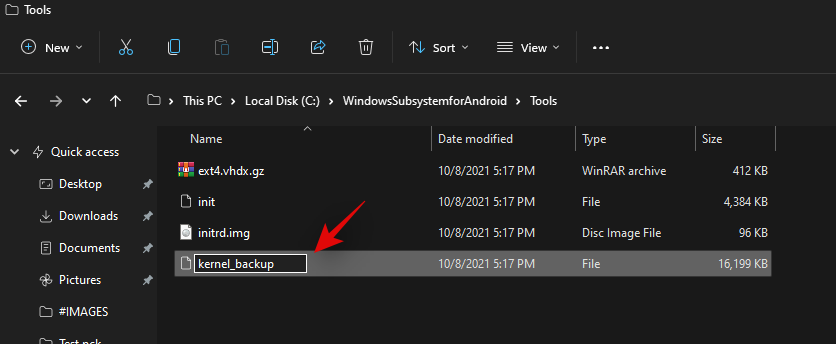
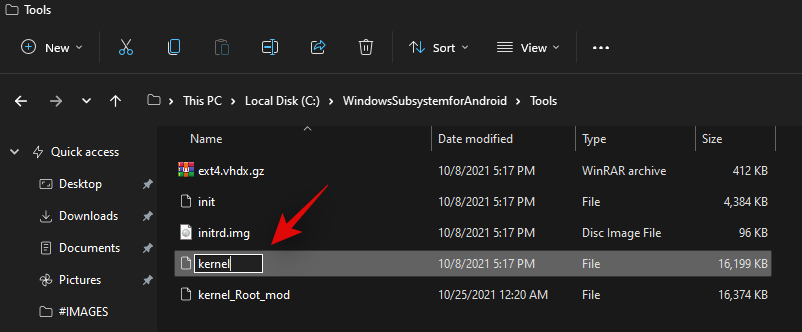
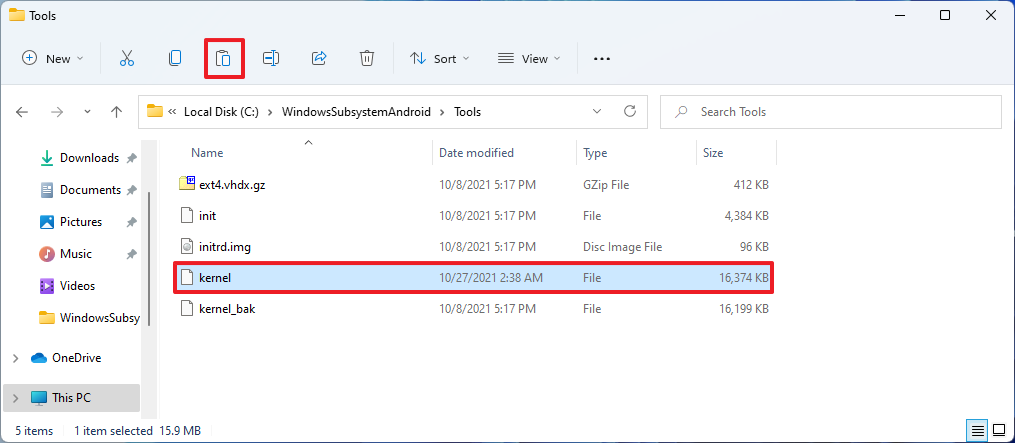
Переходим в директорию C:\WindowsSubsystemAndroid\Tools переименовываем файл kernel в kernel_bak
-
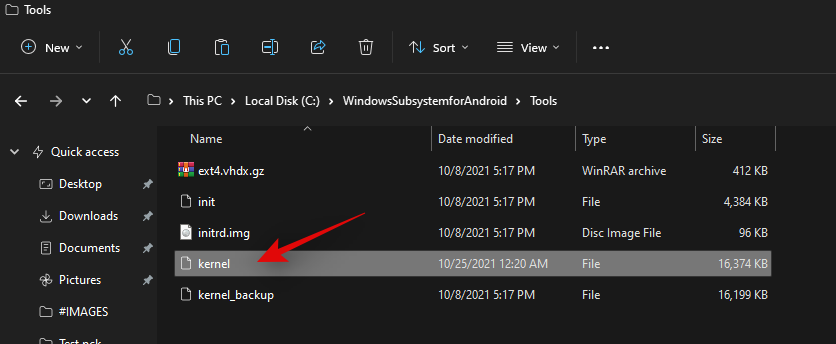
Копируем файл kernel из C:\GAppsWSA\misc в C:\WindowsSubsystemAndroid\Tools
Установка WSA с Google приложениями. Сюда переходим, если скачали готовый архив и не делали инструкцию выше
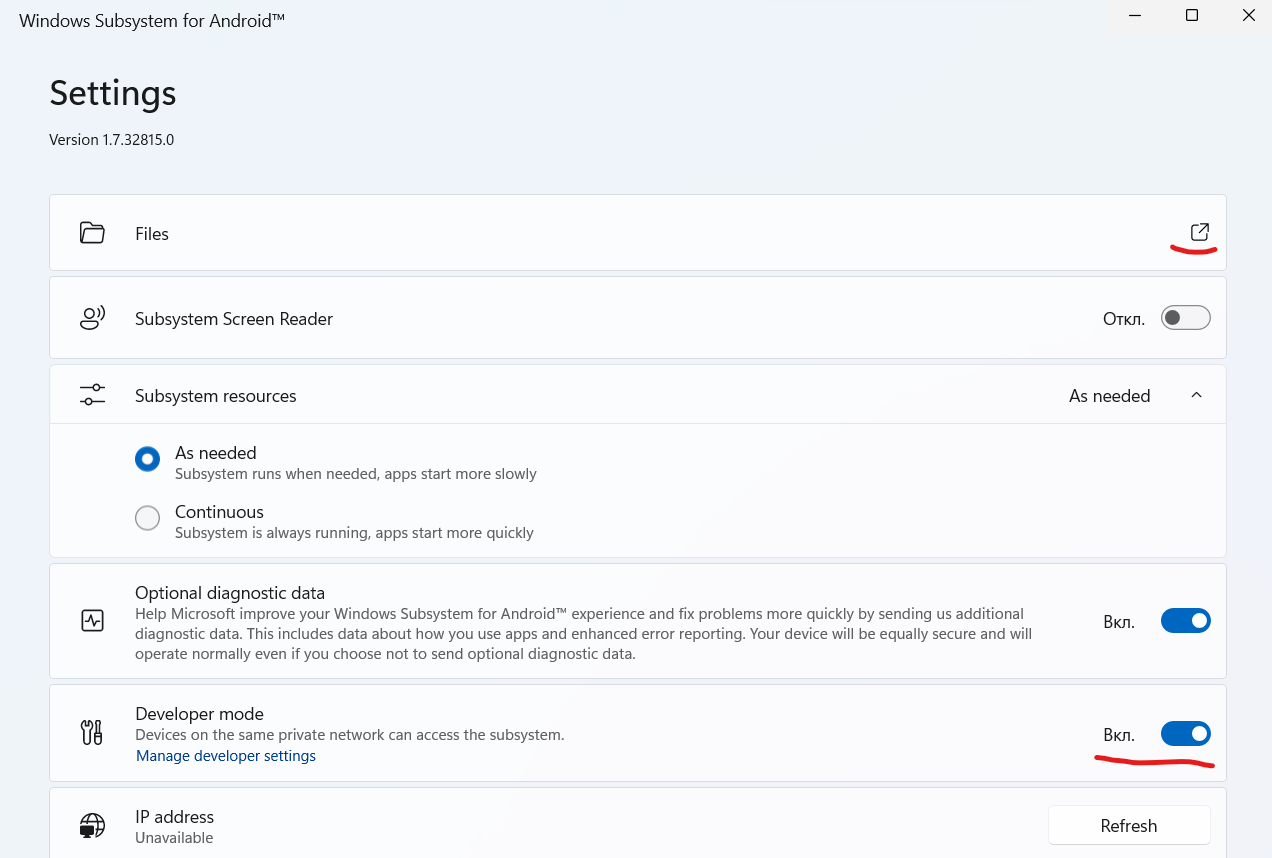
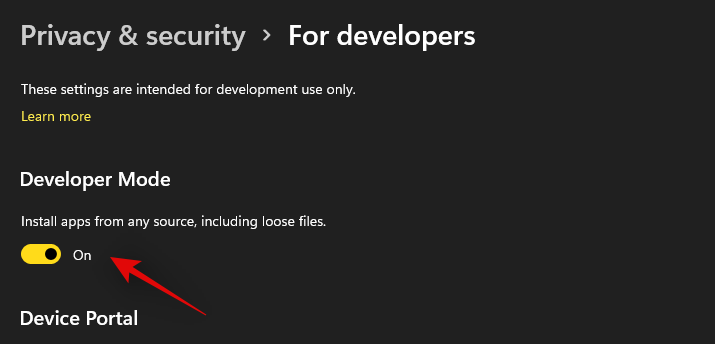
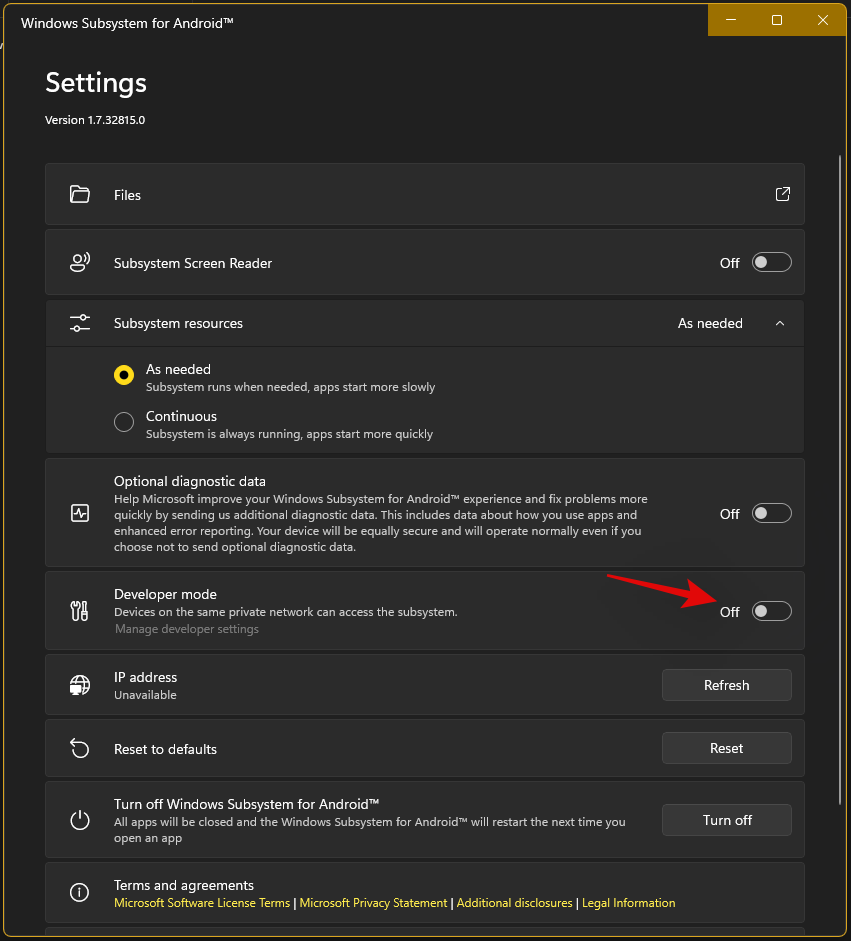
Для дальнейшей установки необходимо включить developer mode в Windows. Как включить посмотреть можно тут
Запускаем PowerShell от имени администратора
-
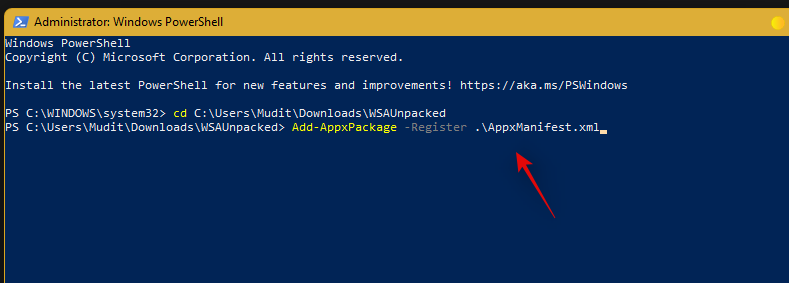
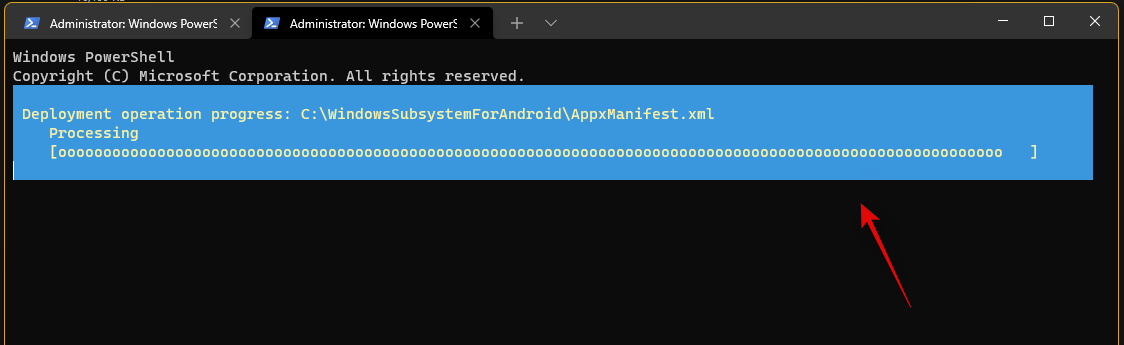
Выполняем команду
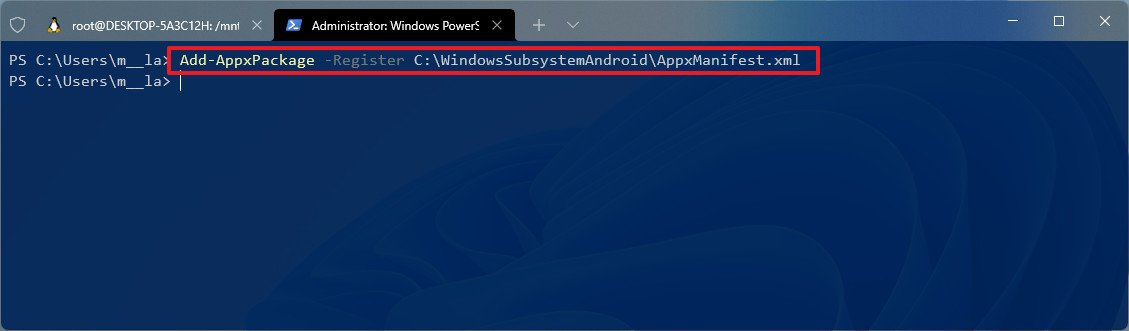
Add-AppxPackage -Register C:\WindowsSubsystemAndroid\AppxManifest.xml
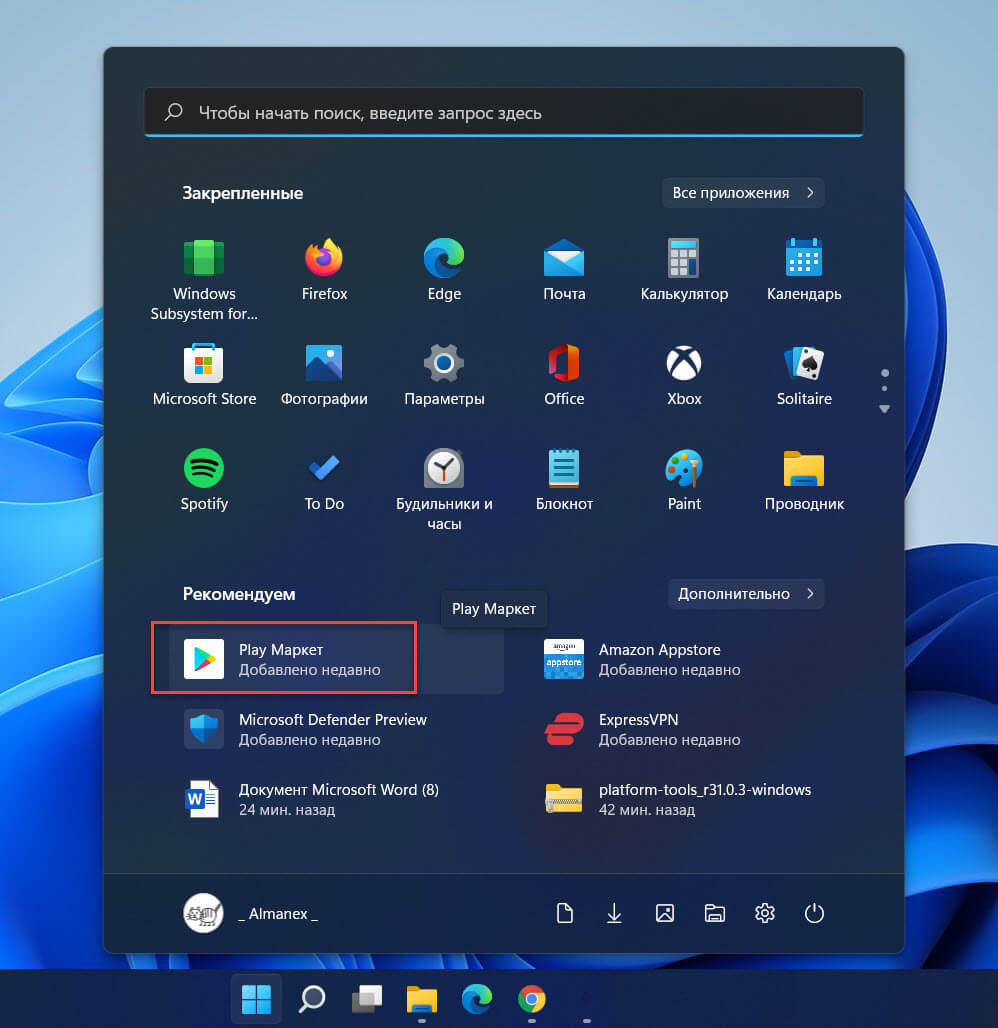
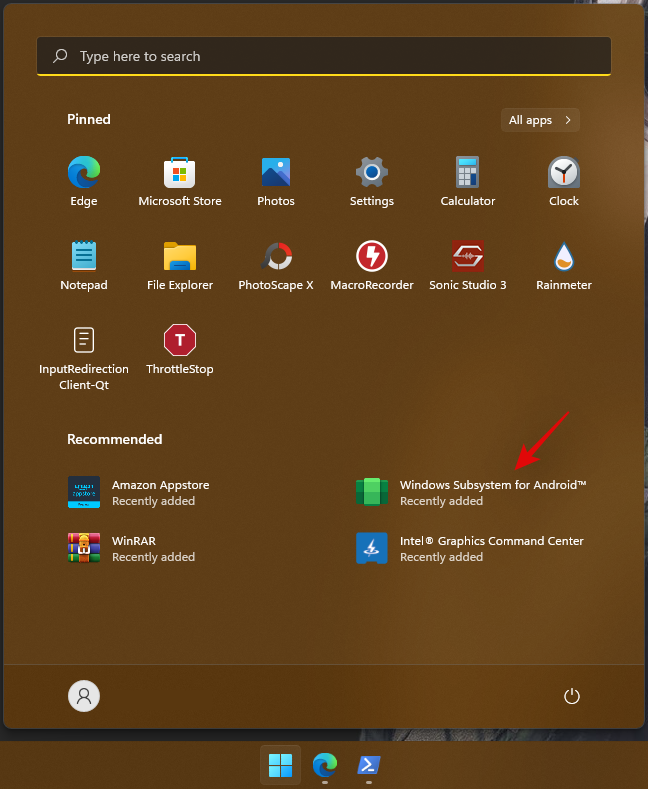
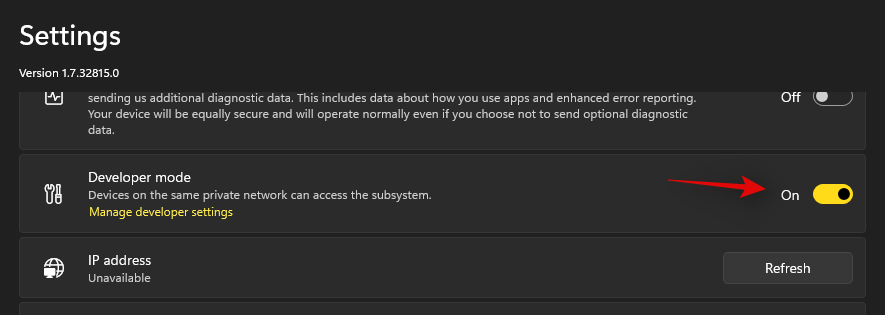
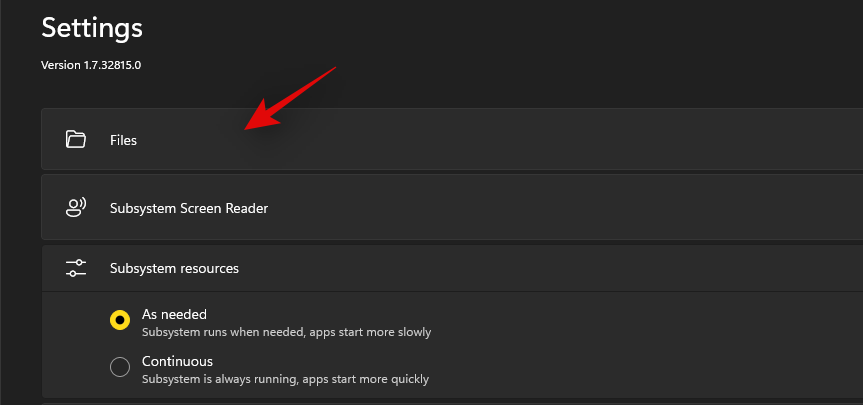
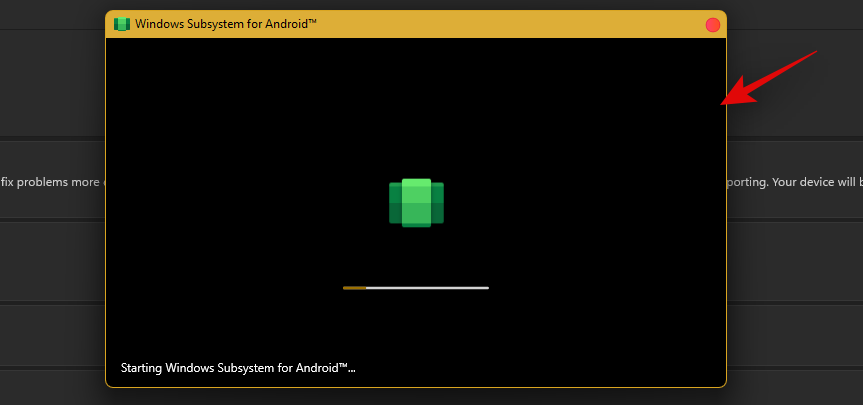
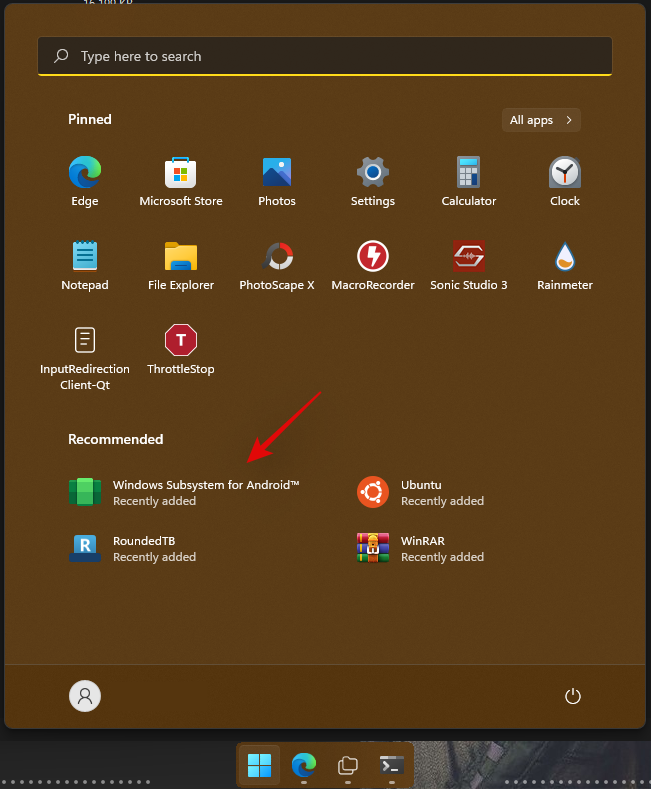
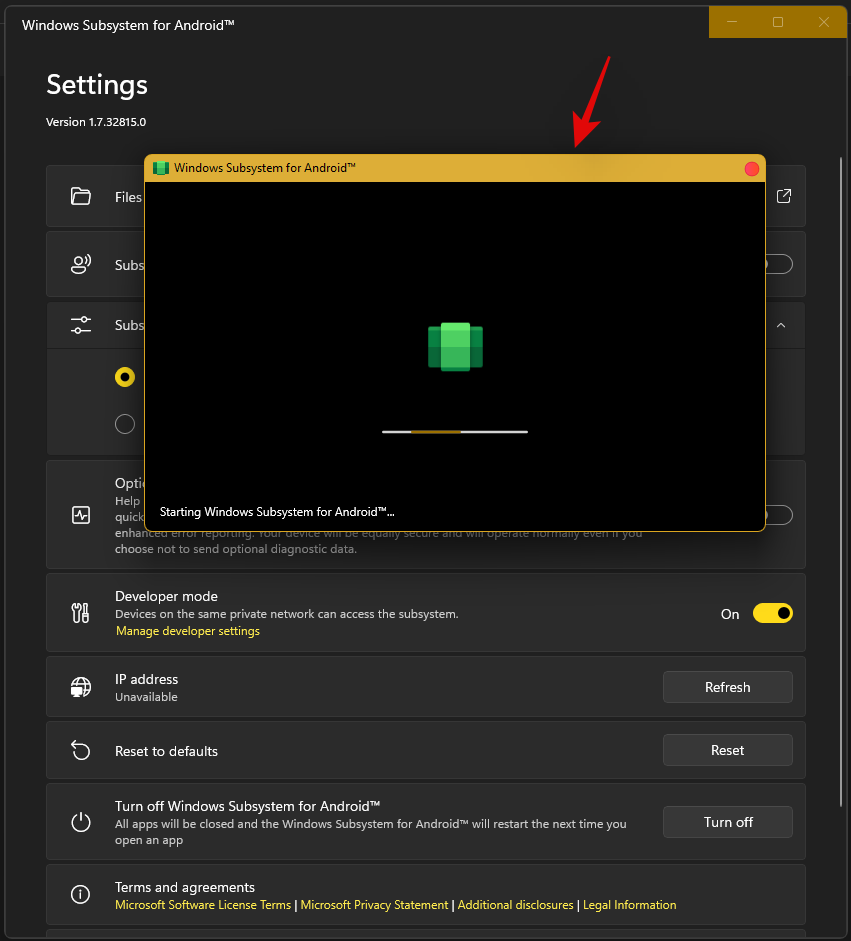
WSA установлена, запускаем ее из меню пуск. Включаем Developer Mode, и запускаем подсистему значком рядом с пунктом Files. Авторизовываться в Google пока рано! еще немного терпения
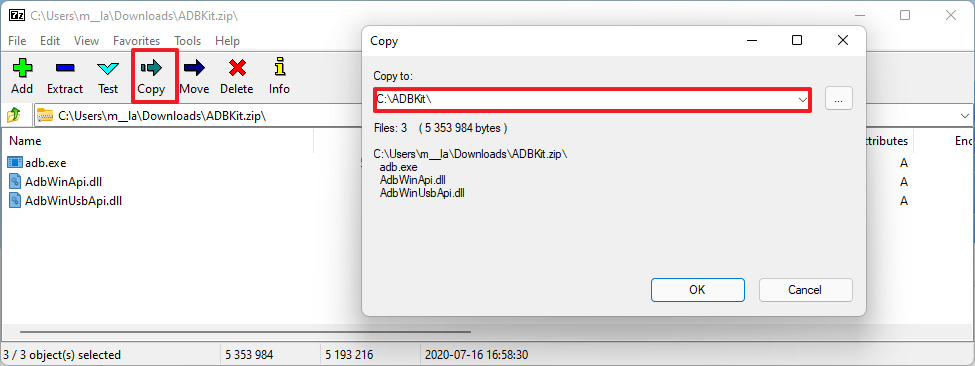
Скачиваем ADBKit и разархивируем его в папку C:\ADBKit
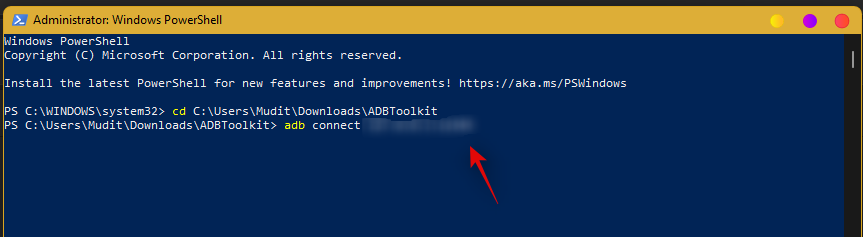
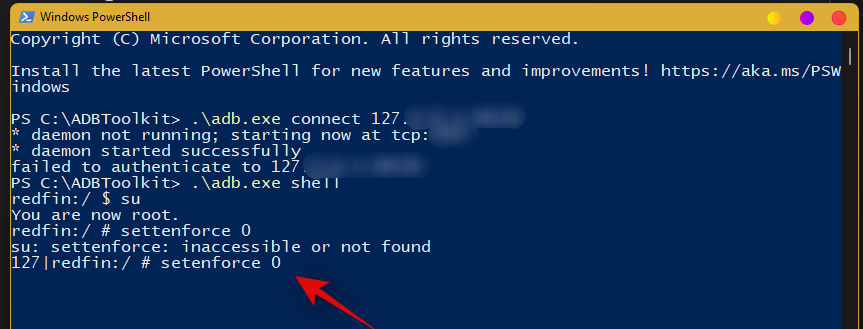
В PowerShell переходим в директорию C:\ADBKit. Далее выполняем команды
-
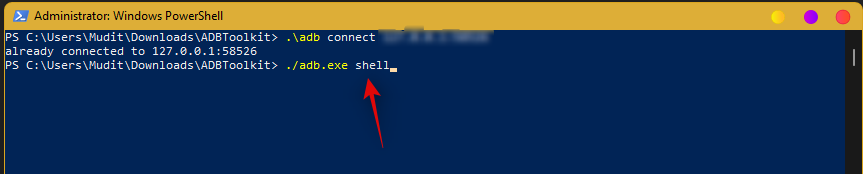
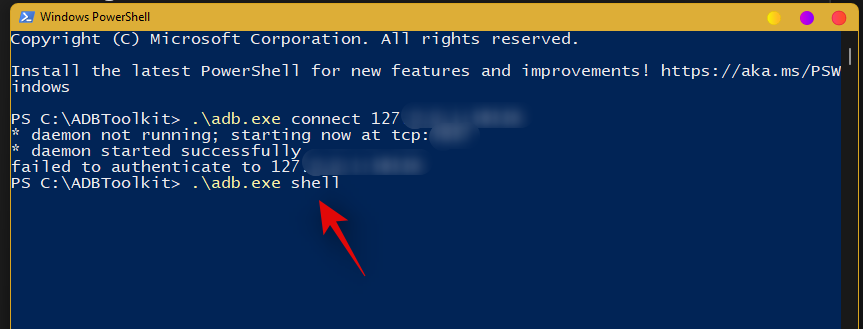
.\adb.exe connect 127.0.0.1:58526 -
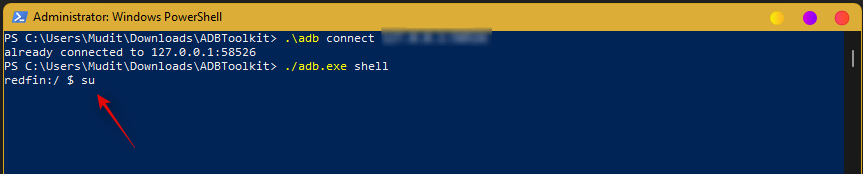
.\adb.exe shell -
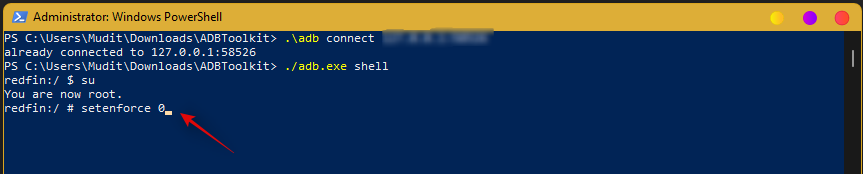
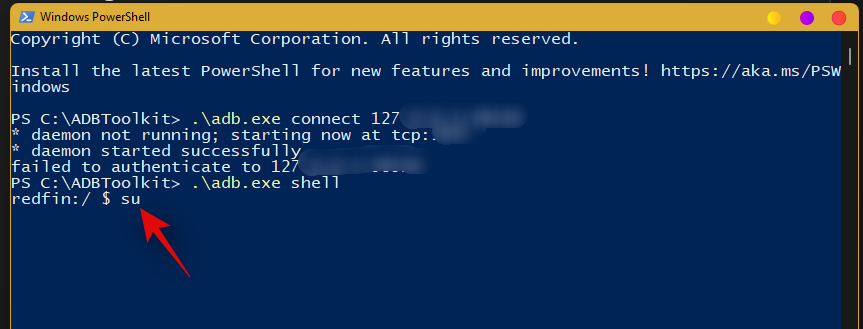
su -
setenforce 0
После этого можно авторизовываться в Google.
Осталось пару шагов.
-
Выключаем WSA, для этого нажимаем кнопку «Turn off» в настройках
-
Переходим в директорию C:\WindowsSubsystemAndroid\Tools
-
Файл kernel переименовываем в kernel_root
-
Файл kernel_bak переименовываем в kernel
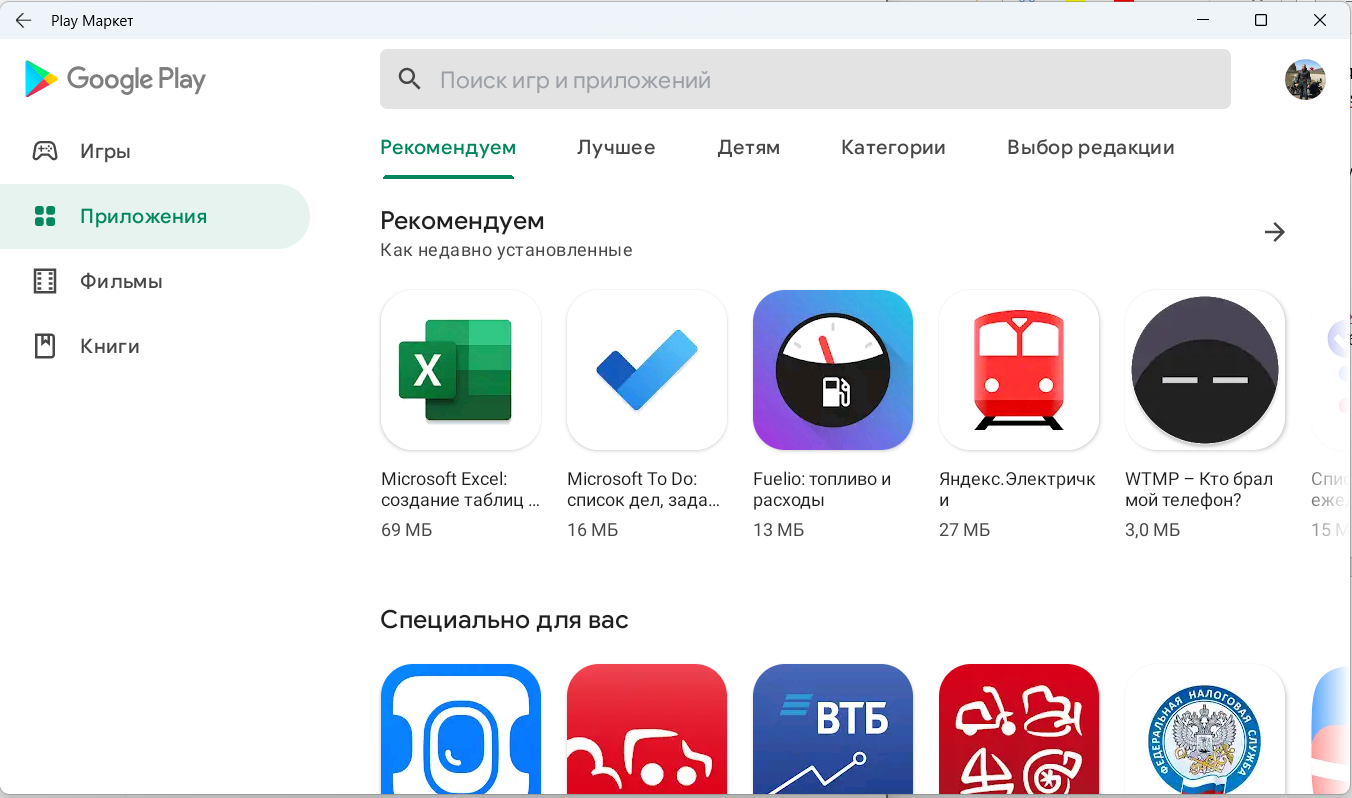
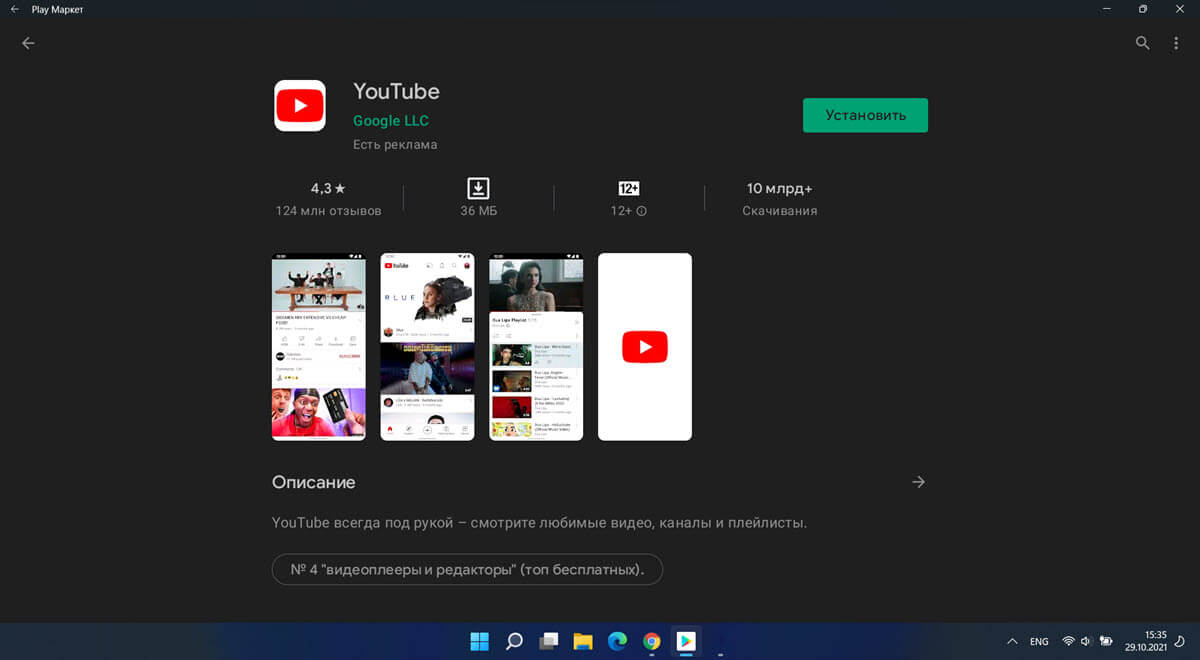
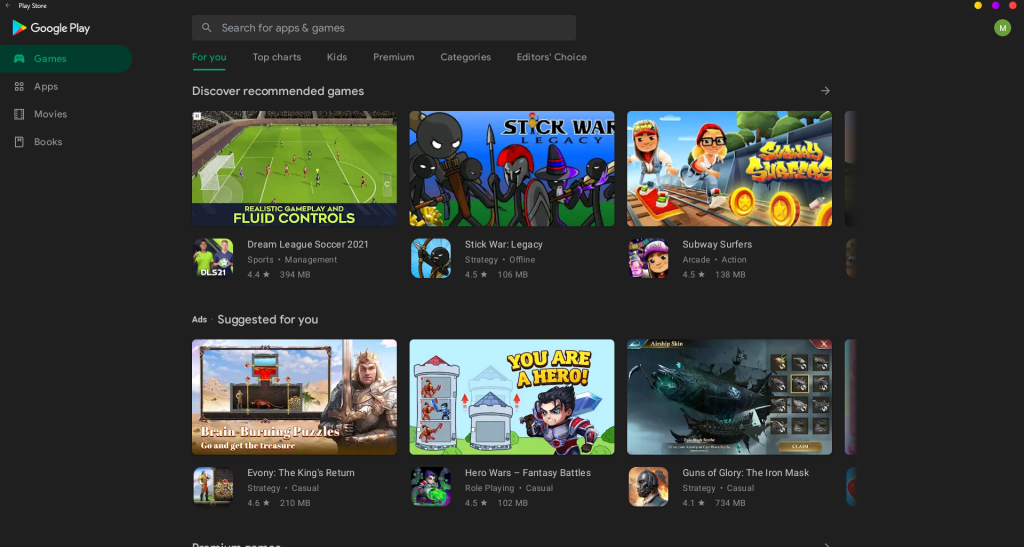
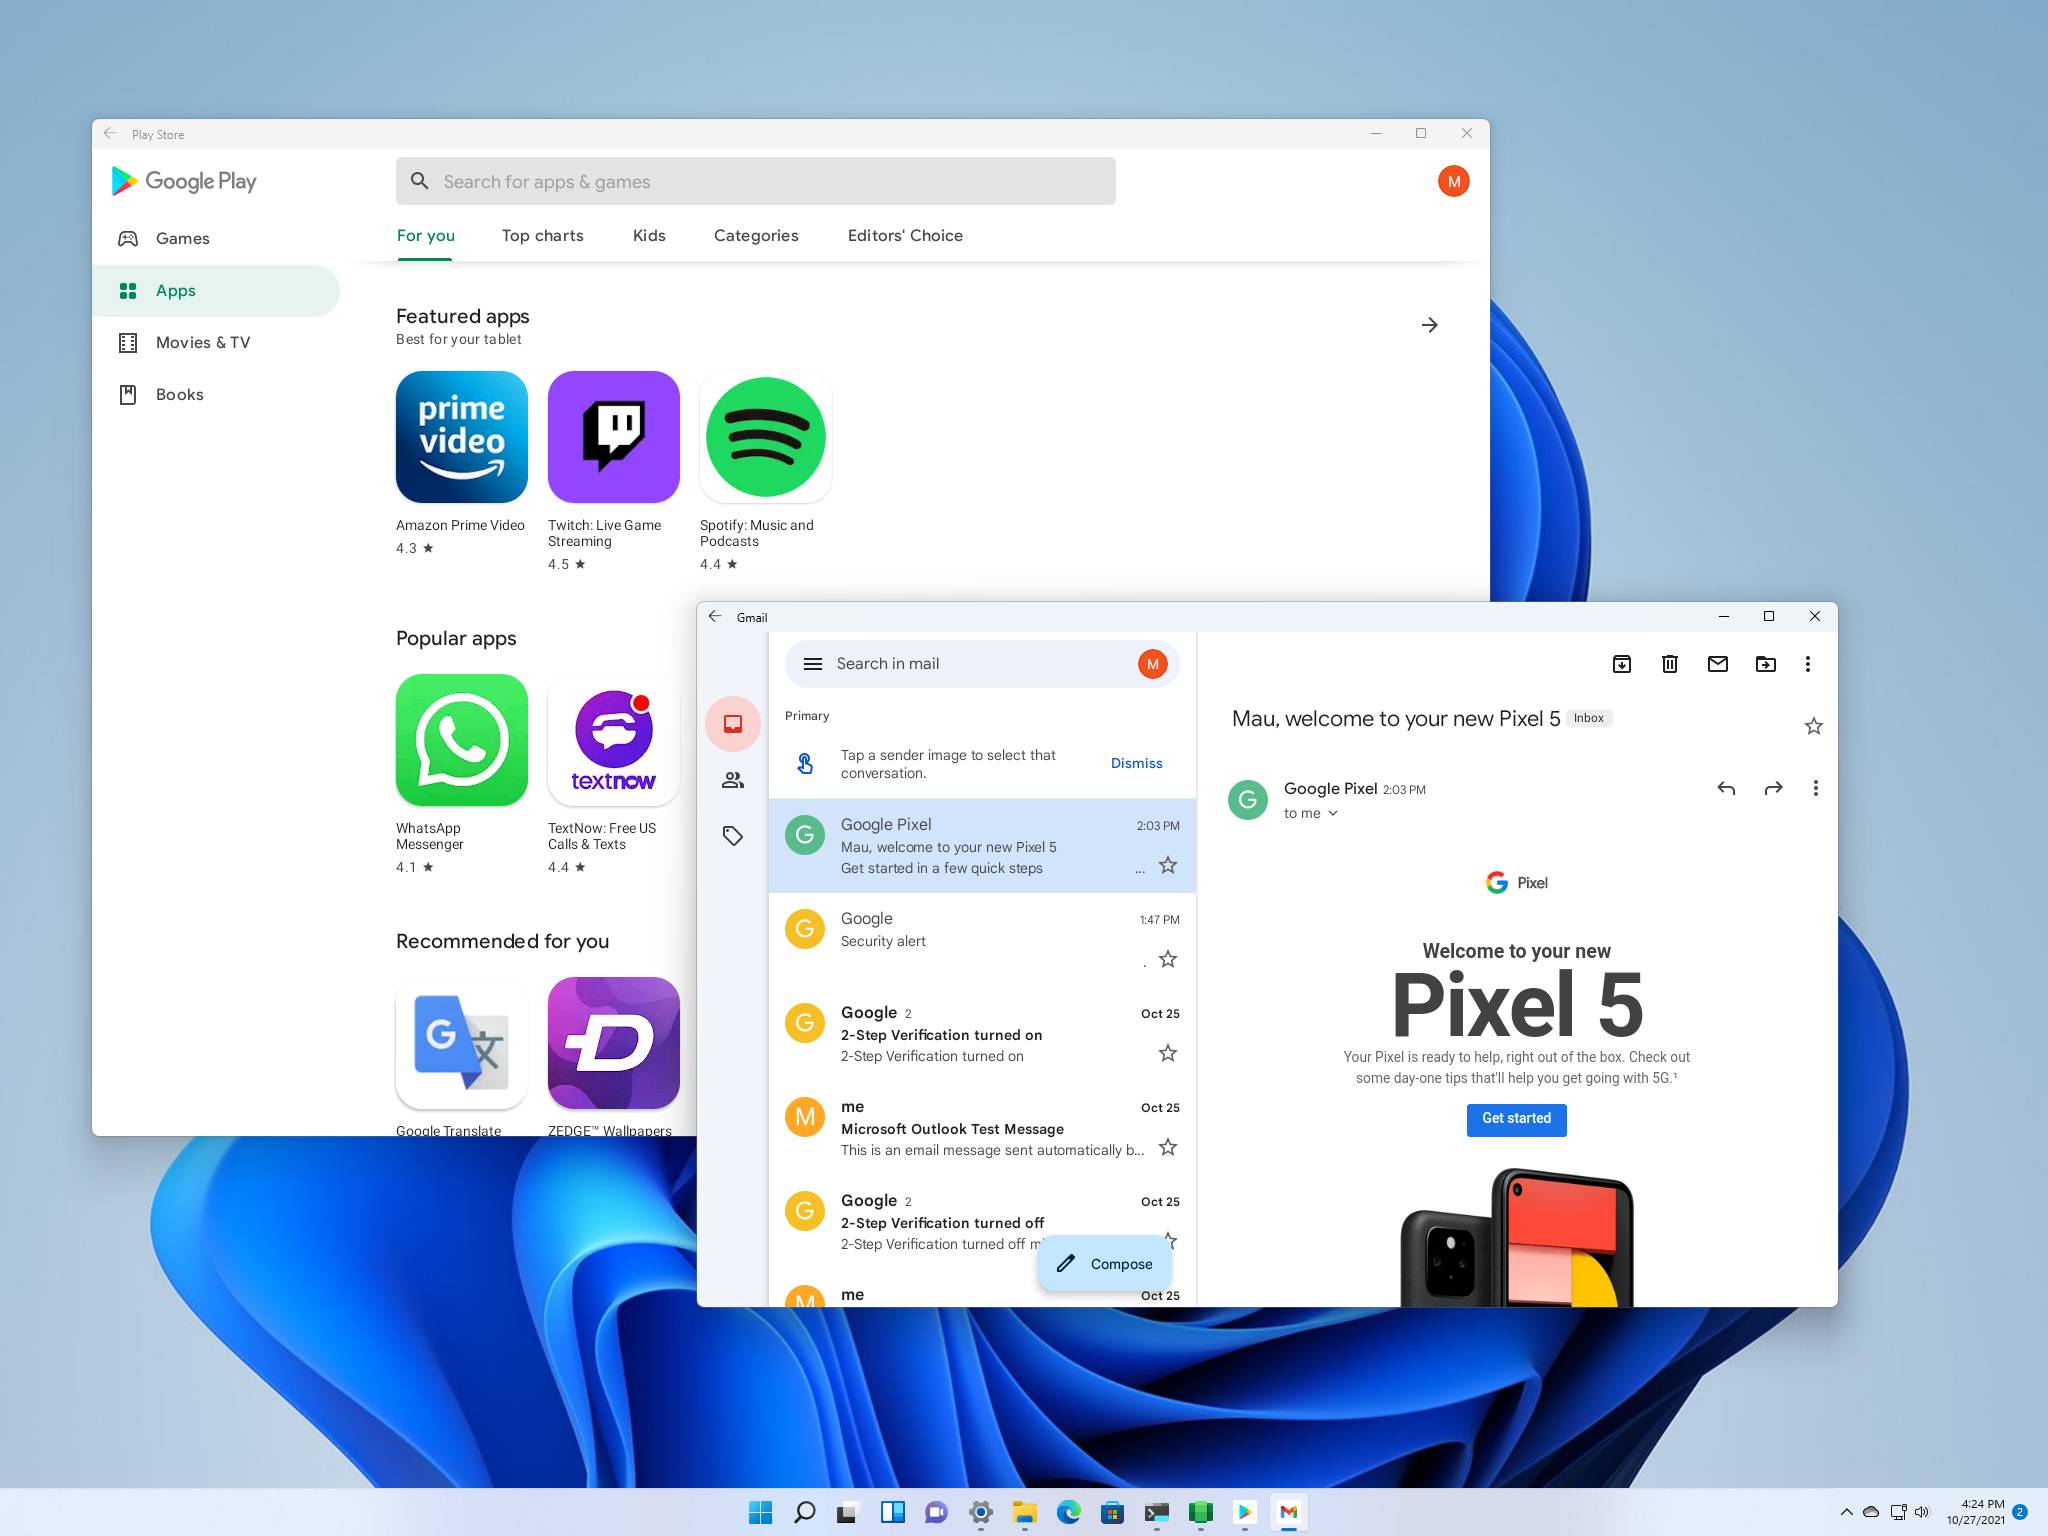
Можно пользоваться Google Play и устанавливать оттуда приложения. Полноценно оценить какие работают а какие нет — еще не успел, возможно разберу позже
Надеюсь помог тем кто хотел это опробовать)
P.S устройство определяется как Google Pixel 5

Если эта публикация вас вдохновила и вы хотите поддержать автора — не стесняйтесь нажать на кнопку
Finally, Microsoft has released the Windows subsystem for Android with Amazon App Store support. Yes, you can install Amazon Appstore on Windows 11 and Sideload Android Apps. But, now you don’t have to do that so. Because now you can install Google Play Store on Windows 11 using Android Subsystem. Even, you will be able to sign in to Play Store without any errors. So no more need to sideload apps by running commands. You can directly install any App from Google Play Store.
Yes, for now, you might not able to play Android Games like PUBG/BGMI, because of keymapping required. But hopefully soon, we will find out the solution for that as well. Before you start following this guide, first do uninstall any older version of the Windows subsystem for Android. You can uninstall by using Windows search. Also, if you haven’t installed the Android subsystem yet, then first complete the following requirements.
Install Google Play Store on Windows 11
Prerequisites.
- Latest Version of Windows 11
- Set the region to the United States
- Enable Virtualization in BIOS.
- Enable Virtual Machine Platform.
Step 1: Install the Latest Version of Windows 11.
The Amazon Appstore is available for the latest version of Windows 11 22H2. So make sure you’re using the latest version of Windows 11.
- Press
Windows + IKeyboard Shortcut to open Settings App.
- From the left pane, click on Windows Update.
- Click on “Check for updates”.
- That’s it, Windows 11 will now check for any required updates. And, it will install it for you.
Step 2: Set the region to the United States. (Optional)
As I mentioned earlier, the preview is only available for devices based in the United States. So, you have to first change your region. Though, if you’re already from the United States, then you can skip this part.
- Press
Windows + Ikey to open the Settings App. Now, from the left pane, click on “Time & language”.
- After that, click on “Language & Region”.
- Now select the United States in “country or region”.
- Also, do change the Window display language.
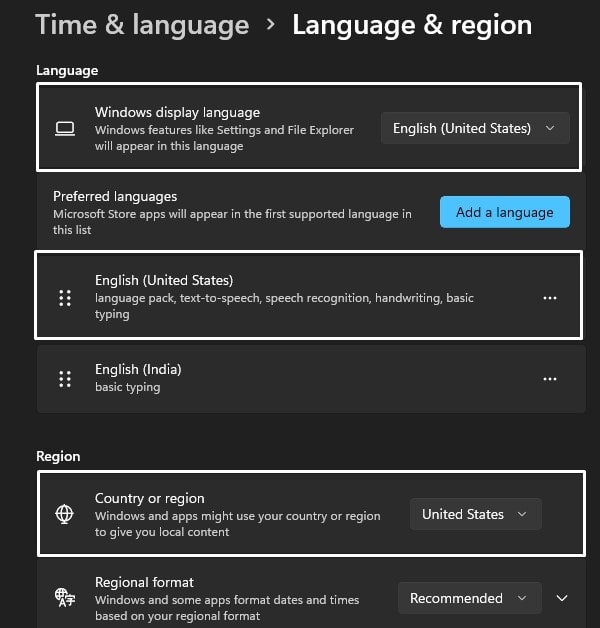
- That’s it, now restart Windows.
Step 3: Enable Virtualization in BIOS.
To run the Windows Subsystem for Android, you need to enable virtualization from BIOS settings. Every motherboard’s BIOS settings are different. It is not possible to mention every manufacturer’s motherboard. So do check your computer/motherboard manufacturer to find specific steps to enable Virtualization. I am using Intel Processor, so I have enabled “Intel (VMX) Virtualization Technology”.

Step 4: Enable Virtual Machine Platform.
Once you enable virtualization from BIOS settings, after that, you have to enable Virtual Machine Platform.
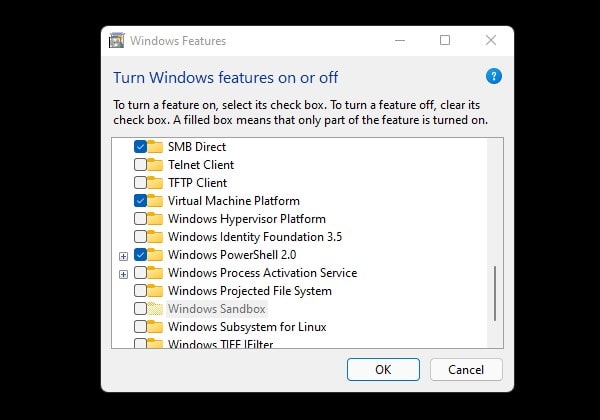
- Search for “Turn Windows features on or off” in Windows 11. And, click on open from the top search result.
- Windows features window will now get Open, scroll, and do select “Virtual Machine Platform”.
- And, click on ok.
- Once the Virtual Machine Platform gets installed, you have to restart Windows to Apply changes.
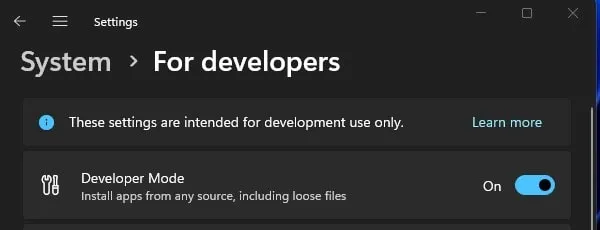
Step 5: Enable Windows 11 Developer Mode.
As of now Windows Subsystem for Android with Google Play Store support is in development mode. So to sideload it we have to enable developer mode.
- Press Windows + I keyboard Shortcut to open Settings App.
- Click on System from left-pane.
- Click on “For developers”.
- Now, from here, do enable developer mode.
Download WSA Gapps Package
Now, do download latest WSA build from the following GitHub link. You will find “Windows Subsystem for Android” for the arm64 and x64. If you’re unaware with your system type. Then, follow these steps to check.
- Open Settings App.
- Click on system.
- Scroll down and click on About.
- You will now find your System type.
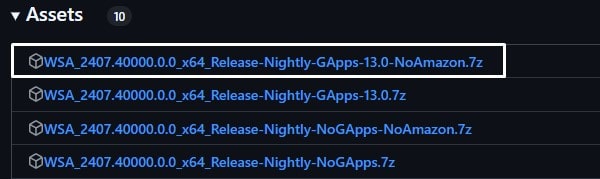
If your system type is x64, then scroll down and you will find WSA for Windows 11 x64. Open the asset section and download the WSA package with Gapps and NoAmazon.
Extract WSA Package
- First, make sure 7-Zip is installed in your system. If not do install it, it’s free.
- Right-click on downloaded WSA zip file. Click on Show More options.
- Now, click on 7-Zip > Extract to WSA.
(Alternatively you can click on Extract All > Extract)
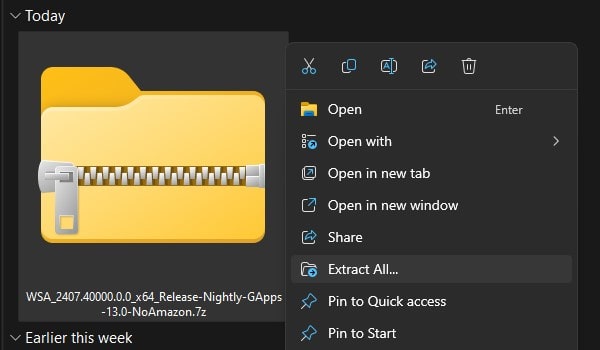
- That’s it, 7-Zip will extract the Android Subsystem package.
- Do open extracted folder, you will find another WSA folder inside it.
- Do rename folder name to “WindowsSubsystemAndroid” or “WSA”.
Install Windows Subsystem for Android with Play Store.
- Open WindowsSubsystemAndroid folder, and do Right-Click on Install file and then click on “Run with PowerShell”.
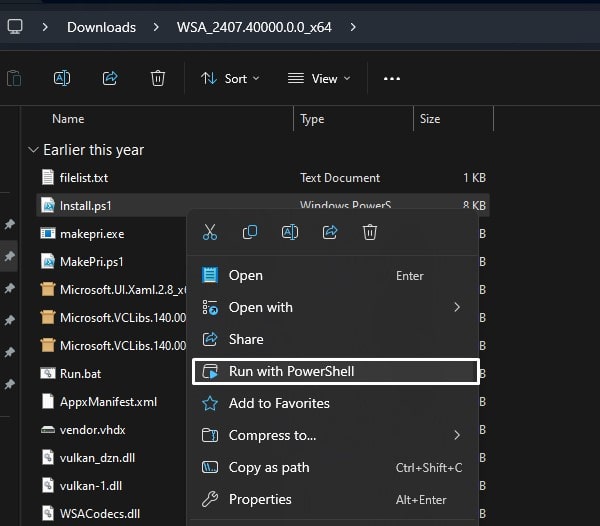
- Security Warning might appear, click on Open. UAC window will now appear, click on Yes.
- That’s it, within a few seconds through Windows PowerShell Windows subsystem for Android with Play Store gets installed.
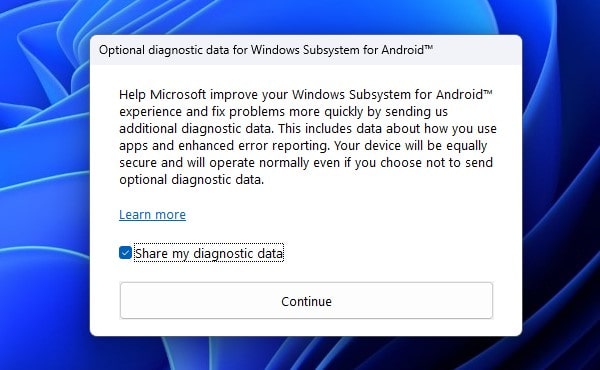
- Optional Diagnostic data for Windows Subsystem for Android window will appear. Click on Continue.
- That’s it, Play Store window with starting windows subsystem for Android will appear. And, Play will get open within few seconds.
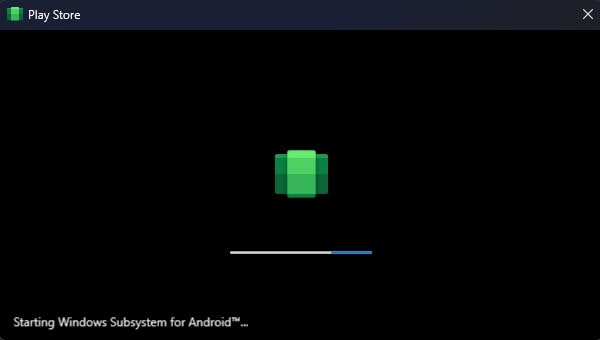
- However, if Play Store doesn’t get open. Then, use Windows Search, and do search and open “Windows Subsystem for Android”.
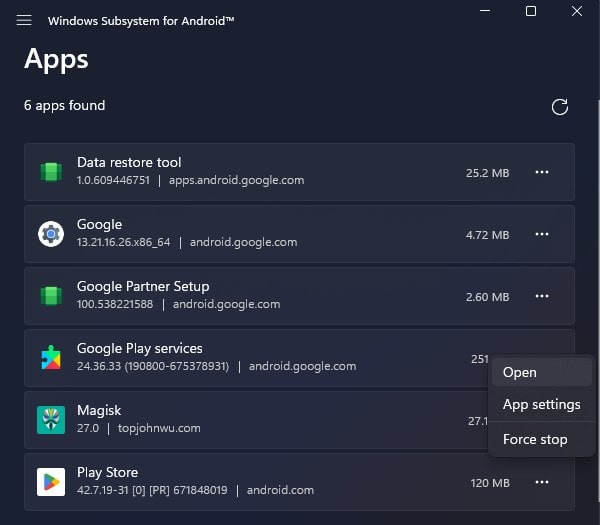
- Click on Apps from left-pane. And, you will find Play Store App in Apps list. Click on “…” icon and then click on Open. (Yes, you can use Windows Search and directly open Play Store.)
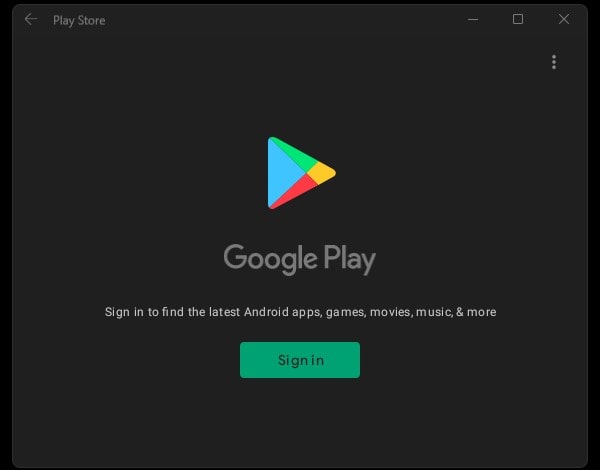
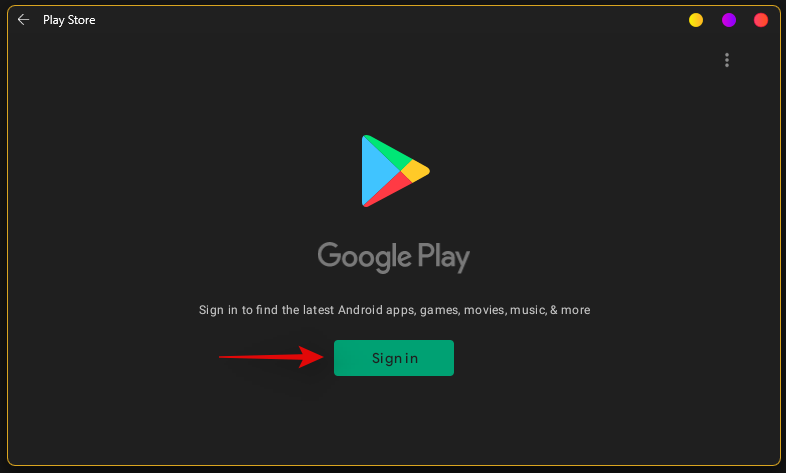
- Once, Play Store gets open, Click on Sign In and login using your Google Account.
- Now, you can install any Android app on Windows 11 PC.
- So, that’s how you can Install Google Play Store on Windows 11 using WSA.
В Windows 11 с помощью подсистемы Windows для Android (WSA) вы можете установить магазин Google Play Store, загружать и устанавливать любые приложения Android на свой компьютер с помощью определенных действий, которые включает в себя множество шагов.
Это был просто вопрос времени, теперь вы можете устанавливать Android приложения из Play Store в Windows 11, но не официально. Пользователь твиттера — ADeltaX, разработал процедуру, позволяющую обойти подсистему Windows для Android и установить приложение Google Play Store, что дает вам доступ в Windows 11 ко всему каталогу приложений для Android.
Пока, неясно, как это повлияет на будущие обновления. Другими словами, данный способ вполне может быть только временным решением, поскольку до сих пор не понятно, что произойдет после того, как WSA получит обновление через Магазин Microsoft. Вероятно, любому, кто использует этот метод, придется повторить весь процесс настройки. Конечно, если вы не отключите автоматическое обновление приложений в параметрах приложения Магазин Microsoft.
Этот способ установки магазина Google Play Store в Windows 11 является сокращением инструкций ADeltaX, но, если есть желание, вы можете следовать полной инструкции из репозитория Github.
Следуйте шагам ниже, чтобы установить магазин приложений Google и иметь возможность устанавливать приложения для Android в Windows 11.
Подготовка компьютера с Windows 11 для установки WSA
Прежде чем перейти к загрузке и установке, необходимо убедиться, что на вашем компьютере включены дополнительные функции Hyper-V и Virtual Machine Platform.
Шаг 1: Для этого, нажмите сочетание клавиш Win R, чтобы открыть диалоговое окно «Выполнить».
Шаг 2: Введите или скопируйте и вставьте:
OptionalFeatures
Шаг 3: Здесь в окне «Компоненты Windows» для «Hyper-V» и «Платформа виртуальной машины» установите флажок, чтобы включить его.
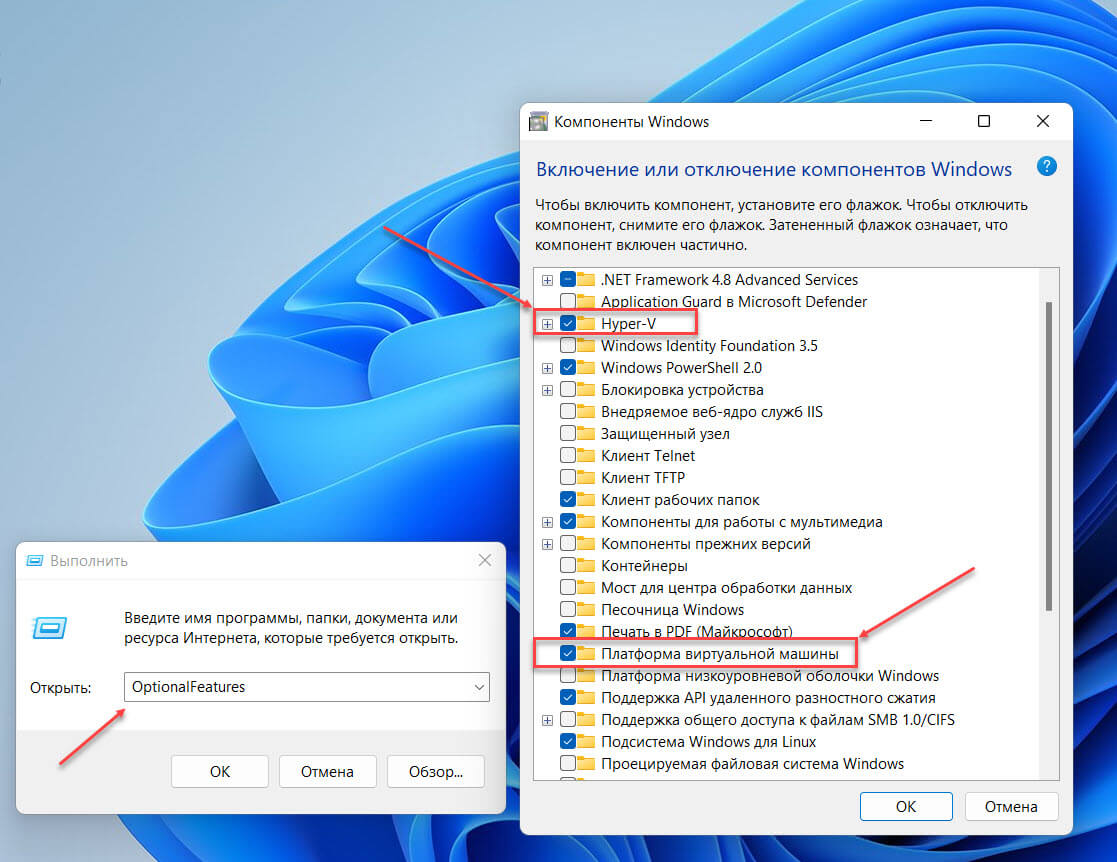
Шаг 4: Нажмите кнопку «ОК», чтобы установить эти дополнительные функции на свой компьютер с Windows.
Удалите любой ранее установленный пакет WSA
Удалите подсистему Windows для Android, если она уже установлена. Это связано с тем, что мы будем устанавливать новую подсистему Windows для Android, в которой существует интеграция Google Apps.
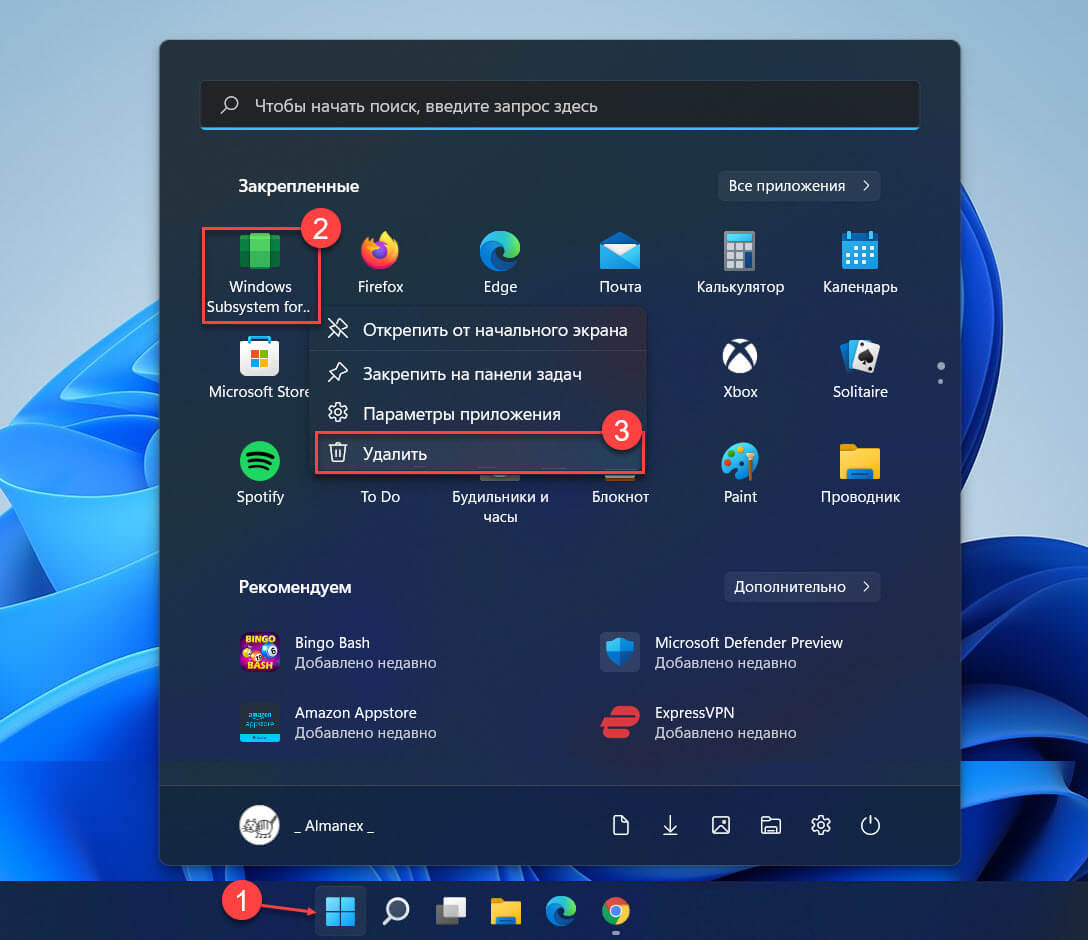
Шаг 5: Для этого, откройте меню «Пуск», найдите и кликните на подсистему «Windows Subsystem for Android» правой кнопкой мыши и выберите в контекстном меню пункт «Удалить». Затем следуйте инструкциям на экране, чтобы завершить процесс удаления.
Включите параметры разработчика в Windows 11.
Вам нужно будет включить параметры разработчика в Windows (в Windows 11, а не в WSA!).
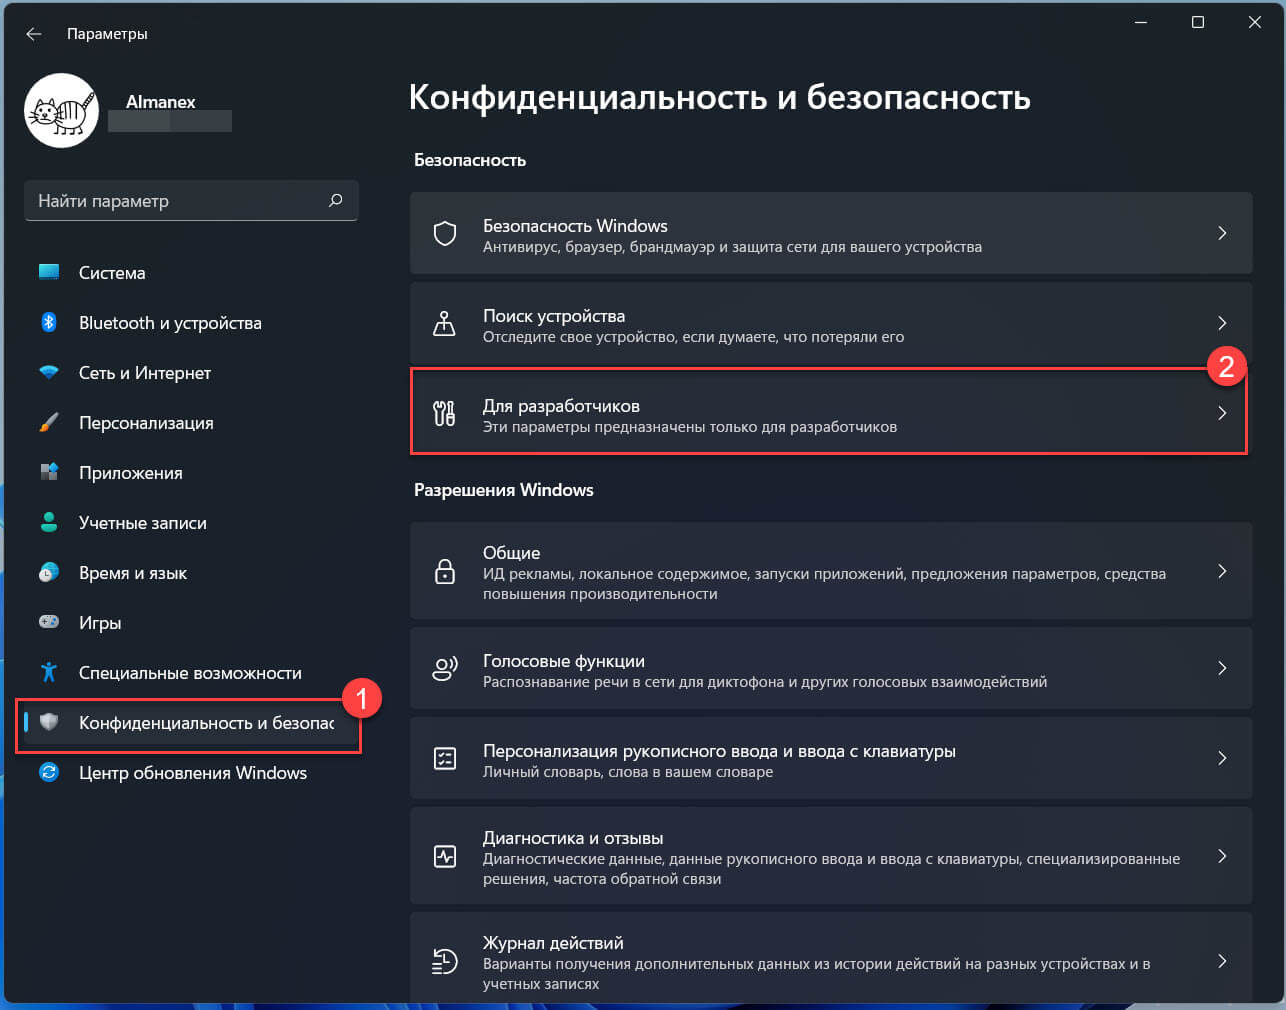
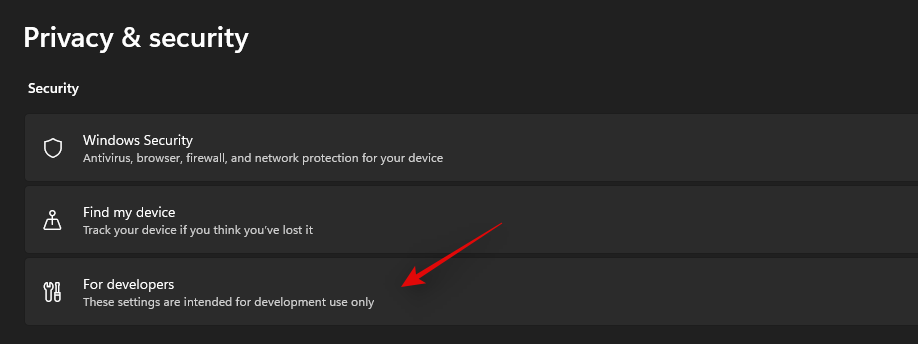
Шаг 6: Откройте параметры Windows 11, перейдите в раздел «Конфиденциальность и безопасность» → «Для разработчиков».
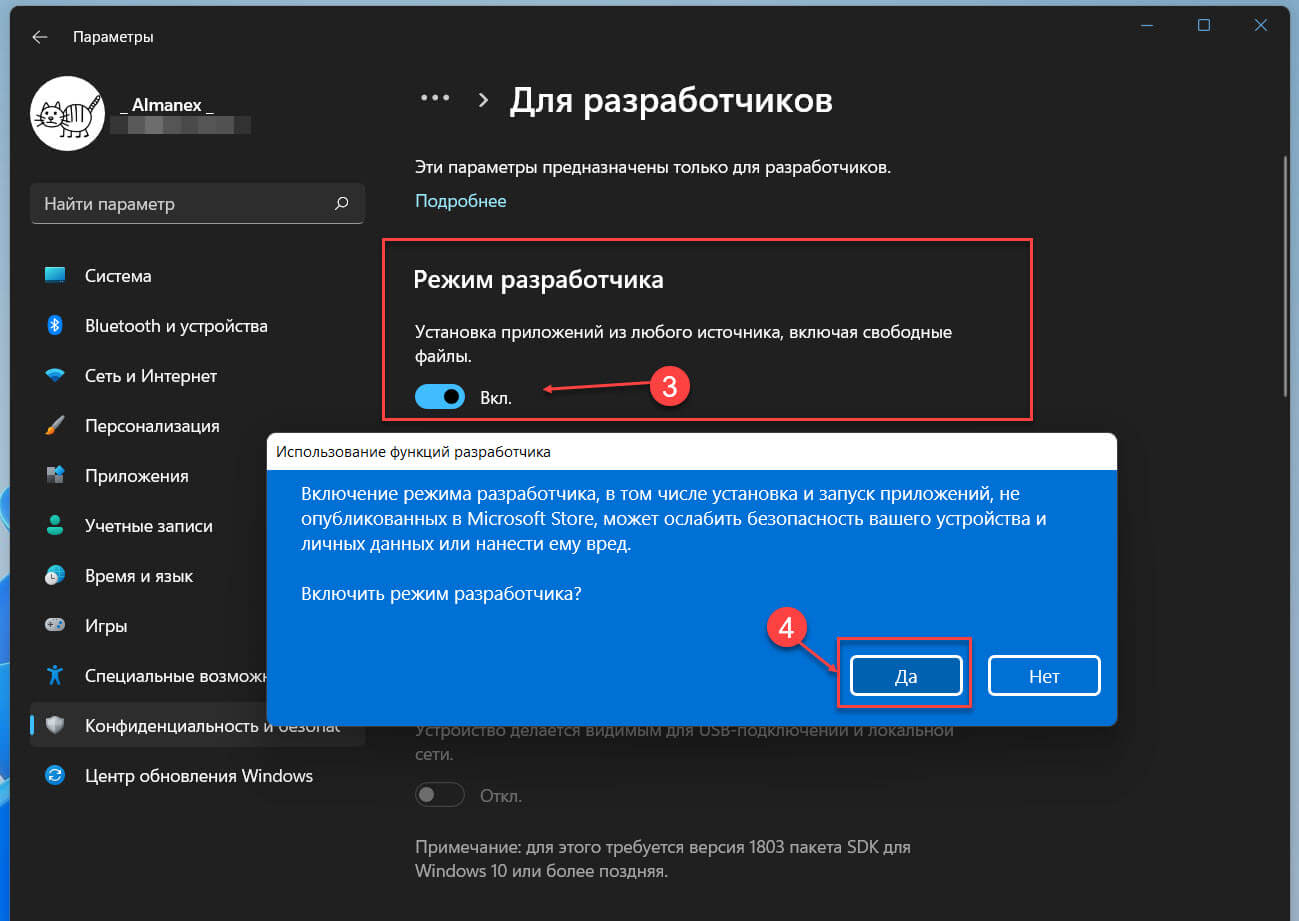
Шаг 7: В разделе режим разработчика передвиньте ползунок переключателя в положение «Вкл.»
Шаг 8: В следующем всплывающем окне подтвердите свои действия нажав кнопку «Да».
Загрузите WSA + GApps пакет MSIX:
Выберите для загрузки файл в зависимости от вашего устройства.
Шаг 9: Это модифицированная версия – «Windows Subsystem for Android (WSA-x86 64-бит + GApps)». (Mirror | Mirror 2)
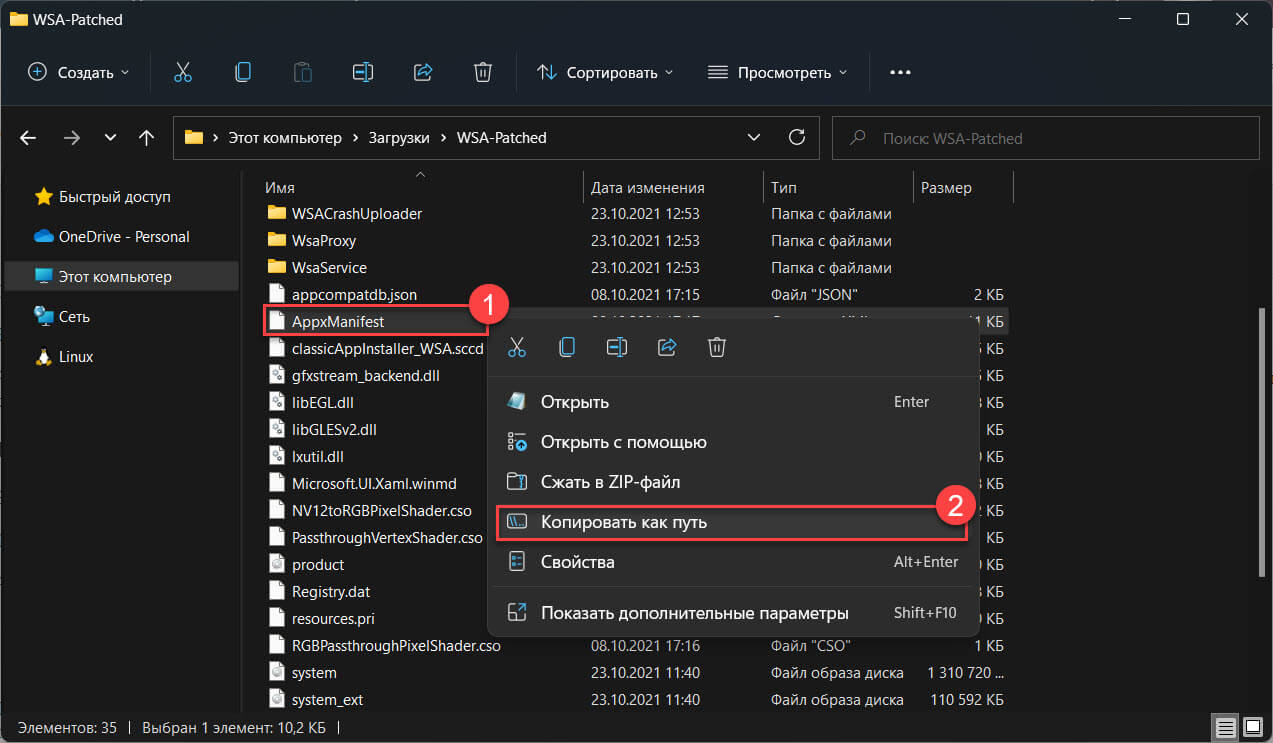
Шаг 10: Распакуйте загруженный Zip-архив в любое расположение, в дальнейшем нам потребуется указать путь к файлу AppxManifest.xml из этой папки.
Чтобы быстро получить путь к расположению файла, кликните на AppxManifest.xml правой кнопкой мыши и выберите «Копировать как путь», чтобы скопировать путь к файлу в буфер обмена ПК с Windows 11.
Зарегистрируйте пакет WSA + GApps:
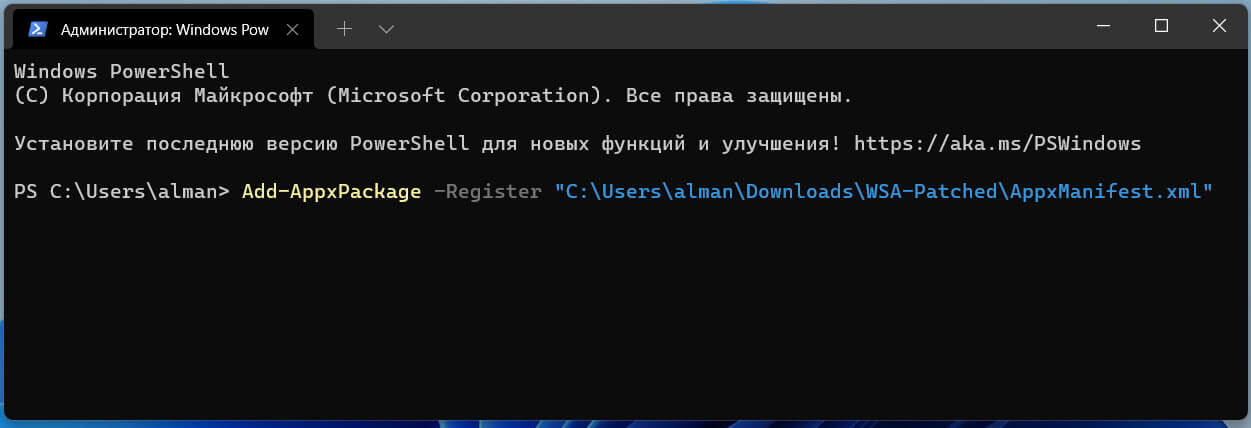
Шаг 11: Запустите Powershell от имени администратора с помощью Терминала или любым другим удобным вам способом.
Шаг 12: Измените команду Powershell, указав расположение извлеченного Zip-файла
Add-AppxPackage -Register "Путь_к_папке_с_WSA\AppxManifest.xml"
В моем случае команда выглядит так:
Add-AppxPackage -Register "C:\Users\almanex\Downloads\WSA-Patched\AppxManifest.xml"
Приложение WSA будет установлено на ваше устройство в фоновом режиме. Если вы получите сообщение об ошибке, убедитесь, что все шаги были выполнены правильно.
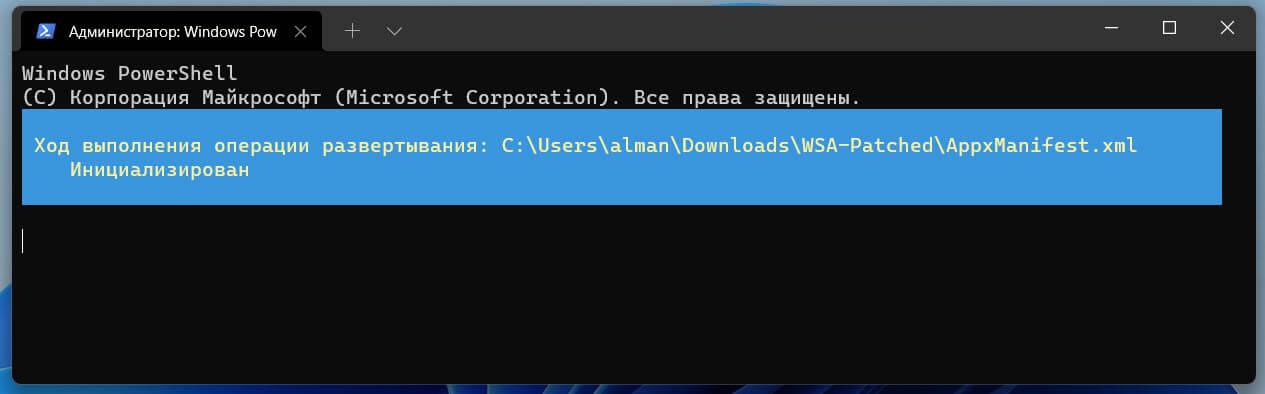
После регистрации WSA, магазин Google Play должен быть доступен в меню «Пуск».
И последнее, что нужно сделать, прежде чем вы сможете войти в свою учетную запись Google.
Загрузите ADBKit:
Шаг 13: На странице developer.android.com загрузите «SDK Platform-Tools for Windows».
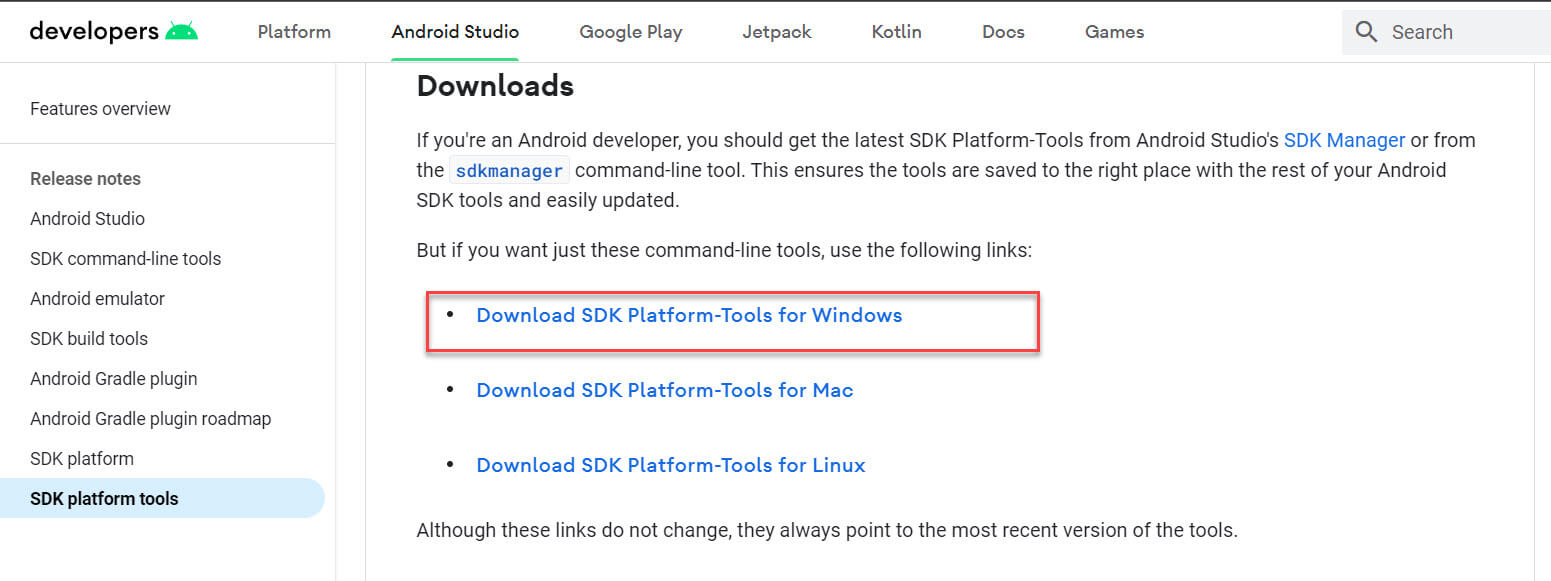
Шаг 14: Pаспакуйте zip-архив в любую папку.
Настройка WSA
Шаг 15: С помощью меню «Пуск» откройте приложение «Windows Subsystem for Android».
Шаг 16: В разделе «Режим разработчика» передвиньте ползунок переключателя в положение «Вкл.», как показано на экране ниже.
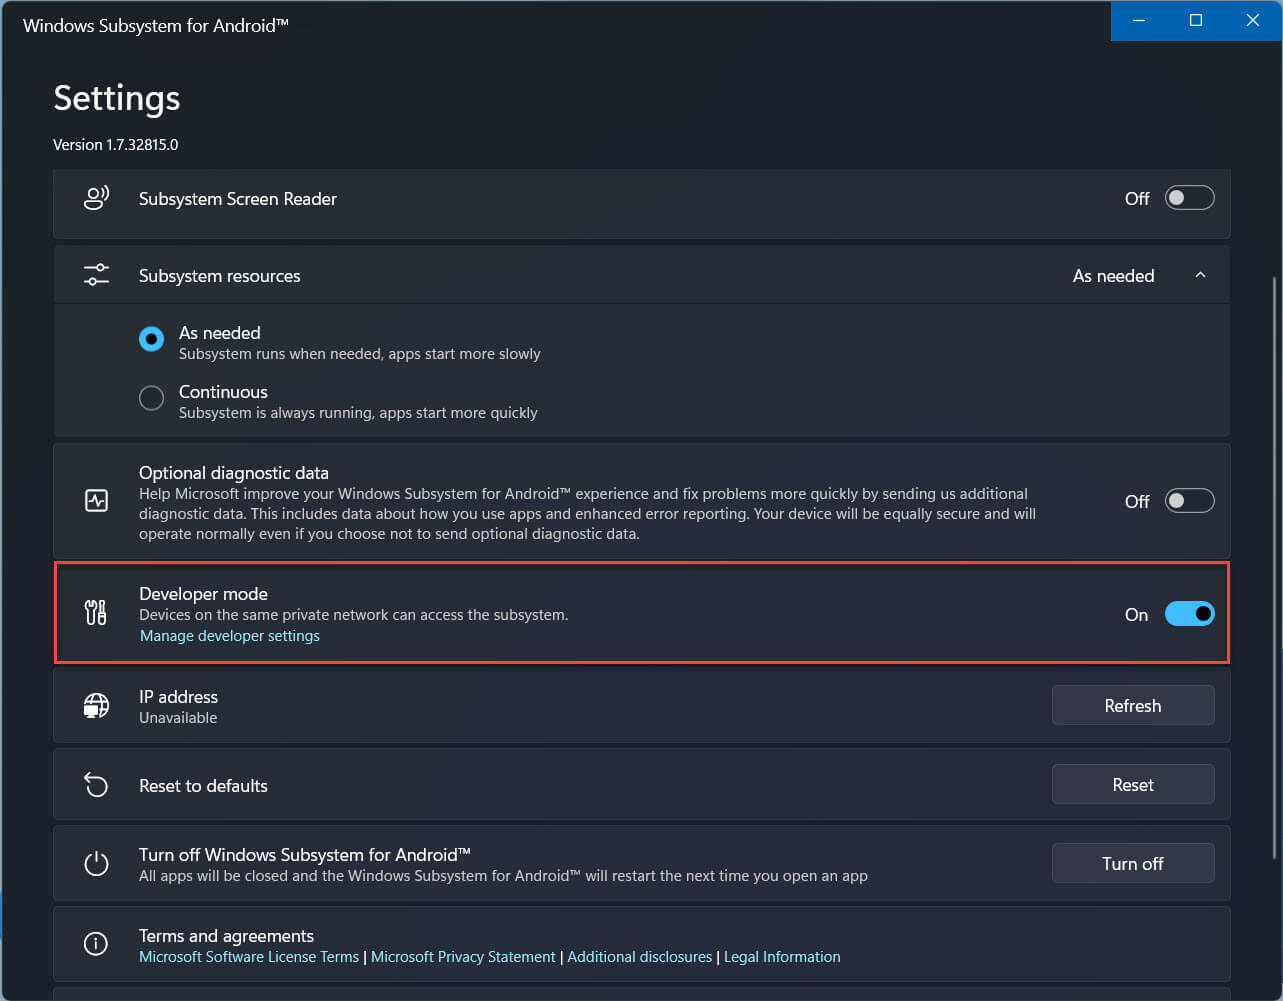
При появлении запроса брандмауэра разрешите доступ ADB.
Скопируйте IP-адрес
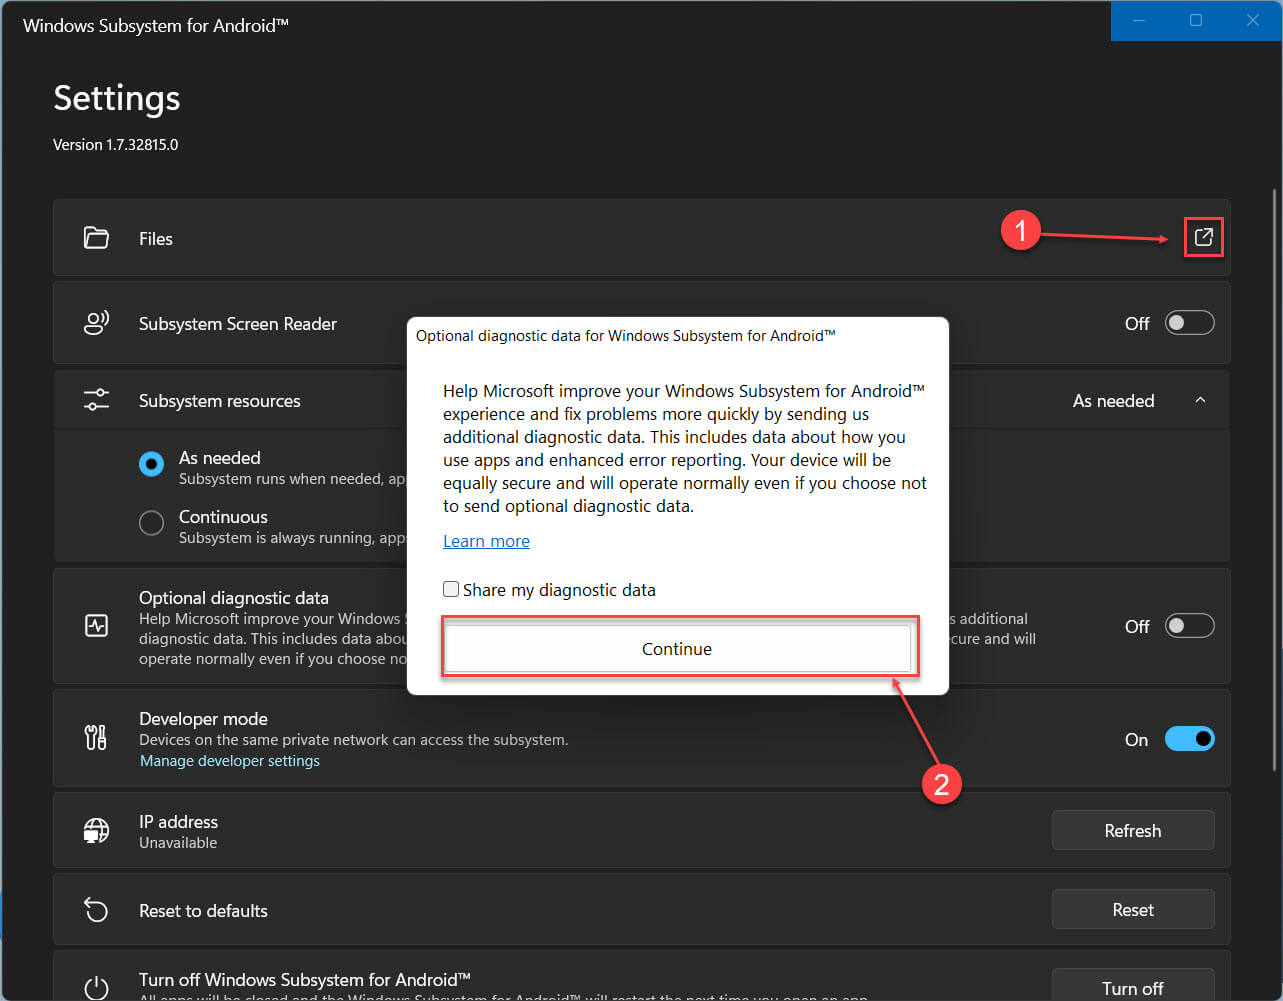
Шаг 17: Теперь в верхней части страницы параметров WSA откройте опцию «Файлы», в появившемся диалоговом окне нажмите «Продолжить».
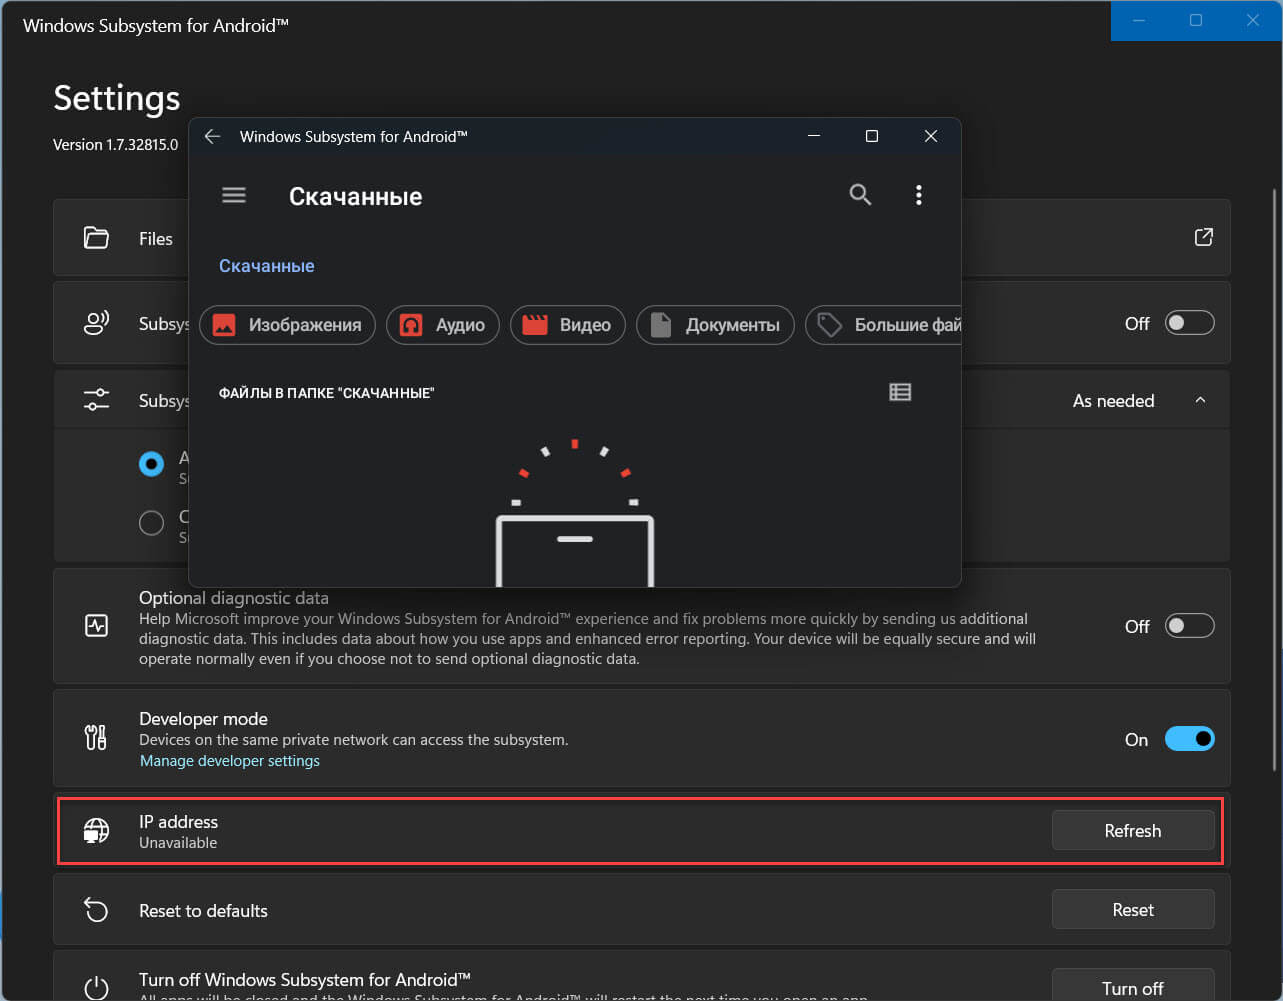
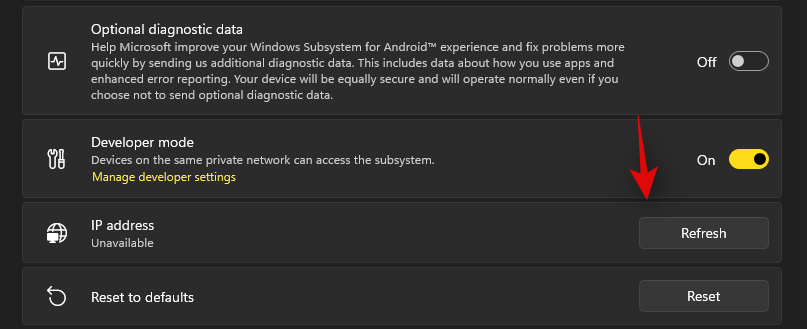
Шаг 18: Затем нажмите кнопку «Обновить» напротив опции IP-адрес.
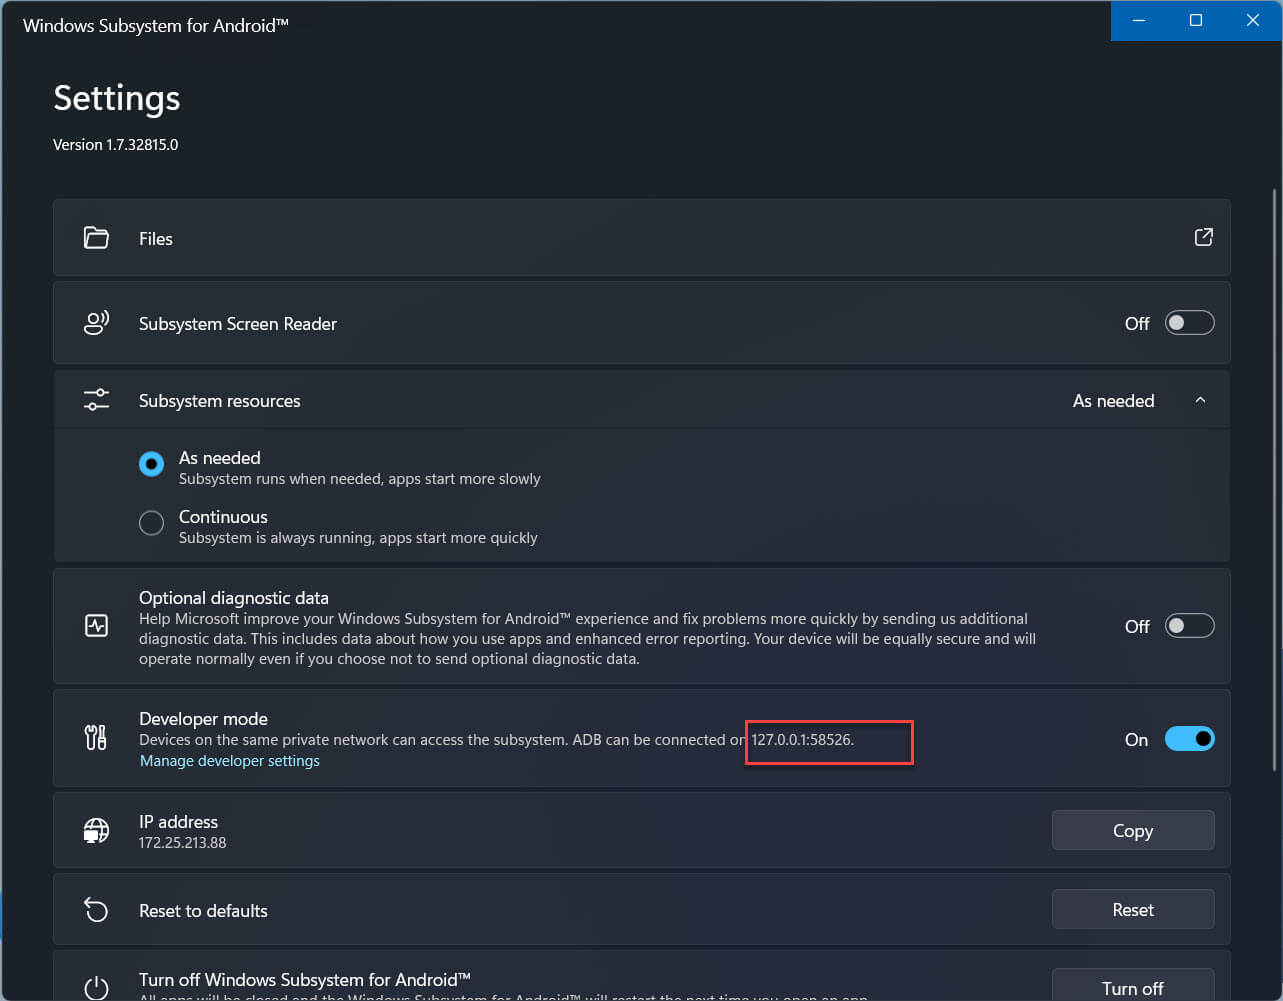
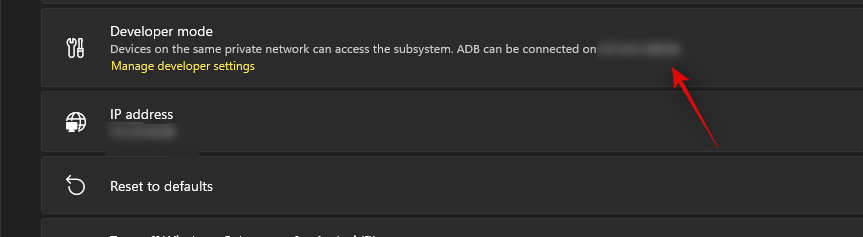
Шаг 19: Обратите внимание на адрес ADB, в разделе «Developer mode» отображается как 127.0.0.1:58526 (он должен быть таким же для вас)
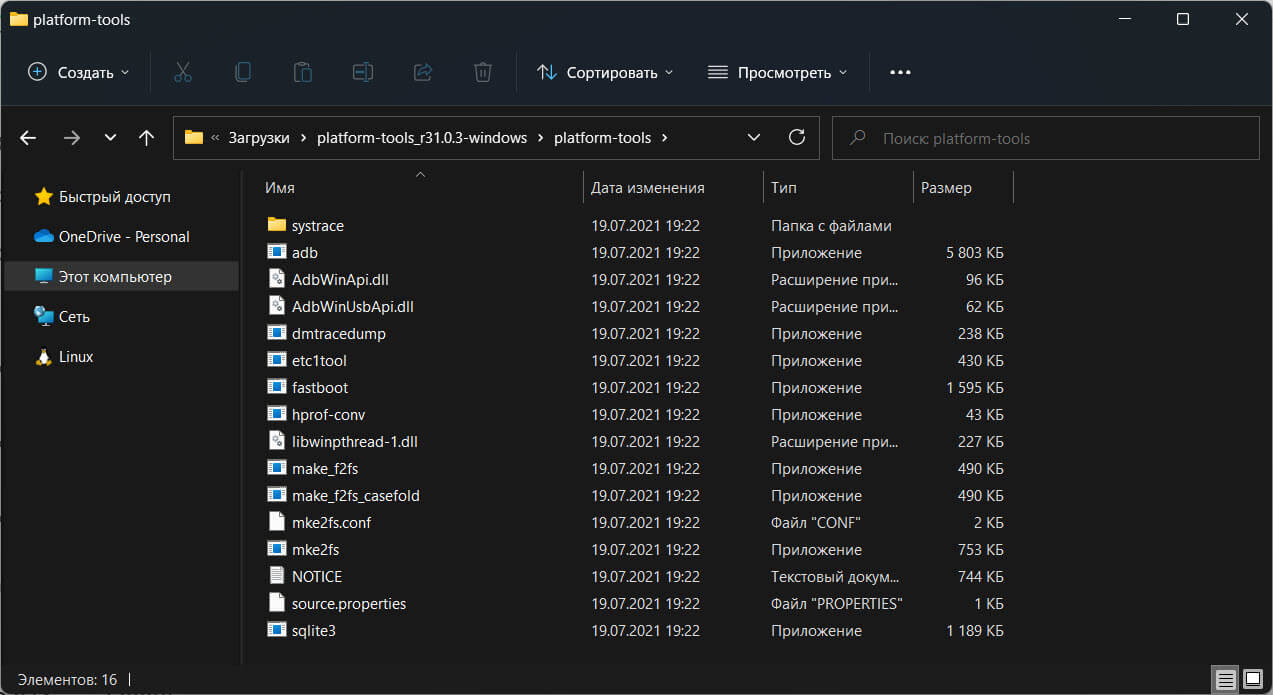
Установите соединение
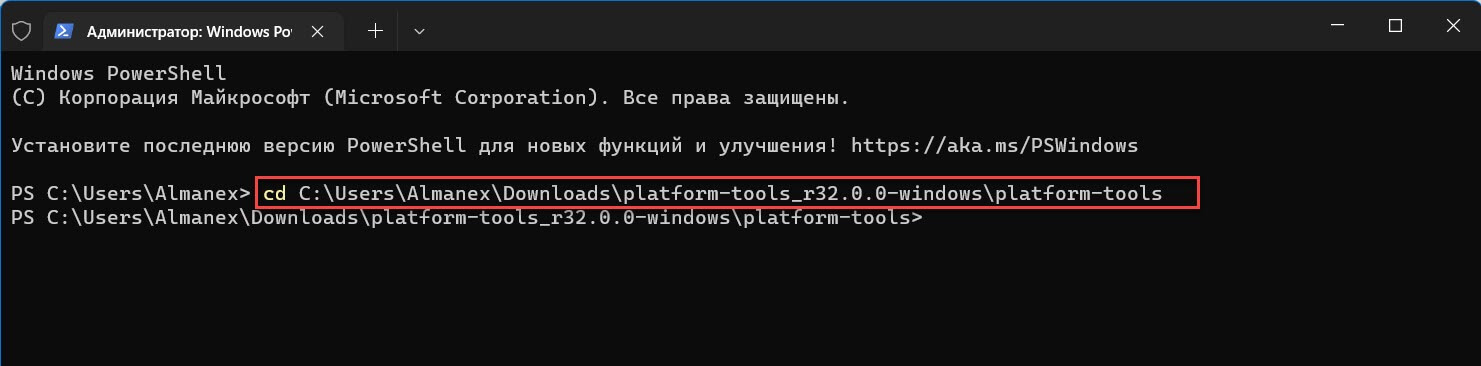
Шаг 20: Откройте Powershell от имени администратора и перейдите в папку «C:\Users\Almanex\Downloads\platform-tools_r32.0.0-windows\platform-tools» для этого можно использовать команду, предварительно заменив Имя_пользователя:
cd C:\Users\Имя_пользователя\Downloads\platform-tools_r32.0.0-windows\platform-tools
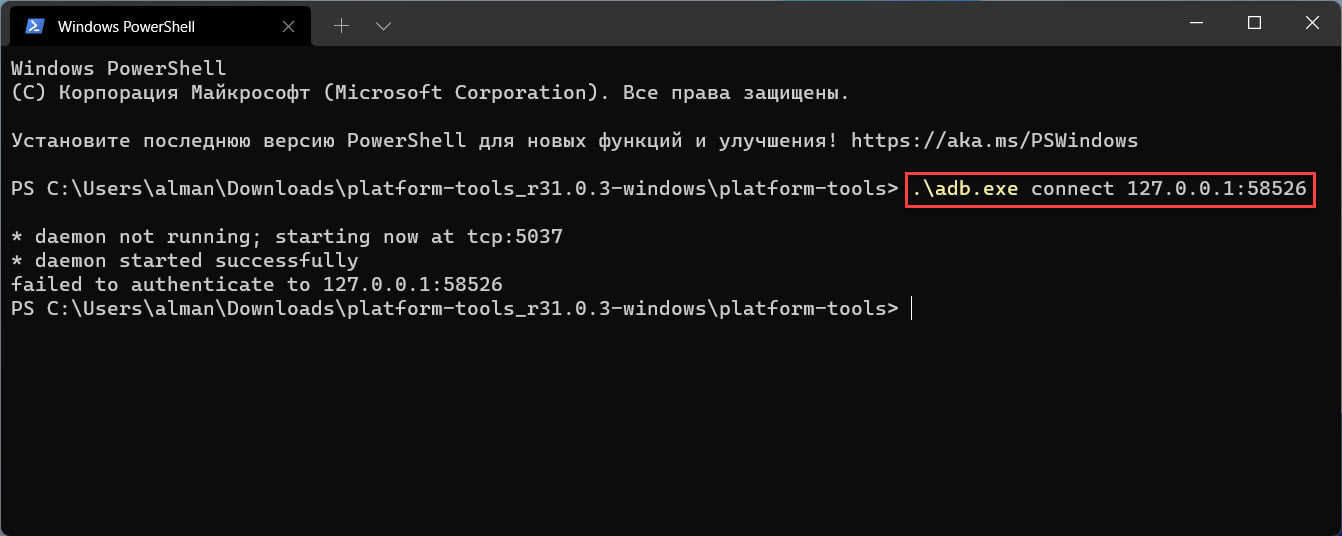
Теперь, выполните команду:
.\adb.exe connect 127.0.0.1:58526
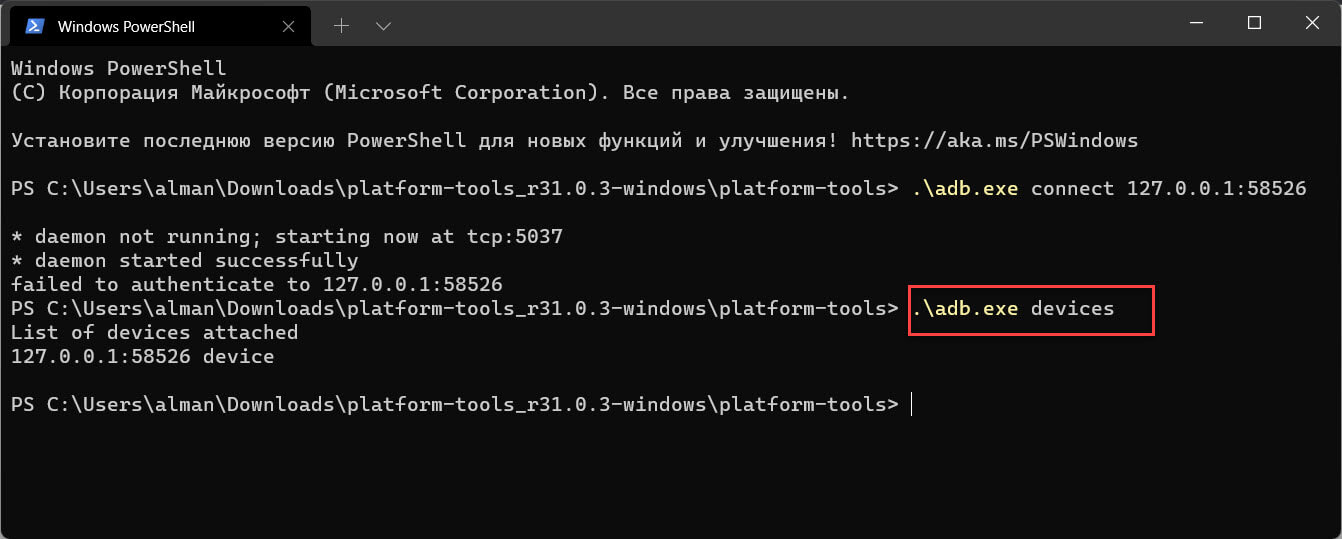
Шаг 21: Убедитесь, что adb подключен, выполнив:
.\adb.exe devices
Установите Google Play Store в Windows 11
Шаг 22: Чтобы иметь возможность авторизироваться в магазине Google Play, выполните по очереди три команды:
.\adb.exe shell
su
setenforce 0
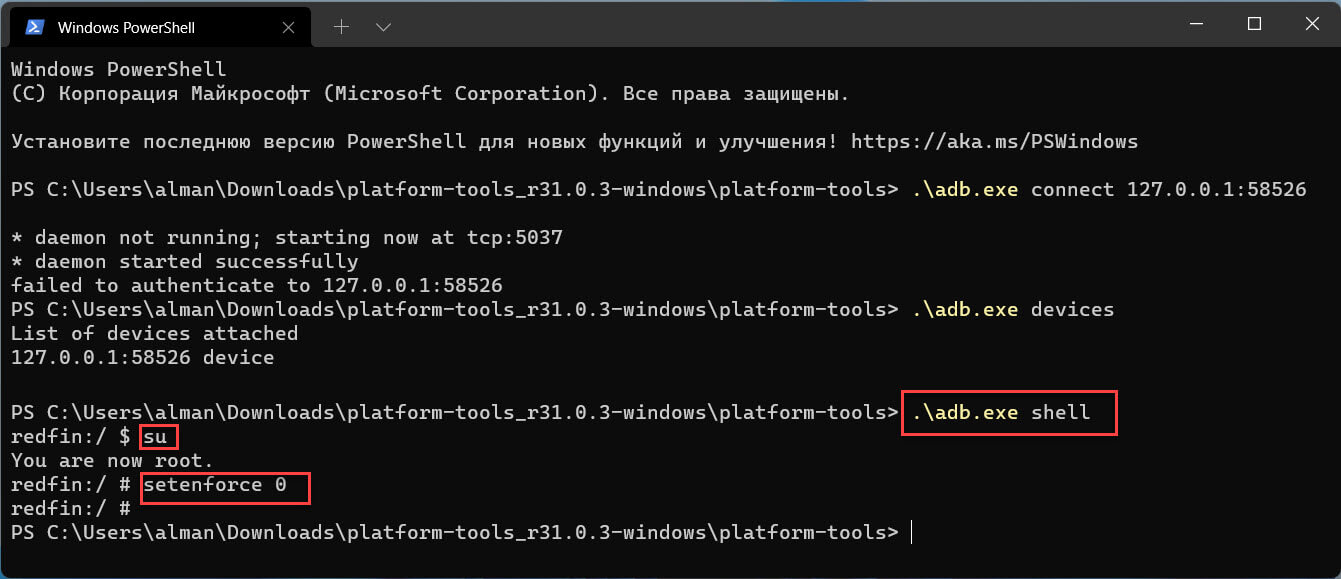
Если вы все сделали правильно, вы сможете войти в Google Play Store со своей учетной записью Google.
Теперь вы можете пользоваться полным набором приложений Google Play на наших компьютерах с Windows 11.
Большое спасибо ADeltaX, благодаря которому это стало возможным!
На этом мы завершаем руководство о том, как установить Google Play Store на ПК с Windows 11 с помощью подсистемы Windows для Android. Play Маркет, вероятно, лучший вариант, потому что он может похвастаться большим каталогом приложений и обеспечивает безопасную и надежную экосистему.
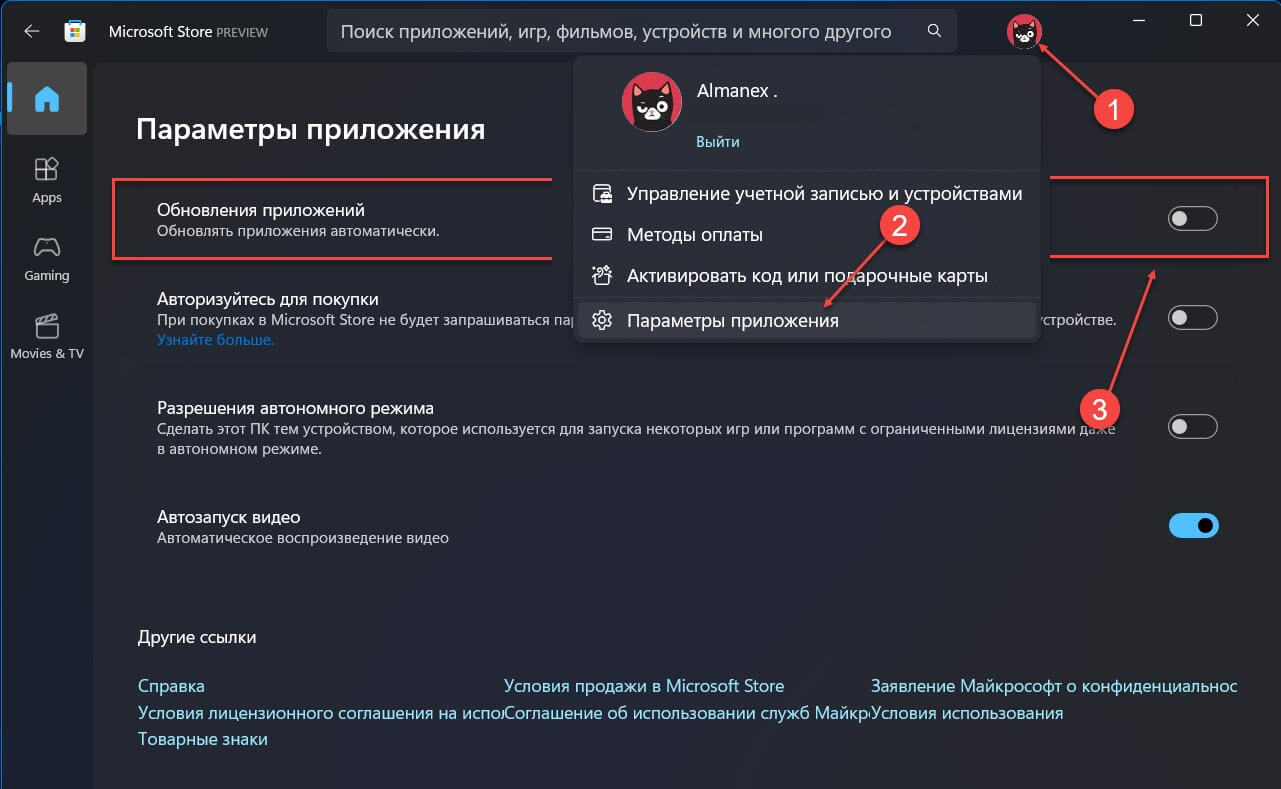
Если вы хотите, чтобы будущие обновления для подсистемы Windows для Android не сбросили выполненный вами процесс, вы можете отключить автоматические обновления для приложений в Магазине Microsoft: перейдите в меню «Профиль» → «Параметры приложения» и отключите автоматическое «Обновление приложений». Если вы хотите обновить другие приложения, вам необходимо обновить их вручную.
Вопросы.
- Могу ли я использовать Google Play Store для установки приложений в Windows 11?
Да, Google Play Store полностью работает в Windows 11. Спасибо пользователю Twitter ADeltaX.
- Нужен ли мне канал Windows Beta для запуска приложений Android в Windows 11?
Официально да. Но вы можете установить модифицированный пакет Msixbundle, чтобы он работал в любой сборке Windows 11.
- Как удалить приложение Android из Windows 11?
Чтобы удалить приложение Android из Windows 11, откройте меню «Пуск» найдите приложение, которое хотите удалить. кликните приложение правой кнопкой мыши и выберите «Удалить».
When Windows 11 announced the ability to install and use Android apps, everybody was over the moon. People were excited to run social media apps, games, and more directly from their PC. Sadly this excitement was cut short when Microsoft revealed that they would be using the Amazon App Store instead of the Google Play Store.
For comparison, the Amazon apps store only has around 460,000 while the Google alternative has 3.48 million apps in total. This is one of the reasons many users have been looking to install Google Play Services and Store manually. Are you in the same boat? Then we have the perfect guide for you!
Use the methods below to get and use Google Play Store and Gapps on your Windows 11 PC.
Related: How to Ungroup Icons on Windows 11 Taskbar With a Registry Hack
Method #1: Install custom WSA with Gapps and Play Store pre-installed
A simpler way to get Google Apps and Google Play Store with WSA is by using a pre-modified WSA that has the Gapps pre-installed. This WSA was shared by a Redditor called Rageman666 (see here). Once downloaded, you can use the mod given below to sign in to Google Play Store with your Google account. (However, if you want to install WSA officially only and then take on the complex method of installing Gapps yourself, then look at Method 2 below.)
What do you need
- Modified WSA | Download Link (Mirror | Mirror 2)
- ADBToolkit | Download Link
- Important: You will need to uninstall the original WSA from your system in case you have it installed before proceeding with this guide.
Step-by-step guide
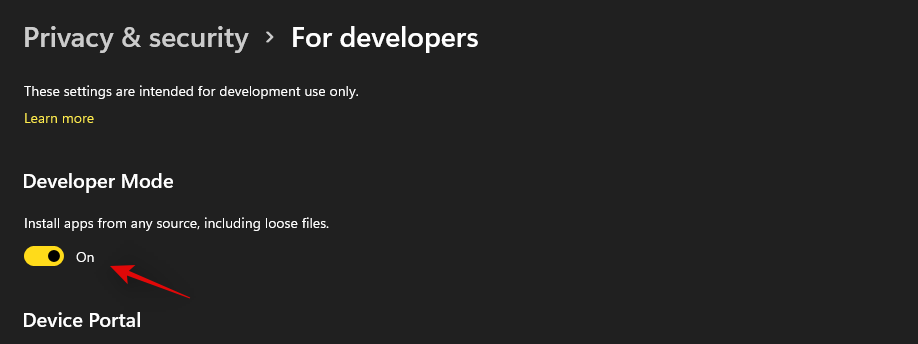
We will first need to enable developer mode on your installation of Windows 11. Press Windows + i on your keyboard and select ‘Privacy & security’ from the left sidebar.

Click on ‘For developers’ on your right.
Click and turn on the toggle for ‘Developer Mode’. Click on ‘Yes’ to confirm your choice.
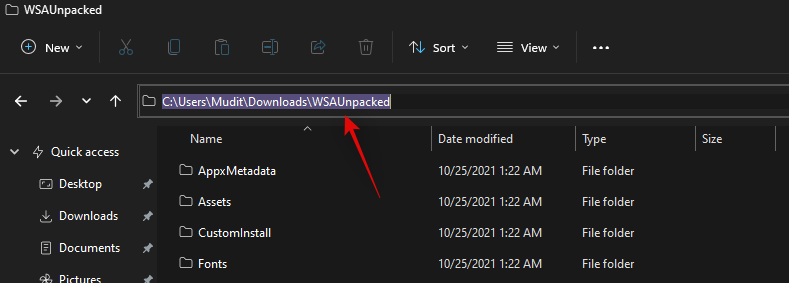
Now download the WSA linked above to a convenient location on your local storage. Unzip the files to a new folder named ‘WSAUnpacked’. Click on the address bar in the ‘WSAUnpacked’ folder and copy the path to your clipboard.
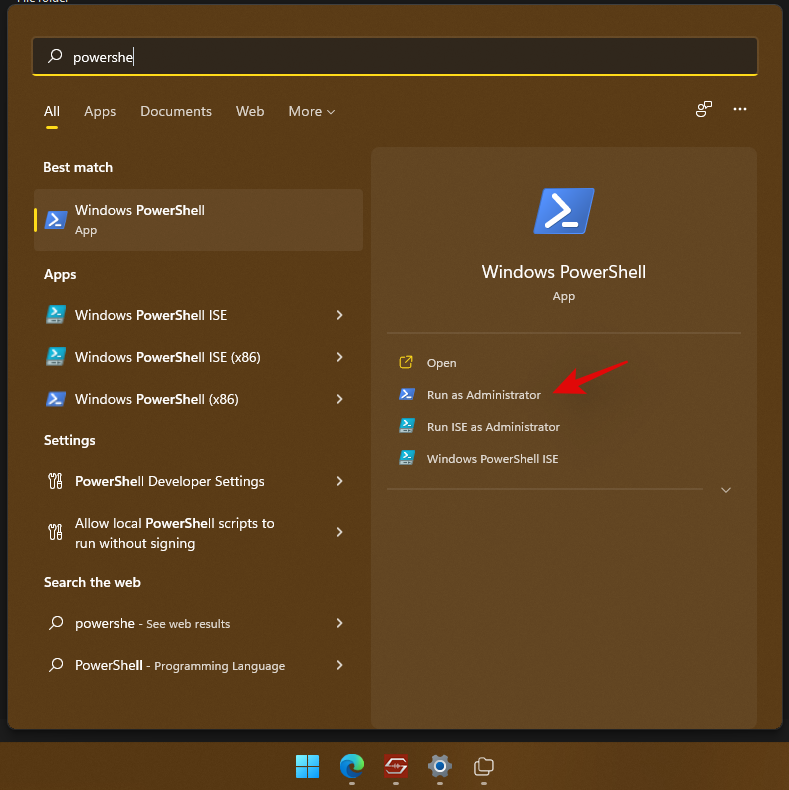
Press Windows + S on your keyboard, search for ‘Powershell’ and click on ‘Run as administrator’ once it shows up in your search results.
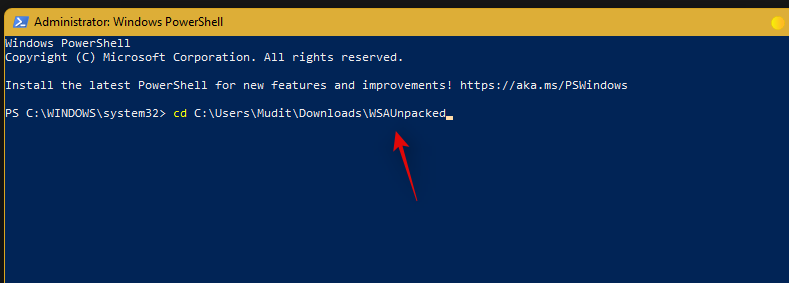
Type in the following command and replace PATH with the path we copied to your clipboard. Ensure that you remove the quotes from the pasted path.
cd PATH
Now type in and execute the following command.
Add-AppxPackage -Register .\AppxManifest.xml
The modified WSA will now be installed on your system. Press the Windows key and launch the same from your Start menu.
Once the Subsystem launches, click and enable ‘Developer Mode’.
Now click on ‘Files’ at the top so that it launches Windows Subsystem for Android on your system.
Close the Files app. We now need to use a workaround to sign in to the Play Store.
Download ADBToolkit linked above and extract it to a new folder on your desktop named ‘ADBToolkit’. Once extracted, click on the address bar at the top and copy the address to your clipboard.
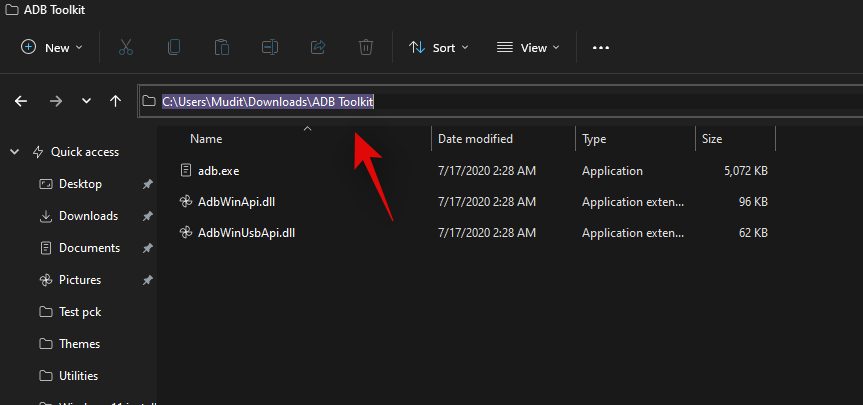
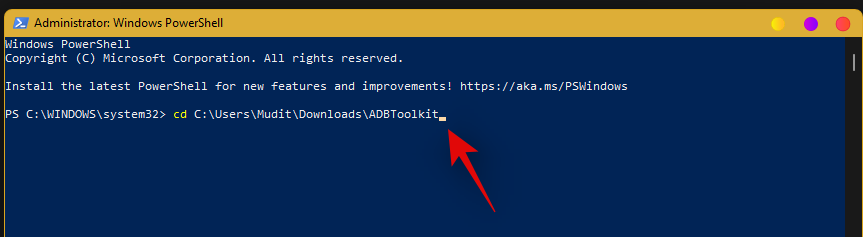
Press Windows + S on your keyboard and search for Powershell. Click on ‘Run as administrator’ once Powershell shows up in your search results.
Type in the following command and replace PATH with the path to ADBToolkit we copied earlier.
cd PATH
Note: Ensure that you remove the quotes from the pasted path to ADBToolkit.
Now switch back to the subsystem window and copy the address given below ‘Developer Mode’.
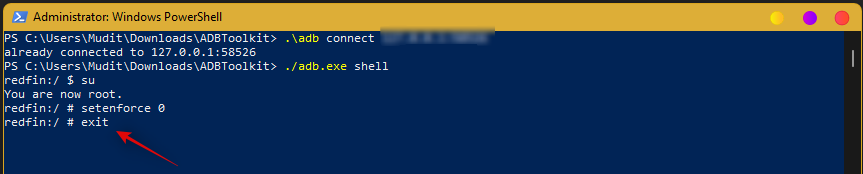
Execute the command given below to launch and connect ADB. Replace ‘ADDRESS’ with the address copied to your clipboard (from above).
.\adb.exe connect ADDRESS
Type in the following command to launch ADB shell.
.\adb.exe shell
Now use the following command to gain root access.
su
Now type in the following command.
setenforce 0
Type in ‘Exit’ to exit PowerShell.
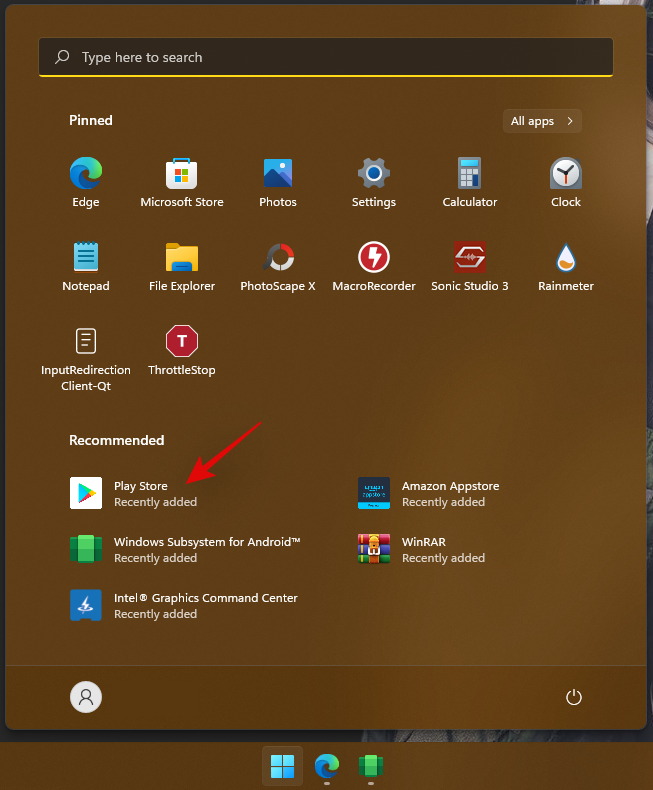
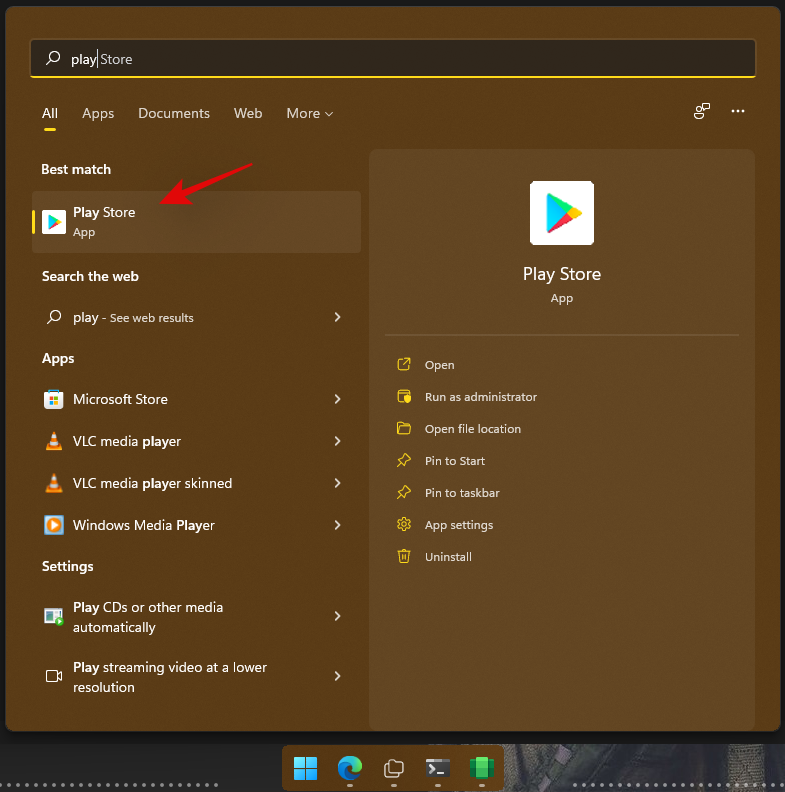
You can now close all the windows open on your desktop. Press Windows + S and search for ‘Play Store’ now. Click and launch the app once it shows up in your search results.
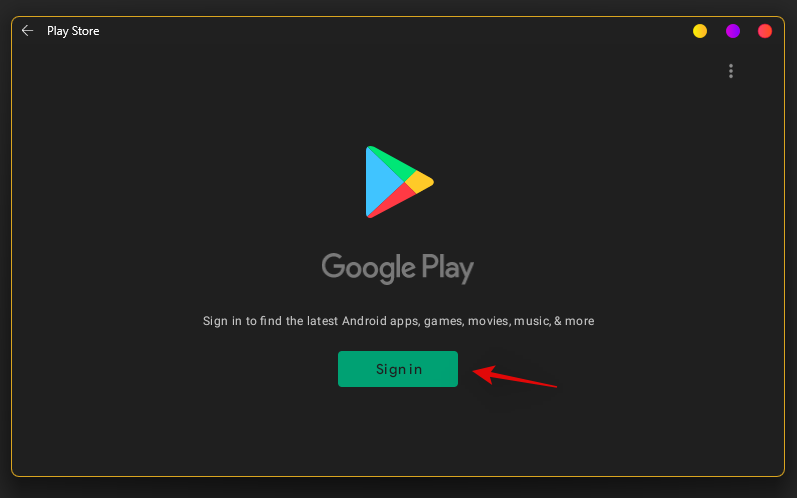
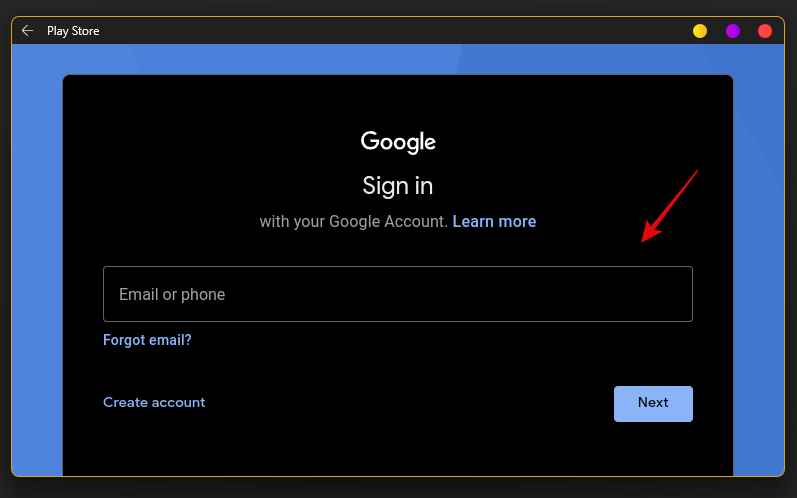
Now click on ‘Sign in’ and sign in with your Google account.
You will now be signed in with your Google Account and you should now be able to use Google Play Store on your Windows 11 PC.
And that’s it! You can now download and install the desired Android apps on your system directly from the Google Play Store.
Related: Sideload APK on Windows 11 using ADB manually | Automatically with a script
Method #2: Install WSA and then install Gapps yourself
The method above is much easier and thus easy to go with even though not exactly recommendable, as it’s a pre-modified (custom) WSA package. But if you want an official WSA package from Microsoft and want to install Gapps yourself over this, then this is the method for you. It’s quite complex btw, so may often wonder whether simply installing a custom WSA package that comes with Gapps pre-installed is worth it, which we’d say, is.
Getting Google Apps and Play Store on your PC on official WSA by installing Gapps package yourself is recommended as you wouldn’t need a pre-modified WSA which helps if you are concerned about the security of a custom WSA package under method 1.
What do you need
- WSGA script | Download Link (Gapps script for Windows Subsystem for Android)
- Windows Subsystem For Android | Link
- Store Adguard | Link
- OpenGApps | Link
- ADBToolkit | Download Link
- WinRAR | Download Link
- WSL: Windows Subsystem for Linux
- Ubuntu: Download Link
- Important: Uninstall the original Windows Subsystem For Android if you already have it installed on your PC before proceeding with this guide.
Step-by-step guide
Visit the WSA link above and copy and paste the following link given below or above in the text box.
Link
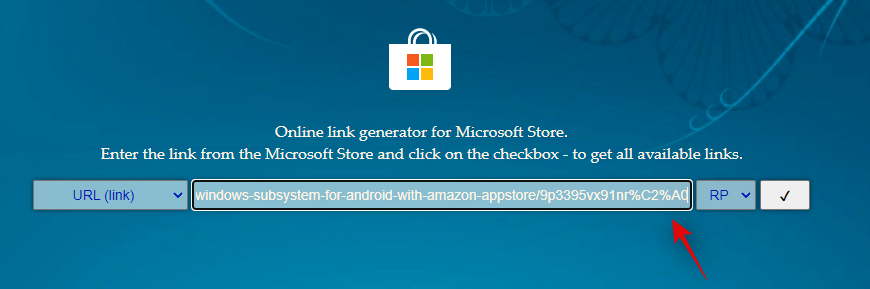
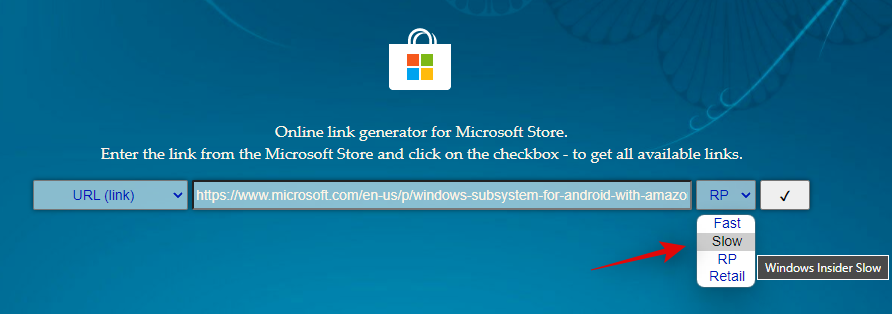
Now click on the drop-down menu beside the text box and click on ‘Slow’.
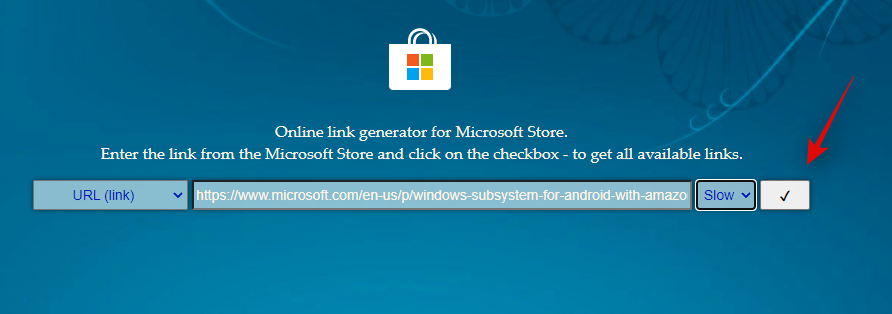
Click on the ‘Check Mark’ to process the given link.
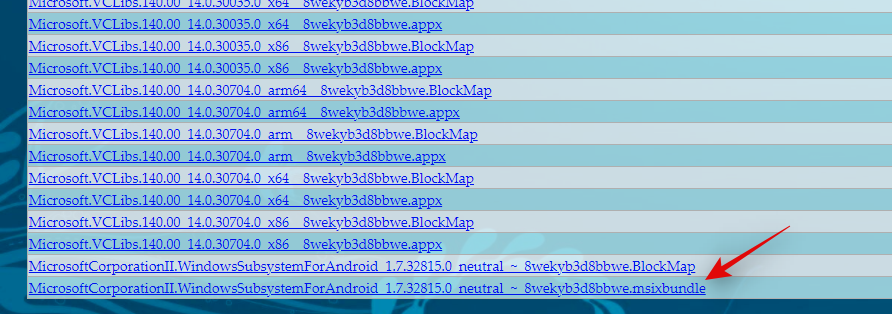
Once processed, all the linked download files will now be available on your screen. Scroll to the bottom and click on the .msix bundle at the bottom and download it to a convenient location on your local storage.
Now go to the downloaded file, right-click on it and open it with WinRAR. If you do not have WinRAR on your PC then use the link above to download and install the same.
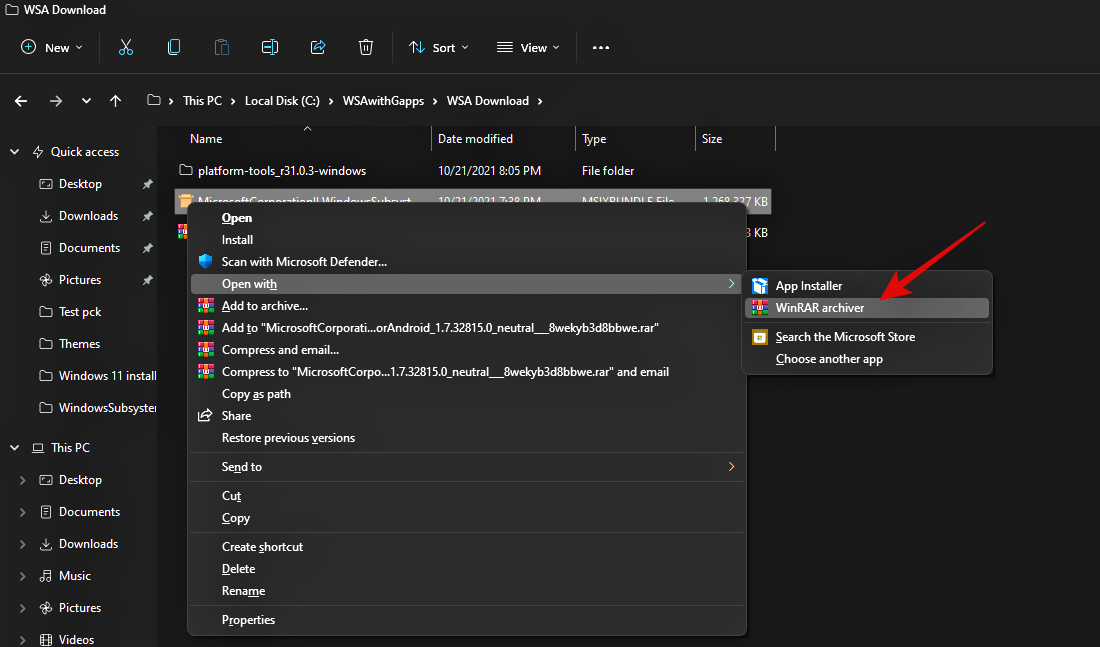
Once the bundle is open in WinRAR, scroll to the bottom and check the architecture of the .msix bundle. It should match your CPU architecture, if not, you can select the desired version from the list and proceed with the guide.

Double click and open the same bundle in WinRAR. Once you are done, go to your C/boot drive and create a new folder named ‘WindowsSubsystemForAndroid’.
Switch back to Winrar and select all the files except the following folders and files.
- AppxMetadata (folder)
- AppxBlockMap.xml (file)
- AppxSignature.p7x (file)
- [Content Types].xml (file)
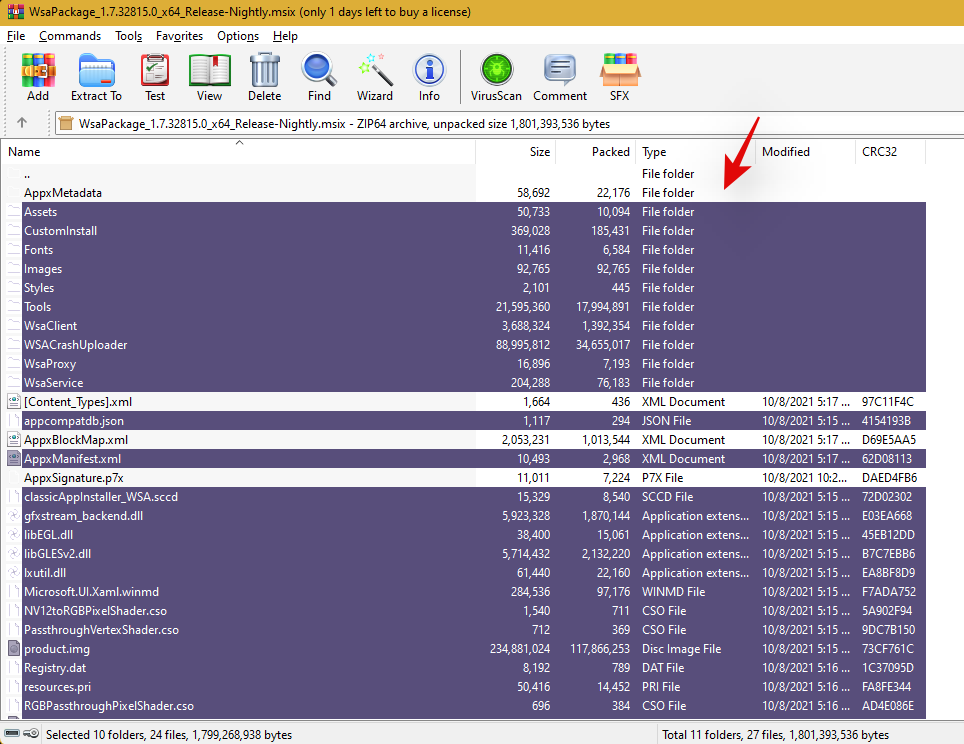
Copy all the selected files to the new ‘WindowsSubsystemForAndroid’ folder we created earlier.
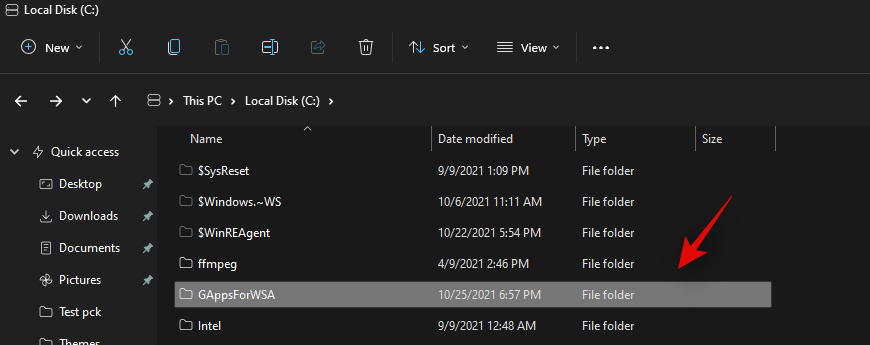
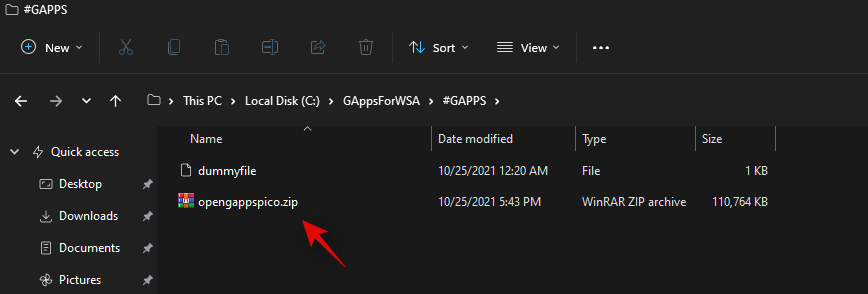
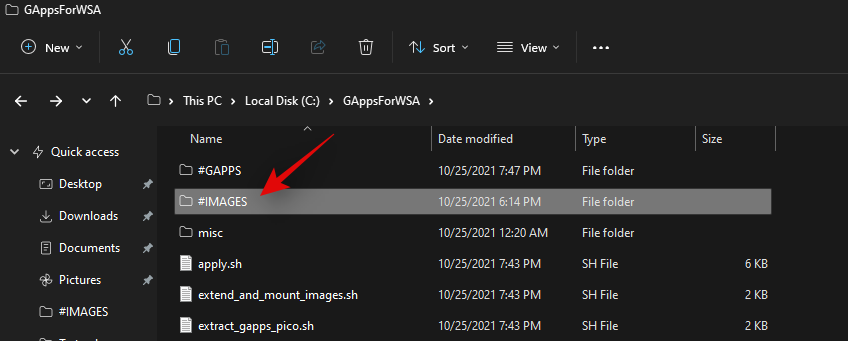
Once copied, create another new folder on your boot drive named ‘GAppsForWSA’.
Open the link for the WSGA script at the top and download the same as a .zip to your local storage.
Extract the .zip to the new ‘GAppsForWSA’ folder that we created in your boot drive.
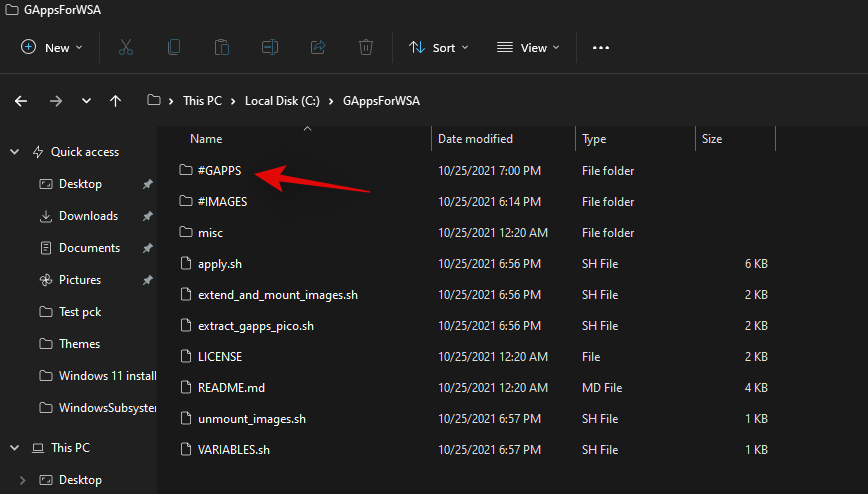
Note: Extract the contents of the ‘WSGAScript-main’ folder contents inside the archive.
With the contents archived, right-click on ‘VARIABLEs.sh’ and open it with Notepad.
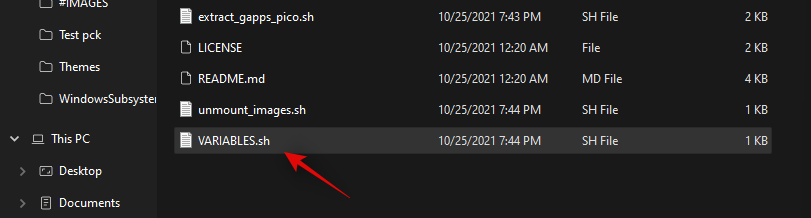
Replace ‘GAppsWSA’ with ‘GAppsForWSA’.
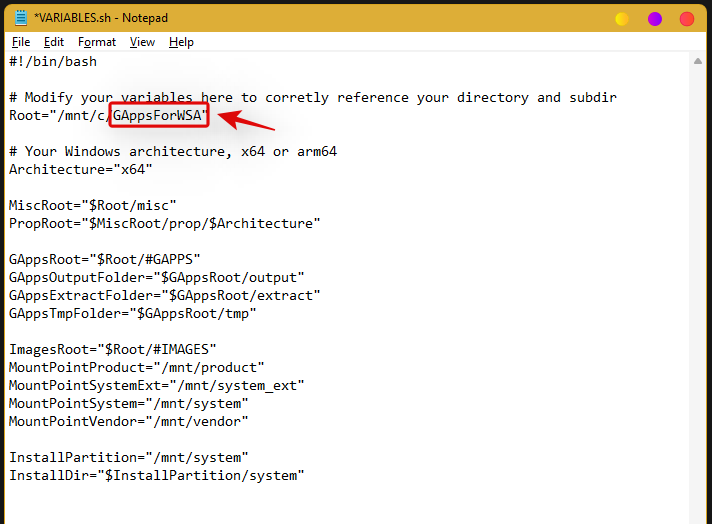
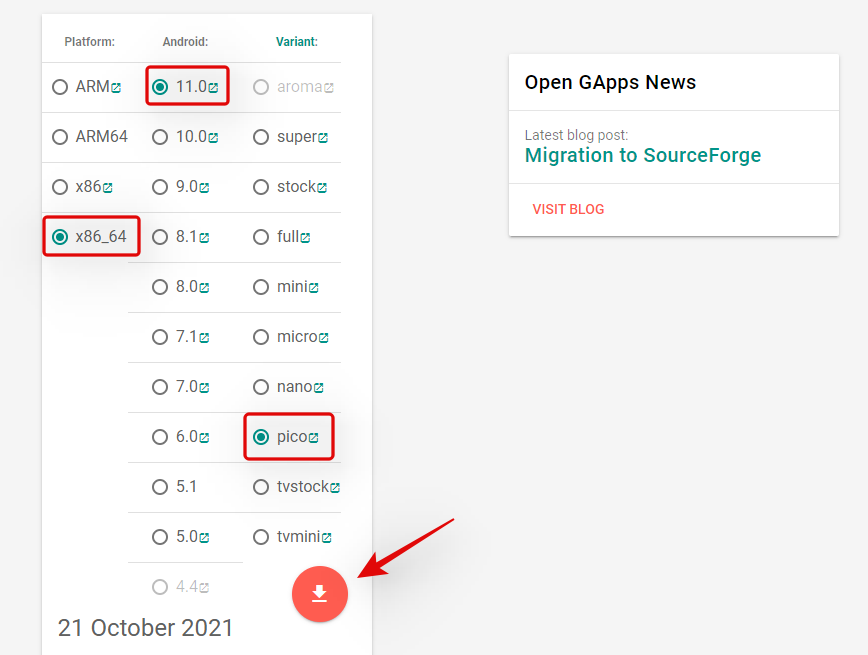
Press Ctrl + S on your keyboard to save the changes. We will now download GApps for your WSA installation. Visit the link for OpenGApps at the top and select the following options given below.
- Platform: x86_64
- Android: 11.0
- Variant: pico
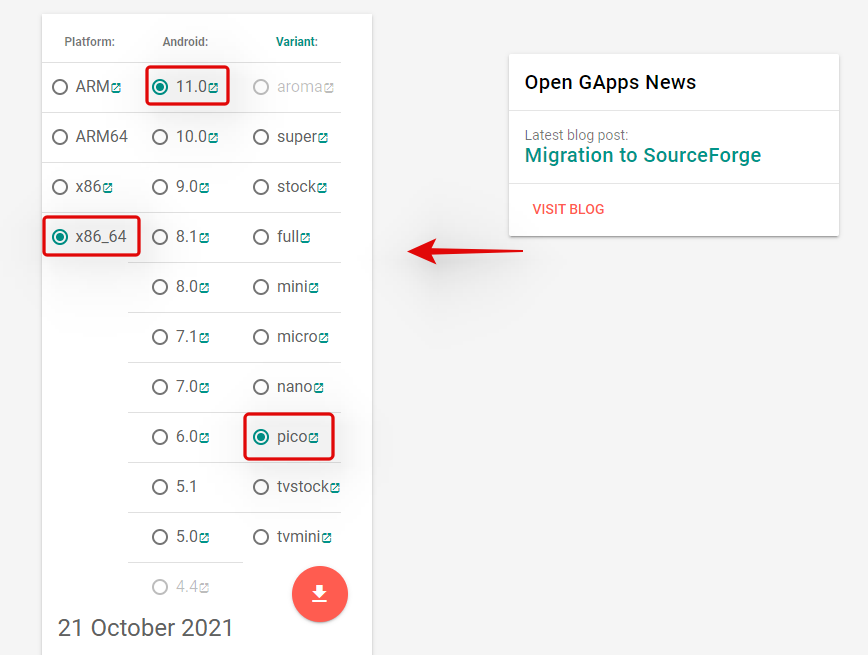
Click on the ‘Download icon’.
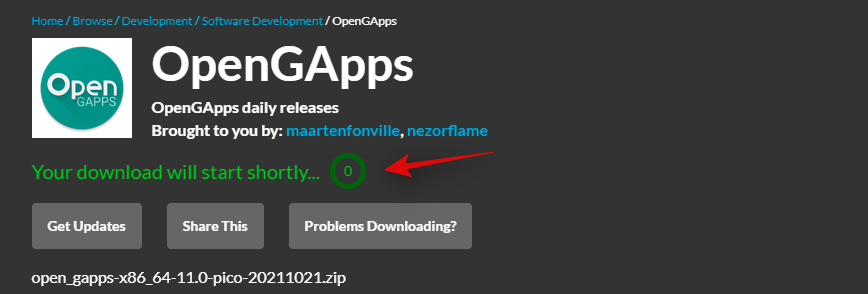
You will now be redirected to Sourceforge, wait a few seconds and the download should automatically be initiated for you.
Download and store the archive in the following location in the ‘GAppsForWSA’ folder on your boot drive.
Boot Drive\GAppsForWSA\#GAPPS
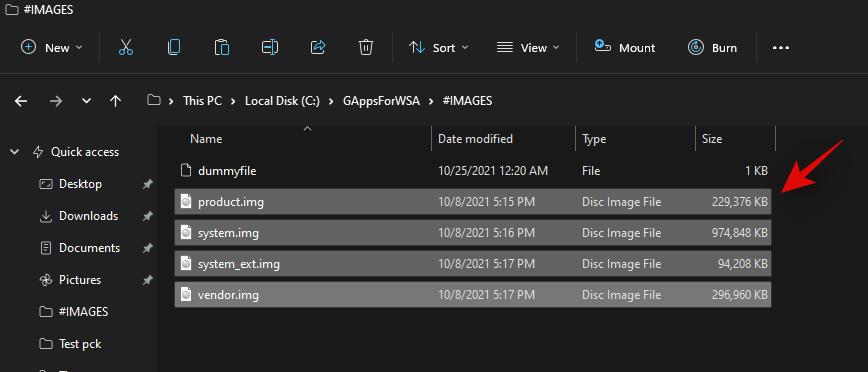
Now go back to your boot drive and open the ‘WindowsSubsystemForAndroid’. Copy the following 4 files.
- vendor.img
- system_ext.img
- system.img
- product.img
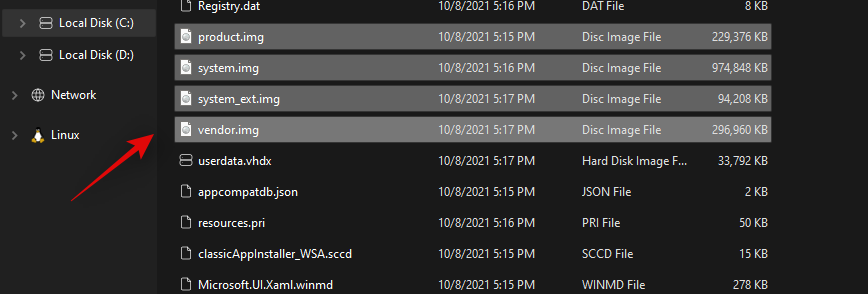
Navigate to the following location and paste all your copied files.
Boot Drive\GAppsForWSA\#IMAGES
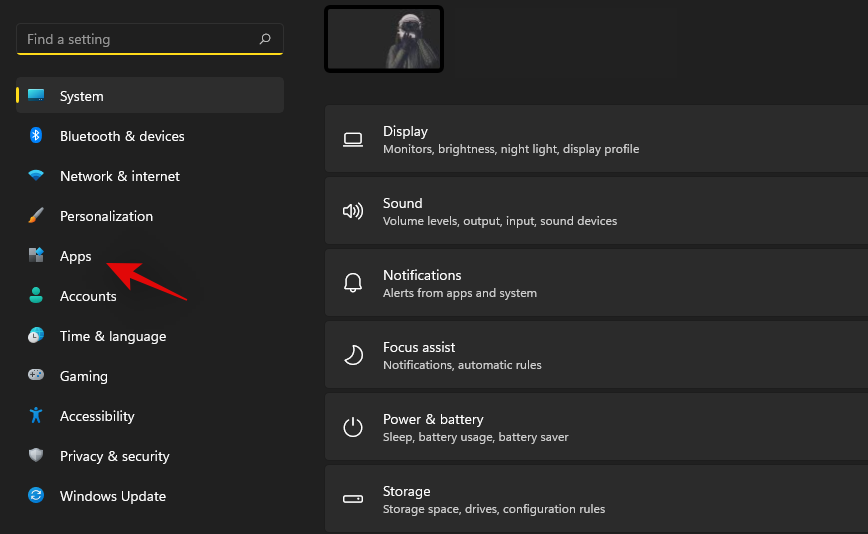
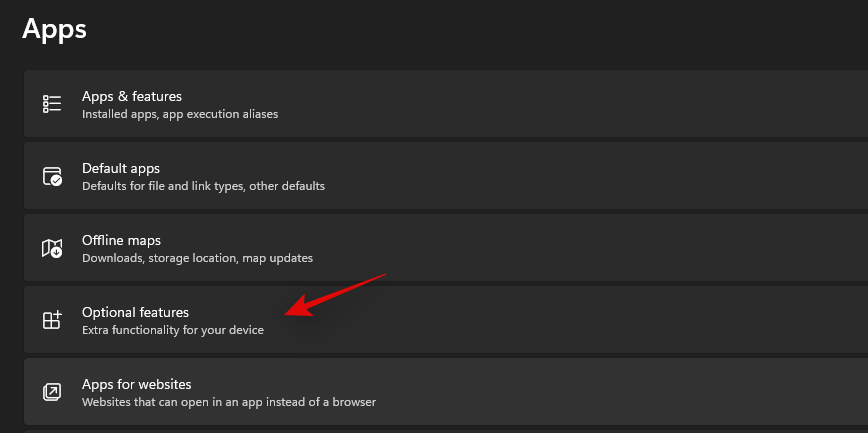
We will now install WSL for your system. WSL is a Linux Subsystem that will allow you to use executables and scripts developed for Linux. Press Windows + i on your keyboard to open the Settings app and then click on ‘Apps’ on your left.
Now click on ‘Optional Features’.
Scroll down and click on ‘More Windows features’.
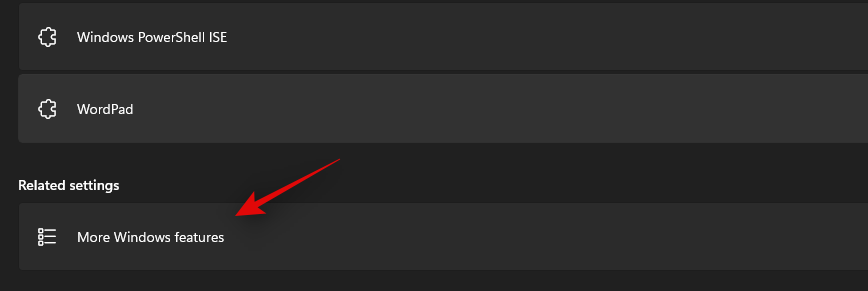
A new window for available features will now open on your screen. Scroll to the bottom and check the box for ‘Windows Subsystem for Linux’.
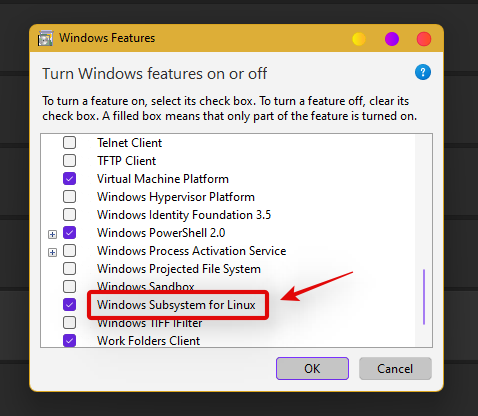
Click on ‘Ok’ once you are done. The Linux Subsystem will now be installed on your PC. You will now be prompted to restart your PC. We recommend you restart your PC at this point even if you are not prompted.
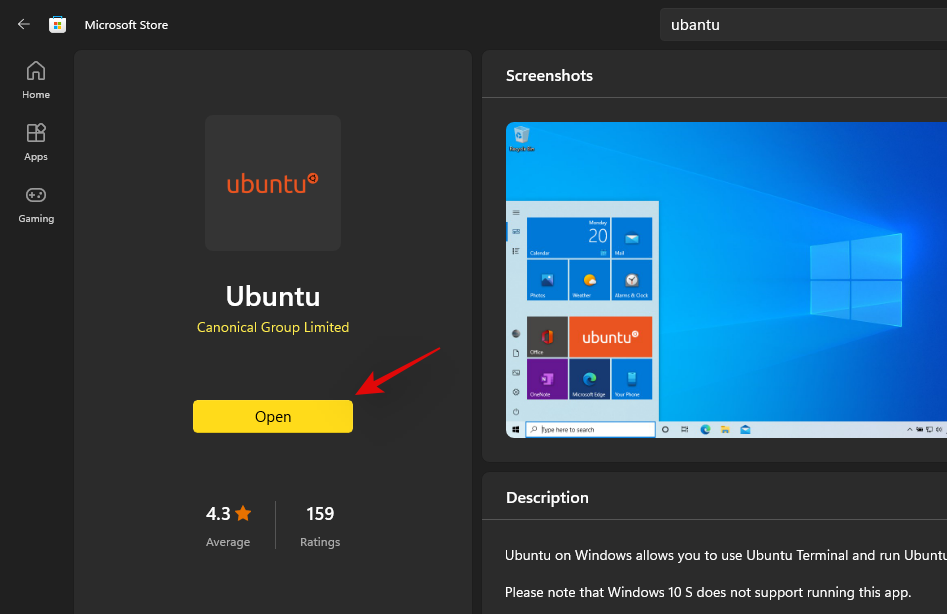
We will now install a distro that will help us during this setup. We recommend you use Ubuntu available on the Microsoft Store as it is easily downloaded and removed from your system. Use the link below to visit and download Ubuntu in the Microsoft Store.
- Ubuntu | Microsoft Store Link
Click on ‘Open’ once the app is installed to configure your installation. You can also launch the app from your Start menu depending on your preference.
Ubuntu will now be installed on your system. Once installed, proceed to set a Username to protect your installation. Subsequently, enter a password to protect root access on your system.

The Distro has now been setup on your system, you can close the current window and press Windows + X instead. Select ‘Windows Terminal (admin)’.

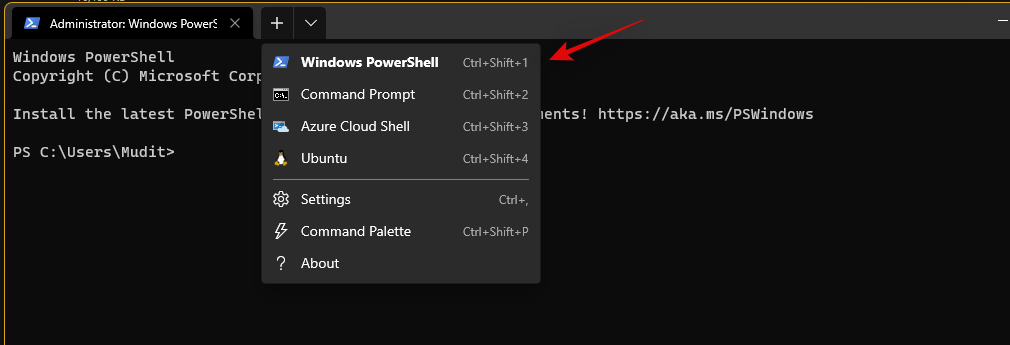
Click on the drop-down arrow at the top and select the same to launch a WSL terminal in the new tab. We’ll now need root access to modify your WSA with GApps. Type in the following command and press Enter on your keyboard. If you did not set a username or password then you should already have root access in the terminal. You can skip this step and move to the next one instead.
sudo su

Enter your password to grant root access (if applicable). Now type in the following commands one by one.
cd ..
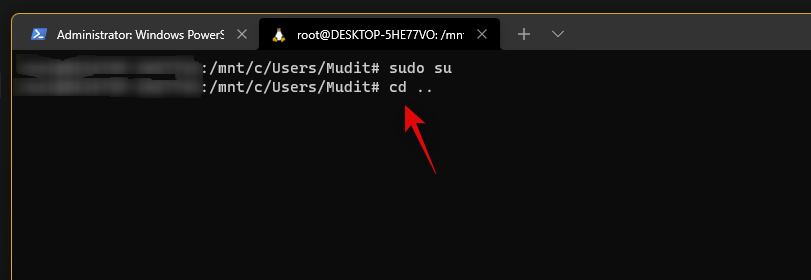
cd ..
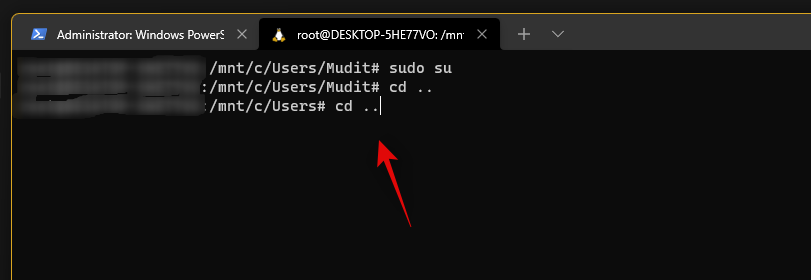
Finally use the command below to navigate to ‘GAppsForWSA’.
cd GAppsForWSA/
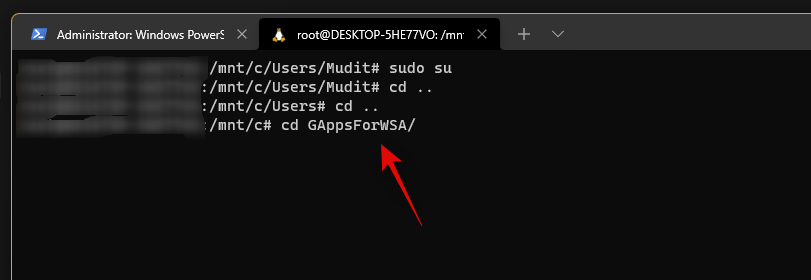
Now type in the following command to install ‘lzip’ and ‘unzip’ which will be needed for this process.
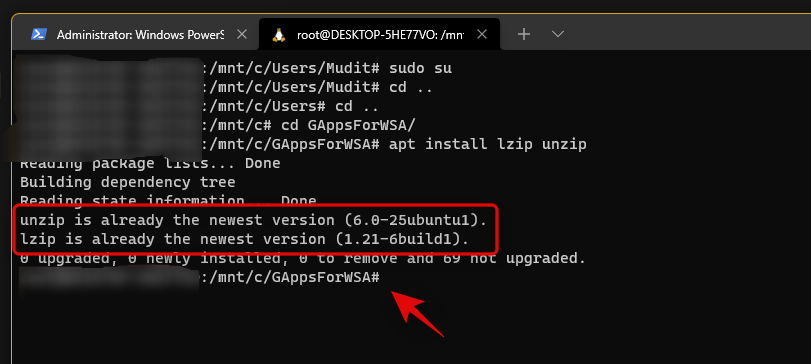
apt install lzip unzip
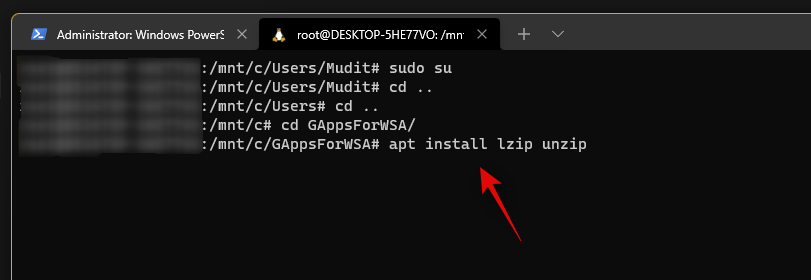
Note: If you are unable to get lzip or unzip setup, then run apt-get update -y to update your repositories and packages.
Confirm your choice by typing in ‘Y‘.
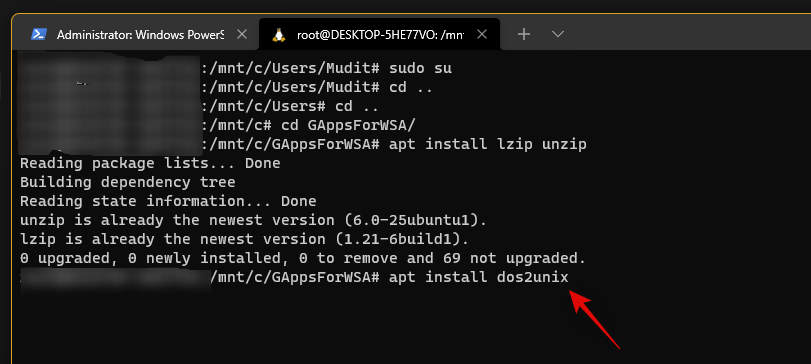
We will now install ‘dos2unix’ which will also be needed for this modification. Use the command below to install the same on your PC.
apt install dos2unix
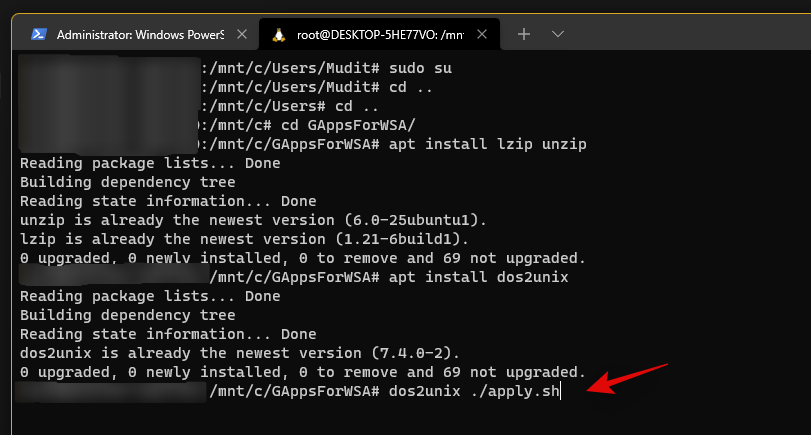
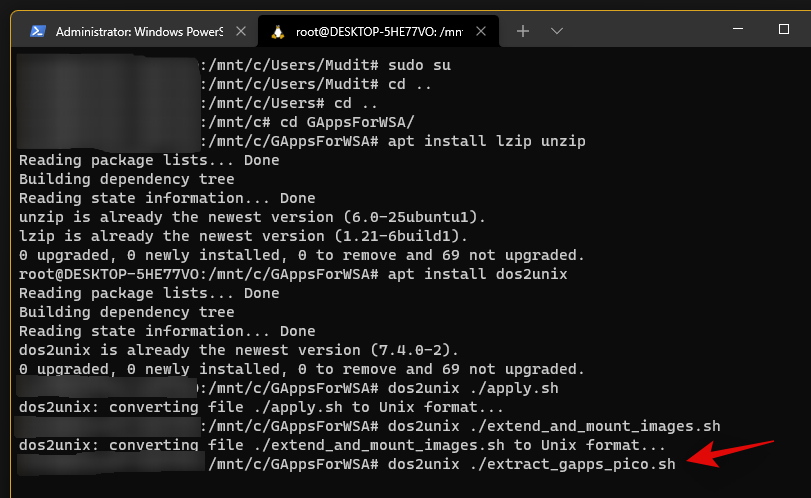
Now it’s time to modify your WSA image. Type in and execute the following commands in the terminal one by one in the same order.
- Command 1:
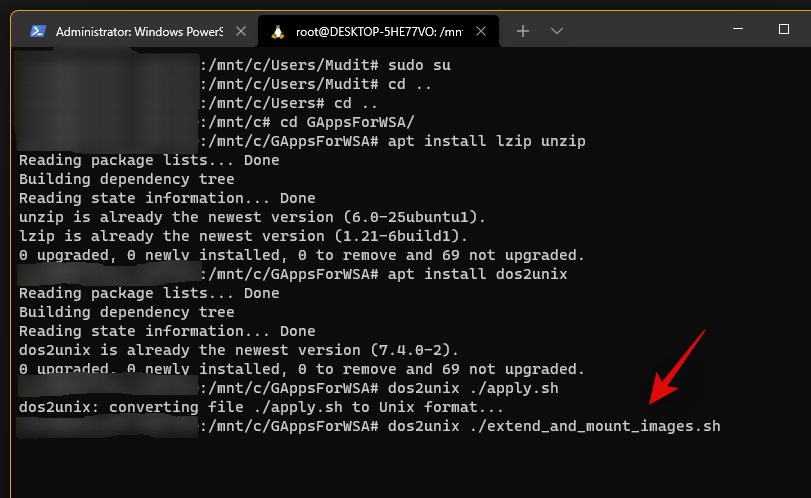
dos2unix ./apply.sh
- Command 2:
dos2unix ./extend_and_mount_images.sh
- Command 3:
dos2unix ./extract_gapps_pico.sh
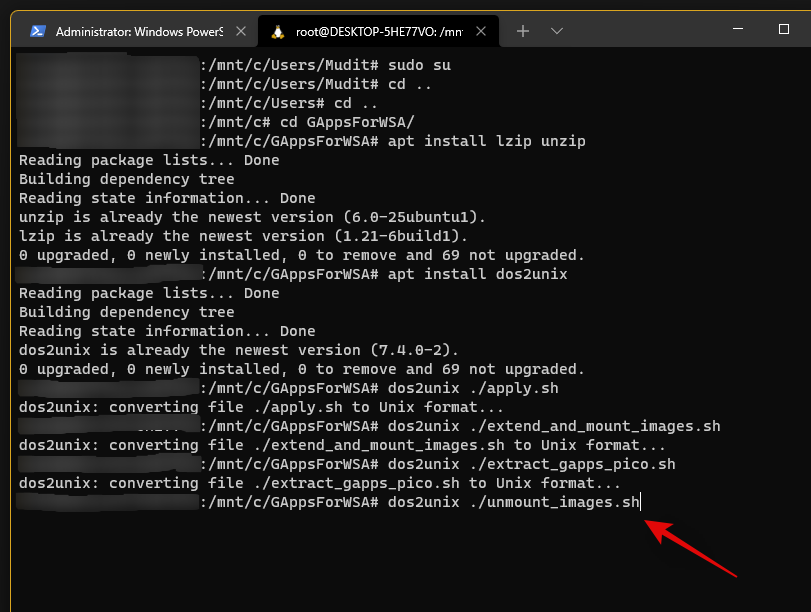
- Command 4:
dos2unix ./unmount_images.sh
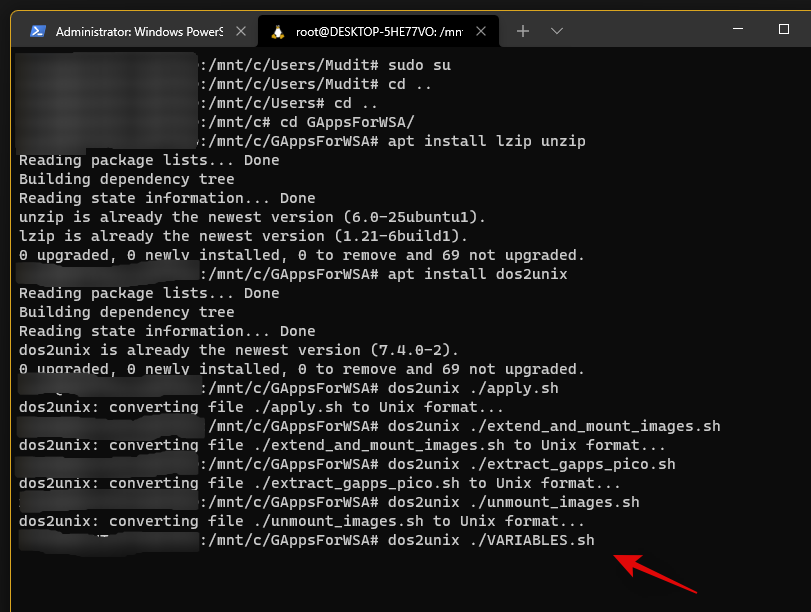
- Command 5:
dos2unix ./VARIABLES.sh
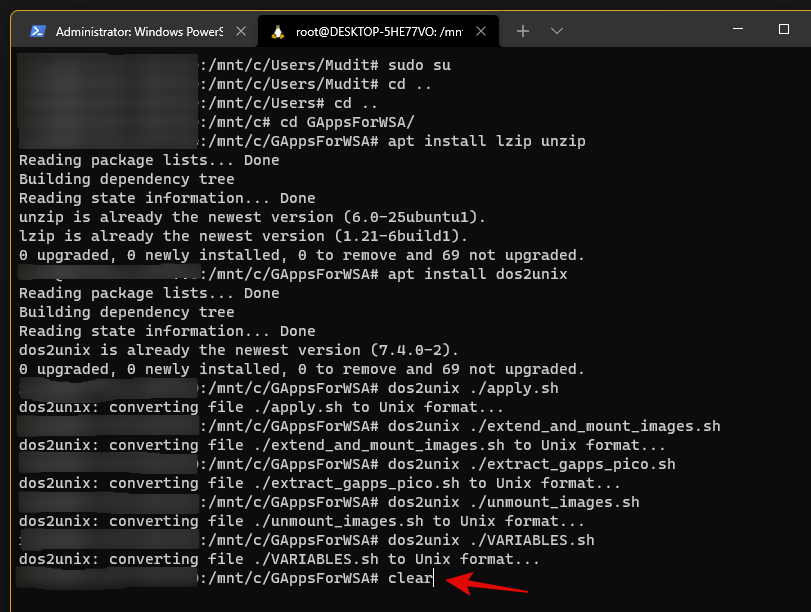
Once the process completes, type in the following to clear up your terminal for better management.
clear
Now that we have our scripts, let’s execute them. Type in and execute the commands given below one by one in the same order.
- Command 1:
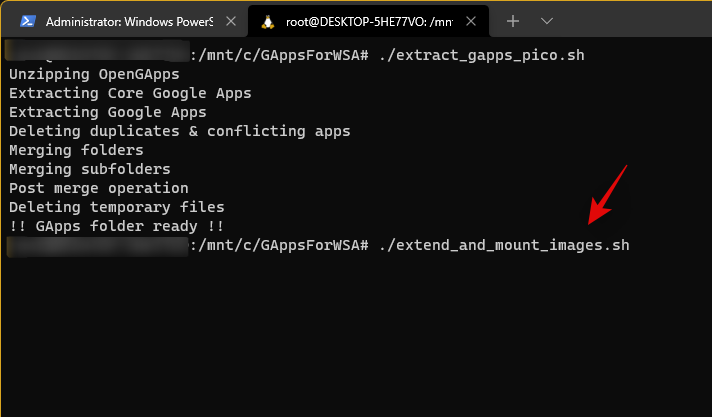
./extract_gapps_pico.sh
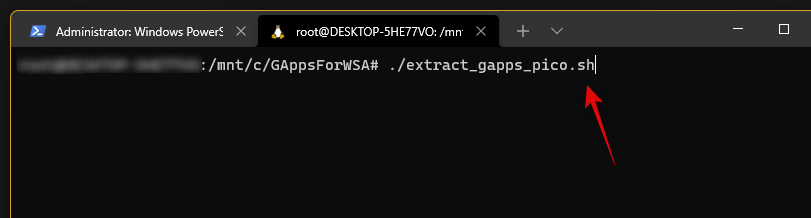
- Command 2:
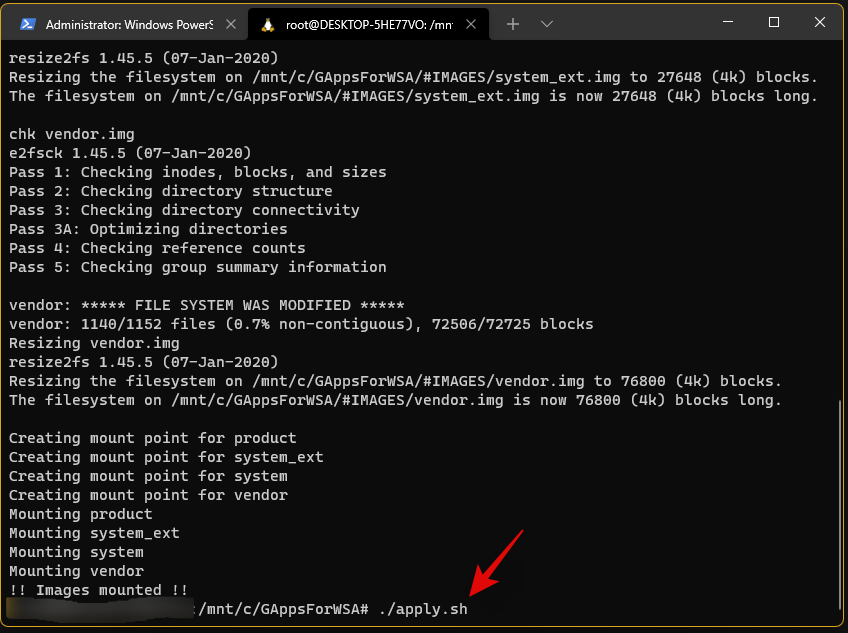
./extend_and_mount_images.sh
- Command 3:
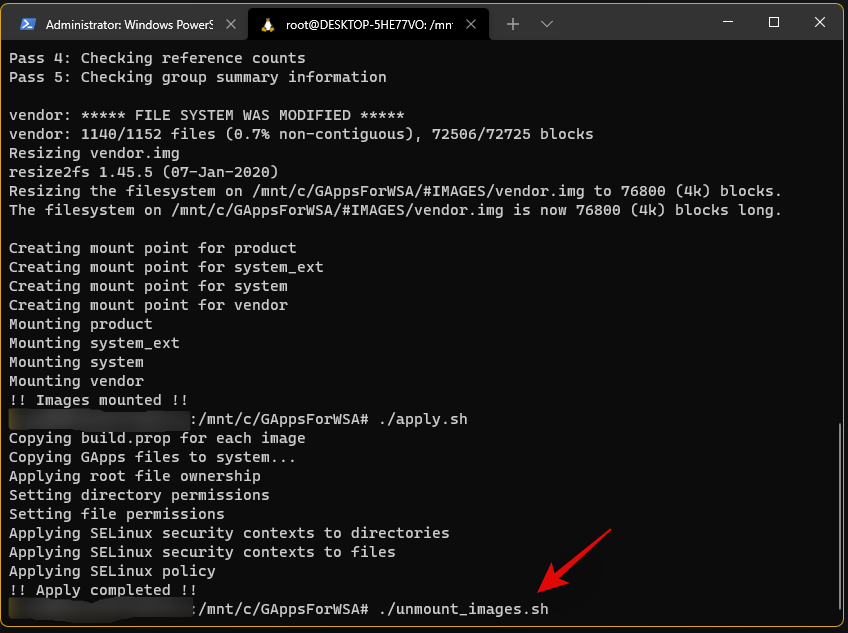
./apply.sh
- Command 4:
./unmount_images.sh
We are now done with the console, for now, you can close the same. Go to your boot drive and navigate to the following location.
\GAppsForWSA\#IMAGES
Copy the following files to your clipboard.
- product.img
- system.img
- system_ext.img
- vendor.img
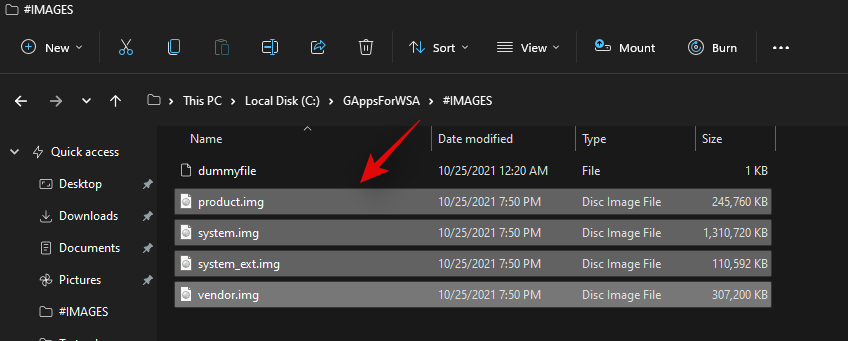
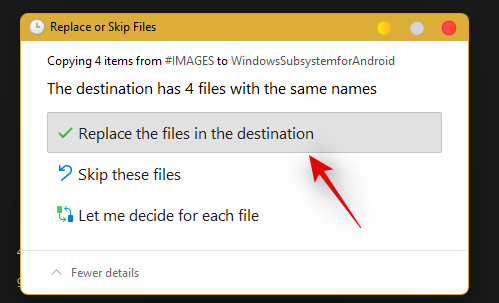
Now navigate to the ‘WindowsSubsystemForAndroid’ folder on your boot drive and paste all the copied images in the same location. Choose to replace the files when prompted.
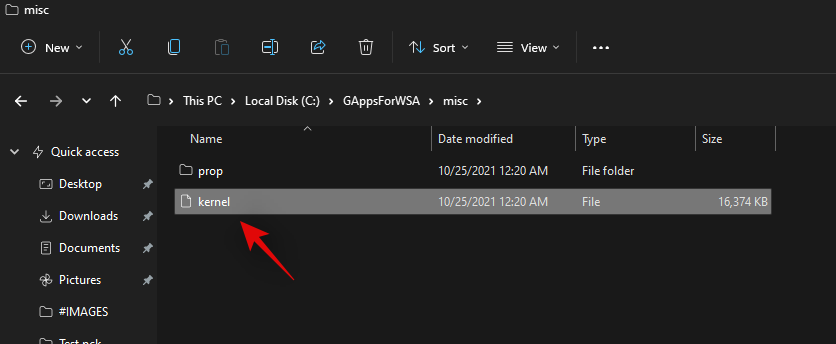
We’re almost done with the modification now. Navigate to your ‘GAppsForWSA’ folder on your boot drive and double click and open the ‘misc’ folder.

Copy ‘kernel’ to your clipboard.
Navigate to the following location.
Boot drive\WindowsSubsystemForAndroid\Tools
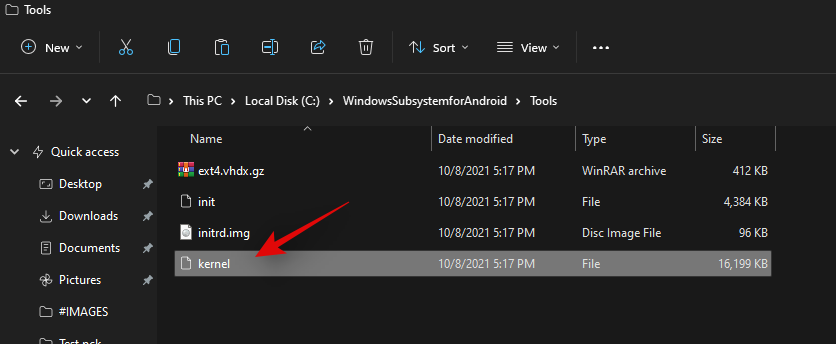
Rename ‘kernel’ to ‘kernel_backup’.
Now paste the kernel file we copied to your clipboard earlier in the same location.
We will now need to enable developer mode for your installation of Windows 11. Press Windows + i to open the Settings app and then click on ‘Privacy and Security’ on your right.

Click on ‘For developers’.
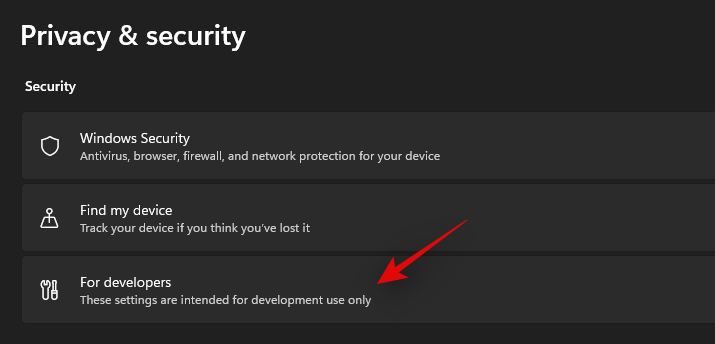
Enable the toggle for ‘Developer Mode’ at the top.
Click on ‘Yes’ to confirm your choice. Now press Windows + X and select ‘Windows Terminal (admin)’.
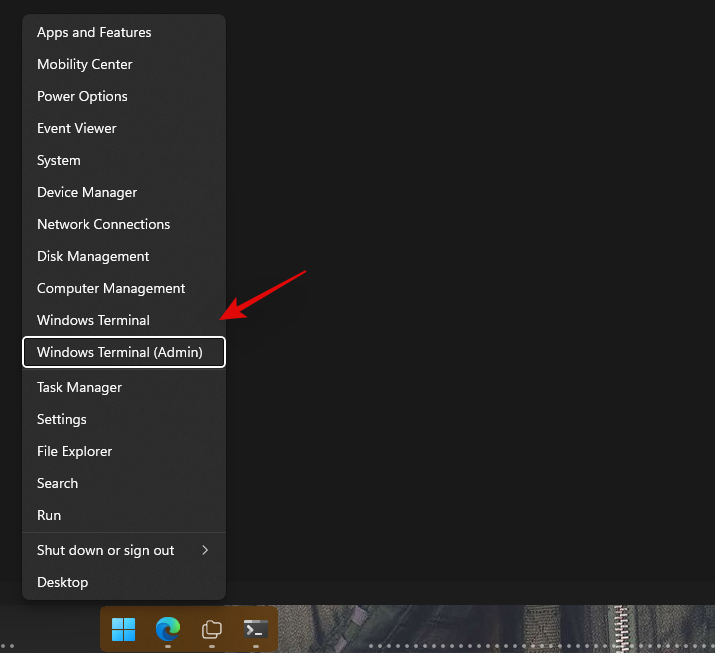
Click on the drop-down arrow at the top and select ‘Windows Powershell’.
Note: Do not select ‘Powershell’, ensure that you select ‘Windows Powershell’.
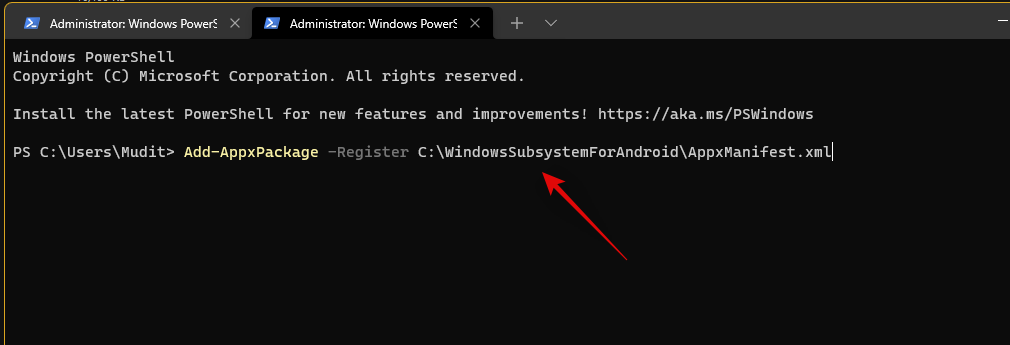
Now run the following command.
Add-AppxPackage -Register C:\WindowsSubsystemForAndroid\AppxManifest.xml
The modified subsystem will now be installed on your PC.
Press the Windows key and launch the same once the process completes.
Enable the toggle for ‘Developer mode’ in the Android Subsystem.
Click on ‘Files’ at the top to launch the Subsystem on your PC. You might have to wait a few minutes now depending on your PC.
Close the Files app once it opens and download the ADBToolkit linked above.
Now create a new folder on your boot drive and name it ‘ADBToolkit’.
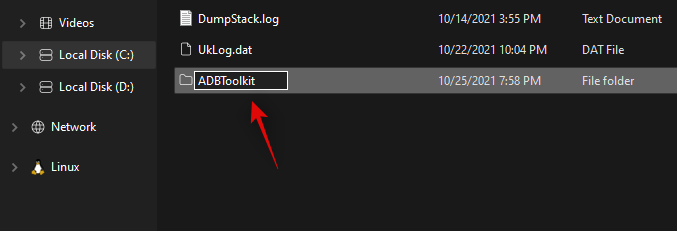
Extract the archive in the same location, and delete the archive and the original folder.
Press the Windows key, search for Play Store and launch it on your system. Do not click ‘Sign-in’ yet.
Go back to the ‘ADBToolkit’ folder and click on the address bar at the top, type in ‘Powershell’ and press Enter on your keyboard.

Go back to the Android Subsystem and note down the address shown below ‘Developer Mode’.
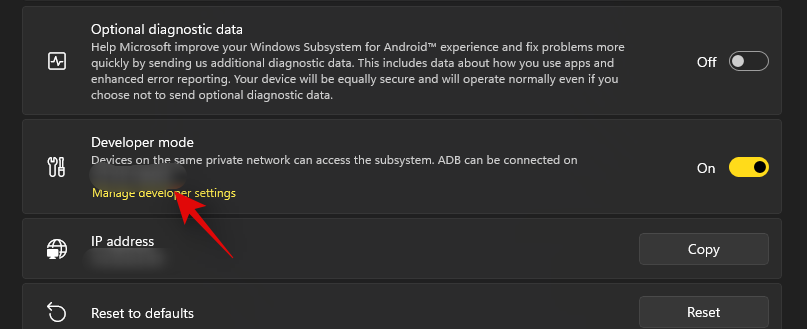
Note: If the address does not show up, simply click on ‘Refresh’ beside IP address.
Type in and execute the following command. Replace ADDRESS with the address shown in the ‘Developer Mode’ section in the Android Subsystem.
.\adb.exe connect ADDRESS

Once you are connected, execute the following command.
.\adb.exe shell
Type in the following command to gain root access.
su
Execute the following command next.
setenforce 0
Now go back to the Play Store and click on ‘Sign-in’.
Sign in with your desired Google account now.
Note: This will also enable Google Sync, which by default will sync your Google data to Windows including things like Contacts, Calendar events, Browser history, and more.
Once you are signed in, close the Play Store. We now need to restore your original kernel. Open the Windows Subsystem for Android window and click on ‘Turn off’.

The Subsystem will now stop running in the background on your PC. Navigate to the ‘WindowsSubsystemForAndroid’ folder on your boot drive and open the ‘Tools’ folder.

Rename the ‘kernel’ file to ‘kernel_Root_mod’.
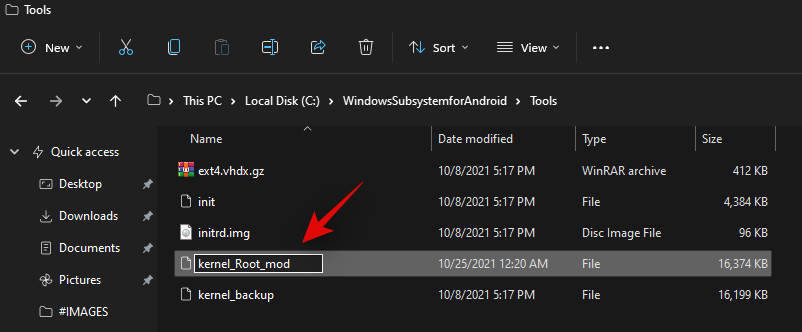
Similarly, rename ‘kernel_backup’ to ‘kernel’.
You can now close everything. We recommend you restart your system at this point. Once restarted, you should now be able to use the Play Store on your system while signed in with your Google account.
We hope you were able to easily set up and use GApps and Play Store on your PC using the guide above. If you face any issues or have any questions, feel free to reach out using the comments section below.
Related:
- How to Remove Appraiserres.dll to Bypass Requirements When Using Windows 11 Setup
- How to Install WSA Manually Using Msixbundle
- How to Fix ‘Virtualization Not Enabled’ Error for WSA on Windows 11
- How to Change Refresh Rate on Windows 11
- Windows 11 Start Menu Not Working: How to Fix
- Fix VAN 1067 Valorant Issue on Windows 11
- How to Disable CSM to install Windows 11
- How To Remove Language Switcher on Windows 11
- Right Click Menu Not working on Windows 11? How to Fix
(Image credit: Windows Central)
On Windows 11, you can now install the Windows Subsystem for Android (WSA) to run Android apps. The problem is that officially, you can only install apps available from the custom version of the Amazon Appstore, which currently only has around 50 apps.
You can sideload Android apps on Windows 11, but it’s not possible to use apps that require the Google Play Services, such as Gmail and Google Maps. However, an Italian UX design student (ADeltaX on Twitter) has found a way to make it possible to install the Google Play Store app to bring virtually every Android app to Windows 11.
It’s a tedious process, and it may not work on the first try, but once you get it working, you can install all your favorite Android apps.
In this Windows 11 guide, we will walk you through the steps to create a custom version of the Windows Subsystem for Android to install and run Android apps from the Google Play Store.
Disclaimer: Trying to install the Google Play Services may violate the Play Services Agreement. Also, these instructions involve downloading third-party tools and using unsupported methods. Use this guide at your own risk.
How to install Google Play Store and run Android apps
The Google Play Store’s installation process on Windows 11 requires the setup of various tools running several Linux, Command Prompt, and PowerShell commands. The instructions below have everything you need to complete this task. If something isn’t working correctly, you probably did something wrong. If this is the case, start over with the instructions until it works.
Setting up environment
The preparation process includes removing any previous installation of the Windows Subsystem for Android (WSA) from your device and installing the Windows Subsystem for Android and Ubuntu. It’s also a requirement to enable Developer mode on Windows 11 and install a tool like 7-zip to extract files. Furthermore, you have to download a copy of the original Windows Subsystem for Android, OpenGApps, the WSAGAScript scripts, and the ADBKit tools.
All the latest news, reviews, and guides for Windows and Xbox diehards.
Uninstall WSA
Since you cannot run both the original and custom versions of WSA, you will need to remove the original if it’s installed on your computer. Otherwise, continue the WSL2 installation.
To uninstall the original WSA, use these steps:
- Open Settings.
- Click on Apps.
- Click the Apps & features page from the right side.
- Select the Amazon Appstore.
- Click the menu (three-dotted button) on the right side.
- Click the Uninstall button.

- Click the Uninstall button again.
Once you complete the steps, you can continue with the Linux subsystem installation.
Install WSL2
You will need a Linux distribution to complete this setup. If you don’t have the Windows Subsystem for Linux already installed on your computer, then continue with the steps below. Otherwise, continue with the steps to eanble the Developer mode on Windows 11.
To install WSL alongside the Ubuntu distro, use these steps:
- Open Start.
- Search for Command Prompt, right-click the top result, and select the Run as administrator option.
- Type the following command to install the Windows Subsystem for Linux and Ubuntu and press Enter:
wsl --install
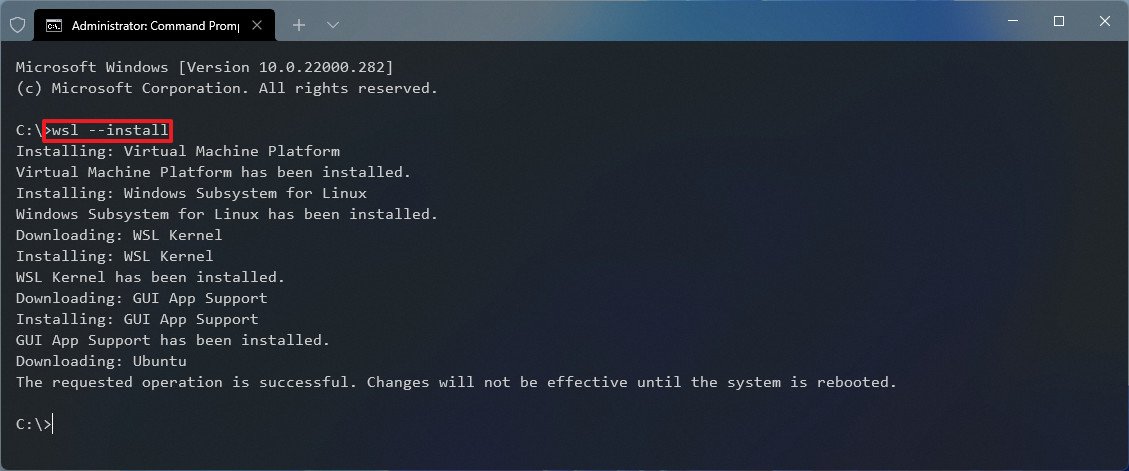
- Restart the computer to apply the changes.
- Continue with the on-screen directions to set up the Ubuntu distro.
After you complete the steps, the Linux subsystem will install with the Ubuntu distro.
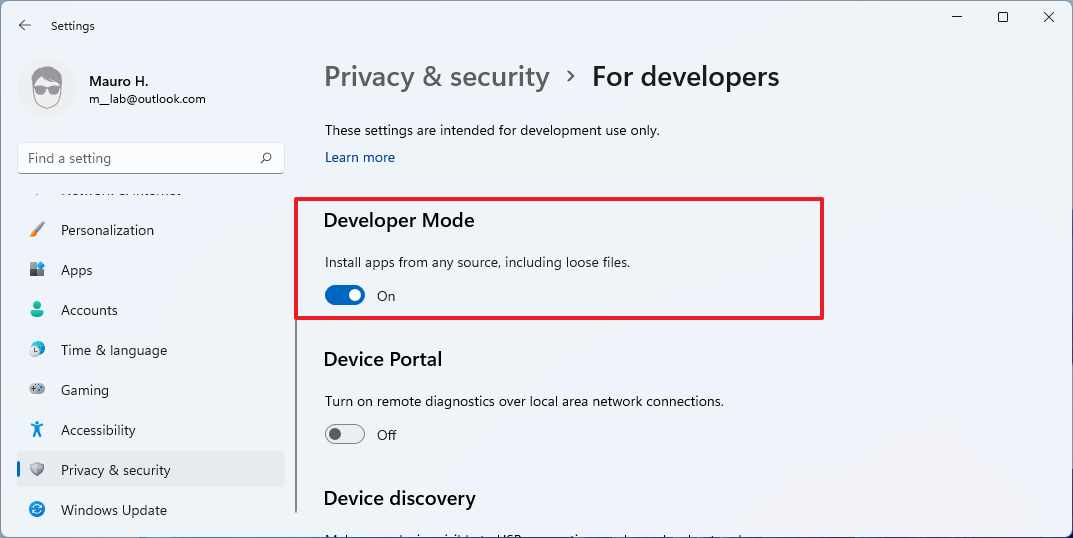
Enable Developer mode
The next step is to make sure that Developer mode is enabled on Windows 11:
- Open Settings.
- Click on Privacy & security.
- Click the For developers page on the right side.
- Turn on the Developer mode toggle switch.
Once you complete the steps, you can sideload applications on Windows 11.
Install 7-zip
Since you will need to retrieve files from different containers, you will need an application like 7-zip. If you already have it, you can skip these steps.
To install 7-zip from the Microsoft Store, use these steps:
- Open the 7-zip Microsoft Store page.
- Click the Get button.
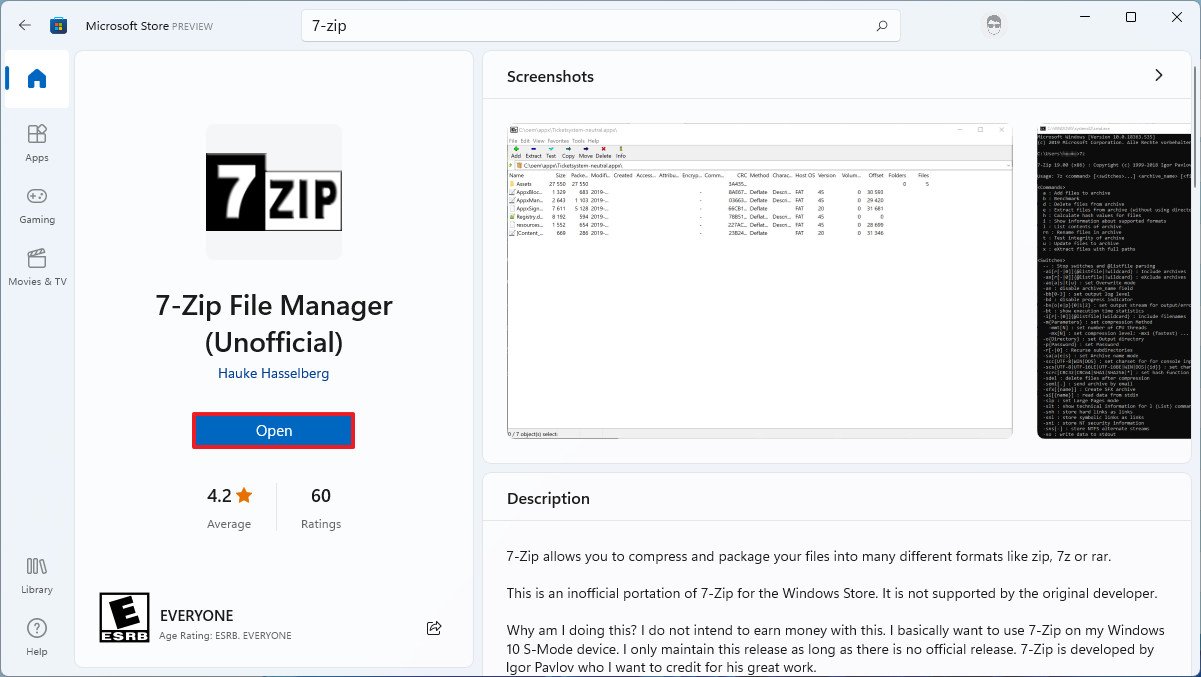
After you complete the steps, the file manager application will install on Windows 11.
Download WSA
The process to run Android apps from the Google Play Store requires creating a custom version of the Windows Subsystem for Android, which means that you will need to download the package to modify it.
To download the Windows Subsystem for Android package, use these steps:
- Open the rg.adguard website.
- Select the Productid option.
- Copy and paste this ID 9P3395VX91NR.
- Select the Slow option.
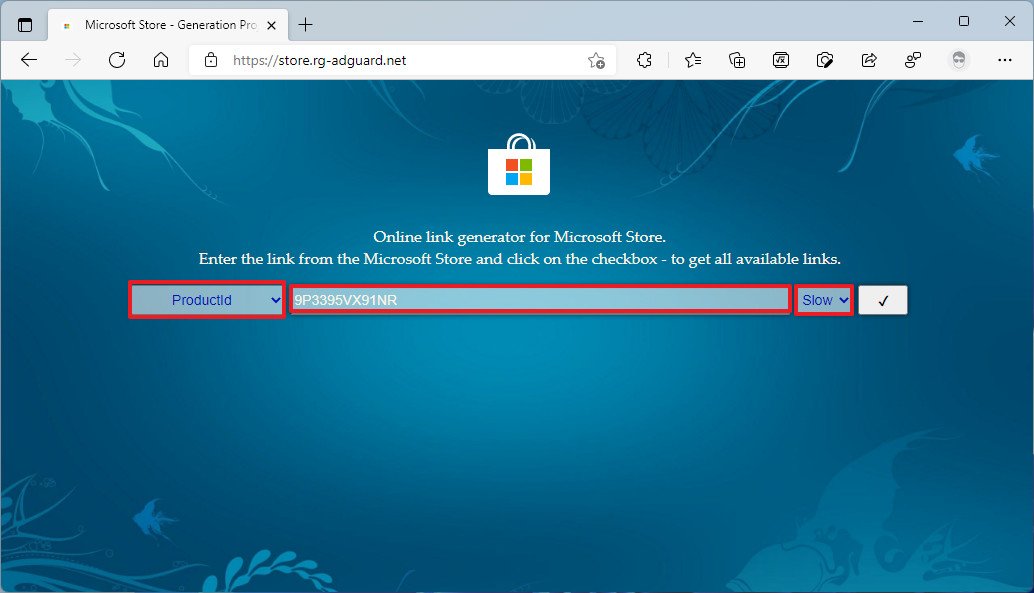
- Click the Check button.
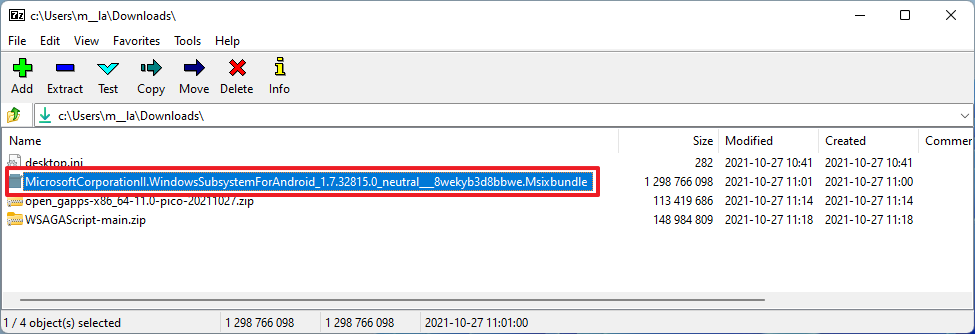
- Scroll down and click the MicrosoftCorporationII.WindowsSubsystemForAndroid_1.7.32815.0_neutral_~_8wekyb3d8bbwe.msixbundle link to download the Windows Subsystem for Android package.Quick note: If the browser refuses to download the file, select the Keep option from the download menu.
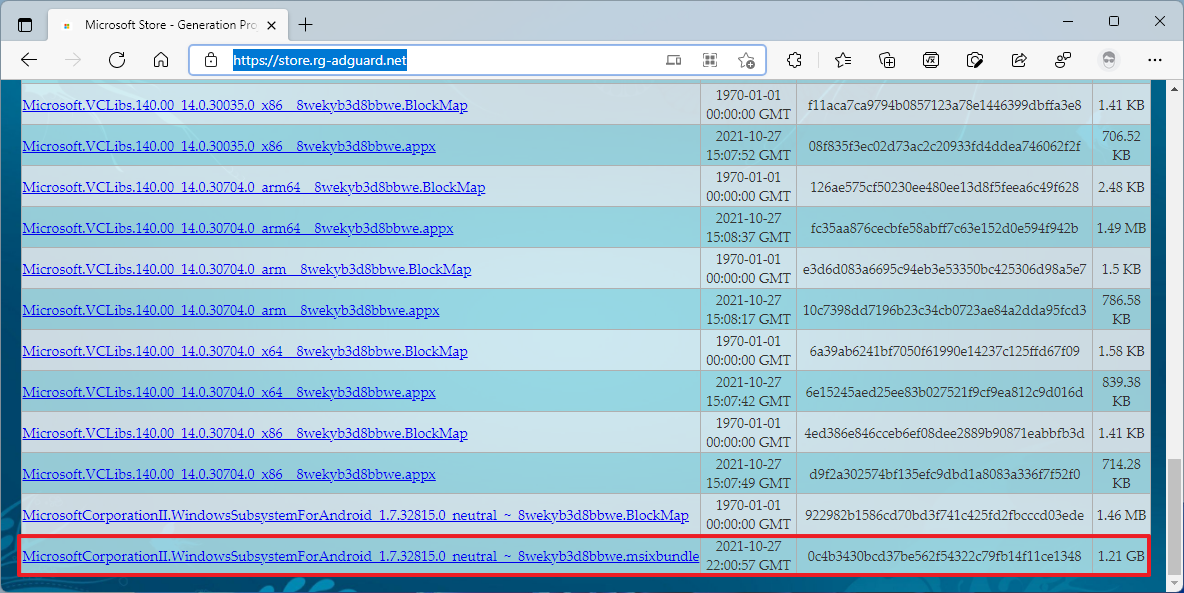
Once you complete the steps, there are other components you will need to download to continue with the process, including the OpenGApps tools and the custom WSAScript scripts.
Download OpenGApps
To download the OpenGAapps tools, use these steps:
- Open the OpenGApps website.
- Select the x86_64 option for the platform.
- Select the 11 option for the Android version.
- Select the pico option for the variant.
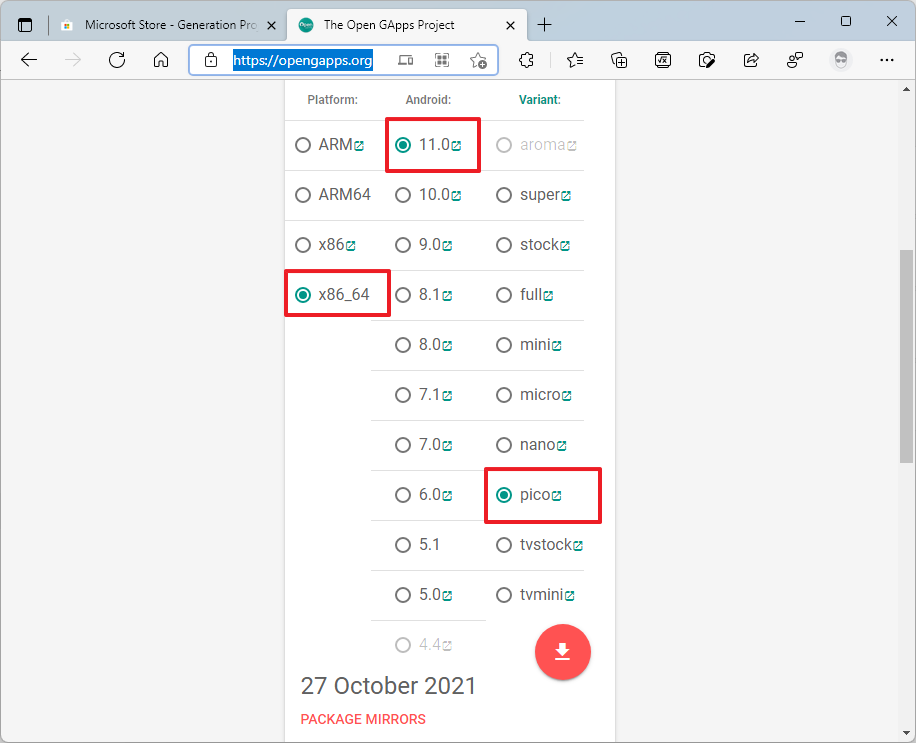
- Click the Download button to save the file on your device.
After you complete the steps, you need to download the WSAGAScript package.
Download WSAGAScript
To download the WSAGAScript scripts, use these steps:
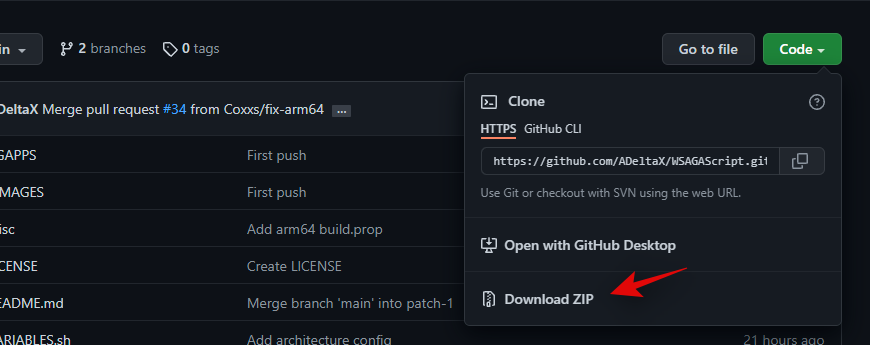
- Open the WSAGAScript GitHub page.
- Click the Code menu and select the Download ZIP option.
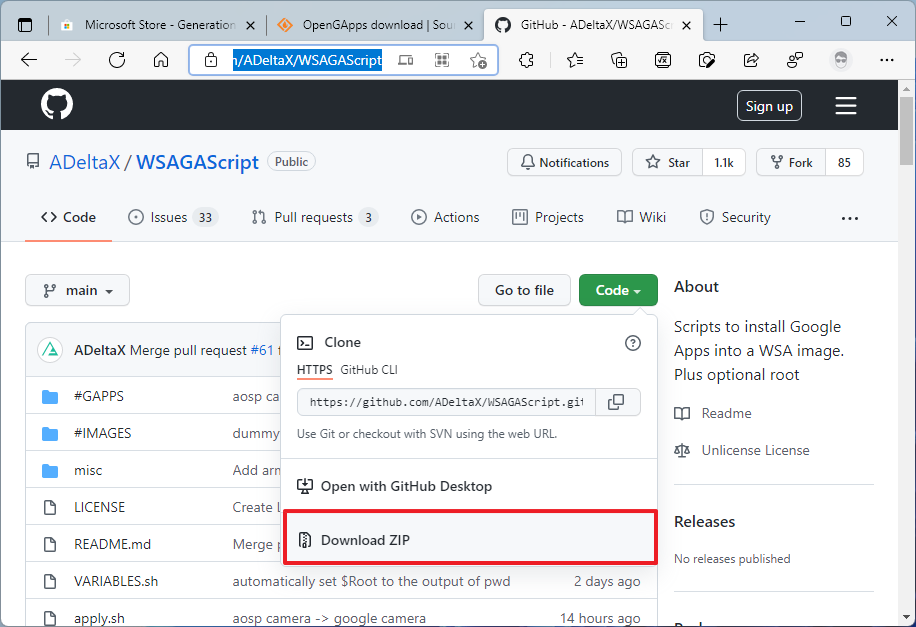
- Save the file to your computer.
Once you complete the steps, the scripts package will download on the computer.
Download ADB toolkit
At the end of the process, you will need to use the Android Debugging Bridge (ADB) tools to make the Google Play Store usable.
To download the ADB toolkit, use these steps:
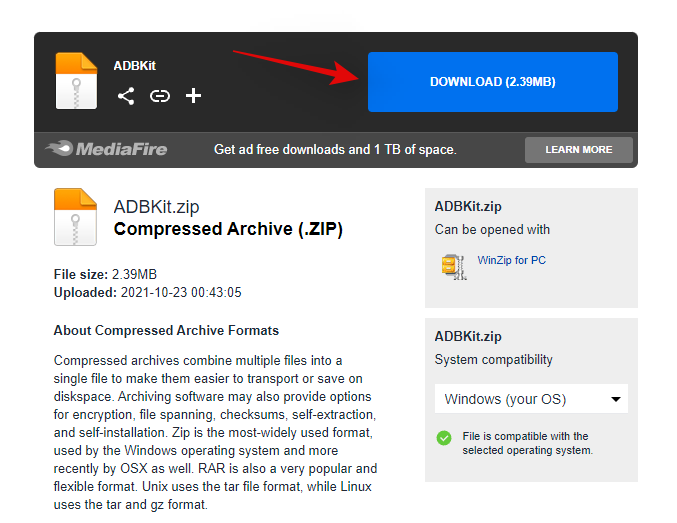
- Open the MediaFire download page.
- Click the Download button.
- Save the file on the computer.
After you complete the steps, the zip will download onto your device.
Create setup folders
Also, you will need to create three folders in the «C» drive to extract all the packages you downloaded earlier.
To set up the folder structure to create a custom version of WSA, use these steps:
- Open File Explorer.
- Click on This PC from the left navigation pane.
- Open the Local Disk (C drive).
- Click the New menu and select the Folder option.
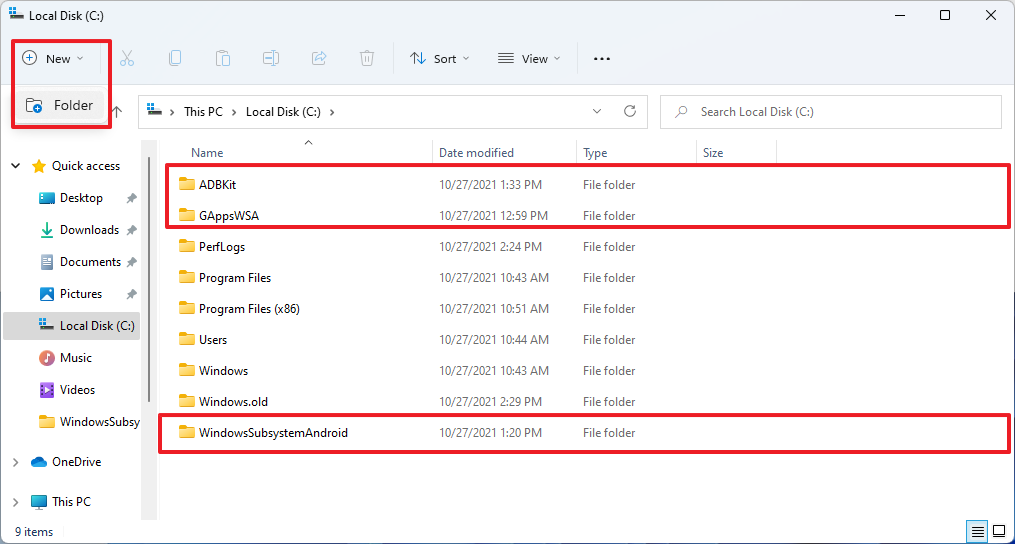
- Name the folder WindowsSubsystemAndroid and press Enter.
- Click the New menu and select the Folder option.
- Name the folder GAppsWSA and press Enter.
- Click the New menu and select the Folder option.
- Name the folder ADBKit and press Enter.
Once you complete the steps, the setup folders will be created.
Create a custom version of Windows Subsystem for Android
Since the original version of WSA doesn’t allow the Google Play Store, you will need to create a custom version. The process involves extracting and modifying files from the original version of the Windows Subsystem for Android.
Set up WindowsSubsystemAndroid contents
To extract the files of the original WSA package to the WindowsSubsystemAndroid folder, use these steps:
- Open Start.
- Search for 7-zip File Manager and click the top result to open the app.
- Browse to the folder where you downloaded the Msixbundle file.
- Double-click the MicrosoftCorporationII.WindowsSubsystemForAndroid_1.7.32815.0_neutral_~_8wekyb3d8bbwe.msixbundle file.
- Double-click the WsaPackage_1.7.32815.0_x64_Release-Nightly.msix file.
- Select all the files (Ctrl + A keyboard shortcut).
- Click the Extract button.
- In the «Copy to» field, specify the following path, and click the OK button:
C:\WindowsSubsystemAndroid\

- Type the following path in the address bar and press Enter:
C:\WindowsSubsystemAndroid\ - Select the following files while holding the Ctrl key:
- AppxMetadata.
- AppxBlockMap.xml.
- AppxSignature.p7x.
- Content_Type.xml.
- Click the Delete button.
After you complete the steps, the files necessary to continue with the process will be available in the WindowsSubsystemAndroid folder.
Set up the GAppsWSA contents
To extract the WSAGAscripts to modify the original Windows Subsystem for Android package, use the steps:
- Open Start.
- Search for 7-zip File Manager and click the top result to open the app.
- Browse to the folder where you downloaded the WSAGAScript-main.zip file.
- Open the WSAGAScript-main folder.
- Select all the files (Ctrl + A keyboard shortcut).
- Click the Extract button.
- In the «Copy to» field, specify the following path and click the OK button:
C:\GAppsWSA\
- Browse to the folder where you downloaded the open_gapps-x86_64-11.0-pico-xxxxxxxx.zip file.
- Select the open_gapps-x86_64-11.0-pico-xxxxxxxx.zip file.
- Click the Copy button.
- Type the following path in the address bar and press Enter:
C:\GAppsWSA\#GAPPS\

- Click the OK button.
Once you complete the steps, the GAppsWSA folder will include all the files to continue with the process.
Set up the ADBKit folder
To extract the contents of the ADBKit zip folder, use these steps:
- Open Start.
- Search for 7-zip File Manager and click the top result to open the app.
- Browse to the folder where you downloaded the ADBKit.zip file.
- Select all the files (Ctrl + A keyboard shortcut).
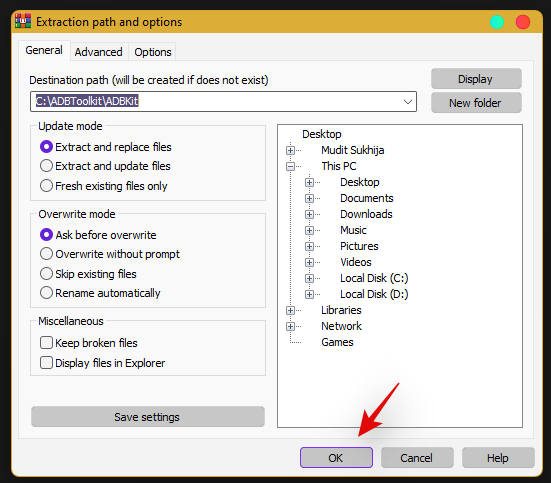
- Click the Extract button.
- In the «Copy to» field, specify the following path, and click the OK button:
C:\ADBKit\
You will be these tools at the end of this guide to fix access to the Google Play Store.
Copy images files
Before proceeding, you will need to copy four essential files from the WindowsSubsystemAndroid folder to the #IMAGES folder using these steps:
- Open File Explorer.
- Browse to the following path:
C:\WindowsSubsystemAndroid\ - Select these four files while holding the Ctrl key:
- vendor.img.
- system_ext.img.
- system.img.
- product.img.
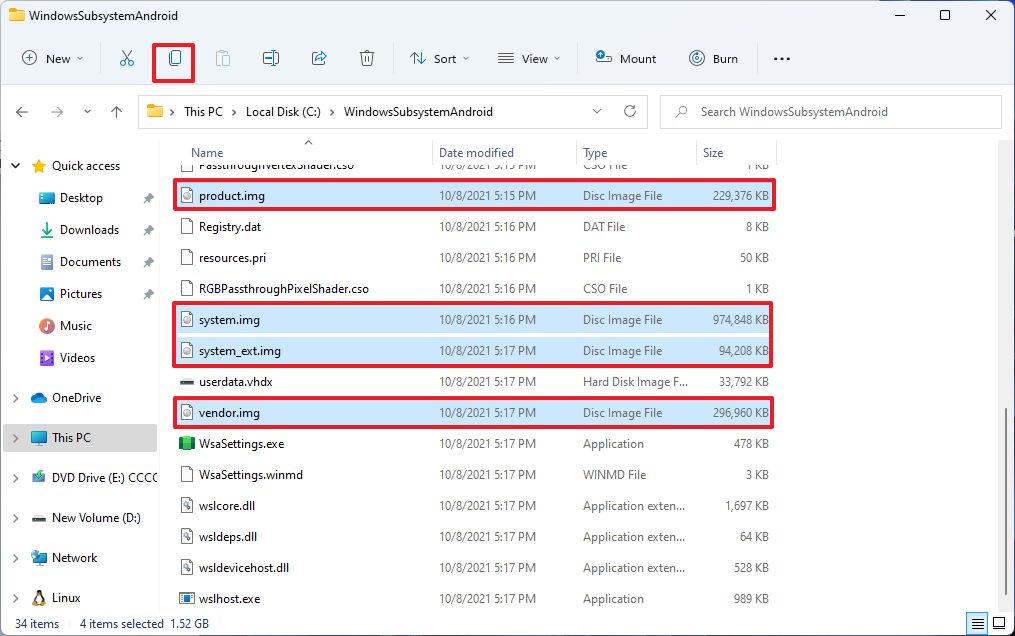
- Click the Copy button from the command bar.
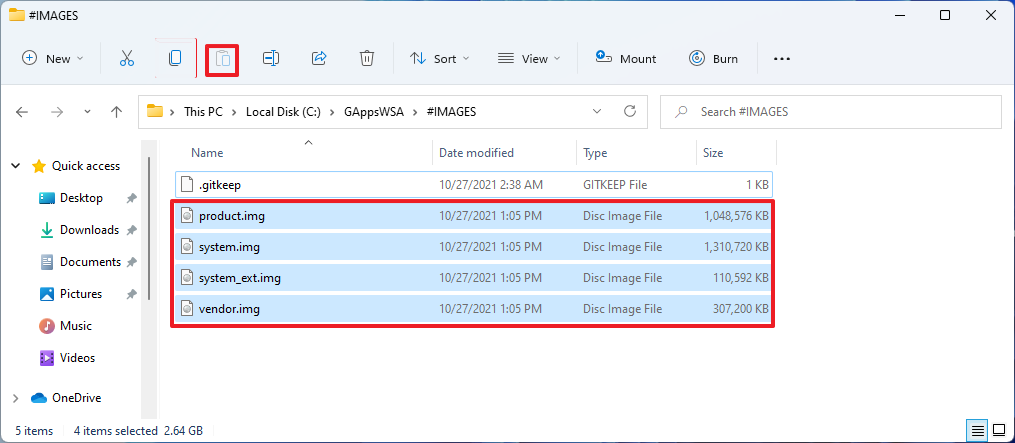
- Browse to the following path:
C:\GAppsWSA\#IMAGES - Click the Paste button from the command bar.
After you complete the steps, you will need to use a Linux distro to create a custom version of the Windows Subsystem for Android.
Modify Windows Subsystem for Android to install Google Play Store
To modify WSA to allow the Google Play Store, use these steps:
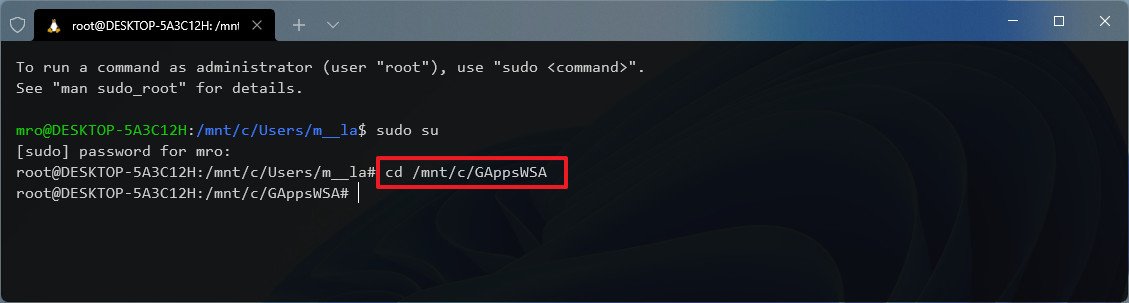
- Open Start.
- Search for Ubuntu, right-click the top result, and select the Run as administrator option.
- Type the following command and press Enter:
sudo su - Type the following command to change location to the GAppsWSA directory and press Enter:
cd /mnt/c/GAppsWSA
- Type the following command to update the system and press Enter:
sudo apt-get update - Type the following command to install the lzip unzip tool and press Enter:
sudo apt-get install unzip lzip

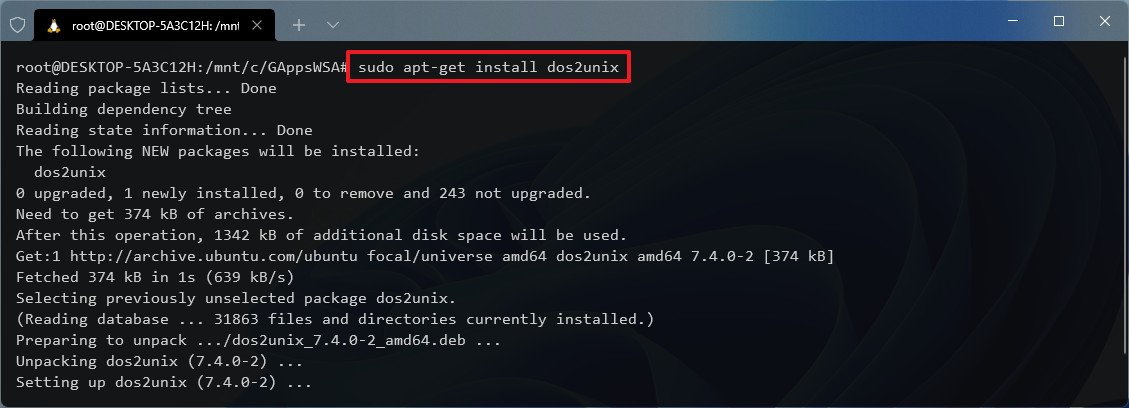
- Type the following command to install the dos2unix tool and press Enter:
sudo apt-get install dos2unix
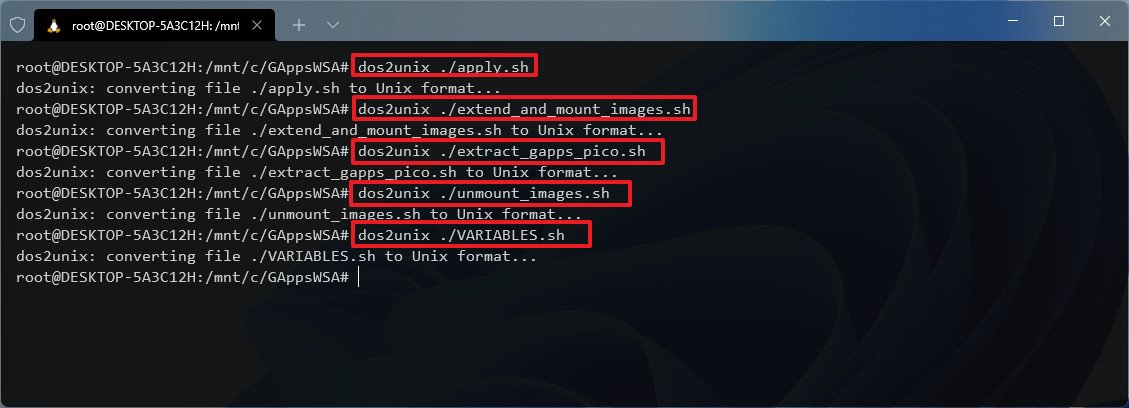
- Type the following command to convert the script to Unix format and press Enter:
dos2unix ./apply.sh - Type the following command to convert the script to Unix format and press Enter:
dos2unix ./extend_and_mount_images.sh - Type the following command to convert the script to Unix format and press Enter:
dos2unix ./extract_gapps_pico.sh - Type the following command to convert the script to Unix format and press Enter:
dos2unix ./unmount_images.sh - Type the following command to convert the script to Unix format and press Enter:
dos2unix ./VARIABLES.sh
- Type the following command to execute the first step and press Enter:
./extract_gapps_pico.sh - Type the following command to execute the second step and press Enter:
./extend_and_mount_images.sh - Type the following command to execute the third step and press Enter:
./apply.sh
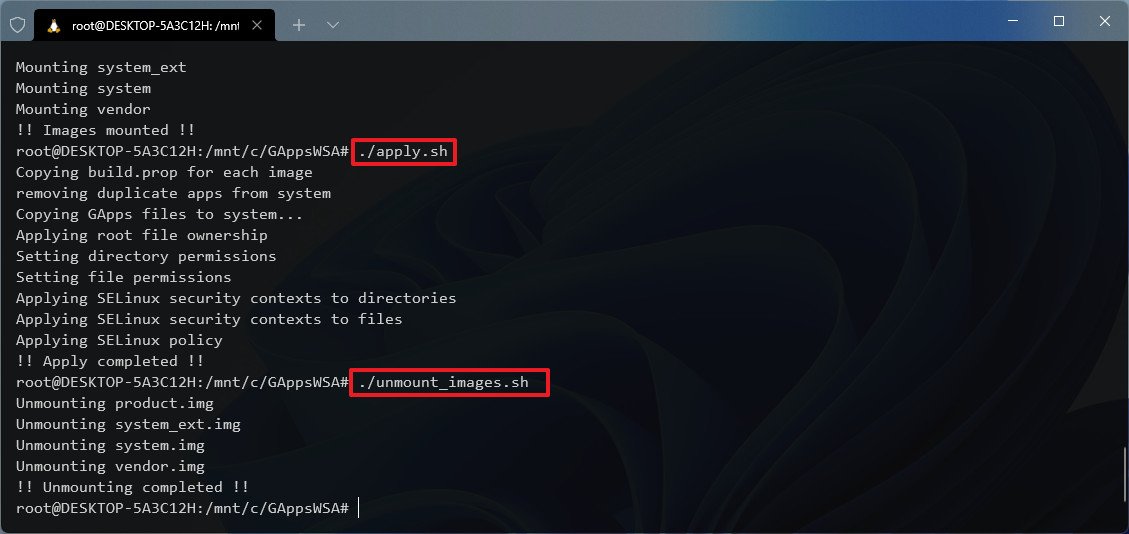
- Type the following command to execute the fourth step and press Enter:
./unmount_images.sh - Open File Explorer.
- Browse to the following path:
C:\GAppsWSA\#IMAGES - Select these four files while holding the Ctrl key:
- vendor.img.
- system_ext.img.
- system.img.
- product.img.
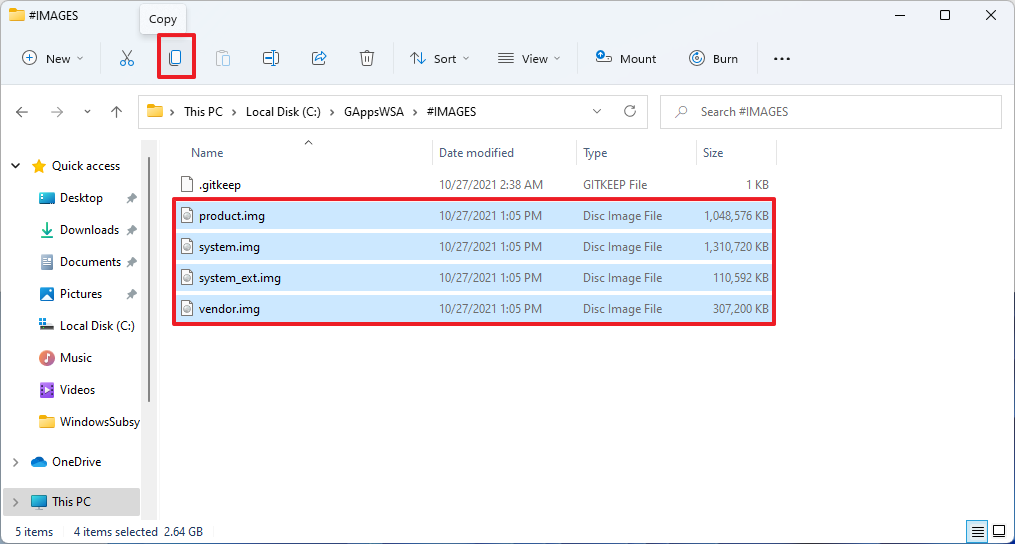
- Click the Copy button from the command bar.
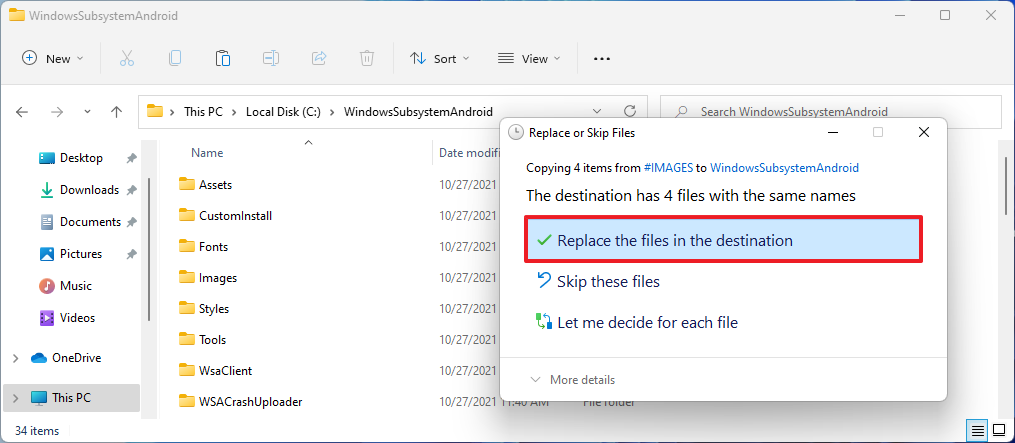
- Browse to the following path:
C:\WindowsSubsystemAndroid - Click the Paste button from the command bar.
- Click the Replace the files in the destination option.
- Browse to the following path:
C:\GAppsWSA\misc - Select the kernel file.
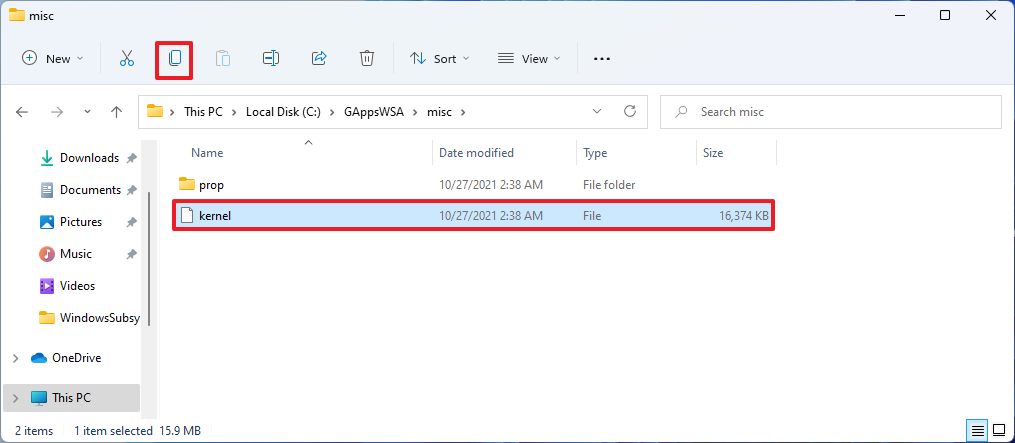
- Click the Copy button from the command bar.
- Browse to the following path:
C:\WindowsSubsystemAndroid\Tools - Select the kernel file.
- Click the Rename button from the command bar.
- Change the name to kernel_bak and press Enter:
- Click the Paste button from the command bar to paste the new kernel file.
Once you complete the steps, the custom version of WSA is ready to be installed on Windows 11.
Install custom version of WSA on Windows 11
To install the Windows Subsystem for Android with PowerShell, use these steps:
- Open Start.
- Search for PowerShell, right-click the top result, and select the Run as administrator option.
- Type the following command to install the custom WSA package and press Enter:
Add-AppxPackage -Register C:\WindowsSubsystemAndroid\AppxManifest.xml
After you complete the steps, the Windows Subsystem for Android and Google Play Store will install on Windows 11. However, the Google Play Store won’t work until you do some modifications with the steps below.
Set up Google Play Store on WSA
To set up the Play Store correctly to download Android apps on Windows 11, use these steps:
- Open Start.
- Search for Windows Subsystem for Android and click the top result to open the app.
- Turn on the Developer mode toggle switch.
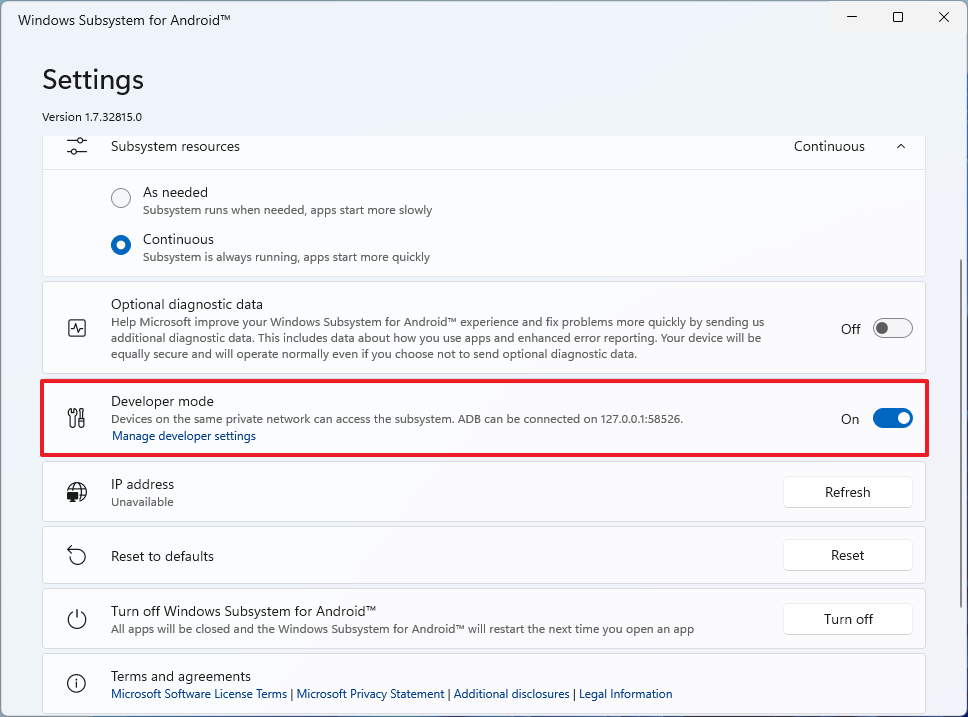
- Click the Manage developer settings option to spin the WSA virtual machine.
- Clear the Share my diagnostic data option.
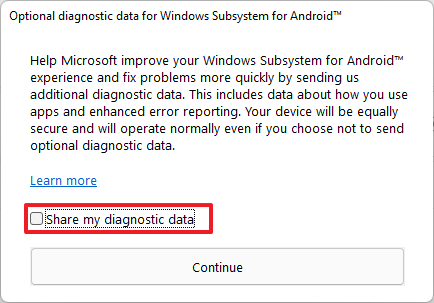
- Click the Continue button.
- Click the Close button.
- Open Start.
- Search for Command Prompt, right-click the top result, and select the Run as administrator option.
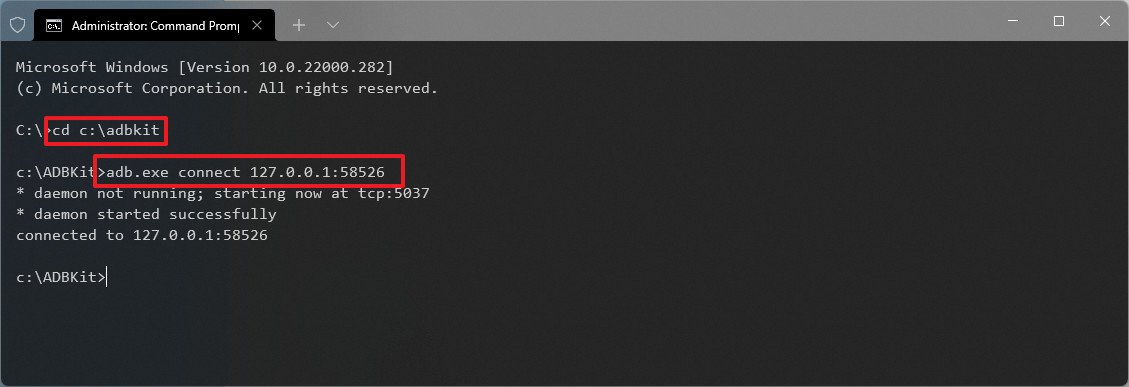
- Type the following command to change location to the ADBKit folder and press Enter:
cd C:\adbkit - Type the following command to connect to the Windows Subsystem for Android and press Enter:
adb.exe connect 127.0.0.1:58526
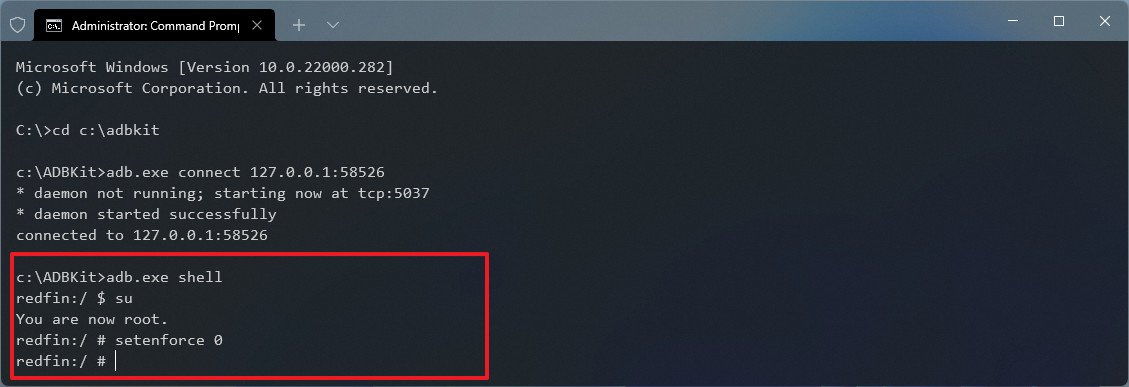
- Type the following command to open the shell and press Enter:
adb.exe shell - Type the following to gain root access and press Enter:
su - Type the following command to make the Google Play Store work and press Enter:
setenforce 0
- Open Start.
- Search for Play Store and click the top result to open the app.
- Click the Sign in button.
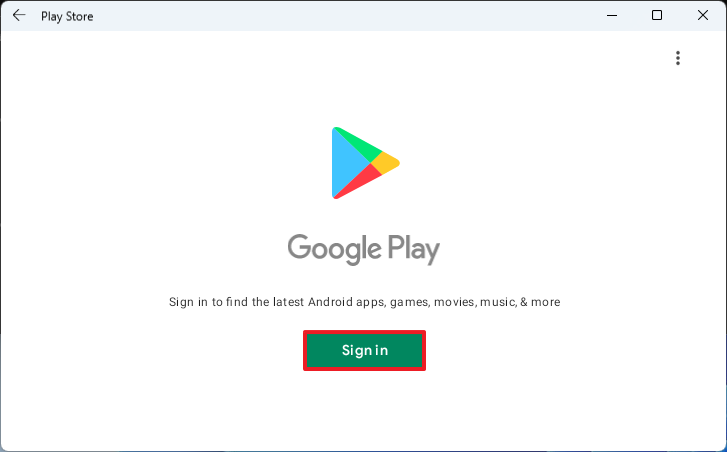
- Sign in with your Google credentials.
- Click the Agree button to agree to the terms.
Once you complete the steps, you can now start downloading and installing Android apps from the Google Play Store.
Install Android apps from the Google Play Store
To install and run Play Store Android apps on Windows 11, use these steps:
- Open Start.
- Search for Play Store and click the top result to open the app.
- Search for an app – for example, Gmail.
- Click the Install button.
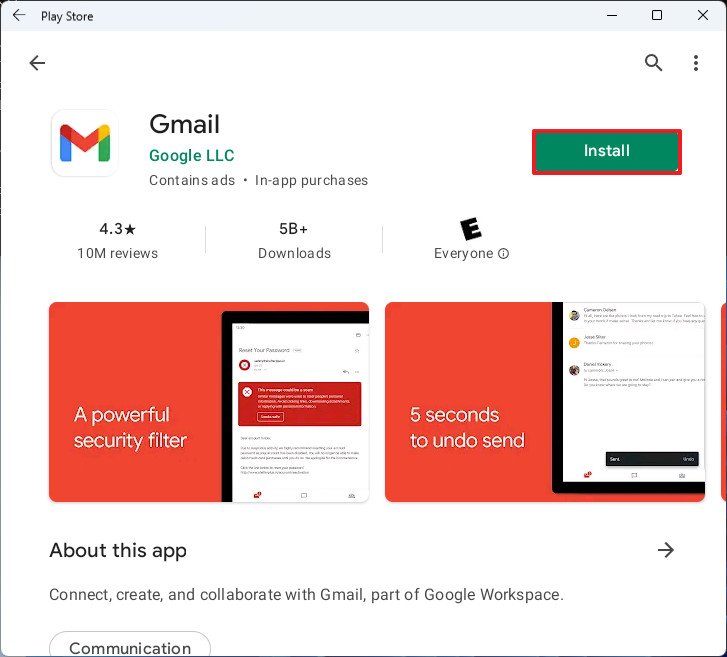
- Click the Continue button.
- Click the Skip button.
- Click the Open button.
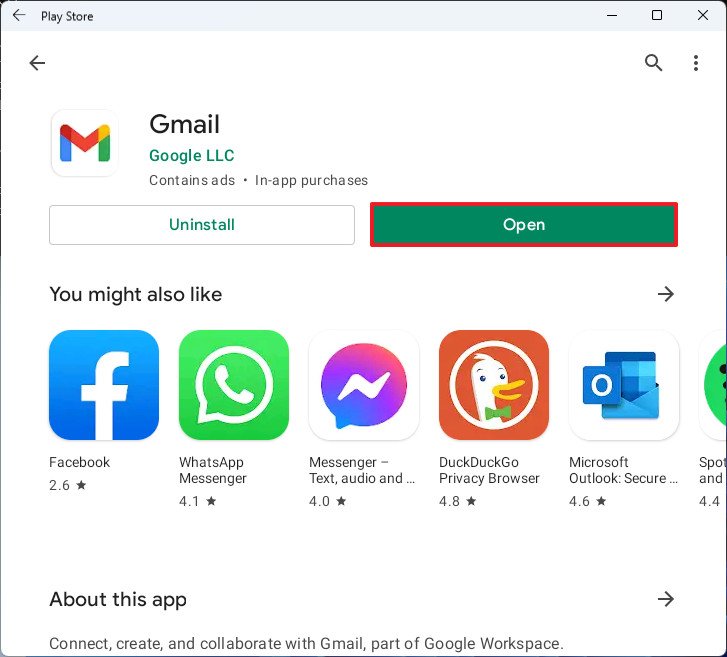
- Continue with the on-screen directions to set up and use the app.
After you complete the steps, you can repeat the above instructions to install virtually any app from the Google Play Store on Windows 11.
More Windows resources
For more helpful articles, coverage, and answers to common questions about Windows 10 and Windows 11, visit the following resources:
- Windows 10 on Windows Central — All you need to know
- Windows 10 help, tips, and tricks
- Windows 11 on Windows Central — All you need to know
Mauro Huculak has been a Windows How-To Expert contributor for WindowsCentral.com for nearly a decade and has over 15 years of experience writing comprehensive guides. He also has an IT background and has achieved different professional certifications from Microsoft, Cisco, VMware, and CompTIA. He has been recognized as a Microsoft MVP for many years.