
Leaving excess services running can drain system resources and cause your computer to appear to run slower than it actually is. Additionally, these excess resources can take up network bandwidth.
To regain your lost speed and keep your computer running at peak shape, here’s how to deactivate unnecessary startup services on Windows 11
Why Change Your Startup Services?
When you install a new program on Windows it isn’t uncommon for it to set itself up as a startup service or enable other services on startup. While this might not be a bad thing, it is possible over time for a computer to become bogged down by an overabundance of services.
If too many services are run at once, extra system resources will be taken up. This will result in slower performance that, over time, may lead to greater issues. Additionally, certain services require a constant open connection to a remote server.
When you deactivate the services that run when your computer starts to boost your PC’s speed, you shouldn’t blindly turn them off. If you turn off a service linked to a program you commonly use it may cause the program to be slower to start, or not function at all.
The simplest way to double-check before you shut the service off is to do a quick Google search of the service’s name when you aren’t certain. In most cases this will quickly clear up the service’s purpose, to help you determine whether it is worth it to shut it down.
Accessing the Windows Service Manager
The first step to deactivate any service in Windows is to access Windows Service Manager. The quickest and easiest way to do so is to use the Windows run dialog, which you can open with Win + R.
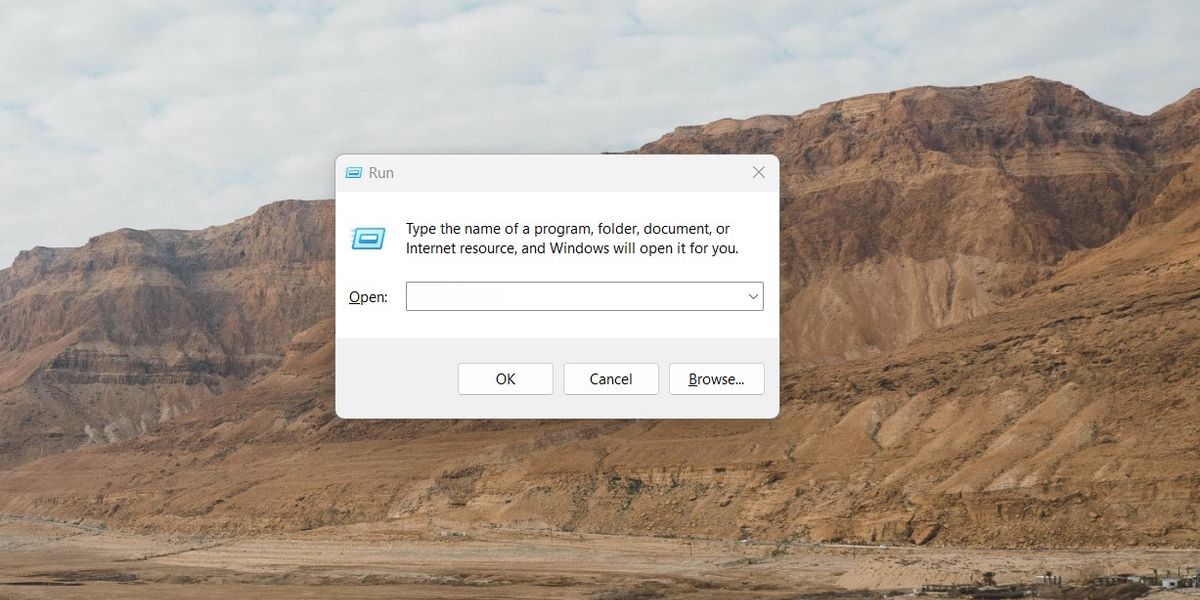
Now, type in services.msc into the box and press Enter. When you do so the Windows Service Manager will immediately be pulled up. This will open a new window with every currently registered service on your computer listed.
Alternatively, if you aren’t able to access the run dialog, you can also use the search bar in the taskbar to locate the Service Manager. Type the word Services into the search bar. The top result will say Services with an icon next to it of a pair of gears, which will open the Windows Service Manager.
Identifying the Current Startup Services
With the service manager pulled up, you will be faced with a complete list of the services currently registered on your computer. This includes any services that the programs you use require in order to run.
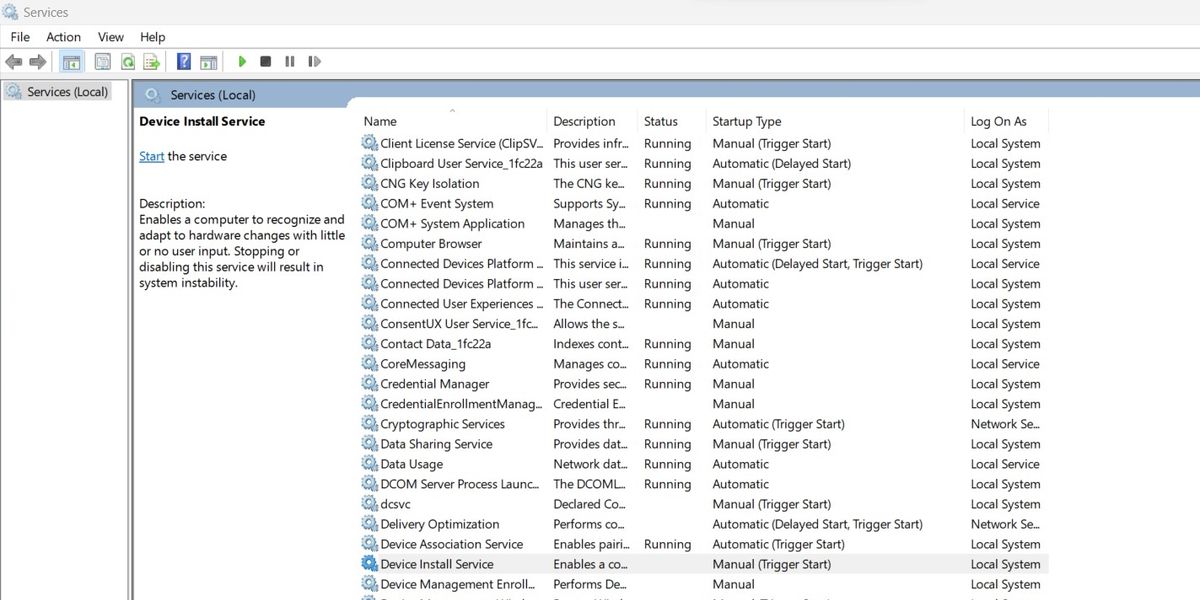
The list of startup services is composed of five separate columns, the service name, a description of the service, its current status, the startup type, and the user it acts as. The fourth column is the most important one for our purposes as it lists how and when the service starts.
Changing the Status of Services
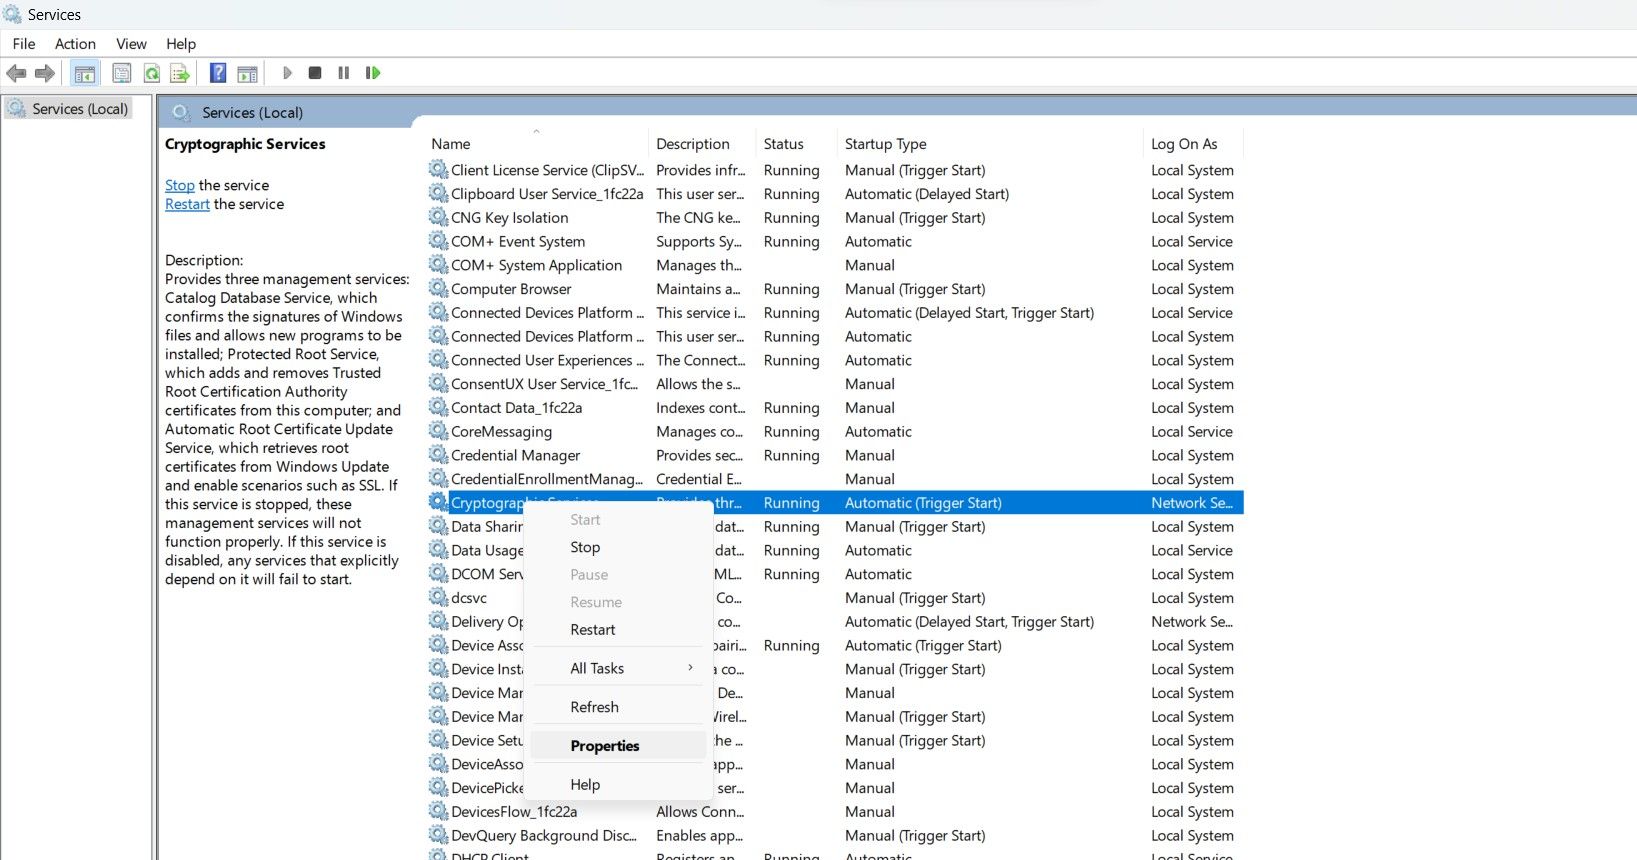
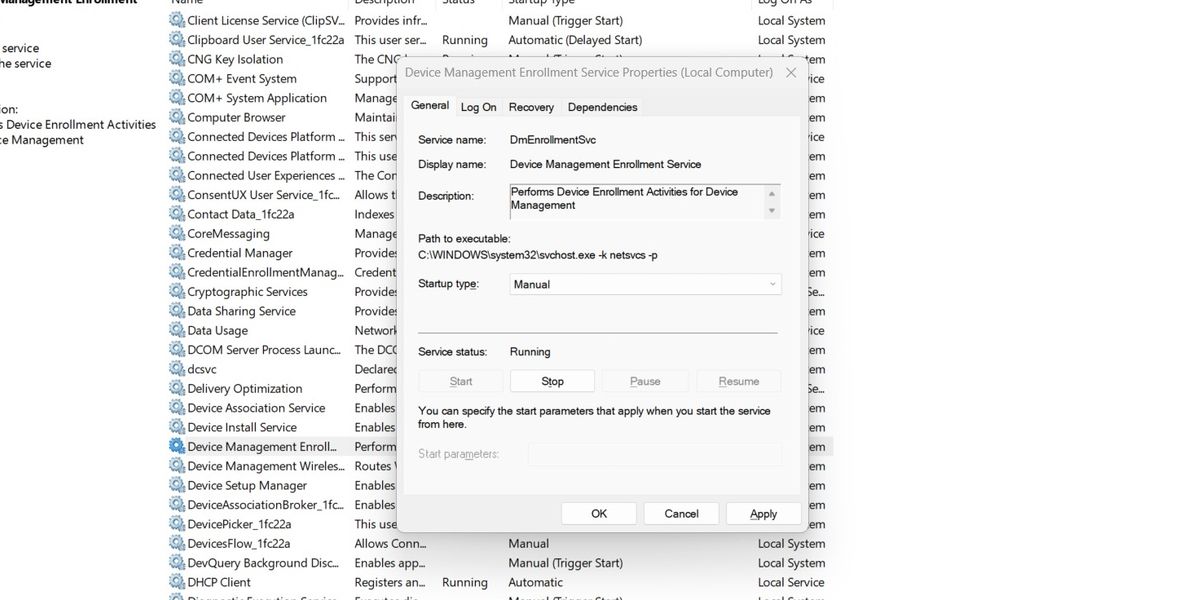
Once you have identified one or more services that need to be deactivated, simply switch their startup type. Right-click on any service to bring up a context menu with a number of management options on it. Near the bottom, you will see an option labeled Properties.
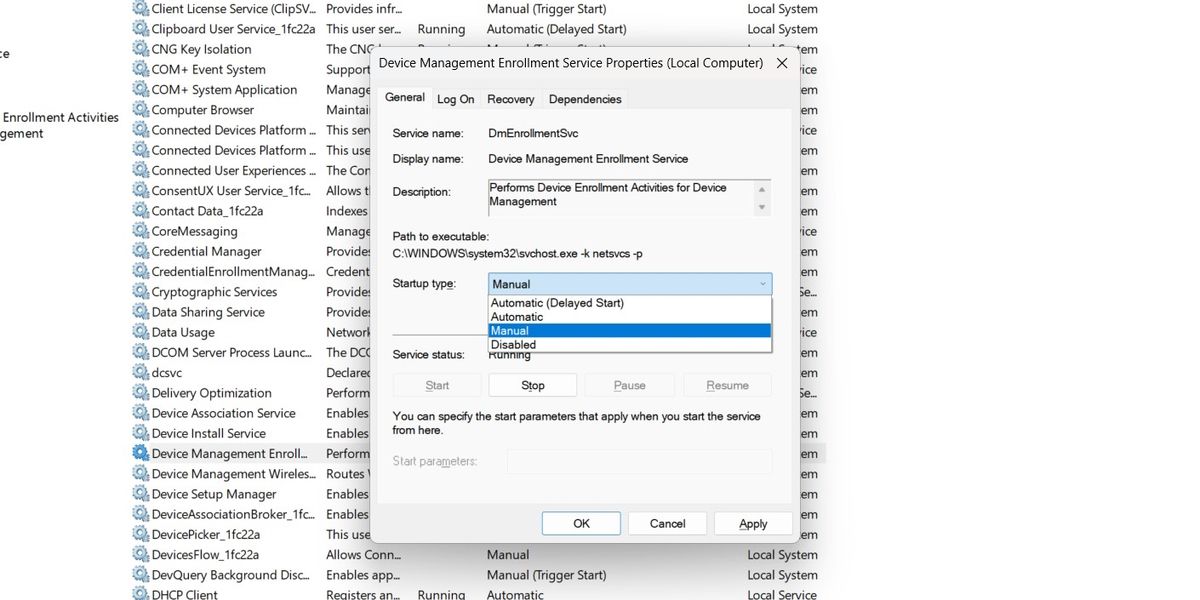
Once you click it, a new window will open with the properties for the service you clicked on. Halfway down the window you will see a select box labeled Startup Type. This select box contains all the different startup types that a service can use.
Service Startup Types
There are two main types of startup types for services. Automatic indicates that the service starts up on its own when Windows starts. Manual, on the other hand, means that another program triggers this service to start. Some services, such as the Windows Installer Service, can be enabled or disabled as needed.
Aside from Manual and Automatic, you may also see the words Delayed Start or Trigger Start in parentheses after the type. These modifiers indicate further info about the start type, however, for the purposes of deactivating startup services, they can be ignored.
Changing Startup Types
The dropdown menu will offer several options that depend on the service selected. The three main options that will be present for all services are Automatic, Manual, and Disabled.
Set the type to Automatic to start the service up when Windows first boots. Manual will wait until an outside trigger from either a program or the user to run the service. Disabled will prevent the service from running. This may cause problems if the service is required by a program that you use.
As such, don’t use Disabled unless you are certain that the service is unnecessary or malicious. In the event that the service will never again be needed, you can delete the service from your Windows device altogether.
Once you have selected the proper startup type, click on the Apply button at the bottom of the screen. This saves the current setting for the service. The next time you start up your computer, the setting you have selected will be used.
Stopping Running Services
Once you have selected the new startup type for the service, you can determine if the service needs to be run currently. If not, you can stop the service now, without the need to restart your PC.
Below the startup type, there is another section labeled Service Status. This section shows whether the service you have selected is Running, Paused, or Stopped. If you want to stop the service immediately, select the button that says Stop in this section.
Once the button has been pressed, Windows will attempt to gracefully shut the service down. Once terminated, it will remain deactivated until another program triggers it to run again. This is just one of the possible ways to start or stop a service in Windows.
Configure Your Startup Services in Windows
Unnecessary services that you run on your computer can drain your resources and limit network bandwidth. To keep your PC running well, periodically turn off the excess services that have been enabled by various programs.
The services in Windows can be listed using the Service Manager tool.
To start the Service Manager GUI, press ⊞ Win keybutton to open the “Start” menu, type in services to search for the Service Manager and press Enter to launch it.
The services can also be listed using the command-line prompt (CMD) or the PowerShell.
In this note i am showing how to list the services and how to search for a specific service in Windows using the command-line prompt (CMD) or the PowerShell.
Cool Tip: List processes in Windows from the CMD! Read more →
List Services Using Command Line (CMD)
List all services:
C:\> sc queryex type=service state=all
List service names only:
C:\> sc queryex type=service state=all | find /i "SERVICE_NAME:"
Search for specific service:
C:\> sc queryex type=service state=all | find /i "SERVICE_NAME: myService"
Get the status of a specific service:
C:\> sc query myService
Get a list of the running services:
C:\> sc queryex type=service
- or -
C:\> sc queryex type=service state=active
-or -
C:\> net start
Get a list of the stopped services:
C:\> sc queryex type=service state=inactive
Cool Tip: Start/Stop a service in Windows from the CMD & PowerShell! Read more →
List all services:
PS C:\> Get-Service
Search for specific service:
PS C:\> Get-Service | Where-Object {$_.Name -like "*myService*"}
Get the status of a specific service:
PS C:\> Get-Service myService
Get a list of the running services:
PS C:\> Get-Service | Where-Object {$_.Status -eq "Running"}
Get a list of the stopped services:
PS C:\> Get-Service | Where-Object {$_.Status -eq "Stopped"}
Was it useful? Share this post with the world!

In this article, you can learn how to display and interact with the started services panel from the command line feature. Windows can also provides the Net utility. From using the Command Line Promt, you can use this utility at start, stop, pause and continue services. Before the windows, people can use Linux, Unix, MS DOS like operating systems, which are command line promt.

But when the windows (Graphical User Interface ) are introduced, people can don’t use command line promt. But you can use this feature to show any files , folders or any other window functions using some simple commands.
Here is the simple command, which you can use to display the started services into your PC.
Syntax ( Command )
net start
Window Started Services Using Command Line Promt
Step 1 – Go to Start Menu in Window.

Step 2 – Type in Run Bar ” CMD “ .

Step 3 – write here ” net start “ and then Enter.

Step 4 – Below list of services shown ( Depending your own PC ,List of Services Can Change).

This List Shown After Enter of putting this command in CMD ( net start ) .
- Avast AntiVirus
- Avast Vbox COM Services
- Offline Files
- IP Helper
- DCOM Service Processor
- Power Plug and Play
- Background Intelligent Transfer Service
- CNG Key Isolation
- Computer Browser
- Cryptographic Services
- Network Connections
- DHCP Client
- Multimedia Class Schedular
- Diagnostic Policy Service
- Network List Services
- Print Spooler
- Server
- Security Accounts Manager
- COM + Event System
In this article…
- What is a service’s Startup Type? Where do I find it?
- Automatic
- Automatic (Delayed Start)
- Manual
- Disabled
- Intermission: What does “Trigger Start” mean?
- Automatic (Trigger Start)
- Automatic (Delayed Start, Trigger Start)
- Manual (Trigger Start)
- Windows Service startup types: Summary
What is a service’s Startup Type? Where do I find it?
A Windows Service is a special application whose lifecycle is managed by the operating system. That is, unlike a “normal” application that relies on a person to start or stop it, Windows itself is responsible for starting, stopping or restarting a service.
To give you some control over how things work, each Windows Service has a startup type property that dictates how Windows should manage it. The options range from “start it as soon as you can” to “don’t run the service at all”. There’s even the ability to start a service when certain conditions are met. But more on those later as we dig into each of the startup types below.
The built-in Services application shows the startup type for each service. You can launch the application by typing “services” into the search bar and clicking its icon:
")
The Services window lists all the Windows Services running on your computer. The “Startup Type” column indicates how each service is configured to start:
")
Double-click a row to reveal the details of that service in the Properties window. You’ll see the “Startup type” field about half-way down:
")
If permissions allow, you can change the startup type right there as well. Simply choose a new value from the list and click OK (or Apply) to record your change:
")
And now that you know how to find the startup type of any service, let’s review the values available and what each of them means.
Automatic
When a service is set to “Automatic”, Windows will start it as soon as possible whenever the system boots.
Because of that early start, all critical Windows Services — like those supporting networking, security and user management — are set to start automatically. That enables them to come to life quickly, to support key functionality across your computer.
When to set startup type to “Automatic”
Automatic start is best for services that:
-
Implement technical functions that are vital for the operation of your PC;
-
Are needed to support other services or applications;
-
Must run all the time.
Examples of “Automatic” services
Many of the built-in Windows Services are set to start automatically. Here are a few examples:
-
Windows Defender Firewall — helps protect your computer by preventing unauthorized users from gaining access to your computer through the Internet or a network. This service must be ready by the time the network is up.
-
Local Session Manager — a core Windows Service that manages local user sessions. Stopping or disabling this service will result in system instability.
-
Windows Event Log — manages events and event logs for other services. Stopping this service may compromise the security and reliability of the system.
Automatic (Delayed Start)
Windows launches “Automatic (Delayed Start)” services about 1-2 minutes after your computer boots — after Automatic services have started.
You can think of Windows launching services in two rounds at boot. Automatic services go in the first round while “Automatic (Delayed Start)” services are kicked off in the second round.
As such, the “Automatic (Delayed Start)” setting is most useful in lessening the mad rush for resources when your computer starts up.
For example, suppose that there are 20 services all being started at the same time. In reality, they will all be competing for slices of the machine’s precious resources (CPU/RAM/Disk/Network). The inevitable result is that each service will take longer to become available.
If you have a few services that are critical, then you may want to set those few to “Automatic” and set as many of the others as you can to “Automatic (Delayed Start)”. This will ensure that the critical services get the most resources early and become available sooner, while the non-critical services start a bit later (which by definition is OK).
When to set startup type to “Automatic (Delayed Start)”
“Automatic (Delayed Start)” is best for services that:
-
Should start at boot but don’t perform mission-critical activities;
-
Are best started after supporting services are up and running;
-
Should run all the time.
Examples of “Automatic (Delayed Start)” services
On Windows 11, less than a dozen of the built-in Windows Services are set to start delayed. Here are a few examples:
-
Security Center — monitors and reports security health settings on the computer. This service should run all the time but there is no need to start it ASAP because it’s focused on reporting.
-
Update Orchestrator Service — manages Windows Updates. If stopped, your computer will not be able to download and install the latest updates. Since it’s not a critical service, Windows starts it in the second round.
-
Dropbox Update Service — keeps your Dropbox installations up to date. The service is certainly helpful but it doesn’t need to start the instant your PC reboots.
Manual
A “Manual” service isn’t automatically started by Windows at boot. Instead, it will be started on demand — either by a user or by an application.
For the most part, “Manual” services sit idle until they’re needed. And often, they return to an idle state once they’ve performed the work they were summoned to do. As such, they tend to be the most efficient group of services, only running when they need to.
Note that in previous versions of Windows, the vast majority of services were set to “Automatic” and only a handful were “Manual”. But over the years, as Microsoft focused on streamlining the boot process, the situation has fully reversed. Most of the built-in Windows Services are now started on demand!
When to set startup type to “Manual”
The “Manual” startup type is appropriate for services that:
-
Don’t need to run 24/7;
-
Are only used occasionally;
-
Provide uncommon functionality that only some devices (or users) will need;
-
Aim to achieve maximum efficiency, only running when necessary;
Examples of “Manual” services
Many of the built-in Windows Services are set to “Manual”. Here are a few examples:
-
Windows Backup — provides backup and restore capabilities, which are only necessary at defined times.
-
Fax Service — enables you to send and receive faxes. Who uses that anymore? 🙂
-
Microsoft Edge Elevation Service — keeps Microsoft Edge up to date. This service only comes to life a few times per day.
Disabled
Setting the startup type to “Disabled” tells Windows don’t allow the service to start — under any circumstances. You cannot run a disabled service.
If you wish to start a disabled service, you must first change its startup type to another value. Setting to “Manual” usually makes the most sense.
When to set startup type to “Disabled”
You should disable services that:
-
Shouldn’t (or cannot) run;
-
Are responsible for unused functionality;
-
Are insecure and may compromise the system in some fashion.
Examples of “Disabled” services
Here are a few examples of services with startup type set to “Disabled”:
-
Shared PC Account Manager — Manages profiles and accounts on a SharedPC configured device. It’s disabled on our machine because we’re not using the SharedPC feature.
-
OpenSSH Authentication Agent — holds private keys used for public key authentication. Citing security concerns, Microsoft disables this rarely used service in new installations of Windows 10 & 11.
-
Remote Registry — enables remote users to modify registry settings on this computer. Certainly not for everyone!
Intermission: What does “Trigger Start” mean?
Because the remaining startup types all mention “Trigger Start”, we thought this would be a good time to explain what that means. Here goes…
In older versions of Windows, the only startup types available were the ones we’ve already reviewed — Automatic, Automatic (Delayed Start), Manual and Disabled. Each service was assigned one of those values. (Incidentally, most were set to “Automatic”, which made for utter chaos as they all scrambled to start at boot.)
However, in Windows 7 (circa 2009), Microsoft introduced a new capability — the ability to start (or stop) a service when a key operating system event occurs. They called those events triggers and services that react to the events trigger start services.
Putting it all together, a service has “Trigger Start” in its startup type if it has at least one trigger.
But why did Microsoft introduce trigger start services?
Well, by offering trigger start as an option, Microsoft made it easier for Windows Services to avoid starting at boot and running 24/7. For example, if your service works with USB drives, you can configure it to start whenever someone inserts a USB drive. Similarly, a network-monitoring service may choose to run only when your computer signs out of a domain or leaves the network. Options abound, and you can read about the technical details in the Developing Efficient Background Processes for Windows white paper.
So service triggers are great. But there is one major inconvenience…
You can’t view or edit triggers with the Services application
Until Microsoft updates the Services application to manage triggers, you either have to:
-
rely on the Windows SC command-line program, or
-
use our free Service Trigger Editor GUI utility, which shows you all the trigger start services on your system:

Anyway, back to startup types…
Automatic (Trigger Start)
“Automatic (Trigger Start)” means start the service immediately at boot — and also restart it whenever specific operating system events (triggers) occur.
It’s the same as Automatic, plus with one or more triggers too.
As a result, an “Automatic (Trigger Start)” service can be very efficient. Even though Windows starts it as soon as possible, the service can do its initial work and quickly exit — secure in the knowledge that Windows will fire it up again whenever it’s needed.
When to set startup type to “Automatic (Trigger Start)”
“Automatic (Trigger Start)” start works best for services that:
-
Should to start as soon as possible after boot;
-
Don’t need to run all the time;
-
Can be reactivated by a triggering event.
Examples of “Automatic (Trigger Start)” services
On our Windows 11 computer, only six services are set to “Automatic (Trigger Start)”. Here are a few of them:
-
Server — supports file, print, and named-pipe sharing over the network. As you might expect, the two triggers are network-related:

-
Windows Connection Manager — makes automatic connect/disconnect decisions based on the network connectivity options currently available to the PC and enables management of network connectivity based on Group Policy settings.
-
Group Policy Client — responsible for applying settings configured by administrators for the computer and users through the Group Policy component.

Automatic (Delayed Start, Trigger Start)
An “Automatic (Delayed Start, Trigger Start)” service starts a few minutes after boot — and also in response to a trigger.
As you may have guessed, “Automatic (Delayed Start, Trigger Start)” is similar to Automatic (Trigger Start), except that the service starts 1-2 minutes after boot (instead of ASAP).
When to set startup type to “Automatic (Delayed Start, Trigger Start)”
“Automatic (Delayed Start, Trigger Start)” can apply to services that:
-
Should to start at boot but can wait for a couple of minutes;
-
Don’t need to run all the time;
-
Can be reactivated by a triggering event.
Examples of “Automatic (Delayed Start, Trigger Start)” services
Few of the built-in Windows Services use this startup type. Here are three examples:
-
Microsoft Edge Update Service — keeps your Microsoft software up to date.
-
Software Protection — enables the download, installation and enforcement of digital licenses for Windows and Windows applications.
-
Windows Time — maintains date and time synchronization on all clients and servers in the network. Because it’s all about networking, the service will trigger-start when your computer joins a domain:

Manual (Trigger Start)
Windows never starts a “Manual (Trigger Start)” service at boot. It only starts the service in response to a trigger.
This is the most efficient startup type of them all. Windows only starts the service when its needed.
When to set startup type to Manual (Trigger Start)
“Manual (Trigger Start)” is a fine choice for services that:
-
Don’t need to start at boot;
-
Don’t need to run all the time;
-
Can be reactivated by a triggering event.
Examples of Manual (Trigger Start) services
“Manual (Trigger Start)” is the most popular startup type on our Windows 11 computer. That’s a testament to the work that Microsoft has put in to ensure that its services don’t hog resources by running when they don’t need to.
Example services include:
-
BitLocker Drive Encryption Service — provides secure startup for the operating system, as well as full volume encryption for OS, fixed or removable volumes. It only needs to run under special conditions (when a custom event is triggered).
-
Windows Update — enables the detection, download, and installation of updates for Windows and other programs. As you can see, the service will spring to life whenever a policy changes:
-
Portable Device Enumerator Service — enforces group policy for removable mass-storage devices. It employs a dozen triggers!


Windows Service startup types: Summary
To recap, the startup type tells Windows how it should start your service.
Here is what each value communicates to the operating system:
-
Automatic: “Start this service at boot, early in the cycle.”
-
Automatic (Delayed Start): “Start this service at boot, but delay it by a couple of minutes.”
-
Manual: “Don’t start this service at boot.”
-
Disabled: “Don’t start this service at boot, and don’t allow anyone (or any program) to start it either.”
-
Automatic (Trigger Start): “Start this service early in the boot cycle and start/stop it when specific events occur.”
-
Automatic (Delayed Start, Trigger Start): “Start this service a couple of minutes after boot and start/stop it when specific events occur.”
-
Manual (Trigger Start): “Don’t start this service at boot, only start/stop it when specific events occur.”
You may also like…
If you no longer need a service to run at startup, suspect it is malware, or prefer it to run only when you need it, you can disable it. Here’s a quick tutorial on how to disable services from running at startup on Windows 11 or Windows 10.
Note: This tutorial is intended for advanced users with adequate knowledge in computer and Microsoft Windows. Disabling an important service accidentally may cause your Windows to malfunction or even brick your PC. We will not be held responsible for any damage or loss caused by improper use of these instructions.
See also: 30+ Windows 11 Services to Disable for Gaming Performance
What services can you safely disable from running at startup on Windows 11/10
A Windows service is a program that operates in the background to make things work. Similar to startup programs, there is a list of services that will run during the startup of your Windows PC. Most of these services are important and mandatory for Windows to work.
However, some programs have their own services set to run during Windows startup and continue to run in the background as you use your computer. These services are usually required for their corresponding programs or software to work properly. This is also why, even after you’ve stopped a program from running at startup in Task Manager, that particular program would still run during startup because it has a corresponding service that automatically starts it up.
Disabling a service that a program relies on will cause the program to stop working or give errors when you run it. While some of these services can be malicious or unknown, it’s best to uninstall the corresponding program that you suspect to be the culprit of your problem than to disable its service.
If you insist on disabling a service from running at startup, make sure that particular service is not a Microsoft service that Windows relies on to function properly. If you accidentally disable any of these crucial Windows-related services, you could possibly brick your Windows. But don’t worry, we will show you how to hide the sensitive Windows-related services in the tutorial below so that you don’t accidentally disable any of them.
How to stop services from running at startup on Windows 10 or 11
To stop any service from running at startup on Windows 11/10, follow these steps:
- Go to start menu (or press Win+R keys), type in MSCONFIG and open it.
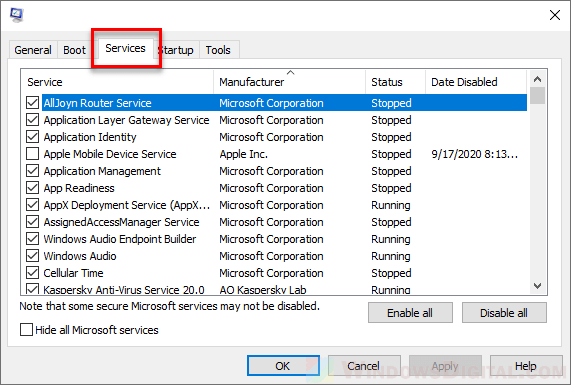
- In the system configuration window (aka MSCONFIG) you’ve just open, click on Services tab.

- Recommended: Check the checkbox that says “Hide all Microsoft services“. Doing so will hide all sensitive and important Microsoft services so that you don’t accidentally disable any of them and end up bricking your PC.
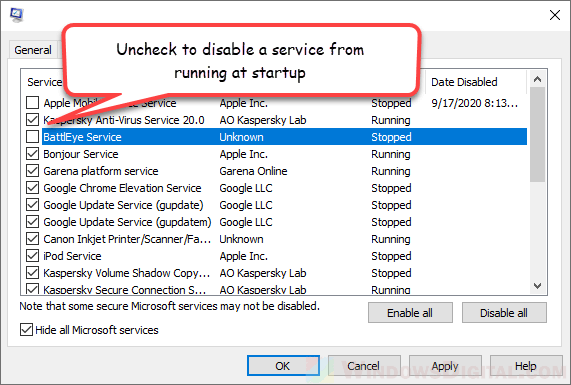
- To disable a service from running at startup, simply uncheck the checkbox next to its corresponding service.
- Click on Apply and restart your PC. The disabled services will not run on Windows startup again.
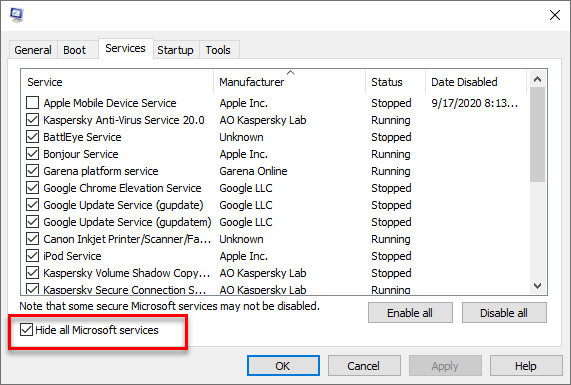
Services listed in the MSCONFIG window are all the services that would run at startup on your Windows PC. Usually, you will know what a service does by looking at its corresponding manufacturer. For example, if you have Apple devices and iTunes installed on your PC, you should be able to see several services related to it with the manufacturer shown as Apple Inc.
Avoid clicking the Disable all or Enable all button. You may not know if a program that you need for your daily uses relies on any of the services. Disable only the services that you know what they are and that you no longer need.
How to determine which services to disable
Before disabling any service, it’s important to understand what it does and how it affects your system. You can usually find this information by looking up the service name online. Microsoft’s Service Database is a good place to start.
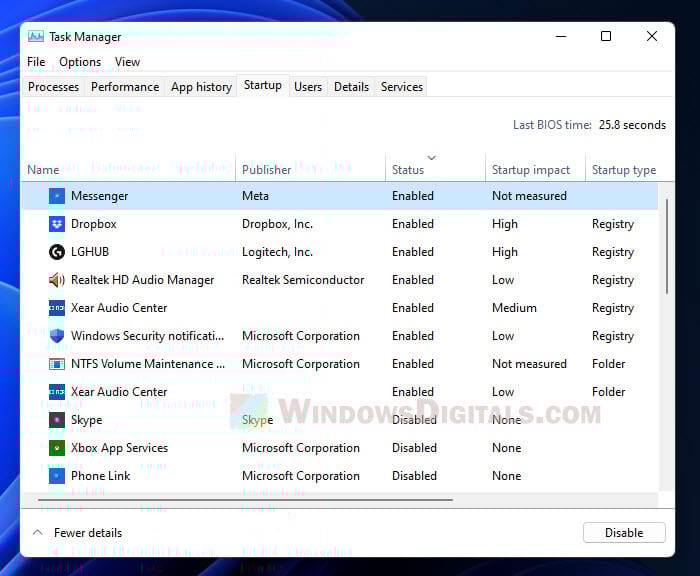
Another way to determine which services to disable is to use the Task Manager’s “Startup” tab. This tab lists all the programs that start with Windows and provides information about their impact on system performance. If a program has a high startup impact, disabling its associated service may help improve system performance.
How to re-enable a disabled service
If you disabled a service and later decide that you need it, you can re-enable it using the same process outlined in the tutorial. Simply check the box next to the service you want to enable and click “Apply“. You may need to restart your computer for the changes to take effect.
Other ways to turn off startup services
Although MSCONFIG is generally a better tool for handling startup services, you can also try different methods. For example, the Services app lets you see more details about each service. Just type “services.msc” in the Start menu or Run dialog box to open it.
Alternatively, you can also use third-party software like CCleaner or Autoruns. These programs have much more advanced options to manage startup services.