
The Windows Spotlight feature is a nifty personalization feature in Windows 10 and 11 that automatically sources high-quality, real-world wallpapers from Bing and displays them on the Windows Lock screen. Last year, Microsoft added the Spotlight feature for the Windows Desktop on Windows 11, allowing users to cycle through informative and beautiful wallpapers on their Desktop background.
However, after coming from the previous Windows 10 platform, many users have reported that the Windows Spotlight feature is not working on their PC or laptop with Windows 11. So, if you are amongst the users who are facing the Windows Spotlight not working in Windows 11 issue on their PCs and laptops, you have clicked the right article.
Fix Windows Spotlight Not Working in Windows 11
In this in-depth fix guide, we have compiled a list of some of the best solutions for the Windows Spotlight not working issue in Windows 11. While some of these fixes are general fixes to resolve system issues in Windows 11, some are particularly curated to fix the issue that we are discussing.
So, be sure to try them all out on your Windows 11 PC or laptop to see which one works for you. With that out of the way, let’s check out the fixes for Windows Spotlight not working in Windows 11 right below.
1. Restart Your Windows 11 PC or Laptop
Now, the first thing that you might want to try when you experience the Windows Spotlight not working issue in Windows 11 is to restart your PC or laptop. Although you might think that restarting your Windows 11 device is not that effective in fixing these kinds of system issues, I say it surely is.
You see a quick restart of your Windows 11 system force-closes all the running applications and background processes. It even clears out the RAM of your PC or laptop. Hence, if a third-party app or a Windows background process was causing the Windows Spotlight not working issue, a restart should be able to fix it right away.
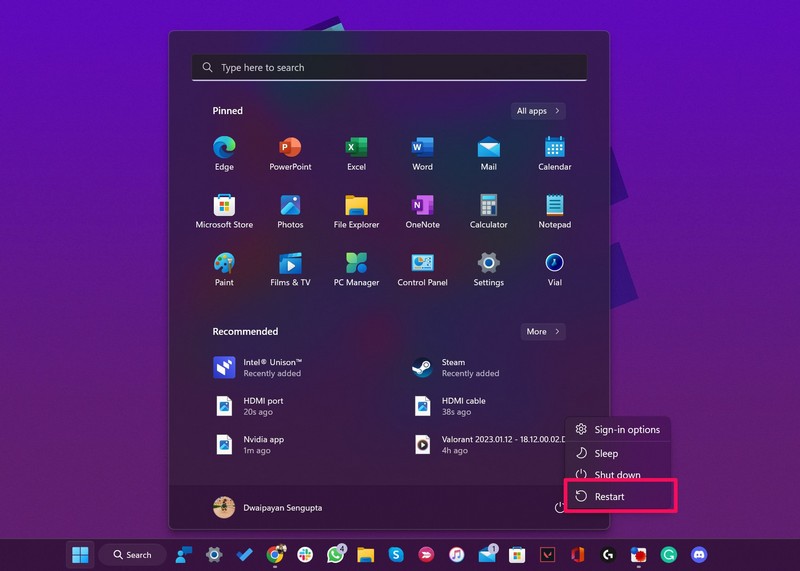
So, head over to the Power options in the Start menu and hit the Restart button to quickly restart your Windows 11 PC or laptop. Following the restart, check whether Windows Spotlight is working on your device or not.
2. Check for an Active Internet Connection
One thing to note about the Windows Spotlight feature is that as it sources the wallpapers and information from the internet via Bing, it requires an active internet network to properly function in Windows 11. So, if your internet network is down or inactive, the Spotlight feature could stop working on your Windows PC or laptop.
In this case, all you can do is contact your internet provider to inform them about the issue and wait for them to fix it. Once your internet is back, restart your Windows 11 PC or laptop and the Windows Spotlight should start working on your device again.
3. Check If Windows Spotlight is Enabled in Windows 11
If restarting your PC or laptop did not do the trick and the Spotlight feature is still inoperable in Windows 11, you might want to check if the feature is actually enabled for your Desktop and Windows Lock screen. To check if Windows Spotlight is enabled for Desktop and Windows Lock screen in Windows 11, follow the steps right below:
1. Use Windows + I to launch the Settings app in Windows 11.
2. Go to the Personalization tab on the left nav bar and click on Background.
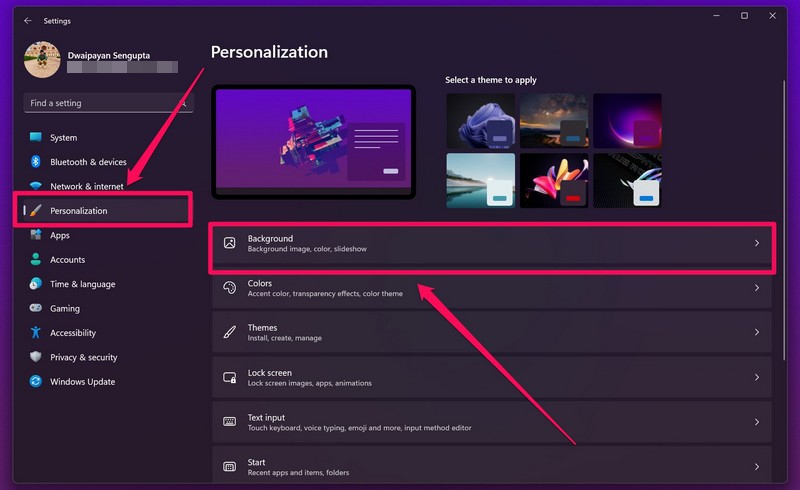
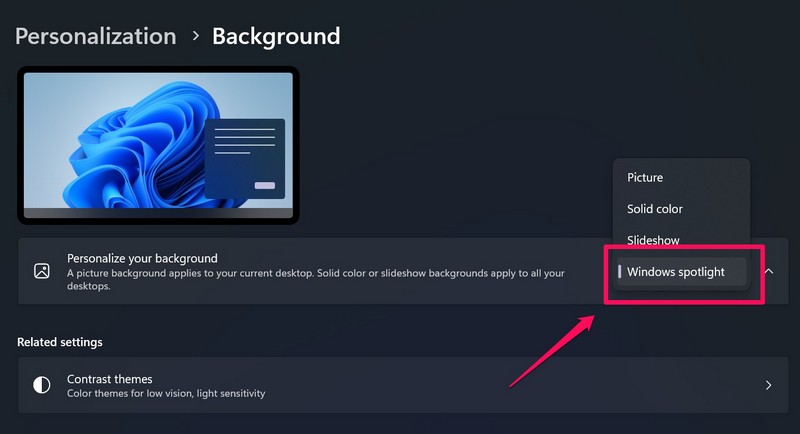
3. Here, make sure that the Personalize your background option is set to Windows Spotlight. If it is not, click the drop-down box and select Windows Spotlight on the following list.
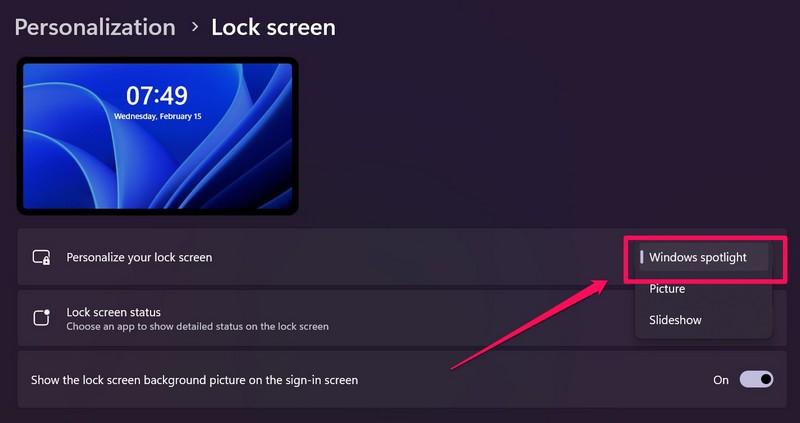
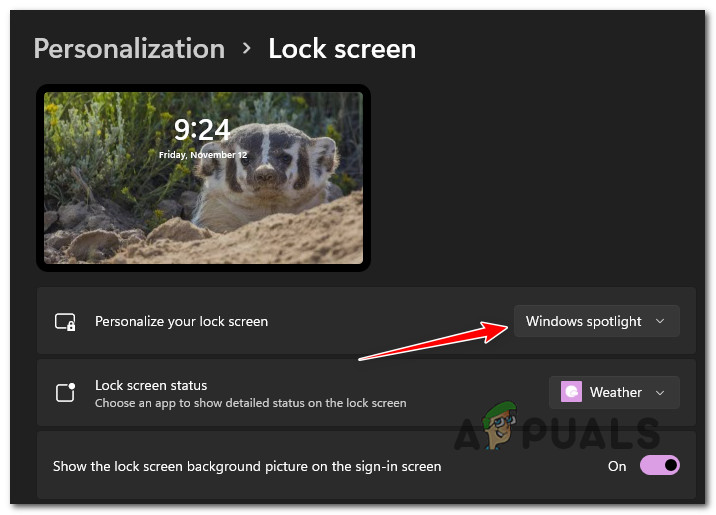
4. Next, go back to the Personalization menu and click on Lock screen.
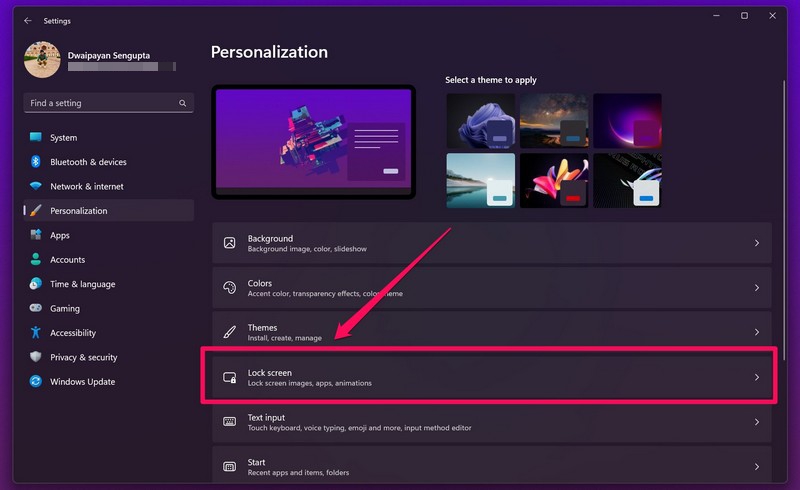
5. On this page, set the Personalize your lock screen option to Windows Spotlight from the drop-down list.
Now that you have enabled Windows Spotlight in Windows 11, the feature should start working on your PC or laptop. Restart your device to check whether or not the issue has been fixed.
4. Disable Metered Connection in Windows 11
If you are using an ethernet connection and the Metered connection option is enabled on your device, you might face the Windows Spotlight not working issue in Windows 11. According to some users, the metered connection restricts Spotlight to download the necessary media, causing the feature to malfunction.
Hence, some users have reported that disabling the Metered connection option for the Ethernet network in Windows 11 could solve the Windows Spotlight feature. Here’s how to disable the Metered connection option for ethernet in Windows 11:
1. Press Windows + I to open the Settings app in Windows 11.
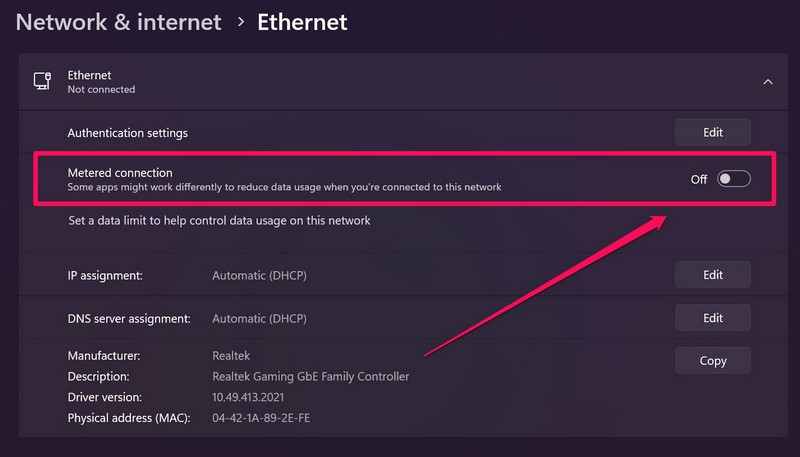
2. Under the Network & internet tab on the left navigation bar, click the Ethernet option.

3. Next, make sure that the toggle for the Metered connection option is disabled. If it is enabled, click the toggle to disable it.
4. Restart your Windows 11 PC or laptop and check whether Windows Spotlight is working or not.
5. Sync the Date and Time in Windows 11
For those unaware, if you have an incorrect date and time set on your Windows 11 PC or laptop, you might experience network-based issues such as the Windows Spotlight not working issue in Windows 11.
However, if that is the case, the fix is quite easy. Follow the steps right below to sync the date and time on your Windows 11 PC or laptop and get Windows Spotlight up and running again:
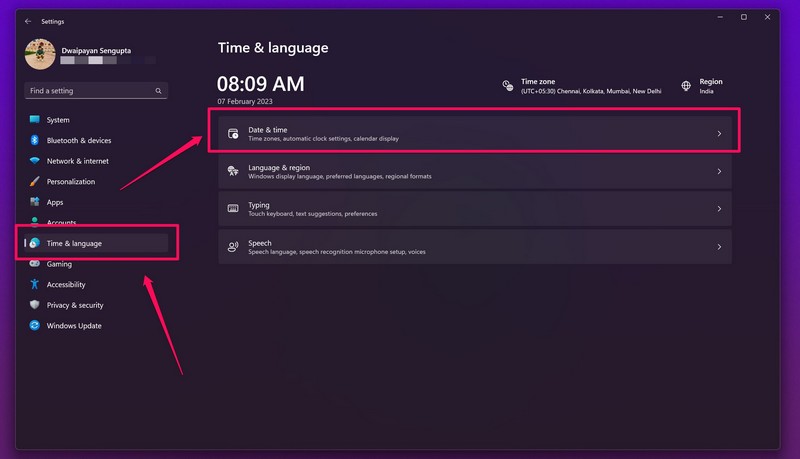
1. Press the Windows + I shortcut to open the Settings app in Windows 11.
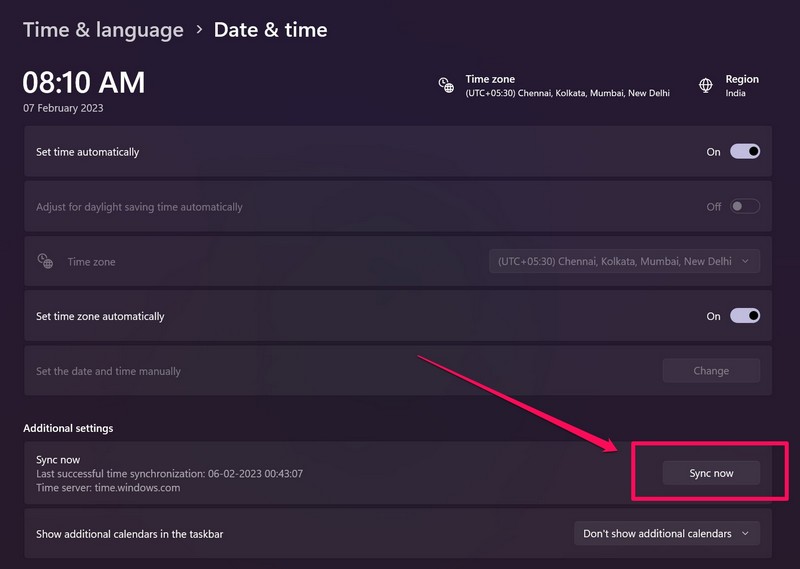
2. Under the Time & language tab on the left nav bar, click the Date & time option.
3. On the following page, make sure that the Set time automatically and Set time zone automatically options are enabled.
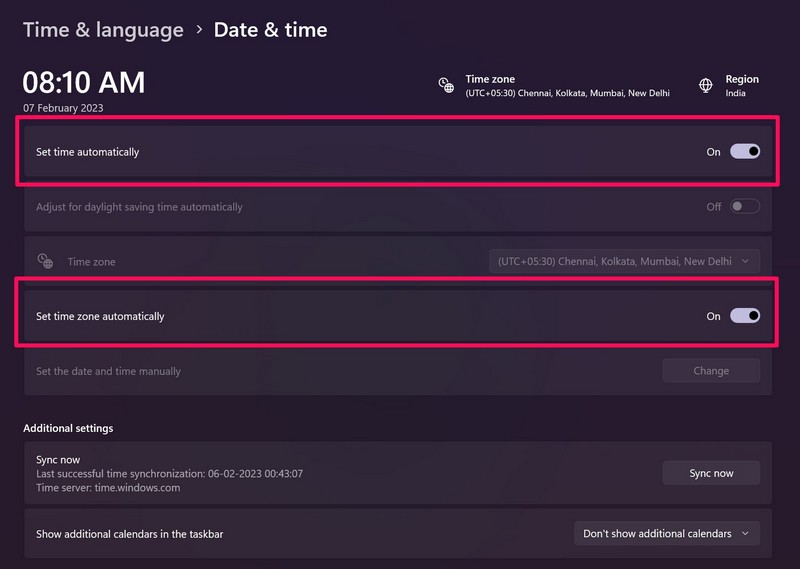
4. Next, click the Sync now button to sync the date and time on your Windows 11 PC or laptop with Windows servers.
You can check out our in-depth guide on time sync not working in Windows 11 to know more about syncing the date and time on your PC or laptop. Following this change, check whether the Spotlight not working issue has been fixed or not.
6. Uninstall Third-Party Antivirus Program in Windows 11
Now, many users have reported that third-party antivirus programs, specifically Bitdefender, can create conflicts for Windows Spotlight and prevent it to work in Windows 11.
In this case, uninstall the third-party antivirus software, if you have any installed on your device. Follow the steps right below to uninstall third-party antivirus software in Windows 11:
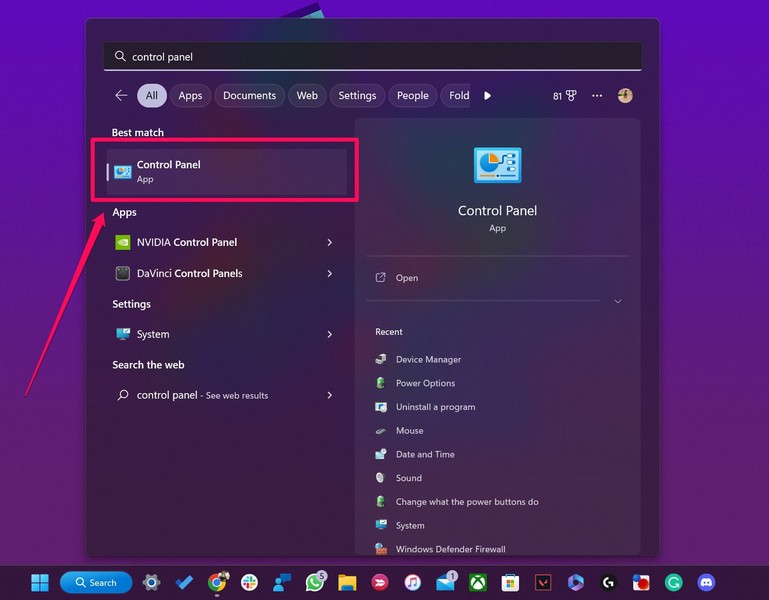
1. Press Windows + S to open Windows search and search for Control Panel.
2. Click Control Panel in the search results to open it.
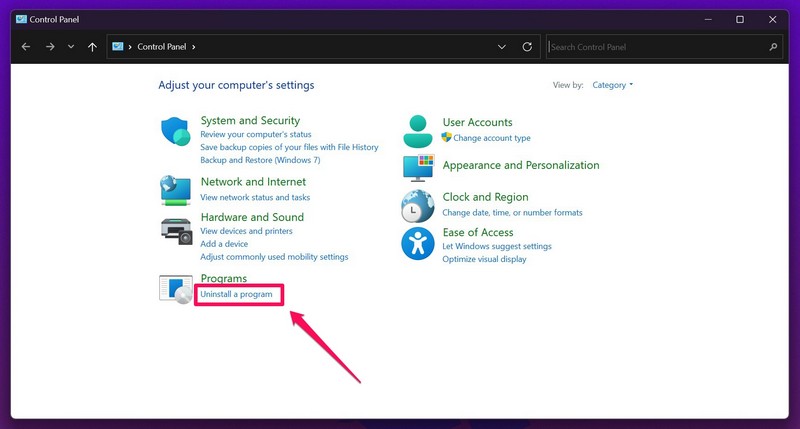
3. Click the Uninstall a program option under Programs.
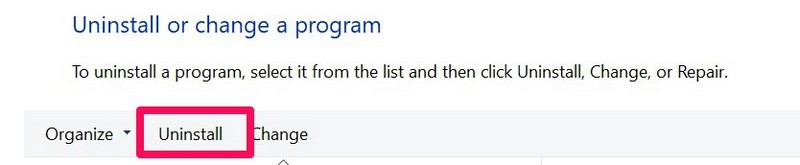
4. Now, find the third-party antivirus program that is installed on your device on the list.
5. Click on it to select it and click the Uninstall button above.
6. Follow the on-screen instructions to remove the antivirus program.
7. Restart your Windows 11 PC or laptop after the uninstallation.
7. Run SFC Scan in Windows 11
Other than misconfigured settings and conflicts with third-party apps, issues in system files can also cause the Windows Spotlight not working issue in Windows 11. In this case, you can use the nifty command-line tool SFC scan, aka the System File Checker scan, to check the system file directory and replace missing or corrupted system files on your PC or laptop. Follow the steps right below to run an SFC scan in Windows 11:
1. Press Windows + S to open Windows search and search for cmd.
2. Click the Run as administrator button for the Command Prompt tool in the search results.

3. Click Yes on the following User Account Control prompt.
4. Once the Command Prompt tool opens, type in the following command and press Enter:
sfc /scannow
5. Wait for the scan to complete.
6. Restart your Windows 11 PC or laptop.
Following the restart, the Windows Spotlight should start working on your Windows 11 device.
8. Re-Register Spotlight in Windows 11
Re-registering the Windows Spotlight feature using the Powershell tool in Windows 11 is another effective fix that you can try when you face the said issue on your PC or laptop. For this, follow the steps right below:
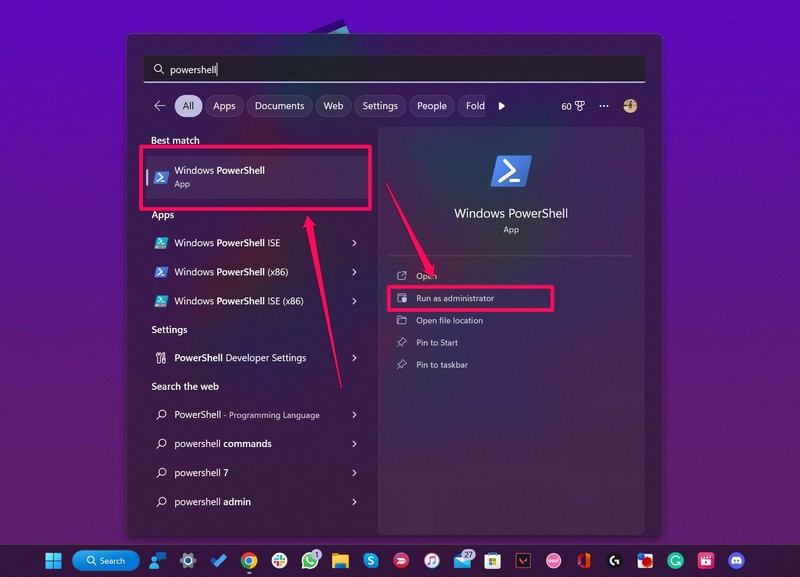
1. Press Windows + S to open Windows search and search for Powershell.
2. Click the Run as administrator button for the tool in the search results.
3. Click Yes on the UAC prompt.
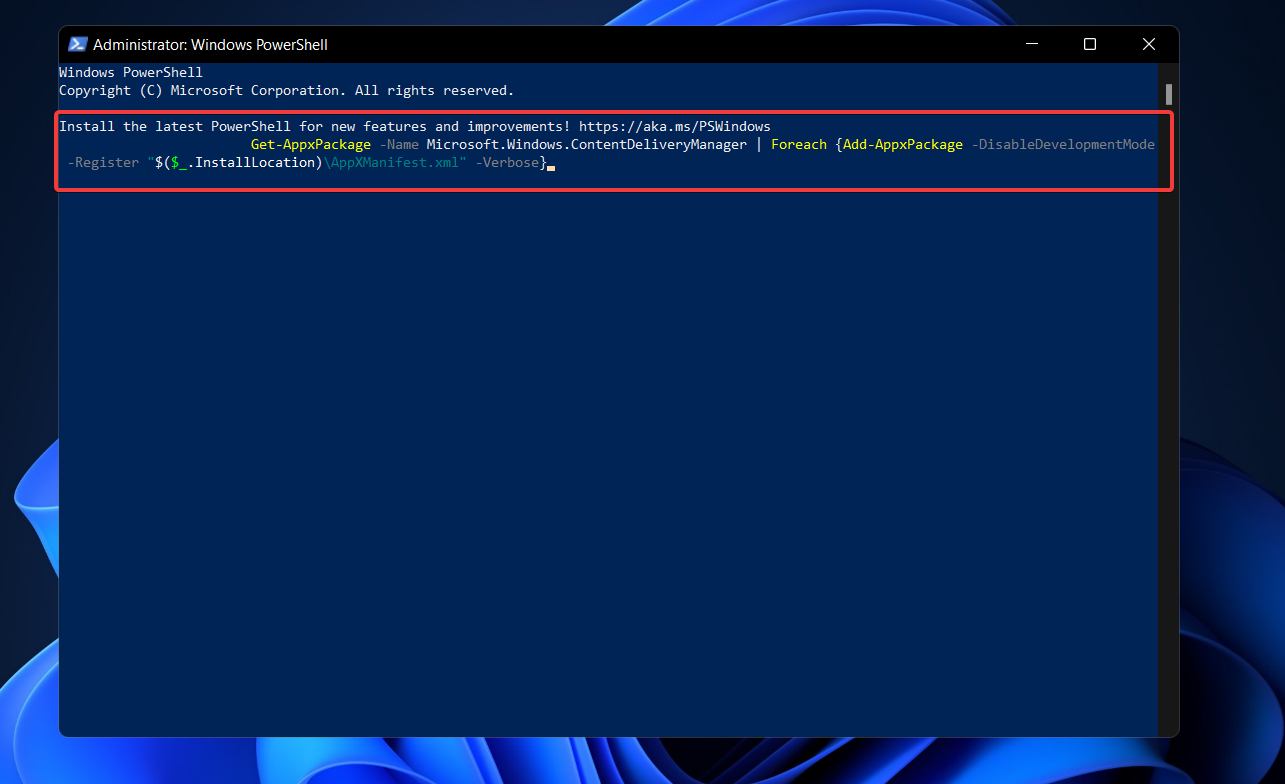
4. Type in or copy-paste the following command in Powershell and press Enter:
Get-AppxPackage -Name Microsoft.Windows.ContentDeliveryManager | Foreach {Add-AppxPackage -DisableDevelopmentMode -Register "$($_.InstallLocation)\AppXManifest.xml" -Verbose}5. After completion, restart your Windows 11 PC or laptop.
9. Delete Windows Spotlight Cache in Windows 11
Apart from corrupted system files and inconsistencies, corrupted Spotlight cache data can also prevent the feature to function in Windows 11. In this case, you can use the Command Prompt tool to clear out the cache data for Windows Spotlight on your PC or laptop. Follow the steps right below to do that:
1. Launch the Command Prompt as an administrator as explained in Fix #7.
2. Once the tool opens, type in the following commands and press Enter one by one:
DEL /F /S /Q /A "%USERPROFILE%/AppData\Local\Packages\Microsoft.Windows.ContentDeliveryManager_cw5n1h2txyewy\LocalState\Assets"DEL /F /S /Q /A "%USERPROFILE%/AppData\Local\Packages\Microsoft.Windows.ContentDeliveryManager_cw5n1h2txyewy\Settings"Note: Do not run the above commands simultaneously in Command Prompt.
3. Once the above commands execute in Command Prompt, close the tool and launch Windows Powershell as an administrator.
4. Type in the following command in Powershell and press Enter to re-register Windows Spotlight in Windows 11:
Get-AppxPackage -allusers *ContentDeliveryManager* | foreach {Add-AppxPackage "$($_.InstallLocation)\appxmanifest.xml" -DisableDevelopmentMode -register }5. Restart your Windows 11 PC or laptop after the above step.
Following the restart, check whether Windows Spotlight is working on the Windows Lock screen or not.
10. Update Windows 11
Another factor that can cause the Windows Spotlight not working issue in Windows 11 is running outdated Windows versions. This can happen, especially if you are a Windows Insider and are running a Windows beta build on your PC or laptop. A random bug or a glitch might sometime cause such system issues.
In this case, you can check for the latest available updates for Windows 11 on your PC or laptop and install them to fix the Windows Spotlight not working issue. Follow the steps right below to do that right now:
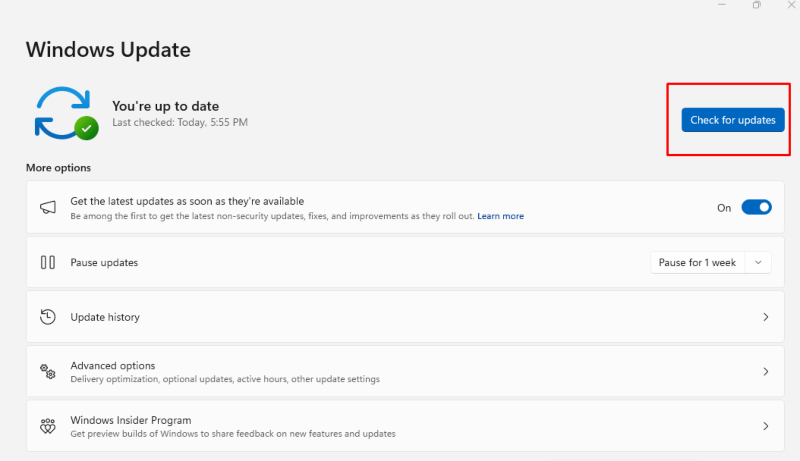
1. Press Windows + I to launch the Settings app in Windows 11.
2. Go to the Windows Update tab on the left nav bar and click the Check for updates button.

Note: Make sure your PC or laptop is connected to an active internet network during this process.
3. Once the updates show up, click the Download and install button to install them on your device.
4. Once the updates are installed, restart your Windows 11 PC or laptop.
FAQs
What is Windows Spotlight in Windows 11?
Windows Spotlight is essentially a customization feature in Windows 11 that automatically cycles through various high-quality wallpapers with relevant information on the Desktop and Windows Lock screen.
Is Windows Spotlight available for Windows 11?
Yes, the Windows Spotlight feature is available on both Windows 10 as well as Windows 11. However, unlike on Windows 10, on Windows 11, users can set the Spotlight feature for their Desktop along with their Windows Lock screen.
How do I enable Windows Spotlight in Windows 11?
To enable Windows Spotlight on your Windows 11 PC or laptop, open the Settings app and go to the Personalization tab. There set Windows Spotlight for both Background and Lock screen via the respective settings.
Wrapping Up
There you go! These are some of the best fixes for the Windows Spotlight not working issue in Windows 11. These solutions helped many Windows 11 users fix the said issue on their PCs and laptops and we hope one of the above-listed fixes works for you too. Let us know if they did help you fix the Windows Spotlight feature in Windows 11. Meanwhile, you can check out our other in-depth fix guides right here!
Windows Spotlight is a popular Windows 10 and 11 feature that displays beautiful images on the lock screen. However, sometimes, users face issues where the feature stops working. If you’ve encountered this problem, you’re not alone.
We will explain why Windows Spotlight might stop functioning and provide step-by-step solutions to get it back on track.
Why Is Windows Spotlight Not Working?
- Corrupt System Files
Windows Spotlight depends on specific system files. If these files are corrupted, Spotlight may fail to fetch or display new images correctly.
- Issues with the Internet Connection
Windows Spotlight requires an active internet connection to download new images. Spotlight may not work as expected if your connection is unstable or offline.
- Disabled Windows Spotlight Settings
Sometimes, Windows Spotlight may be accidentally disabled in the settings. This will prevent it from displaying new images on the lock screen.
- Misconfigured Group Policy Settings
Group Policy settings may interfere with the Spotlight feature for Windows Pro or Enterprise editions users. If Spotlight is restricted through these policies, it won’t function properly.
- Cached Images and Data Issues
The Spotlight feature caches images and data locally. If the cache becomes corrupted, Spotlight stops rotating images or gets stuck on the same one.
8 Ways to Fix Windows Spotlight Not Working
Check Your Internet Connection
A stable internet connection is essential for Windows Spotlight to function.
Windows Spotlight fetches new images and metadata from Microsoft’s system. Microsoft’s internet connection won’t allow the images to be stored on your lock screen. Ensuring your connection is stable and active is the first troubleshooting step.
Steps:
- Test your connection by opening a web browser and visiting any website.
- If the internet is slow or intermittent, restart your router or contact your ISP.
- Switch to a wired connection or move closer to your Wi-Fi router if you’re using a you’re network.
Re-enable Windows Spotlight in Settings
Sometimes, the feature may be turned off in the settings.
If Spotlight is disabled, Windows will display a static image or custom slideshow instead of dynamic images. Ensuring the feature is enabled ensures it can function correctly.
Steps:
- Press Windows + I to open Settings.
- Navigate to Personalization > Lock Screen.
- Under the Background section, select Windows Spotlight.
Reset Windows Spotlight Settings
Resetting the Spotlight feature can resolve many underlying issues.
Over time, cached data can become corrupted, causing Spotlight to fail to update images. Resetting clears any corrupted data, allowing the feature to refresh itself.
Steps:
- Press Windows + R and type %localappdata%\Packages\Microsoft.Windows.ContentDeliveryManager_cw5n1h2txyewy\LocalState\Assets to access Spotlight assets.
- Delete all the files in the folder.
- Now, navigate to Settings > Personalization > Lock Screen and re-enable Windows Spotlight.
Run the System File Checker (SFC) Tool
System corruption may be behind the issue.
The SFC tool scans and repairs corrupted system files crucial for various Windows features, including Spotlight. If any critical files are missing or damaged, Spotlight will not work.
Steps:
- Press Windows + X and select Windows Terminal (Admin).
- Type sfc /scannow and hit Enter.
- Wait for the scan to complete and restart your computer.
Update Windows
Outdated Windows versions can cause many bugs, including issues with Spotlight.
Microsoft regularly releases updates that address bugs, add new features, and enhance system stability. Running an outdated version of Windows can cause features like Spotlight to malfunction.
Steps:
- Press Windows + I to open Settings.
- Go to Update & Security > Windows Update.
- Click on Check for updates and install any available updates.
Modify Group Policy Settings (For Windows Pro/Enterprise Users)
Group Policy settings may restrict Spotlight on some devices.
Administrators might turn off certain features, including Spotlight, in corporate or managed environments. Modifying these settings allows users to re-enable the feature if it’s blocked.
Steps:
- Press Windows + R and type gpedit. msc.
- Navigate to Computer Configuration > Administrative Templates > Windows Components > Cloud Content.
- Double-click “Do not use Windows Spotlight” and set it to Not Configured or Disabled.
Re-register Spotlight via PowerShell
Re-registering Windows Spotlight can resolve persistent issues.
Re-registering the feature resets all its components and dependencies, providing a fresh start and eliminating any bugs or misconfigurations that might prevent it from functioning correctly.
Steps:
- Press Windows + X and select Windows Terminal (Admin).
- Type the following command and press Enter: Get-AppxPackage -allusers *ContentDeliveryManager* | Foreach {Add-AppxPackage -DisableDevelopmentMode -Register “$($_.InstallLocation)\AppXManifest.xml”}.
- Restart your PC.
Use DISM to Fix Corrupt System Files
If corrupt system files persist after running SFC, the DISM tool can repair the Windows image and resolve deeper corruption issues.
Corrupt system files can disrupt features like Windows Spotlight. Using DISM ensures the Windows image is repaired, which may restore functionality.
Steps:
- Open Windows Terminal (Admin).
- Type the following command and press Enter:
- Copy code: DISM /Online /Cleanup-Image /RestoreHealth
- Let the process finish, then restart your computer.
This should fix any remaining corruption-causing issues with Windows Spotlight.
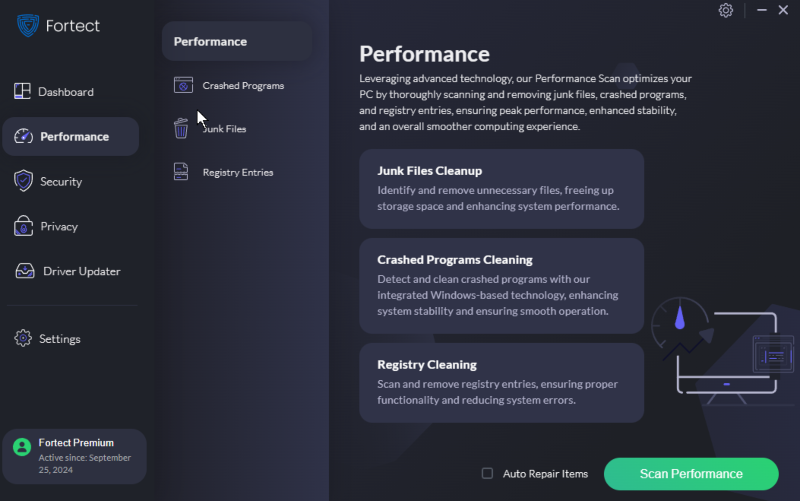
Or better yet, invest in a third-party PC Repair that automatically fixes corrupted files that cause Windows spotlight errors, such as Fortect.
Fortect Premium repairs the registry, replaces corrupted system files with fresh copies, and removes unnecessary junk files. It also automatically scans your PC, detects corrupted files and other issues affecting your Windows PC’s performance—including those causing the Windows Spotlight error—and repairs them to ensure your system runs optimally.
Download and install Fortect now.
Conclusion
Windows Spotlight is a delightful feature, but it can be frustrating when it stops working. Whether the issue is due to corrupt files, disabled settings, or an unstable internet connection, our solutions will help you restore its functionality.
These troubleshooting steps cover the most common causes behind Windows Spotlight malfunctions, from checking your connection to running system scans and updating Windows. By following these steps, you’ll be back on your lock screen images quickly.
Windows Spotlight is a terrific lock screen tool that downloads and installs a new picture for Windows 11 PCs in seconds, but many reported that it’s not working.
Though this feature is usually flawless, the images in Windows Spotlight can sometimes become frozen. And fixing it is not as complicated as it appears.
However, before we delve into the actual solutions, let’s first understand what causes the error, which is important when troubleshooting.
Does Windows 11 have Windows Spotlight?
Yes, Windows Spotlight is a built-in feature in the recent iterations of the OS and is available on Windows 11. The feature automatically downloads and displays images of landscapes, historic locations, and similar kinds on the lock screen and comes with a desktop icon.
You can use it to brighten the lock screen while taking in the breathtaking sights of the world’s most beautiful and distinctive locations.
On top of that, you can mark whether you like a particular image or not. Then, depending on your preferences, Windows Spotlight will show you more or fewer images of that kind.
Why is Windows Spotlight not working in Windows 11?
The fact is that seeing the same picture every time the screen is locked might become monotonous after some time. In addition, depending on how severe the problem with Windows 11 Spotlight is, you may not be able to see any images on the locked screen.

Common reasons for experiencing troubles with Spotlight include a bad Internet connection, faulty image or system files, driver problems, or an outdated Windows update (amongst other things).
The photos displayed on the Windows 11 lock screen or login screen while using the Spotlight function are typically obtained from Bing daily. Therefore, your screen will remain frozen on that exact image without an active Internet connection.
Windows Spotlight and other critical processes must be activated to run in the background of the Windows 11 computer for it to function correctly. This includes Microsoft Store, Microsoft Edge, and the Settings apps.
If essential programs are not running, it is possible that Windows Spotlight images will not be working in Windows 11.
Microsoft’s servers must be able to access your location from the regional language settings to provide you with tailored background images.
If the regional language settings on your Windows 11 computer are incorrect, Spotlight cannot download the proper background photographs for the lock screen.
How do I fix Windows Spotlight if it’s not working on Windows 11?
1. Check your network connection
The photos displayed on the Windows 11 lock screen or login screen while using the Spotlight function are typically obtained from Bing daily.
Your screen will remain frozen on that exact image without an active Internet connection.
Check to see if Spotlight has begun altering the photos on the lock screen once you are sure the Internet connection is fast and steady.
If the problem continues after this, you should attempt a different solution.
2. Make sure the metered connection is off
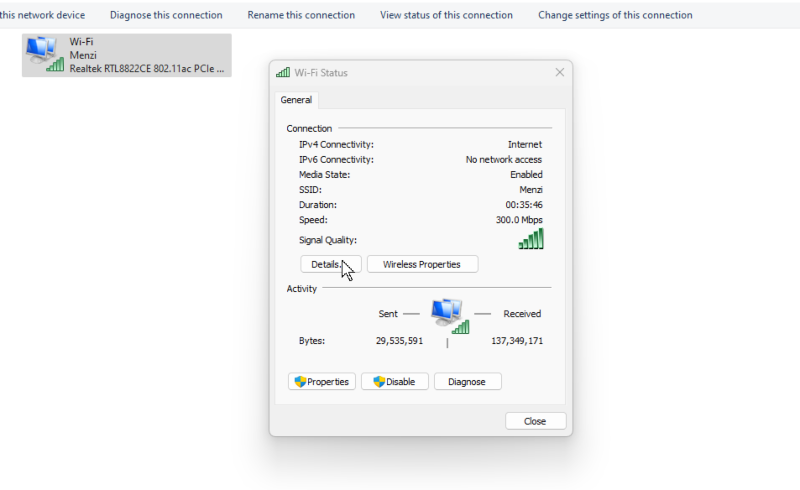
- Click on the Search button, type in Settings, and click on the most relevant result.

- Now, go to Network & internet, then click on WiFi.

- Now, click on your Network properties.

- Next, turn off the Metered connection.


3. Make sure the date, time, time zone, and region are correct
- If your date or time isn’t set correctly, right-click on them in the bottom-right corner, then select Adjust date and time.

- Make sure the Set the time automatically option is turned on, then select your correct Time zone from the dropdown menu.

- Next, click on Language & region.

- Under the Region section, check whether the Country or region is set to your current location.


4. Disable and enable Spotlight
- Click on the Search button, type in Settings, and click on the most relevant result.
- Select Personalisation from the left panel, and then click on the Lock screen on the right.

- Next, choose Picture from the Personalize your lock screen menu.

- Once done, again click on the menu, and this time, select Windows spotlight.


If Windows Spotlight is not working and there’s a blue screen instead, re-enabling the feature should do the trick. This also helps if Windows Spotlight is in another language.
5. Re-register Spotlight using PowerShell
- Click the Search icon, type powershell, right-click on the relevant result, and select Run as administrator.

- Click Yes in the UAC prompt that appears.
- Type or paste in the following command, then press Enter:
Get-AppxPackage -Name Microsoft.Windows.ContentDeliveryManager | Foreach {Add-AppxPackage -DisableDevelopmentMode -Register "$($_.InstallLocation)\AppXManifest.xml" -Verbose}

Once you have finished the steps outlined above, you must restart your computer to complete the process. And it should fix things if Windows 11 lock screen wallpaper is not changing. This will also help when the lock screen background reverts to blue.
How do I turn off Windows Spotlight?
If you want to restrict the use of Windows Spotlight, you can do so in four different ways:
- Manually turn off Windows Spotlight locally
- Turn the feature off using Registry
- Disable Windows Spotlight features using Group Policy
- Deactivate it using Intune


The first two approaches outlined above are labor-intensive and need you to work on a local computer at your leisure. Therefore, it is not recommended to have many PCs in your setup.
To disable Windows Spotlight on business-managed devices, you must use either group policy or Intune (MEM) to accomplish your goal.
Windows Spotlight is activated by default on Windows 11 operating system devices. On the other hand, it may be turned off manually on each computer. However, the manual way may be inconvenient if you have many machines.
Using the Mobile Device Management (MDM) policy, enterprise administrators can block users from accessing the Windows Spotlight background when using their handsets.
How do I reset Windows Spotlight on Windows 11?
- Press Windows + I to open Settings, select Personalization from the navigation pane, and click on the Lock screen on the right.

- Now, choose Picture from the Personalize your lock screen menu.
- Next, press Windows + R to open Run, paste the following path in the text field, and click OK:
%LocalAppData%\Packages\Microsoft.Windows.ContentDeliveryManager_cw5n1h2txyewy\Settings
- Rename the roaming.lock file as roaming.dat.back, and the settings.dat file as settings.dat.back.
- Once done, restart the computer.
- Now, head back to the Lock screen setting and select Windows spotlight from the Personalize your lock screen menu.


This will reset the feature and fix things if you see a Windows 11 Spotlight black screen.
Our readers reported issues with the lock screen slideshow as well. If you think you might be experiencing the same problem, find out how to fix Windows 11’s lock screen slideshow.
Although we’ve all had time to familiarize ourselves with Microsoft’s latest operating system, users discover new features daily. The Windows 11 3D parallax effects are one feature, so check them out.
User feedback has shown that the live desktop is also a prevalent feature. Thus, you might be interested in setting a live wallpaper in Windows 11.
That should be the end of it. As you can see, there are some straightforward and more complex solutions. Try them in the above sequence to find the best for you.
Leave a comment below to tell us about your experience, including which strategy you applied and which Windows 11 feature you found the most useful.
Loredana Harsana
Windows Software Expert
Loredana is a passionate writer with a keen interest in PC software and technology. She started off writing about mobile phones back when Samsung Galaxy S II was on top of the world and she fell in love with tech of all sorts.
Whenever she’s not at her work desk, you’ll find her enjoying refreshing tea flavors, spilling stories on paper, and listening to the radio.
Windows Spotlight is a native feature in Windows 10 and 11 that fetches new images using the Bing search engine and displays them on your computer’s lock screen and the background/desktop. Of course, you have the option to enable it, use a theme-default image, or select an image of your own.
If you were using the Windows Spotlight and noticed that the image no longer changes itself after a certain time, it may be possible that the feature has stopped working. Although the images are supposed to rotate, an issue with the Spotlight feature can prevent it.
If you are experiencing issues with the Spotlight feature, this article lists several methods to fix the problem so you won’t have to refresh the entire operating system.
Table of Contents
Why is Windows Spotlight Not Working
The primary reason for the Windows Spotlight feature to stop working is the corruption of the feature or any files associated with it.
- The image files for the Spotlight feature have become corrupted, making them unable to change automatically.
- The Spotlight service itself has been corrupted.
- A Windows update has affected the functioning of the feature.
- Unavailability of the internet and the Spotlight feature could not update its images.
Fix Windows Spotlight Feature
There are two methods to fix the Spotlight feature in Windows. Perform the following solutions in the given chronological order and see if each one fixes the issue before heading to the next one.
Restart Windows Spotlight
The simplest method to fix Spotlight is by restarting it. This often resolves any minor issues with the Spotlight service.
To restart Spotlight, all you need to do is deactivate the feature and reactivate it. Here is how:
-
Go to the following:
Settings app >> Personalization >> Background
-
From the drop-down menu in front of “Personalize your background” select either Picture, Solid color, or Slide Show.

Pick any background other than Spotlight -
Now, expand the drop-down menu again and select Windows Spotlight.
Re-enable Windows Spotlight -
Now go to the following:
Settings app >> Personalization >> Lock screen
-
From the drop-down menu in front of “Personalize your lock screen” select either Picture or Slide Show.
Pick any lock screen other than Spotlight -
Now, expand the drop-down menu again and select Windows Spotlight.
Re-enable Windows Spotlight for the lock screen


This will restart the Spotlight service for both the desktop and the lock screen. Check to see if you begin seeing new images again.
If the issue persists, try resetting the Spotlight service instead using the following methods.
Reset Windows Spotlight
Another method to fix any issues with Windows Spotlight is to reset the service entirely. This can be done using a simple batch file that you can download from here:
Reset and Re-Register Windows Spotlight (unknown, 653 hits)
Download the file, extract the contents, and run the .bat file to reset or re-register the service. But before you do, make sure to turn off Spotlight from the Background and Lock Screen Settings app page as shared above.
The file contains the following commands that you can copy and create your own batch file:
:: Reset Windows Spotlight
DEL /F /S /Q /A "%USERPROFILE%/AppData\Local\Packages\Microsoft.Windows.ContentDeliveryManager_cw5n1h2txyewy\LocalState\Assets"
DEL /F /S /Q /A "%USERPROFILE%/AppData\Local\Packages\Microsoft.Windows.ContentDeliveryManager_cw5n1h2txyewy\Settings"


:: Re-register Windows Spotlight
PowerShell -ExecutionPolicy Unrestricted -Command "& {$manifest = (Get-AppxPackage *ContentDeliveryManager*).InstallLocation + '\AppxManifest.xml' ; Add-AppxPackage -DisableDevelopmentMode -Register $manifest}"
Alternatively, you can also perform the same actions performed by the batch file, manually. Here is how:
-
Paste the following in File Explorer’s navigation bar and press Enter.
%USERPROFILE%/AppData\Local\Packages\Microsoft.Windows.ContentDeliveryManager_cw5n1h2txyewy\LocalState\Assets

Open assets location for Spotlight This is where the images (assets) for the Windows Spotlight are saved.
-
Select everything by pressing CTRL + A and then hit Del to delete everything in this folder.
Delete all Spotlight assets -
Now navigate to the following folder:
%USERPROFILE%/AppData\Local\Packages\Microsoft.Windows.ContentDeliveryManager_cw5n1h2txyewy\Settings
-
Select everything and delete it.
Delete the Spotlight configuration settings file -
Now open an elevated PowerShell instance and run the following command to allow scripts:
Set-ExecutionPolicy Unrestricted -
When asked, enter “A” to allow all.
-
Now run the following command to register the Spotlight service:
$manifest = (Get-AppxPackage *ContentDeliveryManager*).InstallLocation + '\AppxManifest.xml' ; Add-AppxPackage -DisableDevelopmentMode -Register $manifest
Register Windows Spotlight using PowerShell -
Return to the Background and Lock Screen Settings page and re-enable Windows Spotlight.


The steps above fully reset the Spotlight feature, its assets, as well as its configuration file. Once these steps are performed, any issues associated with Windows Spotlight should be automatically fixed.
Closing Words
Every day people spend time making their Windows computers as personalized and customized as possible. Windows Spotlight is just another part of the personalization experience and learning something new about the images. What would be fun if you’re stuck on the same image day in and day out?
This article gives a step-by-step guide on fixing any issues with the Spotlight feature and shows you how to reset and re-register the service to get it up and running again.
Some Windows 11 have suddenly discovered that Windows Spotlight no longer changes the images, and fun facts no longer appear at all on the login screen. Some affected users have reported that they previously had the issue on Windows 10 and thought upgrading to Windows 11 would solve the problem, but it didn’t.
We’ve investigated this issue thoroughly, and we’ve figured out that there are several different resolutions available to you if you’re currently dealing with this issue.
But first, let’s take a look at all the potential causes that might be responsible for causing this Spotlight issue on Windows 11:
- Common Spotlight Inconsistency – Before advancing to more focused troubleshooting guides capable of fixing this Spotlight issue, you should start by running the System Maintenance Troubleshooter to see if your Windows installation is capable of resolving this issue automatically.
- Corrupted Spotlight Cache – One of the most common causes that will end up breaking Spotlight on Windows 11 is a corrupted cache folder. If you find yourself in this scenario, you should first clear both cache folders that Spotlight uses, then register the app once again to prevent any temp file from causing this issue.
- 3rd-party antivirus interference – While Windows Security is not known to interfere with the functionality of Spotlight, some 3rd party security suites are. For example, BitDefender is often blamed for this issue. Unfortunately, there is no way of fixing this conflict other than uninstalling the problematic security suite.
- The dynamic theme is disabled – Depending on your current Spotlight configuration, you can expect to deal with this issue if you don’t have the active theme installed and enabled on your PC. After allowing the dynamic theme, you should see how Spotlight starts working once again.
- Inconsistent asset folder – The weak spot of Spotlight has always been the asset folder, and this is also true on Windows 11. If you’re into customizing your Spotlight to the brim, you run the risk of breaking the asset folder. To fix it, you need to navigate to the location of the asset folder manually and clear its contents before restarting Spotlight.
- Required Background apps are disabled – Keep in mind that Spotlight has some app dependencies that need to be enabled to allow Spotlight to function correctly. If you haven’t already, take the time to ensure that Microsoft Edge, Microsoft Store, and the Settings app are all enabled as background apps.
- System file corruption – Under certain circumstances, you can expect to see this particular issue due to some kind of system corruption that either affects the Spotlight component directly or some associated dependencies. To resolve this issue, you should take the time to deploy DISM and SFC in quick succession.
Now that you are aware of every potential scenario that might break Spotlight’s functionality start following the methods below to troubleshoot the issue at hand.
Running the System Maintenance Troubleshooter
Before you move on to more specific troubleshooting guides, you should start by checking if your current Windows 11 installation is not capable of fixing the issue automatically.
Windows 11 (as well as Windows 10) comes equipped with the System Maintenance Troubleshooter – this is a utility that allows you to 1-click apply a series of automated fixes related to common issues affecting the desktop, icons, the login screen, and other display-related inconsistencies.
In case you haven’t tried fixing this issue by running the System Maintenance Troubleshooter yet, follow the instructions below to run this tool and apply the recommended fix:
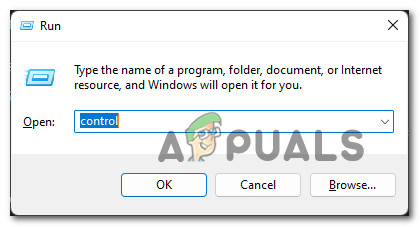
- Press Windows key + R to open up a Run dialog box. Next, type ‘control’ inside the text box and press Enter to open the classic Control Panel interface.

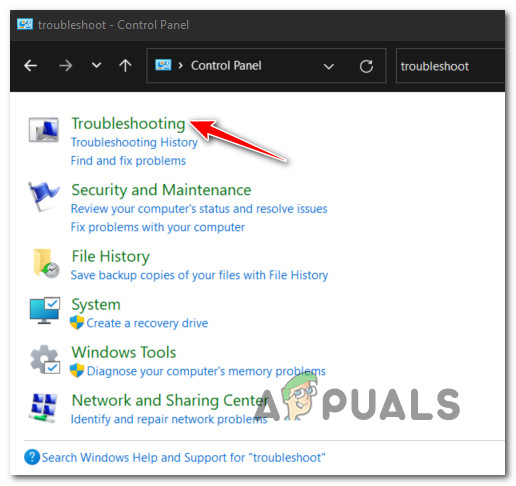
Open up the classic Control Panel menu. - Once you’re inside the classic Control panel menu, use the search function at the top to search for ‘troubleshoot’ and press Enter.
- From the list of results, click on Troubleshooting.

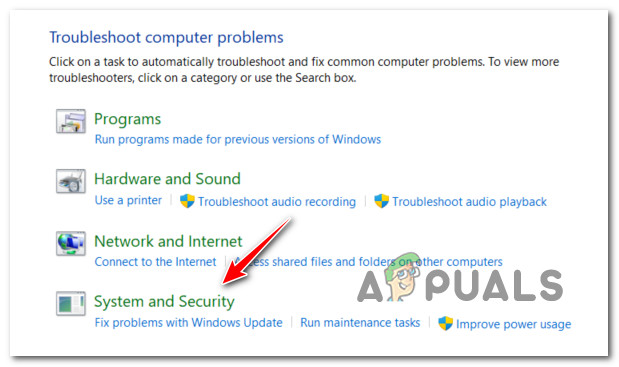
Opening up the Troubleshooting tab - Next, from the dedicated Troubleshooting menu, click on System and Security.

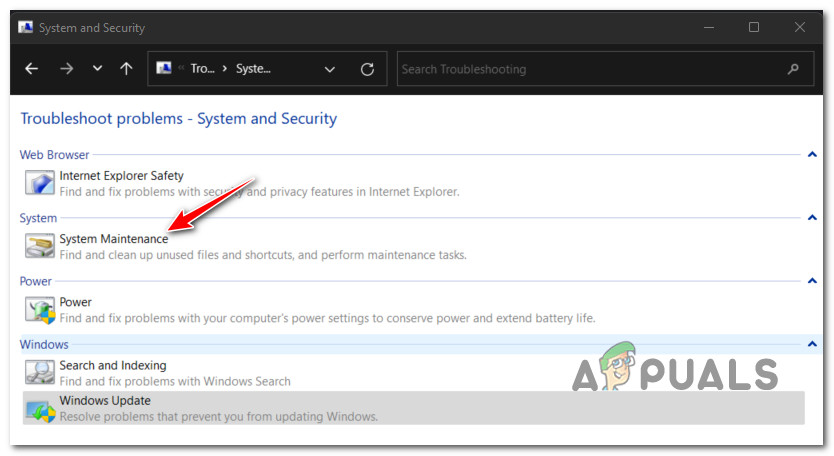
Open up the System and Security tab. - From the dedicated System and Security menu, click on System Maintenance (under System).

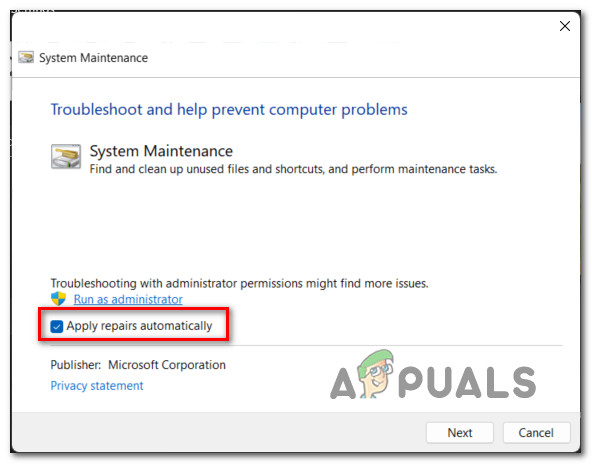
Open up the System Maintenance troubleshooter. - Once you’re at the first screen of the System Maintenance tab, click on the Advanced hyperlink first, then check the box associated with Apply repairs automatically.

Apply the repairs automatically. - Hit Next, then follow the remaining prompts to run the troubleshooter and apply the recommended fix automatically.
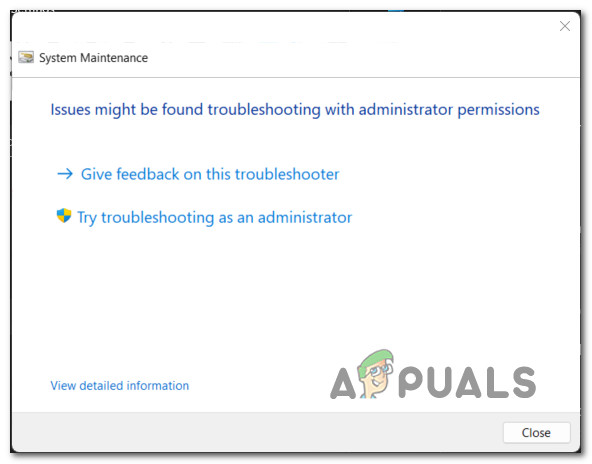
Troubleshooting with admin access Note: If you get asked to troubleshoot as an administrator, do so by clicking on Try troubleshooting as an administrator.
- Depending on the fix that gets recommended, you might get asked to perform a series of manual steps.
Once you have successfully run the System Maintenance troubleshooter and applied the recommended fix, reboot your PC and check if Spotlight has started working.
If the same kind of issue is still occurring, move down to the next potential fix below.
Clean the Cache and Reinstall
Suppose the automated fix above was not effective in your case. In that case, the next thing that you should do is troubleshoot against a potential issue brought about by corrupted data stored in one of the two Spotlight cache folders.
Other users dealing with the problem have confirmed that they fixed the issue by deleting both cache folders and registering the main Spotlight app (using a series of elevated CMD and Powershell commands).
Follow the instructions below for specific steps of cleaning the Spotlight cache and reinstalling the main app:
Note: In the name of simplifying things, we will use the new Windows terminal as the platform for inputting the required commands. This action will allow us to run both CMD and Powershell commands without the need to open two separate windows.
- Press Windows key + R to open up a Run dialog box. Next, type ‘wt’ inside the text box and press Ctrl + Shift + Enter to open up a Windows Terminal interface with admin access.
Open up the Windows Terminal interface. - When the User Account window prompts you, click Yes to grant admin access.
- Once you’re inside the elevated Windows Terminal app, start by running both of these CMD commands in quick succession (press Enter after each command) to clear both of the problematic SpotLight cache folders:
DEL /F /S /Q /A "%USERPROFILE%/AppData\Local\Packages\Microsoft.Windows.ContentDeliveryManager_cw5n1h2txyewy\LocalState\Assets"
DEL /F /S /Q /A "%USERPROFILE%/AppData\Local\Packages\Microsoft.Windows.ContentDeliveryManager_cw5n1h2txyewy\Settings"
- After you run both of these commands, run the following Powershell command from the same Windows Terminal window to register the Spotlight app once again:
Get-AppxPackage -allusers *ContentDeliveryManager* | foreach {Add-AppxPackage "$($_.InstallLocation)\appxmanifest.xml" -DisableDevelopmentMode -register } - Reboot your PC to allow your operating system to re-create the two deleted cache folders and see if Spotlight starts working again.

If you followed the instructions above and are still dealing with the same issue, move down to the next potential fix below.
Uninstall BitDefender (if applicable)
Remember that BitDefender is often singled out for interfering with some critical Windows service dependencies that Spotlight also uses. Several users who we’re also dealing with have confirmed that the Spotlight issue was only fixed after they uninstalled the Bitdefender suite altogether.
Note: Disabling the real-time protection won’t help as other affected users report it.
Update: If you’re using BitDefender and you suspect that it might be interfering with Spotlight, try updating the 3rd-party AV suite to the latest version available before deciding to uninstall it. Some affected users have raised tickets about this Windows 11 issue, so chances are BitDefender will patch it sooner than later.
If this scenario is applicable, follow the instructions below for specific instructions:
- Press Windows key + R to open up a Run dialog box. Next, type ‘appwiz.cpl’ inside the text box and press Enter to open the Programs and Features menu.
Open up the Programs and Features menu. Note: If the User Account Control prompts you, click Yes to grant admin access.
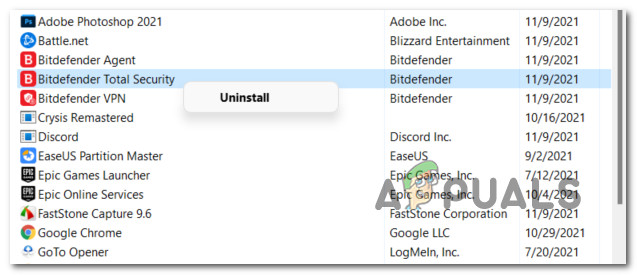
- Once you’re inside the Programs and Features menu, scroll down through the list of applications and locate the BitDefender Total Security listing.
- Right-click on Bitdefender Total Security and choose Uninstall from the context menu.

Uninstall BitDefender - Follow the uninstallation prompts to remove the main BitDefender app from your Windows 11 system.
- Next, proceed to uninstall the remaining supporting AV installations (BitDefender VPN and BitDefender Agent)
- Once the main BitDefender app + all the supporting software is uninstalled, follow this guide to remove any remnant files left behind by your AV.
- Finally, reboot your PC and see if the Spotlight functionality is resumed once the next startup is complete.

If this method was not applicable or didn’t fix the issue, move down to the next potential below.
Clear the Asset folder
Another potential scenario that might leave you stuck with a broken Spotlight component is a corrupted asset folder. This is usually reported when Spotlight is overly customized, or you’ve just upgraded to Windows 11 from an older Windows 11 where Spotlight was configured.
Fortunately, fixing a corrupted asset folder is quite simple. All you need to do is disable Spotlight first, then navigate to the asset folder manually and delete the contents inside (not the folder) before rebooting your PC.
This method has been confirmed to be effective by a lot of affected Windows 11 users.
Follow the instructions below for step by step instructions on clearing the asset folder and fixing the Spotlight functionality on Windows 11:
- First things first, we need to disable Spotlight temporarily. To do this, press Windows key + I to open up the Settings app on Windows 11.
- Next, click on Personalization from the vertical menu on the left.
Accessing the Personalization tab Note: If the vertical menu on the left is not visible by default, click the action icon at the top to make it visible.
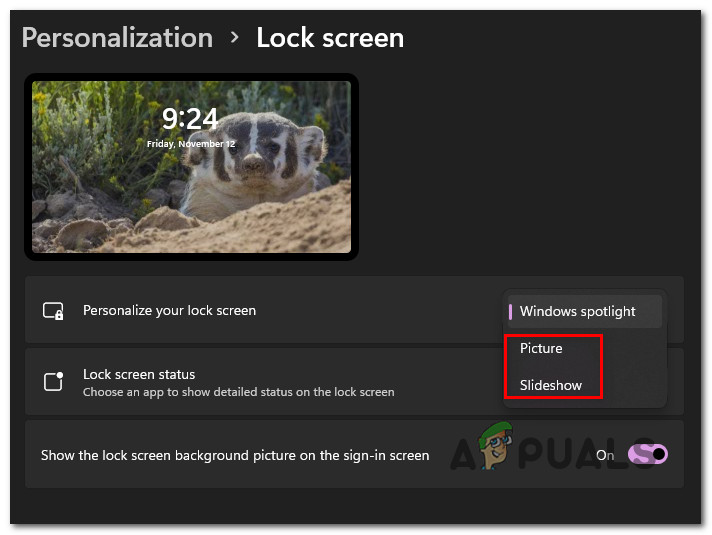
- Once you are inside the Personalization tab, click on Lock Screen from the options at the bottom.
- Inside the Lock Screen tab, change the drop-down menu associated with Personalize your lock screen from Windows Spotlight to either Picture or Slideshow.

Disable Windows Spotlight Note: This will effectively disable the Windows spotlight functionality.
- Once you’ve ensured that Spotlight is disabled, close the Settings screen and open File Explorer.
- Using File Explorer, navigate to the following location:
C:\Users\<USERNAME>\AppData\Local\Packages\Microsoft.Windows.ContentDeliveryManager_<Package ID>\LocalState\Assets
Note: If your Windows drive is different than C, replace the letter with the correct one in the path above. Additionally, <USERNAME> is just a placeholder. Replace it with the actual username of your active account.
- Once you arrive inside the correct location, start by clicking on the View tab at the top, then ensure the Hidden Items box is enabled.

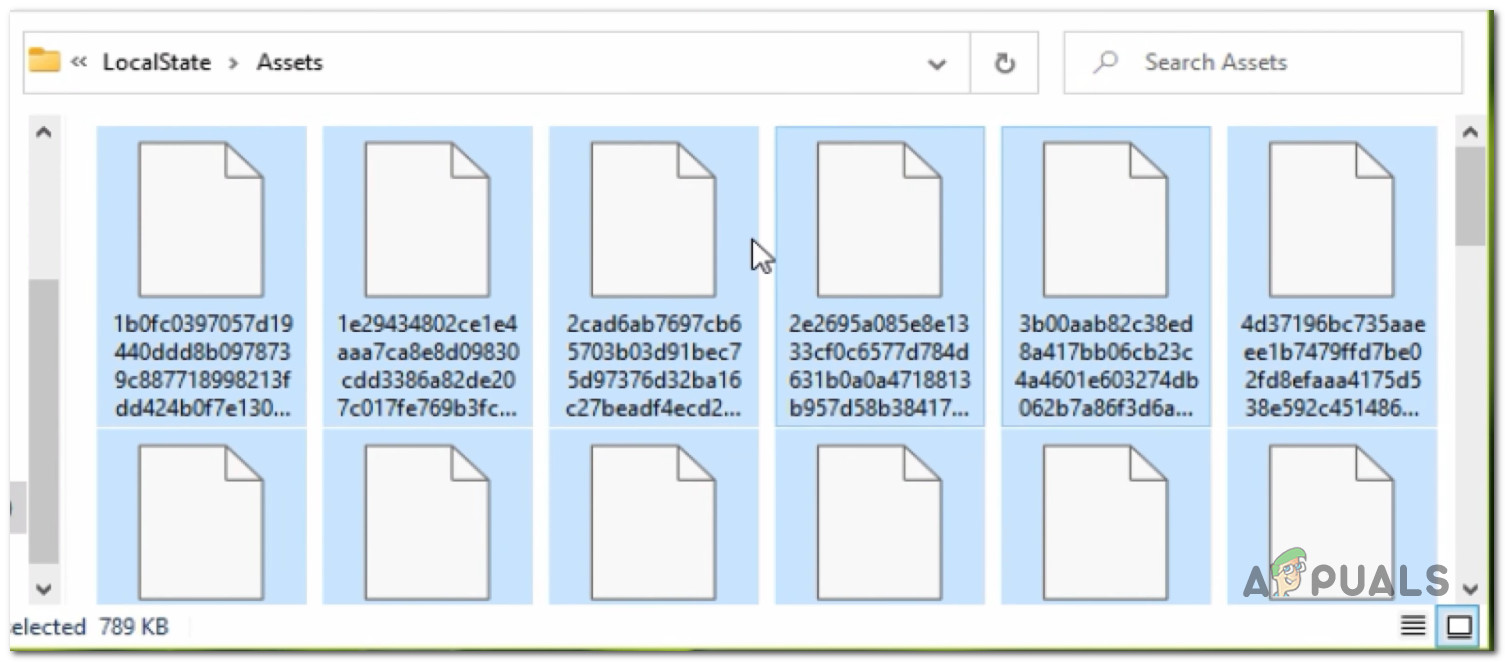
Enable ‘Hidden Items’ - After you’ve made sure that the hidden items are visible, click inside the Assets folder, then press Ctrl + A to select everything inside.

Delete the Asset folder - Next, press the Del key or right-click a selected item; once every item is selected, choose Delete from the context menu.
- Once the asset folder has been cleared, return to the Lock screen tab (under Personalization) in the Settings tab and re-enable Spotlight by setting the Personalize your Lock screen drop-down menu to Spotlight.

Enabling the Spotlight functionality back - Reboot your PC to allow the changes to take effect, then check if Spotlight has resumed working the next time your Windows 11 PC boots up.

If the same kind of issue is still occurring, move down to the next potential fix below.
Restart or Reset your router
Although these are two unrelated things, the reason why you might notice that Spotlight stops working might be your router. Temporary data accumulated by your router cache or a bad DNS range can both be viable culprits why Spotlight might stop updating itself.
This is even more likely if you’re dealing with similar network-related issues when using other Windows components like Windows Update.
If this scenario is applicable, you should start with a simple router reset – this operation consists of doing a simple network reboot that will clear the currently cached data (both Internet Protocol and Transmission Control Protocol)
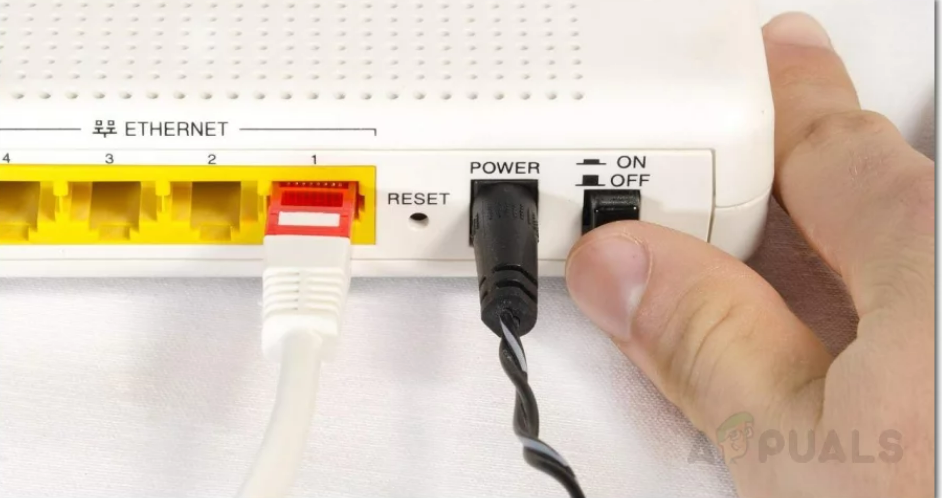
To perform a simple router reboot, look for the power button on your router; it’s typically located on the back.
Once you find it, press it once to cut off the power, then physically disconnect the power cable from the power outlet to give the power capacitors enough time to clear themselves.
Once the router is reset, reboot your PC and see if the Spotlight component is fixed.
If the same kind of issue is still occurring, there’s still one more thing that you need to do before you exclude your router from the list of potential culprits; resetting your router.
Note: Resetting your router will also reset every network setting back to their factory defaults – this includes any previously forwarded ports, blocked items, and any other custom settings. Also, if you’re using PPPoE, expect the currently saved credentials to be lost at the end of this procedure.
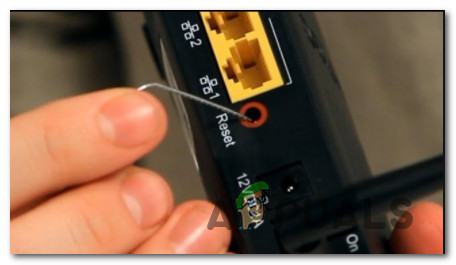
To perform a router reset, press and hold on to the reset button on the back of your router for 10 seconds (or until you notice all the front LEDs flashing at the same time)
Once you manage to reset your router, re-establish the connection to the Internet and see if Windows Spotlight starts functioning again.
If the same kind of issue is still occurring, move down to the next potential fix below.
Re-register the Windows Spotlight app
Suppose none of the methods above have proven effective in your case. In that case, you should also start thinking of a potential inconsistency brought about by some corruption affecting the main Spotlight app.
For example, it’s a well-known fact that upgrading from Windows 10 to Windows 11 using a generic key might end up breaking the Spotlight functionality.
If you find yourself in this scenario, you should be able to fix the issue by using an elevated Powershell window to re-register the main Windows Spotlight app.
Follow the instructions below for specific instructions on how to do this on Windows 11:
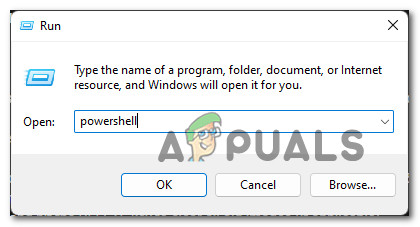
- Press Windows key + R to open up a Run dialog box. Next, type ‘powershell’ inside the text box and press Ctrl + Shift + Enter to open an elevated Powershell window.
Accessing the Powershell window - When you see the User Account Control window, click Yes to grant admin access.
- Once you’re finally inside the elevated Powershell window, type or paste the following command to re-register Windows Spotlight:
Get-AppxPackage -allusers *ContentDeliveryManager* | foreach {Add-AppxPackage "$($_.InstallLocation)\appxmanifest.xml" -DisableDevelopmentMode -register } - Once the command is processed successfully, close the elevated command prompt and reboot your PC.
- Once your Windows 11 PC boots up, pay attention to the login screen to see if the Windows Spotlight functionality has been fixed.
If the same kind of issue is still occurring, move down to the next potential fix below.
Deploy DISM and SFC scans
Suppose you’ve come this far without a tangible result. In that case, you can also assume that you might be dealing with some system file corruption that affects Spotlight directly or some associated dependencies.
Since there are a lot of different components involved, the best course of action is to use one of the two system file corruption built-in tools that Windows 11 features – DISM (Deployment Image Servicing and Deployment) and SFC (System File Checker)
Note: These two tools share some similarities, but our recommendation is to run both of them in quick succession to improve your chances of fixing the issue. SFC is entirely local (uses a locally-stored cache). At the same time, DISM relies on a sub-component of Windows Update to download healthy files that will be used to replace corrupted equivalents.
Follow the instructions below to deploy both SFC and DISM scans on your Windows 11 computer (from the same elevated CMD prompt):
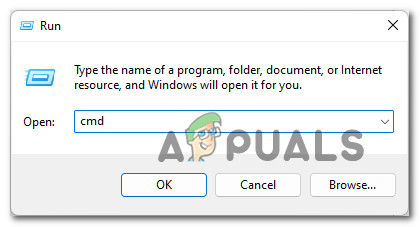
- Press Windows key + R to open up a Run dialog box. Next, type ‘cmd’ inside the Run box and press Ctrl + Shift + Enter to open up an elevated CMD prompt.
Open up an elevated CMD prompt - When the User Account Control prompts you (UAC), click Yes to grant admin access.
- Once you’re inside the elevated Command Prompt window, type the following command and press Enter to initiate an SFC scan:
sfc /scannow
Note: If this utility finds any corrupted Windows files, it will use a locally stored folder to replace any corruption with healthy equivalents.
- Once the SFC scan is complete, reboot your PC and open up another elevated CMD prompt (using step 1) once your Windows 11 computer boots back up.
- Next, once you’re back inside the CMD prompt, run the following command to deploy a DISM scan:
DISM /Online /Cleanup-Image /RestoreHealth
Note: Before you initiate this scan, make sure that you have a reliable Internet connection.
- Once the DISM scan is complete too, reboot your PC one final time and see if the Spotlight component starts working again.
If the same problem is still occurring even after you deployed SFC and DISM scans, move down to the next potential fix below.
Enable Background Apps (Windows 10 Only)
If you didn’t know, Windows Spotlight has specific dependencies that might effectively break the functionality of Spotlight when they’re not configured to function as default apps: Microsoft Edge, Microsoft Store, and the main Settings app.
Several users that we’re also dealing with have confirmed that once they’ve managed to fix the issue by accessing the Background Apps tab of the Settings menu and ensuring that Microsoft Edge, Microsoft Store, and the main Settings app are all permitted to run as background apps.
To do this, follow the instructions below:
Note: This method is only applicable to Windows 10 installations.
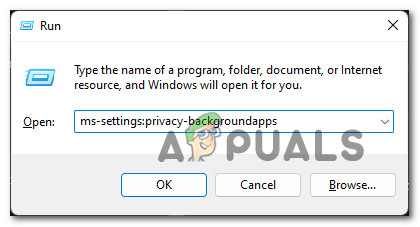
- Press Windows key + R to open up a Run dialog box. Next, type ‘ms-settings:privacy-backgroundapps’ inside the text box that just appeared, then press Enter to open up the Background Apps tab of the Settings menu.
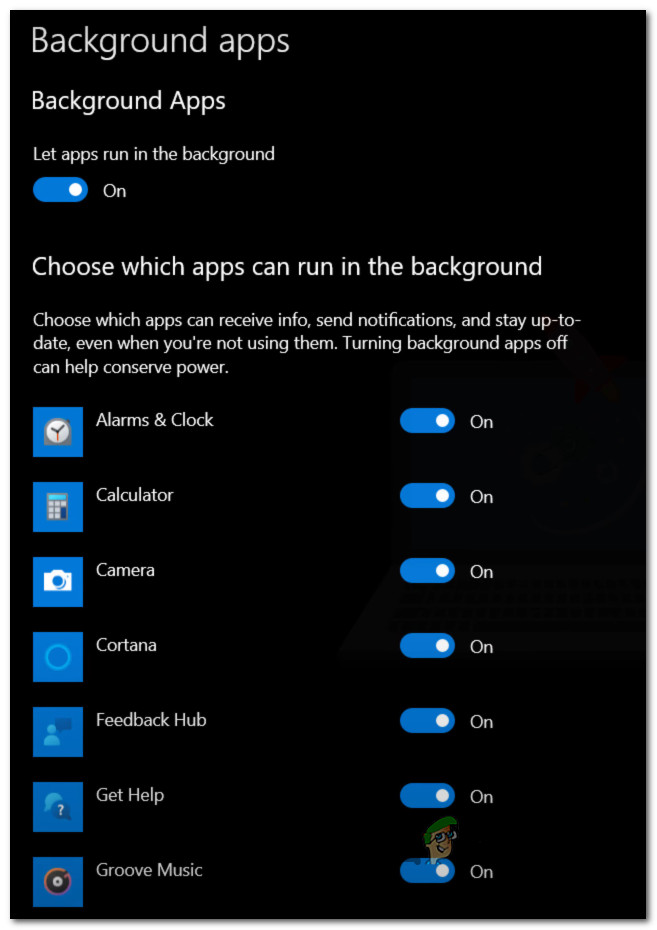
Open up the Background apps tab on Windows 11 - Once you’re inside the Background Apps menu, start by enabling the toggle associated with Background Apps.
- Next, scroll down and ensure that the main Settings app, the Microsoft Store, and the Microsoft Edge toggles are enabled.

Ensure that Spotlight dependencies are permitted to run as background apps - Reboot your PC and see check to see if Spotlight starts running the next time your computer boots up.
Use a dynamic theme
If you’ve burned through every available fix mentioned above, there’s little else you can do (besides repair installing) to fix Windows Spotlight.
However, as other affected users have reported, you should be able to circumvent the issue entirely while getting the very same functionality by installing a Windows Store personalization app called Dynamic Theme.
Think of Dynamic Themes as a type of wrapper that will allow you to feature the same lock screen picture display powered by Bing and Windows Spotlight, but without using the built-in Spotlight component.
It works beautifully, and there isn’t any compromise.
Update: Even if the app is officially a Windows 10 app, we’ve tested it on Windows 11, and it seems to work just fine