
Все способы:
- Способ 1: Смена региона на США (только для региона Россия)
- Способ 2: Очистка кешированных обоев экрана блокировки
- Способ 3: Очистка временных файлов
- Способ 4: Удаление системных файлов
- Способ 5: Редактирование локальной групповой политики
- Способ 6: Редактирование реестра
- Способ 7: Повторная регистрация пакетов
- Вопросы и ответы: 7
Способ 1: Смена региона на США (только для региона Россия)
С недавнего времени компания Microsoft прекратила поддержку некоторых своих продуктов в России. В связи с этим доступ к определенным серверам тоже запрещен. Пользователи из этой страны заметили, что как раз из-за установленного региона экран блокировки с «Интересным» не меняется, поскольку данные с сервера просто не подгружается. Пока что это можно исправить путем смены региона на США через настройки операционной системы.
- Понадобится открыть «Пуск» и перейти в «Параметры», кликнув по значку с шестеренкой.
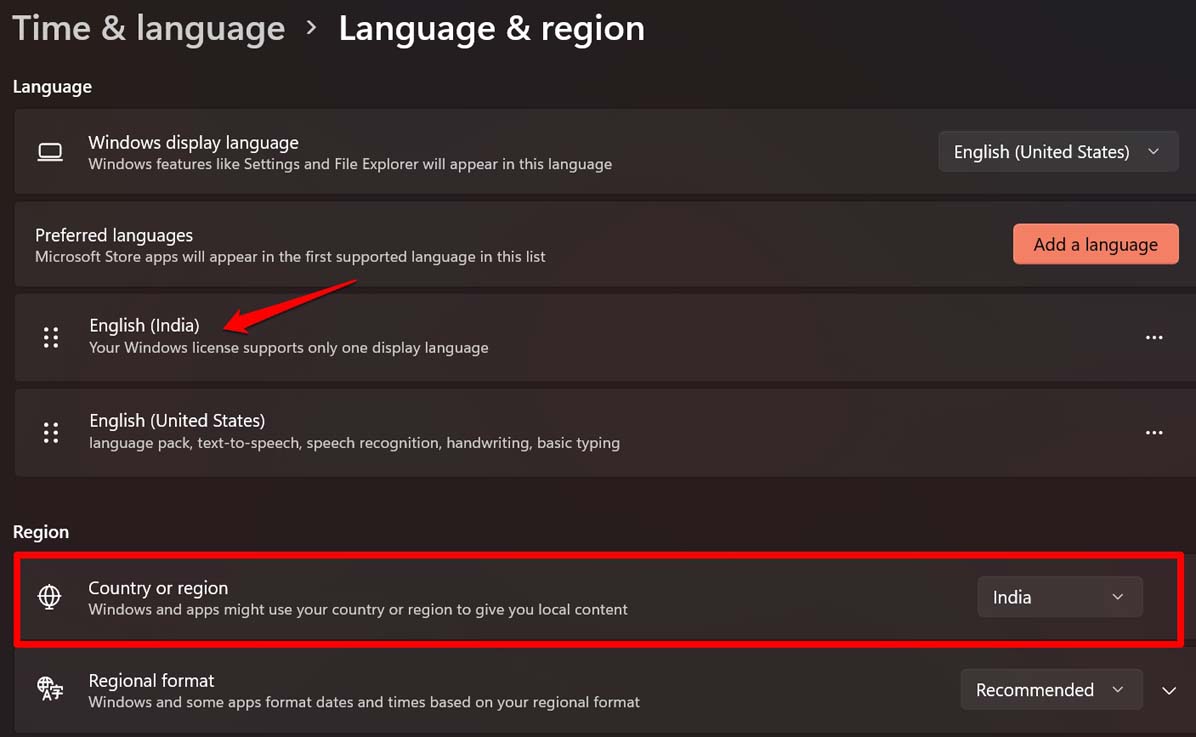
- На панели слева выберите раздел «Время и язык», затем справа щелкните по категории «Язык и регион».
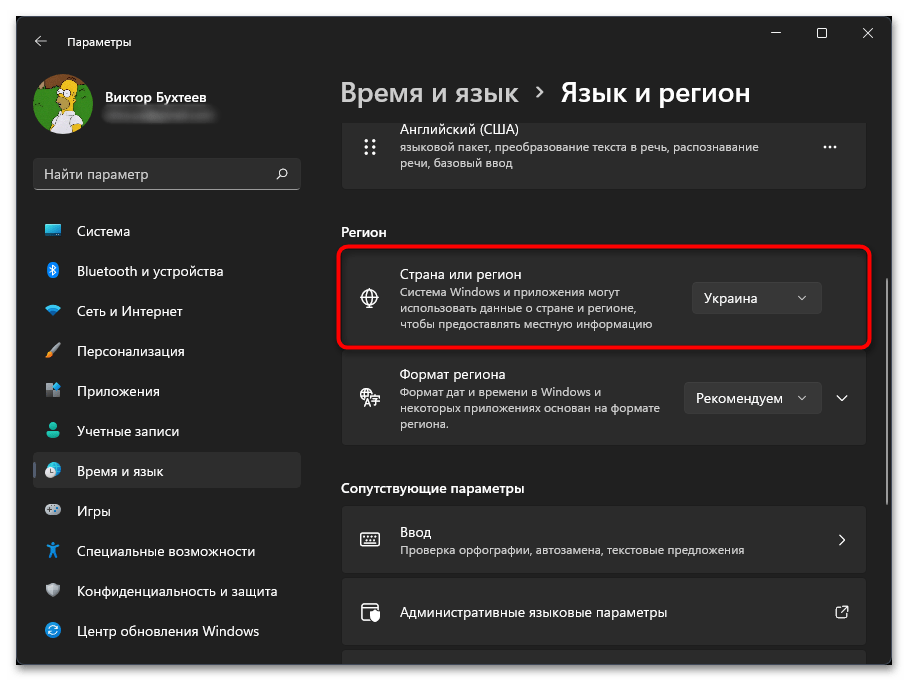
- В блоке «Регион» найдите пункт «Страна или регион» и разверните его.
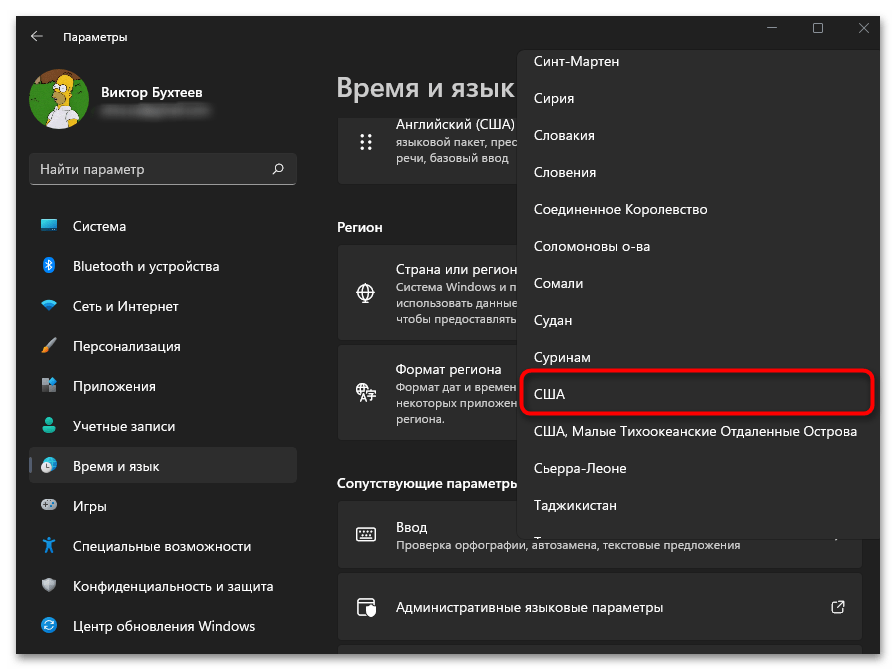
- Отыщите «США» и подтвердите данный выбор.
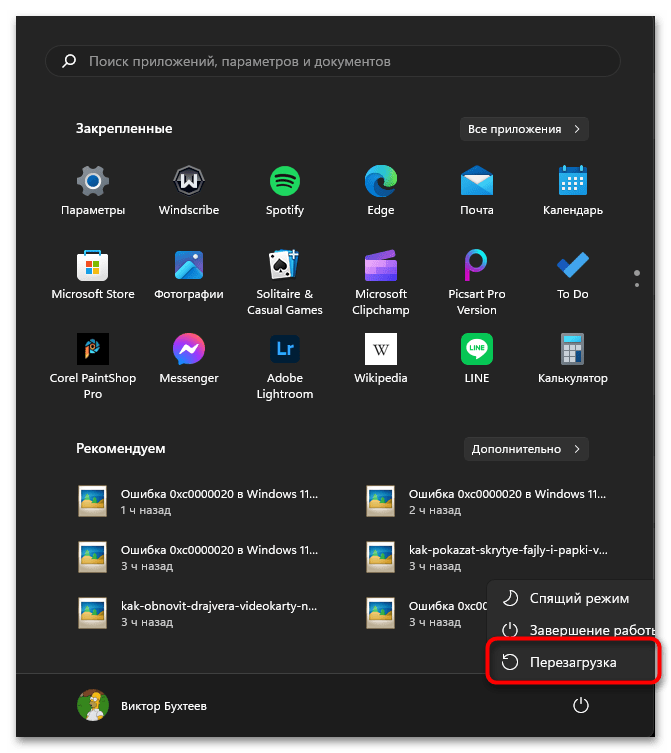
- Теперь остается только перезагрузить компьютер, чтобы изменения вступили в силу. После этого можете приступать к проверке исправления.


Способ 2: Очистка кешированных обоев экрана блокировки
Для обоев на экране блокировки операционная система создает файлы кеша, нужные для быстрой загрузки картинок при входе в операционную систему или выходе из нее на экран блокировки. Это позволяет значительно быстрее показывать вам заставки. Однако иногда в кешированных файлах возникают сбои, что может привести к тому, что заставки у «Интересного» просто не будут меняться и останется только та, которая была на момент возникновения такого сбоя. Решить эту ситуацию можно путем ручной очистки данных файлов, что выглядит следующим образом:
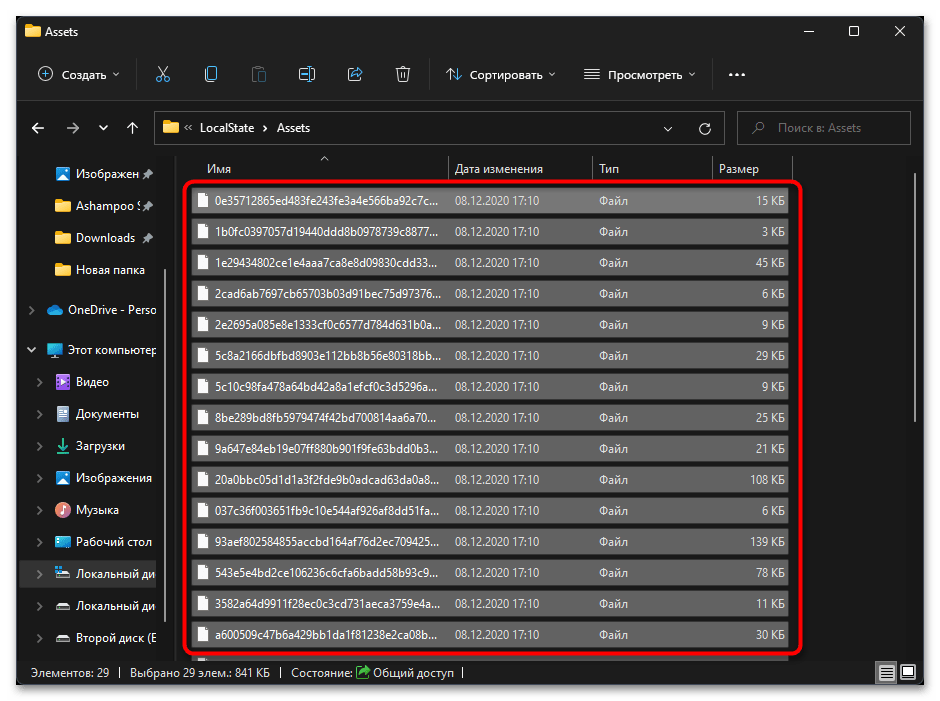
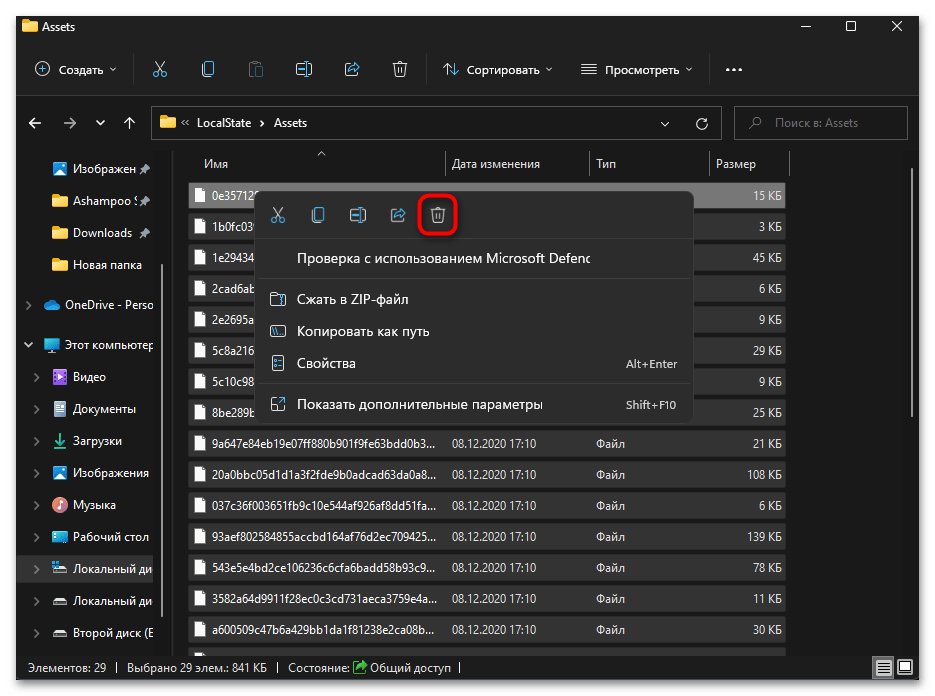
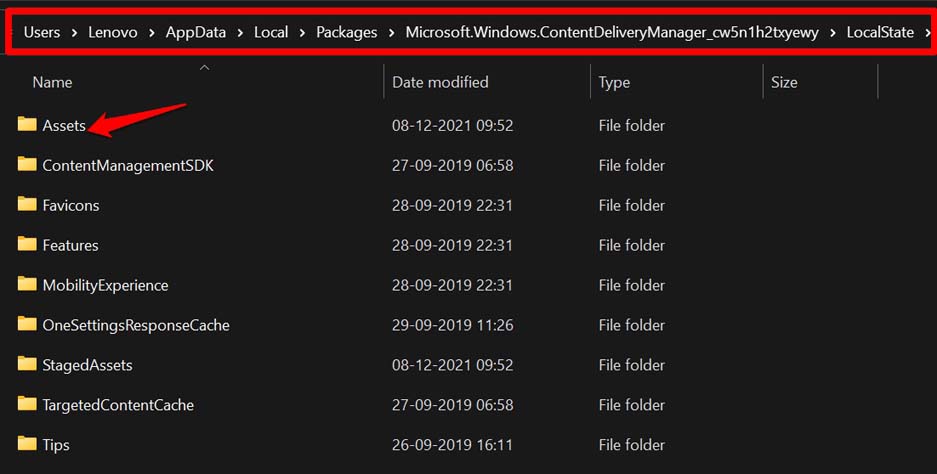
- Откройте «Проводник», в адресную строку вставьте путь
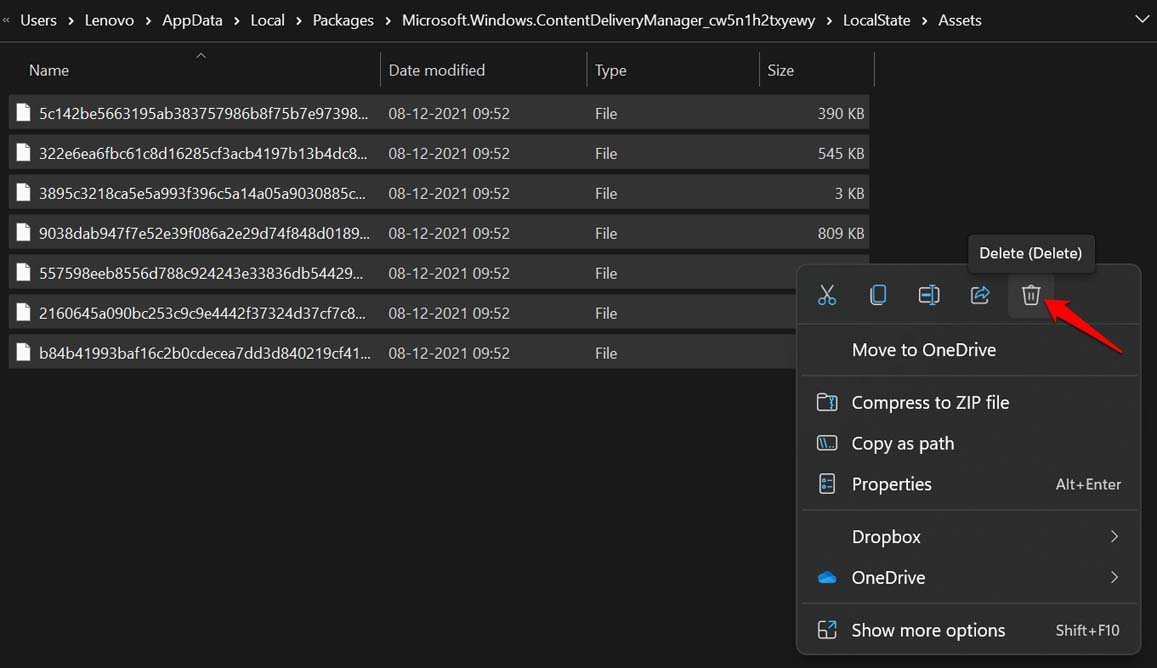
%USERPROFILE%/AppData\Local\Packages\Microsoft.Windows.ContentDeliveryManager_cw5n1h2txyewy\LocalState\Assetsи нажмите Enter, чтобы перейти по нему. - Выделите все находящиеся в конечной директории папки с зажатой левой кнопкой мыши, затем щелкните по любому из них правой.
- Из контекстного меню выберите пункт удаления, подтвердите это действие и дождитесь его завершения. Перезагрузите компьютер и проверьте, меняется ли теперь заставка экрана блокировки с «Интересным».

Способ 3: Очистка временных файлов
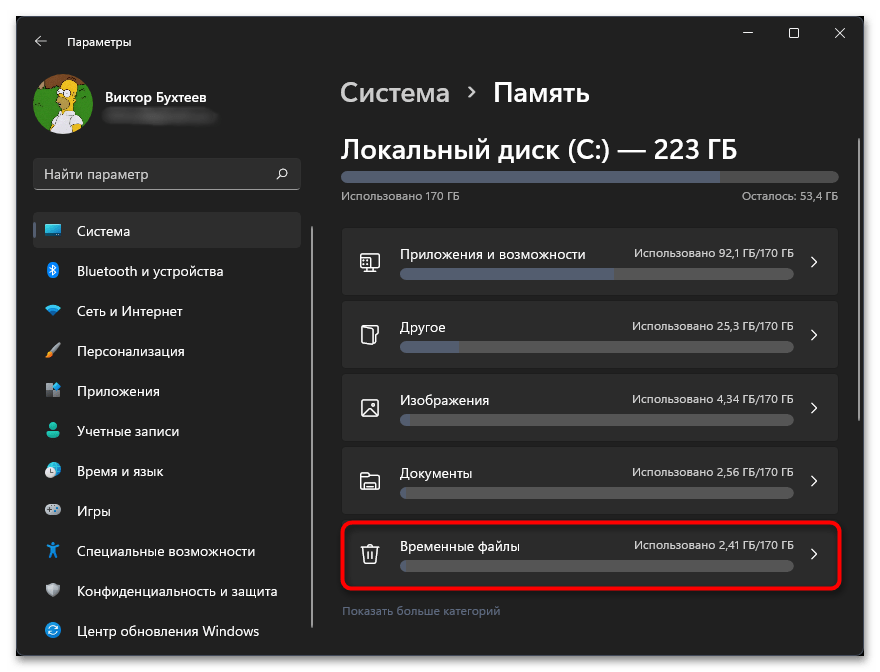
Если очистка исключительно файлов кеша не помогла, можно попробовать избавиться ото всех системных временных файлов, которые создаются со временем использования Windows 11 и установленных приложений. Сделать это можно как при помощи системного инструмента, так и через различные сторонние программы. О каждом методе, преимуществах и принципах реализации читайте в другом материале на нашем сайте по ссылке далее.
Подробнее: Удаление временных файлов в Windows 11
Способ 4: Удаление системных файлов
Этот вариант исправления работы смены «Интересного» на экране блокировки подразумевает удаление двух системных файлов, связанных с данным компонентом. Они должны создаться автоматически заново в следующем сеансе после перезапуска компьютера. Это поможет исправить проблемы с ними, если файлы были повреждены или каким-то образом изменены.
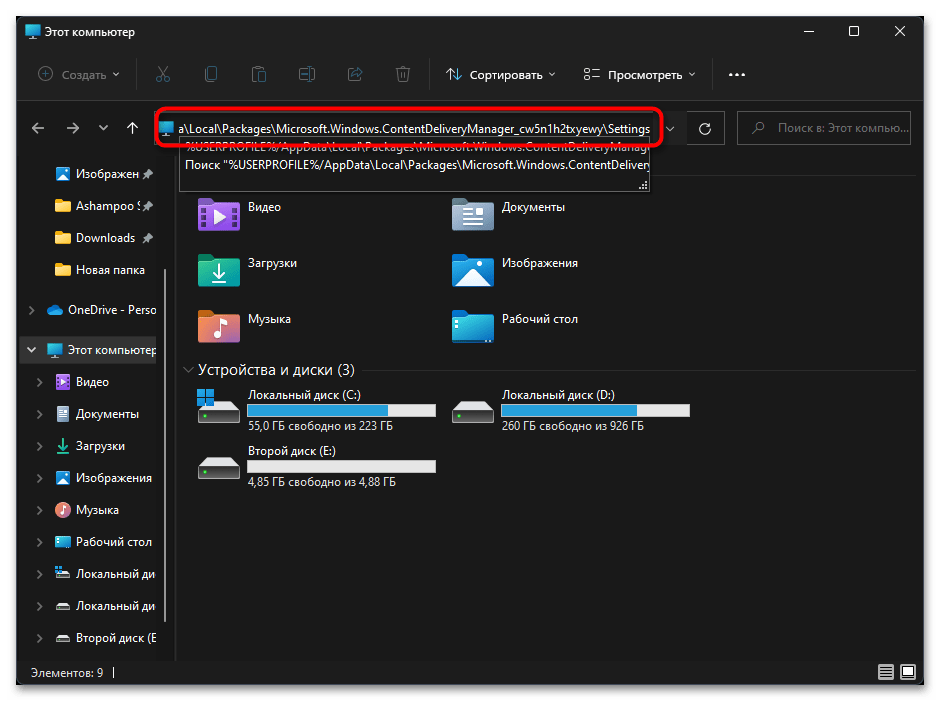
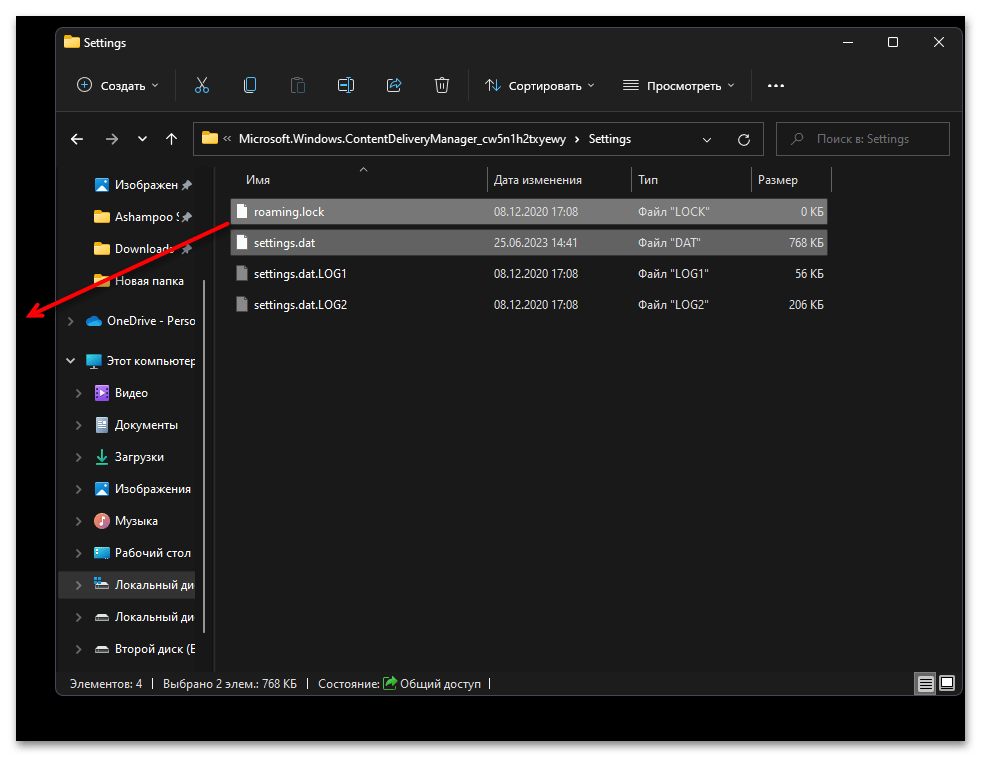
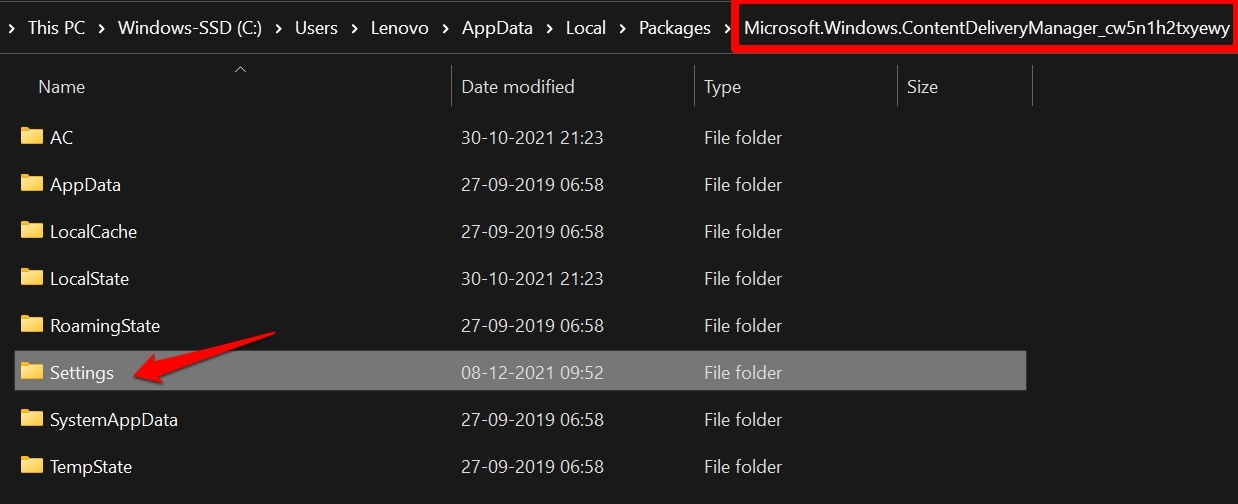
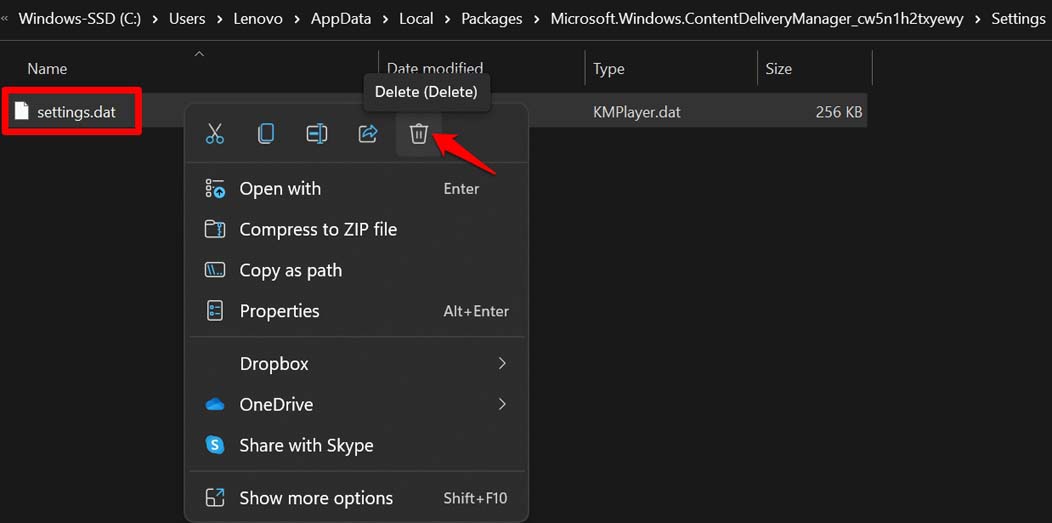
- Снова откройте «Проводник» и на этот раз перейдите по пути
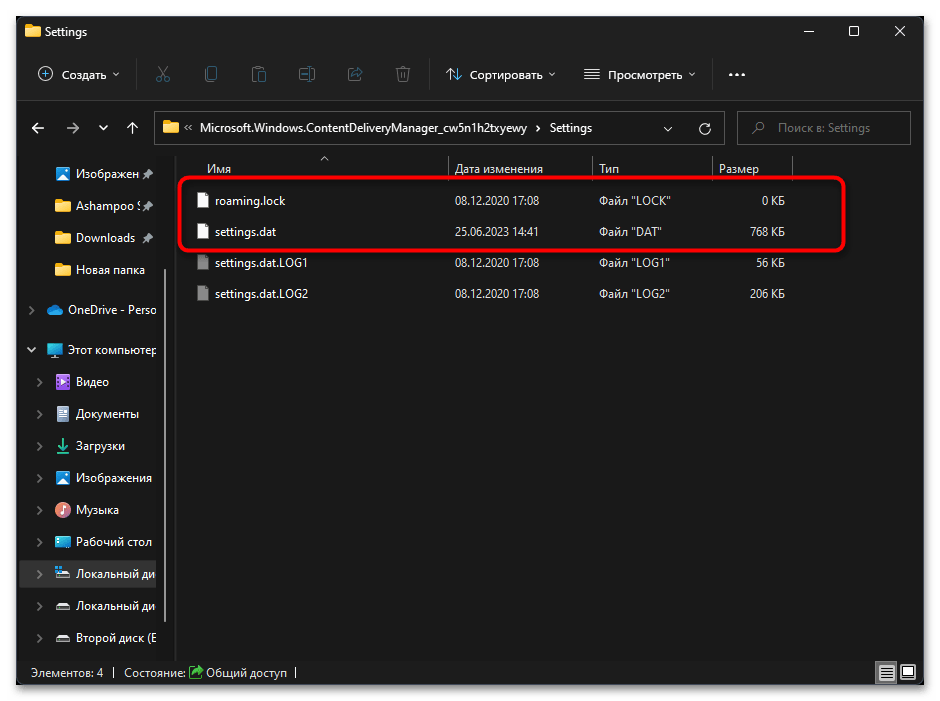
%USERPROFILE%/AppData\Local\Packages\Microsoft.Windows.ContentDeliveryManager_cw5n1h2txyewy\Settings. - В данном каталоге найдите файлы с названиями «roaming.lock», «settings.dat».
- Вам понадобится переместить их на рабочий стол или создать копии с немного измененными названиями в этой же папке, чтобы иметь возможность восстановить их, если вдруг возникнут какие-то проблемы с работоспособностью ОС.
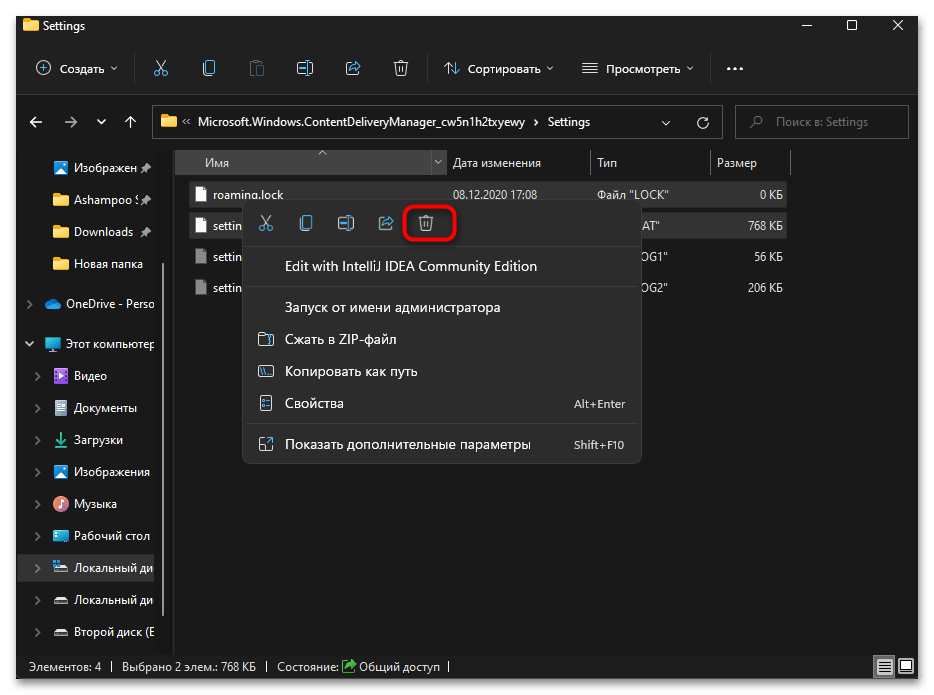
- Как только сделаете это, нажмите по файлам правой кнопкой мыши и удалите их, затем отправьте компьютер на перезагрузку.
Способ 5: Редактирование локальной групповой политики
Доступ к локальной групповой политике через интерфейс редактора можно получить только в Windows 11 Pro или Enterprise. Если у вас стоит другая версия, нужное приложение будет недоступно и вам придется пропустить этот метод, переходя к редактированию реестра, что является практически альтернативой данному методу. При наличии доступа к нужному редактору понадобится найти и изменить всего один параметр.
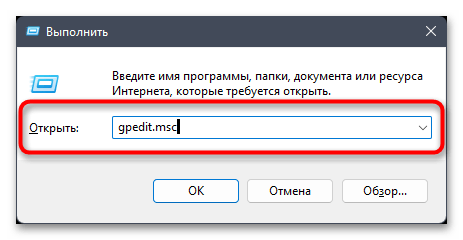
- Откройте утилиту «Выполнить», используя для этого сочетание клавиш Win + R. Введите команду
gpedit.mscи нажмите Enter для ее активации. - В окне редактора откройте «Конфигурация компьютера», выберите папку «Административные шаблоны» > «Панель управления» > «Персонализация».
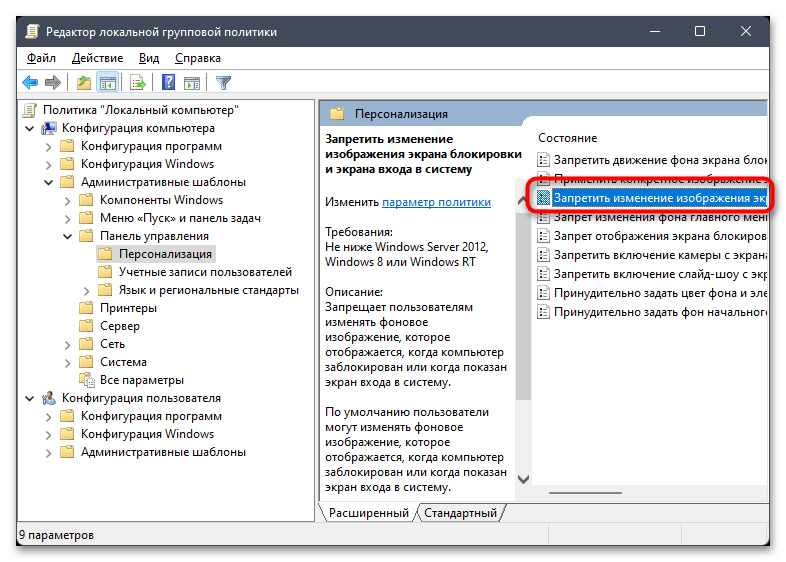
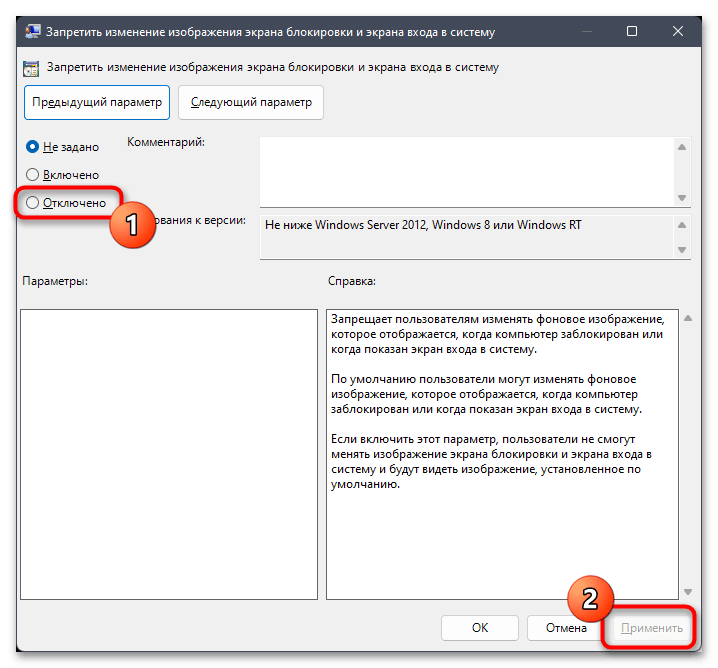
- В списке параметров справа отыщите правило под названием «Запретить изменение изображения экрана блокировки и входа в систему». Дважды щелкните по нему левой кнопкой мыши, чтобы открыть «Свойства».
- Измените значение на «Отключено», примените изменения и перезагрузите компьютер.

Способ 6: Редактирование реестра
Способ с редактированием реестра может выступать как альтернативой предыдущему, если доступа к локальным групповым политикам нет, так и выступать самостоятельным, когда предыдущие настройки не принесли должного результата. Вам понадобится отыскать параметр, который запрещает изменение экрана блокировки, затем отключить его или вовсе удалить.
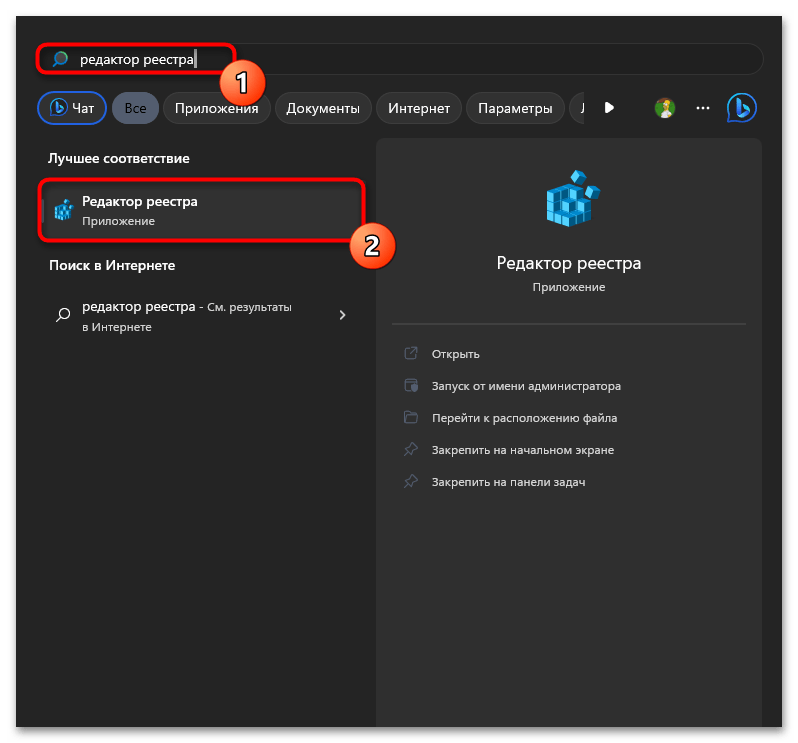
- Для этого через «Пуск» отыщите «Редактор реестра» и запустите данное приложение.
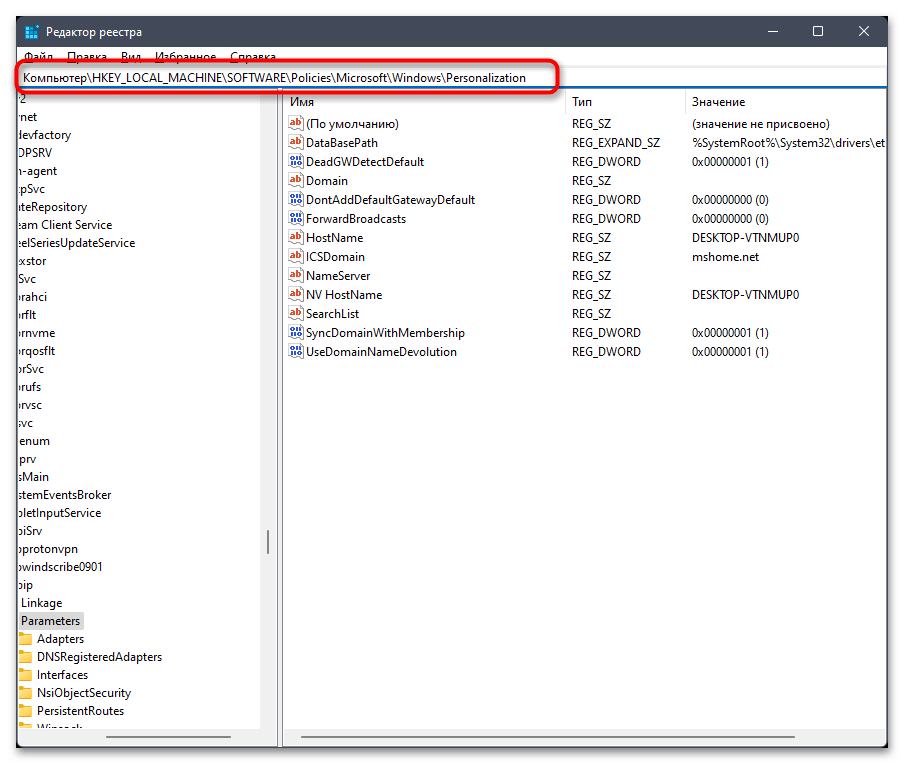
- В адресную строку вставьте путь
Компьютер\HKEY_LOCAL_MACHINE\SOFTWARE\Policies\Microsoft\Windows\Personalizationи перейдите по нему. - Найдите параметр с названием «NoChangingLockScreen». Если он отсутствует, пропустите данный метод и переходите к следующему.
- Можно дважды кликнуть по данному параметру и изменить значение на «0».
- Поддерживается и удаление, что приведет к такому же результату. По завершении не забудьте перезагрузить компьютер.


Способ 7: Повторная регистрация пакетов
В Windows 11 есть несколько пакетов со стандартными файлами, которые отвечают как за работу экрана блокировки, так и смену «Интересного» во время его активности. Дальнейшие действия подразумевают повторную регистрацию данных пакетов, что позволит исправить поврежденные файлы или загрузить заново утерянные.
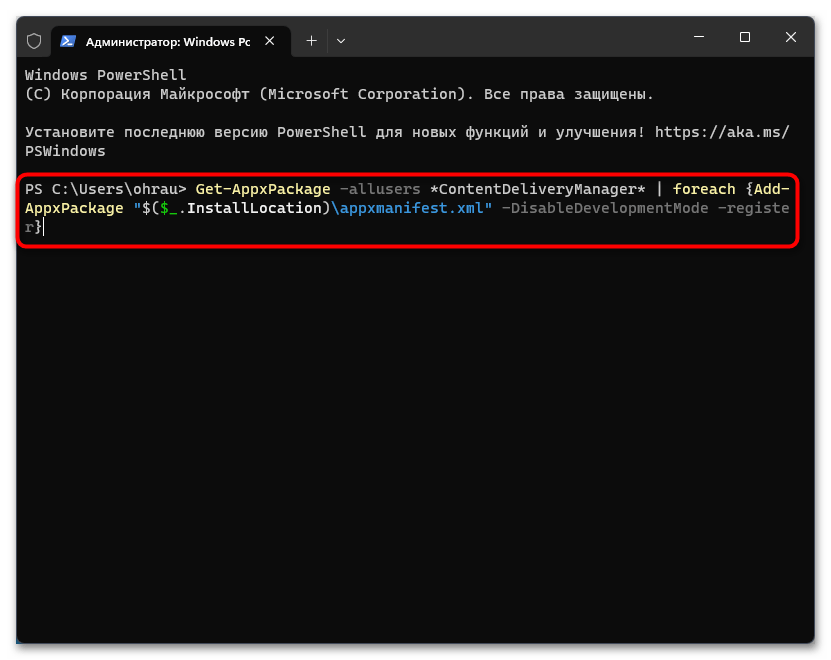
- Щелкните правой кнопкой мыши по «Пуску» и из появившегося контекстного меню выберите пункт «Терминал Windows (Администратор)».
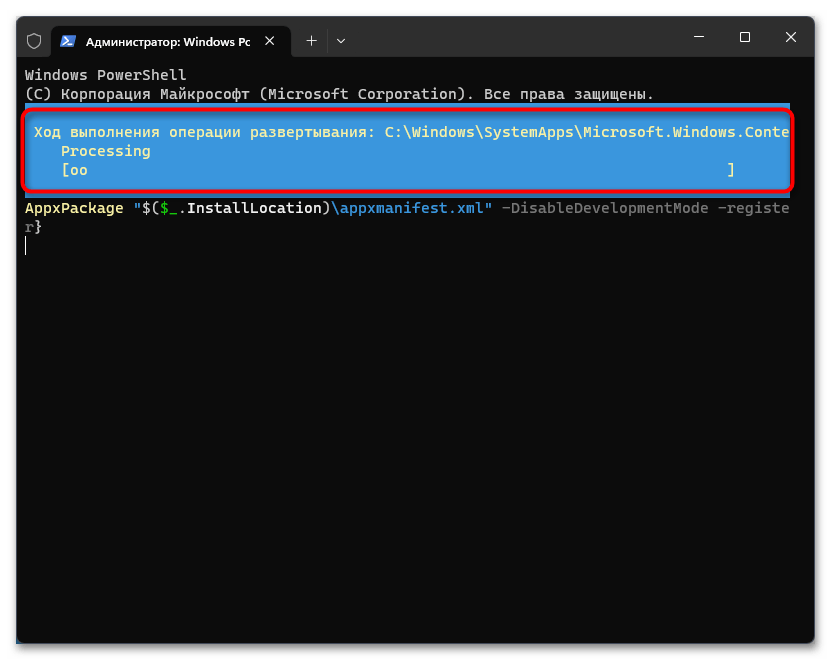
- Вставьте команду
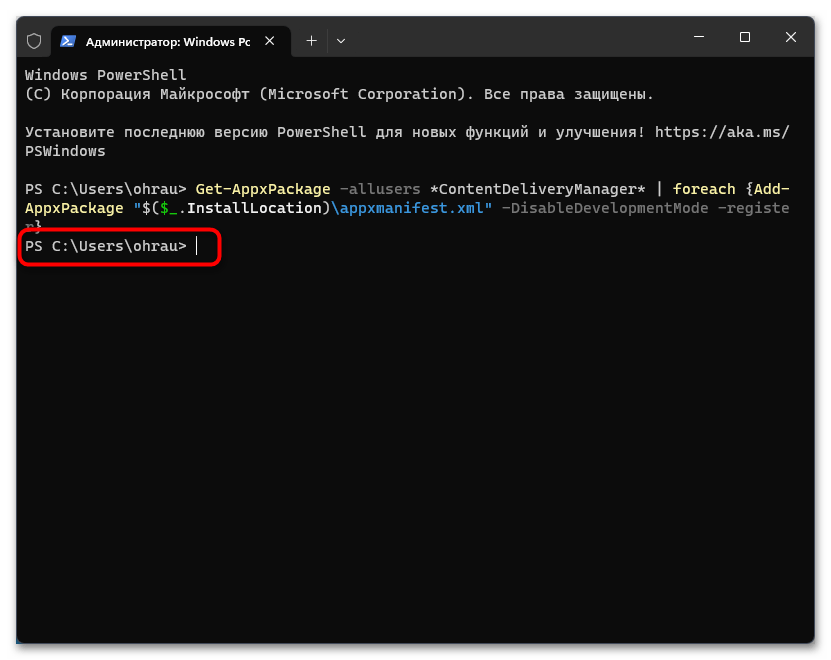
Get-AppxPackage -allusers *ContentDeliveryManager* | foreach {Add-AppxPackage "$($_.InstallLocation)\appxmanifest.xml" -DisableDevelopmentMode -register}и нажмите Enter для ее подтверждения. - Ожидайте окончания развертывания, что займет меньше минуты.
- Если на экране спустя время появилась просто следующая строка для ввода команд, значит, операция закончилась без каких-либо ошибок и можно проверять ее действенность.
Наша группа в TelegramПолезные советы и помощь
Is your Windows 11 Lock Screen Spotlight Wallpaper Not Changing? Here are the Best Solution to Fix Windows 11 Spotlight Not Working.
A lot of users have been complaining that after upgrading to Windows 11, the Windows Spotlight not working. If you are one of those users, then this guide will help you out. I have put up various troubleshooting tips that have helped a lot of users to enable Windows spotlight on Windows 11.
The spotlight feature displays attractive images on the lock screen of the PC, which are fetched from the internet. In the regular interval, the image dynamically changes. You will see the date and time and some information about the image that will be on display.
The update to Windows 11 brought significant changes. Some of these changes do mess up a few system components. Hence, the Windows spotlight feature gets buggy. Even after it is enabled from the Windows settings, users complain about seeing a Blue screen with white waves displaying the calendar.
This issue is 100 percent fixable. After digging through various Microsoft forums and personally trying out several fixes, I have compiled this guide for you.
Reasons Why Windows 11 Spotlight feature May Not Work
- If you don’t have an active internet connection on your computer, the Windows 11 spotlight feature won’t work.
- Also, if you have metered your internet usage, then you may not have stable internet to regularly fetch high-quality images from the internet.
- Some system files may have become corrupt, causing a few features to glitch out, including the Windows spotlight feature.
- The location, date, and time information are incorrect and not in sync with your actual location.
- It may be a bug in the current build of Windows 11 OS installed on your computer, causing the Spotlight feature to not work.
Let us start the troubleshooting Windows 11 Spotlight Feature is Not Working Issue
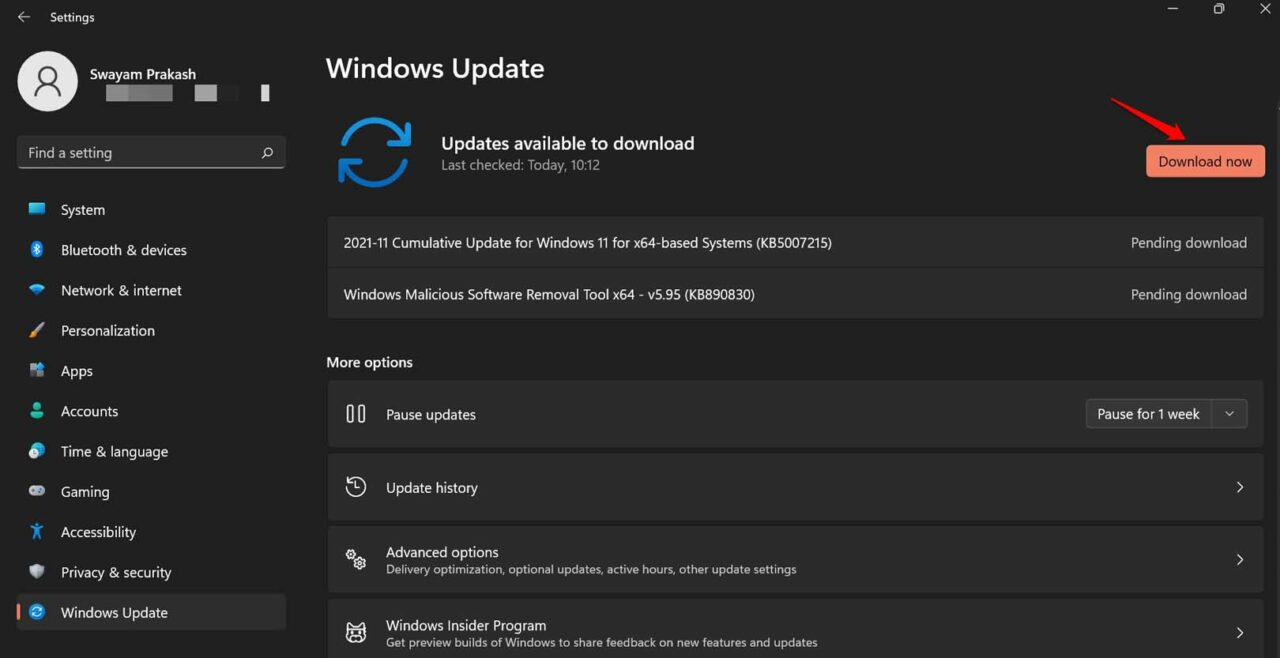
1. Update Windows OS
Start by updating the Windows operating system to the latest build. Bugs are a never-ending issue on Windows OS. Upgrading to the latest version of Windows should fix the problem.
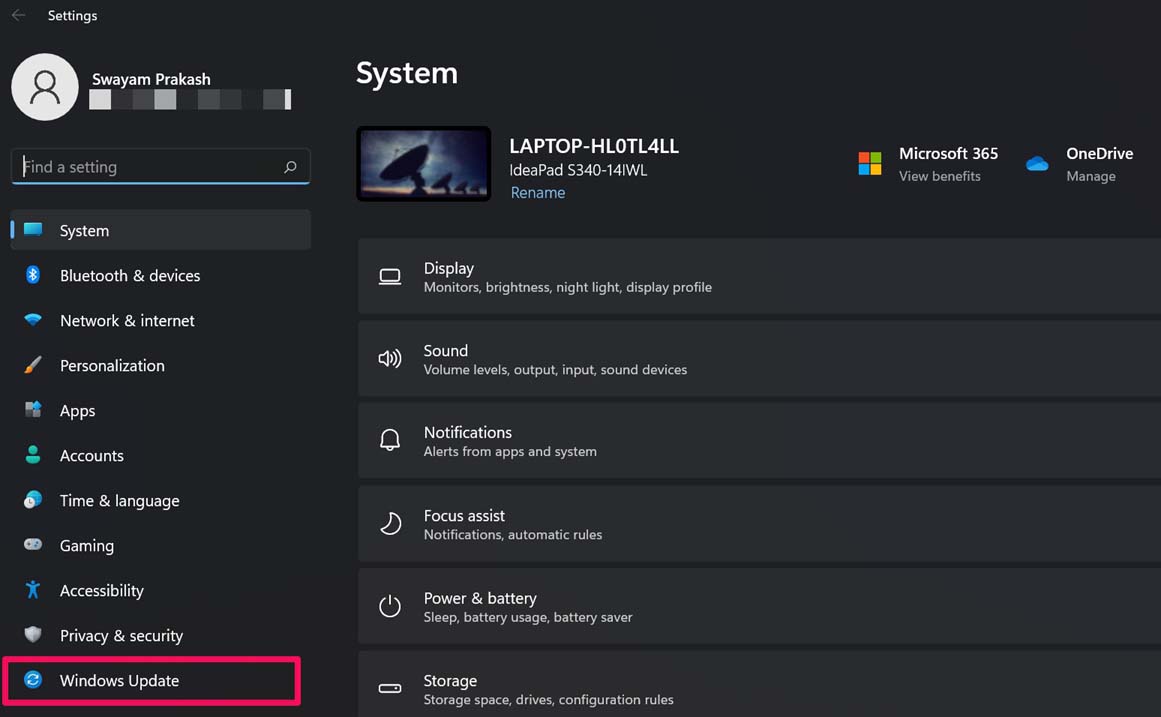
- Go to Settings by pressing Windows + I.
- Then on the left-hand side, navigate to Windows Update and click on it.

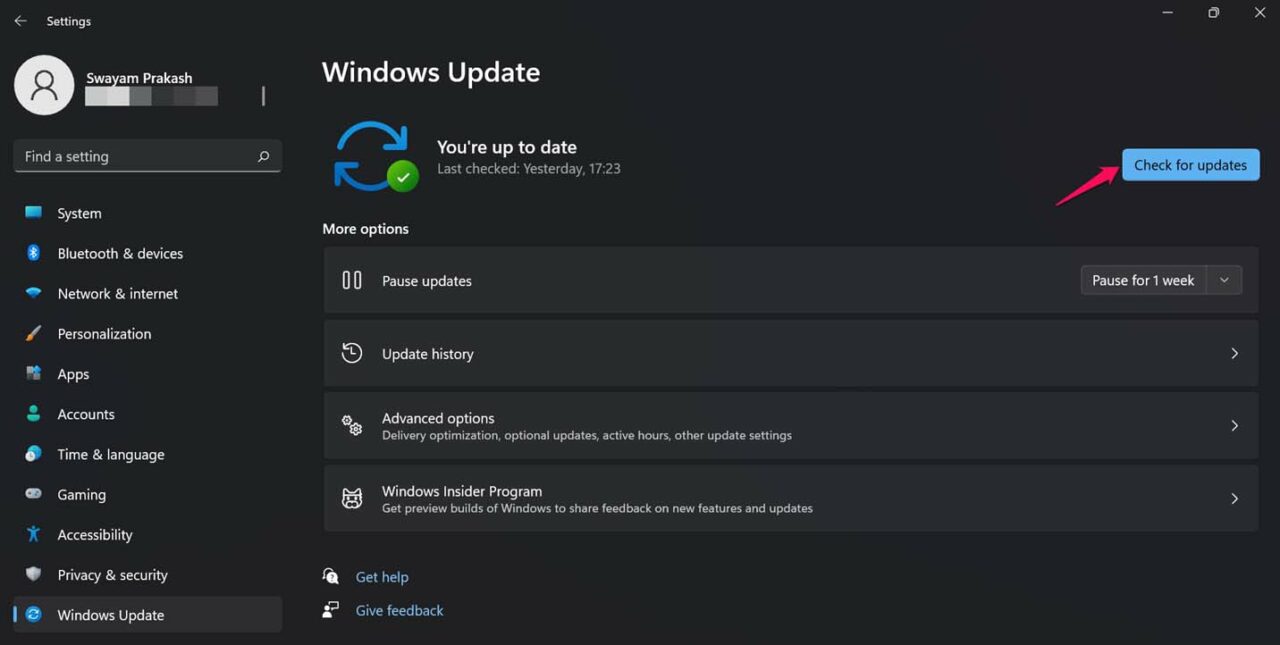
- Then click on Check for Updates.

- If an update is available, it shows up, there will be an option Download Now which you have to click.

After installing the new build of Windows OS, the PC will reboot, and then you try to enable the Windows Spotlight feature.
2. Check the Internet Connection is Active or Not
It would be best to have an active internet connection to have random high-resolution images update automatically on the lock screen with information about them.
If your internet is not working, ask for technical support from the ISP or switch to some other WiFi. A stable network is desirable to have images change dynamically on the lock screen.
3. Disable Metered Internet Connection
Often metered connection, when enabled, limits the internet usage and may cause you to not see the Windows Spotlight feature on Windows 11. So, you can turn that off.
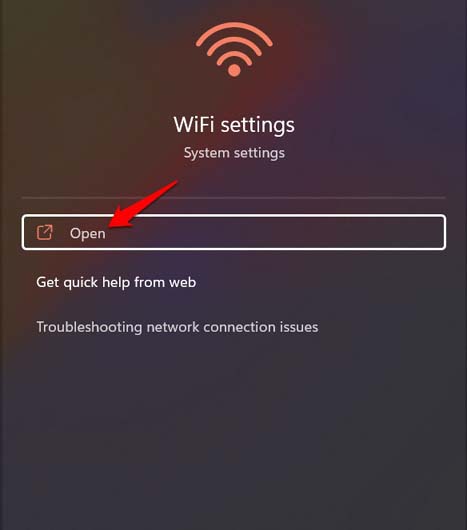
- Using the Windows search, look for WiFi Settings.
- Click Open.

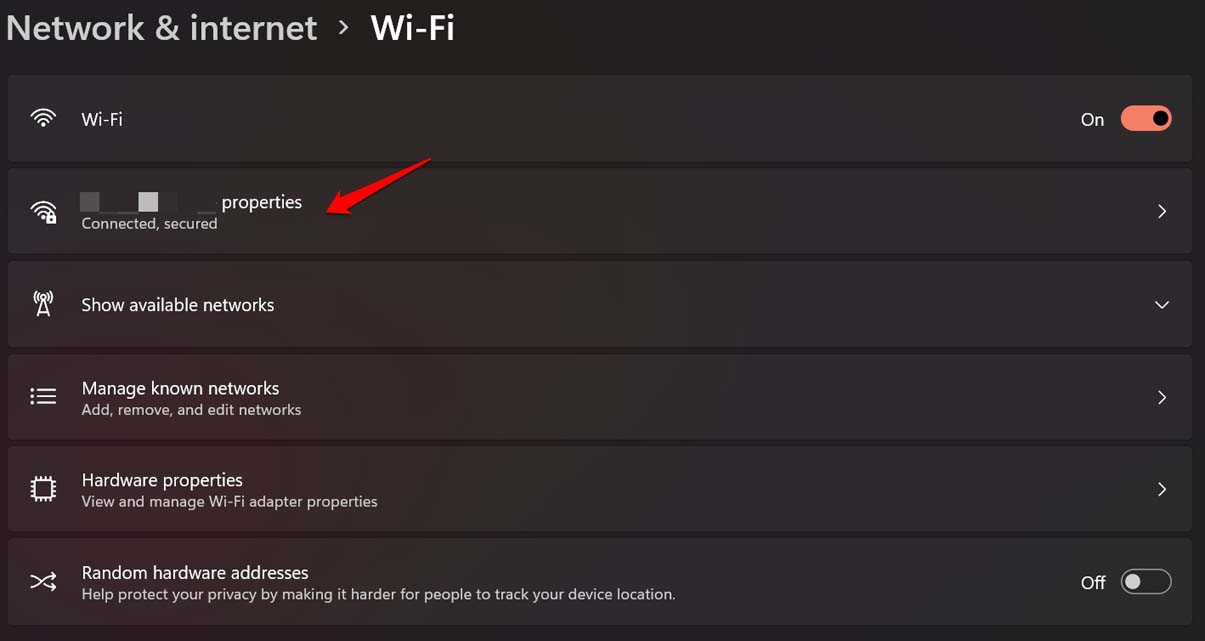
- Then click on the WiFi Properties [WiFi name will vary as per the network you are on]

- Navigate to Metered connection and click on the switch beside it to disable the feature.


Now, check if Windows Spotlight Wallpaper is working or not.
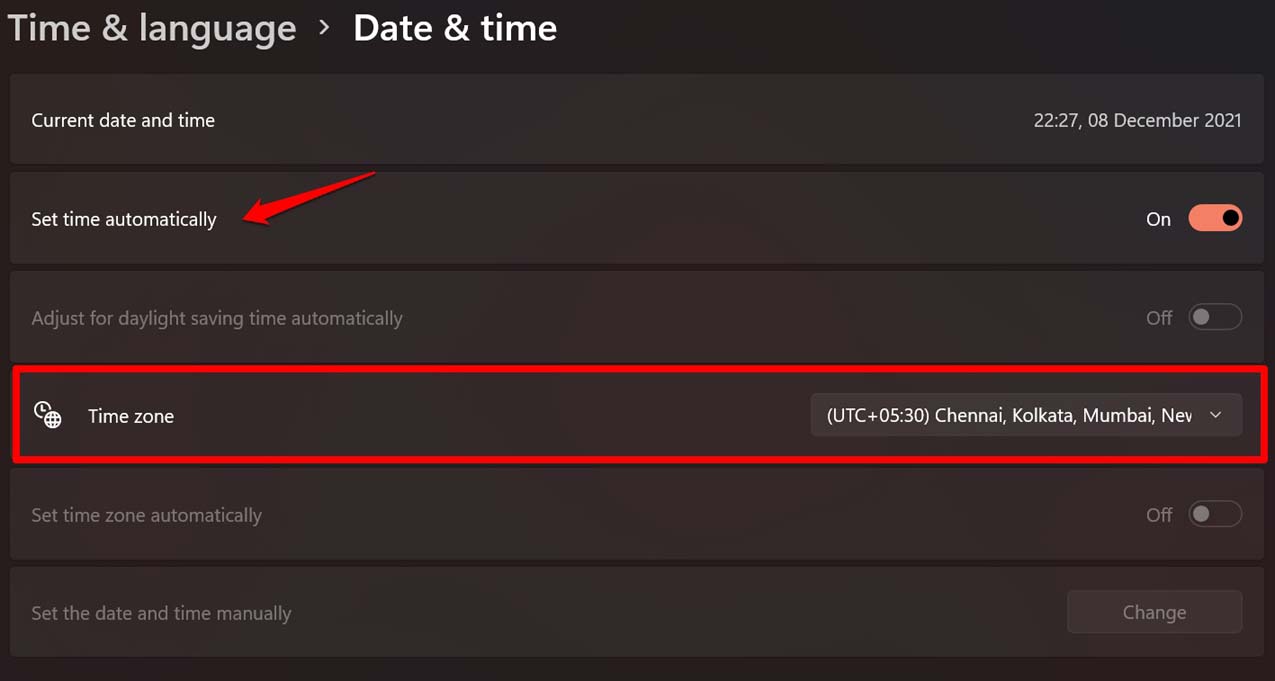
4. Set the Correct Date and Time/Time Zone on Your PC
You need to enable automatic time on your computer. Also, check that you have set the correct time zone and language.
- On your desktop, right-click on the Time/date section on the taskbar.
- Click on Adjust Date and Time.
- Click the switch beside Set Time Automatically to enable the feature.
- Also, check the time zone and set it according to your respective region.

- Now navigate to Language and Region and click on it.

- Set your Preferred Language as per your requirement
- Also, check if the correct Country is set.


5. Reset the Spotlight Components
There is another fix that involves clearing out the spotlight components manually, which a few users reported worked for them. So, you can try that as well.
- Open the C: Drive.
- Click on Users.
- Click on Username [This will vary from computer to computer. For example, on my PC, it is Lenovo].
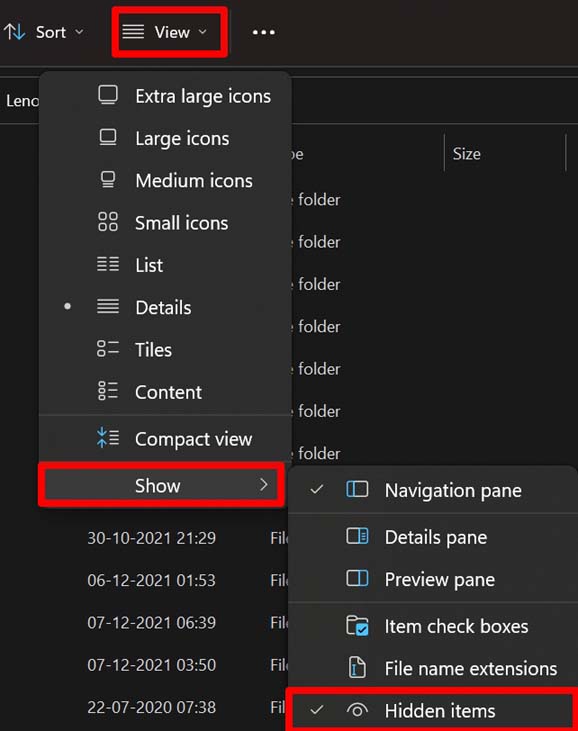
- Click on App Data [make sure you have enabled viewing hidden items]
- Next, follow the folder sequence
Local > Packages > Microsoft.Windows.ContentDeliveryManager > LocalState > Assets

- Select and delete all the items present in the folder Assets.

- Now get back to the screen where you have the folder LocalState.
- In that section, click on Settings.

- There will be two file settings.dat and roaming.lock
- Delete these two files. [sometimes you may only see the settings.dat file]

- Restart your computer and connect to wiFi
- Try to set the Windows spotlight and check the lock screen.
In case you did not know how to enable viewing hidden items on Windows 11, then check the screenshot below. Follow the steps.
6. Install Dynamic Theme App on Windows 11
Now, this is the troubleshooting that worked for my PC running on Windows 11. Even I was not able to enable the Windows spotlight feature. I tried other tricks, and somehow it did not work. After installing the dynamic theme, the lock screen displayed the images by fetching them from the internet. Here is how to do this.
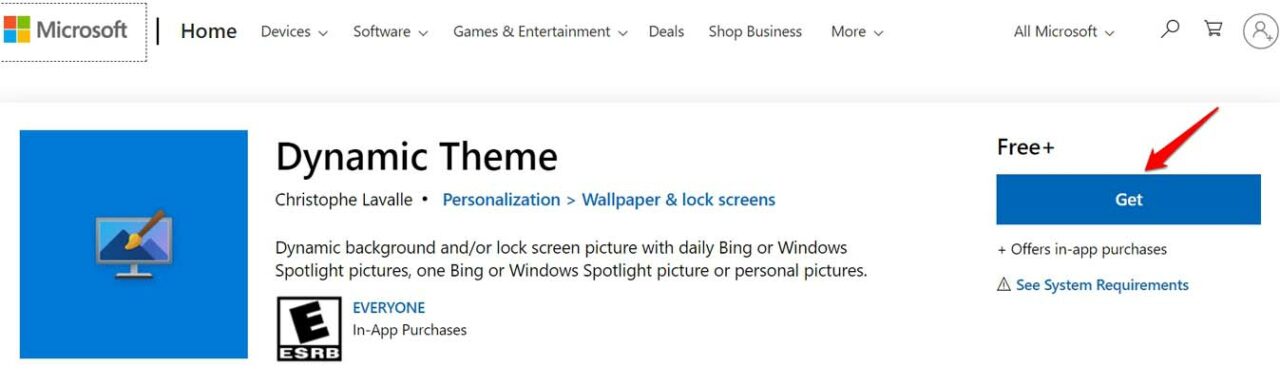
- Open the Microsoft Store app or go to store.microsoft.com.
- Search for Dynamic Theme.
- Click on Get.

- It will take a few seconds to install.
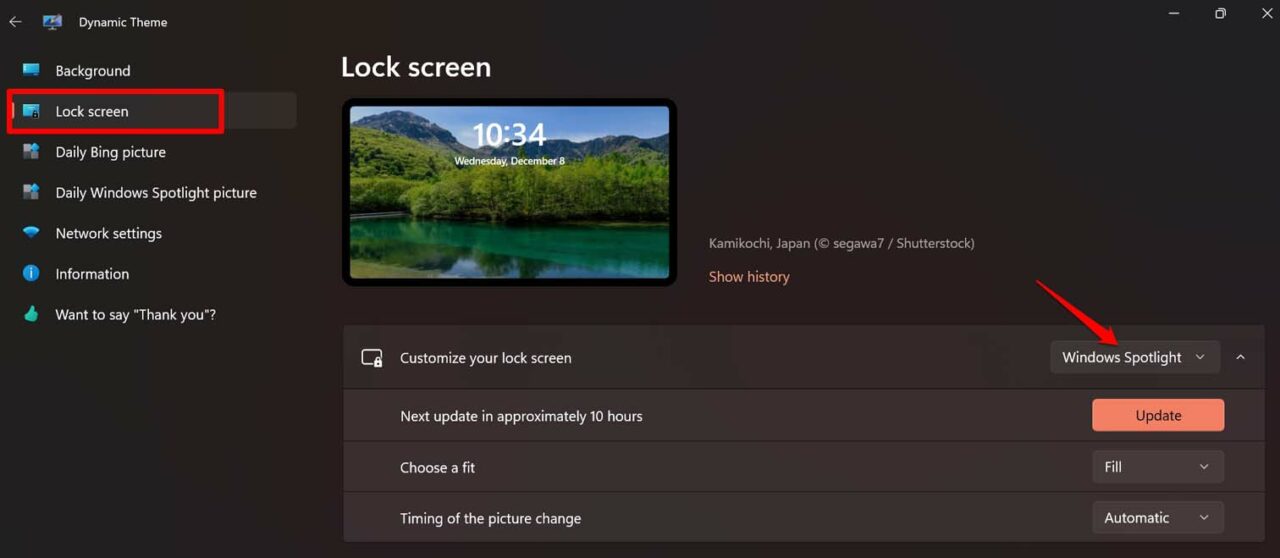
- Open the Dynamic Theme app.
- On the left-hand side, click on Lock Screen.
- Now, click the drop-down menu beside the option Customize Your Lock Screen.
- Set it to Windows Spotlight.

Also, under Personalization, make sure that Windows Spotlight has been enabled for the lock screen from your PC settings. You can follow the next troubleshooting tip for the same.
7. Disable and Re-enable Spotlight
You can try to disable and re-enable the Spotlight feature from the Windows 11 personalization settings.
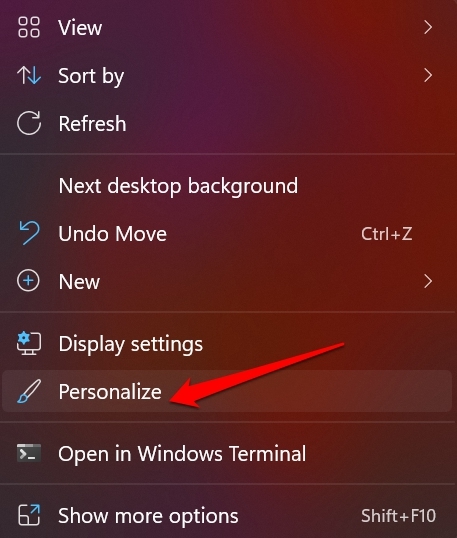
- Right-click on your desktop.
- From the menu, select Personalize.

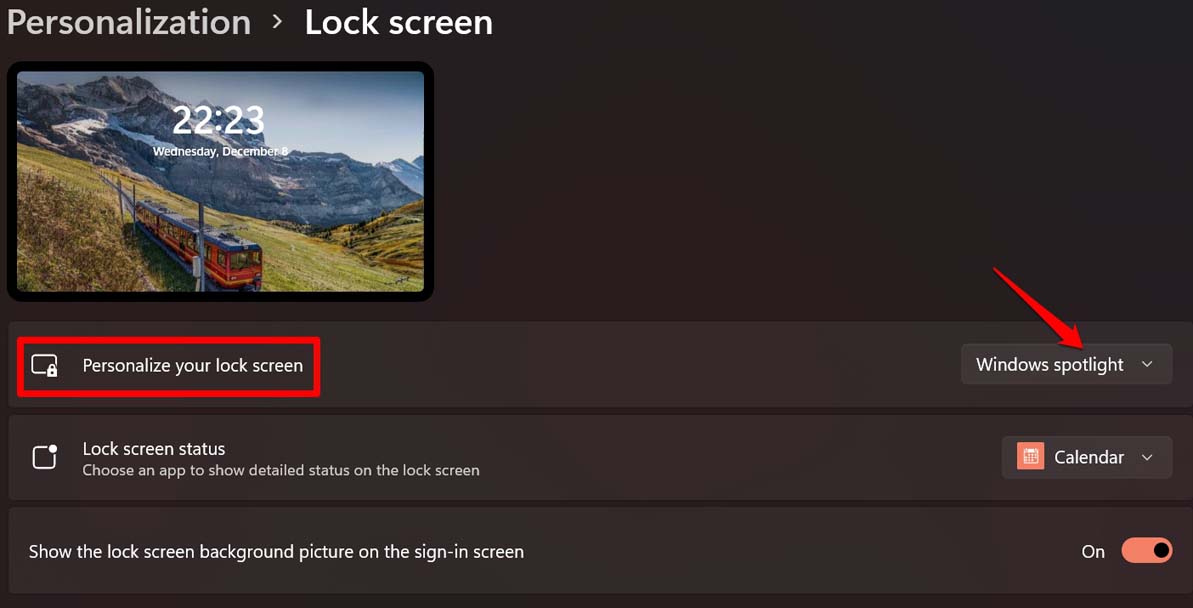
- Click on Lock Screen.

- Then click on the drop-down menu beside Personalize your lock screen.
- Select Windows Spotlight from the drop-down menu.

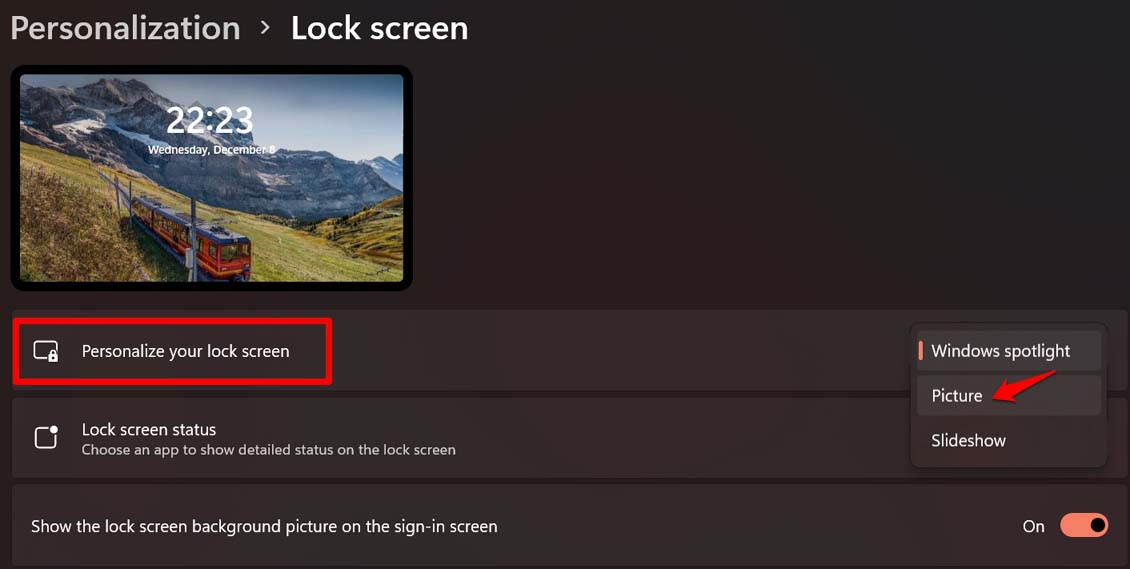
- Then from the same drop-down, many switch to Picture.

- Again switch back to the Windows Spotlight.

This should fix the issue, and you should be able to view the Windows Spotlight on the lock screen.
8. Re-register Spotlight Using PowerShell
Some users mentioned that re-registering the Spotlight feature through the PowerShell command enabled the feature on their Windows 11 computers.
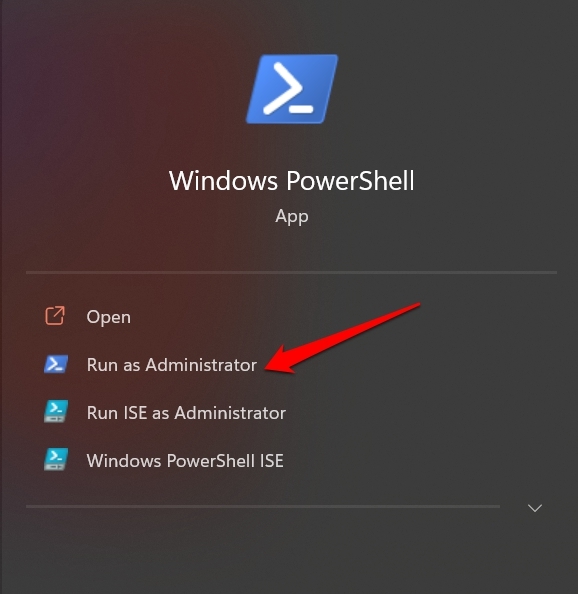
- Open PowerShell using Windows search options.
- Click Run As Administrator.

- Now, enter the following command and press enter.
Get-AppxPackage -Name Microsoft.Windows.ContentDeliveryManager | Foreach {Add-AppxPackage -DisableDevelopmentMode -Register "$($_.InstallLocation)\AppXManifest.xml" -Verbose}
- It will take a few seconds to deploy.
- Once done, close the PowerShell and restart your computer.
- After restarting, check if the Windows Spotlight feature is now showing on the lock screen or not.

So, these are the various working fixes to enable the Windows 11 spotlight feature on your computer. Try these out, and let me know which method solved the issue for you in the comments.
If you’ve any thoughts on [Fixed] Spotlight Wallpaper Not Changing on Windows 11, then feel free to drop in below comment box. Also, please subscribe to our DigitBin YouTube channel for videos tutorials. Cheers!
The Windows spotlight feature is a personalization feature on Windows 11 that automatically download high-quality real-world wallpapers from Bing and display them on the Windows lock screen. You can enable spotlight desktop wallpapers on Windows 11 from settings -> “Personalization” and then “Lock screen.” Ensure that the “Background” option is set to “Windows spotlight.” But sometimes you may notice the Windows Spotlight image is not changing on your Windows 11 lock screen or display the same picture each time on lock screen. A Few users report Windows Spotlight Image Not Changing after Windows 11 upgrade.
“Spotlight Not Working on Windows 11” it works perfectly on Windows 10, this issue only started after Windows 11 free upgrade. Here in this article explore potential causes that might be responsible for causing this Spotlight issue on Windows 11 and look at some fixes to resolve the issue.
Contents
- 1 Windows 11 Spotlight Not Working
- 1.1 Check your internet connection
- 1.2 Restart Windows Spotlight
- 1.3 Update Windows 11
- 1.4 Clear the Windows Spotlight cache
- 1.5 Sync the Date and Time in Windows 11
- 1.6 Re-register Spotlight Using PowerShell
- 1.7 Reset Spotlight Settings
- 1.8 Repair system files on Windows 11
Windows 11 Spotlight Not Working
Windows Spotlight occasionally stuck on the same image because of No internet connection, since Spotlight need a working internet connection to download images from Microsoft server. Sometimes buggy Windows update breaks the Windows spotlight feature, and you may need to restart related services manually to fix the problem. Again corrupted system files or due to some reason images used by the spotlight feature are get corrupted, resulting Windows Spotlight Image Not Changing new images.
And to fix Windows Spotlight not working problem you need to check the internet connection and ensure the date, time, time zone, and region are correct. Resetting the Spotlight feature on Windows 11 is very effective to fix the problem and get Windows Spotlight Image traveling again.
Check your internet connection
Windows Spotlight requires an internet connection to download and display new images. And the first thing you need to ensure have a stable and active internet connection. If you’re using a Wi-Fi connection, try restarting your router or connecting to a different network to rule out any connectivity issues.
In addition check and Make sure the metered connection is off
The metered connection restricts Spotlight to download the necessary media, cause the feature to malfunction.
- Press the Windows key + I to open the settings app,
- Go to Network & Internet, then click on WiFi.
- Now, click on your Network properties, and turn off the Metered connection.
Restart Windows Spotlight
The simple and easy way to fix Windows Spotlight is not working is to restart the service. Resetting the Windows Spotlight settings can help resolve any underlying configuration issues.
- Press the Windows key + I to open the settings app,
- Go to the Personalization tab on the left nav bar and click on Background.
- Here next to Personalize your background open the dropdown menu and choose Picture or Slideshow.
- Close the settings window and reboot your computer.
Now again open Windows settings -> Personalization -> Background and next to Personalize your background select the Windows Spotlight option.
- Now check if the problem is resolved.
Update Windows 11
If you have not updated your Windows 11 PC for a long time or running outdated Windows could also cause the Windows Spotlight not working issue. Again a random bug or a glitch might sometime cause the spotlight feature not working on Windows 11. Let’s check and install the latest Windows update that not only brings the latest bug fixes for fix such problems but also optimizes Windows 11 performance as well.
- Press Windows key + I to open the settings app
- Go to windows update then hit the Check for Updates button,
- If Windows updates are pending there, allow them to download and install from the Microsoft server,
- Once done, reboot your computer to apply the changes, and check if the spotlight feature working again.
Clear the Windows Spotlight cache
Clearing the cache can sometimes resolve issues with Windows Spotlight not changing the lock screen image on Windows 11. Here’s how to do it:
- Press the Windows key + R on your keyboard to open the Run dialog box.
- Type the following command and press Enter:
%LOCALAPPDATA%\Packages\Microsoft.Windows.ContentDeliveryManager_cw5n1h2txyewy\LocalState\Assets - This will open the Assets folder. Select all the files in this folder and delete them.
- Restart your computer and check if the lock screen image starts changing.
Sync the Date and Time in Windows 11
Again If the Date & time and region settings are not set properly, you may encounter the Spotlight not working issue.
- Press Windows key + I to open the settings app
- Go to Time & Language then Date & Time
- Toggle on the switch next to Set time automatically, and select your current time and date from the Time Zone section.
- Go to the Language & Region section and check if you set the Country or region correctly.
Re-register Spotlight Using PowerShell
Sometimes spotlight feature not working issue can be triggered by a potential inconsistency. If the above solutions didn’t fix the problem, try to re-register the Spotlight using PowerShell.
- Press Windows key + S, type PowerShell and select run as administrator,
- In the elevated PowerShell window, copy and paste the following command and hit Enter.
Get-AppxPackage -Name Microsoft.Windows.ContentDeliveryManager | Foreach {Add-AppxPackage -DisableDevelopmentMode -Register “$($_.InstallLocation)\AppXManifest.xml” -Verbose}
- Once finished, close the PowerShell and restart your computer to see if the Spotlight not working problem is resolved.
Reset Spotlight Settings
Also, you can try resetting your Windows 11 Spotlight settings to fix such problem on your computer.
- Open the settings app, Go to personalization then Lock screen from the right pane,
- Toggle off the switch next to Show lock screen background picture on the sign-in screen and select Picture from the background drop-down menu.
- Now press windows key + R, type %LocalAppData%\Packages\Microsoft.Windows.ContentDeliveryManager_cw5n1h2txyewy\Settings and press enterkey
- Here rename both roaming.lock and settings.dat files to roaming.lock.bak and settings.dat.bak
- Reboot your computer and navigate back to the Lock screen in the Settings window
- Then toggle on the switch for Show lock screen background picture on the sign-in screen.
Repair system files on Windows 11
In addition, Run DISM restore health and SFC Scannow Command to look for corrupted system files on Windows 11 and repair them.
Windows 11 Spotlight not working issue could be caused by system file corruptions.
- Press Windows key + S type cmd and select run as administrator,
- First, run DISM command dism /online /cleanup-image /restorehealth
- Then type the command sfc /scannow and press enter key,
- When the command has been successfully executed, check if the Spotlight feature on your computer is now functioning properly.
FAQ:
How can I enable Spotlight in Windows 11?
- To enable Spotlight, go to Settings > Personalization > Lock screen. Under the “Background” section, select “Windows Spotlight” from the drop-down menu.
Why is Spotlight not showing on the lock screen in Windows 11?
- Ensure that the Spotlight feature is enabled. Go to Settings > Personalization > Lock screen and choose “Windows Spotlight” as the background option.
Can I manually change the Spotlight image in Windows 11?
- Currently, there is no built-in option to manually change the Spotlight image in Windows 11. The images are automatically downloaded from the internet.
Why is Spotlight stuck on the same image?
- This could happen if your network connection is unstable or if there are issues with the Windows Spotlight service. Try restarting your device or resetting the Spotlight settings.
Why are the Spotlight images blurry or low resolution?
- The quality of the Spotlight images can vary. Sometimes, the images may appear blurry or low resolution due to compression or other factors. This is a known issue and may be improved in future updates.
Can I disable Spotlight in Windows 11?
- Yes, you can disable Spotlight and choose a static image or a slideshow as your lock screen background. Go to Settings > Personalization > Lock screen, and under the “Background” section, select either “Picture” or “Slideshow” instead of “Windows Spotlight.”
Also read:
- Find and Save Windows Spotlight Lock Screen Images in Windows PC
- Improve Your Windows 10 PC Performance with These 15 Steps
- The drive where Windows is installed is locked Windows 11
- How to Enable and use remote desktop connection Windows 11
- 7 Ways to Fix Microsoft Edge Black Screen Issue on Windows 11
-
Windows Support Forums
-
Personalization
You should upgrade or use an alternative browser.
Solved Windows Spotlight lock screen image not changing
-
Thread starter
Thread starterpwcrickman
-
Start date
Start date
-
-
#1
Is it the case that the Haiti image is corrupt or is there another explanation for the current behavior? Can it be removed from the Spotlight image library in the appropriate folder without causing additional problems?
Any help would be appreciated.
- Windows Build/Version
- Windows 11 Build 22H2 (22621.2134)
My Computer
-
- OS
- Windows 11 Home
- Computer type
- Laptop
- Manufacturer/Model
- Dell Inspiron 15 5510
- CPU
- 11th Gen Intel(R) Core(TM) i7-11390H @ 3.40GHz
- Memory
- 16 GB
- Screen Resolution
- 1920 x 1080
- Hard Drives
- 512 GB SSD
-
-
#2
Is this the tutorial you tried?
Did you follow all the steps in the tutorial? It sometimes takes 24-48 hours for spotlight to resync afterwards.
If it doesn’t work for you, make sure you have no corrupt system files. Open command prompt as admin. Type sfc /scannow.
If sfc found and fixed issues, run through the tutorial again. Restart and wait.
Resetting and re-registering works for most people but not everyone. As a workaround, some have chosen to use the dynamic theme app from the Microsoft store .
Others have chosen to use a folder of their own photos instead.
Last edited:
My Computers
-
- OS
- Windows 11 Pro 24H2 26100.3775
- Computer type
- PC/Desktop
- Manufacturer/Model
- Dell Optiplex 7080
- CPU
- i9-10900 10 core 20 threads
- Motherboard
- DELL 0J37VM
- Memory
- 32 gb
- Graphics Card(s)
- none-Intel UHD Graphics 630
- Sound Card
- Integrated Realtek
- Monitor(s) Displays
- Benq 27
- Screen Resolution
- 2560×1440
- Hard Drives
- 1tb Solidigm m.2 nvme+256gb SKHynix m.2 nvme /External drives 512gb Samsung m.2 sata+1tb Kingston m2.nvme+ 4gb Solidigm nvme
- PSU
- 500w
- Case
- MT
- Cooling
- Dell Premium
- Keyboard
- Logitech wired
- Mouse
- Logitech wireless
- Internet Speed
- so slow I’m too embarrassed to tell
- Browser
- #1 Edge #2 Firefox
- Antivirus
- Defender+MWB Premium
-
- Operating System
- Windows 11 Pro 24H2 26100.3775
- Computer type
- PC/Desktop
- Manufacturer/Model
- Dell Optiplex 9020
- CPU
- i7-4770
- Motherboard
- stock Dell
- Memory
- 24 gb
- Graphics card(s)
- integrated
- Sound Card
- integrated
- Monitor(s) Displays
- Benq 27
- Screen Resolution
- 2560×1440
- Hard Drives
- 256 gb Toshiba BG4 M.2 NVE SSB and 1 tb hdd
- PSU
- 500w
- Case
- MT
- Cooling
- Dell factory
- Mouse
- Logitech wireless
- Keyboard
- Logitech wired
- Internet Speed
- still too embarrassed to tell
- Browser
- Firefox
- Antivirus
- Defender
-
-
#3
I will run the System File Checker as you suggest.
My Computer
-
- OS
- Windows 11 Home
- Computer type
- Laptop
- Manufacturer/Model
- Dell Inspiron 15 5510
- CPU
- 11th Gen Intel(R) Core(TM) i7-11390H @ 3.40GHz
- Memory
- 16 GB
- Screen Resolution
- 1920 x 1080
- Hard Drives
- 512 GB SSD
- Local time
- 8:39 AM
- Posts
- 2
- OS
- Windows 11 Pro
-
-
#4
Desktop
Edition Windows 11 Pro
Version 22H2
OS build 22621.2134
Experience Windows Feature Experience Pack 1000.22659.1000.0
Laptop
Edition Windows 11 Pro
Version 22H2
OS build 22621.2134
Experience Windows Feature Experience Pack 1000.22659.1000.0
My Computer
-
- OS
- Windows 11 Pro
OAT
Pragmatic Member
- Local time
- 10:39 PM
- Posts
- 2,958
- Location
-
San Diego, CA
- OS
- Windows 11 Pro for Workstations
-
-
#5
It’ s very easy to use and is free and 7 MB.

My Computers
-
- OS
- Windows 11 Pro for Workstations
- Computer type
- Laptop
- Manufacturer/Model
- ASUSTeK COMPUTER INC. TUF Gaming FX705GM
- CPU
- 2.20 gigahertz Intel i7-8750H Hyper-threaded 12 cores
- Motherboard
- ASUSTeK COMPUTER INC. FX705GM 1.0
- Memory
- 24428 Megabytes
- Graphics Card(s)
- Intel(R) UHD Graphics 630 / NVIDIA GeForce GTX 1060
- Sound Card
- Intel(R) Display Audio / Realtek(R) Audio
- Monitor(s) Displays
- Integrated Monitor (17.3″vis)
- Screen Resolution
- FHD 1920X1080 16:9
- Hard Drives
- 2 SSD SATA/NVM Express 1.3
WDS500G2B0A-00SM50 500.1 GB
WDCSDAPNUW-1002 256 GB
- PSU
- 19V DC 6.32 A 120 W
- Cooling
- Dual Fans
- Mouse
- MS Bluetooth
- Internet Speed
- Fiber 1GB Cox -us & IGB Orange-fr
- Browser
- Edge Canary- Firefox Nightly-Chrome Dev-Chrome Dev
- Antivirus
- Windows Defender
- Other Info
- VMs of Windows 11 stable/Beta/Dev/Canary
VM of XeroLinux- Arch based & Debian 13 (Trixie)
-
- Operating System
- Windows 11 Insider Canary
- Computer type
- Laptop
- Manufacturer/Model
- ASUS X751BP
- CPU
- AMD Dual Core A6-9220
- Motherboard
- ASUS
- Memory
- 8 GB
- Graphics card(s)
- AMD Radeon R5 M420
- Sound Card
- Realtek
- Monitor(s) Displays
- 17.3
- Screen Resolution
- 1600X900 16:9
- Hard Drives
- 1TB 5400RPM
- Local time
- 8:39 AM
- Posts
- 2
- OS
- Windows 11 Pro
-
-
#6
I find the APP Dynamic Theme from MS Store very helpful at refreshing and manipulating Windows Spotlight images.
It’ s very easy to use and is free and 7 MB.
Yes I gave it a try and it’s fine.
But it’s quite odd to have the Spotlight stuck on the same Haiti image for multiple users.
My Computer
-
- OS
- Windows 11 Pro
-
-
#7
- Reset background and lock screen using bat file provided in the tutorial and run a SFC scan (no corruption found)
- Runs fine for approximately two or three weeks
- Stops changing lock screen image followed soon thereafter with a static, non-changing background image.
I have to conclude that the Spotlight app is either being overwritten by an update or is just faulty to start with.
My Computer
-
- OS
- Windows 11 Home
- Computer type
- Laptop
- Manufacturer/Model
- Dell Inspiron 15 5510
- CPU
- 11th Gen Intel(R) Core(TM) i7-11390H @ 3.40GHz
- Memory
- 16 GB
- Screen Resolution
- 1920 x 1080
- Hard Drives
- 512 GB SSD
- Local time
- 1:39 AM
- Posts
- 302
- Location
-
Santiago
- OS
- Windows 11 Pro
-
-
#8
My Computers
-
- OS
- Windows 11 Pro
- Computer type
- Laptop
- Manufacturer/Model
- Lenovo Legion 7i 16IRX9
- CPU
- Intel Core i9-14900HX
- Motherboard
- LENOVO LNVNB161216 Chipset HM 770
- Memory
- 32 GB
- Graphics Card(s)
- Intel UHD Graphics, NVIDIA RTX 4070 Laptop
- Sound Card
- Realtek in-built
- Screen Resolution
- 3200×2000 200% Scale
- Hard Drives
- C: HDD 1 TB SAMSUNG MZVL21T0HCLR-00BL2
D: HDD 1 TB CRUCIAL CT1000P3PSSD8
- Antivirus
- BitDefender Free
-
- Operating System
- Windows 11 Pro
- Computer type
- Laptop
- Manufacturer/Model
- Lenovo ThinkPad X1 3Gen Extreme
- CPU
- I7 10750H
- Motherboard
- Intel MW-490
- Memory
- 32 GB
- Graphics card(s)
- Intel UHD — NVIDIA 1650 Ti Max-Q
- Sound Card
- Realtek in-built
- Screen Resolution
- 3840×2160 225% Scale
- Hard Drives
- C: WDC PC SN730 SDBQNTY-1T00-1001 (1 TB)
D: KINGSTON SNV2S2000G (2 TB)
- Antivirus
- BitDefender
- Local time
- 6:39 AM
- Posts
- 951
- OS
- Windows 11 Pro
-
-
#9
My Computer
-
- OS
- Windows 11 Pro
- Computer type
- PC/Desktop
- Manufacturer/Model
- Self build
- CPU
- Core i7-13700K
- Motherboard
- Asus TUF Gaming Plus WiFi Z790
- Memory
- 64 GB Kingston Fury Beast DDR5
- Graphics Card(s)
- Gigabyte GeForce RTX 2060 Super Gaming OC 8G
- Sound Card
- Realtek S1200A
- Monitor(s) Displays
- Viewsonic VP2770
- Screen Resolution
- 2560 x 1440
- Hard Drives
- Kingston KC3000 2TB NVME SSD & SATA HDDs & SSD
- PSU
- EVGA SuperNova G2 850W
- Case
- Nanoxia Deep Silence 1
- Cooling
- Noctua NH-D14
- Keyboard
- Microsoft Digital Media Pro
- Mouse
- Logitech Wireless
- Internet Speed
- 50 Mb / s
- Browser
- Chrome
- Antivirus
- Defender
Similar threads
-
Windows Support Forums
-
Personalization
В данной статье показаны действия, с помощью которых можно изменить изображение «Windows: интересное» (Windows Spotlight) на экране блокировки, если изображение не меняется продолжительное время.
Windows: интересное (Windows spotlight) — это функция включенная в операционную систему Windows 10, с помощью которой автоматически загружаются и устанавливаются изображения на экране блокировки.
В некоторых случаях изображение «Windows: интересное» на экране блокировки не меняется продолжительное время, при этом в графическом интерфейсе отсутствует возможность сбросить функцию «Windows: интересное». Если у вас возникла такая проблема, то прочитав данную статью и выполнив несколько несложных действий можно сменить (сбросить) фоновое изображение на экране блокировки.
Как изменить (сбросить) изображение «Windows: интересное» используя графический интерфейс
Чтобы изменить (сбросить) изображение «Windows: интересное», сначала нужно отключить функцию «Windows: интересное», для этого последовательно откройте:
Пуск ➯ Параметры ➯ Персонализация ➯ Экран блокировки
Затем в правой части окна, в выпадающем списке «Фон» установите Фото или Слайд-шоу

Далее скопируйте и вставьте в адресную строку проводника или в диалоговое окно Выполнить следующий путь и нажмите клавишу Enter ↵.
%LOCALAPPDATA%\Packages\Microsoft.Windows.ContentDeliveryManager_cw5n1h2txyewy\LocalState\Assets

В папке Assets выделите все файлы (нажмите сочетание клавиш Ctrl + A) и далее удалите все файлы (нажмите сочетание клавиш Shift + Del).

Теперь, скопируйте и вставьте в адресную строку проводника или в диалоговое окно Выполнить следующий путь и нажмите клавишу Enter ↵.
%LOCALAPPDATA%\Packages\Microsoft.Windows.ContentDeliveryManager_cw5n1h2txyewy\Settings
В папке Settings выделите все файлы (нажмите сочетание клавиш Ctrl + A) и далее удалите все файлы (нажмите сочетание клавиш Shift + Del).

После того как вы удалили файлы, перезагрузите компьютер и включите в персонализации функцию «Windows: интересное».

Заблокируйте компьютер нажав сочетание клавиш + L и на экране блокировки должно появиться новое изображение «Windows: интересное» (Windows Spotlight).

Как изменить (сбросить) изображение «Windows: интересное» используя Windows PowerShell
Если показанные выше действия не помогли исправить проблему смены изображений «Windows: интересное» (Windows spotlight), то попробуйте сбросить настройки, выполнив следующие действия.
Сначала проверим включена ли функция «Windows: интересное», для этого последовательно откройте:
Пуск ➯ Параметры ➯ Персонализация ➯ Экран блокировки
Затем в правой части окна, в выпадающем списке «Фон» установите Windows: интересное (если вы не включите эту функцию, то возможно вы получите ошибку при выполнении команды в PowerShell).

Теперь запустите консоль Windows PowerShell от имени администратора и выполните следующую команду:
Get-AppxPackage -allusers *ContentDeliveryManager* | foreach {Add-AppxPackage «$($_.InstallLocation)\\appxmanifest.xml» -DisableDevelopmentMode -register}

После выполнения команды перезагрузите компьютер.
Теперь заблокируйте компьютер нажав сочетание клавиш + L и на экране блокировки должно появиться новое изображение.

Используя рассмотренные выше действия, можно изменить (сбросить) изображение «Windows: интересное» (Windows Spotlight) на экране блокировки, если изображение не меняется продолжительное время.