
Windows 11, in general, have two versions of speech recognition. The newer version is Voice Typing feature. It is better for dictating text. But the classic version is Windows Speech Recognition and it works on your device with or without an Internet connection. It allows you to control Windows and some applications using voice commands as well. However, if you came across Speech recognition not working on Windows 11 issue, this post may help.
Recently, an user reached to me in forums with this query:
I’m trying to play a game where you must need speech recognition so i tried to set it up in my settings. Italian is my native language but I usually talk in English so i tried to install the English (United States) and English (United Kingdom) language packages (they both have speech recognition). After the installation I went to the “speech settings” in order to change the Speech language but I could only see and select Italian (Italy), there’s neither English (United States) nor English (United Kingdom). I also tried to open Windows speech Recognition program but I’m getting this error:

If you’re also facing the same issue, here’s how to fix it.
Page Contents
Check if you’ve supported language installed
As of this writing, Speech Recognition is available only for the following languages:
- English (United States)
- English (United Kingdom)
- English (Canada)
- English (India)
- English (Australia)
- French
- German
- Japanese
- Mandarin (Chinese Simplified and Chinese Traditional)
- Spanish
If you’ve any other language except the above mentioned ones, it is likely you’re facing this issue. Hence, you need to make sure you install any one of the possible and usable language for you.
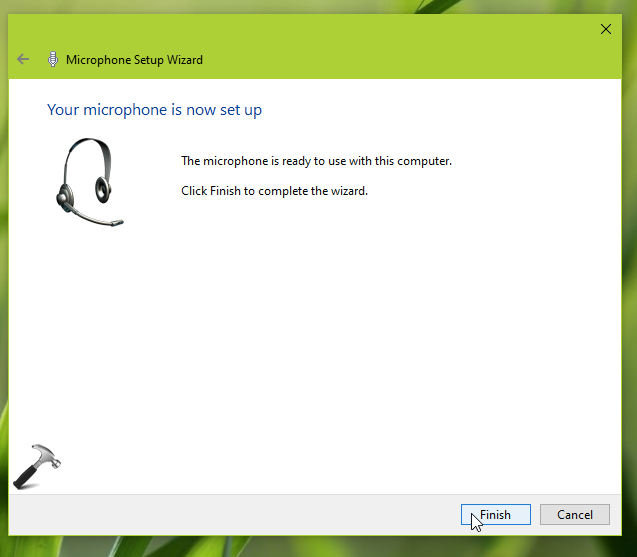
Properly setup microphone
For the speech recognition feature to work properly, it is important that you’ve properly setup your microphone.
You can follow this step-by-step guide to setup microphone.
Restart required services
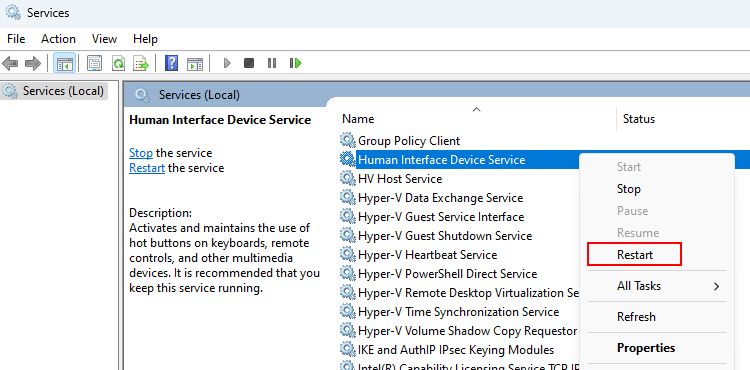
Follow these steps to restart the required services for speech recognition feature:
Press Windows key + R and type services.msc and click OK.
Locate these services one-by-one and restart them and ensure they’re running:
- Human Interface Device Service
- Windows Audio
- Windows Audio Endpoint Builder

Hope this helps!
RELATED ARTICLES
Applies ToWindows 11
Если голосовой ввод не работает в Windows, ниже приведены некоторые действия по устранению неполадок, которые можно выполнить на компьютере.
Подготовка
Ниже приведены некоторые моменты, которые следует сначала проверка, если голосовая ввод не работает:
-
Убедитесь, что нужный микрофон выбран в разделе Параметры. Чтобы проверка, выберите Пуск > Параметры > Система > Звук > Вход> Выберите устройство для речи или записи.
-
Если вы используете внешний микрофон, убедитесь, что он правильно подключен к компьютеру.
Сообщения об ошибках
При использовании голосового ввода могут возникать различные ошибки.
|
Сообщение об ошибке |
Что вы можете сделать |
|---|---|
|
Для ввода голоса требуется доступ к микрофону. Это необходимо включить в параметрах, чтобы использовать речь в тексте. |
Выберите Пуск > Параметры > Конфиденциальность & безопасность > Микрофон и убедитесь, что доступ к микрофону включен. |
|
Голосовой ввод недоступен на текущем языке. |
Проверьте список поддерживаемых языков и установите нужный. См. список |
Текст не отображается после речи
Если после выступления в текстовом поле ничего не отображается, проверка следующие моменты:
-
Отрегулируйте уровень входного сигнала вашего микрофона. Дополнительные сведения см. в статье Настройка и тестирование микрофонов в Windows.
-
Если вы используете встроенный микрофон, попробуйте еще раз с гарнитурой или внешним микрофоном.
Слова введены неправильно
Если слова, которые вы произносите, неправильно введены, ниже приведены некоторые проверка.
-
Переместитесь в более тихое место.
-
Убедитесь, что выбран правильный язык для голосового ввода. Для этого нажмите клавишу с логотипом Windows + ПРОБЕЛ и выберите один из доступных языков. Дополнительные сведения об установке других языков см. в статье Использование голосового ввода для разговора вместо ввода текста на компьютере.
-
Если вы используете встроенный микрофон, попробуйте еще раз с гарнитурой или внешним микрофоном.
Статьи по теме
-
Использование голосового ввода для общения вместо ввода текста на компьютере
Нужна дополнительная помощь?
Нужны дополнительные параметры?
Изучите преимущества подписки, просмотрите учебные курсы, узнайте, как защитить свое устройство и т. д.
Speech recognition enables features like voice-to-text, text-to-speech, and even voice access on your computer. However, issues sometimes arise when speech recognition fails to work, which leads to your computer displaying a popup saying, «speech recognition could not start.»
Don’t worry; we’ll list some troubleshooting methods to help you fix the speech recognition error on Windows.
Why Does the «Speech Recognition Could Not Start» Error Occur?
Several reasons might prevent you from using speech recognition features on your computer. Here are some common causes for an overview:
- Incorrect microphone settings
- Outdated audio drivers
- Wrong speech recognition settings
- Some required Windows services may not be running
Let’s explore the troubleshooting methods to fix this error and get your speech recognition up and running.
1. Start With Some Basic Fixes
If you’re experiencing issues with speech recognition on Windows, the following tips may offer a quick fix:
- Ensure your microphone is correctly connected.
- Change the default microphone and use the voice-to-text feature once.
- Check your system’s sound settings to ensure everything is set to default.
- Try updating the audio drivers using any free driver updater for Windows.
- If you’re still on an older version of Windows, refer to how to update your Windows device for instructions on how to update.
If the issue persists after this quick troubleshooting, try the more advanced fixes outlined below.
2. Troubleshoot Your Microphone
One of the most common causes of the «speech recognition could not start» error is a faulty or improperly set up microphone. To fix this, check your microphone for any physical damage and ensure it is selected as the default device.
If your microphone is connected but not visible in the device’s settings, see how to fix Windows not detecting a microphone. On the other hand, If your microphone is connected properly, follow our microphone troubleshooting guide for more help.
3. Modify the Speech Properties
Another solution is to modify the speech recognition settings from Windows Speech Properties. Here’s how to do that on your computer:
-
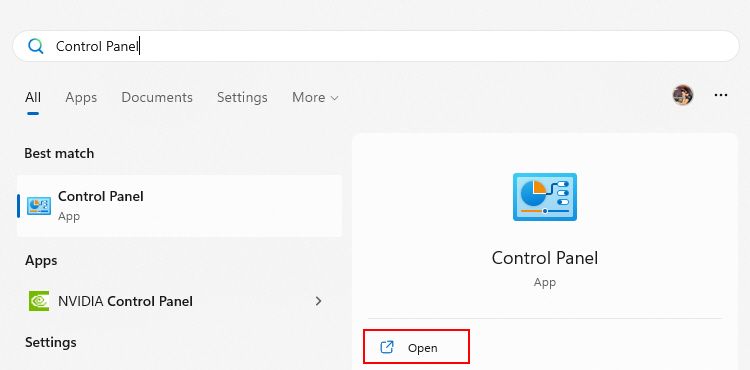
Click the Windows key and type Control Panel on the search bar.

-
Click Open to launch it. Once you’re on the Control Panel window, go to Ease of Access > Speech Recognition > Advanced speech options.
-
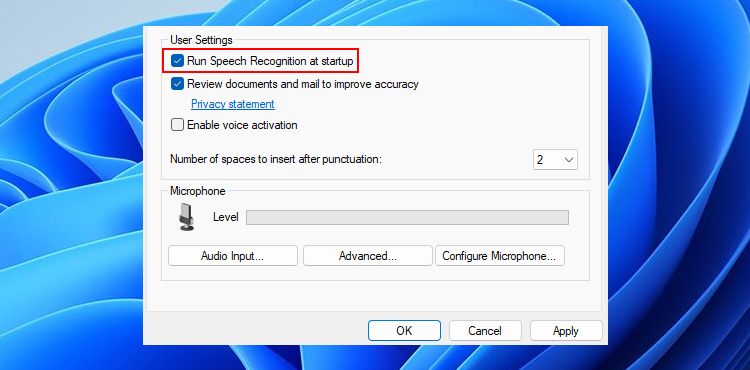
On the Speech Properties screen, choose Run Speech Recognition at startup to enable it.
- Under Recognition Profiles, click the New button and then OK.
- Follow the steps to create a new profile and restart your computer.
Once you’re back on the desktop, you should be able to use all the speech recognition features.
4. Restart Required Windows Services
Windows services always operate in the background and can stop (in rare situations), leading to speech recognition errors. It’s easy to fix via the Windows Services app.
Here’s how to restart the required Windows Services for speech recognition:
- Press Win + R and type services.msc into the field.
- Press Enter to launch the Services window.
- Locate the services related to speech recognition: Human Interface Device Service, Windows Audio, and Windows Audio Endpoint Builder.
-
To restart the above services, right-click on them individually and select Restart.
- Finally, restart your computer once and again check for the speech recognition problem.
If you’re using a Bluetooth microphone, please restart the Bluetooth Support Service and Bluetooth Audio Gateway Service with the mentioned services.
5. Set Up Speech Recognition
Sometimes, the initial setup for speech recognition may create issues for you. For example, you can’t use the voice-to-text feature if you selected the wrong device type during the setup.
To fix this problem, we recommend setting up speech recognition again on your device. You can type Windows Speech Recognition in Windows search and open it. This will open the Speech Recognition Set Up screen.
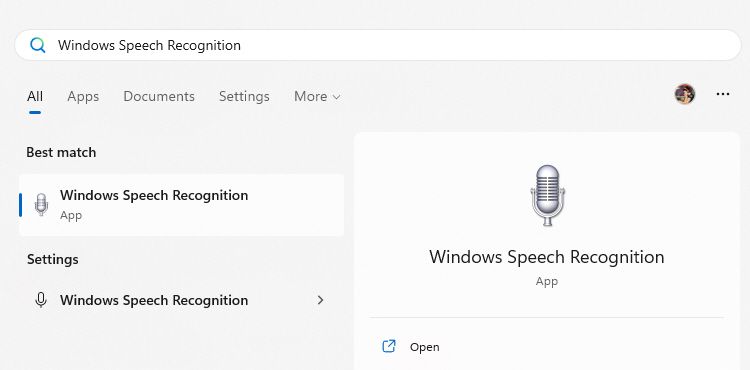
Follow the setup prompts one after the other, and once done, reconnect your microphone. This should quickly fix your speech recognition-related issues. If you cannot open the setup, access it from Control Panel > Ease of Access > Speech Recognition > Set up microphone.
All Set to Use Speech Recognition on Windows Again
Speech Recognition can significantly enhance your productivity, especially if you prefer speaking over typing. Though the «speech recognition could not start» error can be frustrating.
But once you fix the error, there’s so much to do with speech recognition features. For instance, you can use it to dictate your emails or control your computer with only your voice, to name a few possibilities.
A lot of people have reported that they have encountered problems when trying to use Speech Recognition on Windows computers. These problems come in different forms, some of them are encountering problems when trying to install Speech Recognition, while others are unable to use it even if they have managed to install it. This error has been reported that can occur on both Windows 10 and Windows 11.
After a lot of Windows users have complained about this issue online, we have decided to take a deeper look into it to see what could cause this error. Here is a short list of all the possible causes that might trigger this problem to appear:
- Corrupted files – One of the most common causes of this Windows error is the corrupted files that are located inside your computer. This could be happening because the files have become corrupted and harmful to your computer with time, not having anything to do with you. You can fix this by doing a System File Checker inside the Command Prompt, then doing a Restore Health process. To complete the process, you have to do a System File Checker once again to ensure that is fixed.
- Broken microphone – Another cause for this Speech Recognition setup doesn’t work error is that your microphone might be broken and not intact. This issue might be occurring without you even knowing in case you don’t use the microphone too often, so it is worth inspecting it. After you are sure that is not physically broken, you should also make sure that the microphone is enabled properly.
- 3rd party program – This error might be also triggered by some 3rd party programs that are running while you try to use Speech Recognition. You can check this by performing a clean boot.
Now that you are aware of all the possible reasons that may have triggered this issue, here is a list that contains all the fixes that people have used to fix this issue:
1. Run Speech Recognition at Startup
The first thing you should do when you encounter this issue is to force your computer to start Speech Recognition at the startup. By doing this, the feature will start automatically when you turn on your computer. In some cases, this was enough to make Speech Recognition work.
All you have to do is to go to the properties of Speech Recognition and change the setting to make it start when the computer starts. After you do this and save the changes, they will apply at the next startup of your PC.
In case you don’t know how to do this, here are the steps that you need to follow:
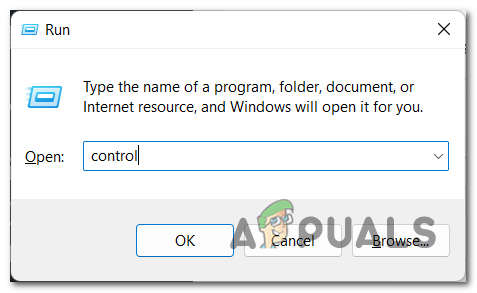
- The first thing you need to do is to open the Control Panel. There are many ways to do this, one of those is to open a Run dialog box by pressing the Windows key + R, then type inside the search bar ‘control‘ and press Enter. The Control Panel will open automatically.

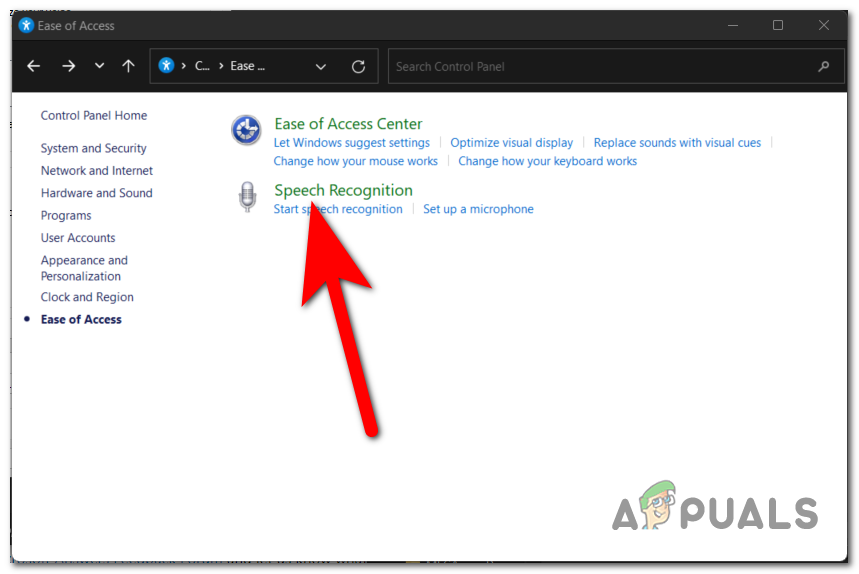
Using a Run dialog box to open the Control Panel - Once you are inside the Control Panel, you need to click on the Ease of Access button. This will take you to another screen that contains accessibilities like Speech Recognition.
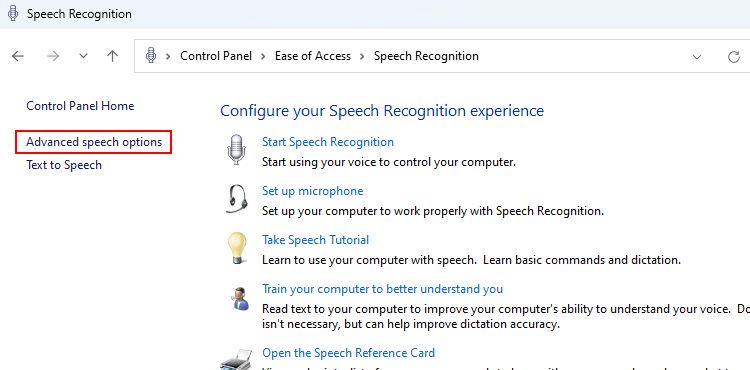
- After you are at the next screen, locate Speech Recognition and click on it.

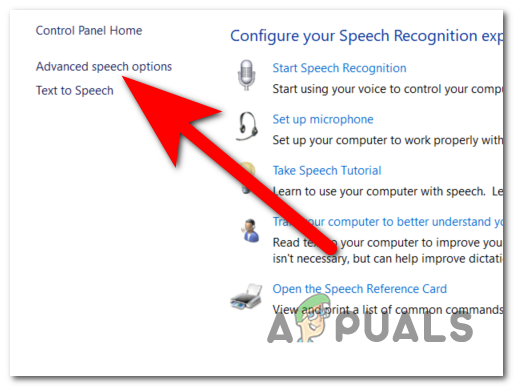
Inside the Control Panel accessing the Speech Recognition - Once you are inside Speech Recognition settings, look on the left side list until you find the Advanced speech options. When you see it, click on io

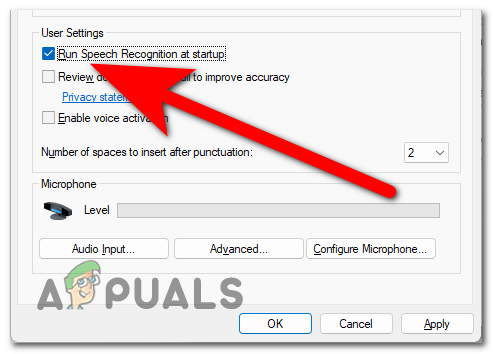
Opening the properties of Speech Recognition - Now that you are inside the Speech Recognition properties, you need to go to the Speech Recognition tab and look for the User Settings. Right under them, you will see the Run Speech Recognition at startup option. Make sure to click on the box next to them to turn on this option.
- After you have done that, click on Apply to save these changes.

Forcing Speech Recognition to start at the startup - Once you’ve done that, all that’s left to do is to reboot your PC to see if at the next startup the Speech Recognition will work.

In case the Speech Recognition is still not working after doing this, check the next method below.
2. Use the System File Checker tool
It’s possible that the “Speech Recognition setup doesn’t function” error was caused by a problem with a system file; in this instance, performing a few diagnostics could automatically fix the problem.
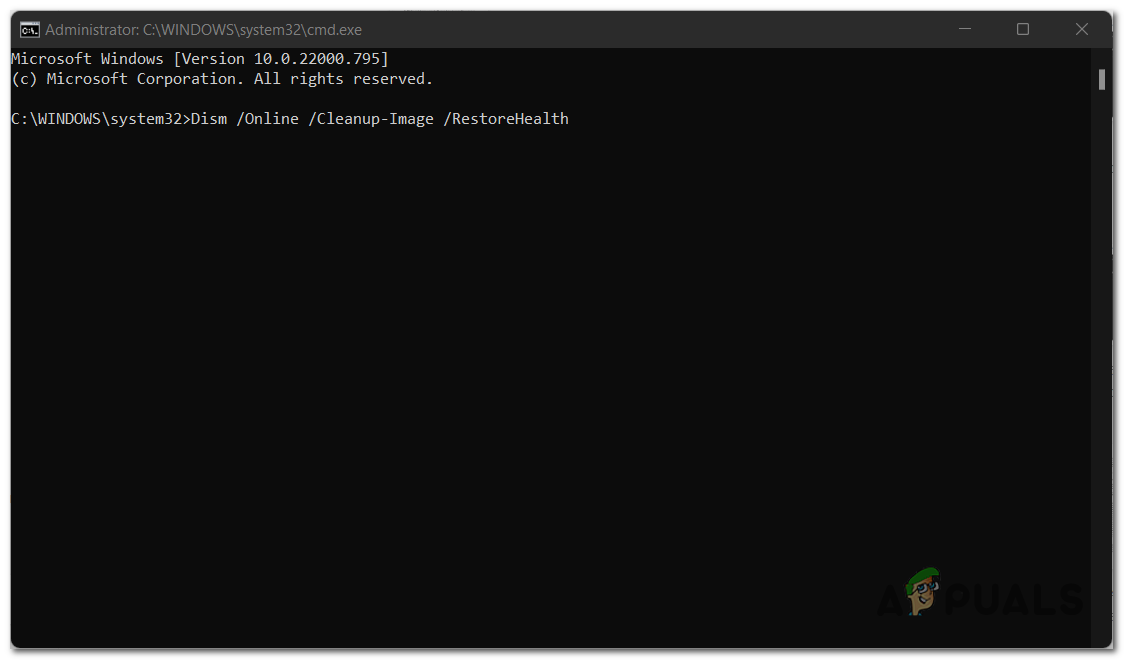
Running an SFC scan has been reported to be successful in resolving the issue for some users. The System File Checker tool will examine all of the system files that are protected and will replace any corrupted files with a cached copy of the files that have been cleaned. We are going to supplement this scan with a command called DISM /Restorehealth so that we can use Windows Update to repair any corrupted files that may have been missed. After that, we will restart the computer and perform another round of the sfc /scannow command.
Note: The sfc /scannow command will use the Windows Component Store to attempt to repair any corrupted files; as a result, it does not require an internet connection in order to function properly. Access to the internet is necessary, however, because using the command Dism /Online /Cleanup-Image /RestoreHealth relies on WU (Windows Update) to replace any corruption that may have occurred. Before continuing with the steps below, ensure that you have a reliable internet connection by checking that you are now connected to the internet.
Keep in mind that it is not uncommon for the System File Checker to find and fix mistakes without notifying them, so it is important to keep this fact in mind. Please make sure to complete all of the steps outlined in the following paragraphs (SFC scan > RestoreHealth > SFC scan), regardless of the results of the initial SFC scan.
When you are ready, follow the guide below to see how you can perform the necessary diagnostic tests:
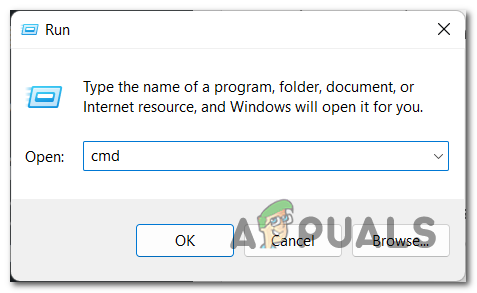
- The first thing you need to do is to open the Command Prompt with administrator privileges. There are some ways to do this, one of them is to use a Run dialog box. Press the Windows key + R and type inside the search bar ‘cmd‘, then press the CTRL + Shift + Enter to give administrator privileges to Command Prompt.
Opening the Command Prompt using a Run dialog box - You will be prompted by the User Account Control (UAC) to confirm that you want to give the admin privileges to Command Prompt. To continue, click on Yes.
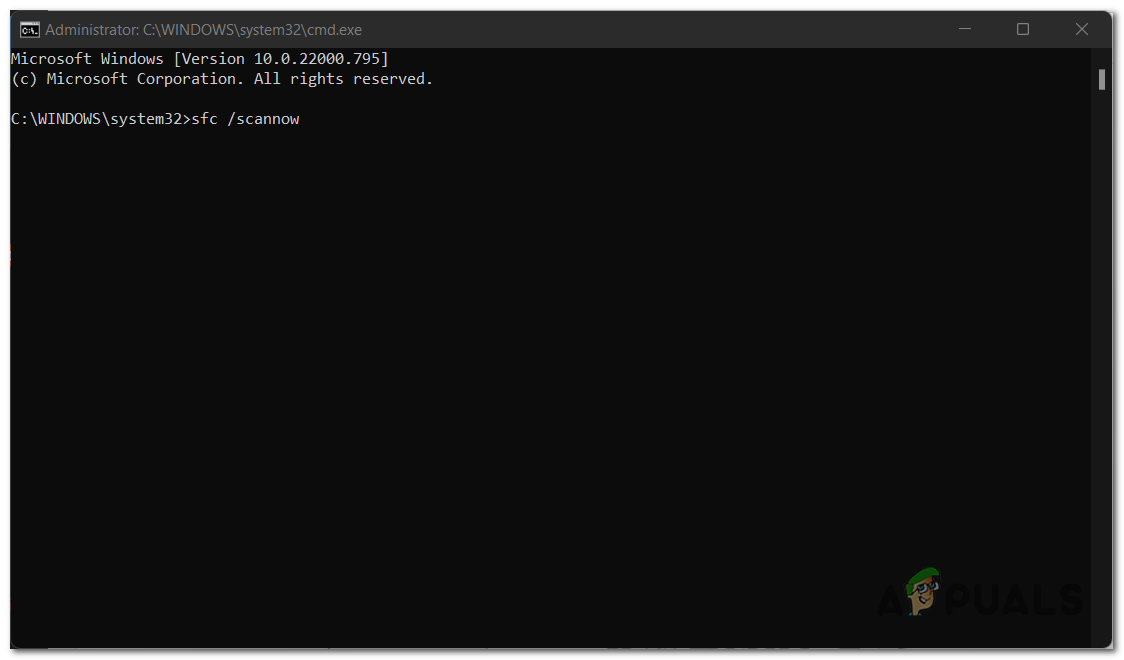
- Once you are inside the Command Prompt, to run the System File Checker all you have to do is to type sfc /scannow before hitting the Enter key.

Starting the System File Checker tool inside the Command Prompt Note: Please keep in mind that the length of time needed to complete this process will vary depending on the severity of the corruption that was discovered in your system. It could take anything from a few minutes to several hours.
- After the scan has been completed, you should restart your system and check to see if the problem is fixed when the system starts up again. If it isn’t, then proceed with the instructions that are listed below.
Note: If the problem still persists, it is necessary to do all of the actions listed below even though the initial scan with SFC did not identify any abnormalities in the system files. - After opening a new elevated Command Prompt (step 1), copy and paste the command Dism /Online /Cleanup-Image /RestoreHealth, and then press the Enter key to begin the RestoreHealth scan.
Using the Command Prompt again to do a RestoreHealth scan Note: Ensure that you do not lose your connection to the internet at any point throughout this process, and wait until the scan has been completed before proceeding further. After that, look at the results section to see if it was successful in correcting any of the problems.
- No matter what the result of the RestoreHealth command was, run another SFC scan by typing “sfc /scannow” in the elevated Command Prompt, and wait for the procedure to finish before proceeding.
- When the third scan has finished running, exit the elevated Command Prompt and restart your device.
Check to see if the problem still exists the next time your computer starts up after making any changes to it. Continue with the following step down below if you are still having the same problem with the Speech Recognition setup that doesn’t work.
3. Make sure your microphone in use is working properly
Another thing that you should do is to make sure that Speech Recognition is enabled properly. A lot of affected users have reported that they were surprised to see that this issue was not happening because of an error, actually, it was caused by some settings of Speech Recognition that were making it not work.
To verify if this case is applicable to you as well, all you have to do is to go to the properties of the microphone that you use for Speech Recognition and check if the volume is good. In case the volume is low, make sure to adjust the input level. Besides this, you should also check if the microphone is physically broken and if it works properly.
Here is a guide that contains all the steps you need in order to check your microphone:
- You should start by looking at your microphone to see if it is working properly. Look at the wires of it to see if they are intact and not cut or broken. Make sure that it is not broken in any way.
- Now if you are sure that the microphone is not broken, you need to go to the properties of it.
- For this, you need to open the Control Panel. One of the ways to do this is to press the Windows key + R to open a Run dialog box, then type ‘control‘ inside the search bar and press Enter to open it.
Opening the Control Panel using a Run dialog box - Once you are inside the Control Panel, you need to go to the Sound settings. Go to the View by section in the top right corner and select the Large icons menu to find the Sound section faster.
Selecting the Sound section inside the Control Panel - Now that the Sound settings appear on your screen, you need to select the Recording tab. After that, search for the microphone you want to use in Speech Recognition and double-click on it to open its properties.
Opening the properties of the microphone you use - You need to select the Levels section and look at the volume of your microphone. All you have to do is to make sure that the microphone volume is set to maximum.
- Besides that, also make sure that the microphone is enabled and all the settings are ok.
- Once you ensure that the microphone is working how it should be, try again to see if the Speech Recognition works now.

In case the Speech Recognition setup doesn’t work error still appears after doing every method before, check below the last method suggested by users.
4. Perform a clean boot
The last thing you should try is to perform a clean boot. This method has been reported by many users to be efficient in fixing this issue because it may be caused by a 3rd party program.
But there may be a lot of programs that could interfere with Speech Recognition and it will take too much time to test every application in particular.
So in this case, the most effective course of action is to make an effort to identify the offenders by beginning the process of booting your computer into clean mode and observing whether or not the issue is still present.
If you are experiencing this issue on Windows 10, follow this article for the exact steps. In case you are encountering it on Windows 11, here’s another guide that contains the exact steps.
Note: A clean boot operation involves putting your computer into a boot state that prevents the launch of any third-party services or processes. This is done by booting the computer into this state.
If you haven’t encountered the Speech Recognition setup doesn’t work error while in clean boot mode, you are free to proceed with re-enabling every process and startup until you find the third-party programs that are causing a conflict with the game that you are attempting to launch.
Kamil Anwar
Kamil is a certified MCITP, CCNA (W), CCNA (S) and a former British Computer Society Member with over 9 years of experience Configuring, Deploying and Managing Switches, Firewalls and Domain Controllers also an old-school still active on FreeNode.
Having trouble with your Windows Speech Recognition? Don’t worry, you’re not alone. As someone who relies on speech recognition for everyday tasks and communication, I understand how frustrating it can be when it’s not working properly. That’s why in this article, I’m going to share my expertise and personal experience with fixing Windows Speech Recognition issues. Whether you’re a beginner or an experienced user, this guide will provide solutions and tips to get your speech recognition back up and running smoothly. So let’s dive in and troubleshoot together!
So, Windows Speech Recognition?
There are several steps you can take to troubleshoot and fix any issues with Windows Speech Recognition. First, check your microphone settings and make sure it is properly connected and set as the default recording device. Next, try restarting the speech recognition program or even your computer. If that doesn’t work, try running the built-in speech recognition troubleshooter or updating your audio drivers. You can also try adjusting the sensitivity of the microphone or using a different one altogether. If all else fails, you may need to reset your speech recognition settings or reinstall the program entirely. With these steps, you should be able to get back up and running with Windows Speech Recognition in no time!
Understanding Why Your Windows Speech Recognition May Not Be Working
Windows Speech Recognition can be a handy tool, but sometimes it just doesn’t perform as expected. One common reason for this is poor microphone quality or incorrect setup. If your microphone isn’t picking up your voice clearly, it won’t understand what you’re saying. Make sure the device is connected properly and that any background noise is minimized; this could include turning off fans or closing windows to reduce outside sounds. Also, check if the microphone settings are configured correctly in the Control Panel—sometimes adjusting input levels can make a world of difference.
Another issue might stem from how well the software understands your speech patterns. Everyone speaks differently, and accents or atypical pronunciations may confuse Windows Speech Recognition. Training the system to recognize your specific way of speaking can greatly improve its accuracy. You can do this by going through the training exercises available in the settings menu, repeating phrases until it gets more comfortable with your voice style.
Additionally, ensure that you have updated drivers for both Windows and any related hardware; outdated software often leads to compatibility issues that affect performance.
With these adjustments, you should find better results when using speech recognition features!

Troubleshooting Steps to Fix Common Windows Speech Recognition Issues
When using Windows Speech Recognition, it’s not uncommon to encounter a few hiccups along the way. One of the first steps you can take is ensuring that your microphone is set up properly. Go into your computer’s settings and check if the microphone is recognized and working correctly. You might want to run a quick sound check: speak clearly and see if the mic picks up your voice without any issues. If it doesn’t, consider adjusting its position or even trying out another microphone for better clarity. Also, don’t forget to ensure that any noise-cancelling features are either enabled or disabled based on your environment; sometimes background sounds can confuse the recognition software.
Next, calibrating Windows Speech Recognition can significantly enhance its accuracy. Start by launching the speech recognition tool and navigate through its setup process carefully. This often involves reading aloud specific phrases so that the program learns how you communicate naturally—a vital step! Additionally, keeping your system updated ensures you have all bug fixes and improvements at hand. Regularly visiting Microsoft’s support page for updates about known issues also helps; they provide tips based on common user experiences, which could save you time in troubleshooting.
Finally, remember patience is key—sometimes a simple restart of both hardware and software does wonders in refreshing everything back into smooth operation!
Read also: Transcription vs Dictation
Advanced Solutions for Complex Windows Speech Recognition Problems
When it comes to tackling complex issues with Windows Speech Recognition, the journey can sometimes feel like a maze. One major challenge users face is understanding why the software might misinterpret commands or fail to recognize speech altogether. Common culprits include background noise and accents that differ from the program’s training data. To combat this, employing techniques such as voice training can optimize recognition accuracy significantly. Users can enhance performance by reading specific phrases aloud; over time, this helps the software learn unique vocal patterns and nuances.
Another effective strategy involves adjusting settings within the application itself. For instance, ensuring that your microphone is properly calibrated is crucial for clarity in audio capture. A simple yet often overlooked tip is to utilize a quality headset designed for voice input—it makes all the difference! Additionally, exploring advanced options like creating custom vocabularies or using macros allows users to tailor their experience even further. By leveraging these sophisticated tools and settings, you empower yourself not just to overcome challenges but also to streamline everyday tasks with greater efficiency and ease.
In short, patience paired with strategic adjustments leads to an improved interaction with Windows Speech Recognition.
Increasing the Efficiency of Windows Speech Recognition After Troubleshooting
After you’ve worked through the initial troubleshooting steps for Windows Speech Recognition, there are still several ways to enhance its performance. First, ensure that your microphone is positioned correctly; it should be about six inches away from your mouth and pointed directly at you. This small adjustment can make a big difference in how accurately the software picks up your voice. Additionally, speaking clearly and at a steady pace helps the system learn and adapt to your unique speech patterns more effectively. If you’re using background noise-cancellation features on your microphone, test them out to find what provides the clearest sound.
Next, consider customizing the vocabulary of Windows Speech Recognition to better fit your needs. You can add specific words or phrases that you frequently use but might not be recognized by default. To do this, simply navigate to the “Speech Dictionary” within settings and start adding terms that are relevant to you—like specialized jargon related to work or hobbies. Furthermore, take advantage of voice commands for common actions like opening applications or controlling media playback; they truly streamline tasks and improve overall efficiency in navigating through Windows systems.
Lastly, don’t forget about regular training sessions with the software! By spending just a few minutes periodically reading aloud into it, you provide valuable data that helps refine its understanding of your speech over time.