
Want to take a screenshot but nothing happens after pressing the Windows logo key + Shift + S shortcut? This can be very annoying. But don’t worry. In this post, we’ll show you how to fix the Windows + Shift + S not working issue on Windows 11 or Windows 10 easily and quickly.
Before you get started, you should know that on Windows 11, the Snip & Sketch tool is called as Snipping Tool. This guide will walk you through the steps on how to fix your issue on Windows 11 and Windows 10.
Try these fixes
You don’t have to try all of them, just work your way down the list until you find the one that works for you.
- Enable notifications
- Turn on clipboard history
- Reset Snipping Tool or Snip & Sketch
- Reinstall Snipping Tool or Snip & Sketch
- Check for Windows updates
- Use an alternative to take screenshots
Fix 1: Enable notifications
Normally, when you take a screenshot by hitting the Windows logo key + Shift + S, a notification that says Snip saved to the clipboard appears in the lower right corner of your screen. However, if you’ve turned off notifications for the snipping tool on Windows 11 or Snip & Sketch on Windows 10, you’ll have to turn them on again. Here’s how to do it:
Windows 11
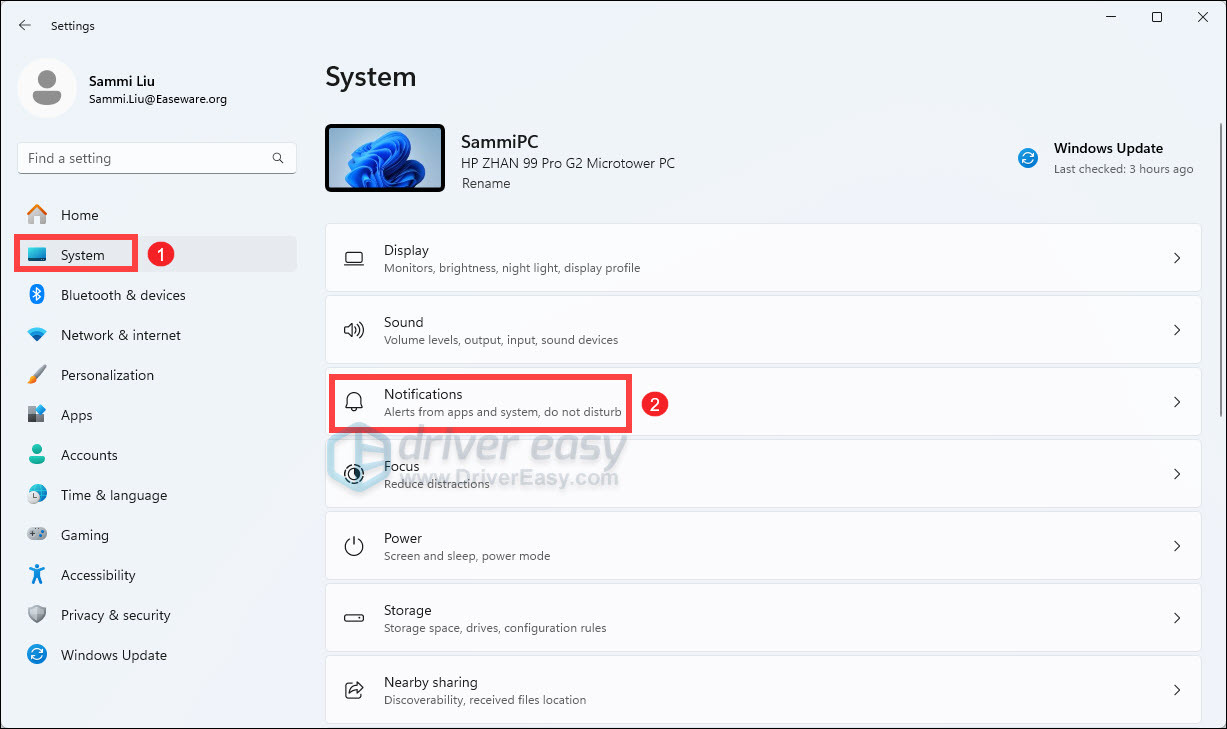
- On your keyboard, press the Windows logo + I keys simultaneously to open Settings.
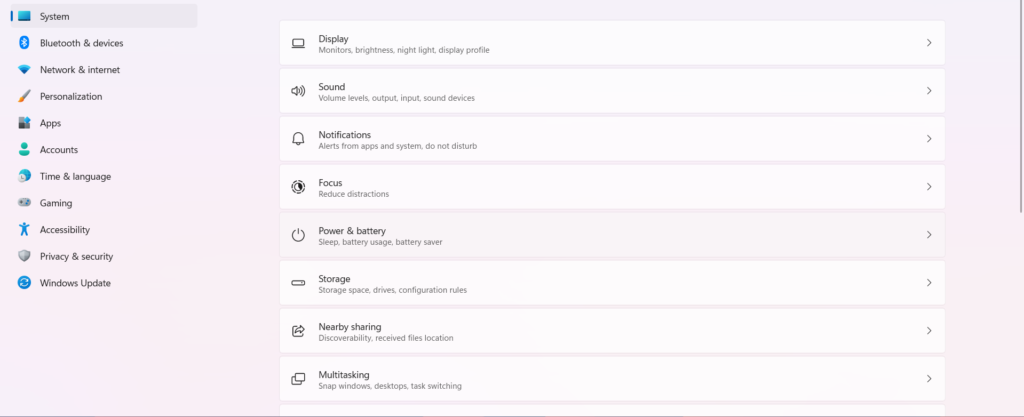
- Select System from the left panel. Then click Notifications.

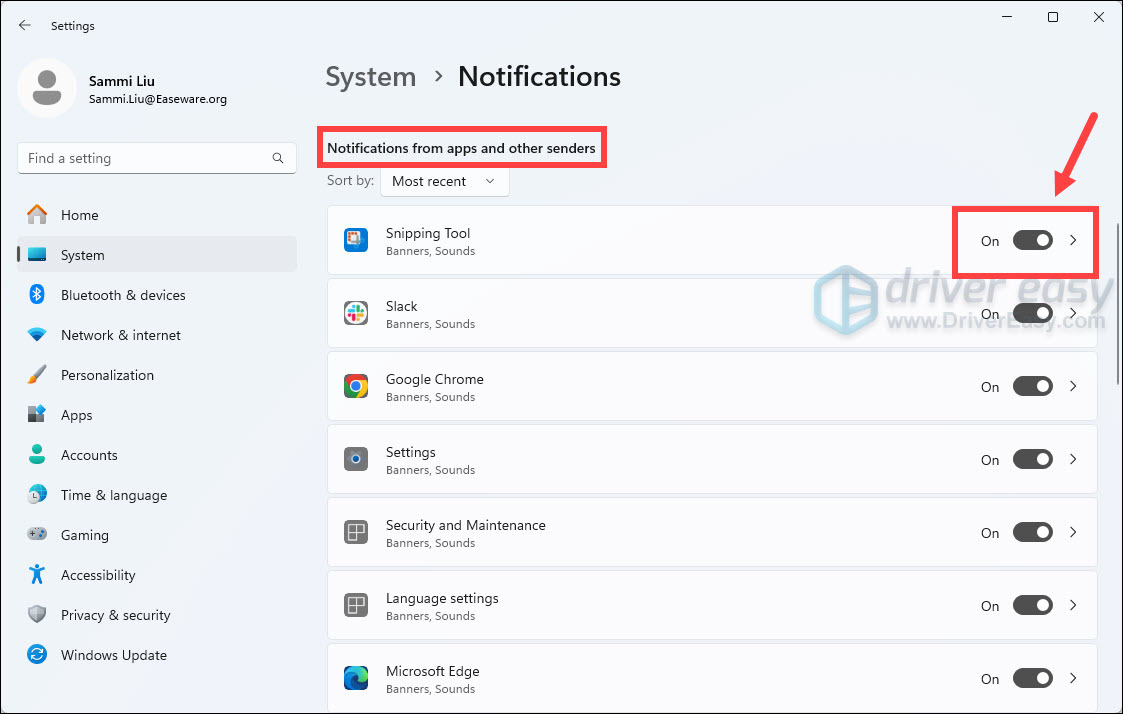
- Under the Notifications from apps and other senders section, make sure the Snipping Tool is On.

Windows 10
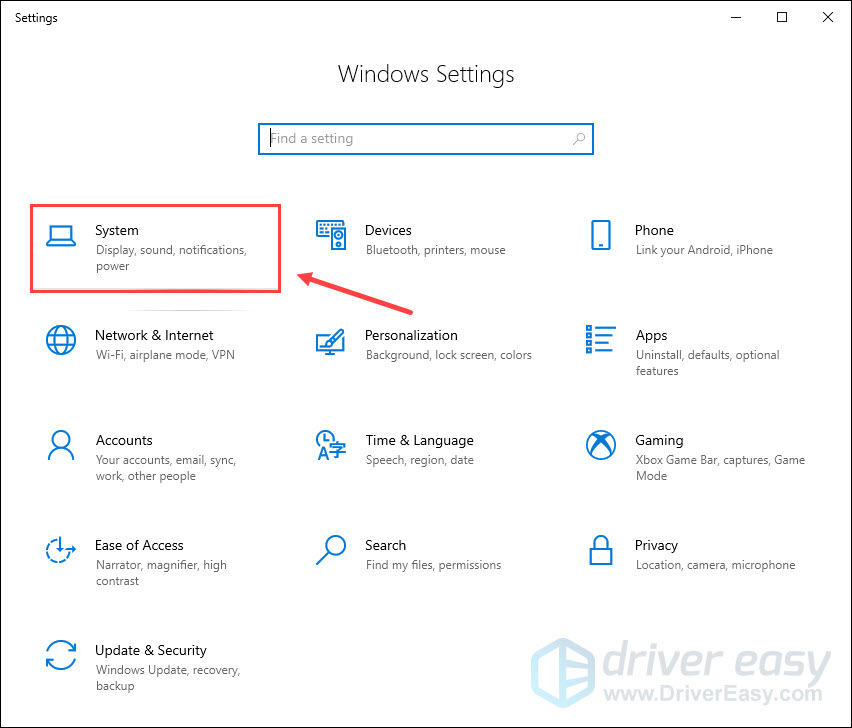
- On your keyboard, press the Windows logo key + I simultaneously to open Windows Settings, then select System.

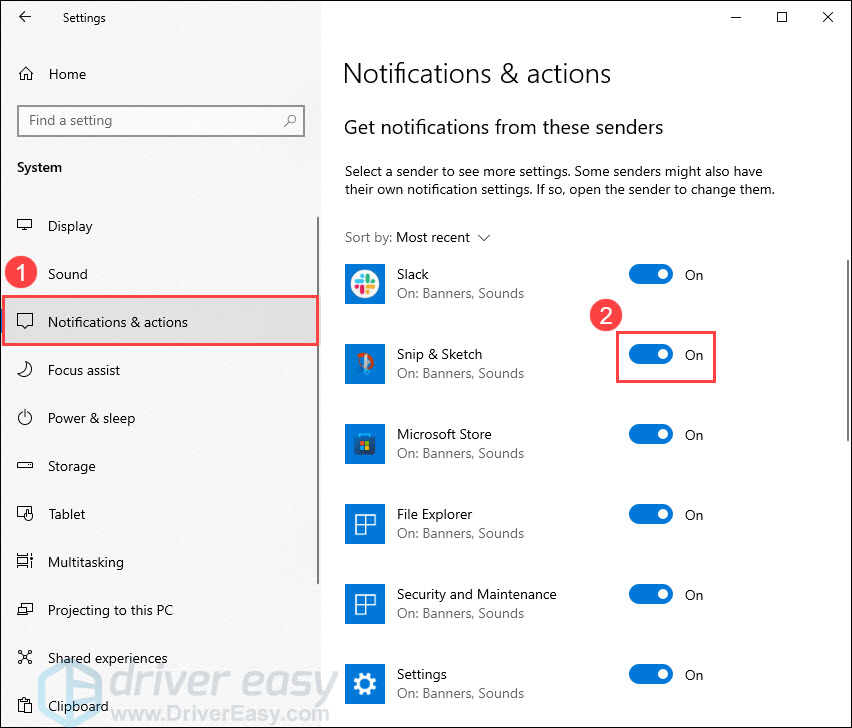
- In the left panel, select Notifications & actions. Under Get notifications from these senders, locate Snip & Sketch and make sure it is set to On.
If you’ve enabled notifications and it still doesn’t work properly, check out the next fix.
Fix 2: Turn on clipboard history
The screenshot you captured will be automatically copied to your clipboard. To view the screenshot, you can turn on the clipboard history. Here’s how:
Windows 11
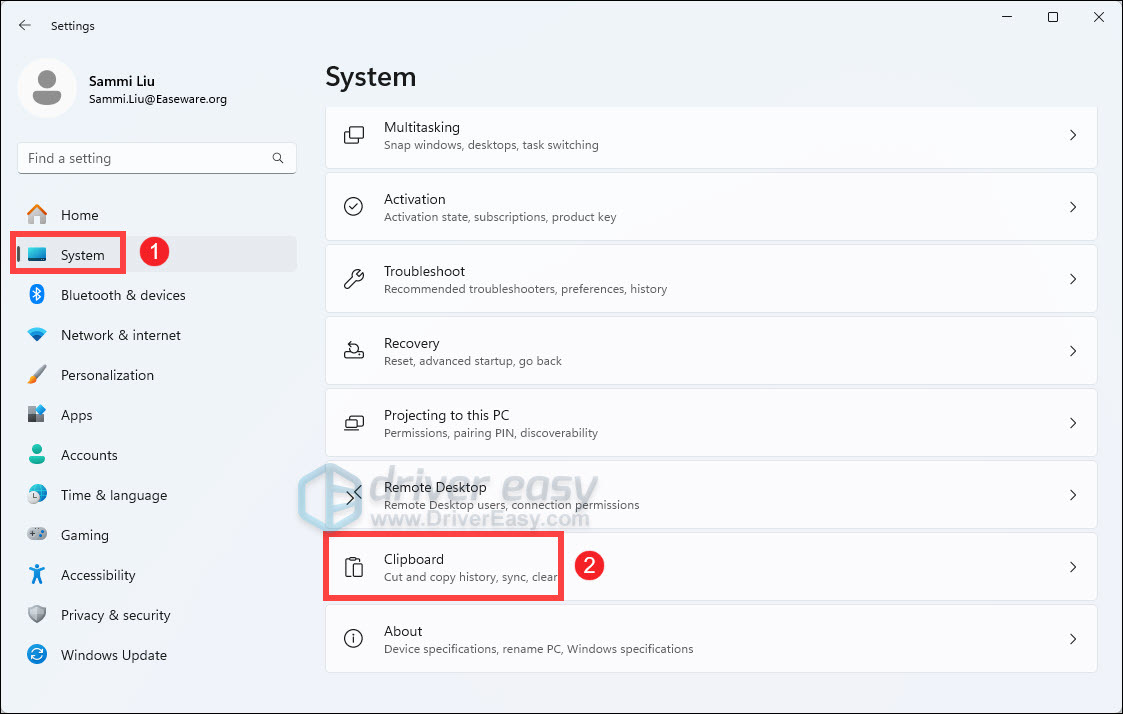
- On your keyboard, press the Windows logo + I keys simultaneously to open Settings.
- Select System. Then on the right side, scroll down until you find Clipboard. Click on it.
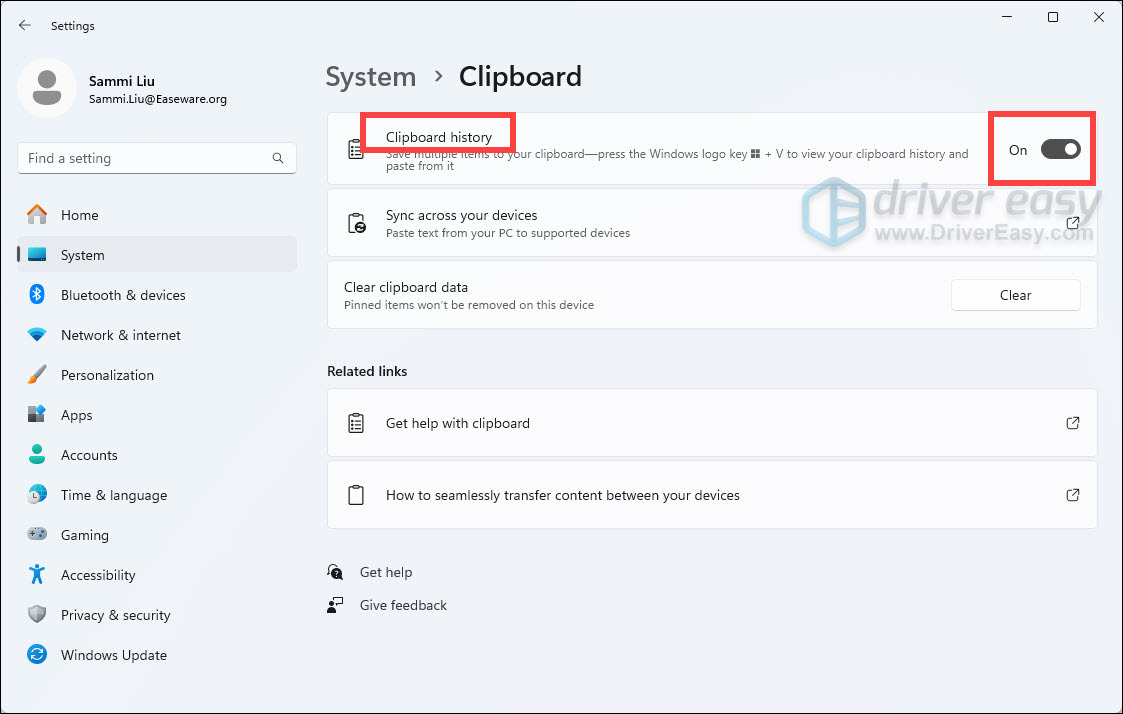
- Turn on the Clipboard history switch.
Windows 10
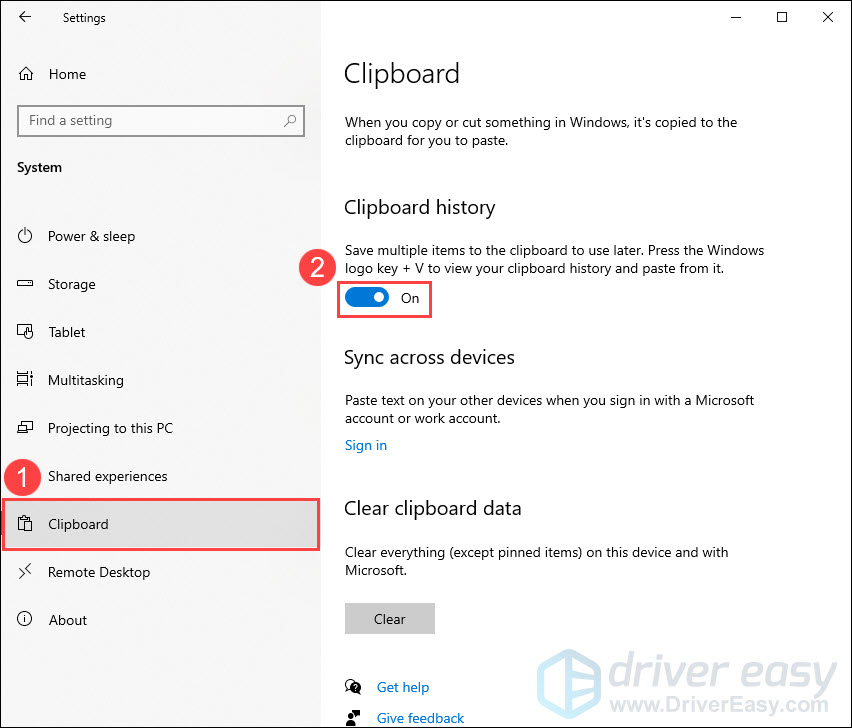
- On your keyboard, press the Windows logo key + I simultaneously to open Windows Settings, then select System.
- In the left panel, select Clipboard, then turn on Clipboard history.
Now press the Windows logo key + Shift + S to take a screenshot and check if the screenshot appears on the clipboard by hitting the Windows logo key + V.
Fix 3: Reset Snipping Tool or Snip & Sketch
The Windows logo key + Shift + S allows you to take a screenshot without starting Snip & Sketch. But if this keyboard shortcut isn’t working right, you can try resetting the Snipping Tool on Windows 11 Snipping Tool or Snip & Sketch on Windows 10.
Windows 11
- On your keyboard, press the Windows logo + I keys simultaneously to open Settings.
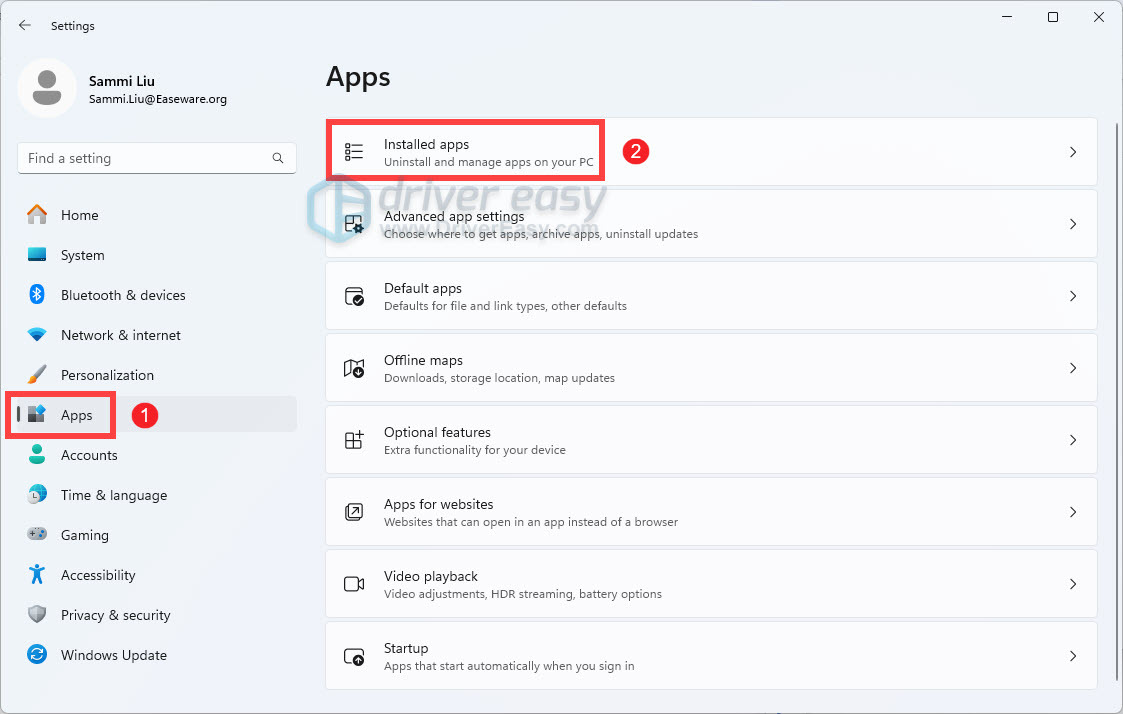
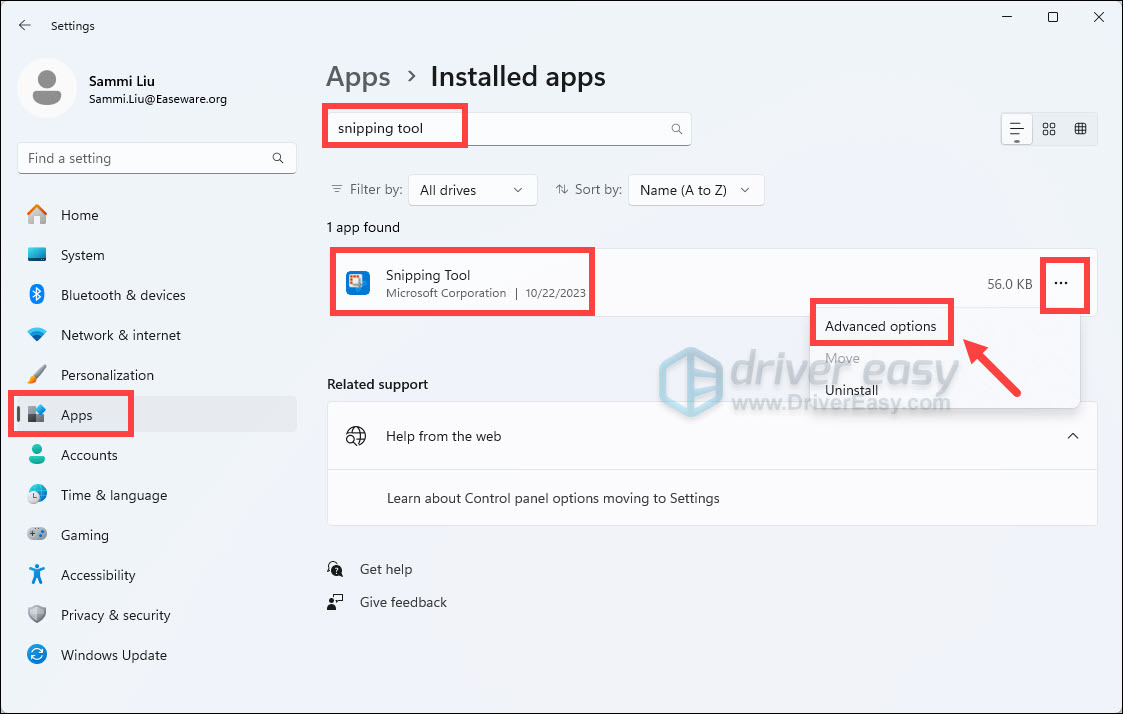
- Select Apps from the left pane. Then click Installed apps from the right side.
- Scroll down the list of apps to locate the Snipping Tool. Or you can type snipping tool in the search bar to quickly locate it. Once you find it, click on the three vertical dots next to it and select Advanced options.
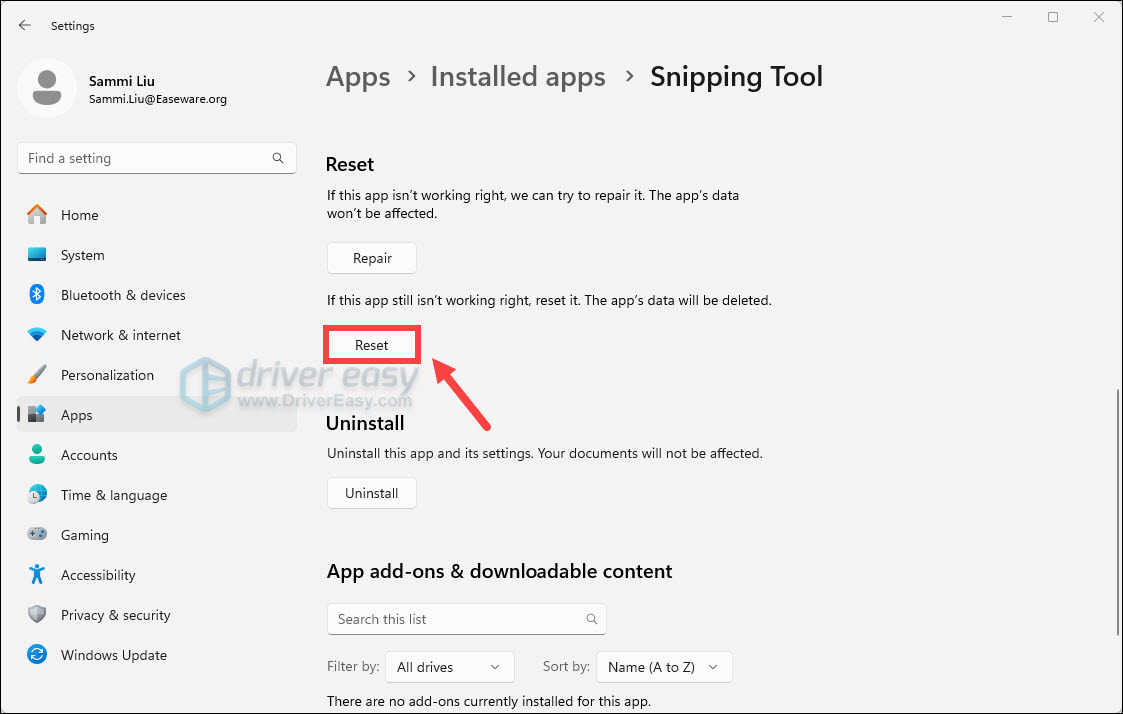
- Now, scroll down and click on the Reset button.
Windows 10
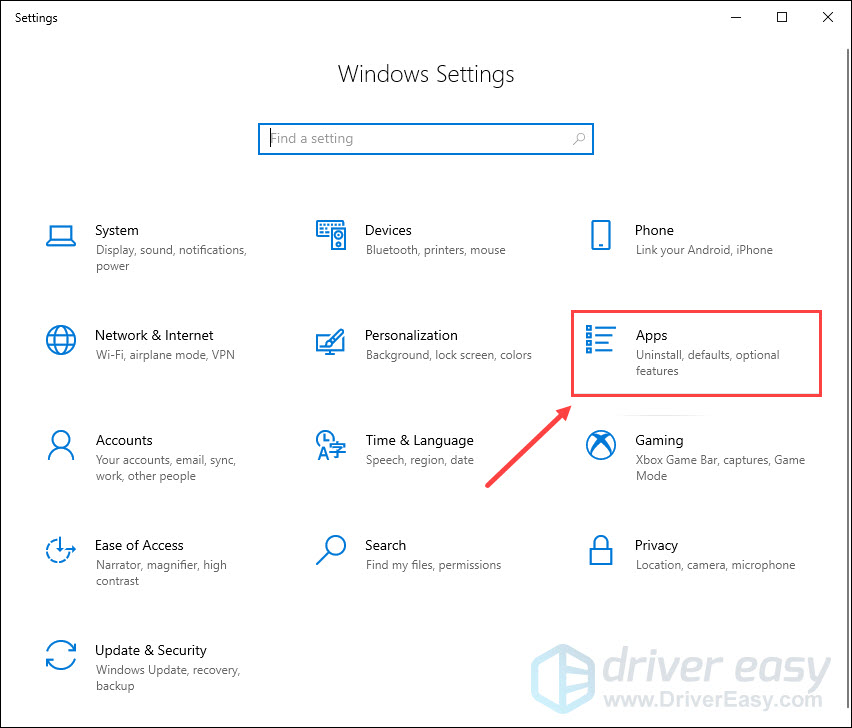
- On your keyboard, press the Windows logo key + I simultaneously to open Windows Settings, then select Apps.
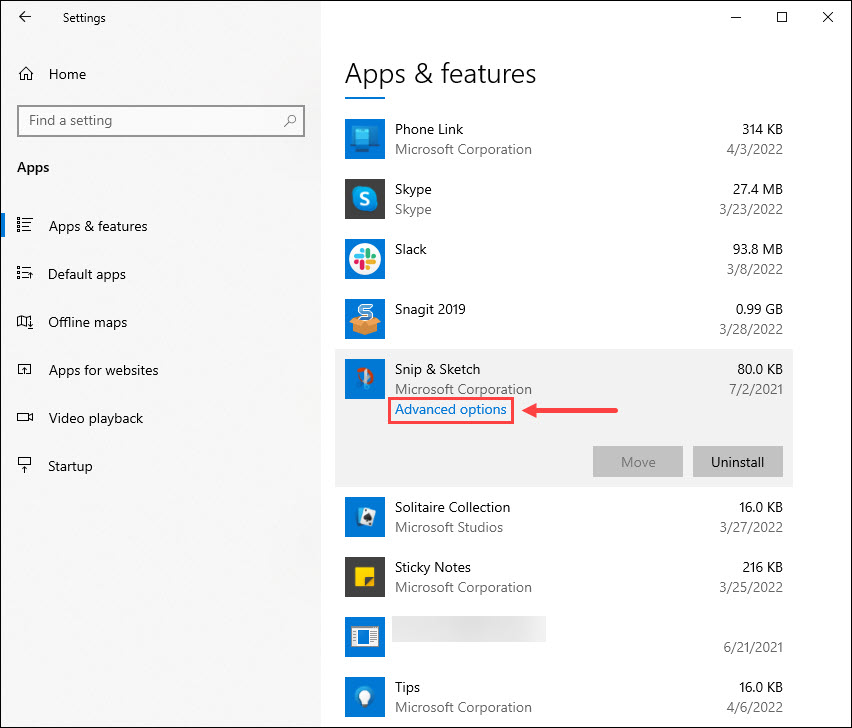
- Under Apps & features, scroll down the page and click Snip & Sketch. Then select Advanced options.
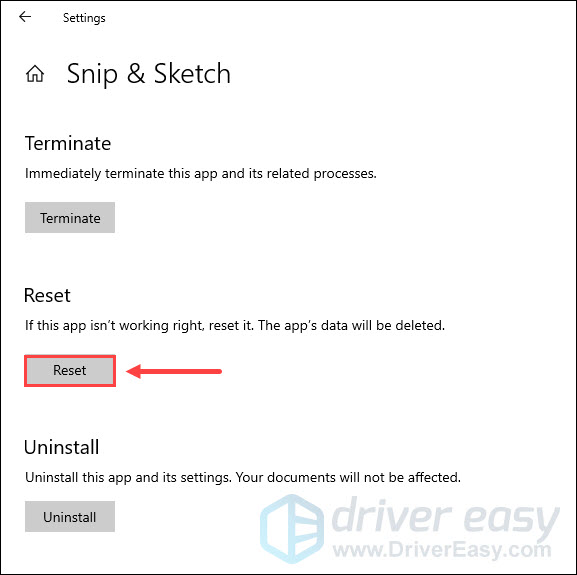
- Click Reset.

- When prompted to confirm your action, click Reset again.
Once the process is finished, restart your computer and check if the Windows logo key + Shift + S hotkey works properly. If not, take a look at the next fix.
Fix 4: Reinstall Snipping Tool or Snip & Sketch
If resetting it doesn’t help, try reinstalling this app. To do so:
Windows 11
- On your keyboard, press the Windows logo + I keys simultaneously to open Settings.
- Select Apps from the left pane. Then click Installed apps from the right side.
- Scroll down the list of apps to locate the Snipping Tool. Or you can type snipping tool in the search bar to quickly locate it. Once you find it, click on the three vertical dots next to it and select Advanced options.
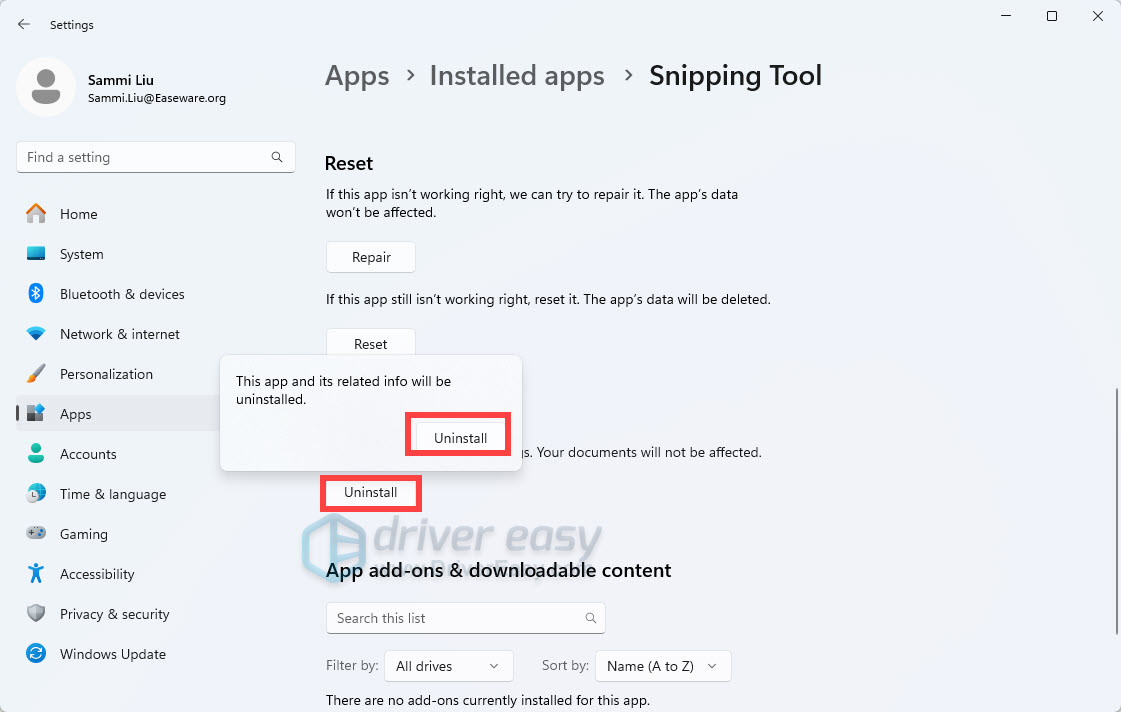
- Now, scroll down and click on the Uninstall button.

- After uninstalling the Snipping Tool, go to Microsoft Store to download and reinstall the app again on your system.
Windows 10
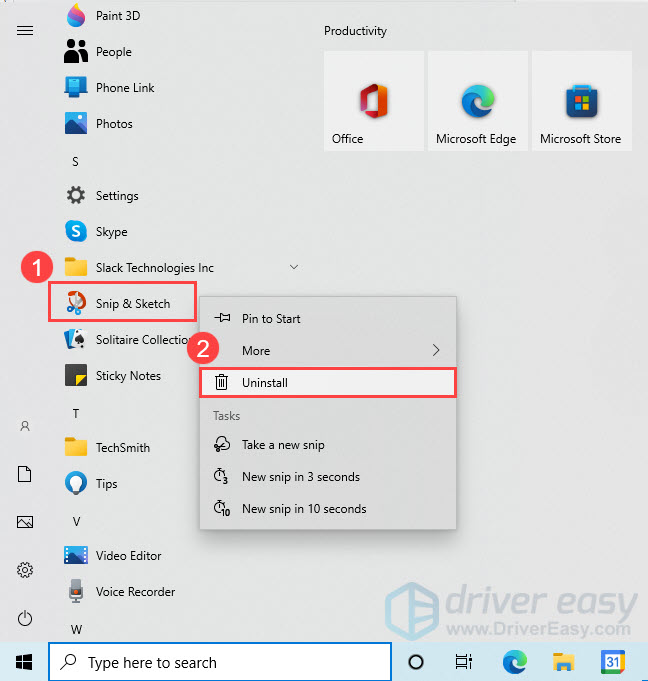
- On your keyboard, press the Windows logo key to open the Start menu. Then right-click Snip & Sketch and select Uninstall.

- In the pop-up window, click Uninstall again.
- After uninstalling Snip & Sketch, go to Microsoft Store to download and reinstall the app again on your system.
Once you’ve reinstalled the app, press the Window logo key + Shift + S to see if it works properly. If not, check out the next fix.
Fix 5: Check for Windows updates
Windows updates often contain bug fixes and security improvements. To ensure the snipping tool works properly, you should install the latest updates on your system. Here’s how to do it:
Windows 11
- On your keyboard, press the Windows logo + I keys simultaneously to open Settings.
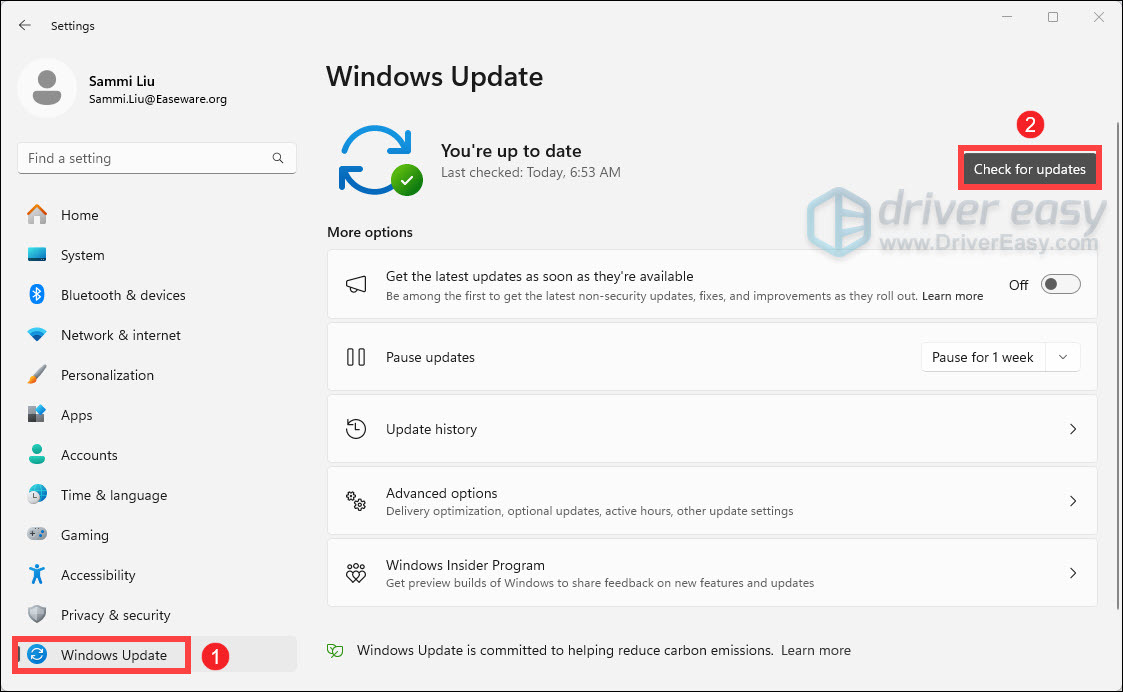
- Select Windows Update from the left panel. Then click on the Check for updates button from the right side.

Windows 10
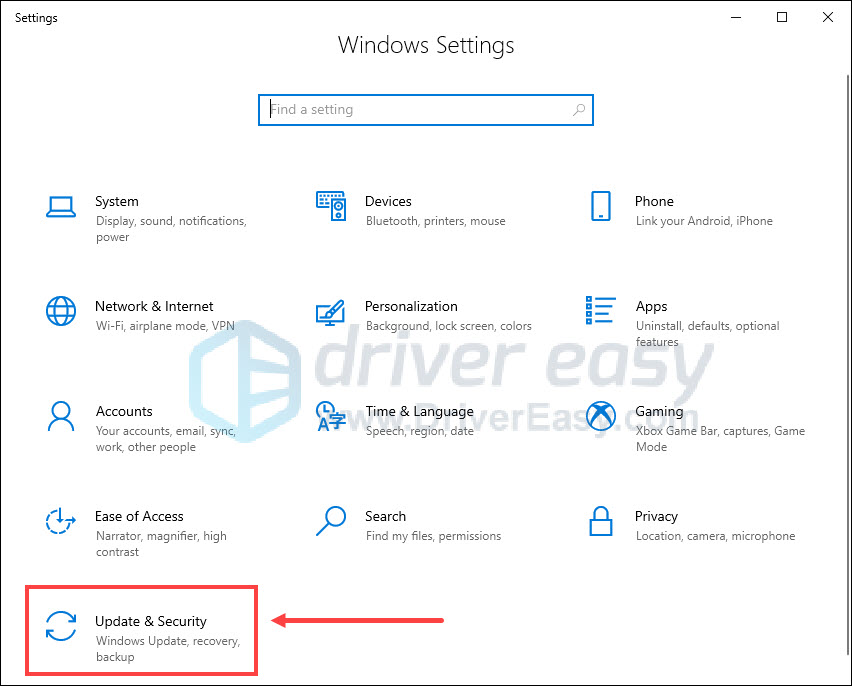
- On your keyboard, press the Windows logo key + I at the same time to open Windows Settings. Then select Update & Security.

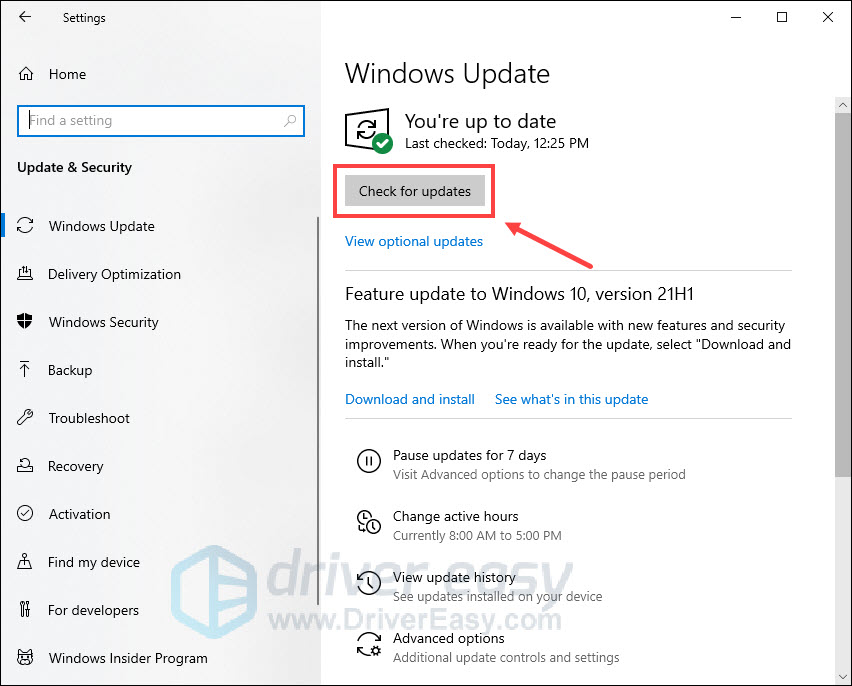
- Under Windows Update, click Check for updates. Windows will automatically scan for, download and install the available updates.
After installing all available updates, restart your computer and check if the Windows logo key + Shift + S shortcut works fine.
If this keyboard shortcut is still not working, consider using an alternative to take screenshots.
Fix 6: Use an alternative to take screenshots
If all the above methods fail to solve your problem, you can try either of the following ways to take screenshots.
Option 1 – Print Screen shortcut on Windows 10
The Print Screen or PrtScn key on Windows 10 allows you to capture an image of your entire screen. To use this button, you need to enable it in settings. Here’s how:
- On your keyboard, press the Windows logo key + I at the same time to open Windows Settings. Then select Ease of Access.
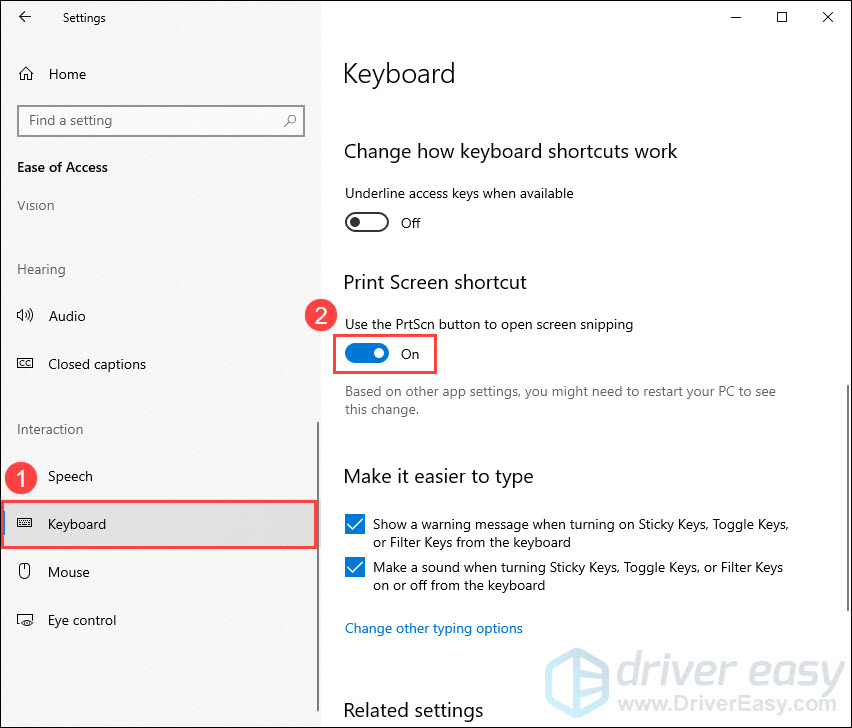
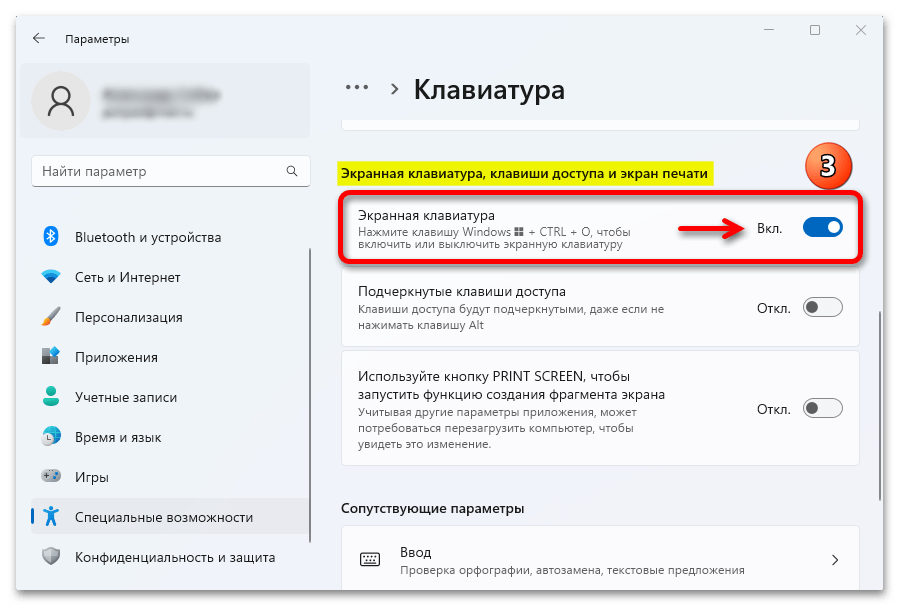
- In the left panel, select Keyboard. Under Print Screen shortcut, toggle the switch to On.

Now you can use the PrtScn key to open screen snipping.
If your keyboard’s PrntScrn key has two jobs then you may need to press the Fn key + PrtScn at the same time to capture an image.
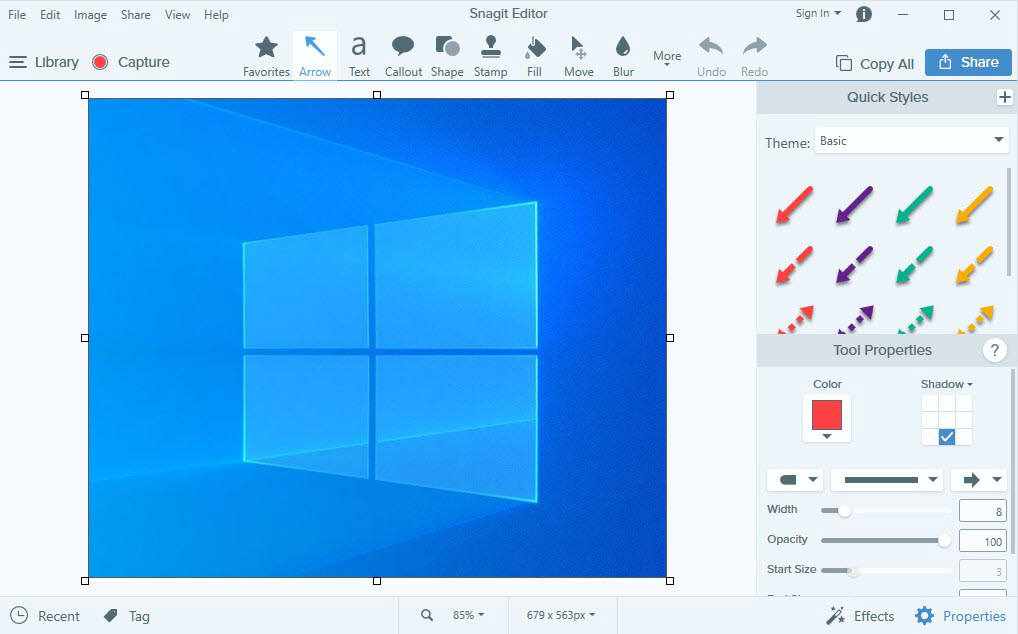
Option 2 – Snagit (Windows 11 or Windows 10)
Snagit is a simple and powerful screen capture and recording software. With Snagit, you can quickly take screenshots, add additional context, and share images, GIFs, or videos across your preferred platforms.
To take a screenshot with Snagit:
- Download and install Snagit.
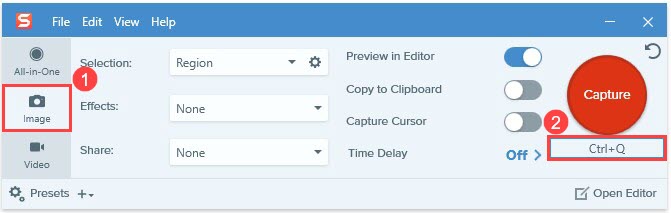
- Open Snagit. Then select Image, click the Shortcut field, and press the desired key combination on your keyboard. The new keyboard shortcut will appear in the field.

- Press the new shortcut you set in Step 2. The screen will be grayed out allowing you to select the screen area for capture by dragging the orange crosshairs.

- Once taken, the screenshot will open up in the Snagit Editor. From there, you can edit the image, such as cropping the image, blurring particular areas, and adding arrows, shapes, icons or text. Once done, you can choose to save it on your desktop, copy it to your clipboard, email it to someone or share it online.


You can get a free trial for 15 days and click here for the detailed tutorial.
That’s all for now. Hopefully, this post helped you solve the snipping tool shortcut (Windows + Shift + S) not working issue. If you have further questions or suggestions, feel free to drop us a line.
65
65 people found this helpful
Многие функции из предыдущей версии Windows перекочевали и в одиннадцатую версию, куда входит и приложение «Ножницы» для создания скриншотов. Некоторые пользователи сталкиваются с проблемами в его работе и не могут сделать снимок экрана.
Я постараюсь разобраться в этой проблеме, представив вашему вниманию все известные методы ее решения.
Перед просмотром следующих рекомендаций убедитесь в том, что скриншоты действительно не создаются. Обычно они сохраняются в папке C:\Users\\Pictures\Screenshots (Снимки экрана). Перейдите в папку и убедитесь в отсутствии изображений в ней.
Способ 1: Использование другой комбинации клавиш
В первую очередь хочется обратить внимание на ситуацию, когда скриншоты не сохраняются исключительно при использовании горячих клавиш для их создания, куда входит PrtSc (Print Screen). Скорее всего, под упомянутую клавишу записано какое-то функциональное действие. Если после нажатия на нее ничего не происходит, рекомендую попробовать комбинацию Fn + PrtSc или Win + PrtSc.
Еще есть сочетание Alt + PrtSc, которое должно создать снимок исключительно активного окна, игнорируя все остальное содержимое. Попробуйте разные варианты и убедитесь в том, что один из них сработал. Если это не так, переходите к следующим методам.
Комьюнити теперь в Телеграм
Подпишитесь и будьте в курсе последних IT-новостей
Подписаться
Способ 2: Проверка установленного времени
Неправильное время, установленное в операционной системе, может сказываться на работе различных системных приложений, в том числе и «Ножниц». Конечно, случается такое редко, но все же стоит проверить текущее время и сравнить его с тем, которое выдаст Гугл или Яндекс при соответствующем запросе.
Если что, вы всегда можете открыть параметр «Изменение даты и времени» через «Пуск», чтобы включить автоматическую синхронизацию или установить правильное значение самостоятельно. Внесенные изменения провоцируют сброс в настройках «Ножниц», что и позволит нормализовать работу приложения, если ошибки действительно возникали из-за времени.
Способ 3: Перезапуск приложения
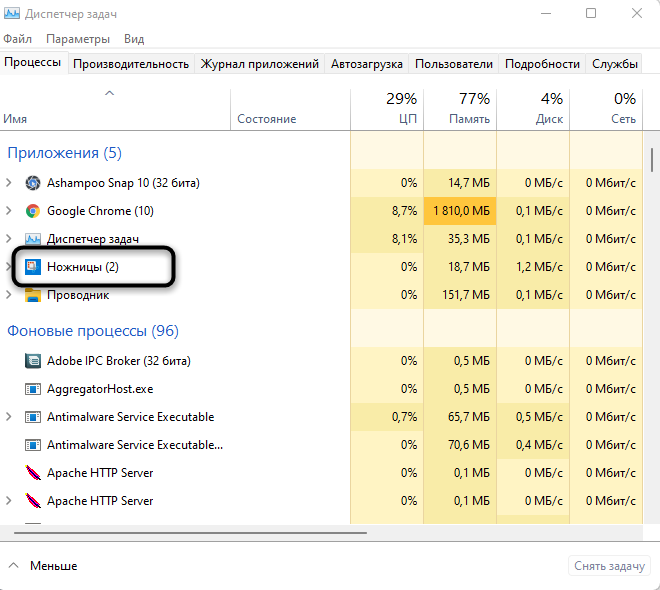
Может показаться, что это предложение звучит банально, но я веду речь именно о перезапуске. Для этого понадобится завершить процесс, что проще всего сделать через «Диспетчер задач».
-
В Windows 11 для открытия «Диспетчера задач» все еще можно использовать горячие клавиши, а также есть другой вариант: нажмите ПКМ по «Пуск» и выберите «Диспетчер задач» из появившегося списка.
-
Найдите задачу «Ножницы» и снимите ее, выбрав соответствующий пункт в контекстном меню.

-
Отыщите «Ножницы» через «Проводник» и запустите его. Проверьте, создаются ли скриншоты теперь.

Способ 4: Настройка фоновой работы приложения
Иногда «Ножницы» не отвечают на запросы пользователя по причине некорректного функционирования в фоновом режиме. Вам необходимо сделать так, чтобы приложение всегда было активным, выполнив следующую настройку:
-
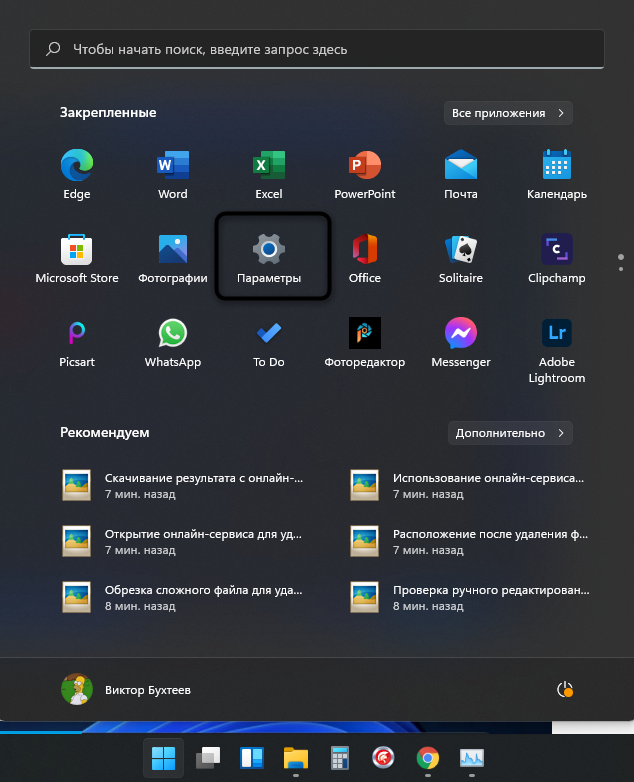
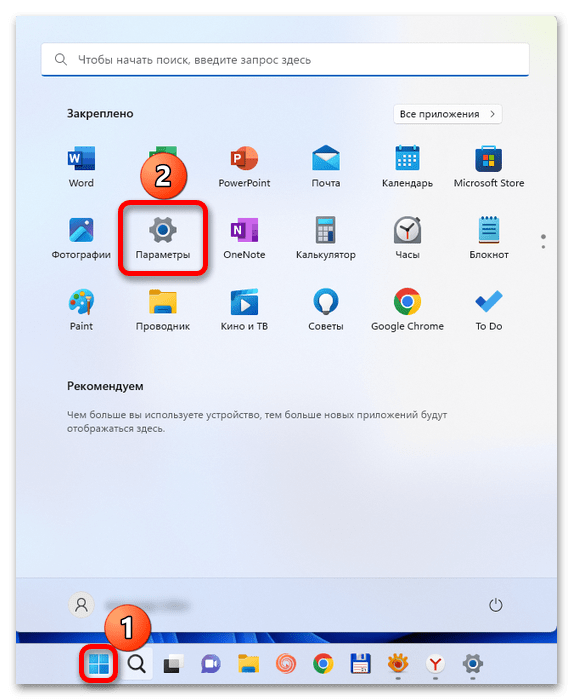
Откройте «Пуск» и нажмите по значку «Параметры».
-
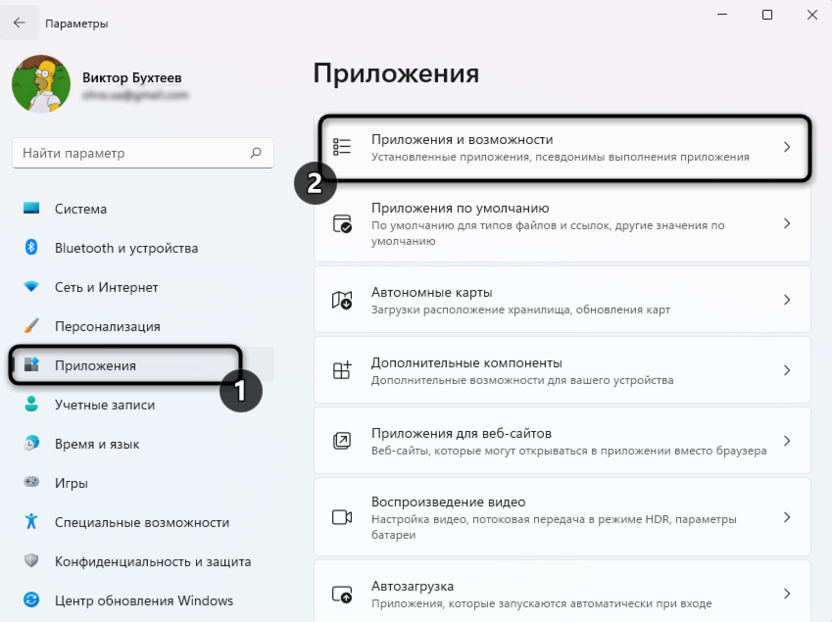
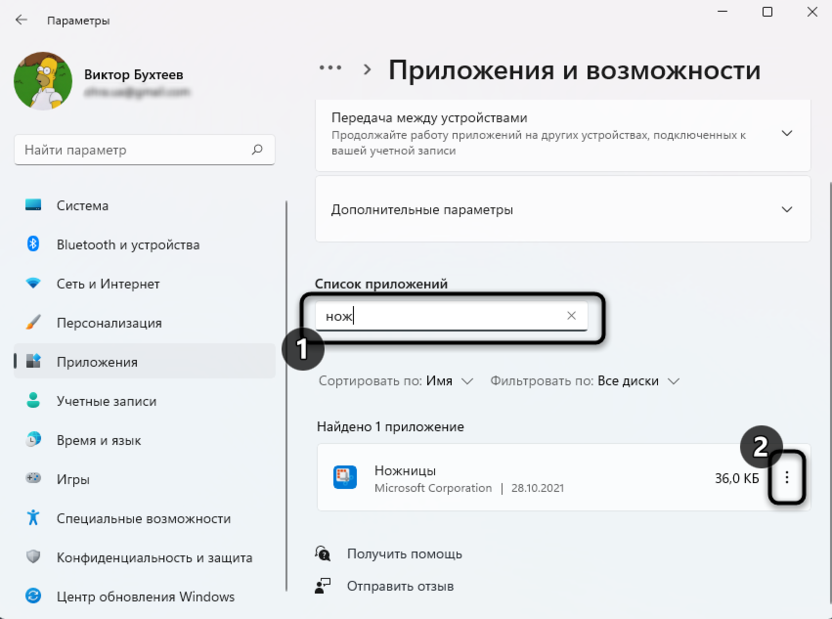
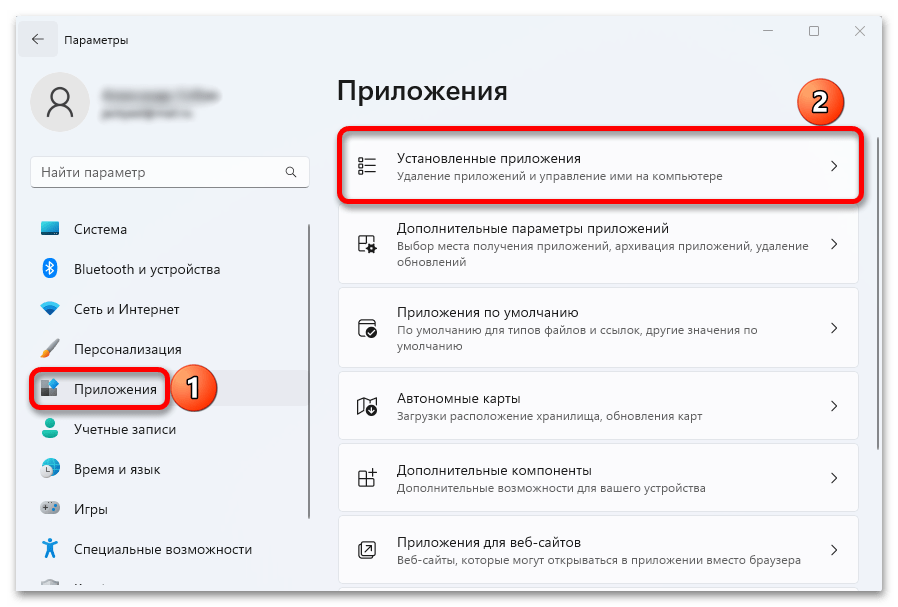
На панели слева выберите пункт «Приложения» и щелкните по первой строке «Приложения и возможности».
-
Обязательно используйте поиск для нахождения «Ножниц» и нажмите по трем точкам в поле справа.
-
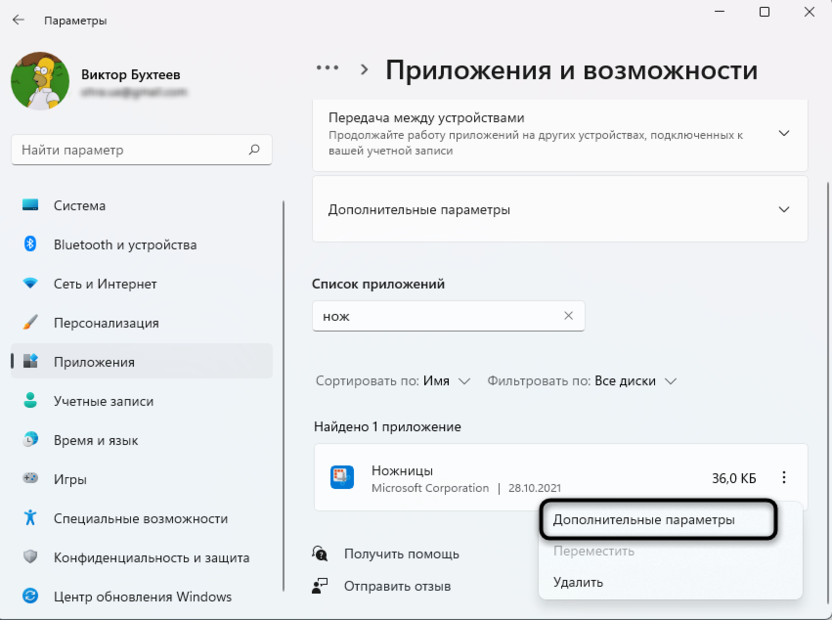
Из появившегося списка выберите «Дополнительные параметры».
-
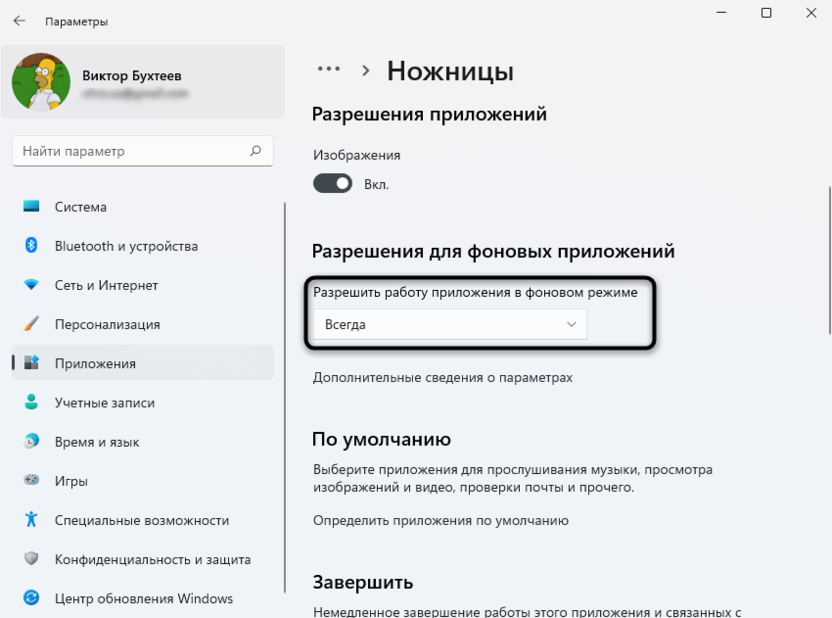
Разрешите работу приложения в фоновом режиме, указав вариант «Всегда». После этого можете перезапустить ПК и попробовать сделать снимок экрана.
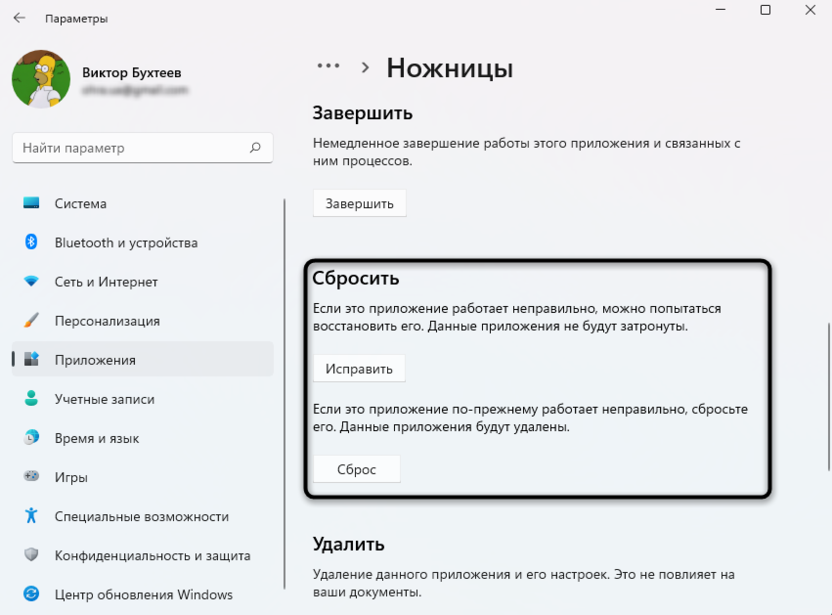
Способ 5: Исправление и сброс приложения
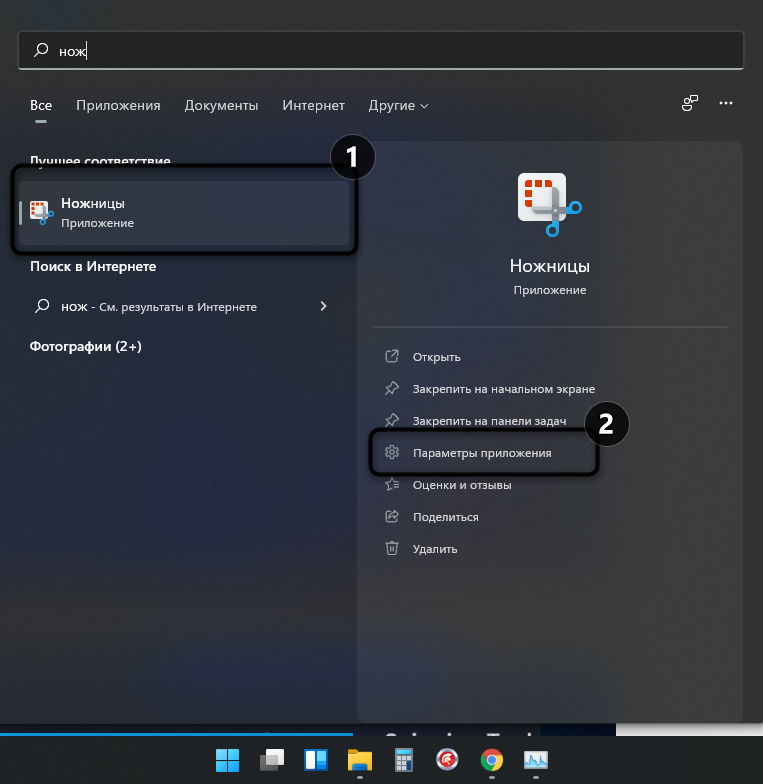
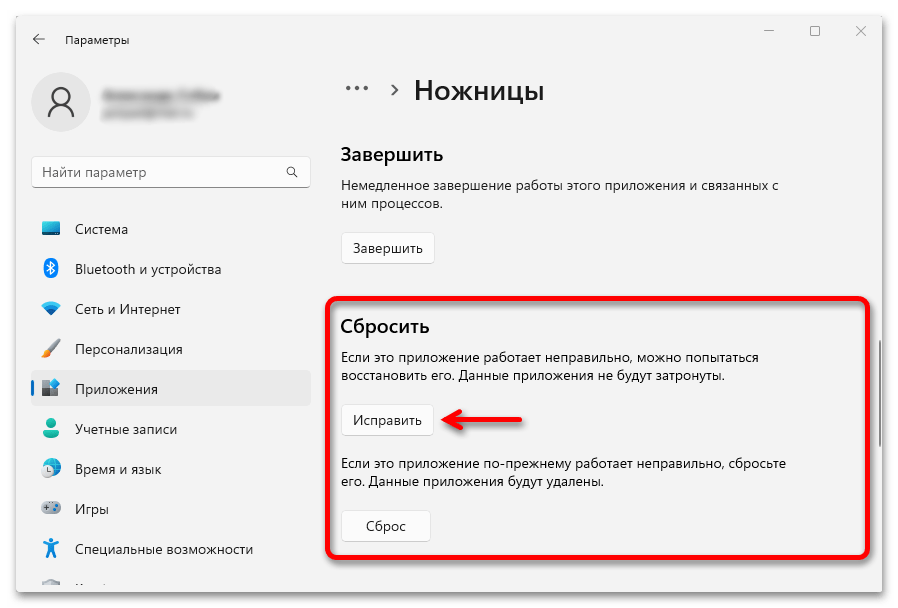
В Windows 11 есть интересные опции для приложений, позволяющие сбрасывать их или исправлять в автоматическом режиме. Возможно, это поможет решить вашу проблему, если она кроется в некорректном функционировании «Ножницы». Для этого откройте тот же раздел с параметрами так, как это было показано выше, или отыщите «Ножницы» через «Пуск» и в меню справа выберите «Параметры приложения».
Сначала нажмите кнопку «Исправить», а если это не поможет, используйте «Сброс». После выполнения таких манипуляций программа возвращается к стандартным настройкам, а все данные удаляются – это позволяет восстановить ее работоспособность.
Скорее всего, хотя бы один из перечисленных выше вариантов окажется полезным. Если нет, откройте «Командую строку» и запустите сканирование целостности системных файлов с помощью sfc /scannow. Это займет некоторое время; в случае нахождения ошибок вы будете уведомлены об их исправлении.
Все способы:
- Способ 1: Диагностика клавиатуры
- Способ 2: Разблокировка клавиши «Win»
- Способ 3: Обновление ОС
- Способ 4: Работа с приложением
- Этап 1: Запуск приложения
- Этап 2: Сброс настроек
- Этап 3: Переустановка приложения
- Способ 5: Стороннее ПО
- Вопросы и ответы: 0
Способ 1: Диагностика клавиатуры
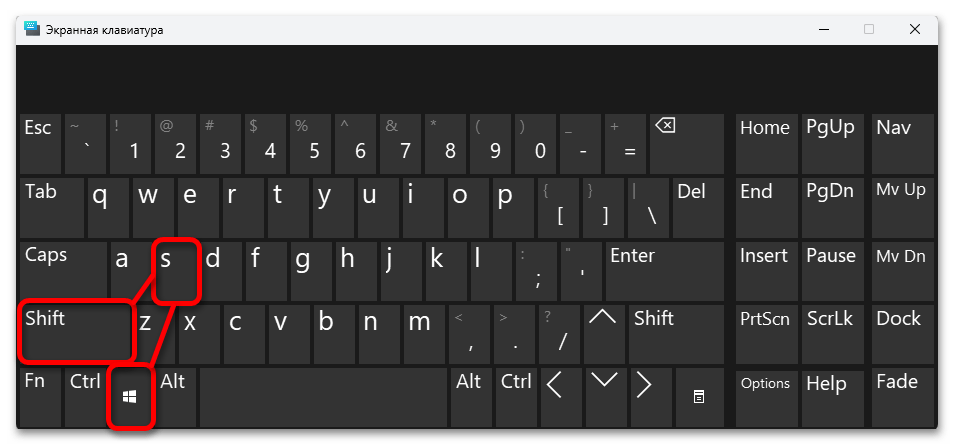
Указанная в названии статьи комбинация вызывает инструмент создания фрагмента экрана. Изменить ее нельзя, и даже если в настройках разрешить эту операцию клавише «Print Screen», «Windows+Shift+S» продолжит работать. Поэтому если после нажатия реакции нет, в первую очередь убедитесь, что соответствующие кнопки на вашей клавиатуре точно работают. Например, можно попробовать включить функцию с помощью экранного устройства ввода.
- Кликаем «Пуск» и открываем системные параметры.
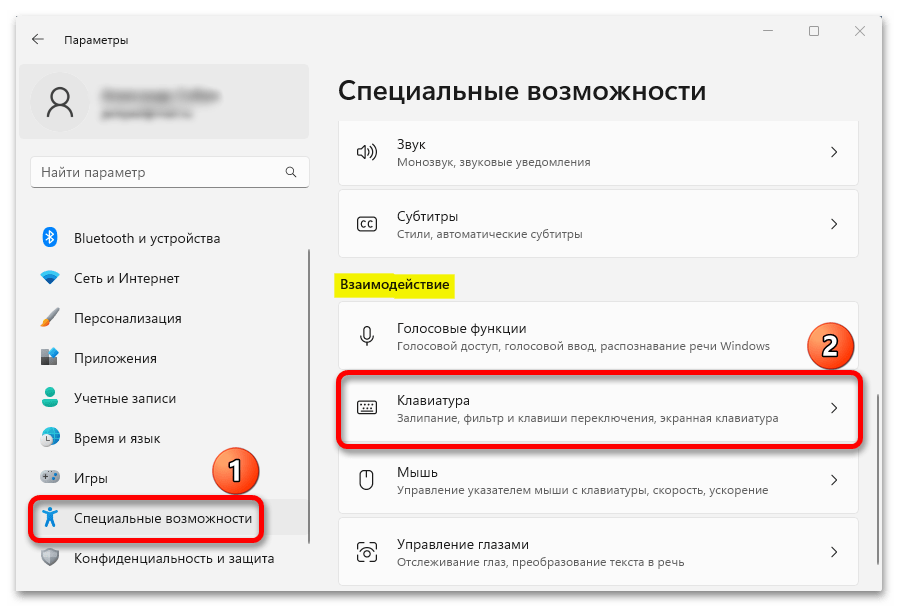
- Переходим в раздел специальных возможностей, в блоке «Взаимодействие» жмем «Клавиатура»

и запускаем ее.
- Теперь нажимаем по очереди кнопки «Win», «Shift» и «S». Раскладка в данном случае не важна, главное, чтобы сами клавиши совпадали. Если функция включилась, значит дело либо в физической клавиатуре, либо заблокирована кнопка «Windows», о чем мы поговорим в следующем блоке.
Способ 2: Разблокировка клавиши «Win»
Операционная система предусматривает возможность отключения как самой кнопки «Windows», так и сочетаний, в которых она участвует. Без стороннего программного обеспечения это можно сделать через реестр или редактор локальной групповой политики. В общем, речь не идет о каком-то случайном действии, поэтому если вы используете личный компьютер, то вряд ли не помните, что когда-то отключали эту клавишу.

С другой стороны, если компьютер чужой, есть смысл проверить версию. На нашем сайте есть статья, в которой подробно описаны все способы отключения кнопки «Win». Вам нужно просто открыть этот материал, найти, следуя инструкциям, описанные в нем параметры, а затем удалить их из системного реестра или отключить в LGPE. Главное, не забудьте потом перезагрузиться, чтобы изменения точно вступили в силу.
Подробнее: Как отключить кнопку Виндовс на клавиатуре
Способ 3: Обновление ОС
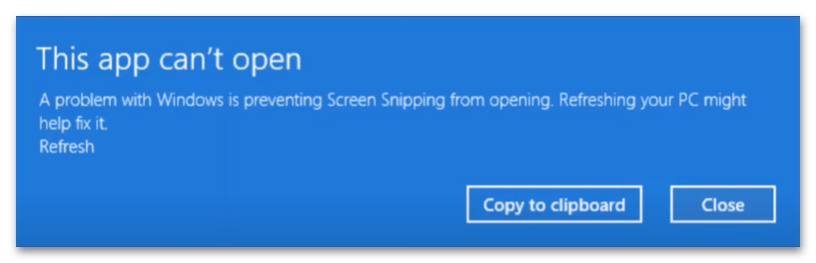
Иногда запуск инструмента сопровождается уведомлением о том, что функция недоступна, но обновление компьютера может решить проблему. В этом случае нам ничего не остается, как хотя бы попробовать выполнить то, о чем нас просят.
- Описанная ошибка может выглядеть так.
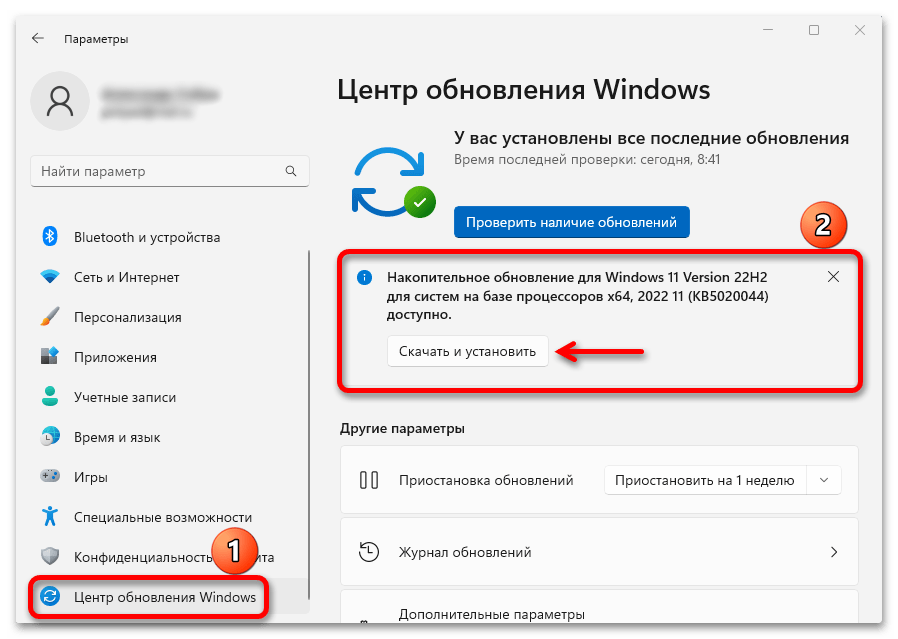
- Сочетанием клавиш «Windows+I» вызываем «Параметры», переходим во вкладку «Центр обновления» и, если какие-то апдейты готовы, нажимаем «Скачать и установить». Как только процесс завершится, пробуем снова создать фрагмент экрана.
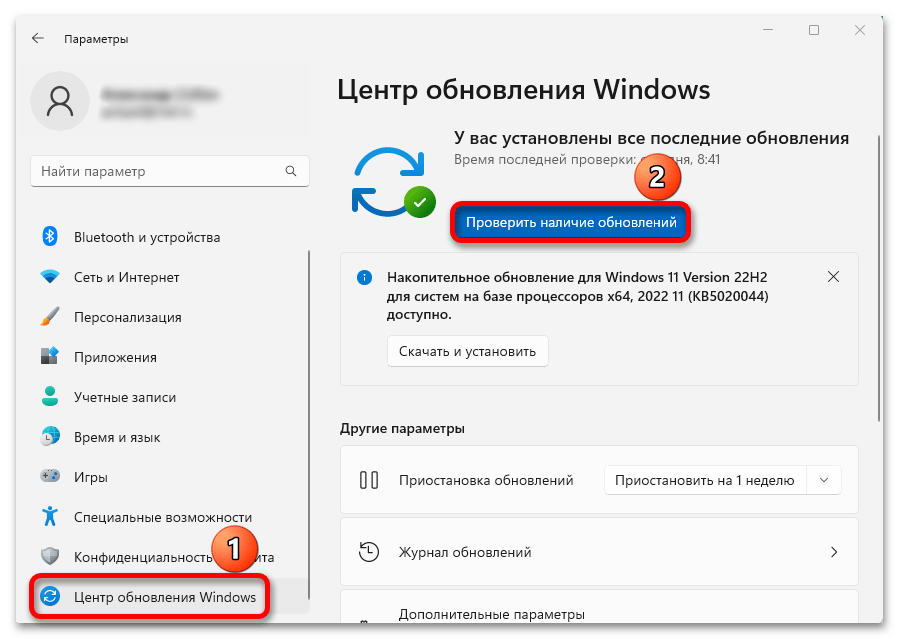
- Когда заранее подготовленных обновлений нет, сначала запускаем поиск их на серверах Microsoft.
Читайте также: Восстановление работы Центра обновления в Windows 11
Способ 4: Работа с приложением
Горячие клавиши «Windows+Shift+S» действуют вместе с приложением «Ножницы», также разработанным Microsoft. Это удобно, так как можно без запуска основного интерфейса программы быстро создать снимок экрана, а затем сразу перейти к его оформлению. Возможно, сейчас этот софт работает неправильно и каким-то образом блокирует комбинацию.
Этап 1: Запуск приложения
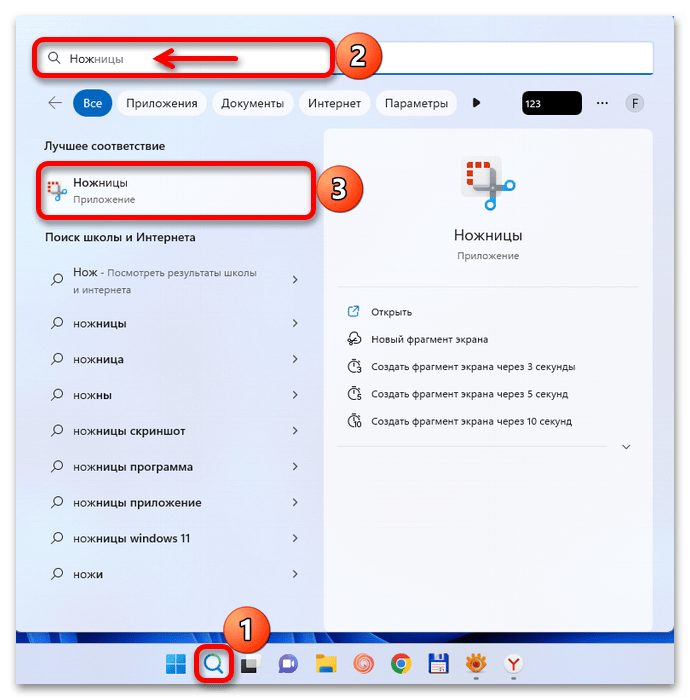
- В поиске Windows вводим «Ножницы» и открываем инструмент.
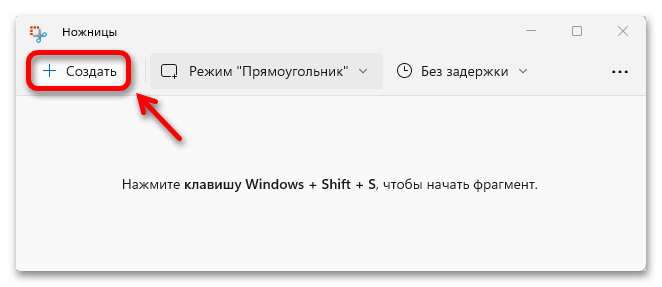
- Если приложение запостилось, то, в принципе, создавать фрагменты экрана можно и с помощью элементов его интерфейса.
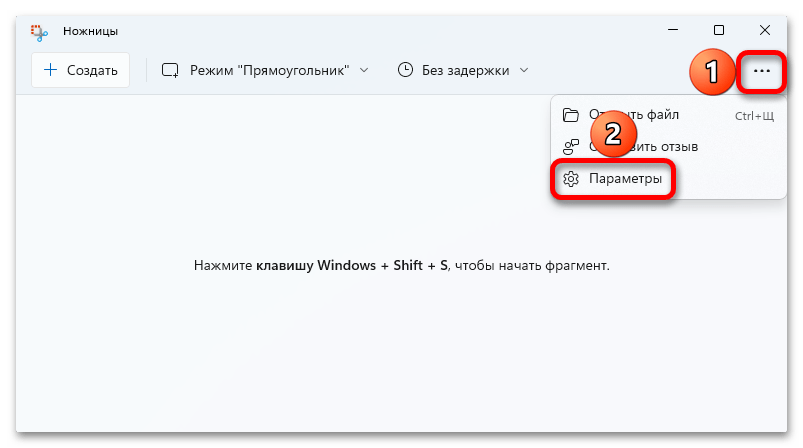
- Если вас интересует именно горячая клавиша, можно заменить текущую комбинацию. Для этого открываем меню, а затем параметры приложения.
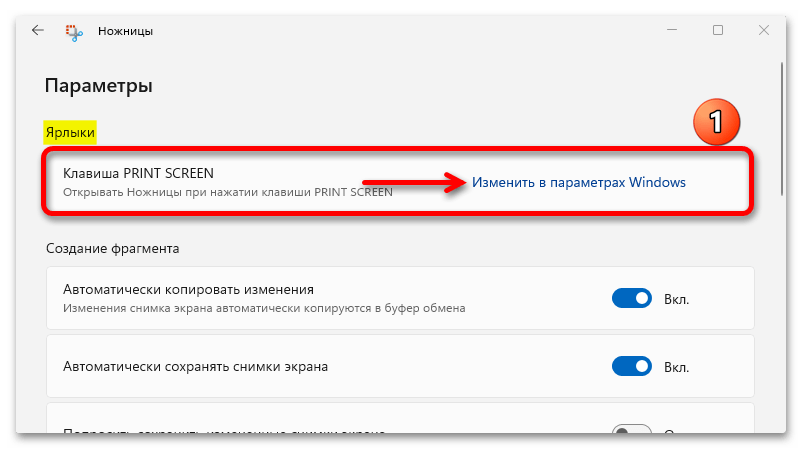
- В блоке «Ярлыки» кликаем «Изменить в параметрах Windows»

и активируем кнопку «Print Screen». Изменения должны вступить в силу сразу, но если этого не произойдет, перезагружаем систему.

Этап 2: Сброс настроек
- Если «Ножницы» не открылись или вам крайне необходима именно комбинация «Win+Shift+S», можно попробовать сбросить настройки компонента. В системных параметрах переходим в раздел «Приложения», открываем список установленных программ,
кликаем иконку с тремя точками справа на плитке «Ножниц» и открываем «Дополнительные параметры».
- Для софта, который ведет себя неправильно, предусмотрена опция «Исправить», поэтому сначала применим ее. Дожидаемся завершения операции и пробуем воспользоваться комбинацией.
- Если результат отрицательный, сбрасываем данные программы.


Этап 3: Переустановка приложения
- Последнее, что мы можем сделать – переустановить софт. Несмотря на то что он от Microsoft и устанавливается без нашего участия, для его удаления нам не придется вводить сложные команды в «PowerShell». Снова открываем список установленных приложений, как делали это в предыдущем шаге, вызываем контекстное меню «Ножниц», жмем «Удалить»

и подтверждаем действие.
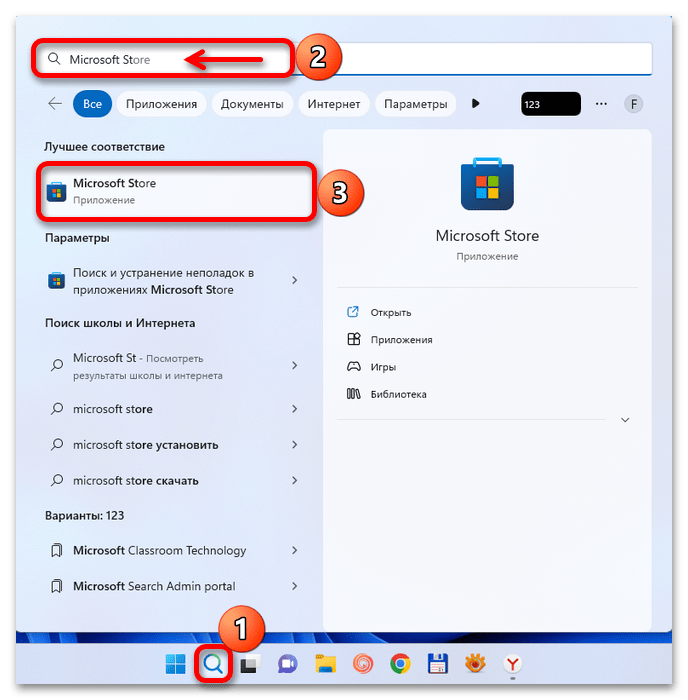
- Теперь в строке поиска Виндовс 11 набираем «Microsoft Store» и запускаем Магазин.
- Вводим запрос «Фрагмент и набросок», потому что именно так это приложение там называется, и нажимаем «Получить». После перезагрузки пробуем снова воспользоваться горячими клавишами.


Способ 5: Стороннее ПО
Если описанные выше действия не исправили ошибку, почему бы не воспользоваться альтернативными инструментами, ведь существует не менее, а то и более функциональное программное обеспечение от сторонних разработчиков. На нашем сайте есть обзоры таких популярных программ, как Lightshot и FastStone Capture, а также описания других приложений для создания скриншотов с указанием их основных достоинств и недостатков.
Подробнее:
Как сделать скриншот на Виндовс 11
Наша группа в TelegramПолезные советы и помощь
Snipping Tool is one of the most useful Windows utilities that lets us capture snapshots of any window or portion. We mainly use the Windows + Shift + S shortcut key to open the Snipping Tool in a few steps. However, in recent times, many Windows 11 users have started facing issues with accessing the Snipping Tool using the Windows + Shift + S key combination.
This is causing trouble for many Windows 11 users, and they are continuously looking for ways to fix the issue. Fortunately, this issue can be fixed with some troubleshooting methods. Here in this guide, we have mentioned some tried and tested solutions to help you overcome the Windows + Shift + S not working issue on your Windows 11 PC.
What Causes Windows + Shift + S Not Working in Windows 11
One of the most common reasons for this issue could be the defective keyboard keys. Besides, there could be more reasons behind the Windows + Shift + S not working issue.
- Outdated Keyboard Drivers
- Improper Functioning of File Explorer
- Issues With Registry Editor
- Faulty USB Ports
- Issues With Keyboard or its Keys
- Misconfigured Settings
- Restricted App Permission
- Disabled Snip & Sketch
- Conflict Between the Snipping Tool and the Onenote Shortcut
Fix Snipping Tool Not Working in Windows 11
We have mentioned more than twelve tried and tested solutions in this section to help you resolve the issue.
1. Restart the PC
One of the most common solutions to mend this issue is to reboot the system. In most situations, rebooting the system resolves the issue immediately. You can try rebooting your Windows 11 PC to see if the issues have been resolved.
2. Clean the Keyboard Keys
We suggest cleaning the keyboard to ensure all the keys are pressing and functioning correctly. Sometimes dust particles occupy the space beneath the keyboard keys and stop them from pressing properly. Hence, wiping the keyboard can resolve the issue.
3. Check USB Ports
Possibly, some of your PC’s USB ports are malfunctioning and causing this issue. You need to ensure that all your USB ports are functioning correctly. To check this, you can try connecting your USB keyboard with another device and see if it’s working properly. If the keyboard works perfectly with other devices, there are surely some issues with your system’s USB ports. You can get them repaired to overcome this issue.
4. Modify System’s Date & Time
One of the most recommended solutions to resolve this issue is to change your system’s date and time settings. Interestingly, this solution is guided by one of Microsoft’s Independent advisors. Therefore, there are high chances that this solution will resolve the issue. You can follow the below-mentioned steps to modify your system’s date and time settings.
1. Press Windows + I to open the Settings app.
2. Click on Time & language from the left navigation pane.

3. Click on Date & time to open the date and time settings.

4. Toggle off the Select time automatically and set time zone automatically option.
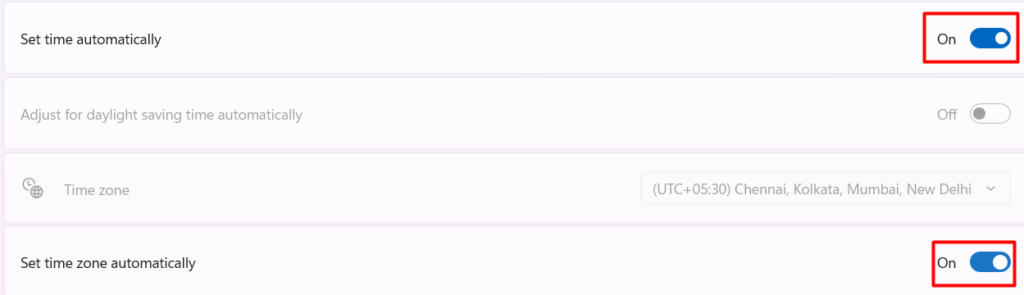
5. Click on Change to modify the time and date.

6. On the next screen, select the random date and time and save the changes.
7. Try using the Windows + Shift + S key combination to check if the issue is fixed.
5. Update Keyboard Drivers
Outdated keyboard drivers could also be one of the culprits of this issue. Thus, you need to ensure that all your keyboard drivers are up-to-date, not leading to this issue. You can follow the mentioned steps to update your keyboard drivers from the Device Manager.
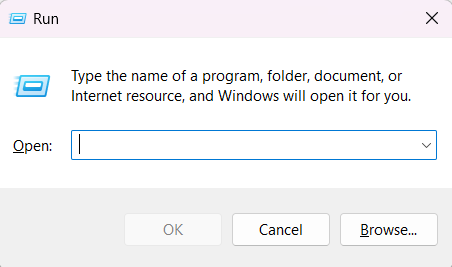
1. Press Windows + R to open the Run program.
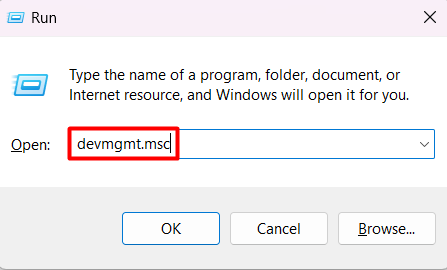
2. Type devmgmt.msc in the Search Box and hit Enter.
3. Search Keyboards in the Device Manager.

4. Double-click on Keyboards to view all the keyboard drivers installed on your system.
5. Right-click on any keyboard driver and select Update driver from the list of options.
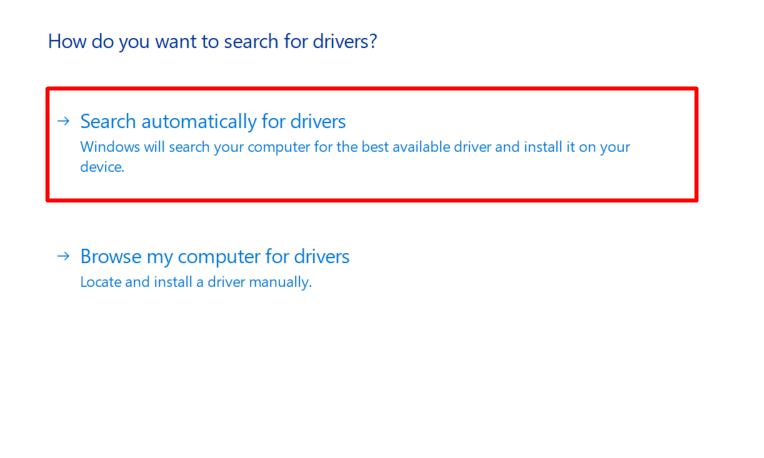
6. Select Search automatically for drivers on How do you want to search for Windows screen.
7. You need to wait until the system updates the driver and displays the final message.
8. Follow the same with the rest of the keyboard drivers.
9. Once everything is done, try using the Windows + Shift + S shortcut to see if the issue is resolved.
6. Turn on Notifications For Snipping Tool
When we press the Windows + Shift + S on our keyboard, a rectangle notification appears on the screen with some options to capture the snapshot. If you aren’t getting the notification, it is possible that you might have disabled the notification for the Snipping Tool. It’s pretty easy to enable the Snipping Tool’s notification, and the below-mentioned steps demonstrate the same.
1. Open the Settings app on your system.
2. Head to the Notifications tab.
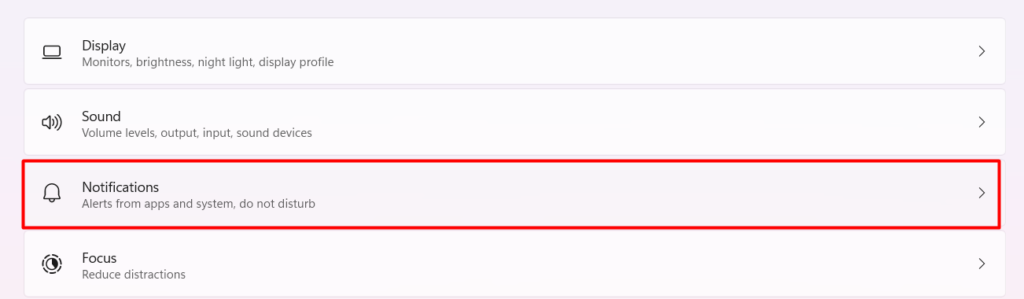
3. Search for the Snipping Tool in the Notifications from apps and other senders section.
4. Ensure that the Snipping Tool toggle is turned on.

5. Click on the Snipping Tool.
6. Select Top in the Priority of notifications in notification center section.
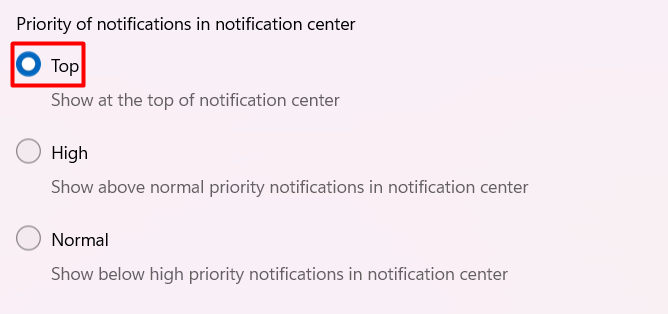
7. Press Windows + Shift + S shortcut key to check whether you are able to take screenshots or not.
7. Restart Windows Explorer
Some Windows features function with the help of Windows Explorer. Snipping Tool is one of the tools that use Windows Explorer to act properly. Many Windows 11 users reported that incorrect functioning of the Windows Explorer app could also be responsible for this issue. They also added that restarting Windows Explorer can resolve this issue. You can follow the below-mentioned steps to do the same.
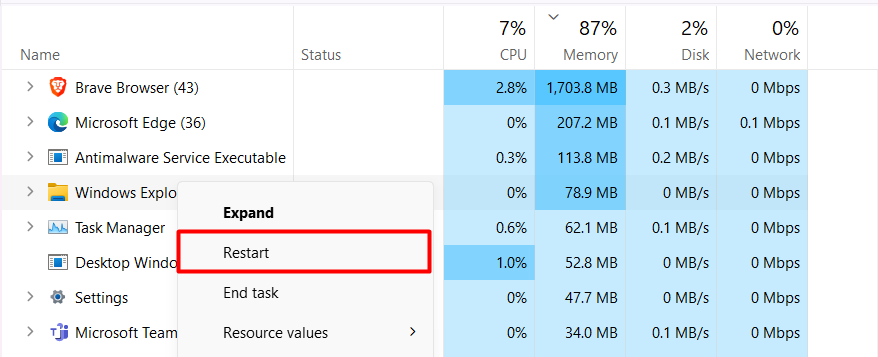
1. Open the Task Manager by pressing the Ctrl + Shift + Esc key combination.
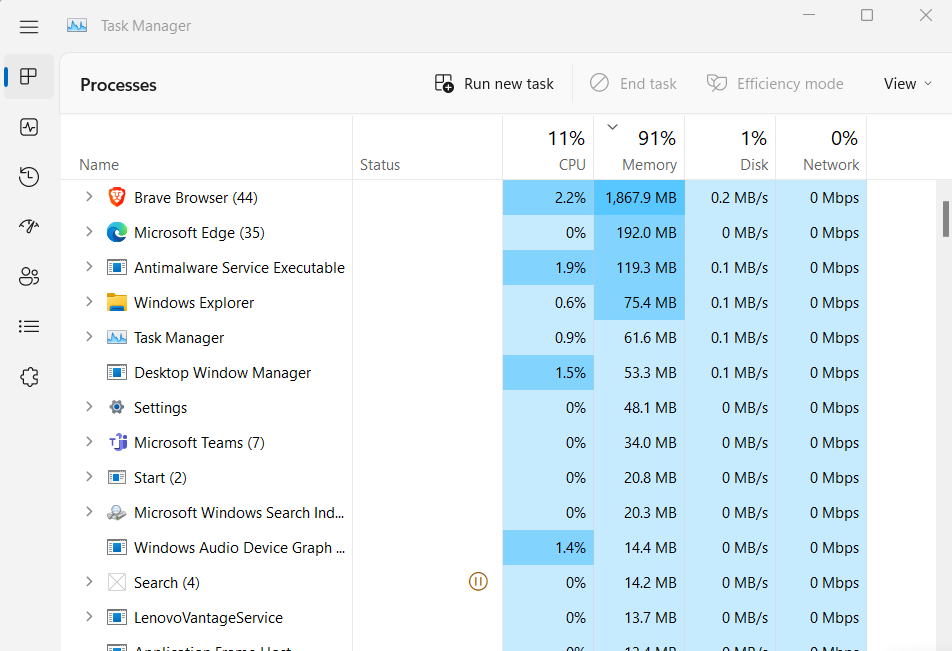
2. Search for Windows Explorer in the list of Processes.
3. Right-click on Windows Explorer and click on Restart.
4. Once done, Reboot the PC.
5. Try using Windows + Shift + S to launch the Snipping Tool.
8. Repair & Reset the Snipping Tool
Windows also allows you to repair and reset the system programs, like Snipping Tool. If restarting the Windows Explorer program doesn’t resolve the issue, you can then try repairing and resetting the Snipping Tool. Follow the below-mentioned steps to repair and reset the Snipping Tool.
Repair the Snipping Tool
1. Open Settings by pressing Windows + I.
2. Head to the Apps section to view all installed applications.

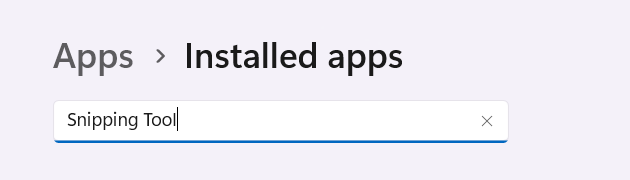
3. Search Snipping Tool in the Search Bar.
4. Click on Three Dots and select Advanced options.

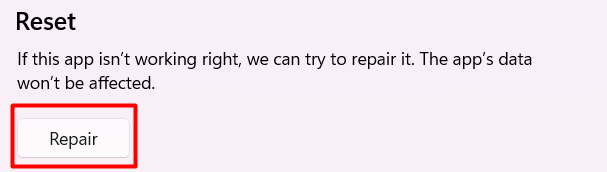
5. Scroll down and click on Repair.
6. System will now start repairing the Snipping Tool. You can see the program bar to know the progress of the scan.
Reset the Snipping Tool
1. Search for the Snipping Tool in the Apps section.
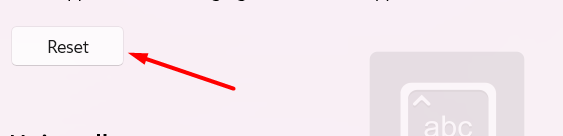
2. Look for the Reset option in the Reset section.
3. Click on Reset and let the system clear every data associated with the Snipping Tool.
4. Press Windows + Shift + S to see if the Snipping Tool is now working properly or not.
9. Enable Clipboard History
One of the causes of this issue could be the disabled Clipboard history feature. If the Clipboard history option is turned off on your system, you won’t be able to save copied images and texts in the clipboard. You can’t paste screenshots that you have copied with the help of the Snipping Tool. You need to enable the Clipboard History option following the below-mentioned steps.
1. Click on the Search icon in the taskbar to open the Windows Search Bar.
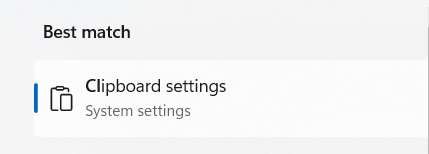
2. Type Clipboard settings in the Search Bar.

3. Click on Clipboard settings in the Best match section.
4. Once the Clipboard setting is opened, enable Clipboard history by clicking on the toggle.

5. Again, press the Windows + Shift + S again to see whether the shortcut key is working.
10. Use Alternate Shortcut Keys to Take a Screenshot
Windows + Shift + S is the most used key combination to launch the Snipping Tool. Besides this, you can also use the Fn + PrtSc shortcut to open the Snipping Tool to capture snapshots.
11. Disable Global Shortcut Key
One of the solutions to eliminate this issue is to disable the Windows + Shift + S shortcut completely. Many Windows 11 users said this solution helped them solve the issue. You can try the same by following the below-mentioned steps.
1. Open the Registry Editor app.
2. Head to the mentioned location to disable the global screenshot shortcut:
HKEY_CURRENT_USER\Software\Microsoft\Windows\CurrentVersion\Explorer\Advanced3. Right-click on an empty space and click on the New option.
4. Select String Value from the menu.
5. Name the new string: DisabledHotkeys
6. Double-click on DisabledHotkeys and enter S in the Value data field.
7. In the end, click on OK.
8. You need to now Restart the system to save all the changes permanently.
12. Change the OneNote Hotkey with Regedit
Many users reported disabling the global shortcut key methods worked for them. In case it doesn’t work for you, you can try changing the OneNote Hotkey from the Registry Editor. Follow the below-mentioned steps to modify the OneNote Hotkey.
1. Press the Windows key and type Registry Editor in the Search Bar.
2. Open the Registry Editor and head to the mentioned location:
HKEY_CURRENT_USERSoftwareMicrosoftOffice16.0OneNoteOptionsOther3. Right-click on an empty part and select New from the given options.
4. Select DWORD (32 bits) Value from the given options.
5. Type ScreenClippingShortcutkey in the Value name field and press Enter.
6. Double click on the ScreenClippingShortcut key and select Hexadecimal as the Base.
7. Add 5A in the Value data field.
8. Lastly, click on OK.
9. You have now changed the OneNote Hotkey. You need to now use the Windows + Shift + Z shortcut key whenever you want to capture screenshots.
13. Reset the PC
The last solution that can indeed solve the Windows + Shift + S not working issue is resetting the PC. You can try resetting your Windows 11 PC to eliminate this problem from the roots. Resetting the PC is pretty easy, and the below-mentioned steps explain the same.
1. Press Windows + I to open the Settings app.
2. Head to the Recovery tab.

3. Click on Reset PC under the Recovery options section.
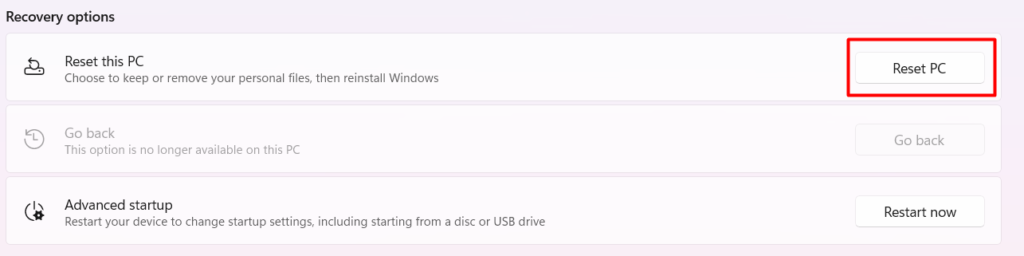
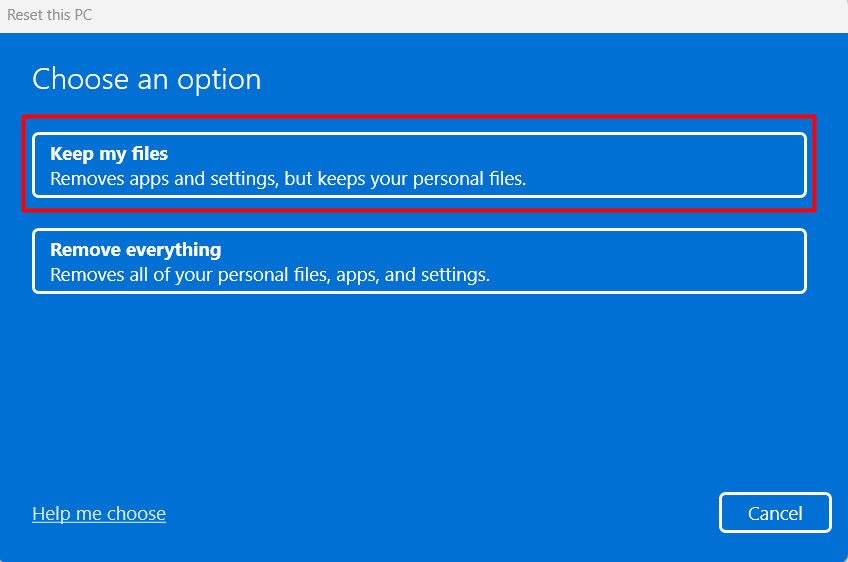
4. Select Keep my files on the popup and let the system reset all the settings.
5. Let the entire system restore, excluding documents stored on your system.
Frequently Asked Questions
Why Isn’t Windows Shift S Not Working?
One of the most causes of this problem is the fault in the keyboard. As a result, you are unable to capture screenshots on your Windows 11 PC.
How Do I Use Shift S in Windows 11?
You can use the Windows + Shift + S shortcut key to launch the Snipping Tool and capture a snapshot of your preferred portion or window.
How Do I Get Windows Shift S To Work?
You can try cleaning your keyboard keys ensuring there are no dust particles beneath the keys preventing them from pressing completely. We also suggest enabling the Clipboard History option on your system.
How Do I Enable Clipboard History?
Open the Settings app on your system. Type Clipboard Settings in the Search Bar and open it. Enable the Clipboard History option in the Clipboard Settings, and you’re done.
Did Windows 11 Get Rid of Snipping Tool?
Windows 11 comes with the Snipping Tool to capture snapshots with ease. You can simply open the Snipping Tool by pressing Windows + Shift + S or Fn + PrtScr to take screenshots.
Final Words
Using the Windows + Shift + S shortcut key to open the Snipping Tool saves a lot of time and effort. However, its sudden breakdown sometimes ruins the entire user experience. Fortunately, you can simply resolve the Windows + Shift + S not working issue by implementing the above-mentioned solutions.
Try all of them patiently and carefully one by one and escape this deteriorating situation. Also, let us know which method resolved the problem for you.
Multiple Windows 11 users are unable to open Snipping Tool in order to take screenshots. There are 2 ways to launch the utility using Keyboard Shortcut and through Search; sadly both of these do not work to launch this built-in screen capturing app. If you are facing Snipping Tool not working in Windows 11 issue then here you will find the solutions. The methods in this post will be effective in all cases whether the app is not working after installing the Windows version or in normal situations.
Snipping tool not working in Windows 11 usually occurs after installing this version. After upgrading to Windows 11, when you press the shortcut keys Ctrl + Shift + S the tool doesn’t open. Furthermore, using search also fails to launch the program. Sometimes, you might find that the program opens but doesn’t work properly. The issue might happen because of buggy Windows update, incorrect settings configuration for the Screenshot capturing tool, corrupted system files, and other.
Snipping Tool not working in Windows 11
Here is how to fix Snipping Tool not working in Windows 11 –
Way-1: When the utility doesn’t work after upgrading
If Windows 11 Snipping Tool missing problem occurs just after installing or upgrading to Windows 11 then this might be due to a bug. Here, you can find a discussion about this issue – Techcommunity. You may assume in this case that Microsoft will soon take notice of the issue and come with a resolution. Until then you can run the app with a tweak that includes restoring Snipping Tool from the Windows.old folder. Installation of the Windows operating system commonly stores the antecedent data and files are in a folder called Windows.old. Many users delete the folder because this folder occupies a large amount of space just after upgradation. So make sure that you haven’t done this then follow the steps –
- Press – Windows and E.
- Click on This PC from the right navigation pane.
- Double click on – Local Disk (C:).
- This will have a Windows.old directory. Double click on it.
- Go to Windows folder in this directory.
- Once reached, double click on System32.
- Here you will find Snippingtool.exe.
- Double click on this.
- The shortcut path to the location of this tool is C: /Windows.old/Windows/System32/SnippingTool.exe.
- After the tool is launched we recommend to pin it to the Taskbar so that you can further open the app easily.
- For this, right-click on the shortcut of the Snipping tool on the taskbar.
- Select – Pin to taskbar.
See – How to Pin Snipping Tool to Start and Taskbar in Windows 11 or 10
Way-2: Reset Snipping Tool
Windows 11 offers to reset any app if it is causing any problem and provides an option in Settings for this purpose. Once you use this option the Snipping tool will restore the default configurations. Therefore, in case, the problem started after changes in settings or installing a third party program then follow the steps –
- Click the – Start.
- Select- Settings.
- When Settings appears, click on- Apps.
- Go to the right and select – Apps & features.
- Let the page load to see the list of all programs installed on your PC.
- Locate Snipping Tool.
- From this section, click on 3 dots menu.
- Select – Advanced options.
- From the next page, click on – Reset.
- You will come across a tiny pop up.
- Again click on ‘Reset’.
- Restart the computer and check if the utility is working now.
Way-3: Download Snipping tool
Snipping tool is a built-in screenshot-taking utility and has been available since Windows XP. However, commonly it comes through installation files and is not downloadable. We have managed somehow the MSU file of the utility using which you will be able to install the utility on Windows 11.
- Click this link.
- Download the Snipping tool.
- Double click Setup file Snipping_Tool_5.2.0.0 (1).msi and follow the instructions on the screen to complete the installation.
Way-4: Uninstall recent updates
Many times, Snipping Tool problem occurs after updating Windows 11. This case indicates that the patch or build you have received is having some bugs. The simplest method to fix the screenshot utility error would be to uninstall the update. Further, install the update after the bug is fixed because it is essential for the protection of your operating system. However, follow the guidelines to uninstall now –
- Click the – Search.
- Type – update history.
- Hit – Enter.
- When the Settings app appears, scroll down to the bottom and click on – Uninstall updates.
- A window from Control panel will open soon; find the patch installed recently. This will be in KB…… form.
- Right-click on this one and select – Uninstall.
- You may notice a confirmation dialog, click – Yes.
- The update will be uninstalled in a while. See if the utility works now.
Way-5: Repair the app
You are getting troubles like Snipping Tool not popping up in Windows 11 then using Repair from the Settings app can work. This will work as a troubleshooter to fix the screenshot utility. Here are the steps –
- Press – Win+I.
- Select – Apps from Settings.
- Click on Apps & features.
- In the list of installed apps click on 3 dots from the Snipping Tool section.
- Select – Advanced options.
- From the coming page, click on – Repair.
Way-6: Use the Shortcut key to launch the Tool
Using Shortcut keys is the handiest way to launch apps on Windows operating system. You can see a complete list of Windows 11 Keyboard shortcuts with downloadable PDF in this concern. Give a try to use these keys as they may easily invoke the Snipping Tool.
- Press Windows + Shift + S on the keyboard.
Way-7: Install the pending Windows updates
When any mishap occurs because of Windows updates sent from Microsoft then you may get a resolution. The only matter is time for this situation so try checking updates at a regular interval. However, the updates are installed automatically but sometimes you may need to follow some manual action as below –
- Press – Winkey+I.
- Select – Windows update.
- Click on – Check for updates.
- Windows will start scanning for updates and in case anyone is pending it will download automatically.
- When the downloading is completed you will get a notification pop up. Click on Restart now on that pop up.
- Now open the app and work with it.
Way-8: Let the app run in background
Some apps require permission in Windows 11 or in the earlier versions for running in the background. The activities in the background commonly help the apps to send and receive notifications, sync information and keep them updated. Lacking permission might prevent the Snipping tool from opening on the desktop. So change the Setting by following steps –
- Press – Winkey + I.
- Select – Apps.
- Click on Apps & features.
- Move down in the next Settings page and reach Snipping Tool.
- Click on the three dots icon in that section and select – Advanced options.
- Now, click the drop-down under Background apps permissions.
- Select – Always.
Way-9: Run SFC aka System file checker
There might be third-party utilities or antivirus programs interfering with the functionality of Windows 11 if you find Snipping Tool not working problem. These programs corrupt the system files and create different types of messes on the PC. But fortunately, System file checker diagnoses all the issues and repair them by running on cmd command prompt. Here is the method –
- Click the Search located on the taskbar.
- Type – cmd.
- Select – Run as administrator.
- A user account control dialog will appear; click on – Yes.
- Once Command prompt opens up, type SFC /Scannow.
- Press – Enter.
- You will see Beginning system scan on the prompt. Once it reaches 100 percent reboot the PC.
Way-10: Run Store app troubleshooter
Store app troubleshooter, being a built-in utility, diagnoses problems with the applications installed through Microsoft Store and repairs them. When Snipping Tool not opening error occurs this utility may be a great help. Follow the instructions –
- Press – Windows logo key+I.
- On the Settings app, click on – Troubleshoot.
- Click on – Other troubleshooters.
- Move down to Store apps and click on Run.
- The tool will scan for issues and then suggest you follow some steps. Go along with them to fix the issue.
Way-11: Run DISM tool
Deployment image servicing and management aka DISM is a command-line utility to detect any messes in WIndows image and rectify them. Once running on Command prompt, the tool repairs the issues which may cause the tool not working in Windows 11. Follow –
- Right-click on Start from the taskbar.
- Select – Windows Terminal (Admin).
- Once User account control pop up prompts, click on Yes.
- Click on ‘Open a new tab’ drop down and select – Command prompt.
- type –
DISM.exe /Online /Cleanup-image /Restorehealth. - Press – Enter.
- Reboot your device and hopefully, the app should work now.
Still, the Snipping Tool couldn’t be opened and you are desperately needing to run it then you can Join Windows Insider Program and switch to receiving builds.
Methods list:
Way-1: When the tool doesn’t work after upgrading to Windows 11
Way-2: Reset Snipping Tool
Way-3: Download Snipping tool
Way-4: Uninstall recent updates
Way-6: Repair the app
Way-7: Use the Shortcut key to launch the Tool
Way-8: Install the pending Windows updates
Way-9: Let the app run in background
Way-10: Run SFC aka System file checker
Way-11: Run Store app troubleshooter
Way-12: Run DISM
That’s all!!