
Если вы не можете удалить какие-то файлы или папки со своего компьютера под управлением ОС Windows, то мы рекомендуем вам воспользоваться такое полезной штуковиной, как PowerShell. При помощи данного средства вы без каких-либо проблем можете удалить из системы файлы и папки, которые сложно или и вовсе нельзя удалить традиционными методами.
PowerShell для удаления файлов и папок
Чтобы удалить из системы файлы и папки с помощью Windows PowerShell, вам нужно придерживаться следующих шагов:
- откройте Windows PowerShell;
- найдите нужный файл или папку;
- выполните команду по удалению объекта.
Верно, все настолько просто. Однако давайте все-таки пройдемся по процессу удаления через PowerShell немного поподробней.
Удаление одного файла через PowerShell
Прежде все, вам необходимо открыть перед собой окошко PowerShell. Для этого нажмите на клавиатуре комбинацию Windows+S, а затем пропишите запрос PowerShell. Нажмите правой кнопкой на найденный результат и выберите «Запуск от имени администратора».
Чтобы удалить какой-то определенный файл, вам нужно выполнить следующую команду:
Remove-item [путь к файлу]
В общем, довольно простая команда. Давайте предположим, что у вас на Рабочем столе есть папка под названием «Testfiles», а внутри нее лежит файл Testfiles.jpg, который вам нужно удалить. В таком случае вышеуказанная команда будет выглядеть следующим образом:
Remove-item C:\Users\[имя пользователя]\Desktop\Testfiles\Testfiles.jpg
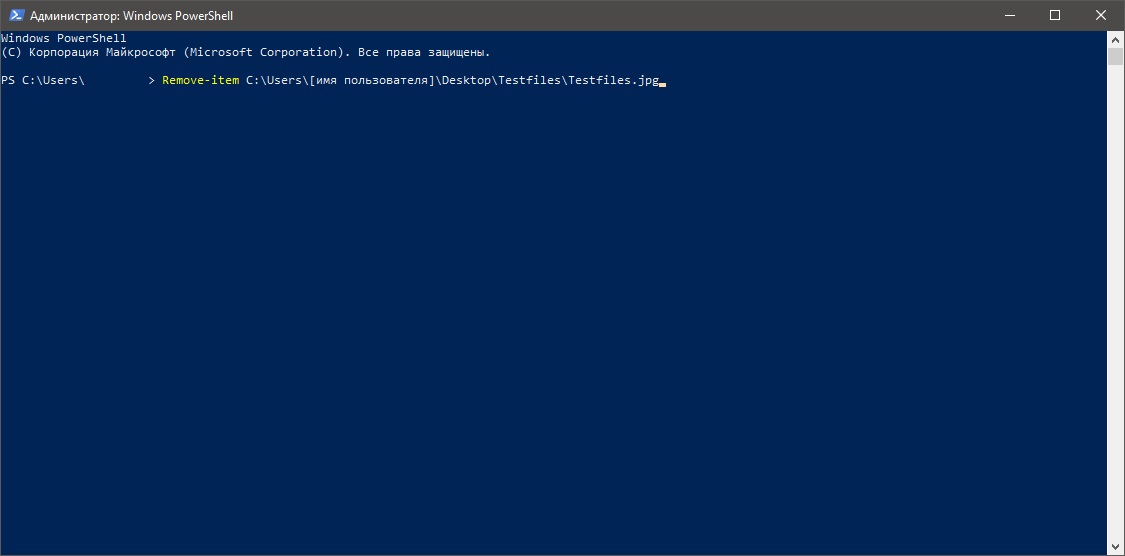
Обязательно не забываем прописывать расширение файла под удаление, иначе PowerShell просто не разберет команду — файл останется на компьютере и вы увидите ошибку в окошке средства.
Удаление одной папки через PowerShell
Хотите удалить какую-то конкретную папку в своей ОС Windows? Тогда вам нужно использовать точно такую же команду, что и ранее.
Remove-item [путь к папке]
Давайте предположим, что у вас на Рабочем столе есть папка под названием «Testfiles» — вы хотите от нее избавиться. В таком случае команда примет следующий вид:
Remove-item C:\Users\[имя пользователя]\Desktop\Testfiles
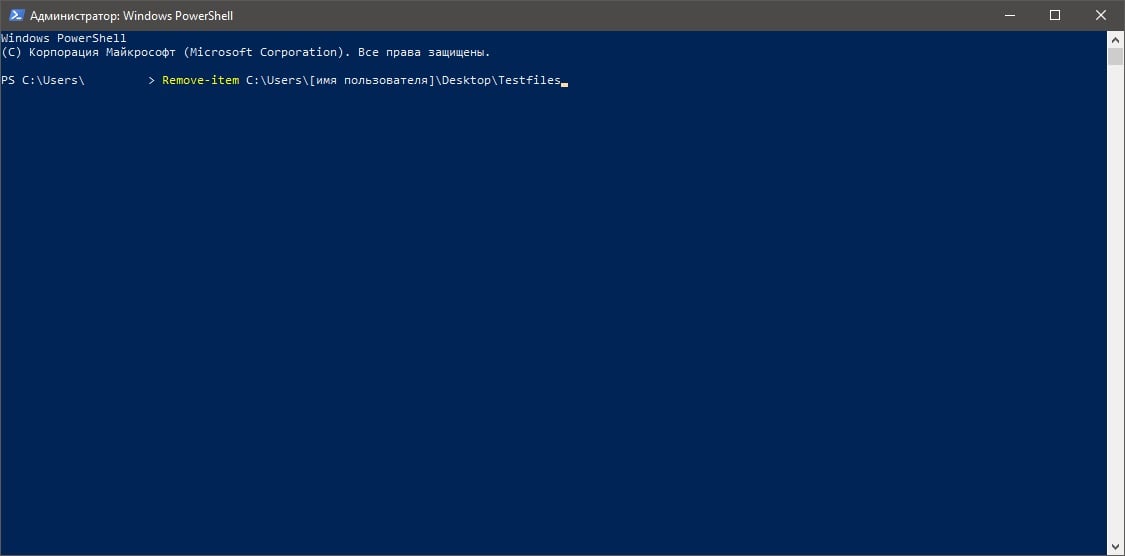
Если папка пустая, то она будет удалена сразу же. Тем не менее при наличии хоть каких-то файлов в ней вам придется нажать на кнопки Y и Enter, чтобы подтвердить их удаление. В окошке PowerShell будут подсказки начнет того, за что отвечают какие кнопки.
Удаление нескольких файлов через PowerShell
Если вы хотите избавиться сразу от нескольких файлов через PowerShell, то вам потребуется использовать уже несколько иную команду. Выглядеть она будет следующим образом:
Remove-item [путь к файлу], [путь к файлу1], [путь к файлу2]
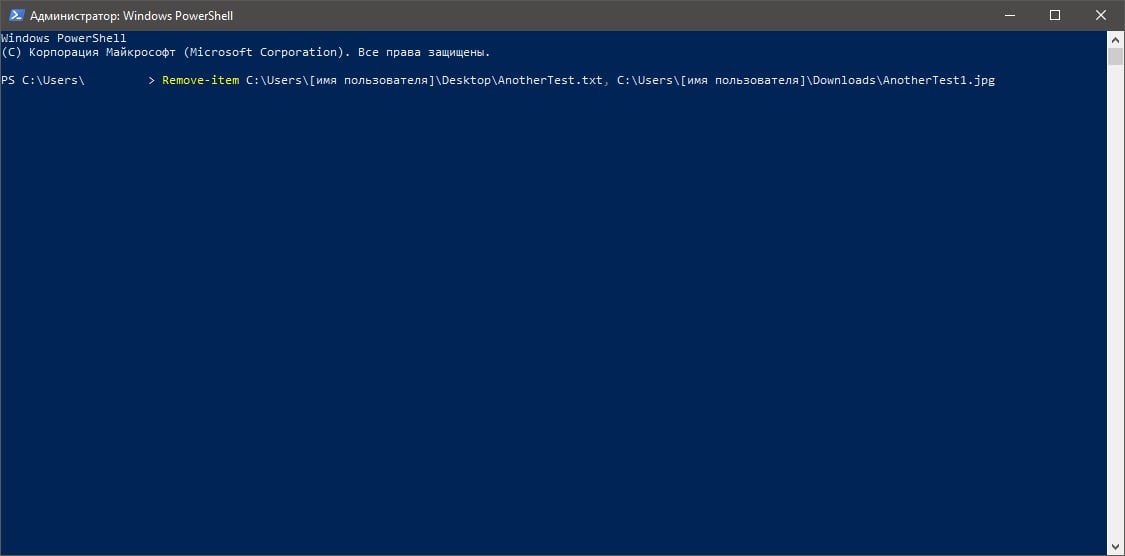
Верно, вам придется вводить местоположение для каждого файла, который вы хотите удалить из своей системы. Предположим, что у вас на Рабочем столе есть файл AnotherTest.txt, а в папке Downloads — AnotherTest1.jpg. Что делать, если их оба нужно удалить? В таком случае команда для PowerShell будет выглядеть следующим образом:
Remove-item C:\Users\[имя пользователя]\Desktop\AnotherTest.txt, C:\Users\[имя пользователя]\Downloads\AnotherTest1.jpg
Удаление нескольких папок через PowerShell
Команда для удаления нескольких папок мало чем отличается от команды, предназначенной для удаления нескольких файлов. Используя прошлые примеры, команда в PowerShell для нескольких папок будет выглядеть следующим образом:
Remove-item C:\Users\[имя пользователя]\Desktop\AnotherTest, C:\Users\[имя пользователя]\Downloads\AnotherTest1
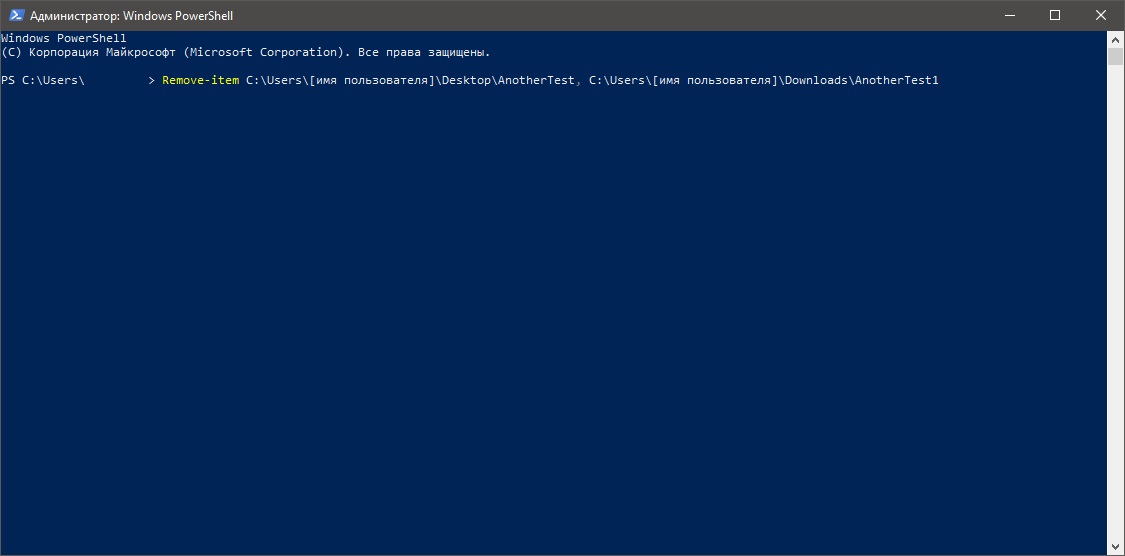
Опять-таки, если в этих папках будут располагаться какие-то файлы, то вам потребуется подтвердить их удаление в окне PowerShell, нажав Y и Enter. Кроме того, стоит отметить, что файлы и папки, удаленные подобным образом, не попадают в Корзину на Рабочем столе, а сразу же удаляются из системы.
Проверка наличия файлов в папке через PowerShell
Если вы не можете открыть папку, но хотите знать, что в ней находится, то можете воспользоваться следующей командой:
Get-ChildItem [путь к папке]
Например, если вы хотите заглянуть внутрь папки «AnotherTest2», располагающейся на Рабочем столе, то команда будет выглядеть вот так:
Get-ChildItem C:\Users\[имя пользователя]\Desktop\AnotherTest2
Задействовав данную команду, вы увидите несколько колонок, в которых будет содержаться полезная информация касательно файлов внутри нужной вам папки. Последняя колонка (по умолчанию) будет отвечать за название файлов. Так вы будете знать, стоит ли удалять эту папку или нет.
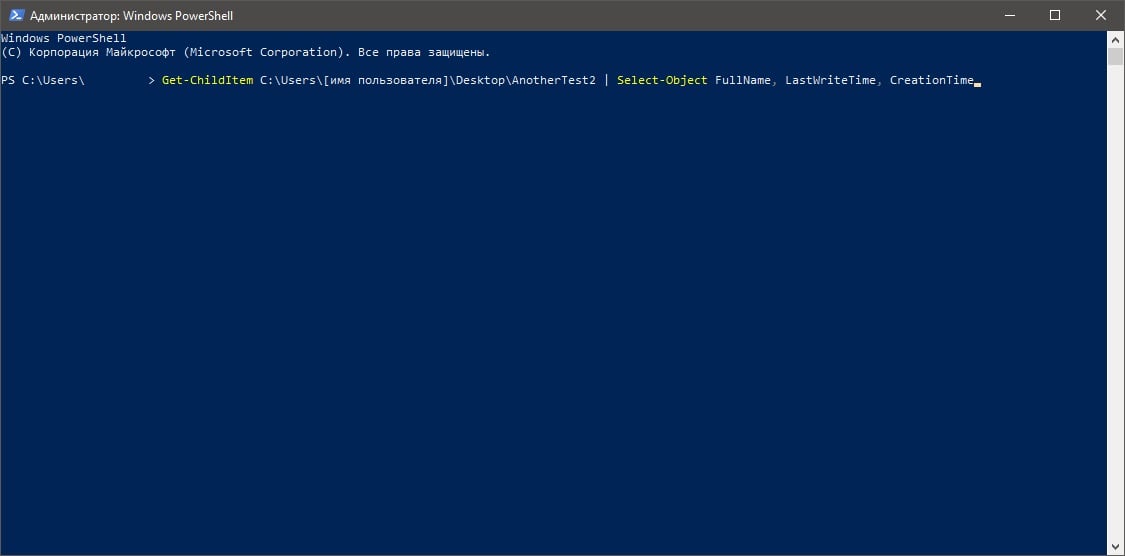
Проверка последнего изменения и времени создания через PowerShell
Если вы хотите понять, когда был создан и изменен какой-то объект (папка или файл) в вашей системе, то вам нужно выполнить в PowerShell следующую команду:
Get-ChildItem C:\Users\[имя пользователя]\Desktop\AnotherTest2 | Select-Object FullName, LastWriteTime, CreationTime
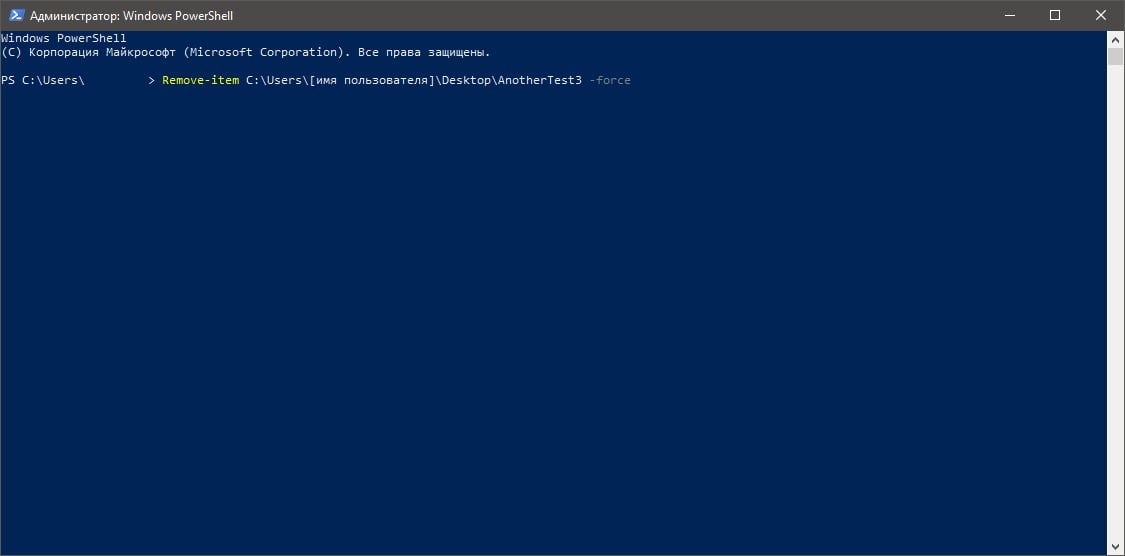
Принудительное удаление объекта через PowerShell
У вас не получится использовать вышеуказанные команды для удаления скрытых файлов и файлов с атрибутом только для чтения. Если вы попытаетесь это сделать, то в окошке PowerShell вас встретит ошибка. Тем не менее вы можете принудительно избавиться от тех или иных файлов/папок, задействовав параметр -force. Предположим, что у вас на Рабочем столе есть папка AnotherTest3 со скрытыми файлами внутри и вы хотите избавиться от нее. Для удаления этой папки вам нужно выполнить в PowerShell следующую команду:
Remove-item C:\Users\[имя пользователя]\Desktop\AnotherTest3 -force
Как и всегда, при желании удалить два или больше объектов вам понадобится нажать Y и Enter в окошке PowerShell, чтобы подтвердить свои намерения.
Удаление файлов/папок без подтверждения через PowerShell
Кстати, говоря о подтверждения об удалении, не хотите постоянно заниматься ими? Тогда вы можете пропустить эти запросы, применив к команде на удаления особый параметр. Такая команда будет выглядеть следующим образом:
Remove-item C:\Users\[имя пользователя]\Desktop\AnotherTest3 -recurse
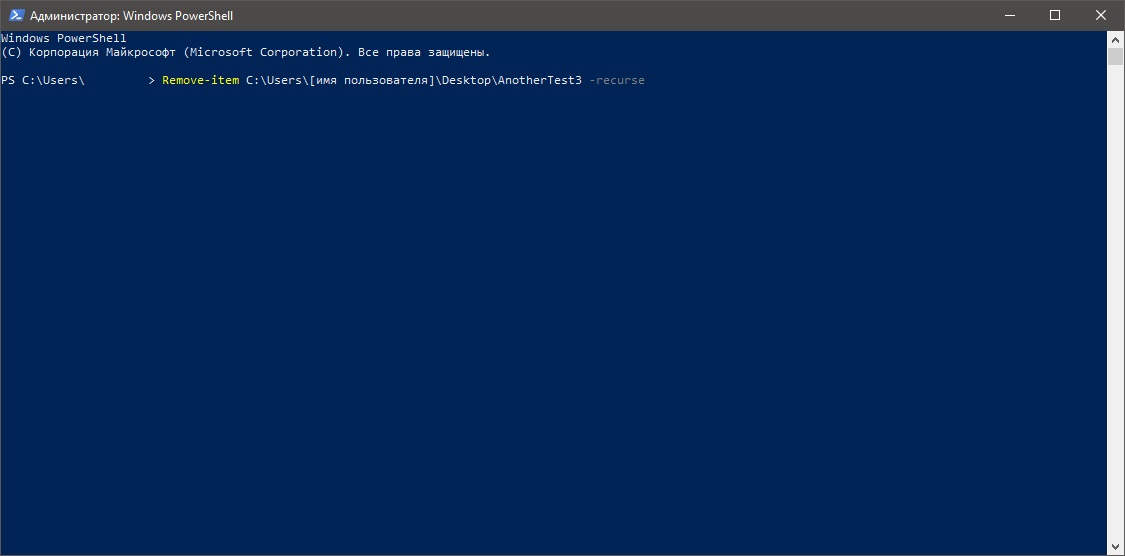
После ввода этой команды все указанные файлы и папки будут сразу же удалены с вашего компьютера — подтверждать ничего не нужно.
Исключение из команды на удаление в PowerShell определенных файлов
Давайте представим, что у вас есть несколько файлов с различными расширениями, например, TXT, PNG, DOCX, PDF и так далее. Вы хотите удалить всё, за исключением файлов с расширением TXT. В таком случае вам нужно задействовать вместе с соответствующей командой параметр -exclude. Вот что у вас должно получиться:
Remove-Item –path C:\Users\[имя пользователя]\Desktop\AnotherTest3* -exclude *.txt

Как вы уже могли догадаться, из папки AnotherTest3 будут удалены абсолютно все объекты, за исключением текстовых файлов. Очень удобная команда для очистки какой-то папки, в которой намешано очень много разных файлов, и вам нужно отфильтровать ее, избавившись от всего ненужного.
Удалить файл или папку с диска или флешки – что, казалось бы, может быть проще? Да, это действительно просто, если только вы не работаете в среде восстановления, в которой Проводник недоступен. В таких случаях вам придется использовать командную строку – мощный инструмент управления Windows, о котором многие пользователи уже начали забывать. Консоль может вам понадобиться и в работающей системе, например, при удалении скрытых и недоступных только для чтения файлов, а также файлов, используемых процессом explorer.exe (после его завершения).
Для удаления файлов в классической командной строке Windows используются две команды – DEL и ERASE, которые функционально ничем не отличаются, имея одинаковый набор аргументов. Команда имеет следующий синтаксис:
del /key full path
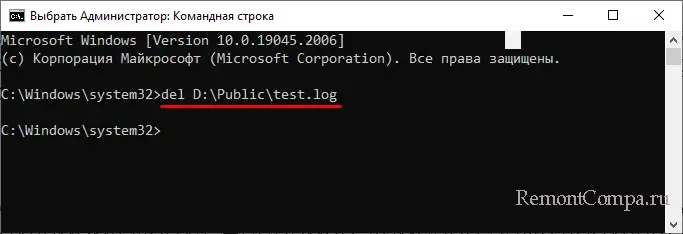
del или erase – это сама команда удаления, /key – это необязательный аргумент, а full path – полный путь к удаляемому файлу. Например, команда ниже удаляет файл test.log в папке Public на диске D:
del D:\Public\test.log
Кстати, указывать полный путь необязательно, если вы заранее перешли в папку с файлов. В этом случае указывается только команда удаления и сам файл:
del test.log

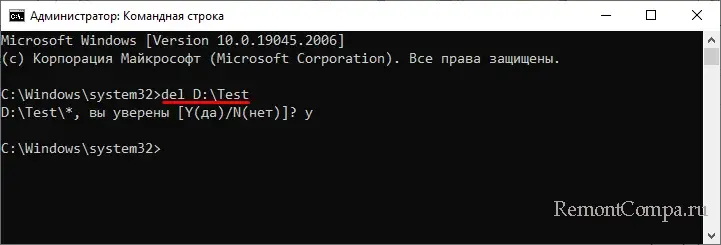
Файлы можно удалять не только по одному, но и все сразу, так, следующая команда удалит все файлы из папки Test:
del D:\Test
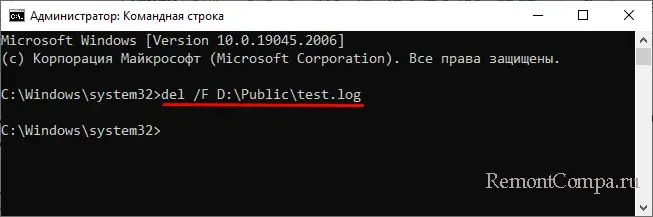
Будут пропущены лишь те файлы, которые имеют атрибуты «Только для чтения», «Скрытые», «Системные» и т. д. Для удаления таких файлов в команду добавляются специальные ключи, например, чтобы удалить файл с меткой «Только для чтения», в команду нужно добавить ключ /F, вот так:
del /F D:\Public\test.log
Помимо ключа /F, командой DEL поддерживает параметры /P, /S, /Q и /A. Рассмотрим их назначение чуть более подробно.
● /P – включает запрос на подтверждение удаления файла.
● /Q – отключает запрос на подтверждение удаления файла, обычно используется при удалении групп файлов.
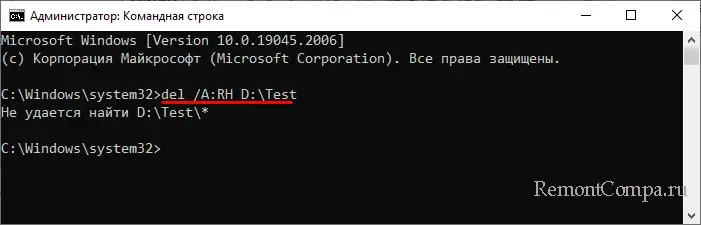
● /A – ключ используется, когда нужно удалить группу файлов с определенными атрибутами – del /A:RH D:\Test – в результате выполнения этой команды из папки Test будут удалены все файлы с атрибутами R (только для чтения) и Н (скрытые).
● /S – если нужно удалить файлы рекурсивно, то есть не только в указанной папке, но и во всех вложенных в нее папках, добавьте в команду ключ S, вот так:
del /S D:\Test.

В принципе, этих знаний достаточно, чтобы удалить любой несистемный файл, но рассмотренная нами тема была бы не раскрыта без упоминания о другом консольном инструменте Windows – PowerShell. Помимо поддержки ею команд DEL и ERASE, PowerShell располагает собственным командлётом для удаления объектов файловой системы. Он называется Remove-Item и имеет следующий синтаксис:
Remove-Item -Path -key
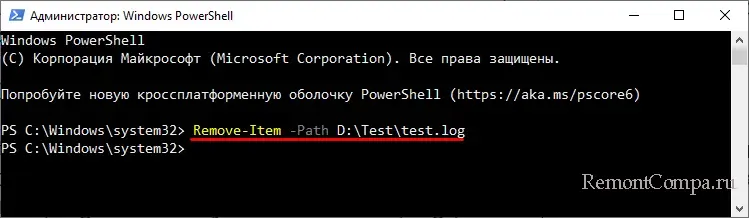
Командлёт очень похож на DEL, Path принимает значение пути к удаляемому объекту, а key – дополнительный параметр или несколько параметров. В отличие от DEL и ERASE, Remove-Item универсален и может использоваться для удаления как файлов, так и каталогов. Удалим файл test.log из папки Test:
Remove-Item -Path D:\Test\test.log
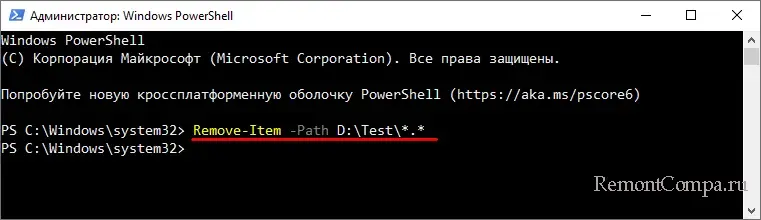
Использовать «-Path» необязательно, так как PowerShell и так понимает, что нужно делать. Папки удаляются аналогично, если нужно удалить только файлы, используется подстановочный знак, в данном случае точка перед расширением.
Remove-Item -Path D:\Test\*.*
Если путь содержит пробелы или кириллицу, его нужно взять в прямые двойные кавычки. Командлёт поддерживает около дюжины параметров, из которых вам наверняка пригодятся -Force и -Recurse.
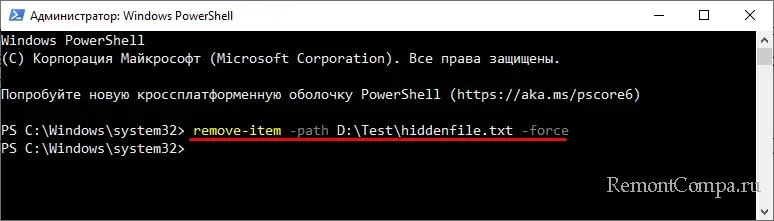
Параметр -Force используется для принудительного удаления файлов с атрибутами «Только чтения», «Скрытый», «Архивный» и «Системный».
remove-item -path D:\Test\hiddenfile.txt -force
Параметр -Recurse служит для удаления файлов в указанной папке и всех вложенных в нее каталогах. Поскольку параметр Remove-Item в связке с командлётом -Recurse работает корректно не во всех версиях PowerShell, вместо Remove-Item лучше использовать Get-ChildItem.
Get-ChildItem -Path «D:\Test» -File -Recurse | foreach { $_.Delete()}

Обращаем внимание, что эта команда удалит все файлы из папок в директории Test мимо Корзины, такова особенность ее работы. И на этом, пожалуй, достаточно. Более подробные сведения об использовании команд DEL, ERASE и Remove-Item можно получить в самой консоли, выполнив интересующую вас команду с ключом /? в классической командной строке и get-help название-командлёта в PowerShell.
Last Updated :
16 May, 2024
While working on Windows devices, we used to work on Windows File Explorer for working with files. On File Explorer of Windows, the creation of new files as well as deleting old ones is one of the easiest processes. However, if your File Explorer is not responding, then the process to Delete Folder using CMD can be an alternative.
The Windows Command Prompt is the command line tool that executes different tasks with the help of Windows Commands. Using CMD in Windows, the File Creation for Windows can also be executed. If you are having trouble Deleting Files or Folders on Windows directly by right-clicking, then you can Delete files using CMD.
This article is going to discuss the commands required to Remove Files & Folders using the UsingCommand Prompt of Windows.
Table of Content
- Methods to Delete Files and Folders Using Command Prompt
- Method 1: Delete Files or Folders on CMD using DEL Command
- Method 2: Delete Files or Folders on CMD using RMDIR Command
- Delete a Folder and Subfolders in Command Prompt
Methods to Delete Files and Folders Using Command Prompt
To Erase Windows Files or Folders using CMD, the following guidelines should be used properly. Let us start with the DEL Command Execution.
Method 1: Delete Files or Folders on CMD using DEL Command
Note: DEL Command is used to delete a file. Here, we will take our sample file “hello.txt” located on the desktop, and try to delete it using the del command in CMD. Follow the steps given below to delete the file:
Step 1: Change the Path of the Directory in CMD and set it to the path of the file. Type the following command and press Enter.
cd desktop
Step 2: Delete the file hello.txt with the following Windows Command.
del hello.txt

Method 2: Delete Files or Folders on CMD using RMDIR Command
Note: RMDIR Command is used to delete the entire folder or directory. Here, we will take our sample folder named “Tasks” placed on the desktop and try to delete it using RMDIR Command in CMD.
Step 1: Change the Directory’s Path in Command Prompt and set it to the path of the folder.
cd desktop
Step 2: Delete the folder Tasks with the following command.
rmdir tasks

From the above discussion, this should become clear that the Deletion of Windows Files using CMD is a matter of a few seconds. You have to just move inside the Windows Directory using the Windows CD Command. And then, as per your choice execute any one of the Windows File Deletion Commands in CMD.
Delete a Folder and Subfolders in Command Prompt
Step 1: Open Command Prompt.
Step 2: Navigate to the directory where the folder you want to delete is located using the cd command.
Command: cd <FolderName>
Step 3: To delete a single folder, use the following command.
Command: rmdir <FolderName>
Step 4: To delete a folder and all its subfolders and files, just include “/s” in between the rmdir and <folderName>, use the following command.
Command: rmdir /s <FolderName>
Step 5: Press Enter to execute the command.
Also Read
- Useful CMD commands for daily use in Windows OS
- CMD Commands to Gather Information of a System
- How to Show all the previously connected WiFi Networks using CMD in Windows?
Conclusion
In this article, we explored how to use Command Prompt in Windows to delete files and folders efficiently when facing issues with File Explorer. We discussed two methods: using the DEL command to delete files and the RMDIR command to delete folders. Additionally, we provided a step-by-step guide on how to delete folders and subfolders using Command Prompt.
PowerShell is a really powerful command-line tool used for automating and scripting various tasks in Windows. It is a fully featured, advanced version of Command Prompt.
PowerShell is also used to perform various file-related operations, such as file creation and modification. It provides a range of commands and functions for file management, including the ability to delete files.
Deleting a single file using PowerShell.
In order to delete a single file in PowerShell, you will need to use the ‘Remove-Item‘ command.
- Open the start menu and type “Windows PowerShell” in the “search box”
- Open it and type the command “Remove-Item” along with the file location and name

type the command “Remove-Item” along with the file location and name
Remove-Item <FilePath>
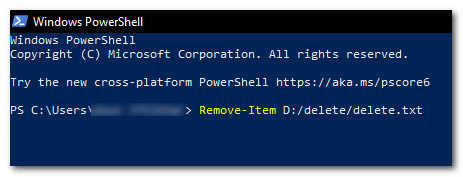
Here, <FilePath> represents the location of the file you want to delete. For example, if you want to delete a file called “example.txt” located in the “C:\Temp” directory, use the following command:
Remove-Item C:\Temp\example.txt
Deleting files and folders recursively.
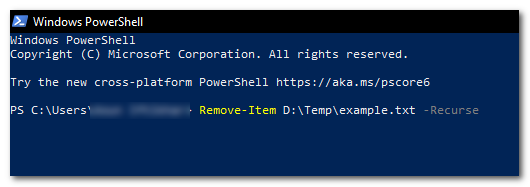
To delete files and folders recursively, you can use the “-Recurse” parameter with the “Remove-Item” command.
- Open “Windows PowerShell” and type the command “Remove-Item” along with the file location and name with “-Recurse” at the end

type the command “Remove-Item” along with the file location and name with “-Recurse” at the end - This will delete the folder located at “x” and all its contents.
For example
Remove-Item C:\Temp\example.txt -Recurse
Forcefully Deleting a File.
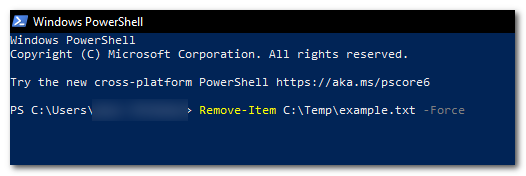
In order to force delete a file that is write-protected or in use by any process through PowerShell, you will need to use the “-Force” parameter with the “Remove-Item” command.
- Open “Windows PowerShell” and type the command “Remove-Item” followed by the file location and name, and add “-Force” at the end.

type the command “Remove-Item” along with the file location and name, with “-Force at the end - This will delete the file located at “x” even if it is read-only or in use by another process
For example
Remove-Item C:\Temp\example.txt -Force
Deleting files recursively based on their file extensions.
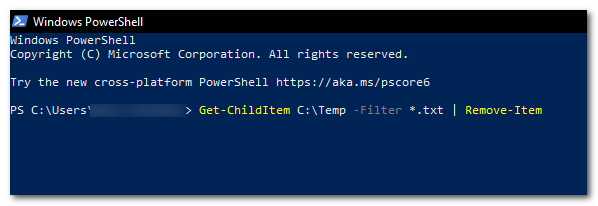
In order to delete files recursively based on file extension (e.g., .txt), you can use the “Get-ChildItem” command with the “-Filter” parameter to retrieve a list of files, and then delete the files with the “Remove-Item” command.
Get-ChildItem C:\Temp -Filter *.txt | Remove-Item
Deleting files that match a particular pattern.

You can use the ‘Get-ChildItem‘ command to gather all files matching the pattern (e.g., files that contain the word ‘test‘ in the file name) with the ‘-Path‘ parameter, and then use the ‘Remove-Item‘ command to delete them.
Get-ChildItem C:\Temp -Path "*test*" | Remove-Item
Deleting all files in a folder.
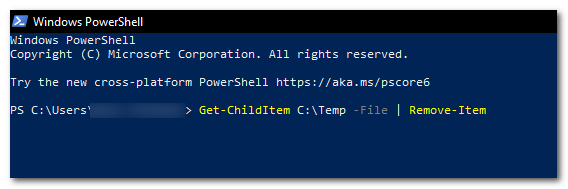
To delete all files in a folder (but not the folder itself), use the “Get-ChildItem” command with the “-File” parameter to retrieve a list of files, and then delete the results using the “Remove-Item” command.
Get-ChildItem C:\Temp -File | Remove-Item
Delete a file only if it exists.
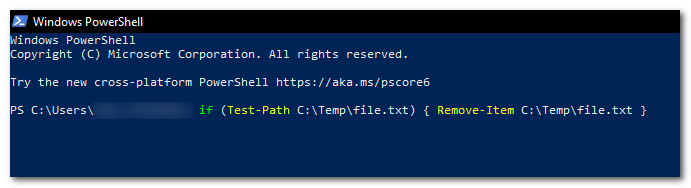
To delete a file only if it exists (to avoid an error if the file does not exist), use the “Test-Path” command to check whether the file exists, and then use the “Remove-Item” command to delete it.
if (Test-Path C:\Temp\file.txt) { Remove-Item C:\Temp\file.txt }
Deleting files that are older than a specified date.
To delete files older than a specified date, use the ‘Get-ChildItem‘ command with the ‘-Path‘ parameter and a wildcard character (*) to retrieve a list of files. Then, pipe the results to the ‘Where-Object‘ command to filter the files based on their creation date. Finally, pipe the results further to the ‘Remove-Item‘ command to delete them.
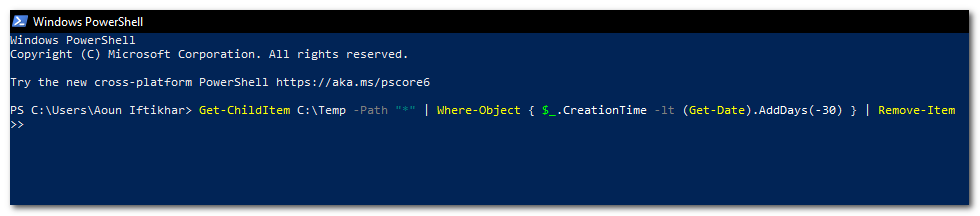
Get-ChildItem C:\Temp -Path "*" | Where-Object { $_.CreationTime -lt (Get-Date).AddDays(-30) } | Remove-Item
I hope this article has helped you in deleting files using Windows PowerShell. Always be careful when using these commands, particularly when employing the “-Force” or “-Recurse” parameters, as they can potentially delete important files or folders. Make sure to double-check your commands before running them to ensure that you are deleting the correct files.
Muhammad Zubyan
Muhammad Zubyan is a certified Google IT Support Professional with over 7 years of extensive experience. He has worked on more than 1500 computers, gaining valuable insights that enable him to detect and troubleshoot any complicated root cause of Windows-related issues and errors. In addition to managing Appuals as a Senior Editor, he is currently developing his own Game Optimization program that caters to both gamers and casual users alike.
on August 5, 2015
Deleting files is one of the frequently done operation from Windows command prompt. This post explains how to use ‘del’ command from CMD for different use cases like deleting a single file, deleting files in bulk using wild cards etc. Before we start to look at the syntax, note that the command works only for files and can’t handle folders.
How to delete a file
Run del command with the name of the file to be deleted, you are done!
del filename
You do not see message after running the command if the file is deleted successfully. Error message is shown only when something goes wrong.
Delete files in bulk
Del command recognizes wildcard(*) and so can be used to delete files in bulk from CMD. Some examples below.
To delete all the files in current folder
del *
To delete all the files with ‘log’ extension
del *.log
Delete all files having the prefix ‘abc’
del abc*
Delete all files having ‘PIC’ somewhere in the file name.
del *PIC*
The above are the basic use cases of del command. Continue to read below for non trivial use cases.
Delete multiple files
‘Del’ command can accept multiple files as argument
del filename1 filename2 filename3 filename4....
Example:
D:\>dir /s /b
1.pdf 2.pdf 3.pdf
D:\>del 1.pdf 2.pdf 3.pdf
D:\>
D:\>dir /s /b
D:\>
Delete Read only files
We can’t delete a read-only file using simple‘del’ command. We get access denied error in this scenario.
c:\>attrib readonlyfile.txt
A    R       C:\readonlyfile.txt
c:\>del readonlyfile.txt
c:\readonlyfile.txt Access is denied.
c:\>
A read-only file can be deleted by adding /F flag.
del /F readonlyfile.txt
Alternatively, we can use the below command too
del /A:R readonlyfile.txt