
In the Windows Operating system, Windows services plays a vital role for any Working windows feature to run without user intervention. These services are known as background services and many windows features, software and applications depends on these background services. Disabling this service will result in breaking their respective feature or software. Sometimes these windows background services will stop automatically, mostly Windows update service will stop automatically after the windows update and won’t start during the next update. This will cause the Windows update failure. To fix the windows update failure you need to start this service. And sometimes you’ll receive The service cannot be started Error 1508 while starting a service. This article will guide you to fix The service cannot be started Error 1508 in Windows 10.
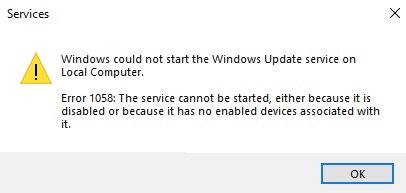
You’ll receive the following full error message while starting the Windows service. If you encounter this error, follow the below-mentioned resolution methods.
Windows could not start the Windows Update service on Local Computer.
Error 1058: The service cannot be started, either because it is disabled or because it has no enabled devices associated with it.
Change the Service Startup Type:
Open Run command by pressing Windows + R and type services.msc and hit enter. This command will open Service Management Console.
Right-click on the service which you are getting this issue and choose Properties.
In Properties Window click on the General tab and under the Startup type drop-down menu choose Automatic.

Next click on Start, this will start the service. Now the service will start without any error.
Click on Apply and OK. If you are still facing the same issue while starting the service follow the next method.
Using Registry Editor:
Note: Modifying the Registry is risky, and it causes irreversible damage to your OS Installation Follow the steps correctly. Friendly advice Before Modifying Registry Creating Restore Point is recommended.
Open Run command by pressing Windows + R and type Regedit and hit enter. This command will open the registry editor console.
Now navigate to the following path.
HKEY_LOCAL_MACHINE\SYSTEM\CurrentControlSet\Services\
Expand the Services registry key and from the left-hand side, you can see the list of service names, you need to choose the service name which you are actually facing issue.
If you don’t know the service name, then you can open service management console and right click on any service and choose properties. From there you can get the service name.
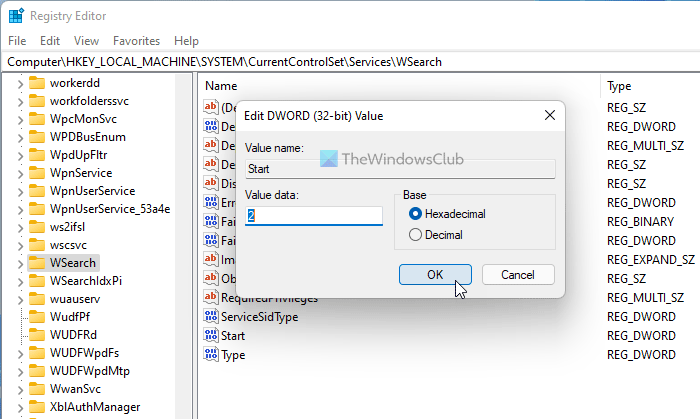
Once you click on the service name, from the right-hand side look for the DWORD named Start.
Double click on the Start DWORD and set 2 Value, and click on Ok.

2 – Automatic
3 – Manual
Close the Registry editor and restart the system once. After the restart check the Problematic service is starting or not. Mostly this will fix the issue.
Read: How to Enable Developer Mode in Discord?
Post Views: 3,629
If you are getting Error 1058, The service cannot be started message while starting a service in the Services Manager on Windows 11/10, the following solutions will be handy for you. There could be different reasons why this error occurs on your computer. However, you can fix it within moments by changing a few settings here and there.
The entire error message says something like this:
Error 1058: The service cannot be started, either because it is disabled or because it has no enabled devices associated with it.

This error occurs mainly because of the sudden termination of service due to some internal conflict or change of settings. Almost all the services depend on some other service, and it is called Dependencies of a Windows service.
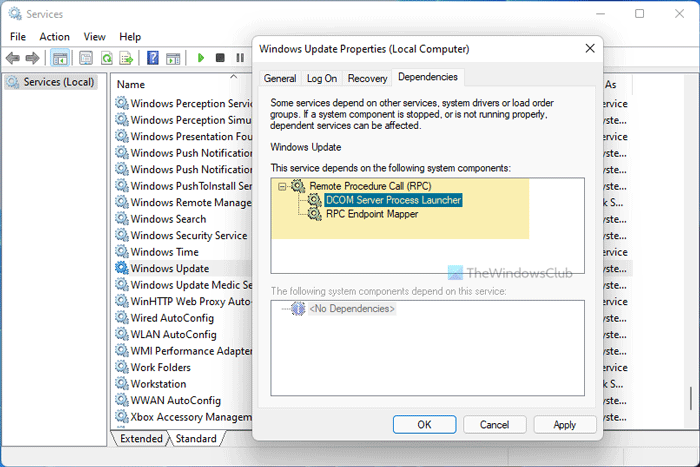
For example, the Windows Update service depends on DCOM Server Process Launcher and RPC Endpoint Mapper. Even if one of them is not running as it should be, you might encounter this error while starting the Windows Update service in the Services panel.
This error can occur while starting almost any service in the Services panel. The solution is to check if all the dependencies are running or not. Apart from that, you need to check if the primary service has the correct setting or not.
To fix Error 1058, The service cannot be started error, follow these steps:
- Search for services in the Taskbar search box.
- Click on the individual result.
- Find out the service that is causing the issue.
- Double-click on it.
- Select Startup type as Automatic.
- Click the Start button.
- Switch to the Dependencies tab.
- Note down all the services mentioned in the box.
- Click the OK button.
- Open the noted services one after one.
- Click the Start button.
- Click on the OK button to save the change.
At first, you need to open the Services panel on your computer. For that, click on the Taskbar search box, type services, and click on the individual search result.
Next, find out the service that is causing the error and double-click on it. It must be set as Stopped. You need to expand the Startup type drop-down list and select the Automatic option.
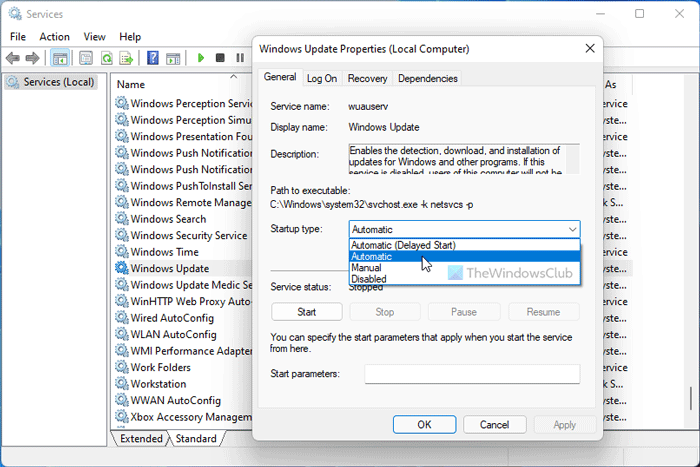
Then, click the Start button.
It should start immediately. However, if it is not starting, you need to switch to the Dependencies tab, find out all the services mentioned in the box, and click the OK button.
As your primary service depends on these services, you need to open them one after one and click on the Start button.
Once done, again open the primary service, choose the Automatic option from the Startup type drop-down menu, and click the Start button.
Now, your service will start without any problem.
You can change the Startup type of a service using Registry Editor as well. However, you must know the name of the service in REGEDIT. You could use PowerShell to generate the names of Windows Services.
For example, the Background Intelligent Transfer Service is called BITS or Windows Search is called WSearch, and so on. If you already know that, you can follow these steps:
Press Win+R to open the Run prompt.
Type regedit > press the Enter button > click the Yes option.
Navigate to this path:
HKEY_LOCAL_MACHINE\SYSTEM\CurrentControlSet\Services
Select the primary service and double-click on the Start DWORD value.
Set the Value data as 2 and click the OK button.
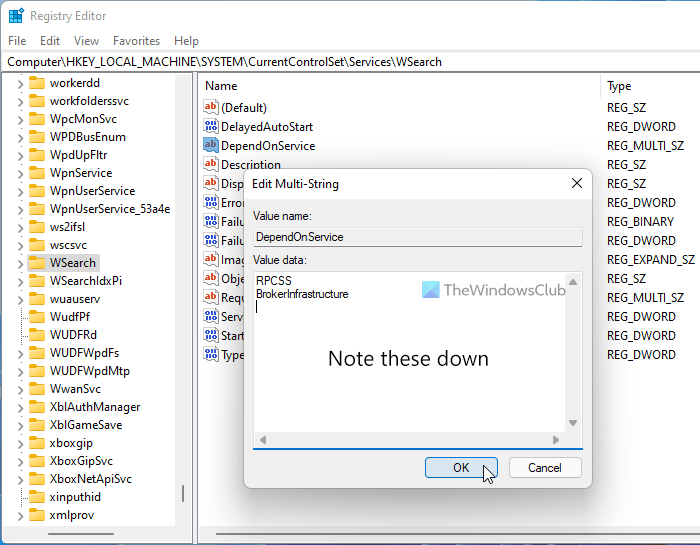
Double-click on the DependOnService and note down the service code names.
Open those dependencies’ keys > double-click on the Start DWORD value.
Set the Value data as 2 and click the OK button.
Restart your computer.
After that, you won’t have any problem starting a service.
Troubleshoot: Windows Services will not start.
How do you fix error 1058 the Service Cannot be started?
You can fix Error 1058: The service cannot be started error by choosing Automatic as the default Startup type in the Services panel. Alternatively, you can change the same using Registry Editor. For that, you need to follow the aforementioned steps.
How do I fix Windows Update service not running?
If the Windows Update service is not running on your computer, you need to check the dependencies one after one. Once you set the correct Startup type in the Services panel, this service will start running.
Read: The Windows Update service could not be stopped.
Windows Update Service Disabled
For Windows Update repair, there is an improved guided walk-through from Microsoft: https://support.microsoft.com/en-us/help/10164/…. Hopefully that helps.
These solutions can help you if you get Error 1058 in Windows 11/10 when starting a service.
The Service Cannot Be Started Either Because It Is Disabled
Start-Run, then type services.msc into the Run box and press Enter to open the Service Window.
Windows 10 depends heavily on background services to make a feature work. You can manage services using Windows operating system’s Services snap-in. If there are problems with the background services, they will break their respective features. For example, we will use Windows Update as an example to show you how to fix error 1058 The service cannot be started.
It is possible that the error occurs on your computer for a variety of reasons. However, a few settings can be adjusted and the error can be fixed in seconds.
We are going to cover a number of possible fixes to resolve the system error 1058 in this article.
According to the error message, the following is what it says:
An error 1059 has occurred because the service either does not exist or is not running.
Why am I receiving ‘error 1058: The service cannot be started’?
It is highly likely that your system is under attack if you don’t see the BFE service in the Services MMC or if the Action Center warns you that the Windows Firewall isn’t enabled. Whenever malware is on-board your system, you will not be able to repair these services without professional assistance. Using a reputable anti-malware tool to detect and remove it is not going to be effective.
In most cases, this error occurs because one of the programs isn’t working properly. It occurs when you try to start a program that requires another program. Check that the required components are installed if you receive this error message while installing software.
Make sure your hard drive has enough space on it, and check for duplicate copies of the same application if you are having trouble starting a program.
Here are some possible causes of this type of error. These are just a few. Other errors may also be causing this type of error.
This error could occur when you launch the Windows Update service, even if neither DCOM Server Process Launcher nor RPC Endpoint Mapper is working properly.
- Antivirus software from a third party.
- Corruption of the hard drive.
- There is a disablement of core system services.
Launch the windows update troubleshooter

Use the Windows Update troubleshooter if you’re experiencing problems updating Windows 10.
Troubleshooting steps for Microsoft Update:
The Run dialog box should be opened.
I just reinstalled windows due to a hal.dll error when i get everything set back up how i like it i go to enable my shared network between my two computers and it said when i tried to go to the adv. features tab of the connection”Because the windows management instrumentation (WMI) service has been disabled, windows cannot display the properties of this connection or the home network.”i then went to serives.msc and tried to enable it then it says”Could not start the Windows Management Instrumentation service on Local Computer.Error 1058: The service cannot be started, either because it is disabled or becasue it has no enabled device associated with it”im usally alright on my own when it comes to fixing my computer but i google to my heart content and most of what i found did not help me.im asking for someones help if you can help please do
In the search box, type ms-settings:* and press Enter.
In order to resolve Error 1058 Windows 10 service not started, I would recommend updating your Windows 10. If your system is outdated, it can cause this error. An updated version of Windows can run smoothly without any errors.
To troubleshoot Windows Update, select it from the troubleshooter list.
4. Press OK.
The fix can be completed by following the instructions.
The problem I’m having is that now that I have configured my Blazor app as a service, I’ve lost all my CSS. It still uses Startup as it should but it just doesn’t load my CSS? Can it be a path issue?
Run the Service from services
By pressing Windows + R, you can open the Run dialog box.
Hit Enter after typing services.MSC.
You will start troubleshooting Microsoft SQL Server Agent once you find it and double-click on it.
The computer may need to be restarted if the problem persists.
We have another guide if you are still experiencing problems.
Enable the startup type
It is likely that your Startup Type setting is configured incorrectly if you get the following error when running Windows Updates. The Startup Type setting must be set to Automatic or Disabled rather than Manual if you don’t know how to do it. If you don’t know how to do it, here are some instructions.
Click on the Control Panel icon.
The next step is to select System and Security.
Choose Advanced system settings from the left-hand side panel.
You can change what happens when you turn on your computer by selecting Change what the operating system does.
Make sure the Automatic or Disable option is selected under Startup Settings.
5. Choose Automatically restart when prompted if you want an automatic restart.
Reboot your computer after saving changes.
Tweak the Start Registry key within the Service
The error “The service cannot be started” could mean one thing: the service isn’t functioning properly. If you are running Microsoft Windows 10, here’s how to do it if the issue persists despite restarting the computer. You may need to tweak the registry keys associated with the service, but this isn’t always the case.
The Start menu will appear once you click it.
In the box that appears, type Regedit.
3. Press Enter.
Open HKEY_LOCAL_MACHINE/SOFTWARE/Microsoft/Windows NT/CurrentVersion/Winlogon and expand it.
5. Give the startup type a name.
Boot into safe mode and restart the service
This article offers instructions on how to start the services if you have trouble.
The computer should be restarted.
The BIOS Setup can be accessed by repeatedly pressing F8 during startup.
You can select advanced startup options by selecting the third option.
Choosing the Safe Boot option from the options list is the next step.
The BIOS setup will be saved when you save the settings.
Press F10 on the keyboard to enter the main menu after restarting the computer.
Make sure Windows 10 is up to date
In order to fix error 1058 on Windows 10, I will first recommend updating your operating system. Having an old version of Windows installed on your device may be the cause of your issue. To make sure that there are no compatibility issues, you must upgrade your operating system to Windows 10. To resolve error 1058, follow the steps provided below.
To begin, click Start.
In the search box, type Control Panel.
Could not start Windows Time on Local Computer: Error 1058: The service cannot be started because it is disabled or because its devices are not enabled.
From the list of options, select Control Panel.
From the left pane, click on the System icon.
In the Advanced section of the System window, click on Advanced.
Click on one of the options listed below in the window that appears:
The option labelled Automatically download updates can be checked by clicking the checkbox next to it.
After downloading all the updates, wait a few minutes.
Close the window by clicking OK once you are done.
One more reboot is required.
Make sure that the Service is enabled
Following the steps listed below will enable the service manager again if you are having trouble accessing it.
Start by typing www.google.com/support/ into your browser.
“Service Manager” can be accessed by clicking the link.
The service is enabled if you see this screen.
3. The data must be present for you to proceed.
Configure the registry settings
Using Registry Settings will help you solve the problem. You must try to repair the registry manually. Following the instructions carefully will help you to do so. As the registry is a crucial part of a computer, if any problems occur, the whole system becomes unstable.
Press Enter after typing “Regedit” in the Start button.
Using the Start Menu, navigate to HKEY_LOCAL_MACHINE/SOFTWARE/Microsoft/Windows NT/CurrentVersion/Winlogon.
4. Remove DefaultUserName from the value list.
The RunOnceExe file can be found in the HKEY_CURRENT_USER/Software/Microsoft/Windows/CurrentVersion/RunOnce folder. It should be deleted.
The issue should not persist after restarting the machine.
It’s okay to stop reading now if the issue has been resolved. If not, continue reading.
Skip to content
Table of Contents
Subtle hint… A colleague came to me and said he could not start a Service with the error message: ‘Win32: The service cannot be started, either because it is disabled or because it has no enabled devices associated with it.‘.
A ‘disabled’ Service cannot be started!!!
We will need to change the Startup Type from Disabled to either manual or automatic, but a disabled Service cannot be started.
Open Run and type in Services.msc.
Right click on the Service and choose Properties
Open the Startup Type field and change the setting to the desired option (Automatic or manual).
For the PowerShell savvies among us
Change SERVICENAME to the correct service name and run the below to Set the StartupType to Automatic and to start the service.
$Service = SERVICENAME
Set-Service $Service -StartupType Automatic
Start-Service $Service
Bas Wijdenes
My name is Bas Wijdenes and I work as a PowerShell DevOps Engineer. In my spare time I write about interesting stuff that I encounter during my work.
View all posts by Bas Wijdenes
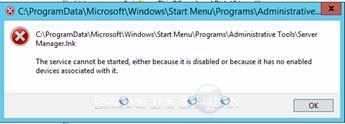
You receive the following error in Microsoft Windows trying to start Network Policy Server or similar Windows service.
C:\ProgramData\Microsoft\Windows\Start Menu\Programs\Administrative Tools\Server Manager.ink
The service cannot be started, either because it is disabled or because if has no enabled devices associated with it.
If you cannot start services.msc (Go to Start -> Run and type services.msc) reboot your machine. All else SafeMode setting «Application information» service to «Automatic» with WinKey+R -> Services.msc -> Enter.
* Please use the comment form below. Comments are moderated.*