
В мире информационных технологий серверы считаются сердцем сети, и их идентификация среди множества других серверов — важный аспект. Имя хоста, присвоенное вашему виртуальному серверу, играет ключевую роль в этой идентификации. Однако, в процессе развития вашей инфраструктуры ситуация может изменяться, и возможно, вам потребуется переименовать ваш VPS. В этой статье мы рассмотрим три основных способа того, как изменить имя хоста в Windows Server 2016, которые должны помочь вам успешно выполнить эту операцию.
В общем смысле, имя хоста — это простое название, присваиваемое устройствам, подключённым к сети. Это имя используется для идентификации устройств в различных электронных средствах связи, таких как интернет. Хост — это метка, присвоенная устройству, которая отличает одно устройство от другого в определённой сети.
Способ первый: Диспетчер Серверов
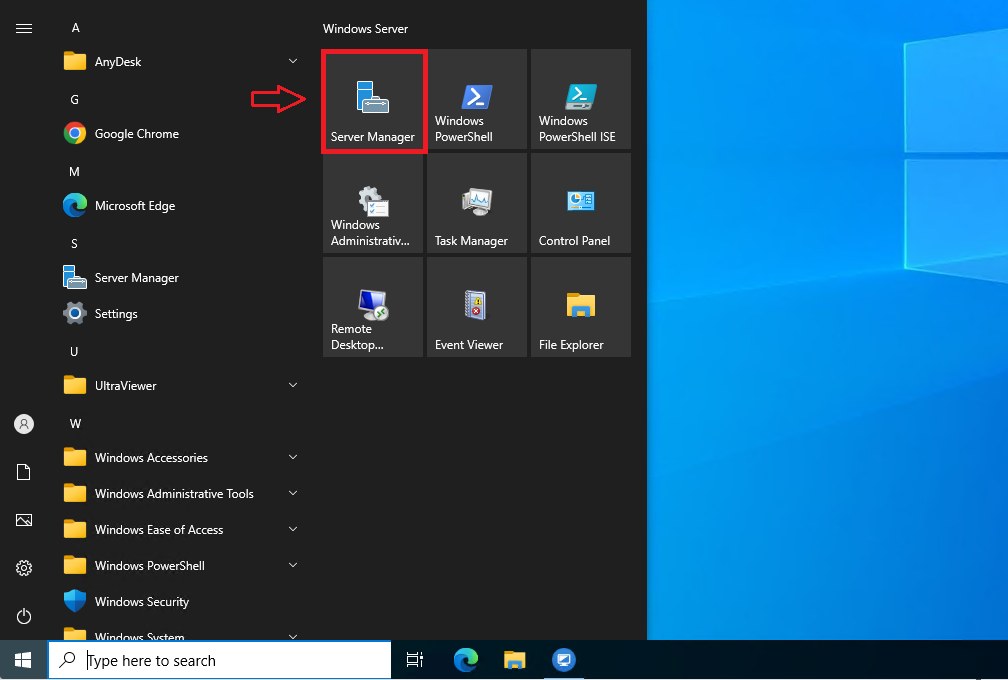
Для изменения имени сервера с применением графической оболочки Windows необходимо будет воспользоваться Диспетчером Серверов — Server Manager. Чтобы запустить его, откройте стартовое меню и кликните по иконке Server Manager.

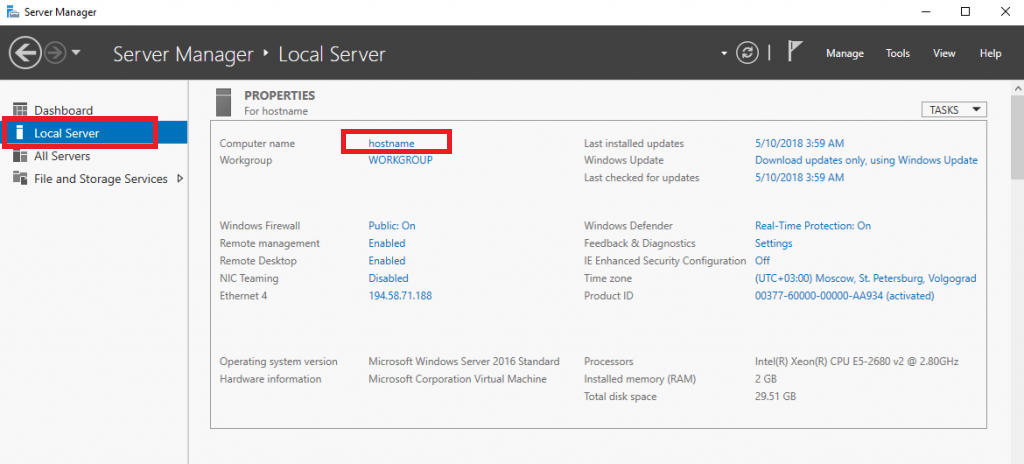
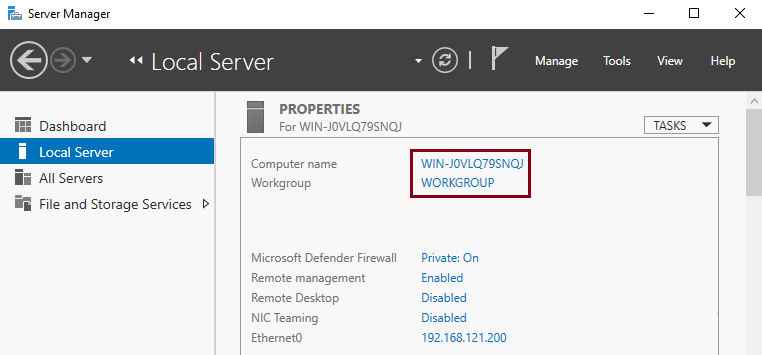
В правой части окна диспетчера перейдите в раздел Local Server и затем уже в основном окне кликните в имя сервера в строке Computer name.
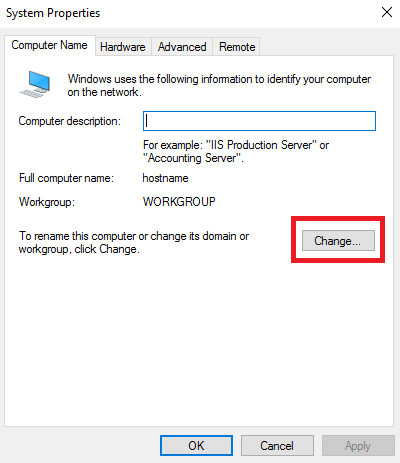
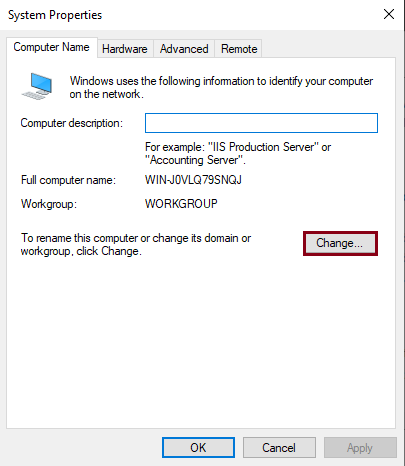
Далее, в открывшемся окне нажмите кнопку Change.
И в следующем окне внесите новое имя сервера в строку Computer name. После чего нажмите ОК.
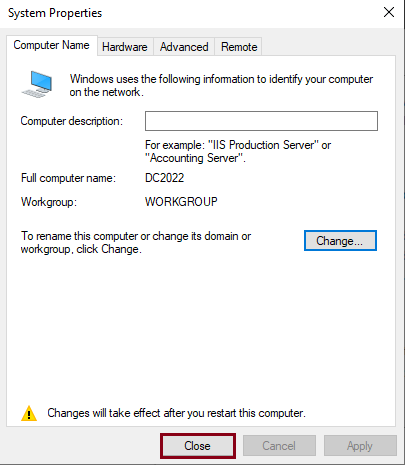
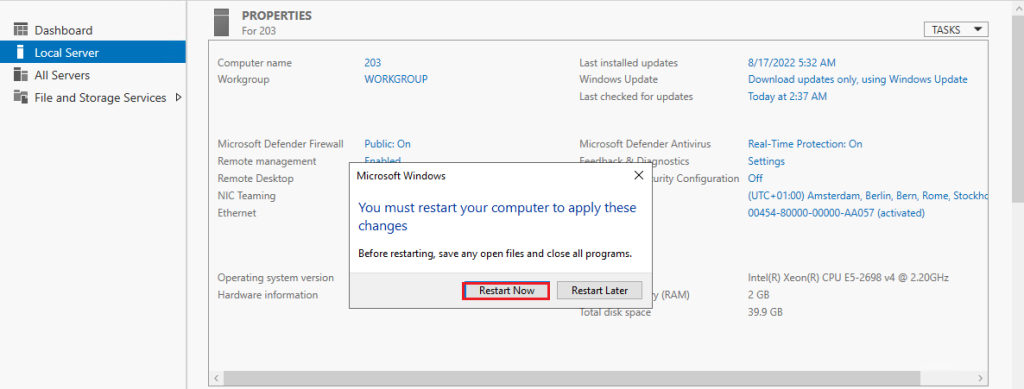
Система предупредит вас о том, что внесённые изменения вступят в силу только после перезагрузки сервера.
В результате ваш VPS изменит своё имя после того, как вы его перезапустите.
Способ второй: PowerShell
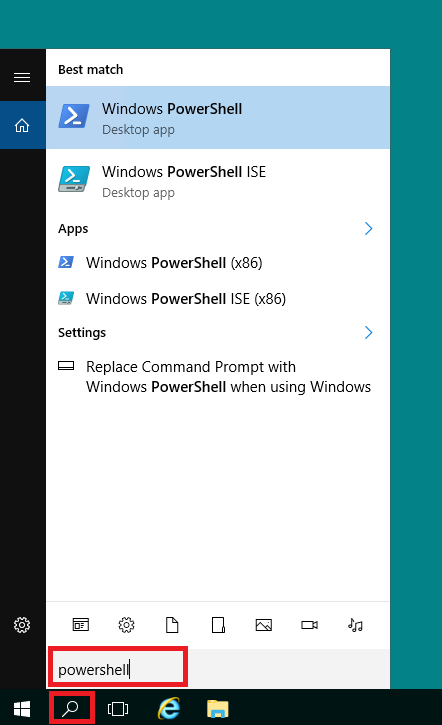
Для изменения имени сервера можно также воспользоваться командной оболочкой PowerShell. Чтобы запустить данную оболочку с строке поиска наберите powershell.
Текущее имя вашего VDS отобразится в PowerShell, если вы наберёте в командной строке следующую команду:
$env:computername
Чтобы изменить имя хоста, введите команду, которая содержит новое имя сервера и перезагружает его:
Rename-Computer -NewName "WINDOWS-SERVER" -Restart
Здесь WINDOWS-SERVER — новое имя VPS.
После того, как виртуальная машина перезагрузится, проверьте её имя при помощи знакомой уже команды:
$env:computername
Способ третий: параметры сервера
Ещё один способ изменения имени хоста — это использование параметров сервера. Что внести изменения в параметры, в стартовом меню перейдите в Settings.
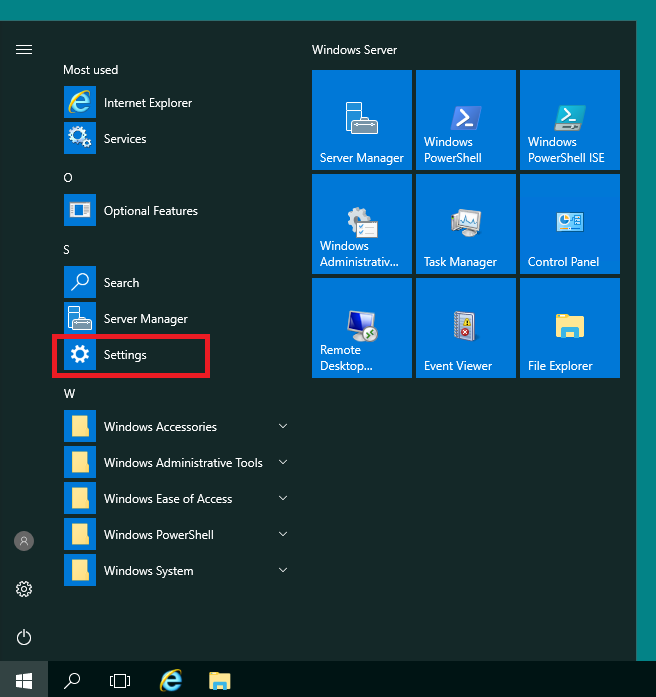
Далее, кликните в значок System.
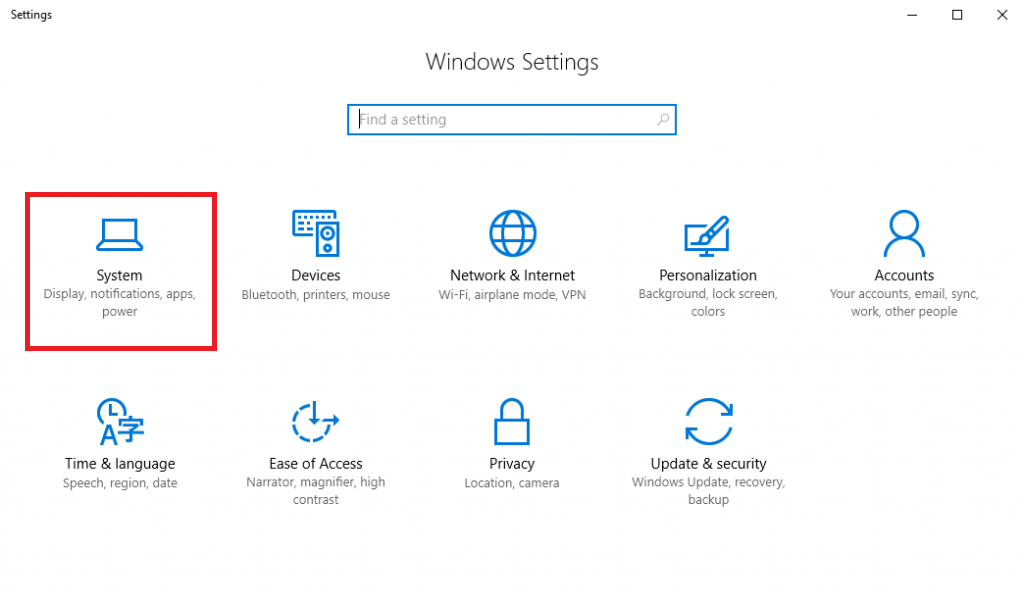
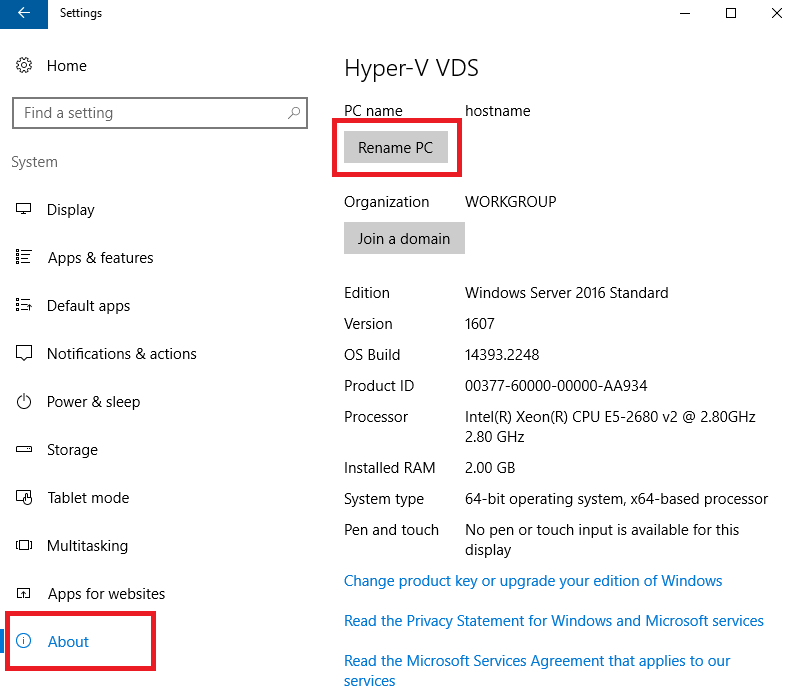
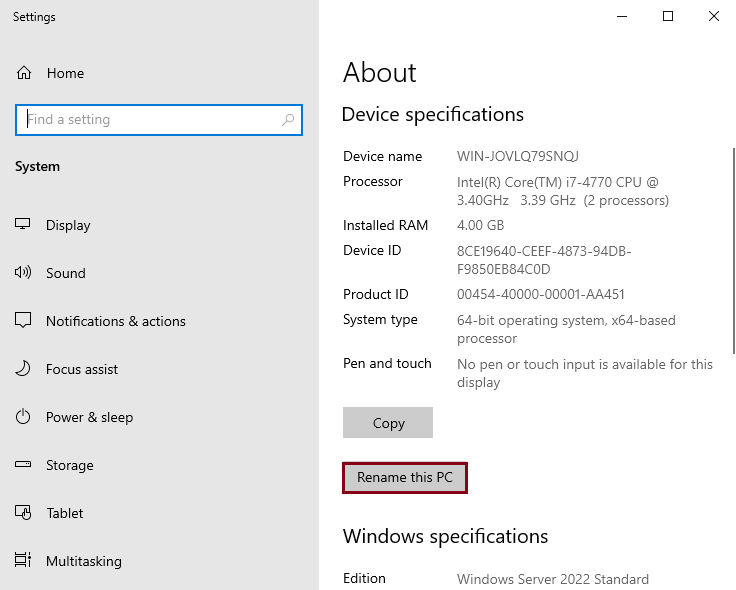
После чего перейдите в раздел About и нажмите на кнопку Rename PC.
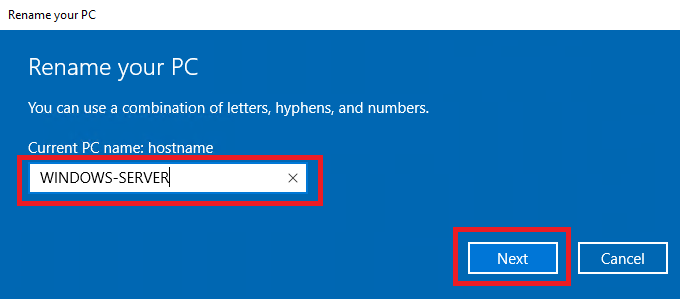
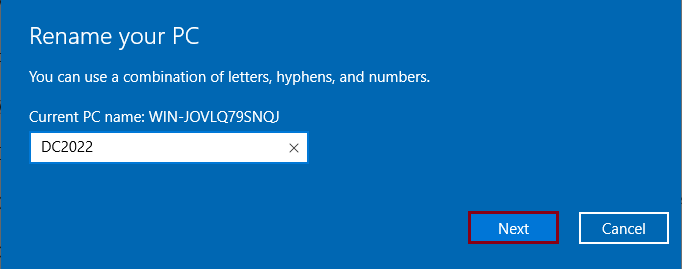
В открывшемся окне введите новое имя сервера в соответствующую строку, после чего нажмите Next.
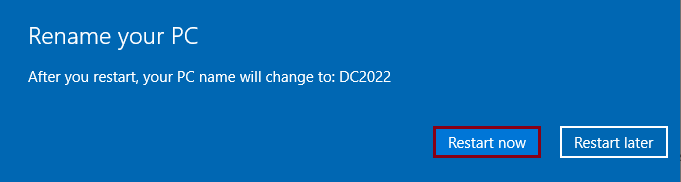
Для того, чтобы изменение имени хоста вступило в силу, необходимо перезагрузить VPS. Сделать это можно сразу же, для чего нажмите на Restart now.

Заключение
Таким образом, в статье мы показали несколько простых способов того, как изменить имя хоста в Windows Server, что является неотъемлемым этапом администрирования серверной среды. В дальнейшем применяйте любой из них на ваше усмотрение. Правильное выполнение этой процедуры поможет улучшить идентификацию сервера и его интеграцию в сеть, что в свою очередь содействует более эффективной работе вашего предприятия.
In today’s blog, I will explain how to change server name 2022 Windows Server using the server settings menu, Server Manager, Control Panel, PowerShell, and Command Prompt. You can get your computer name back to default by noting it down and following the below steps again. Let’s get started.
Table of Contents
Prerequisites
Dedicated server, Virtual Machine, or Hyper-V with Windows Server 2022 installed
I logged in to the server with an administrator account.
Change Server name via Server Manager
In the Server Manager, from the left side, select the local server and then click on the computer name.
For system properties, select the change button.
Now enter the server’s name you wish to change it to, and then select OK.
You need to restart your server to apply the changes. Select OK to restart your computer.
Click ok
Click on Restart Now.
Change Hostname Name Server 2022
Right-click on this PC’s name and then select Properties.
Under About, select Rename this PC.
Enter your new server name (DC2022) and then select Next.
Select restart now.
Select a reason to describe the reboot of the server, and then click Continue.
Change Server Name 2022 using PowerShell
In addition, you can change the server using a PowerShell command if you are more comfortable with PowerShell. Search for Windows PowerShell, right-click on the PowerShell app, and then select Run as administrator.
PowerShell Command to Change Server Name
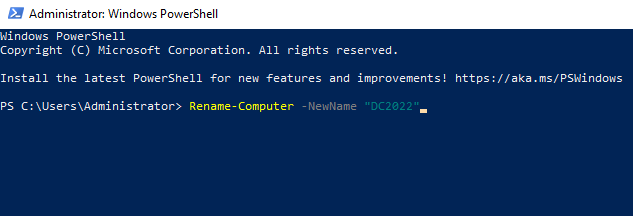
Enter the below PowerShell command in Windows PowerShell, and then the presenter. Substituting DC2022 with your preferred name.
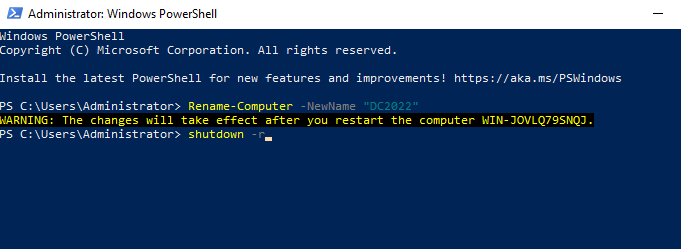
Rename-Computer -NewName “DC2022”
A server reboot required changes to take effect.
Change Server Name 2022 using Command Prompt
If you would prefer to rename the server using the command line, the command prompt is also an option. This is much easier, quicker, and more helpful if you don’t have access to the server GUI. Type CMD in the Windows Server search bar, right-click on the command prompt app, and then choose Run as administrator.
We can rename a server using the command prompt by typing the below command.
WMIC computersystem where caption=’currentname’ rename newname
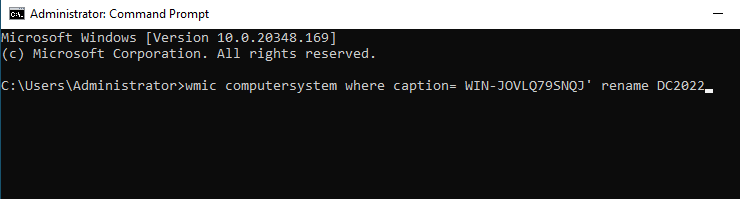
For instance, if the current server’s name is random, to rename it to DC2022, we can run the following command:.
wmic computersystem where caption= WIN-JOVLQ79SNQJ’ rename DC2022
Now you need to reboot the server to make the changes effective.
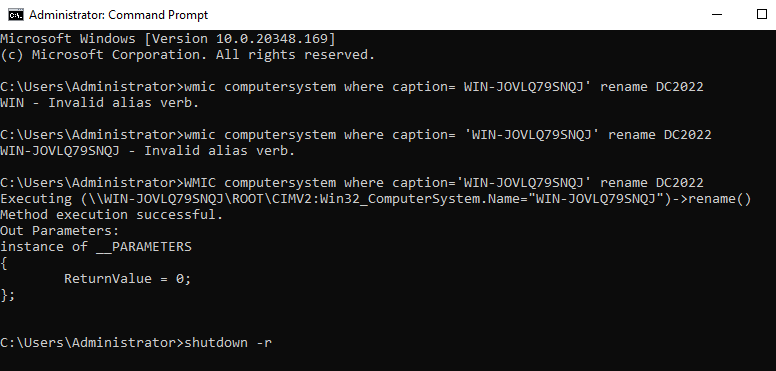
The server name has been changed after restarting.
Read this article to learn more about how to change the server name.
Conclusion
That’s all. We have learned how to change the hostname on Windows Server 2022.
Jamilhttp://jamiltech.com
A Professional Technology Blog Writer | An energetic professional with more than 20+ years of rich experience in Technology, Planning, Designing, Installation, and Networking.
Estimated reading: 4 minutes
945 views
A computer or hostname is a unique label assigned to a machine or device connected to a computer network in Windows. The hostname is assigned automatically by default. This server’s hostname, however, can be changed at any time. Most Windows users do not know how to change the computer name on the Windows Server. Changing the hostname or server name is quite an easy and simple process. This task does not need the learning of advanced skills.
Today, in this guide, we will show you how to change the server name or computer name in Windows server 2022 using two different possible methods.
Prerequisites
- Windows Server 2022 should be installed on a dedicated server, Hyper-V, or on a Virtualbox.
- The user should have administrative privileges.
We can change the computer/Server name using the following three ways:
- Change Server Name using Server Manager (Graphical User Interface)
- Change Server Name using PowerShell (Command-line)
- Change Server Name using Using the Command Prompt
Method 1: Change Server Name using Server Manager (Graphical User Interface)
Using the ‘Server Manager’ you can easily change the server name. When you start your system, it automatically launches on your desktop. Otherwise, you can also launch Windows ‘Server Manager’ from the Start menu of your Windows Server.
Click on the ‘Local Server’ from the left sidebar menu and click on the ‘Computer name’.

The ‘System Properties’ dialog appears on the screen. Click on the ‘Change’ button in the ‘Computer Name’ tab.

Enter the server name in the ‘Computer name’ field that you want to use as a server name. Further, click on ‘More’.

Enter the primary DNS suffix for your computer. Click on ‘OK’.

At this point, you need to restart your Windows Server to apply the above changes.

Now, click ‘Restart Now’ which will restart your computer right away.
To verify changes, again open the ‘Server Manager’ and you will notice that the computer name is successfully changed or updated.

Method 2: Change Server Name using PowerShell (Command-line)
You can also change the server name using PowerShell commands. Most Windows users prefer to use PowerShell while working on Windows Server. So, you need to perform the following steps to change the server name in the windows server via PowerShell:
Open the PowerShell window from the Start menu of Windows Server.
Now, use the following syntax to change the server name:
Rename-Computer -NewName [Server-name] -Force -PassThru
Replace the ‘Server-name’ with the name that you want to set for your computer. For example, here we choose the name ‘Greencloud’. Now, run the following command with administrative privileges:
Rename-Computer -NewName “Greencloud” -Force -PassThru
After running the above command following output will show on the PowerShell terminal:

To effect the changes, you must restart your computer. So, restart your system by using this command:
Restart-Computer
Method 3: Change Server Name using Using the Command Prompt
If you’d prefer to change the server name using the command line, CMD is also an option
Type Command Prompt in the Server search bar, right click on command prompt, and then select Run as administrator.

We can rename a server computer from the command prompt using WMIC computersystem command.
wmic computersystem where caption='currentname' rename newname
For example: If the current server name is Greencloud, to change it to Server 2022, we can run the following command.
wmic computersystem where caption='Server2022' rename Greencloud
After applying this command, you need to restart the server to make the changes effective.
Conclusion
We demonstrated in this guide how to change the computer or Server name in Windows Server 2022 using both methods via GUI and using command-line. Now, I hope you can easily change your server name by following the above-mentioned steps. If you feel any difficulty, you can ask any time via comments. Thanks!
Good Luck!

In Windows Server, the hostname is a unique identifier for your server on a network. By default, this name is automatically generated, but it can be changed manually at any time. Changing the server name is a simple process that can be completed via the Server Manager or through PowerShell.
Your VPS has two distinct names: the name displayed within mPanel and the hostname configured within the operating system. To modify the displayed hostname within the mPanel, please refer to this helpdesk article we have on the matter: How to rename services on BinaryLane
TABLE OF CONTENTS
- Changing Your Hostname via Server Manager (GUI)
- Changing Your Hostname via PowerShell (Command-line)
Changing Your Hostname via Server Manager (GUI)
This method uses the graphical user interface (GUI) and is one of the easiest ways to change your server’s name.
- Open Server Manager from the Start Menu (it also launches automatically on startup):

- In Server Manager, select Local Server in the left-hand menu followed by selecting the current name of your server Next to Computer name:
- In the System Properties window, under the Computer Name tab, select Change:
- Enter your desired server name in the Computer name field, then select More:
If required, enter your Primary DNS suffix for your server and select OK:
- You’ll be prompted to restart the server to apply the changes. Select OK:
- Once your system restarts, open Server Manager again to verify that the server name has been successfully updated.


Changing Your Hostname via PowerShell (Command-line)
If you prefer using the command line, PowerShell provides a faster method to rename your server.
1. Open PowerShell from the Start Menu.
2. Run the following command, replacing `[New-Server-Name]` with your desired server name:
Rename-Computer -NewName [New-Server-Name] -Force -PassThru
For example, to change the name to `Win-Server2022`, you would use:
Rename-Computer -NewName "Win-Server2022" -Force -PassThru

3. To apply the change, restart the server by running this command:
Once the system has restarted, the new server name will be in effect.
If you require assistance, feel free to submit a support ticket at our helpdesk here: Submit a ticket | BinaryLane
Changing the hostname on Windows Server versions 2012 R2, 2016, and 2019 is a straightforward process. Below is a tutorial on how to change the hostname for each of these versions.
Step 1: Log in as an Administrator
Log in to your Windows Server 2012 R2 with an administrator account. You need administrative privileges to change the hostname.
Step 2: Open System Properties
Press Win + X and select “System.” Alternatively, you can right-click on “Computer” in the Start menu and choose “Properties.”
Step 3: Change Settings
In the System Properties window, click on the “Change settings” link in the “Computer name, domain, and workgroup settings” section.
Step 4: Change the Computer Name
In the “Computer Name/Domain Changes” window, click the “Change” button.
Step 5: Enter a New Name
Enter the new hostname in the “Computer Name” field and click “OK.”
Step 6: Restart
You will be prompted to restart your computer to apply the changes. Click “OK” to restart your server.
Windows Server 2016 and 2019
The process for changing the hostname in Windows Server 2016 and 2019 is very similar to that of 2012 R2.
Step 1: Log in as an Administrator
Log in to your Windows Server 2016 or 2019 with an administrator account.
Step 2: Open System Properties
Press Win + X and select “System.” Alternatively, you can right-click on “Computer” in the Start menu and choose “Properties.”
Step 3: Change Settings
In the System Properties window, click on the “Change settings” link in the “Computer name, domain, and workgroup settings” section.
Step 4: Change the Computer Name
In the “Computer Name/Domain Changes” window, click the “Change” button.
Step 5: Enter a New Name
Enter the new hostname in the “Computer Name” field and click “OK.”
Step 6: Restart
You will be prompted to restart your computer to apply the changes. Click “OK” to restart your server.
In all three versions (2012 R2, 2016, and 2019), changing the hostname requires administrative access, and you will need to restart your server for the changes to take effect. Always ensure you have proper backups and inform relevant parties before making changes to the hostname on a production server.