
В публикации речь пойдет о методах борьбы с чрезмерным потреблением ресурса ЦП процессами WindowServer, nsurlsessiond, mdnsresponder, mds_stores, hidd, trustd и syslogd в Мак (macOS).
Обновление:
Замедление работы — следствие старения конкретного Mac-устройства и нехватки ресурсов для поддержания более ресурсоемких приложений. Это естественный процесс. Когда железо все еще можно прокачать, проблему можно решить посредством установки большего объема оперативной памяти (ОП) и замены штатного носителя данных с вращающимися элементами (HDD) на более быстрый SSD-накопитель. Но что, если производительность совершенно нового или недавно выпущенного MacBook, iMac, Mac Pro ниже чем обычно? Давайте разберемся, что к чему! Многие пользователи в подобной ситуации открывают Мониторинг Системы, чтобы изучить работу процессов на компьютере. Они обнаружат, что процесс с именем WindowServer на постоянной основе использует большую часть ресурсов ЦП. Во многих случаях, эта аномалия происходит одновременно с чрезвычайно высоким потреблением памяти. После перезагрузки Мак симптомы исчезают, но только на время, и проблема в конечном итоге возникает снова. Стоит отметить, что баг, вызываемый WindowServer, часто наблюдается на фоне непропорционального потребления ресурса ЦП следующими процессами: nsurlsessiond, mdnsresponder, mds_stores, hidd, trustd и syslogd.

Что представляет собой WindowServer в системе Mac? И почему загрузка ЦП временами так взлетает? Давайте попробуем разобраться. Перво-наперво, вот некоторые вики-материалы по этому вопросу: WindowServer — это набор служб, которые выполняют задачу управления окнами. Его также определяют как комплексный механизм, который выводит приложения на экран Mac. Коренной процесс macOS протекает между выполняемыми программами и их графическим отображением на экране. Он запускается при входе в систему и прекращается при выходе из нее. Работаете с программой? Просматривайте сайты в Интернете с помощью браузера? Увидели рекламу онлайн? Играете на компьютере? Именно WindowServer обеспечивает Вам динамический просмотр соответствующей информации. Следовательно, это чрезвычайно важный и по определению безвредный элемент системы. Это, впрочем, не означает, что он всегда работает безупречно.
Специальное предложение
Вредоносная программа, из-за которой WindowServer использует много ресурсов ЦП, может инфицировать Mac неоднократно, до тех пор, пока Вы не удалите все ее фрагменты, включая скрытые. Поэтому рекомендуется загрузить Combo Cleaner и просканировать вашу систему на наличие этих файлов. Таким образом, вы можете сократить время очистки с часов до минут.
Скачать сейчас
Узнайте как работает Combo Cleaner. Если утилита обнаружит вредоносный код, вам придется купить лицензию, чтобы избавиться от него.
Один из широко известных сценариев, при которых WindowServer потребляет слишком много ресурсов ЦП и оперативной памяти, связан с подключением внешнего монитора к компьютеру Mac. Такое неблагоприятное событие более вероятно, если это 4K монитор. Кроме того, многие пользователи отмечают появление данной проблемы после включения масштабированного разрешения на дисплее Retina. Неправильная реализация эффектов прозрачности может быть еще одной причиной нежелательной активности. Такое наслаивание факторов предполагает, что проблема может возникать тогда, когда обычный процесс визуализации графики усложняется из-за определенных настроек и регулировки разрешения. Некоторые пользователи сталкиваются с затруднениями непосредственно после обновления системы Apple до macOS Catalina 10.15 — текущей версии операционной системы. В идеале, подобный сбой не должен наблюдаться ни в одном из этих случаев, но на практике он часто возникает и требует немедленного исправления. В результате компьютер предельно загружен и работает медленнее, чем должен. Иногда этот баг вызывает kernel panics, состояние, при котором Mac выходит из строя, а отрегулировать его весьма непросто.
Опять же, беда не приходит одна. Истощение ресурса ЦП часто вызывает комплексная нагрузка, WindowServer создает только ее часть. Если перейти в меню Утилиты macOS и запустить Мониторинг Системы, можно заметить еще несколько процессов, коллективно потребляющих большую часть ресурсов центрального процессора. Вот краткое описание процессов Мак, которые имеют свойство внезапно превращаться в настоящих пожирателей ресурса ЦП:
- Nsurlsessiond. Процесс, связанный с синхронизацией изображений, контактов и прочих данных пользователя Mac с сервером iCloud.
- Mdnsresponder. Это сетевая служба с нулевой конфигурацией, которая позволяет устройствам Apple обнаруживать друг друга по одной сети и обмениваться контентом, к примеру библиотеками iTunes. Mdnsresponder является составной частью так называемого протокола Bonjour.
- Mds_stores. Это компонент средства поиска Spotlight. Одной из его функций является индексация файлов, хранящихся в Mac.
- Hidd. Аббревиатура означает «human interface device daemon» (демон интерфейса устройства пользователя). Его роль — интерпретировать все события, связанные с использованием мыши и клавиатуры.
- Trustd. Это демон, который управляет цифровыми сертификатами и проверяет их, чтобы убедиться, что текущие процессы подписаны кодом и им можно доверять. Он также проверяет, шифруют ли веб-сайты соединение и безопасны ли они для посещения.
- Syslogd. Функция процесса syslogd заключается в ведении системных журналов. Среди прочего, он выполняет сжатие этих журналов, чтобы оптимизировать их размер и убедиться, что они не занимают слишком много места на диске.
С кибер-безопасностью связан целый отдельный аспект аномальной загрузки ЦП в Mac сервисом WindowServer и процессами, перечисленными выше. Эти нарушения могут сигнализировать о присутствии определенных штаммов малвари на компьютере Mac. Маловероятно, что киберпреступники будут проводить всестороннее тестирование своего вредоносного кода, что может приводить к сбоям при закулисном проникновении в систему. Также известно, что рекламные приложения, нацеленные на веб-браузеры, тратят массу ресурсов ЦП, оказывая чрезмерную нагрузку на легитимные службы macOS. Поэтому, если рабочую мощность вашего компьютера постоянно истощают процессы, описанные в этом руководстве, проверка его на вредоносную активность так же важна, как обнаружение и устранение регулярных сбоев системы.
Удаление вручную вирусов, вызывающих проблемы с высокой загрузкой ЦП сервисом WindowServer
Изложенные ниже шаги позволят Вам удалить это зловредное приложение. Обязательно следуйте инструкциям в указанном порядке.
-
Разверните меню Переход на панели Finder Вашего Mac и выберите вкладку Утилиты, как показано ниже.

-
Найдите значок Мониторинг Системы в открытой вкладке Утилиты, и дважды щелкните его.

-
В открывшемся приложении Мониторинг системы найдите процесс, который выглядит подозрительным. Чтобы сузить область поиска, сфокусируйте внимание на незнакомых ресурсоемких процессах в списке. Имейте в виду, что название этого процесса не обязательно связано с проявлением угрозы, поэтому здесь Вам придется руководствоваться собственными оценками. Если Вы засекли нарушителя, выберите его и нажмите значок Стоп в верхнем левом углу экрана.

-
Когда появится всплывающее диалоговое окно с вопросом, уверены ли Вы, что хотите завершить проблемный процесс, выберите вариант Завершить принудительно.

-
Снова нажмите значок меню Переход панели Finder и выберите Переход к папке. Вы также можете использовать сочетание клавиш Command-Shift-G для быстрого перехода.
-
В диалоговом окне поиска папок введите /Библиотеки/LaunchAgents и нажмите кнопку Перейти.

-
Изучите содержимое папки LaunchAgents на предмет наличия сомнительных элементов. Обратите внимание, имена файлов, созданных зловредными программами, могут не выглядеть явно зловредными, поэтому следует искать недавно добавленные объекты, которые выглядят как отклонение от нормы.
В качестве иллюстрации, вот несколько примеров из LaunchAgents, связанных с распространенными инфекциями Mac: com.pcv.hlpramc.plist, com.updater.mcy.plist, com.avickUpd.plist, и com.msp.agent.plist. Если обнаружите файлы, которые не принадлежат к списку, просто перетащите их в Корзину.

-
Снова используйте функцию поиска Переход к папке чтобы перейти к папке под названием ~/Библиотеки/Application Support (обратите внимание на символ тильды, добавленный перед путем).

-
Когда откроется каталог поддержки приложений (Application Support directory), найдите в нем недавно созданные подозрительные папки и отправьте их в Корзину. Быстрый совет — ищите элементы, названия которых не имеют ничего общего с продуктами Apple или приложениями, которые Вы точно сами установили. Вот несколько примеров имен известных зловредных папок: UtilityParze, ProgressSite и IdeaShared.

-
Введите строку ~/Библиотеки/LaunchAgents (не забудьте включить символ тильды) в область поиска Переход к папке.

-
В системе отобразятся Агенты запуска (LaunchAgents), находящиеся в каталоге Home текущего пользователя. Ищите сомнительные файлы, связанные с вирусом (см. алгоритм предыдущих пунктов) и перетащите подозрительные файлы в Корзину.
 пользователя")
-
Введите /Библиотеки/LaunchDaemons в строке поиска Переход к папке.

-
В открытом окне вкладки LaunchDaemons попытайтесь определить файлы, которые зловред использует для персистентности (в данном случае, чтобы автоматически запускаться на корневом уровне). Несколько примеров таких объектов, генерируемых инфекциями Mac: com.pplauncher.plist, com.startup.plist и com.ExpertModuleSearchDaemon.plist. Немедленно удалите скомпрометированные файлы.
 пользователя")
-
Снова нажмите на значок меню Переход на панели Finder, и в перечне выберите Программы.

-
Найдите объект для приложения, которое там явно лишнее, и переместите его в Корзину. Если для подтверждения этого действия потребуется пароль администратора, просто введите его.

-
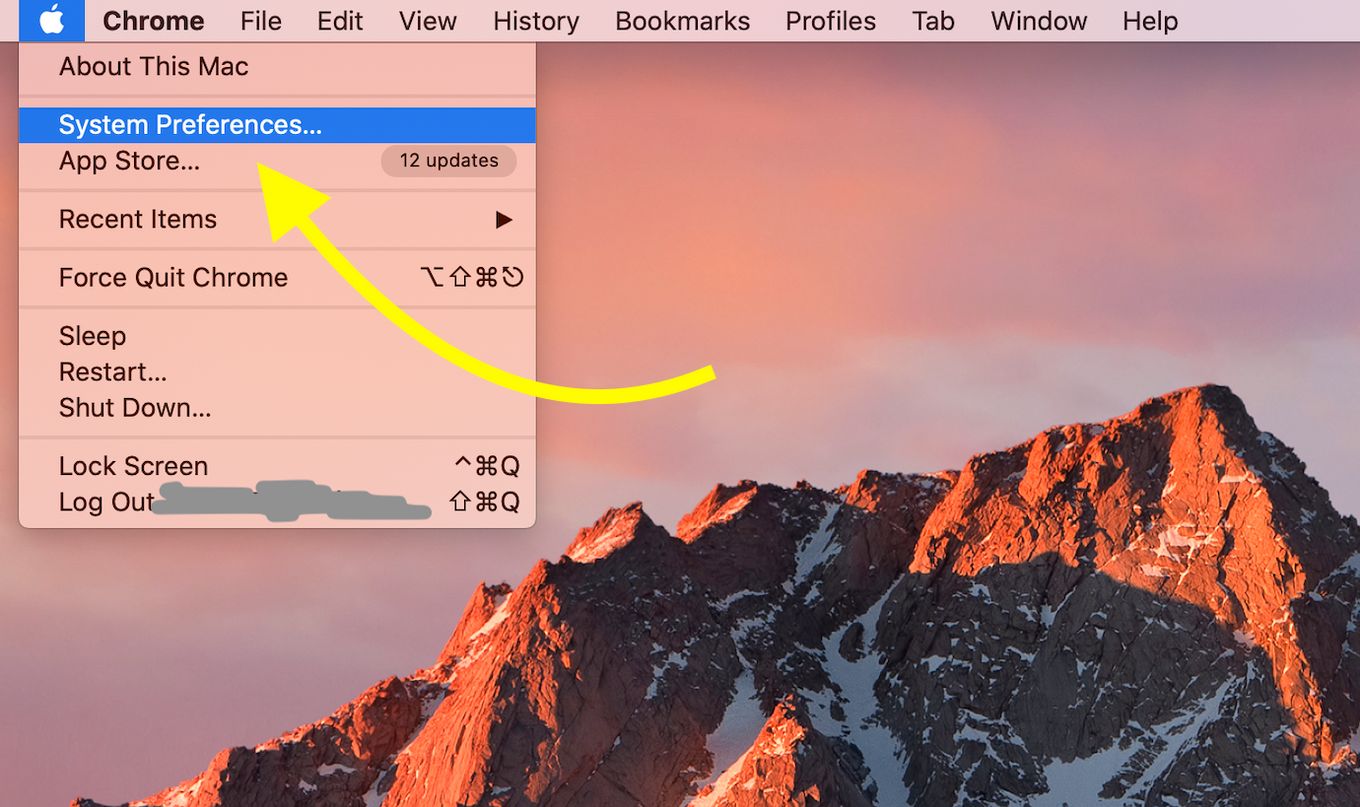
Разверните меню Apple и выберите пункт Системные настройки.


-
Откройте Пользователи и группы и щелкните вкладку Объекты входа.

Система отобразит список процессов, которые запускаются при включении компьютера. Найдите там потенциально нежелательное приложение и нажмите кнопку «-» (минус).

-
Теперь выберите Профили на вкладке Системные настройки. Ищите зловредный элемент на левой боковой панели. Несколько примеров профилей конфигурации, созданных Mac адварей: TechSignalSearch, MainSearchPlatform, AdminPrefs и Chrome Settings. Выберите зловредный элемент и нажмите на знак «минус» внизу, чтобы устранить его.


Если Ваш Mac был заражен адварей, вирус, скорее всего, по-прежнему будет контролировать веб-браузер, который Вы используете по умолчанию, даже после того, как Вы удалите базовое приложение вместе с его компонентами в разных частях системы. Воспользуйтесь приведенными ниже инструкциями по очистке браузера, чтобы устранить оставшиеся последствия этой атаки.


 пользователя")

 пользователя")


Как удалить заражение WindowServer в веб-браузере Mac
Для начала необходимо вернуть в исходное состояние первичные настройки веб-браузера, которые были нарушены вирусом WindowServer. Это удалит большинство пользовательских конфигураций, историю веб-поиска и все временные данные, которые хранятся на веб-сайтах, но зато прекратит вмешательство вируса в работу браузера. Ниже изложены шаги для выполнения этой процедуры:
- Как удлить вирус WindowServer в Safari
-
Откройте браузер и перейдите в меню Safari. Выберите Настройки в выпадающем списке.

-
После появления окна Настройки, щелкните вкладку Дополнения и активируйте опцию «Показывать меню «Разработка» в строке меню».

-
Теперь, когда пункт Разработка добавлен в меню Safari, раскройте его и щелкните Очистить кэши.

-
Далее, выберите История в меню Safari и щелкните Очистить историю в выпадающем списке.

-
В Safari появится диалоговое окно с запросом указать период времени, к которому относится это действие. Для максимального эффекта, выберите всю историю. Щелкните кнопку Очистить историю для подтверждения и выхода.

-
Вернитесь в Настройки Safari и перейдите на вкладку Конфиденциальность в верхнем меню. Найдите опцию «Управлять данными веб-сайтов» и щелкните ее.

-
В браузере появится следующее окно со списком веб-сайтов, которые хранят информацию о Вашей действиях в Интернете. Это диалоговое окно также содержит краткое описание последствий: данное действие может привести к выходу из веб-сайтов или изменению их поведения после завершения процедуры удаления данных. Если принимаете такие условия, просто щелкните кнопку Удалить все.

-
Перезапустите Safari.
-
- Как удалить WindowServer в Google Chrome
-
Откройте Chrome, щелкните значок Настройка и управление Google Chrome (⁝) в правом верхнем углу окна и выберите Настройки в выпадающем списке.

-
В открытой панели Настройки, выберите Дополнительные.
-
Промотайте вниз до раздела Сбросить настройки.

-
Подтвердите сброс настроек Chrome в появившемся диалоговом окне. По завершении процедуры, перезапустите браузер и проверьте отсутствие симптомов зловредного ПО.

-
- Как удалить WindowServer в Mozilla Firefox
-
Откройте Firefox и перейдите в Справка – Информация для решения проблем (или наберите about:support в адресной строке и нажмите Enter).


-
В открытом окне Информация для решения проблем, нажмите кнопку Очистить Firefox.

-
Выполните подтверждение заявленных изменений и перезапустите Firefox.
-


Используйте автоматический инструмент, чтобы устранить проблему WindowServer в системе Mac
Приложение для обслуживания и безопасности Mac-компьютеров под названием Combo Cleaner — это универсальное средство для обнаружения и удаления вируса WindowServer. Этот метод имеет существенные преимущества по сравнению с ручной очисткой, поскольку утилита ежечасно получает обновления вирусных баз и может точно определять даже самые новые инфекции Mac.
Кроме того, автоматическое решение найдет основные файлы вредоносного ПО в глубине структуры системы, что может оказаться довольно трудоёмким при ручном поиске. Вот пошаговое руководство для решения проблемы WindowServer с помощью Combo Cleaner:
-
Скачайте установщик Combo Cleaner. Когда сделаете это, сделайте двойной клик на файл combocleaner.dmg и следуйте инструкциям по установке программы на Ваш Mac.
Скачать Combo Cleaner
Загружая любые приложения, рекомендованные на этом сайте, вы соглашаетесь с нашими Условиями and Политикой Конфиденциальности. Бесплатный сканер проверяет, заражен ли ваш Мак. Чтобы избавиться от вредоносных программ, вам необходимо приобрести Премиум-версию Combo Cleaner.
-
Откройте приложение с Панели запуска и дайте ему запустить обновление своей вирусной базы, чтобы убедиться, что оно сможет идентифицировать последние угрозы.
-
Нажмите кнопку Start Combo Scan (Начать Сканирование), чтобы проверить ваш Mac на наличие вредоносных действий и проблем с производительностью..

-
Изучите результаты сканирования. Если в отчете написано “No Threats” (Нет угроз), то Вы правильно произвели ручной очистку и можете перейти к приведении в порядок Вашего веб-браузера, который, в свою очередь, может продолжать содержать последствия атаки вредоносного ПО (см. Инструкции выше).

-
Если Combo Cleaner обнаружил вредоносный код, нажмите кнопку Remove Selected Items (Удалить Выбранные Объекты) и удалите силами утилиты зловредный WindowServer вместе с любыми другими вирусами, PUP (потенциально нежелательными программами) или ненужными файлами, которые не принадлежат вашему Mac..

-
После того как вы дважды убедились, что вредоносное приложение удалено, в Вашем списке может всё ещё оставаться устранение неполадок на уровне браузера. Если ваш любимый браузер затронут, обратитесь к предыдущему разделу этой инструкции, чтобы вернуться к беспроблемному веб-серфингу.


After reading a few other posts I’ve decided to start off by attaching an EtreCheck report. Little to no other activity is occuring while the WindowServer is at such a high CPU consumption. Certainly acts sluggish trying to launch apps and switching between users can produce a gray screen of death, just goes to a gray screen, never recovers. Seems really strange to me. Any help is greatly appreciated.
Hardware Information:
MacBook Pro (13-inch, Mid 2010)
MacBook Pro — model: MacBookPro7,1
1 2.4 GHz Intel Core 2 Duo CPU: 2 cores
8 GB RAM
Video Information:
NVIDIA GeForce 320M — VRAM: 256 MB
Audio Plug-ins:
BluetoothAudioPlugIn: Version: 1.0
AirPlay: Version: 1.9
AppleAVBAudio: Version: 2.0.0
iSightAudio: Version: 7.7.3
Startup Items:
NMTCPSettingsTuning — Path: /System/Library/StartupItems/NMTCPSettingsTuning
System Software:
OS X 10.9 (13A603) — Uptime: 14 days 12:28:56
Disk Information:
WDC WD5000BPKT-00PK4T0 disk0 : (500.11 GB)
EFI (disk0s1) <not mounted>: 209.7 MB
Macintosh HD (disk0s2) /: 499.25 GB (155.32 GB free)
Recovery HD (disk0s3) <not mounted>: 650 MB
MATSHITADVD-R UJ-898
USB Information:
Apple Inc. Built-in iSight
Western Digital My Book 1110 999.5 GB
EFI (disk1s1) <not mounted>: 209.7 MB
MyTimeMachine (disk1s2) /Volumes/MyTimeMachine: 999.16 GB (657.63 GB free)
Apple, Inc. Keyboard Hub
Apple, Inc Apple Keyboard
Apple Computer, Inc. Apple Cinema HD Display
Apple Internal Memory Card Reader
Apple Inc. BRCM2046 Hub
Apple Inc. Bluetooth USB Host Controller
Apple Computer, Inc. IR Receiver
Apple Inc. Apple Internal Keyboard / Trackpad
FireWire Information:
Thunderbolt Information:
Kernel Extensions:
com.wavtap.driver.WavTap (1.6.6)
com.bresink.driver.BRESINKx86Monitoring (7.0)
Problem System Launch Daemons:
Problem System Launch Agents:
Launch Daemons:
[loaded] com.adobe.fpsaud.plist
[loaded] com.google.keystone.daemon.plist
[loaded] com.microsoft.office.licensing.helper.plist
[loaded] com.sierrawireless.SWoCTool.plist
Launch Agents:
[loaded] com.google.keystone.agent.plist
User Launch Agents:
[loaded] com.adobe.ARM.[…].plist
[failed] com.google.GoogleContactSyncAgent.plist
User Login Items:
GrowlHelperApp
GrowlHelperApp
iTunesHelper
Spark Daemon
AdobeResourceSynchronizer
Alarm Clock
Evernote
EvernoteHelper
Dropbox
Google Chrome
TrapsMonitor
3rd Party Preference Panes:
Flash Player
Flip4Mac WMV
Growl
Printopia
Internet Plug-ins:
AdobePDFViewer.plugin
AdobePDFViewerNPAPI.plugin
Default Browser.plugin
DirectorShockwave.plugin
Flash Player.plugin
FlashPlayer-10.6.plugin
Flip4Mac WMV Plugin.plugin
Google Earth Web Plug-in.plugin
googletalkbrowserplugin.plugin
iPhotoPhotocast.plugin
JavaAppletPlugin.plugin
npgtpo3dautoplugin.plugin
o1dbrowserplugin.plugin
QuickTime Plugin.plugin
RealPlayer Plugin.plugin
SharePointBrowserPlugin.plugin
Silverlight.plugin
Unity Web Player.plugin
User Internet Plug-ins:
Bad Fonts:
None
Time Machine:
Skip System Files: NO
Mobile backups: ON
Auto backup: YES
Volumes being backed up:
Macintosh HD: Disk size: 499.25 GB Disk used: 343.93 GB
Destinations:
MyTimeMachine [Local] (Last used)
Total size: 999.16 GB
Total number of backups: 34
Oldest backup: 2013-10-26 02:26:00 +0000
Last backup: 2013-11-22 01:58:55 +0000
Size of backup disk: Too small
Backup size 999.16 GB < (Disk used 343.93 GB X 3)
Time Machine details may not be accurate.
All volumes being backed up may not be listed.
Top Processes by CPU:
35% WindowServer
4% PluginProcess
1% EtreCheck
1% Microsoft Word
0% ocspd
0% notifyd
0% securityd
0% softwareupdated
Top Processes by Memory:
197 MB Safari
197 MB WindowServer
170 MB Mail
156 MB Evernote
98 MB mds_stores
98 MB Finder
90 MB Preview
66 MB Calendar
66 MB com.apple.WebKit.WebContent
66 MB Microsoft Word
Virtual Memory Statistics:
885 MB Free RAM
2.37 GB Active RAM
1.72 GB Inactive RAM
1017 MB Wired RAM
20.52 GB Page-ins
2.25 GB Page-outs
Mac OS WindowServer process supports each activity on the device. Many users do not notice it as it runs silently in the background.
Windowserver process on the Mac, however, can sometimes consume a lot of resources (specially CPU usage) and therefore it can slow down your computer.
The WindowsServer CPU usage increases due to a variety of reasons such as having many windows open. But… what is exactly the WindowServer process on a Mac?
What Is Windowserver On Mac?
WindowServer is a process on Mac that facilitates communication between displays and apps. All open apps are rendered on display by this process. Simply put, when you have your Mac open, it is the Windowserver Mac responsible for allowing you to see it on your device.
A simpler way of answering the question of what is Windowserver on Mac is: Windowservers on Mac enable your machine to run smoothly by providing a communication mechanism between the display and apps.
It is what allows Mac users to see whatever is running on the machine.
Windowserver on Mac is responsible as well for redrawing your screen whenever you switch to another tab in Safari, moving open windows around, or editing videos or images.
Users need to know what Windowserver on Mac is to understand the implications of running too many apps or opening too many windows all at the same time.
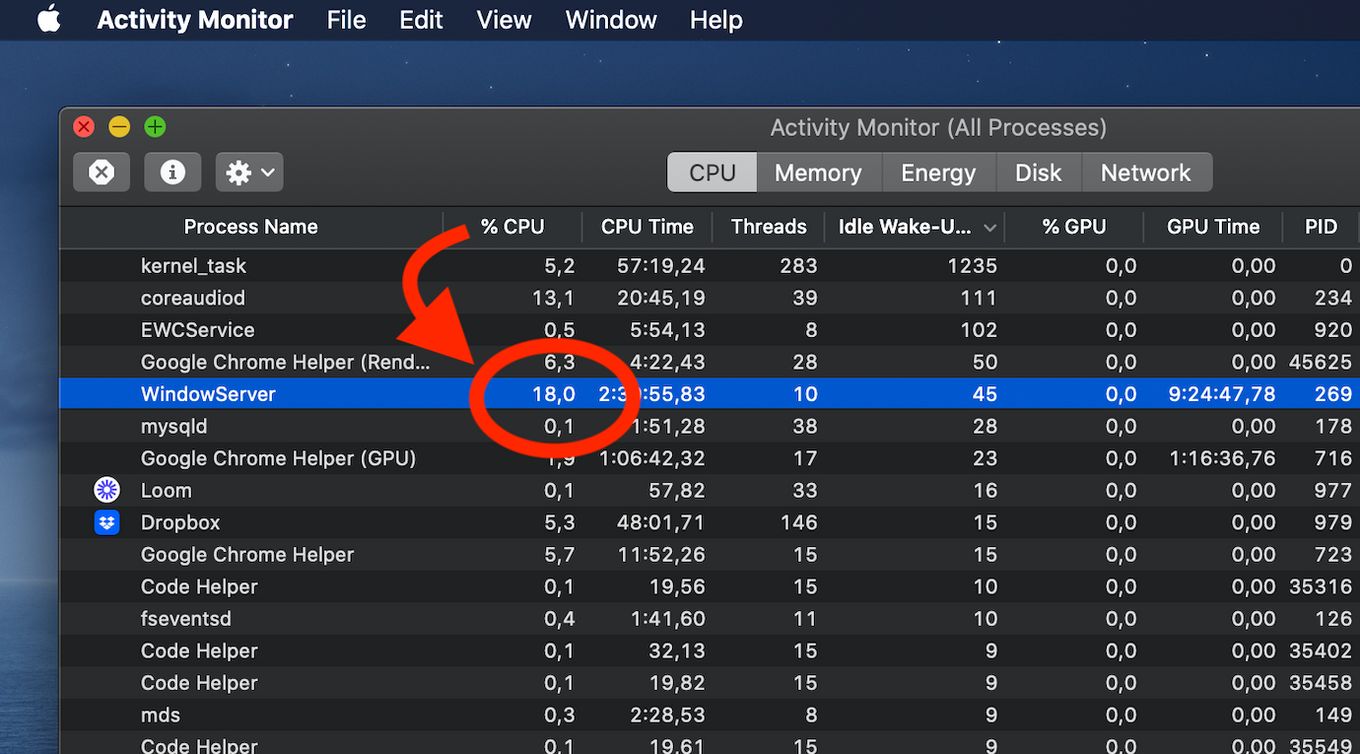
Where Do You Find Windowserver CPU usage?
Your WindowServer on Mac might consume a high CPU load because you have multiple folders or files cluttering up the desktop screen.
Enabling visual effects like Motions and Transparency also results in multiple displays, which increases the WindowServer Mac CPU usage.
Here’s how you can check the CPU usage of Windowserver on your Mac.
Step 1: Open the Spotlight Search by pressing Command + Spacebar

Step 2: Type “Activity monitor” and press enter
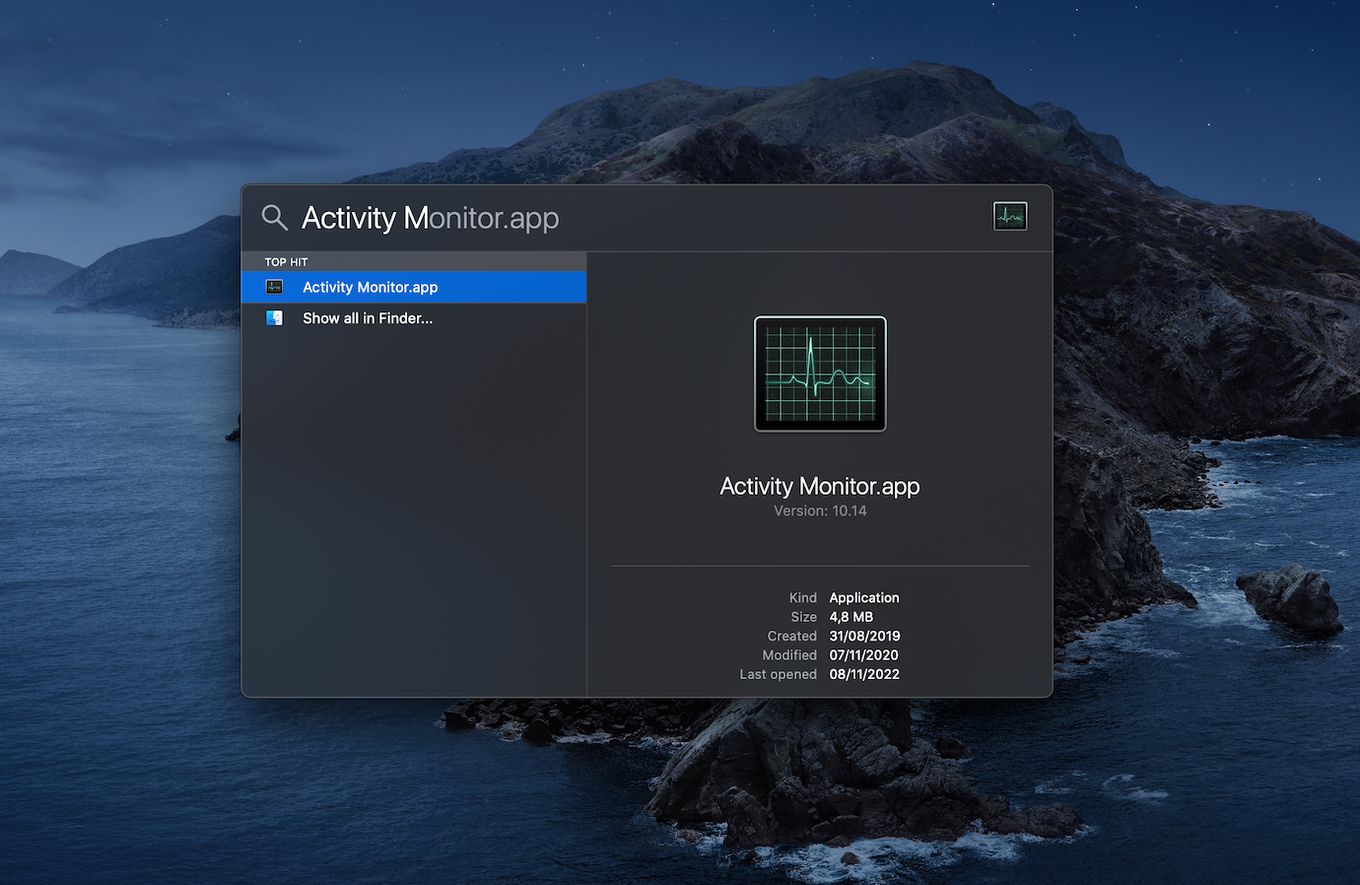
Step 3: Open the active processes by clicking on the “CPU” tab
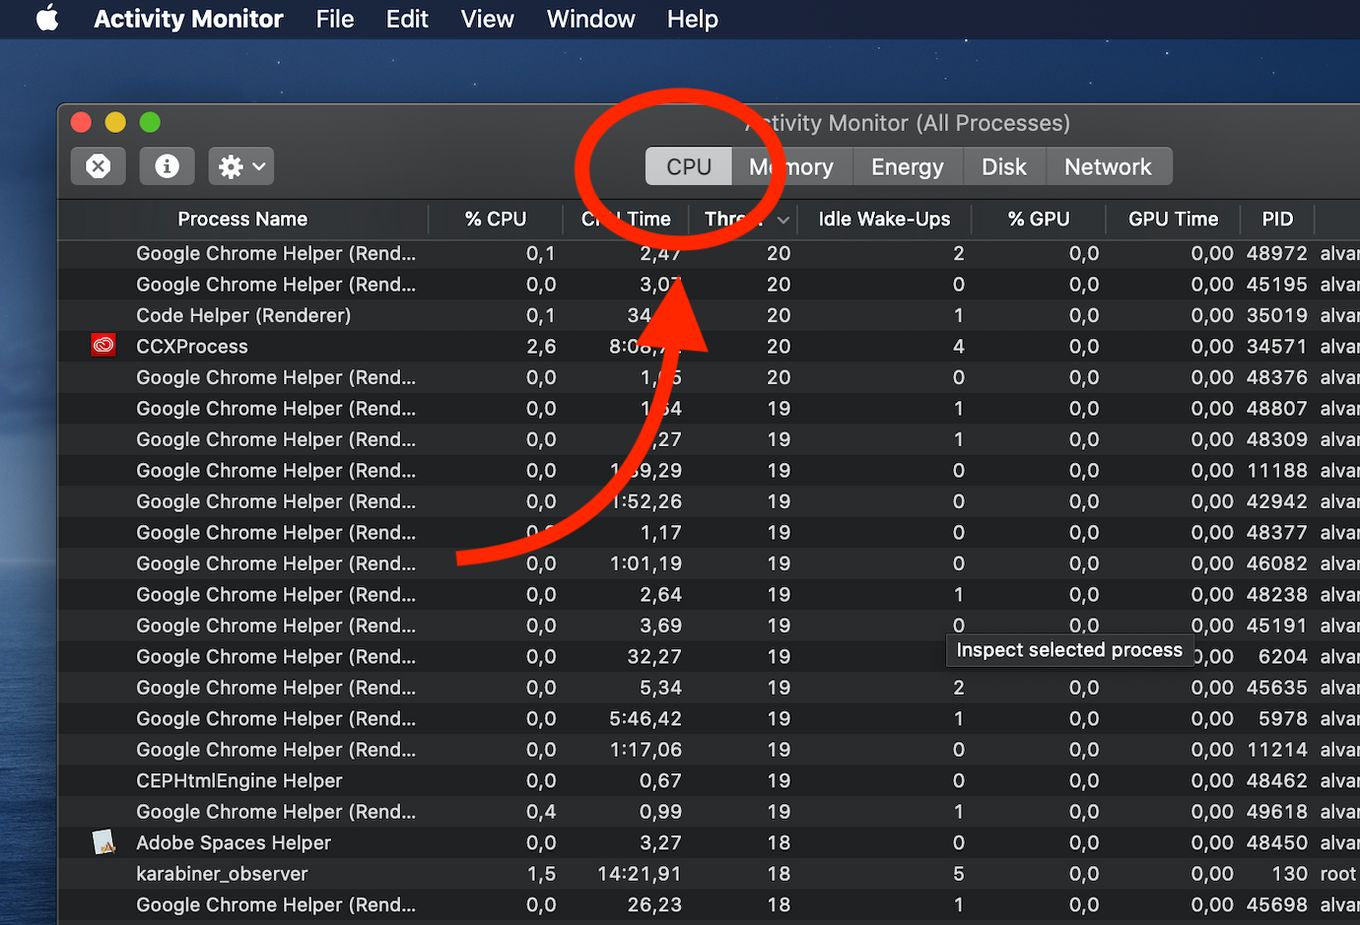
Step 4: Search for the “WindowServer” among the list of processes
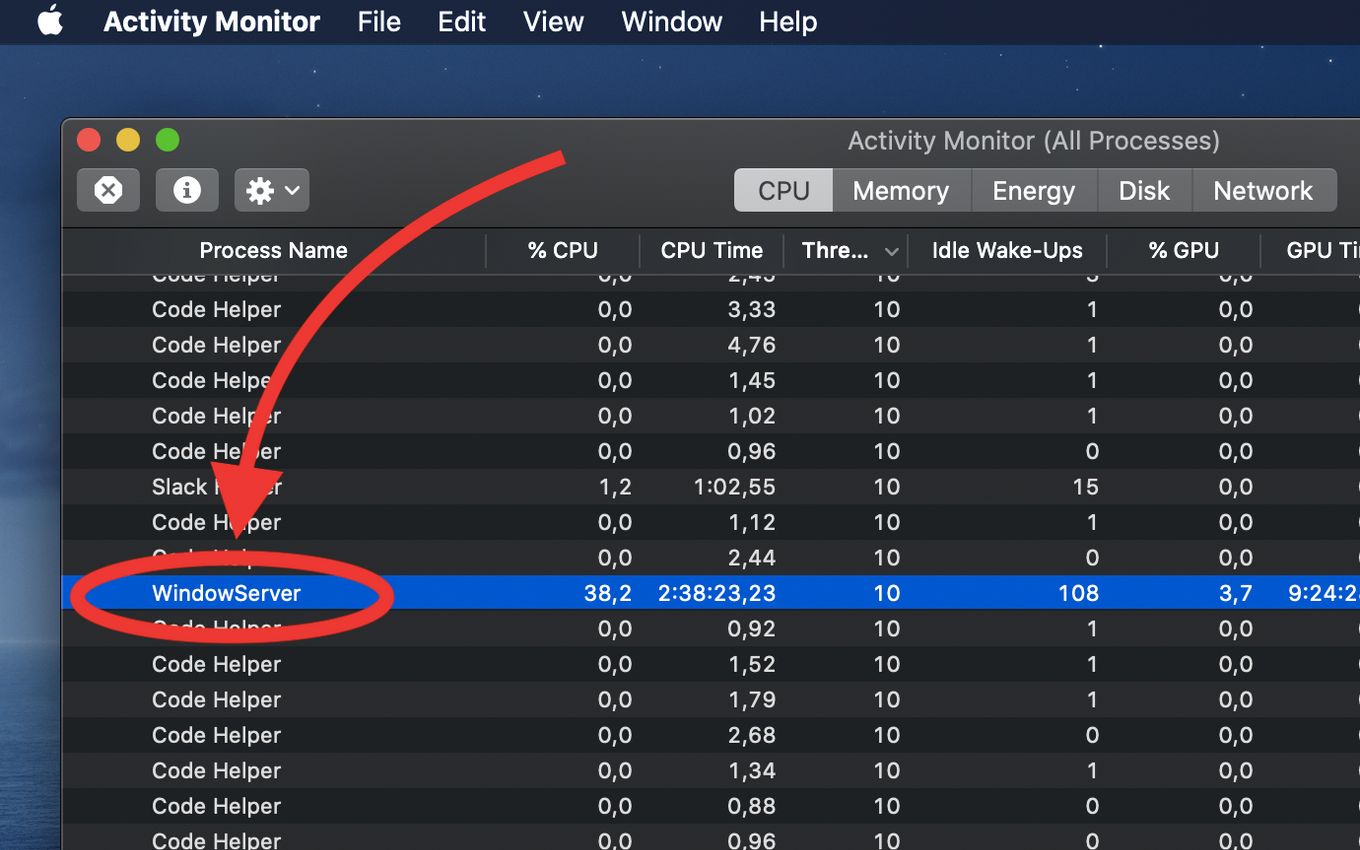
Step 5: Look for the “CPU percentage” of the Windowserver
9 Ways To Reduce the High CPU Usage of Windowserver on Mac
Having high CPU usage is relatively normal, but it can be concerning in some cases. This increased usage may cause your MAC to lag frequently. High CPU usage can also make it difficult for your device to perform even the simplest tasks.
Ideally, the Windowserver on your Mac should not take up more than 30%of CPU resources.
Below are some steps you can follow when you want to fix the high CPU usage of the Windowserver on your Mac.
Solution 1. Close Unnecessary Windows
Having many open windows makes WindowServer work harder. This is especially true if you’re using an older Mac device.
To reduce the overall load on your Mac system, you should also close all browser tabs you aren’t using.
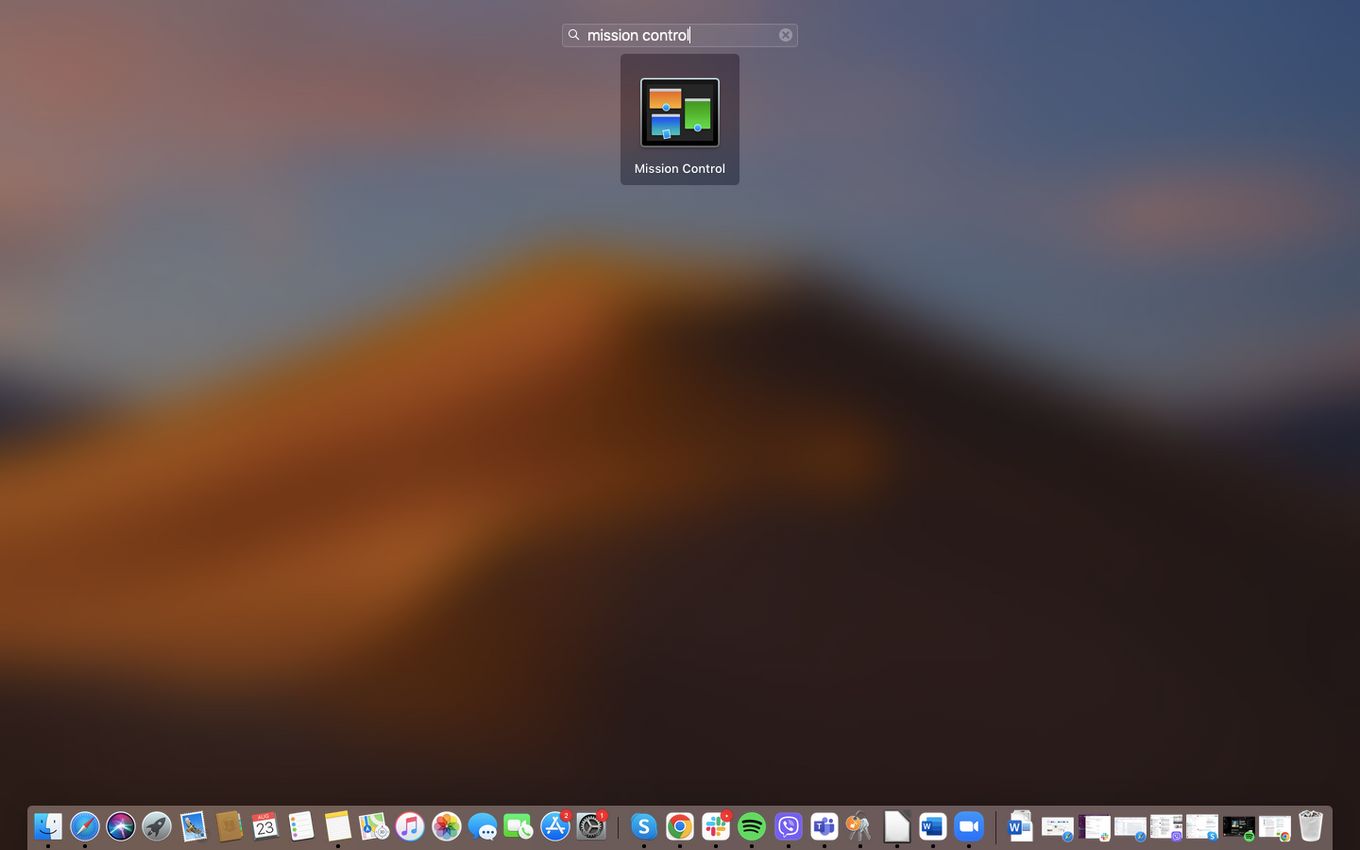
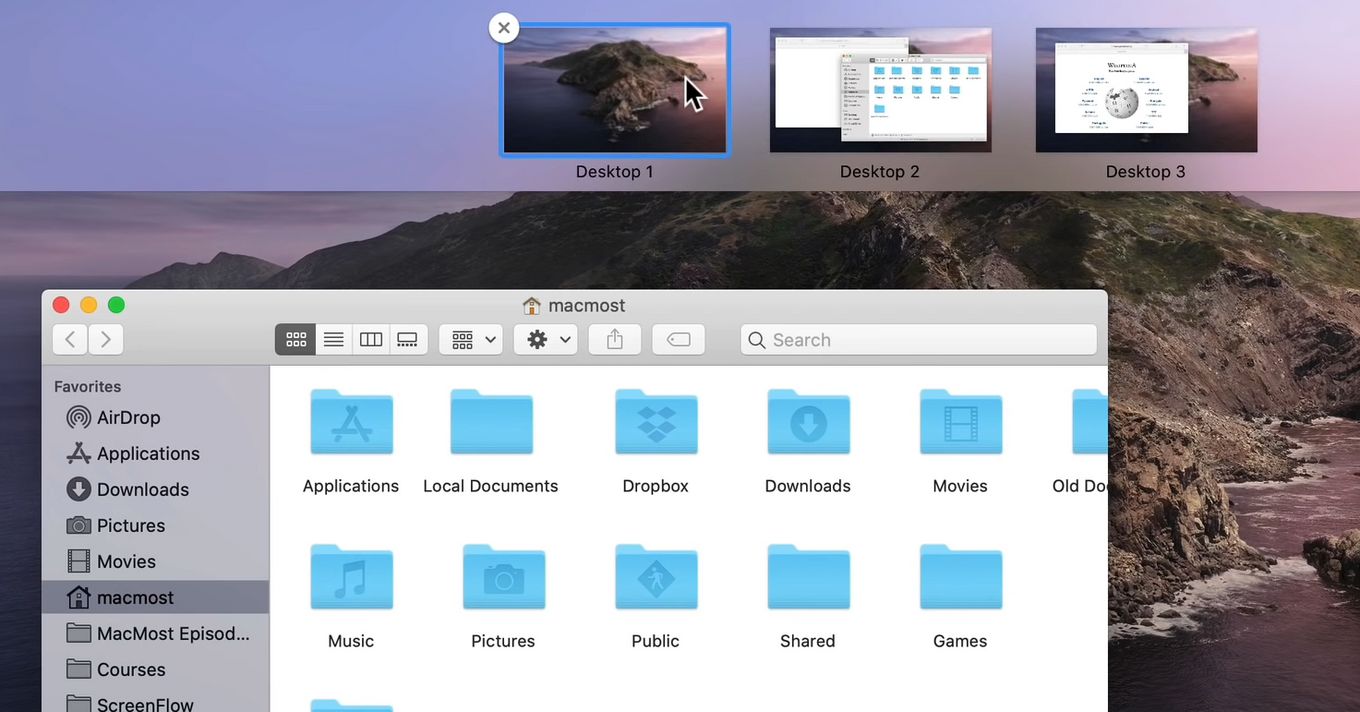
Solution 2. Close Additional Desktops
You can also lower the Windowserver on Mac CPU usage by closing additional desktops. Here’s how.
-
Step 1: Go to the Dock and click the “Launchpad” Icon

-
Step 2: Choose “Mission Control”
-
Step 3: Use the mouse pointer to hover over unattended desktops
-
Step 4: Close it by clicking on ‘X’ in the upper corner of the desktop

Solution 3. Reduce Transparency And Motion
Some visual effects settings on Mac devices are automatically enabled including Transparency and Motion. This allows Mac users to experience an enhanced visual experience overall.
Automatic enabling of visual settings, however, consumes a greater amount of CPU power. You may be able to avoid this problem by reducing these features.
You can follow these steps.
-
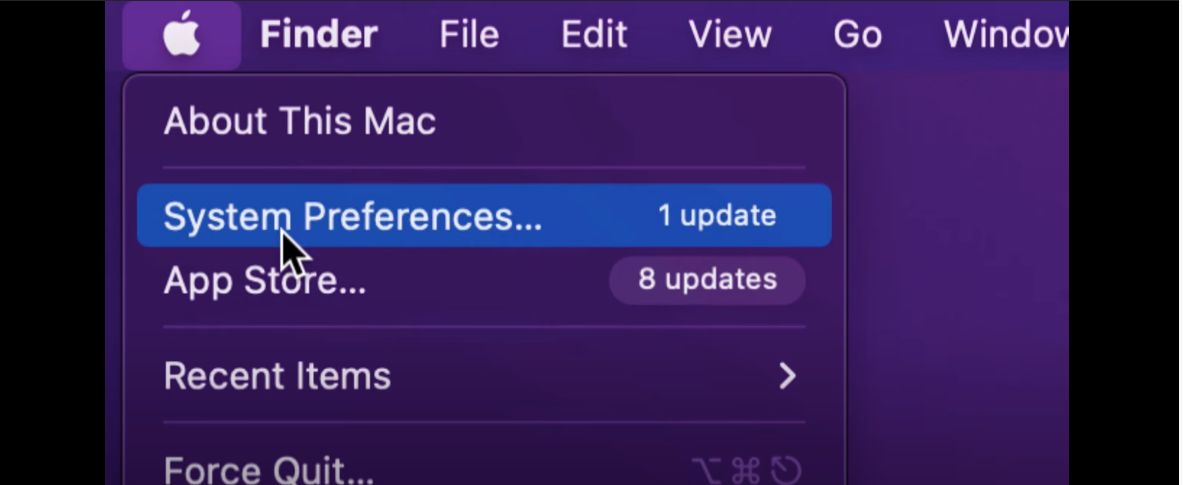
Step 1: Click on the “Apple Logo” found at the top left of your device’s screen
-
Step 2: Click “System Preferences”
-
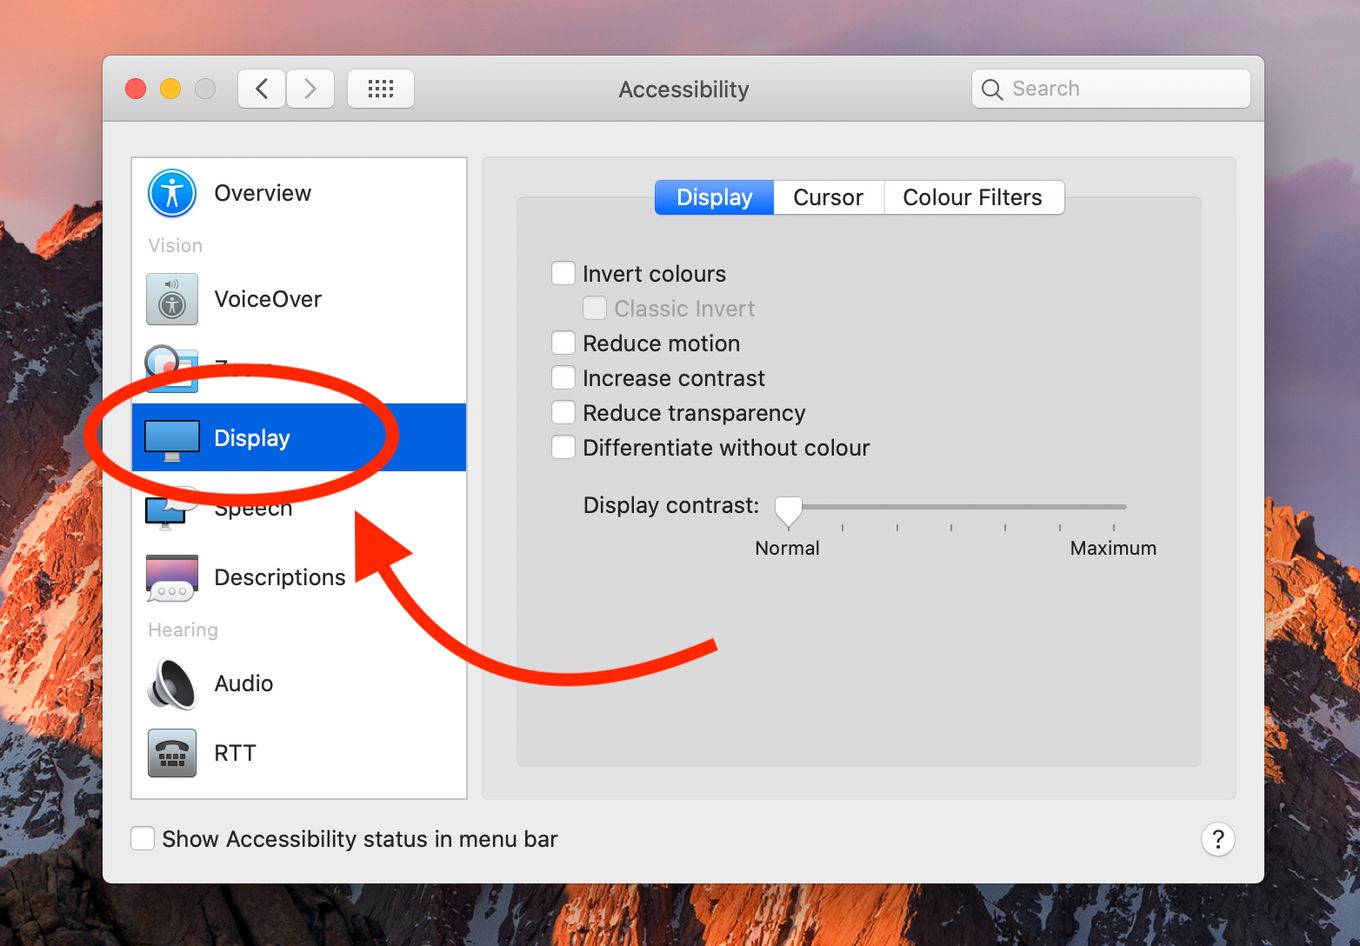
Step 3: Double-click the “Accessibility” icon
-
Step 4: Click the “Display” option from the left panel
-
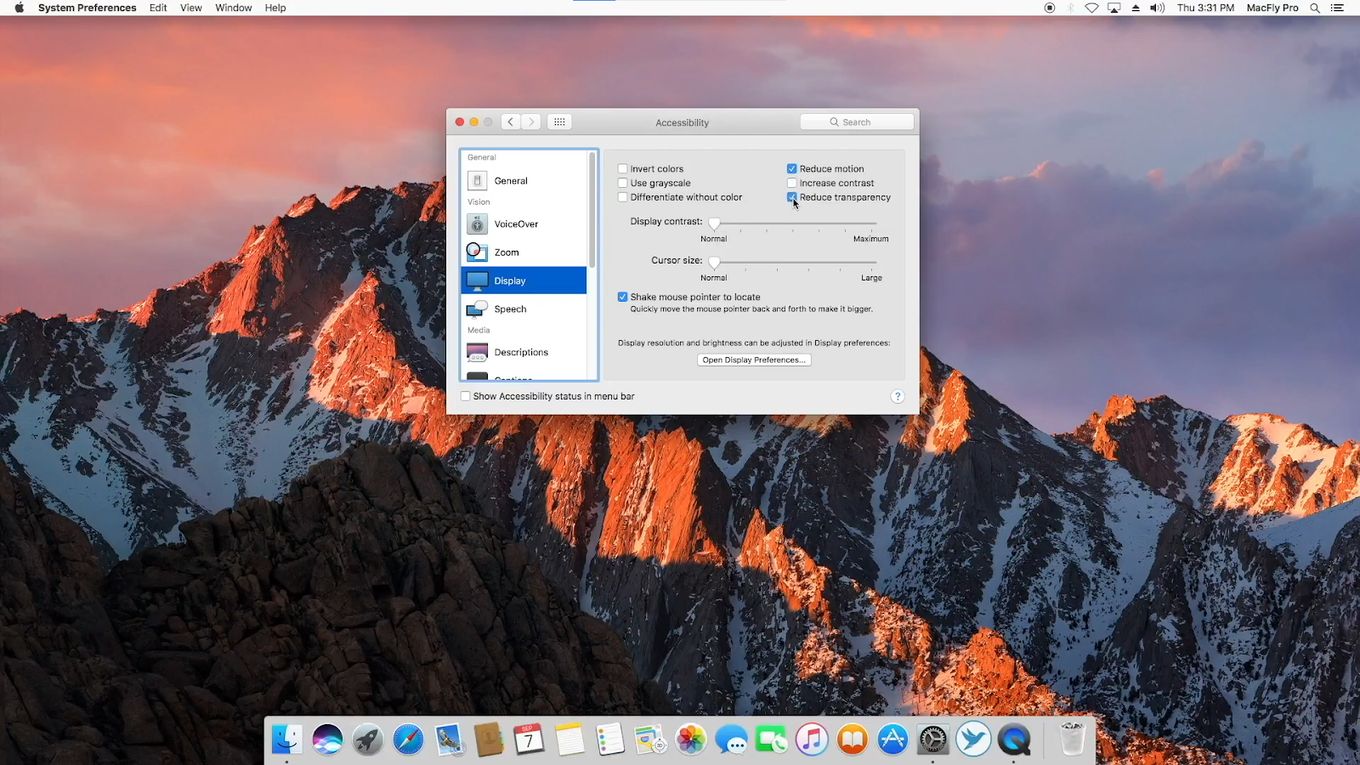
Step 5: Tick the boxes for “Reduce Motion” and “Reduce Transparency”
Solution 4. Clear Files
Aside from the disorganization of having plenty of files on your Mac device, it can also increase the CPU usage of your WindowServer.
This is because more visual elements are required as the number of files increases.
To prevent this from happening, you should either move all these files to a new folder or remove them from the desktop. This will allow you to significantly decrease the Windowserver CPU usage.
Solution 5. Uninstall Corrupt Applications
Sometimes, your Mac may be experiencing performance problems due to a corrupt application. It can also be consuming a lot of CPU energy and usage.
Try reverting to when the application was last installed and see if the problem occurred recently. See if your issue can be fixed by locating and uninstalling it from your device.
Follow these steps:
-
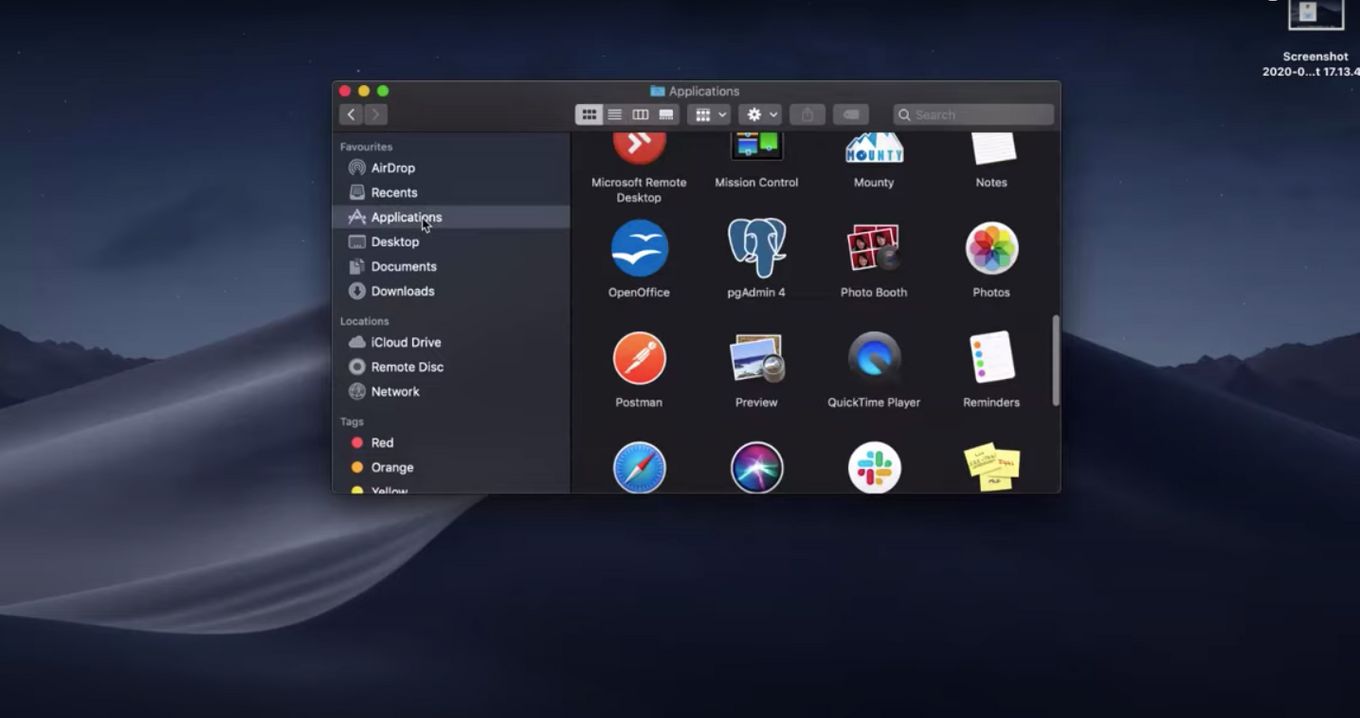
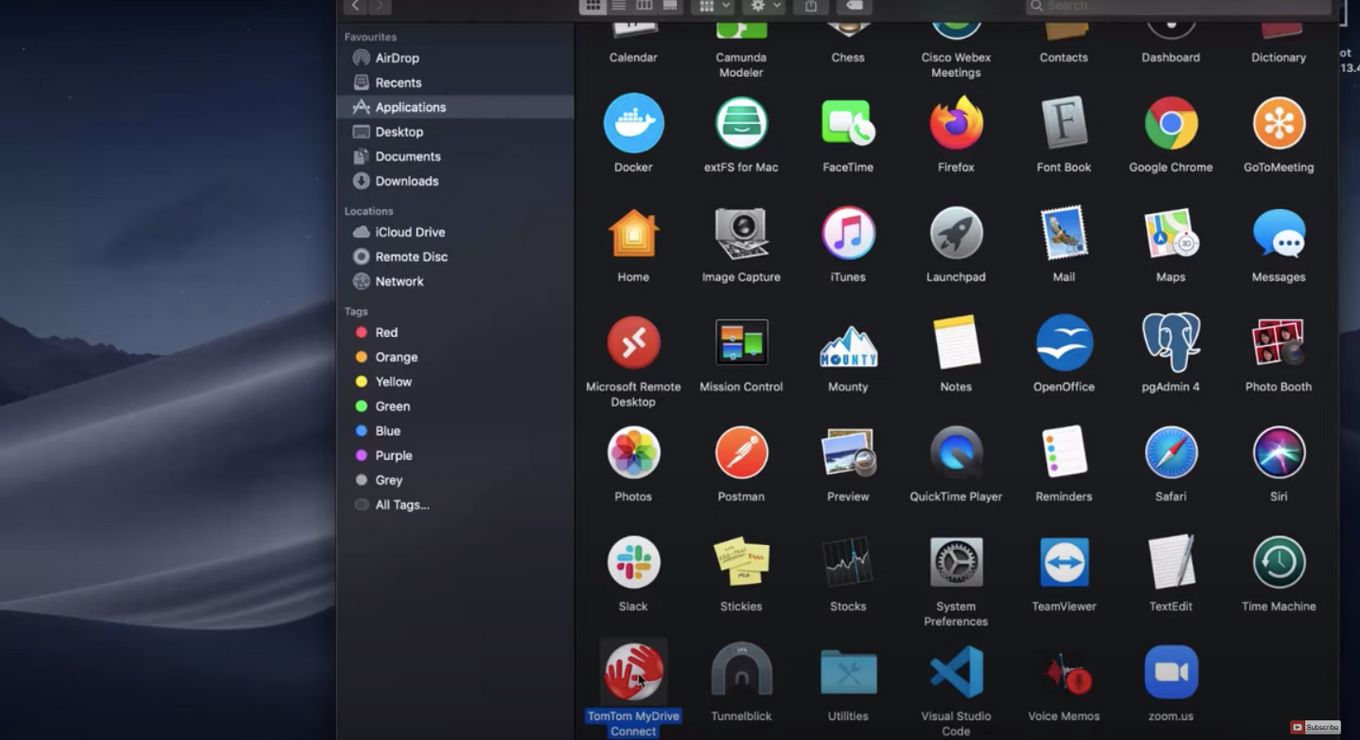
Step 1: Go to “Finder”
-
Step 2: Click “Applications”
-
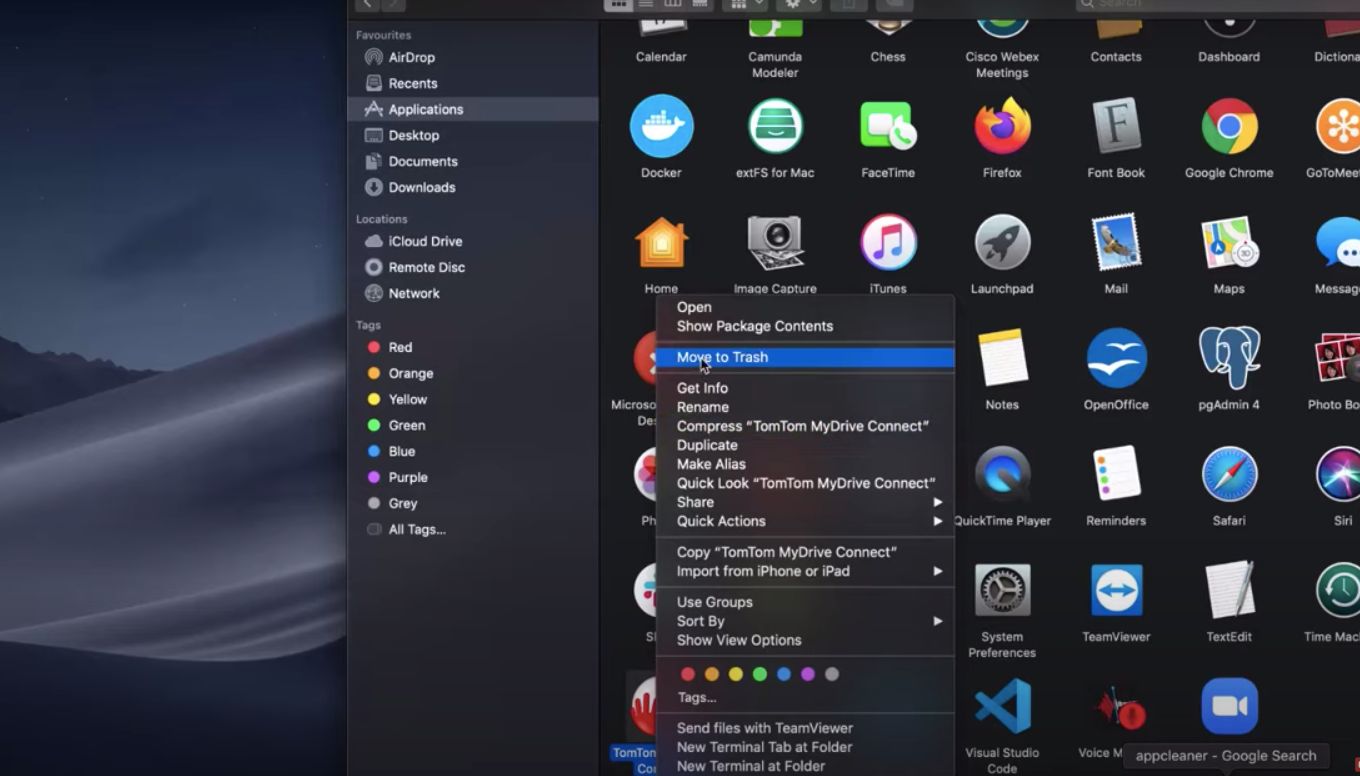
Step 3: Select the problematic app by command-clicking it
-
Step 4: Choose “Move to Trash” option from the list

Solution 6. Turn Off Multiple Displays
Having more than one monitor connected to your device might also be causing the heavy CPU consumption of the WindowsServer on Mac.
The process is heavily affected by this factor given that external monitors lack a separate graphics processor unit or more commonly known as GPU.
This means that your device is taking care of all the graphical and visual processing.
Thus, your WindowServer on Mac is taking up an extraordinarily heavy CPU load. Taking out the external monitor may result in a decrease in CPU usage.
Related article: Mac stuck on “Checking for Updates”
Solution 7. Ensure That The System Software Is Updated
In many cases, system errors or bugs might be infiltrating the current version of your Mac.
This then might result in an even higher load on your process.
In order to prevent such issues, you should ensure that your Mac’s system software is up to date.
Here’s how to ensure the software is updated.
-
Step 1: Click the Apple logo on the upper left of your screen
-
Step 2: Go to the “System Preferences” option
-
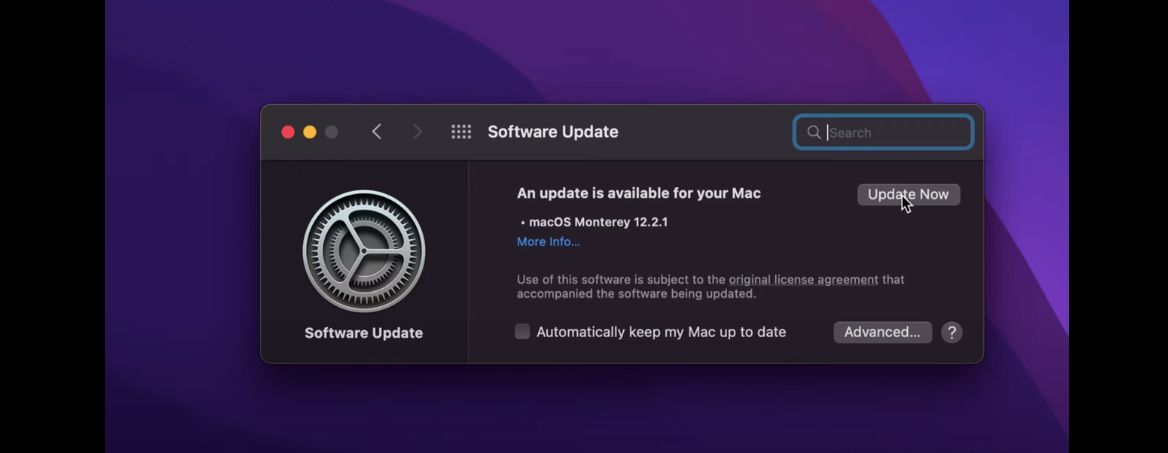
Step 3: Go to “Software Update”
-
Step 4: Click the “Update Now” button if an update is available

Solution 8. Restarting Your Mac
Many Mac users do not shut down or restart their devices. They simply close the lid of their device after they’re done working and simply open it again.
Restarting, however, is essential as it deletes temporary files and cache, and frees up RAMs.
It can also fix problems such as too many CPU cycles being consumed by certain processes. Do your device a favor and shut down or restart your Mac now and then instead of simply putting it to sleep.
Solution 9. NVRAM/SMC Reset
You can also opt to reset your MAC’s NVRAM or SMC if it continuously fails to respond or still lags.
There is evidence that these resets help resolve minor issues and improve the smooth operation of your Mac.
To Reset NVRAM, Follow These Steps:
-
Step 1: Turn off your Mac by clicking the “Shut Down” option in the Apple Logo Menu.
-
Step 2: Press and hold down for roughly 10 seconds “Command + Option + P + R” keys
-
Step 3: Upon hearing the startup sound from your Mac, release all the keys.


To Reset SMC Follow These Steps:
-
Step 1: Shut down your Mac by clicking the “Shut Down…” option in the Apple Logo Menu.
-
Step 2: Press and hold simultaneously the “Shift + Option + Control + Power” buttons
-
Step 3: Release the keys and turn the power on again.


Is WindowServer On Mac A Virus?
The WindowServer On Mac is not a virus and is completely safe. The most important thing to know is that WindowServer on Mac is what every application you use on the device needs to display its content on the screen.
Why Does Windowserver Run On Mac?
The Windowserver process on Mac is the process that is responsible for managing the graphical interface as well as the overall visual appearance of the Mac. Without this process, your device may not run smoothly. Neither will you be able to view anything on your Mac dynamically.
The Windowserver on Mac plays a significant yet harmless role in the operating system.
Should You Stop Windowserver From Running On Your Mac?
No, experts do not recommend quitting the WindowServer on the Mac process given its critical role in the overall operation of your computer. You will be prompted to log out and all of your applications will be terminated if you choose to quit this process.
If you’re concerned that the Windowserver on Mac is causing your device to slow down, then you can simply check the CPU usage, and take action as outlined above.
The Windowserver On Mac Is Essential
The Windowserver on Mac has an essential role to play in the system as it is what allows displays and apps to communicate with each other.
Whatever you see on the screen of your Mac, you can be sure that the Windowserver is behind it. It’s not a virus, and should not be removed or terminated.
The WindowServer on Mac, however, can take up a significant percentage of the CPU resources, thus slowing down your device. You can check if this is the case and fix the problem accordingly.
Some of the steps you can do include closing unused windows and desktops, clearing files, turning off additional displays, and restarting your device.
Related Articles
- Mac Option Key on Windows Keyboard
- Scroll Lock on a Mac – How to Use & How To Turn It Off
- 9+ Fastest Web Browsers For Mac [Reviewed & Ranked]
- Best Mac Database Software
- How To Scroll Down on Macbook Air & Pro
Whenever you check your Activity Monitor on your Mac, you must’ve discovered the WindowServer process, which’s always taking a lot of CPU power. Now you may wonder, what is the WindowServer process, why is it running on Mac, why does it consume so much CPU resources, is it safe, and so on. Well, in this post, we will discuss all your queries related to the WindowServer process!
What Is WindowServer Process & Is It Safe?
In layman’s terms, it is the macOS process that is responsible for dealing with all the visual side of the desktop – the Dock bar, Menu bar, and so on. The WindowServer process makes the control between the UI and the hardware part. There are multiple things that result in WindowServer taking up several CPU cycles. It includes all the folders/files placed on the desktop, activated effects such as transparency & drop shadows, a cluttered desktop with icons, and older Macs running recent versions (struggling with visual effects).

The resource consumption ratio of the process WindowServer spikes high because of plenty of reasons, which automatically leads to sluggish Mac performance. All your programs begin to jam, it becomes difficult to access Finder, the screensaver starts shaking and all the executed commands seem to be delayed.
Additional Tip
Additional Tip:
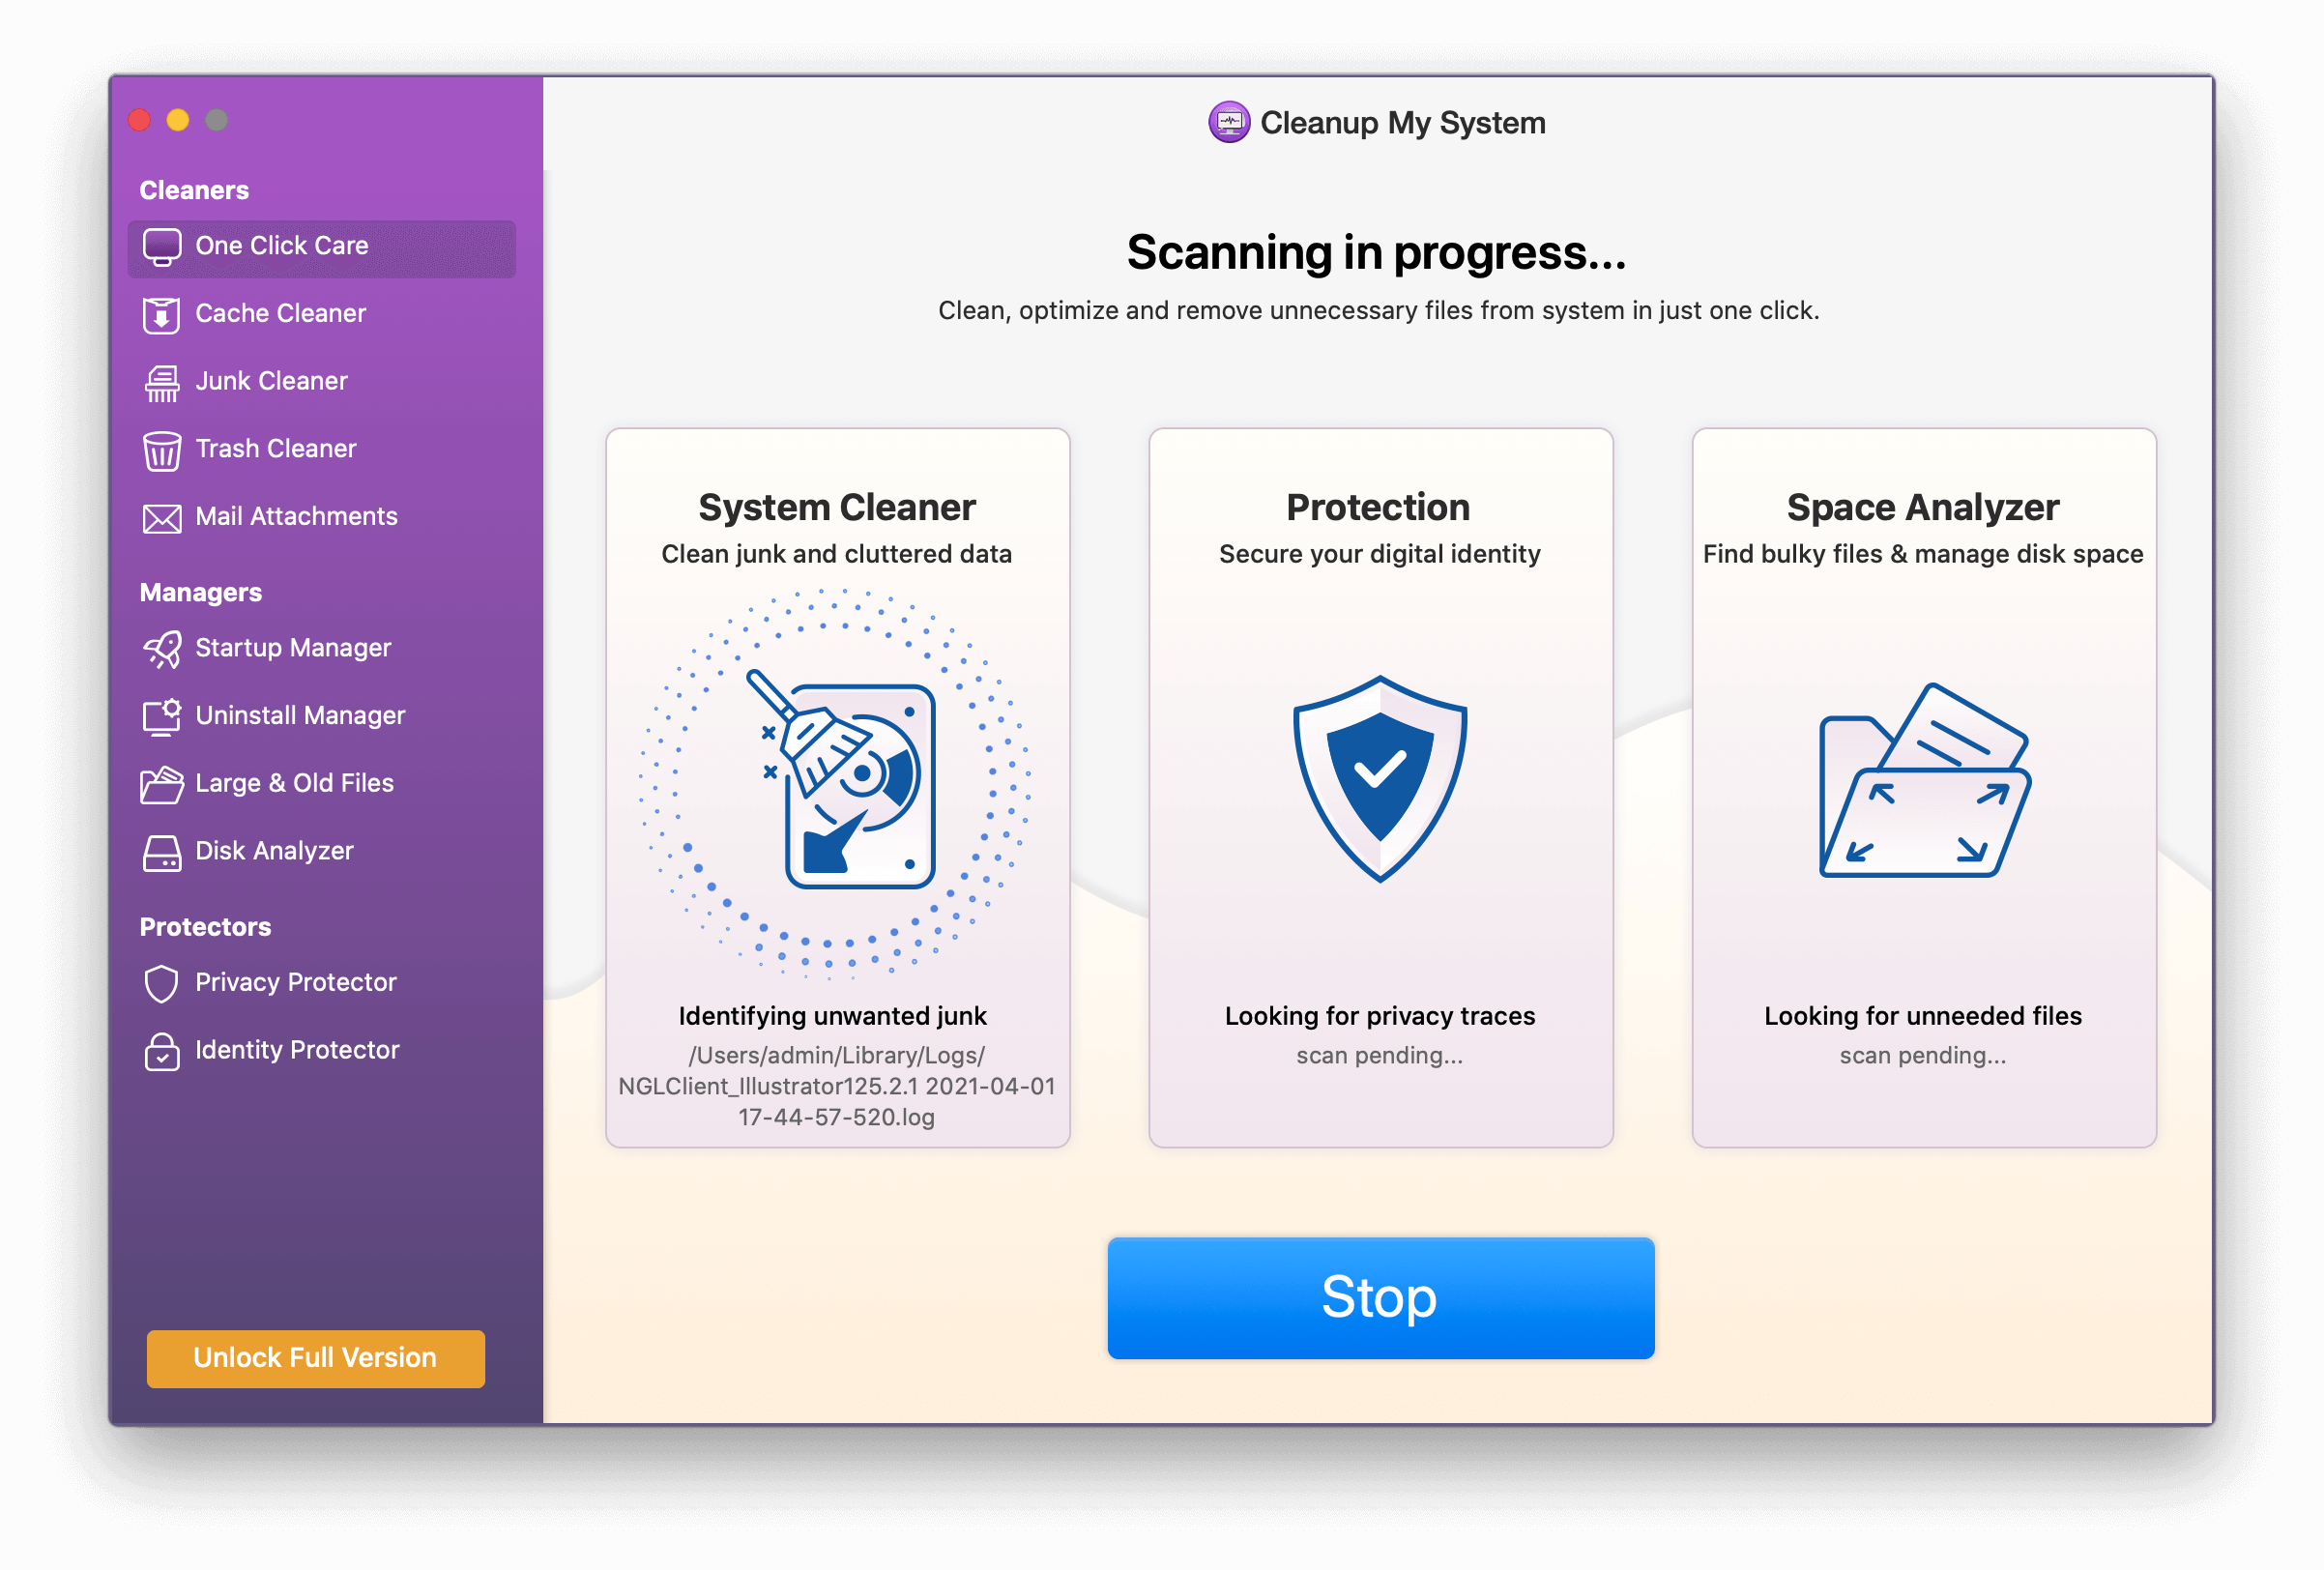
Additional Tip: If you observe your Mac performing slow or unresponsive, install Cleanup My System right away. Its Smart Cleanup feature works pretty well. Additionally, the application runs several cleaning and optimization routines to free up unnecessary occupied RAM ( mail attachments, trash items, large & old files), clean junk files, logs, cookies, and other redundant data that may hamper overall performance.
It can also remove the privacy and identity traces from web browsers to keep you safe from online trackers. The Disk Analyzer module will help in giving you a storage visualization to learn more about disk consumption. The Startup Manager lets up enable/disable the Login items and manage the Launch Agents.
To know more about the Mac Cleaning, Optimization & Protection tool, click here to read the complete review!
How to Check the CPU Usage of WindowServer?
Now that we know what the WindowsServer process is, it’s time to determine how many resources are consumed. For this, simply follow the steps shared below:
- Press the Command + Space shortcut keys to launch Spotlight on your machine.
- Look for Activity Monitor.


- Search for WindowServer and double-click on the process to view CPU and Memory usage of the same.


- WindowsServer process is capable of consuming a lot of CPU cycles.
If it takes up more than 50% of CPU resources, you know it’s using more CPU cycles than it should.
What Can We Do To Lower WindowServer CPU Usage On Mac?
Here are the following things you can do to reduce WindowServer CPU usage issue on Mac:
1. Minimize the number of files & folders saved on your desktop
For instance, if you have 30 files on the desktop and 10 folders, try adding them all to one folder, or you can remove the needles from your desktop and shift to somewhere else. Doing so, the WindowServer process will simply focus on one visual element instead of 40.
You might want to read: 15 Top Ways To Clean Up Your Mac, MacBook, iMac
2. Close needles Windows
You must have understood how the WindowServer Process consumes CPU cycles. The more Windows & browser tabs will be open, the more resources will be consumed. In case you are using an older machine, the resource consumption will certainly be more. Hence, close unnecessary opened browser tabs to reduce consumption. In case any program is launched in the background, which is of no use at the moment, simply quit them to manage CPU usage on Mac.
3. Deactivate transparent effects
Features that add visual effects are responsible for taking more RAM & other system resources. Simply disable the transparent effects on your Mac to make your device run smoothly and at a faster rate. It will give a significant boost to your machine. Here’s how to do it:
- Navigate to the System Preferences.
- Go to Accessibility and head towards the Display option.
- Check the box next to Reduce transparency.

This will lower WindowServer CPU usage on Mac. In addition to this, you can try the following workarounds.
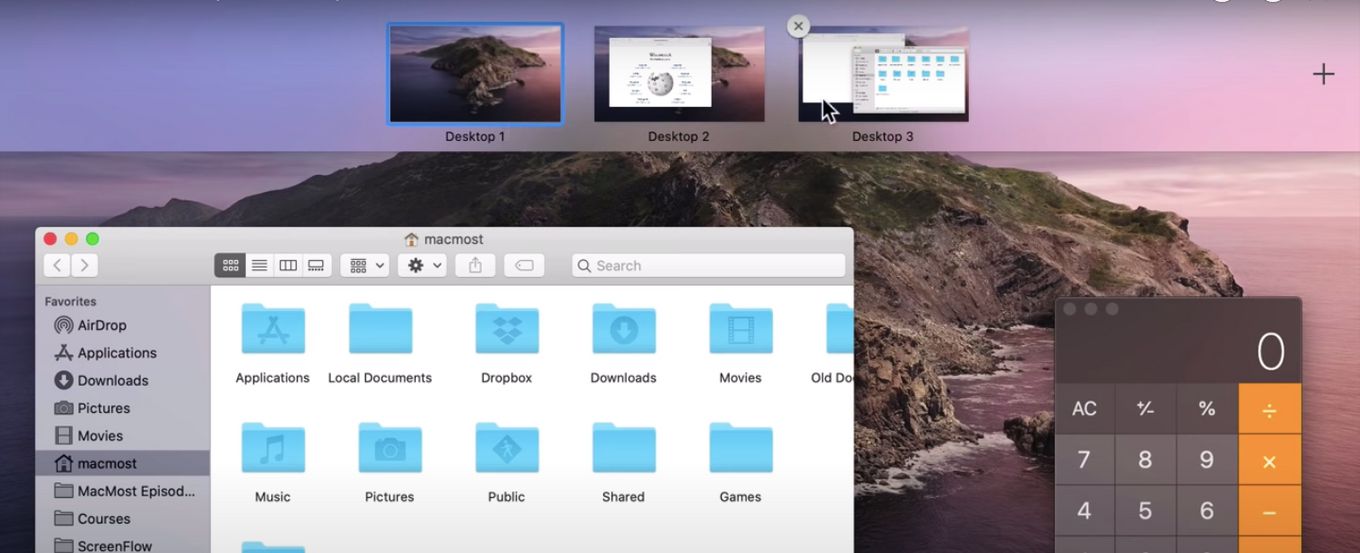
4. Reduce additional desktops
Well, several users have recommended that closing the number of desktops from Mission Control has made a significant difference. Try the following:
- Hit the F5 key to launch Mission Control on your MacBook.
- Now simply hover the mouse pointer on any desktop you are not using at the moment.
- Hit the (X) button to close it!

5. Have multiple displays? Switch off Spaces for each
In case you have a multiple-display setup, the next thing you should try to lower WindowServer CPU usage on Mac is the following:
- Launch System Preferences and navigate to Mission Control.
- Now, simply toggle off the setting that states ‘Displays have separate spaces’.

- Reboot your Mac to implement the changes successfully!

In addition to this, you need to stop rearranging Mission Control Spaces. Try turning off the settings for ‘Automatically reorder spaces based on most recent use’. Several users have witnessed a great improvement on Mac to lower WindowServer CPU usage.
You might want to read: How To Fix Screen Flickering Issue On Mac, MacBook, And iMac?
6. Make Sure Your Mac Apps & OS Are Up-To-Date
Running the latest versions of macOS and apps can certainly help in lowering WindowsServer’s high CPU consumption. Keeping this fact in mind, an optimized machine will free you from other common macOS-related errors and issues as well.
- From the main Apple menu, navigate to the System Settings and choose the General option.
- Click on the Software Update option.
- Follow the on-screen instructions to check if an update is available. Alternatively, you can turn on the Automatic updates option.

As soon as you’ve updated your machine to the latest macOS version, it’s time to ensure all the installed apps are up-to-date as well. For this, you can head toward the App Store > and click on the Updates button. Next, you can either click on the Update button next to each app you wish to install the newest version for or the Update All button.
7. Remove problematic apps from your Mac
At times, a bug in a program or virus infection may cause WindowServer high CPU usage on Mac. So, go through the list of programs installed on your machine, and if you suspect any unwanted app making space on your computer or do not remember installing, simply remove it.
To quickly delete an application on Mac, all you have to do is:
- Locate the specific utility in the Finder.
- Drag the app to the Trash. Alternatively, you can select it and go to File > Move to Trash.
- You might be asked to enter your username and password.
- Go ahead to successfully remove the app from your Mac.

Don’t forget to Empty your Trash regularly to ensure no redundant data gets piled up on your storage or eats RAM causing WindowServer high CPU usage on Mac. In addition to this, we highly recommend running a malware scan on your Mac to free up your system from malicious content & other threats.
- The Best Antivirus Software For Mac
- 10 Best App Uninstaller for Mac to Completely Remove Programs
- 6 Tips to Protect Your Mac – Infographic!
8. Disable ProMotion On Your Mac
If you have a Macintosh with a ProMotion display, just like the 14-inch/16-inch MacBook Pro, disabling the feature will help you reduce the refresh rate. This will eventually lower the CPU usage of the WindowsServer process.

To disable the functionality, all you have to do is: Head toward the System Preferences, go to the Displays module > and click on the Refresh Rate. After this, you have to select the refresh rate of your choice.
The Last Resort – Fix or Lower WindowServer CPU Usage On Mac (2023)
If none of the solutions worked for you to fix high CPU Usage problems caused due to the WindowServer process, the last option remains to reset NVRAM or PRAM on your Mac. By doing so, you can resolve plenty of problems appearing on your MacBook, such as the inability to change the display resolution, the battery not charging properly, the device can’t recognize external devices, weird mouse scrolling speed, and more. You can go through the following guide to know about the process in detail.
- What, When, Why & How To Reset NVRAM On MacBook Pro?
- Complete Guide: Reset The PRAM & SMC On Your Mac!
Do you know any other methods to reduce WindowServer CPU Usage on Mac? Share your suggestions in the comments section below! Also, do not forget to check out us on Facebook and YouTube.
FAQ:
Q1. Why is WindowServer running on my Mac?
WindowsServer process is responsible for processing the graphical elements that you see on your machine. It’s one of those elements of your Mac that makes it possible for users to read this blog post and view everything else you see on your machine.
Q2. Why is WindowServer process CPU usage so high?
One of the most common reasons that cause high CPU consumption of WindowsServer includes:
- Having multiple displays at a time.
- Heave use of Visual Effects.
- Cluttered desktop apps & icons.
- Misbehaving applications.
Q3. How do I make my Mac CPU faster?
Some several tips and tricks can help users to speed up their Mac in a few clicks.
- Clean up unnecessary system files.
- Find and eliminate the resource-demanding processes.
- Uninstall apps you no longer use.
- Manage startup programs.
- Swap your HDD with SSD.
- Upgrade your RAM.
This guide covers what WindowServer on your Mac is, why it consumes high CPU and memory resources, and, more importantly, how to reduce the CPU and memory it uses.
In the Activity Monitor, you may notice a process named WindowServer that consumes a significant amount of CPU and memory resources on your Mac.
So, what exactly is WindowServer on your Mac, and why is it using so much CPU and memory? Read on. In this article, you’ll find all the answers.
What Is WindowServer on Mac?
WindowServer is one of the core components of macOS. It serves as the interface between all applications and actions on your screen. Every action you take within an application is reflected by the WindowServer, allowing you to see the results on your screen.
Why Is WindowServer Using So Much CPU and Memory on Mac?
Every program communicates with the WindowServer to display content on your screen. Consequently, the more applications you run, the more CPU and memory resources the WindowsServer process uses.
WindowServer’s primary function is to ensure your computer runs smoothly and efficiently. It does not engage in any malicious activities. However, there may be instances where the WindowServer consumes a substantial amount of CPU and memory resources, even when only a few applications are running.
Several factors could contribute to this:
- Older Macs running the latest macOS.
- Excessive login items.
- Unnecessary visual effects.
- Issues with external accessories.
- macOS bugs.
How to Check CPU and Memory Usage on Mac
Before addressing this issue, let’s first learn how to check CPU and memory usage on your Mac.
Here are the steps:
- Open Activity Monitor via Spotlight or Launchpad.
- In the Activity Monitor window, you can see the CPU load, CPU time, CPU usage, and the number of threads associated with the WindowServer process.
- To view memory usage, click the Memory tab. From the list, you can identify which processes are utilizing your memory. Below the list, a graph displays the amount of memory in use.


How to Lower WindowServer’s CPU and Memory Usage on Mac
Running low on CPU and memory resources can result in a sluggish Mac. Here are some methods to reduce high CPU and memory usage caused by the Windows Server process.
Quit Unused Programs and Apps
As mentioned earlier, running numerous programs or applications can spike CPU and memory usage. It’s a good practice to quit programs you are not actively using.
In the Activity Monitor window, select the applications and processes you don’t need, click the Stop button, and choose Quit or Force Quit.

Additionally, it’s essential to close any unused windows.
Adjust Display Settings
Visual effects such as motion and transparency can also increase CPU usage, particularly on older Macs. Follow these steps to disable them:
- Click the Apple menu and select System Settings > Accessibility.
- Click Display in the sidebar and turn on Reduce transparency.

Disable Unnecessary Login Items
Login items are programs that automatically start when you log into your Mac. Some of these programs may not be necessary to run at startup. Here’s how to prevent unneeded login items:
- Click the Apple menu and select System Settings > General > Login Items.
- Select the login item you want to stop, and click the Minus (-) button.

Alternatively, you can use BuhoCleaner, a handy startup program manager, to take full control of all the login items and startup services on your Mac. Moreover, its RAM release feature can help you reclaim memory space in seconds. Just click the button below to start.
Declutter Your Desktop
Apple treats every icon on your desktop as an active window. This means that the more icons on your desktop, the more pressure it puts on your memory.
Organizing your desktop is easy. Just right-click on your desktop and choose Use Stacks, and you’ll see all the files on your desktop sorted.
Optimize Your Mac
Another way you can try is to optimize your Mac. If you don’t want to manually deal with the tedious cleanup, you can try BuhoCleaner.
BuhoCleaner is one of the best cleaning and optimization software for Mac. It simplifies the process of deleting unnecessary files, uninstalling unwanted applications, freeing up memory, monitoring CPU load and temperature, and more. It’s user-friendly and suitable for everyone.
- Download, install, and launch BuhoCleaner.
- Choose the function in the sidebar and click the Scan button in the right column.
- Check the boxes next to the files you want to delete and click the Remove button.

Conclusion
Now you have a better understanding of WindowServer on Mac and know what to do when it uses too much CPU and memory resources. Please note that to maintain the proper functioning of your Mac, it’s advisable to avoid high CPU and memory usage.
BuhoCleaner
Clean and Speed Up Your Mac Like a Pro
