
Dhcp-Client logs its events to the Windows Event Log. To view this, open the Event Viewer, expand the Windows Logs entry on the left and select System. Here all system messages are shown. To view only Dhcp-Client entries, click «Filter Current Log…» on the right.
- How do I find the DHCP Server event log?
- How do I enable DHCP client events operational log?
- Where are DHCP audit logs stored?
- How do I view DHCP logs?
- How do I know if my DHCP Server is working Windows 2012?
- What is DHCP log files?
- Can I disable DHCP client service?
- What is DNS client service?
- How do I access DHCP server?
- How do I remove IP from DHCP conflict?
- How long are DHCP logs kept?
- Which rule does the DHCP server use when there is an IP address conflict?
How do I find the DHCP Server event log?
Events are displayed from the Operational event log. These events can also be viewed in Event Viewer on individual DHCP servers by navigating to Applications and Services Logs>Microsoft>Windows>DHCP-Server>Microsoft-Windows-DHCP Server Events/Operational.
How do I enable DHCP client events operational log?
To enable the required logs, open Event Viewer ( eventvwr ) and check the logs under Applications and Services Logs > Microsoft > Windows > Dhcp-Client and Applications and Services Logs > Microsoft > Windows > DHCPv6-Client. To enable a log, right-click on it and click Enable Log.
Where are DHCP audit logs stored?
By default, the DHCP Server service writes daily audit logs to the folder WINDOWS \System32\Dhcp. These audit log files are text files named after the day of the week.
How do I view DHCP logs?
Log into the DHCP server, and start the DHCP MMC console. Expand the DHCP server instance we are wanting to audit and expand the IPv4 list. Right click on IPv4 and select properties. Under the General tab there should be a check box that states «Enable DHCP audit logging», select that check box to enable auditing.
How do I know if my DHCP Server is working Windows 2012?
On the Start screen, type DHCP , and click to open DHCP console. On the DHCP console, expand the Server name, and then right-click IPv4 .
What is DHCP log files?
DHCP server logs are comma-delimited text files with each log entry representing a single line of text. … 02 The log was temporarily paused due to low disk space. 10 A new IP address was leased to a client. 11 A lease was renewed by a client.
Can I disable DHCP client service?
The DHCP client is enabled by default. You can disable or re-enable DHCP client on a switch or a router. On a switch, enter global configuration mode. Enter the no ip dhcp-client enable command to disable the DHCP client.
What is DNS client service?
The DNS Client service is used to resolve DNS domain names, by querying locally cached information obtained from a previous query or by querying a remote DNS server.
How do I access DHCP server?
Remember that a scope is a range of IP addresses that the DHCP server can lease to clients. Begin by opening the DHCP console. You can access the DHCP console by selecting the DHCP command from the server’s Administrative Tools menu.
How do I remove IP from DHCP conflict?
show ip dhcp pool [pool name] – This will show information on number of IP’s leased. show ip dhcp conflict – This will show any conflicts in your pools. clear ip dhcp binding | conflict [x.x.x.x] | * – This will clear the pool of the address you specify or all in the case of *.
How long are DHCP logs kept?
With DHCP the logs are typically stored for anywhere from 90–365 days. The DHCP logs will include some important information for identifying who received a specific lease (IP assignment).
Which rule does the DHCP server use when there is an IP address conflict?
Once the conflicted address is found, the server removes it from the pool until the problem is manually resolved by the administrator. Use the «show ip dhcp conflict» command to determine the IP address conflict and use the «clear ip dhcp conflict» command to remove the conflict.
Данная статья описывает процедуру установки и настройки DHCP сервера на базе Windows Server 2019. В статье описаны особенности установки и настройки DHCP роли, создания областей DHCP, настройки их параметров и резервации статических адресов. Мы рассмотрим как привычный способ настройки параметров DHCP сервера через графическую консоль, так и настройку DHCP из командной строки PowerShell.
Протокол DHCP (Dynamic Host Configuration Protocol) используется для автоматического назначения сетевых настроек (IP адрес, маска подсети, шлюз, DNS сервера и т.д.) устройствам в вашей сети (компьютеры, ноутбуки, сканеры, принтеры и т.д.). Также DHCP сервер позволяет более эффективно использовать адресное пространство, избегать конфликта IP адресов в сети и централизованно управлять сетевыми параметрами на клиентских устройствах.
Содержание:
- Установка роли DHCP сервера в Windows Server 2019/2016
- Настройка DHCP областей в Windows Server
- Резервация IP адресов на DHCP сервере
- Настройка и управление DHCP сервером с помощью PowerShell
Установка роли DHCP сервера в Windows Server 2019/2016
В этом примере мы установим DHCP сервер на хосте с Windows Server 2019 и IP адресом 192.168.13.4. Вы можете использовать как Server Core версию, так и Full GUI. В маленькой инфраструктуре допустимо устанавливать DHCP сервер на сервер с ролью контроллера домена Active Directory.
Обязательно назначьте статический IP адрес серверу с ролью DHCP сервер. При установке роли DHCP из консоли PowerShell на сервере с автоматическим получением IP адреса появляется предупреждение:
Configure at least one static IP address on your computer before installing DHCP.
WARNING: The following recommended condition is not met for DHCP: No static IP addresses were found on this computer. If the IP address changes, clients might not be able to contact this server. Please configure a static IP address before installing DHCP Server.
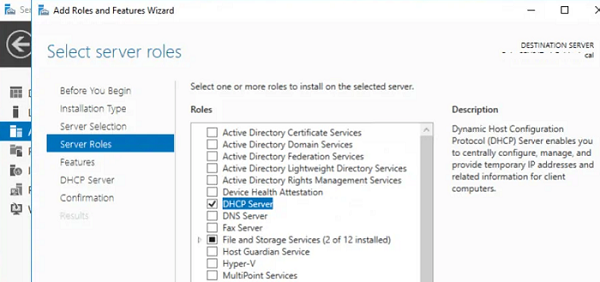
Установить роль DHCP Server можно из консоли Server Manager (Add Roles and Features -> Server Roles).
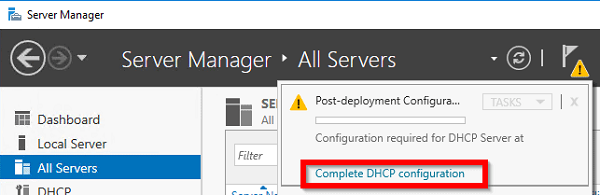
После установки роли DHCP роли нужно выполнить Post-Deployment Configuration. Для этого в консоли Server Manager щелкните по уведомлению и выберите Complete DHCP configuration.
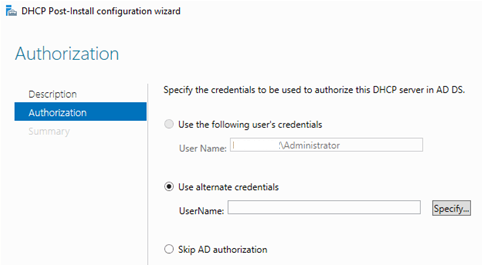
Вам будет предложено аутентифицировать новый DHCP сервер в Active Directory (экран Authorization). Для авторизации DHCP сервера в AD учетная запись должна состоять в доменной группе Enterprise Admins.
Если у вас нет прав на авторизацию DHCP в AD, вы можете указать, чтобы ваш DHCP сервер запускался без проверки авторизации в домене:
Set-ItemProperty -Path "HKLM:\SYSTEM\CurrentControlSet\Services\DHCPServer\Parameters" -Name DisableRogueDetection -Value 1 -Force
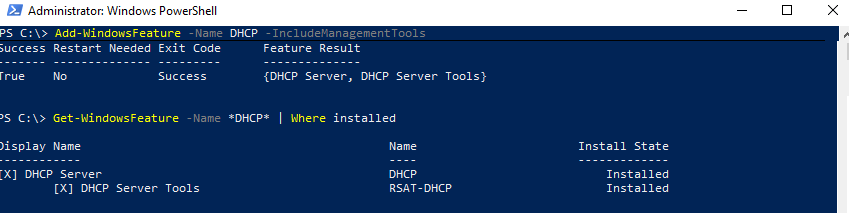
Также вы можете установить и настроить DHCP роль в Windows Server из консоли PowerShell.
Установка роли DHCP:
Install-WindowsFeature DHCP –IncludeManagementTools
Проверьте, что роль и инструменты управления RSAT-DHCP установлены:
Get-WindowsFeature -Name *DHCP*| Where Installed
Авторизуйте DHCP сервер в Active Directory (укажите DNS имя сервера и IP адрес, который будет использоваться DHCP клиентами):
Add-DhcpServerInDC -DnsName hq-dc01.contoso.com -IPAddress 192.168.13.4
Создайте локальные группы безопасности DHCP сервера:
Add-DhcpServerSecurityGroup
Чтобы Server Manager перестал показывать уведомление о том, что DHCP роль требует настройки, выполните команду:
Set-ItemProperty -Path HKLM:\SOFTWARE\Microsoft\ServerManager\Roles\12 -Name ConfigurationState -Value 2
Перезапустите службу DHCPServer:
Restart-Service -Name DHCPServer -Force
База данных и логи DHCP сервера находятся в каталоге
%systemroot%\system32\dhcp
.
- dhcp.mdb — файл базы данных сервера DHCP’;
- j50.log – транзакционный журнал (используется при восстановлении конфигурации DHCP);
- j50.chk — файл контрольной точки;
- tmp.edb — временный рабочий файл DHCP-сервера.
Настройка DHCP областей в Windows Server
После установки роли DHCP вам нужно создать DHCP области (Scopes), которые описывают диапазоны IP адресов и другие настройки, выдающиеся сервером клиентам.
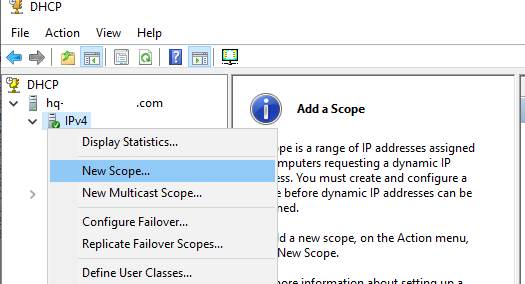
Для управления сервером DHCP используется консоль dhcpmgmt.msc (вы можете управлять DHCP сервером локально или с удаленного компьютера с установленным RSAT). Запустите консоль DHCP, разверните ваш сервер -> IPv4.
Чтобы создать новую область выберите New Scope.
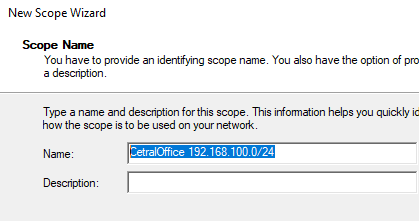
Укажите название DHCP области.
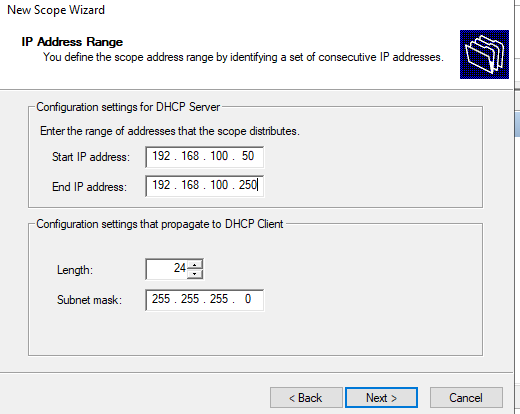
Укажите диапазон IP адресов, который будет выдаваться этой областью и маску сети. В этом примере я хочу использовать эту DHCP область для обслуживания подсети 192.168.100.0/24. В рамках этой сети DHCP сервером будет назначаться динамические IP адреса из диапазона 192.168.100.50 — 192.168.100.250. В следующем окне можно добавить исключения в этот диапазон (Add Exclusions and Delay).
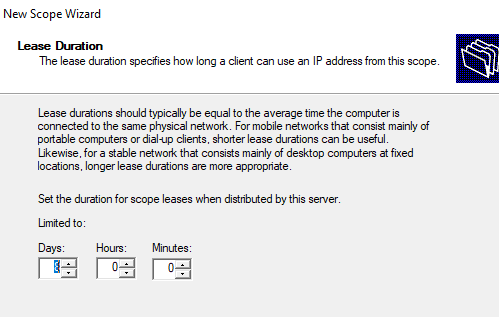
Далее нужно указать длительность аренды (Lease Duration) IP адреса DHCP клиентом (по умолчанию 8 дней, менять без особой необходимости не нужно).
Укажите, что вы хотите настроить дополнительный параметры DHCP области.
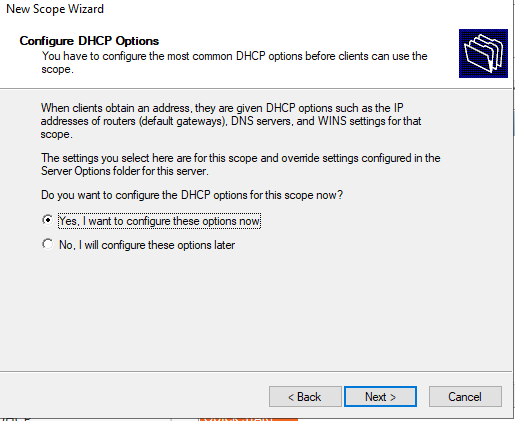
.
Укажите IP адрес шлюза в подсети, который должен назначаться клиентам (в нашем примере это 192.168.100.1).

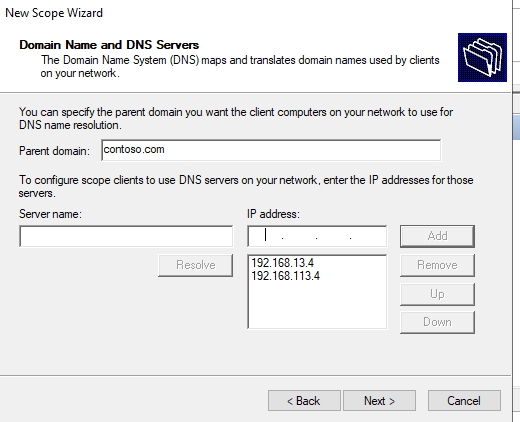
Затем укажите имя домена и адреса DNS серверов, которые будут назначены клиентам DHCP.
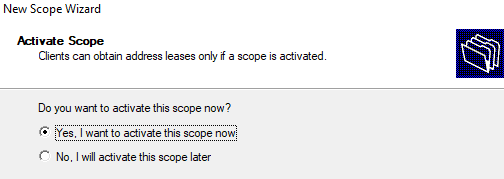
Осталось активировать DHCP область (разрешить ей обслуживать клиентов).
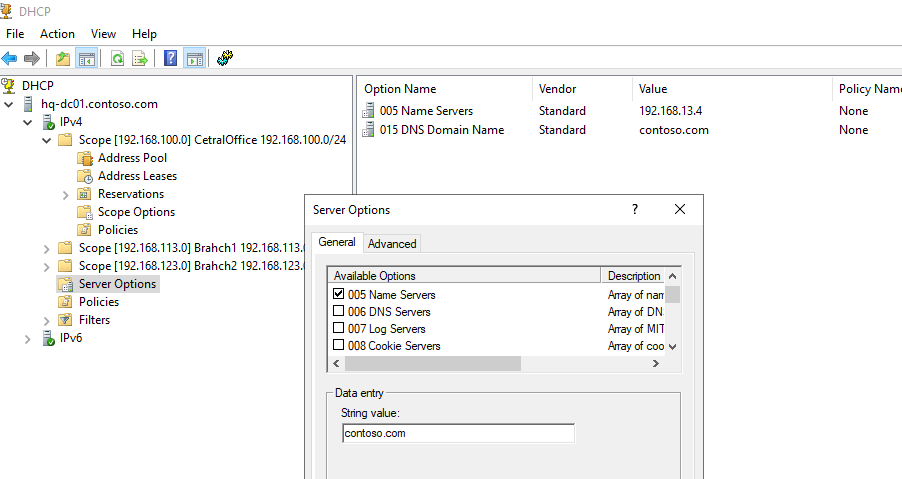
DHCP сервер может выдавать клиентам различный настройки (кроме IP адреса). Для этого используются Scope Options.
В Windows Server DHCP можно настроить глобальные настройки области или Scope Options для каждой области.

Ранее мы уже настроили три опции области:
-
003 Router -
006 DNS Server -
015 DNS Domain Name
Можно добавить и другие опции (NTP сервера, PXE и т.д.).
В разделе Server Options DHCP сервера можно настроить глобальные опции, которые будут наследуются всеми областями. Но вы можете переопределить глобальные настройки в настройках каждой области (опции области имеют приоритет над опциями сервера).
Один DHCP сервер может обслуживать сотни удаленных подсетей и VLAN. Поэтому вы можете создать на нем несколько областей. Главное, чтобы в каждой из подсетей был настроен ретранслятор (DHCP relay agent), который пересылает широковещательные DHCP-запросы на указанный DHCP сервер. В терминах Cisco DHCP ретранслятор называется ip helper. Вы можете настроить DHCP Relay даже на Windows Server.
Протокол DHCP в качестве транспорта использует протокол UDP. Пакеты от клиента к серверу передаются по порту 67 UDP, обратно через UDP 68
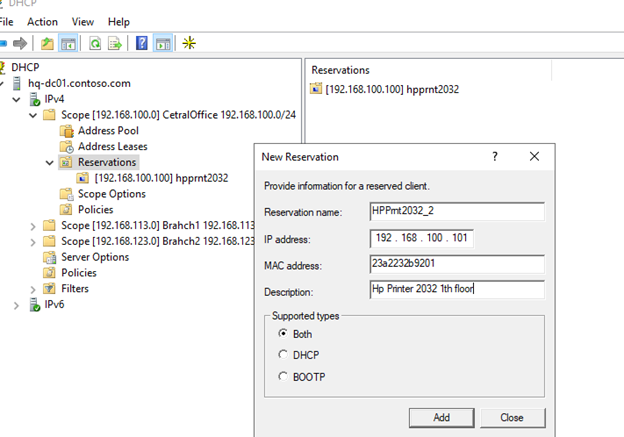
Резервация IP адресов на DHCP сервере
По умолчанию DCHP сервер выдает клиентам динамические адреса. Это означает что IP адрес у любого клиента может меняться. Если вы хотите, чтобы определенные устройства всегда получали от DHCP сервера один и тот же адрес, вы можете его зарезервировать (например, для сетевых принтеров, которые настроены у пользователей).
Для DHCP резервации выберите область и перейдите в секции Reservation. В меню выберите New Reservation.
При создании резервации нужно указать IP адрес, который нужно сохранить за клиентом и его MAC адрес (уникальное значение). MAC адрес в Windows можно получить из результатов команды
ipconfig /all
или с помощью PowerShell
get-netadapter|select name,macaddress
). Опционально можно указать имя и описание устройства.
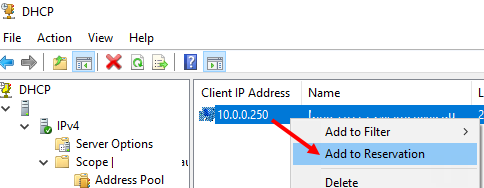
Также вы можете зарезервировать текущий динамический адрес за устройством, найдя его в разделе Address Leases. Щелкните по устройству и выберите Add to Reservation.
Настройка и управление DHCP сервером с помощью PowerShell
Все операции по настройке и управлению DHCP сервером на Windows Server 2019/2016 можно выполнять из консоли PowerShell. Рассмотрим основные команды управления DHCP. Для этого используется модуль DHCPServer. Импортируйте модуль в сессию:
Import-Module DHCPServer
Вывести полный список командлетов в моделе DHCP можно так:
Get-Command -Module DHCPServer

Следующая команда выведет список авторизованных DHCP серверов в Active Directory:
Get-DhcpServerInDC
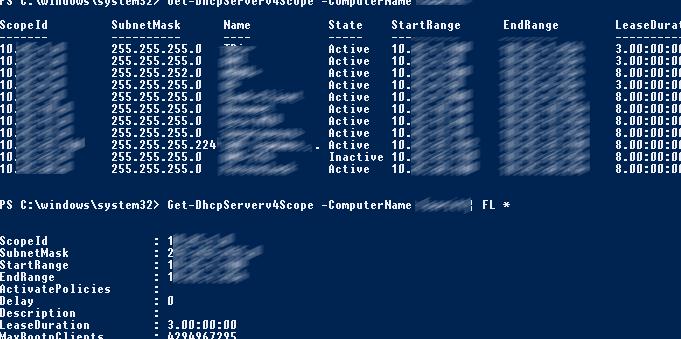
Вывести список DHCP областей на указанном сервере:
Get-DhcpServerv4Scope –ComputerName msk-dhcp1
Если нужно показать все параметры области (Delay, Description, Name и т.д.):
Get-DhcpServerv4Scope –ComputerName msk-dhcp1| FL *
Если нужно отобразить данные о IPv6 областях:
Get-DHCPServerv6Scope
Получить настройки для конкретной области:
Get-DhcpServerv4Scope –ComputerName msk-dhcp1 –ScopeID 10.10.1.0
Создадим новую (неактивную) область с диапазоном адресов с 192.168.113.50 до 192.168.113.250:
Add-DhcpServerv4Scope -Name “Brahch1 192.168.113.0” -StartRange 192.168.113.50 -EndRange 192.168.113.250 -SubnetMask 255.255.255.0 -State InActive
Настроить следующие параметры DHCP сервера: DNS сервер, домен и адрес шлюза по-умолчанию:
Set-DhcpServerv4OptionValue -ScopeID 192.168.113.0 -DnsDomain contoso.com -DnsServer 192.168.13.4 -Router 192.168.113.1
Добавить исключения в DHCP область:
Add-DhcpServerv4ExclusionRange -ScopeID 192.168.113.0 -StartRange 192.168.113.90 -EndRange 192.168.113.100
Активировать DHCP область:
Set-DhcpServerv4Scope -ScopeID 192.168.113.0 -State Active

Для удобства можно использовать такую команду PowerShell при создании новой области:
$HashArgs = @{
'Name' = 'EKB Office Scope';
'Description' = 'workstations';
'StartRange' = '192.168.140.10';
'EndRange' = '192.168.140.200';
'SubnetMask' = '255.255.255.0';
'State' = 'Active';
'LeaseDuration' = '1.00:00:00';
}
Add-DhcpServerv4Scope @HashArgs
Опции для DHCP сервера добавляется так (к примеру, WPAD):
Add-DhcpServerv4OptionDefinition -ComputerName msk-dhcp1 -Name WPAD -OptionId 252 -Type String
Вывести список настроенных опций DHCP сервера можно так:
Get-DHCPServerv4OptionValue -ComputerName msk-dhcp1 | Format-List
Выведем список настроенных параметров зоны:
Get-DHCPServerv4OptionValue -ComputerName msk-dhcp1 -ScopeId 10.10.1.0 | Format-List
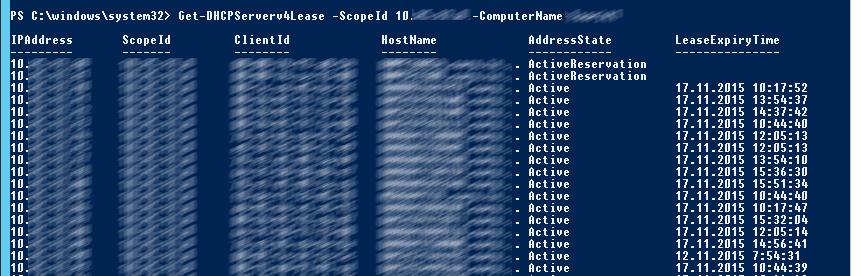
Показать текущий список арендованных адресов для области 10.10.1.0:
Get-DHCPServerv4Lease -ScopeId 10.10.1.0 -ComputerName msk-dhcp1
Создать DHCP резервацию для клиента, которому назначен динамический IP адрес 10.10.1.88 (конвертировать выданный адрес в зарезервированный):
Get-DhcpServerv4Lease -ComputerName msk-dhcp1 -IPAddress 10.10.1.88| Add-DhcpServerv4Reservation -ComputerName msk-dhcp1
Можно массово зарезервировать IP адреса для компьютеров по списку из csv файла. Для этого создайте текстовый файл в формате:
ScopeId,IPAddress,Name,ClientId,Description
10.10.1.0,10.10.1.88,Client1,ba-ab-5c-3d-4e-6f,Reservation PC-msk-s1
10.10.1.0,10.10.1.89,Client2,ba-ab-5c-5d-2e-3f,Reservation PC-msk-s2
Сохраните файл с именем
c:\dhcp\DHCPReservations.csv
и запустите следующую команду, которая импортирует данные из csv файла и создаст DHCP резервации для клиентов:
Import-Csv –Path c:\dhcp\DHCPReservations.csv | Add-DhcpServerv4Reservation -ComputerName msk-dhcp1
Отключить область на DHCP сервере:
Set-DhcpServerv4Scope -ComputerName msk-dhcp1-ScopeId 10.10.1.0-State InActive
Удалить область с DHCP сервера:
Remove-DHCPServerv4Scope -ComputerName msk-dhcp1-ScopeId 10.10.1.0 -Force
Возможно получить статистику DHCP сервера (количество областей, резерваций, процент использования адресов и пр.).
Get-DhcpServerv4Statistics -ComputerName msk-dhcp1
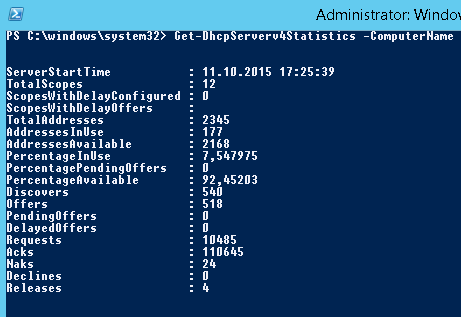
Аналогичная информация для конкретной области может быть получена с помощью командлета Get-DhcpServerv4ScopeStatistics.
Конфигурацию DHCP сервера можно экспортировать в указанный XML файл с помощью команды:
Export-DHCPServer -ComputerName msk-dhcp1 -File C:\dhcp\dhcp-export.xml
Совет. Заданием с такой командой в планировщике задач можно реализовать регулярное резервное копирование конфигурации DHCP сервера.
В дальнейшем эти настройки DHCP сервера можно импортировать (перенести) на другой DHCP сервер:
Import-DHCPServer -ComputerName msk-dhcp2 -File C:\dhcp\dhcp-export.xml -BackupPath C:\dhcpbackup\
Summary
Location of DHCP logs and how to analyse them.
Issue:
If you are in a situation where clients aren’t receiving DHCP leases and you are not sure what else to check the DHCP logs are a good indicator of where to investigate the issue.
The DHCP logs are particularly useful when implementing to a green field site where there could be a multitude of potential issues at play.
Resolution
Logs are located on the DHCP server in the following location:
%windir%\System32\Dhcp
Within this folder you will have logs organised by Day, an odd choice of formatting but one Microsoft has run with nonetheless.

Log Format
Log entries are in the format
ID, Date, Time, Description, IP Address, Host Name, MAC Address
Common Event codes
There is a very useful list of codes at the top of the log but these are the most common ones to look out for
| Event ID | Description |
| 00 | The log was started. |
| 01 | The log was stopped. |
| 02 | The log was temporarily paused due to low disk space. |
| 10 | A new IP address was leased to a client. |
| 11 | A lease was renewed by a client. |
| 12 | A lease was released by a client. |
| 13 | An IP address was found in use on the network. |
| 14 | A lease request could not be satisfied because the address pool of the scope was exhausted. |
| 15 | A lease was denied. |
| 20 | A BOOTP address was leased to a client. |
A full listing of common codes can be found here:
https://technet.microsoft.com/en-us/library/dd183591(v=ws.10).aspx
From the log:
Event ID  Meaning
00	The log was started.
01	The log was stopped.
02	The log was temporarily paused due to low disk space.
10	A new IP address was leased to a client.
11	A lease was renewed by a client.
12	A lease was released by a client.
13	An IP address was found to be in use on the network.
14	A lease request could not be satisfied because the scope's address pool was exhausted.
15	A lease was denied.
16	A lease was deleted.
17	A lease was expired and DNS records for an expired leases have not been deleted.
18	A lease was expired and DNS records were deleted.
20	A BOOTP address was leased to a client.
21	A dynamic BOOTP address was leased to a client.
22	A BOOTP request could not be satisfied because the scope's address pool for BOOTP was exhausted.
23	A BOOTP IP address was deleted after checking to see it was not in use.
24	IP address cleanup operation has began.
25	IP address cleanup statistics.
30	DNS update request to the named DNS server.
31	DNS update failed.
32	DNS update successful.
33	Packet dropped due to NAP policy.
34	DNS update request failed.as the DNS update request queue limit exceeded.
35	DNS update request failed.
36	Packet dropped because the server is in failover standby role or the hash of the client ID does not match.
50+	Codes above 50 are used for Rogue Server Detection information.

QResult: 0: NoQuarantine, 1:Quarantine, 2:Drop Packet, 3:Probation,6:No Quarantine Information ProbationTime:Year-Month-Day Hour:Minute:Second:MilliSecond.
Here is an example log file with the client entry highlighted:
ID,Date,Time,Description,IP Address,Host Name,MAC Address,User Name, TransactionID, QResult,Probationtime, CorrelationID,Dhcid,VendorClass(Hex),VendorClass(ASCII),UserClass(Hex),UserClass(ASCII),RelayAgentInformation,DnsRegError.
25,06/23/15,05:38:51,0 leases expired and 0 leases deleted,,,,,0,6,,,,,,,,,0
11,06/23/15,06:00:23,Renew,192.168.1.104,minint-i1bkgc7.corp.viamonstra.com,000C2938A8BC,,461094449,0,,,,0x4D53465420352E30,MSFT 5.0,,,,0
24,06/23/15,06:38:53,Database Cleanup Begin,,,,,0,6,,,,,,,,,0
25,06/23/15,06:38:53,0 leases expired and 0 leases deleted,,,,,0,6,,,,,,,,,0
25,06/23/15,06:38:53,0 leases expired and 0 leases deleted,,,,,0,6,,,,,,,,,0
If your client does not appear in the log at all it is a reasonable assumption that there is an issue with your network set up.
For example if the DHCP server sits on a different subnet to the client checking IP Helper addresses would be the first point of all to ensure the broadcast is reaching the server.
In this article, we’ll review the necessary information for how to backup and restore information from a Microsoft Windows DHCP server database.
Depending on how familiar you are with this procedure, you may or may not be aware that there’s more to it than just a simple “backup and restore the database”. Besides wanting a full copy of your database, sometimes you may want to only backup specific scope info, or you might want to only backup your reservations.
Whatever the need, I’ve got ya covered in this article ;). My examples will be demonstrated from a Windows Server 2008 R2 installation, but this information will basically be the same or similar in Windows 2012 and beyond.
1. DHCP Backup & Restore Introduction
It goes without saying that it’s important to keep backups of critical data, and DHCP is definitely one of those critical items. It’s important to have good backups available because you never know when unforeseen disaster is going to strike (i.e. data corruption, hardware failure, etc). While my own backup preference may seem a little overkill to some (I keep a backup, an export and occasionally a dump file), I like the peace of mind of knowing that I’ve got multiple options, just in case something ever goes wrong.
NOTE 1: It’s assumed that you have Administrative rights (and any necessary remote access to source and destination servers) to perform the steps laid out in this article. Membership in the Administrators group or the DHCP Administrators group is the minimum required permissions in order to successfully complete these procedures.
NOTE 2: It’s assumed that you already have a DHCP server configured and running.
Let’s get started with some basics first, then I’ll cover all the details of the pertinent info that you’ll want to be aware of as we continue to move forward in the article.
1.1. DHCP Backup Basics 101
To keep things simple, I’m going to present some of Microsoft’s info in my own terms and from my own perspective because I’d like to make this info as easy to understand as possible, for both experienced admins and fresh admins alike. For instance, there are basically two methods of backups that you should be aware of: automatic (“synchronous”) and manual (“asynchronous”).
Anytime you setup a Windows DHCP server, backups will automatically occur every 60 minutes by default, and they’re always saved to the following folder:
C:\Windows\System32\DHCP\Backup
Keep in mind that only one backup copy is stored at any given time (the existing backup is overwritten every 60 minutes with the latest backup copy), so it’s recommended that you keep a copy of this database somewhere other than the default location (i.e. Copy the folder to a file share on your storage server).
NOTE: The DHCP database backup folder location must be a local path. You can copy the backup to a network location after it’s completed, but the backups have to be saved to a local path first.
Also, if you’d like to change the backup time interval, you can either set it with the following command (subsitute “60” with whatever time in minutes you’d like to adjust it to):
netsh dhcp server set databasebackupinterval 60
Or you can modify the following registry key:
HKLM\SYSTEM\CurrentControlSet\Services\DHCPServer\Parameters\BackupInterval
If you’d like to maintain extra or multiple copies of your DHCP database, you can either manually copy the folder at whatever time interval you prefer, you could create a scheduled task (covered in Step 5), or you could use something like RoboCopy (Or a combination of a scheduled task and RoboCopy! This will be covered in Step 5.6.4).
1.2. DHCP Backup Basics 201
When a DHCP backup occurs (whether it’s automatic or manual), the entire DHCP database is saved, including the following data/information:
- All scopes, including superscopes and multicast scopes
- Reservations
- Leases
- All options, including server options, scope options, reservation options, and class options
- All related registry keys and other configuration settings
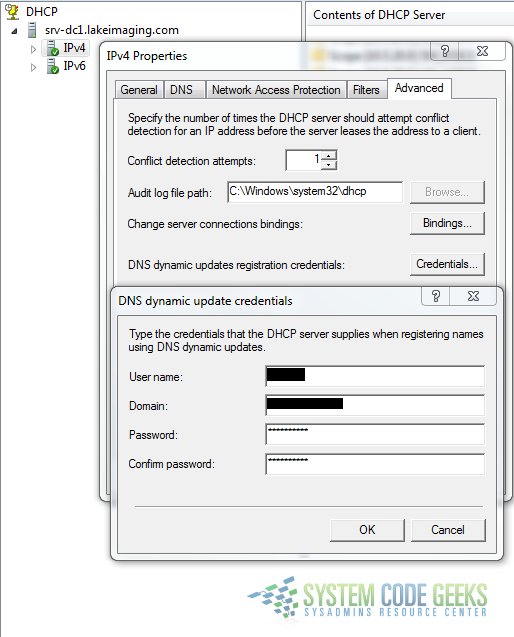
NOTE: If you use DNS dynamic update credentials, this information is not saved as part of the backup; so you’ll have to manually re-enter these credentials again if you ever restore from a backup. This can be done via CLI, using the following command syntax:
netsh dhcp server set dnscredentials <username> <domain> <password>
Or via the DHCP MMC (DHCP Management Console):
Right-click “IPv4” under the server you want to add the credentials to, choose “Properties”, click the “Advanced” tab, click the “Credentials…” button, then enter the appropriate information. Refer to Figure 0 below:
1.3. DHCP Backup Basics 301
There are three main groups of commands that are used when backing up DHCP server database information from CLI (all of which are associated with the “Netsh” command-line tool). I’ll list them and give a brief breakdown of each set of commands.
NOTE: There is a lot of information online pertaining to each of these commands/options! I’ve extensively researched them all and will provide my perspective on what I’ve found. For now, I’ll just list them along with a brief explanation of each, and I’ll provide more details and examples beginning with Step 2.3.
1.3.1. “Backup” & “Restore”
These are the equivalent of the GUI commands for backup and restore (the GUI commands are covered in more detail in Step 2). Command syntax is as follows:
netsh dhcp server backup <backup folder location>
netsh dhcp server restore <backup folder location>
1.3.2. “Export” & “Import”
This is the most widely used set of commands for backing up and restoring a DHCP server database, and it’s the “best practice” and commonly recommended method referenced by Microsoft. As you could likely expect, there can arise some confusion about the difference between “Backup & Restore” vs “Export & Import”. The key difference to be aware of is this: “Backup” & “Restore” can be used to backup & restore a DHCP server database from and to the same OS version, whereas “Export” & “Import” can be used for both backing up and restoring from and to the same server, as well as between different server versions.
To re-iterate and clarify this, if you want to backup a Windows Server 2008 R2 database and restore it to either the same server or to a different Windows Server 2008 R2 installation, you can use “backup & restore” or “export & import”. However, if you want to backup a Windows Server 2008 R2 database and restore it to a Windows Server 2012 R2 server installation, you’ll want to only use the “export” & “import” commands. Export/Import will be covered in more detail in Step 3. Command syntax is as follows:
netsh dhcp server export <backup folder location & filename> <scope info to export> (use "all" for ALL scope info, or specify specific scope(s))
netsh dhcp server import <backup folder location & filename> <scope info to import> (use "all" for ALL scope info, or specify specific scope(s))
1.3.3. “Dump” & “Exec”
The “dump” command is essentially used to export the configuration info of a server (not the entire database), and it’s generally only used for advanced troubleshooting and/or configuration scenarios. While you could use these commands to export/import configuration info from one server to another (with the same OS version or different OS version), I personally would only recommend using it to make changes to the same server that the information was exported from (or at least to the same OS version if your primary DHCP server dies).
Let me help clarify this some more: There are multiple scenarios where using dump and exec can be handy. One example is that you could manually create a template file (a simple .txt file with all of your DHCP configuration info) and then use exec to import that configuration info into one or more servers. This process can save some configuration and deployment time in a “multiple DHCP server deployment” scenario.
Another example of where the dump command can be handy is if you’d like to make a change to a DHCP scope. For example, if you’d like to change the subnet mask of a scope, this can’t be done without deleting the scope and recreating it. However, if there are a lot of customizations in the scope (like reservations and scope options), it’s going to be a lot of extra work to recreate all of that information. But with the dump command, you can export the configuration info for that specific scope, make modifications, then safely delete the scope from the DHCP MMC, and finally re-import all of the updated configuration info using the exec command. Dump/Exec will be covered in more detail in Step 4. Command syntax is as follows:
(Dump – two examples)
netsh dhcp server scope <scopeaddress> dump > <backup folder location & filename>
netsh dhcp server dump > <backup folder location & filename>
(Exec)
netsh exec <path location of dump file>
NOTE 1: The single “>” after “dump” acts as a redirect which outputs all of the configuration info to a file.
NOTE 2: Before using the dump command, it’s recommended that you verify and reconcile any database inconsistencies (so your dump file is “clean”). I’ll cover “reconcile” and other cool tricks in more detail in Step 5.
2. Backup & Restore (GUI & CLI)
In this first main section, I’ll detail the steps for doing a backup and restore from both the GUI and from the command line. Let’s start with the GUI steps first.
2.1. Backup via GUI
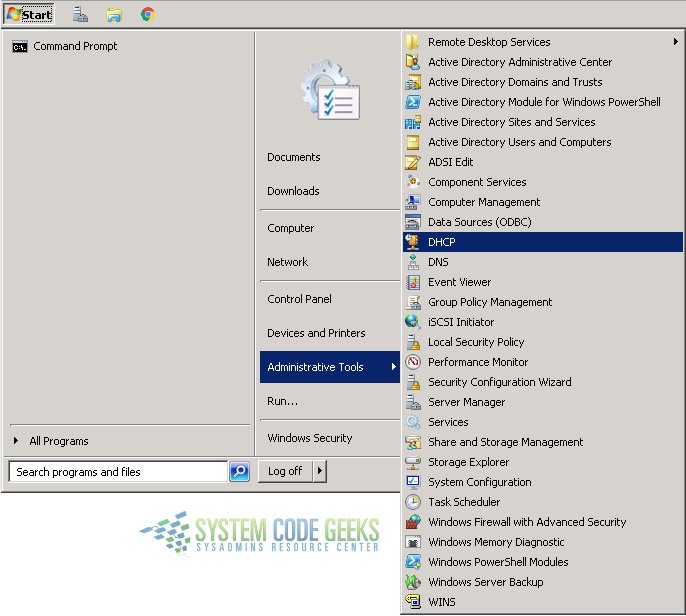
The first backup option I’ll cover is a full backup from the GUI, via the DHCP management console. Again, as stated earlier in the article, this type of backup is ideal for either restoring to the same server and OS version, or to another server running the same OS version. On the server that you want to backup DHCP from, launch the DHCP MMC by navigating to it in the Administrative Tools menu. Refer to Figure 1 below:
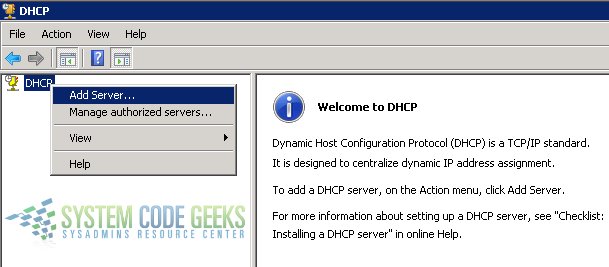
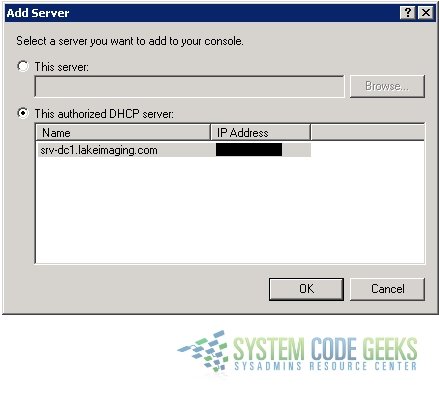
After the console window opens, your server should be listed. If not, right-click on “DHCP” and choose “Add Server”. A new window opens and your server should be listed in the box under “This authorized DHCP server:”. Select it and click “OK”. Refer to Figure 2a and 2b below:
Once your server has been added to the list, right-click on it and choose “Backup”. A “Browse For Folder” window will open, and it will have the default backup folder location already selected (C:\Windows\System32\dhcp\backup); Click “OK”. Refer to Figure 3a and 3b below:
Unfortunately, the Windows OS does not give you any prompt or indication that the backup “completed successfully!”. However, you can open Windows Explorer and navigate to the backup folder and verify that the files have the appropriate date and timestamp. Refer to Figure 3c below:

Remember to store a copy of this backup somewhere else besides the default backup location (as previously referenced in the Note in Step 1.1).
2.2. Restore via GUI
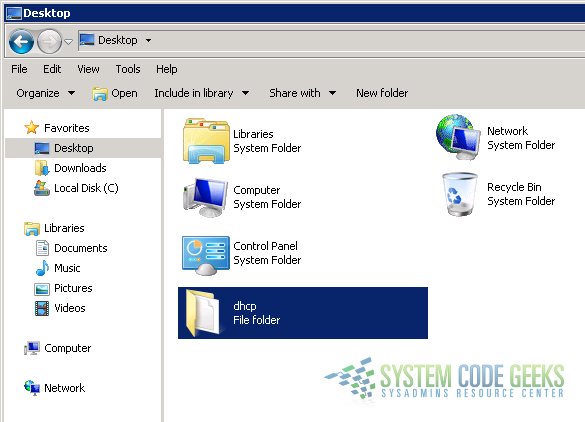
Before doing the restore, I would recommend copying the folder from the saved backup (located on your storage server for instance; as referenced in step 1.1) to the desktop of the user profile of the admin account that you’re using to logon to the DHCP server. In my example, I’ve stored a copy of the backup in a folder named “dhcp”. Refer to Figure 4 below:
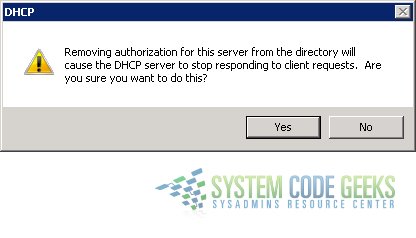
NOTE: Before running the restore, if the old server will no longer be used to host DHCP services, you should either stop and disable the DHCP Server service, de-activate the scopes, or unauthorize the server (I would recommend this last option I mentioned). Refer to Figure 5a and 5b below:
NOTE: I would also recommend verifying the correct permissions on the backup folder that you copied to the desktop before beginning the restore process (Refer to Figure 6f further down).
Now it’s time to restore to the new server. To restore a backup, you would basically follow the same steps that were referenced in section 2.1, but choose “restore” instead of “backup”. As referenced in figure 2a and 2b, launch the DHCP MMC and make sure your new server is listed (if it’s not, add it).
Once your server is available in the DHPC MMC, you should see some red down arrow emblems over the icons for IPv4 and IPv6 (indicating that the server is connected but not authorized). Authorize the new server by right-clicking on it and choosing “Authorize”. Refer to Figure 5c below:
It will take a few moments for the server authorization to fully take effect. You can click “Action” from the menu and choose “Refresh” to update the status. When it’s successfully updated, you should see the emblems on the icons change from red down arrows to green check marks (indicating that the server is connected and active). Refer to Figure 5d below:
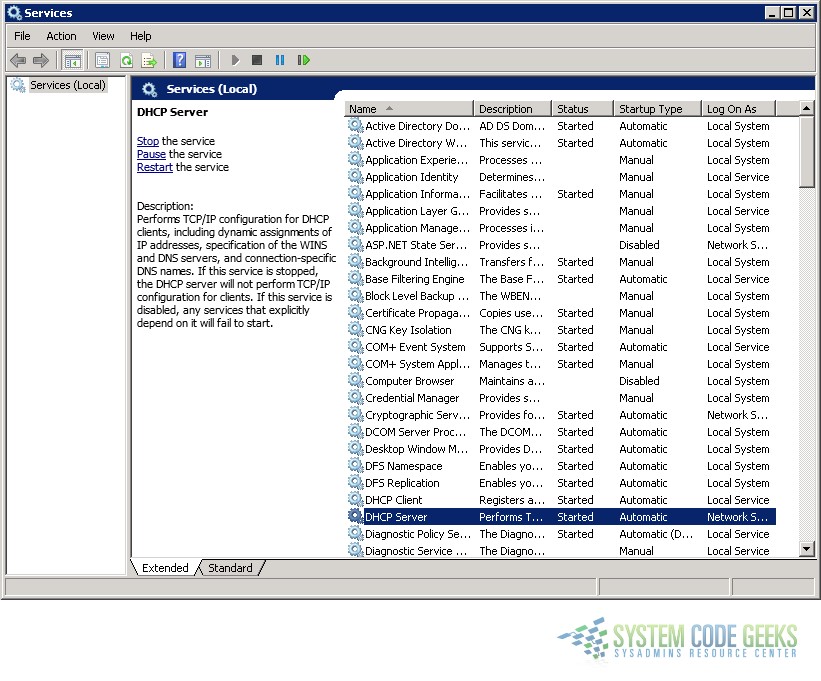
If the status doesn’t successfully update, open the Services MMC (via Administrative Tools) and restart the DHCP Server service (the far right toolbar button, or right-click the service and choose “Restart”). Once the service has been successfully restarted, it should look like this (Refer to Figure 5e below):
Be sure to check the console again and verify that the server is authorized (refer back to Figure 5d). Once the server is successfully authorized, you can perform a restore. Right-click your server and choose “Restore…”. Refer to Figure 6a below:
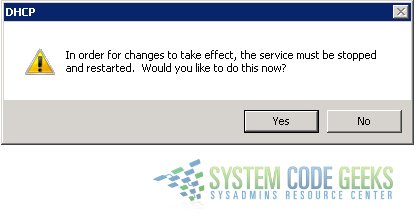
You will be prompted that the service must be restarted for the changes to take effect (this is normal); choose “Yes”. Refer to Figure 6b below:
Once the backup has been successfully restored, you’ll see a confirmation message. Refer to Figure 6c below:
NOTE: There are times when certain variables in the restore process are not quite right, which can cause various error messages. For instance, if the backup folder on the desktop does not have proper permissions configured, you could see messages like these (Refer to Figure 6d and 6e below):
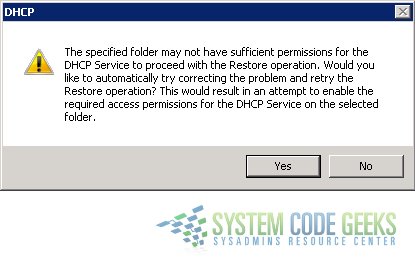
Sometimes DHCP will prompt you that it can attempt to repair the permissions. But if that fails, or you need to verify/set them manually, right-click on the backup folder on the desktop, choose “Properties”, click the “Security” tab, then click the “Edit” button. Verify that the user account you’re currently logged on with has “Allow” permissions for “Full control”. Refer to Figure 6f below:
Try the restore again after you’ve set the correct permissions on the folder that you’re restoring from.
If you ever get a service error message (Refer to Figure 6g below), you can wait a moment, restart the DHCP Server service, then try again:

When the restore has completed successfully, you’ll be able to verify that all of the database information exists under “IPv4” (and “IPv6” if applicable) in your DHCP MMC.
2.3. Backup via CLI
This is essentially the same procedure as in step 2.1, but done entirely from CLI using Netsh. The backup process via CLI is fast and simple compared to the GUI method (granted, neither method is difficult, but the CLI method is much shorter in terms of steps involved, and more efficient in my opinion). This process can be done by remotely connecting to the DHCP server via a command prompt, but I prefer to directly logon to the server and run the commands from the server’s CLI.
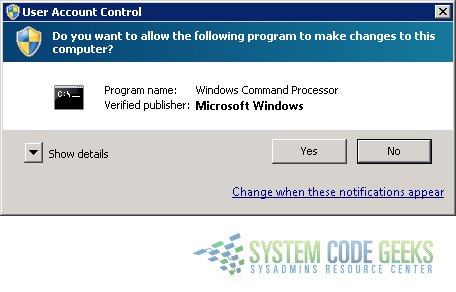
Open an admin command prompt by searching for “cmd” or “command prompt” via the Start menu, right-click on the search result, and choosing “Run as administrator”. Refer to Figure 7a below:
NOTE: If you’re prompted by UAC, click “Yes”. Refer to Figure 7b below:
Once the command prompt is open, doing a backup is as simple as typing the following command syntax:
netsh dhcp server backup <backup folder location>
In the example below, I backup the database to a folder named “dhcp” under “C:\Users\Admin\Desktop\” (Refer to Figure 8 below):
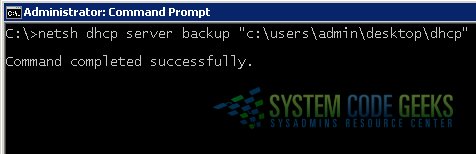
That’s it! Much faster via CLI!
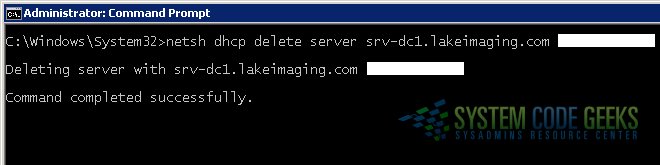
Before you proceed to the next section, if you’re no longer going to use your old server to provide DHCP services, unauthorize the server by typing the following command syntax:
netsh dhcp delete server <ServerDNS> <ServerIP>
Refer to my example in Figure 9 below:
2.4. Restore via CLI
The restore process is also a shorter process than its GUI counterpart, but there are a couple of extra steps on this one. Remote to the new server and login, then copy the backup folder to the desktop (in my example, the folder is named “dhcp”). Be sure to verify the permissions on the backup folder (refer back to Figure 6f from Step 2.2).
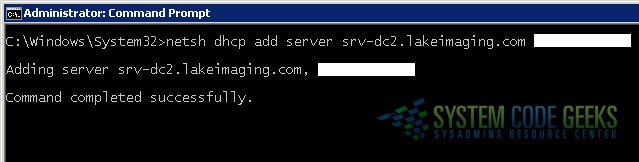
Launch an admin command prompt (refer back to step 2.3) and use the following command syntax to authorize the server:
netsh dhcp add server <ServerDNS> <ServerIP>
Refer to my example in Figure 10a below:
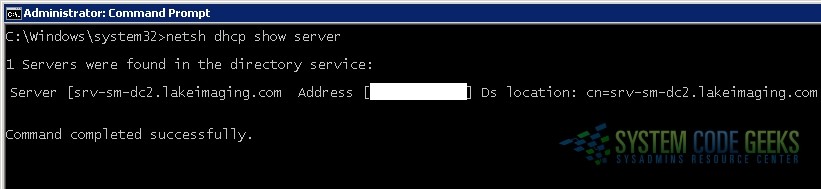
You can also run a command to verify which and how many servers are authorized to provide DHCP services (If the information in the directory service is up to date) by running the following command:
netsh dhcp show server
Refer to my example in Figure 10b below:
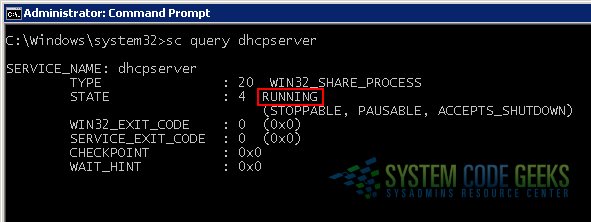
Bonus Tip! Verify that the DHCP Server service is running. This can be done with the following command:
sc query dhcpserver
The output should look similar to my example in Figure 11 below:
If you ever need to start the service, you can do it like this:
sc start dhcpserver
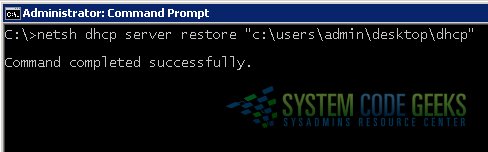
Once everything looks good, you can perform the restore. This can be done with the following syntax:
netsh dhcp server restore <backup folder location>
Refer to my example in Figure 12 below:
3. Export & Import (CLI Only)
The “export” command saves the database to a single file, rather than a folder (like “Backup” does). Refer back to Step 1.3.2 if you’d like to review the primer for the export/import commands. Also, in an effort to prevent this article from being too long, I won’t be covering some of the info that repeats because it would just create duplicate content (i.e. if a previous server is being unauthorized, authorizing the new server, verifying the DHCP server service, etc). Since everything beginning in Step 2.3 and beyond is all done via CLI, all of the same commands apply for the info that would count as repeat content.
3.1. Export
As with all of the commands that involve using CLI, logon to the DHCP server and launch an admin command prompt to begin. Once the command prompt is open, perform an export like this (substituting the filename and path with whatever matches your environment/preference); Refer to Figure 13 below:

NOTE: The filename and extension can be named whatever you want (.log, .txt, .cfg, etc). I personally like to use “.dat” because it’s essentially a copy of the entire database stored inside a single file.
3.2. Import
To import the data from your previous export, the command is nearly identical; just change “export” to “import”. Refer to Figure 14 below:
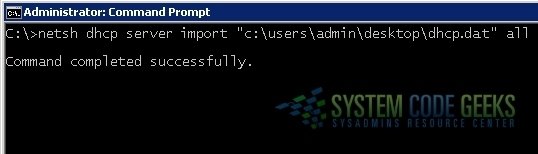
As you could see in my export and import examples, I used the command “all” at the end of each full command, because my intention was to export everything from the database. I’ll give some examples in Step 5 where this command would be modified to export/import specific info instead of “all” info.
4. Dump & Exec (CLI Only)
OK, so a quick reminder about dump: You really shouldn’t ever consider using a dump file as a way to restore a DHCP server or to migrate a lot of DHCP data from one server to another. A dump file should generally only be used in situations where you’re wanting to do some fine-tuned configuring of a server.
Bonus Tip! You can dump database information directly to the command window (instead of a file), but it’s not very practical in most situations (unless you’re using the command to view some brief information). Here’s an example syntax reference (If “10.10.20.0” was one of the scopes that’s configured on the server, the following command would dump all related information related to the 10.10.20.0 scope):
netsh dhcp server scope 10.10.20.0 dump
4.1. Dump (+ Reconcile)
NOTE 1: As stated in the primer earlier (Note 2 in step 1.3.3), you should reconcile your scopes prior to dumping the configuration. There can be a lot of output when running the reconcile command, so I’m not going to provide screenshot examples; but I’ll at least provide you with the commands you need to know, as well as what to look for.
Verify the integrity of your scopes with the following command:
netsh dhcp server initiate reconcile
If everything is good, you should see a message for every scope that you have configured. The messages will each look like this:
"No database-registry inconsistencies detected for scope <Scope-IP>" (where "Scope-IP" would be an address like "10.10.20.0")
If there are any problems, you may see a message indicating that there are inconsistencies, along with specific IP addresses that were found. In those cases, you can “fix” the issue by running a command like this:
"netsh dhcp server scope <Scope-IP> intitiate reconcile fix" (where "Scope-IP" would be a specifc address like "10.10.20.129")
After running the reconcile fix command for any/all inconsistencies found, you can run the original command again to re-verify the database integrity (“netsh dhcp server initiate reconcile”). Once the database looks good, you’re ready to run the dump command.
The dump command is simple and straight-forward, and nearly as powerful as the “export” command (dump exports the same information as the “export” command, with the exception of lease info). Here’s a general example of the dump command (Refer to Figure 15 below):
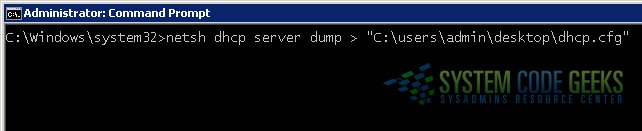
NOTE 2: Again, the filename and extension can be named whatever you want (.log, .txt, .cfg, etc). I personally like to use “.cfg” for dump files because it’s dumping configuration information to a single file.
NOTE 3: You’ll also notice that, for whatever reason, Microsoft didn’t program any kind of notification into the dump command to indicate that the command was successful; it just returns to the command prompt. The dump file is “readable” though, so you can easily open it with a text editor and view the information that was dumped.
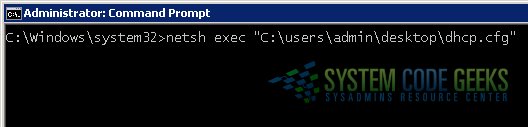
4.2. Exec
As you may have already guessed, the “exec” command is short for “execute” (as in “execute this script or configuration file”), and in our example, it’s used to essentially import the contents of a dump file into a DHCP server.
NOTE: If you thought there was a lot of command output when running the reconcile command, it’s nothing compared to the amount of output you can see when executing a dump file! With that said, I won’t be providing any screenshots of what you would see, other than an example reference of running the command. Refer to Figure 16 below:
5. Bonus: Extra DHPC Management Tricks
In this section, I’m going to be covering some cool additional commands you can run which will hopefully help extend your ability to manage a Windows DHCP server.
5.1. Trick #1
Show MAC/IP reservations for a specific scope:
Example syntax:
netsh dhcp server scope <Scope-IP> show reservedip
Example command with output:
C:\Windows\system32>netsh dhcp server scope 10.10.20.0 show reservedip

Changed the current scope context to 10.10.20.0 scope.

===============================================================
  Reservation Address -    Unique ID
===============================================================

    10.10.20.56       -    00-e0-4b-39-ab-56-
    10.10.20.63       -    18-a9-05-2f-8e-15-
    10.10.20.80       -    00-20-4a-05-18-5d-
    10.10.20.92       -    00-0c-29-4c-81-25-

No of ReservedIPs : 4 in the Scope : 10.10.20.0.

Command completed successfully.
5.2. Trick #2
Dump database information to a file, then use “Find” to search the dump file and output all MAC-IP reservations to a CSV file:
Example commands:
netsh dhcp server dump > reservations.txt
find "Add reservedip" "c:\users\admin\desktop\reservations.txt" > "c:\users\admin\desktop\reservations.csv"
NOTE: I’m not exactly sure why, but the “A” in the word “Add” has to be capitalized, otherwise the command will fail.
5.3. Trick #3
Show general scope info:
Example command:
netsh dhcp server show scope
Example command (geared towards remote access):
netsh dhcp server <server_name_or_ip> show scope
Example output:
=================================================================================
 Scope Address  - Subnet Mask    - State        - Scope Name          -  Comment
=================================================================================

 10.10.10.0      - 255.255.255.0  -Active        -001_VOICE            -VLAN 10
 10.10.20.0      - 255.255.255.0  -Active        -002_VOICE            -VLAN 20
 10.10.30.0      - 255.255.255.0  -Active        -003_VOICE            -VLAN 30
 10.10.40.0      - 255.255.255.0  -Active        -004_VOICE            -VLAN 40
 10.10.50.0      - 255.255.255.0  -Active        -005_VOICE            -VLAN 50
 10.10.60.0      - 255.255.255.0  -Active        -006_VOICE            -VLAN 60
 10.10.70.0      - 255.255.255.0  -Active        -001_IT               -VLAN 70
 10.10.80.0      - 255.255.255.0  -Active        -001_STF              -VLAN 80
 10.10.90.0      - 255.255.255.0  -Active        -002_STF              -VLAN 90
 10.10.100.0     - 255.255.255.0  -Active        -003_STF              -VLAN 100
 10.10.110.0     - 255.255.255.0  -Active        -004_STF              -VLAN 110
 10.10.120.0     - 255.255.255.0  -Active        -005_STF              -VLAN 120
 10.10.130.0     - 255.255.255.0  -Active        -006_STF              -VLAN 130
 10.10.140.0     - 255.255.255.0  -Active        -007_STF              -VLAN 140
 10.10.150.0     - 255.255.255.0  -Active        -008_STF              -VLAN 150

 Total No. of Scopes = 15
Command completed successfully.
5.4. Trick #4
Show general MIB info:
Example command:
netsh dhcp server show mibinfo
Example syntax (geared towards remote access):
netsh dhcp server <server_name_or_ip> show mibinfo
Example output:
        Discovers = 63561.
        Offers = 8.
        Delayed Offers = 0.
        Requests = 626.
        Acks = 86588.
        Naks = 3.
        Declines = 0.
        Releases = 2.
        ServerStartTime = Thursday, January 19, 2017 1:03:35 PM
        Scopes = 15.
        Scopes with Delay configured= 0.
        Subnet = 10.10.10.0.
                No. of Addresses in use = 71.
                No. of free Addresses = 80.
                No. of pending offers = 0.
        Subnet = 10.10.20.0.
                No. of Addresses in use = 36.
                No. of free Addresses = 115.
                No. of pending offers = 0.
        Subnet = 10.10.30.0.
                No. of Addresses in use = 27.
                No. of free Addresses = 124.
                No. of pending offers = 0.
        Subnet = 10.10.40.0.
                No. of Addresses in use = 27.
                No. of free Addresses = 124.
                No. of pending offers = 0.
        Subnet = 10.10.50.0.
                No. of Addresses in use = 11.
                No. of free Addresses = 140.
                No. of pending offers = 0.
        Subnet = 10.10.60.0.
                No. of Addresses in use = 13.
                No. of free Addresses = 138.
                No. of pending offers = 0.
        Subnet = 10.10.70.0.
                No. of Addresses in use = 5.
                No. of free Addresses = 45.
                No. of pending offers = 0.
        Subnet = 10.10.80.0.
                No. of Addresses in use = 15.
                No. of free Addresses = 61.
                No. of pending offers = 0.
        Subnet = 10.10.90.0.
                No. of Addresses in use = 23.
                No. of free Addresses = 76.
                No. of pending offers = 0.
        Subnet = 10.10.100.0.
                No. of Addresses in use = 31.
                No. of free Addresses = 69.
                No. of pending offers = 0.
        Subnet = 10.10.110.0.
                No. of Addresses in use = 12.
                No. of free Addresses = 89.
                No. of pending offers = 0.
        Subnet = 10.10.120.0.
                No. of Addresses in use = 40.
                No. of free Addresses = 61.
                No. of pending offers = 0.
        Subnet = 10.10.130.0.
                No. of Addresses in use = 2.
                No. of free Addresses = 99.
                No. of pending offers = 0.
        Subnet = 10.10.140.0.
                No. of Addresses in use = 6.
                No. of free Addresses = 94.
                No. of pending offers = 0.
        Subnet = 10.10.150.0.
                No. of Addresses in use = 7.
                No. of free Addresses = 93.
                No. of pending offers = 0.
5.5. Trick #5
Scenario: You have two DHCP servers running in the stereotypical “80/20” rule, but you’d rather manage all of the DHCP scopes from one server instead.
Solution: Export the scopes from the server that’s managing 20% of the services, then import them into the server that’s managing the other 80% of the services (thus consolidating all of the scopes info into one server).
Example command to export the scopes from the source server:
netsh dhcp server export "c:\users\admin\desktop\dhcp.dat" 10.10.10.0 10.10.20.0 10.10.30.0
Example command to import the scopes into the destination server:
netsh dhcp server import "c:\users\admin\desktop\dhcp.dat" 10.10.10.0 10.10.20.0 10.10.30.0
5.6. Trick #6
Performing a daily backup of the DHCP server database via a scheduled task:
I’m going to explain the details of how I have mine setup, which you can then use/modify for your own environment. Here’s a brief outline of the solution I’m using:
5.6.1.
A PowerShell script that performs the daily backup:
On the local hard drive of the DHCP server, I have a folder where I store my scripts (C:\Scripts). Here’s the code for the PowerShell script (stored in a file named “dhcp_daily_backup.ps1”):
$file = "C:\DHCP_Backups\dhcp-$((Get-Date).tostring("yyyy-MM-dd-HH-mm-ss")).dat"
netsh dhcp server export $file all
5.6.2.
A folder on the local hard drive where the script stores the daily backup:
C:\DHCP_Backups
5.6.3.
A scheduled task that runs the script each night:
- Task name = DHCP_Daily_Backup
- Description = Performs a daily backup of the DHCP server database
- Security options = Run whether user is logged on or not
- Configure for = Windows 7, Windows Server 2008 R2
- Trigger = Daily at 1am / Recur every 1 days
- Action = Start a program: C:\Scripts\dhcp_daily_backup.ps1
5.6.4. (Bonus!)
A scheduled task that uses RoboCopy to archive the daily backup each night (RoboCopy is already natively included with Windows Server 2008!):
- Task name = DHCP_Daily_Backup_Archive
- Description = Archives each daily DHCP backup to our storage server
- Security options = Run whether user is logged on or not
- Configure for = Windows 7, Windows Server 2008 R2
- Trigger = Daily at 2am / Recur every 1 days
- Action = Start a program: robocopy / Add arguments = “C:\DHCP_Backups” “\\srv-storage\IT_Share\DHCP_Backups” /copy:DAT /r:10 /w:30 /maxage:1 /log+:C:\!Central\Logs\dhcp-backup-archive.log
6. Summary
Managing a Windows DHCP server can be complex and a little time consuming initially (especially if you’re just diving into learning how to do it), but once you have your bearings, it’s really not difficult (and can actually be fun!). Hopefully this article has given you a lot of great info that will empower you to “level up” in your skills, understanding and experience of managing a DHCP server!
PowerShell How-To
Using PowerShell To Parse and Understand Windows Server DHCP Logs

Have you ever scrolled through the Windows Server DHCP logs in the Notepad app while trying to troubleshoot something? Then you know that it’s a tedious task.
There are many alternatives to Notepad such as importing to Excel, but that’s also time-consuming — even more so if you have several DHCP servers in a failover cluster.
In this column, we’ll go through how to collect, parse and understand the Windows Server DHCP logs with the help of PowerShell.
Requirements
There are a few things that you’ll need before following along in this post:
- A Windows DHCP server (I based this post on Windows Server 2019 but it should work the same for at least 2012 R2 and up).
- Local administrator rights on the DHCP server(s).
- WSMan (PowerShell remoting) and its required ports opened on the DHCP server(s).
- PowerShell 5.1 (it may work with other versions but it’s not tested).
Enabling Your DHCP Audit Logs
First, we need to make sure that the DHCP audit logs are enabled. This is easily done through PowerShell and it will just take a minute. Log on to the DHCP server, open PowerShell as an Administrator, then enter the following command:
PS51> Get-DhcpServerAuditLog
If enabled equals True as in the picture below, then you’re good to go.
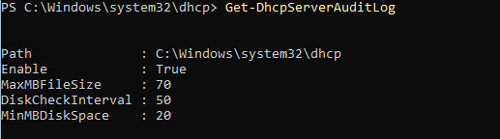
If it isn’t enabled, then you need to enter the following commands that will enable it and restart the DHCP service:
  Set-DhcpServerAuditLog -Enable $True -MaxMBFileSize 70
  Restart-Service DhcpServer
The audit log is now enabled.
Repeat this for all servers in your DHCP cluster (if any).
Finding the Logs
Before parsing the DHCP logs, it’s a good idea to learn where to find them.
The DHCP audit logs are usually located in C:32* and follow the naming context DhcpSrvLog-.log* for IPv4 logs and DhcpV6SrvLog-.log for the first three letters of the day written in English. We can easily locate them using PowerShell:
PS51> Get-ChildItem C:\Windows\system32\dhcp\Dhcp*SrvLog-*.log | Select -ExpandProperty Name

DhcpSrvLog-Fri.log
DhcpSrvLog-Mon.log
DhcpSrvLog-Sat.log
DhcpSrvLog-Sun.log
DhcpSrvLog-Thu.log
DhcpSrvLog-Tue.log
DhcpSrvLog-Wed.log
DhcpV6SrvLog-Fri.log
DhcpV6SrvLog-Mon.log
DhcpV6SrvLog-Sat.log
DhcpV6SrvLog-Sun.log
DhcpV6SrvLog-Thu.log
DhcpV6SrvLog-Tue.log
DhcpV6SrvLog-Wed.log
If you can’t find your audit logs here, then run the PowerShell command Get-DhcpServerAuditLog to see in what directory they are saved under the property Path. Also, double-check that you’ve enabled the audit logs and restarted the DhcpServer service as we described previously.
Understanding the Contents
Interpreting the logs is also fundamental while troubleshooting. The DHCP audit log files consists of two parts:
- Roughly 32 lines mainly describing what the different event codes (ID and QResult) mean in the CSV.
- A CSV with a header.
Most of the columns are pretty well-described by their headers. But the ID column can sometimes be quite cryptic, so I summarized a list of all the IPv4 ID descriptions both from the log files and Microsoft’s official documentation below:
0: The log was started.
1: The log was stopped.
2: The log was temporarily paused due to low disk space.
10: A new IP address was leased to a client.
11: A lease was renewed by a client.
12: A lease was released by a client.
13: An IP address was found to be in use on the network.
14: A lease request could not be satisfied because the scope’s address pool was exhausted.
15: A lease was denied.
16: A lease was deleted.
17: A lease was expired and DNS records for an expired leases have not been deleted.
18: A lease was expired and DNS records were deleted.
20: A BOOTP address was leased to a client.
21: A dynamic BOOTP address was leased to a client.
22: A BOOTP request could not be satisfied because the scope’s address pool for BOOTP was exhausted.
23: A BOOTP IP address was deleted after checking to see it was not in use.
24: IP address cleanup operation has began.
25: IP address cleanup statistics.
30: DNS update request to the name DNS server.
31: DNS update failed.
32: DNS update successful.
33: Packet dropped due to NAP policy.
34: DNS update request failed as the DNS update request queue limit exceeded.
35: DNS update request failed.
36: Packet dropped because the serve is in failover standby role or the hash of the client ID does not match.
50: Unreachable domain
51: Authorization succeeded
52: Upgraded to a Windows Server 2003 operating system
53: Cached Authorization
54: Authorization failed
55: Authorization (servicing)
56: Authorization failure, stopped servicing
57: Server found in domain
58: Server could not find domain
59: Network failure
60: No DC is DS Enabled
61: Server found that belongs to DS domain
62: Another server found
63: Restarting rogue detection
64: No DHCP enabled interfaces
There’s also the QResult column that specifies if a client has been blocked from receiving an IP address with the following description to its IDs:
0: NoQuarantine
1: Quarantine
2: Drop Packet
3: Probation
6: No Quarantine
Additional data is almost always supplied in the Description column. If you would like to learn more about the different events codes in the CSV columns, you can read Microsoft’s documentation here.
Parsing the Audit Log with PowerShell
Using PowerShell is one of the best ways to parse a DHCP audit log. It can also easily be executed on several DHCP servers at once so you don’t have to run it manually on each one.
The script below will use PowerShell remoting to connect to all of your DHCP servers at once to collect the logs and output them as objects instead of CSV:
Function Get-RemoteDhcpAuditLog {
    Param(
        [parameter(Mandatory)]
        [string[]]$ComputerName,

        [parameter(Mandatory)]
        [ValidateSet('Mon','Tue','Wed','Thu','Fri','Sat','Sun','*')]
        [string]$Day = '*',

        [parameter(Mandatory)]
        [ValidateSet('IPv4','IPv6')]
        [string]$Protocol = 'IPv4',

        [string]$LogPath = "C:\Windows\System32\dhcp"

    )

    $Parameters = @{
        Day = $Day
        LogPath = $LogPath
    }

    Switch($Protocol){
        IPv6 {$Parameters["Protocol"] = "v6"}
        IPv4 {$Parameters["Protocol"] = ""}
    }

    $Job = Invoke-Command -AsJob -ArgumentList $Parameters -ComputerName $ComputerName -ScriptBlock {
        $Parameters = $Args[0]

        $LogFiles = Get-ChildItem -Path "$($Parameters.LogPath)\Dhcp$($Parameters.Protocol)SrvLog-$($Parameters.Day).log"
        Foreach($LogFile in $LogFiles){
            # Read the log file
            $LogContent = Cat $LogFile

            # Determine start row of CSV
            $StartRow = 0
            $LogContent | Foreach {
                if($_ -match "^ID,Date"){
                    Break
                }
                Else{
                    $StartRow++
                }
            }


            # Create expressions to use with Select-Object
            $DateTimeExpression = @{
                Name="Date"
                Expression={
                    $_.Date -match "(?\d\d)/(?\d\d)/(?\d\d)" | Out-Null
                    Get-Date "20$($Matches.year)-$($Matches.month)-$($Matches.day) $($_.Time)"

                }
            }

            # Output as CSV from row $StartRow
            $LogContent | Select -Skip $StartRow | ConvertFrom-Csv -Delimiter "," | Select $DateTimeExpression,* -ExcludeProperty Date,Time
        }

    }

    $Job | Wait-Job
    $Job | Receive-Job

}
If we want to fetch audit logs from one or several DHCP servers, we just have to run the following as a user with remoting permissions to the server(s):
# To collect logs from one server
Get-RemoteDhcpAuditLogs -ComputerName srvDhcp01 -Day Tue -Protocol IPv4

# To collect logs from several servers
Get-RemoteDhcpAuditLogs -ComputerName srvDhcp01,srvDhcp02 -Day Tue -Protocol IPv4
This returns a regular PSObject collection that we can filter like this:
Get-RemoteDhcpAuditLogs -ComputerName srvDhcp01 -Day Tue -Protocol IPv4 | Where-Object {$_.'IP Address' -eq "10.10.45.10"}
You can filter on all the properties of the object, making troubleshooting a lot easier (for example, mac, host name and so on).
Summary
Learning how to easily interpret and search the DHCP audit logs is half the battle when it comes to troubleshooting DHCP. And using PowerShell as a tool for that makes it so much quicker.
Creating a PowerShell function for collecting logs it makes it so much easier for us, especially considering that we don’t have to RDP to the DHCP server to run it. Also, running the log collection as a job and not as a regular Invoke-Command makes it so much faster.
About the Author
Adam Bertram is a 20-year veteran of IT. He’s an automation engineer, blogger, consultant, freelance writer, Pluralsight course author and content marketing advisor to multiple technology companies. Adam also founded the popular TechSnips e-learning platform. He mainly focuses on DevOps, system management and automation technologies, as well as various cloud platforms mostly in the Microsoft space. He is a Microsoft Cloud and Datacenter Management MVP who absorbs knowledge from the IT field and explains it in an easy-to-understand fashion. Catch up on Adam’s articles at adamtheautomator.com, connect on LinkedIn or follow him on Twitter at @adbertram or the TechSnips Twitter account @techsnips_io.