
Время на прочтение6 мин
Количество просмотров291K
Всем добрый день. Хотелось бы рассказать о установке и конфигурировании Windows Server 2012 R2 Essentials. Эта статья не является призывом к повсеместной установке Windows или пропагандой продуктов Microsoft. Хотелось бы просто рассказать об интересном продукте и возможно кого-то данный продукт заинтересует и пригодится в работе. Статью я старался писать для неподготовленного читателя, поэтому минимум терминологии и максимум обобщения некоторых понятий.
Немножко о редакции Essentials
Windows Server 2012 R2 Essentials – это одна из редакция серверной операционной системы от компании Microsoft. Однако имеет множество отличий от редакций Standard и Datacenter. Что же умеет Essentials:
- Авторизация и аутентификация пользователей вашей сети (домен контроллер службы каталогов Active Directory)
- Файловое хранилище (роль файлового сервера)
- Удаленный доступ к корпоративной сети (VPN и DirectAccess сервер)
- Удаленный доступ к файловому хранилищу через Web-интерфейс (настроенный для этого IIS)
- Удаленный доступ к рабочем столам клиентских машин (шлюз удаленных рабочих столов)
- Резервное копирование клиентских машин (windows backup)
- Резервное копирование самого сервера (windows backup)
- Интеграция с облачными технологиями Microsoft (Office 365, Azure backup и т.д.)
- Консоль единой настройки Essentials, которая позволит настроить возможности описанные выше даже не подготовленному системному администратору.
Если обобщить, то редакция Essentials имеет большинство ролей Windows Server. Некоторые из этих ролей настроены, некоторые доступны в полном объеме, некоторые как например Hyper-V с серьезными ограничениями. Компенсацией за эти все ограничения является более низкая цена, включенных 25 клиентских лицензий, централизованная и простая настройка. Хочу так же отметить, что процесс лицензирования серьезно отличается. Вы можете использовать эту редакцию только для организаций, где число пользователей не превышает 25. Но повторюсь вам не нужно приобретать какие-либо клиентские лицензии.
Таким образом Essentials очень хорошо подходит для малых организаций, которые бы хотели пользоваться большинством современных решений для обеспечения безопасности корпоративной сети, хранения документов, удаленного доступа, возможно, почтовые системы. Для тех организаций, которые не хотели бы тратить много денег как на саму ИТ инфраструктуру, так и на работу высококвалифицированных системных администраторов.
Установка и первоначальная настройка
Установка данной ОС вполне стандартная процедура. Если вы хоть раз устанавливали Windows Vista /7/8/8.1, то вы без проблем установите и Essentials. Однако, если вы не устанавливали ни вышеперечисленных ОС ни любую из последних версий серверных ОС, то я рекомендую или довериться профессионалу или как минимум студенту второкурснику.
Единственное, что я бы рекомендовал в момент установки, если у вас один жёсткий диск, разбить его на два раздела. Т.е. сделать так чтобы после установки в системе был второй уже отформатированный жесткий диск. Безусловно это только рекомендация, вы сможете подготовить второй диск в последующем, однако придется переносить некоторые папки.
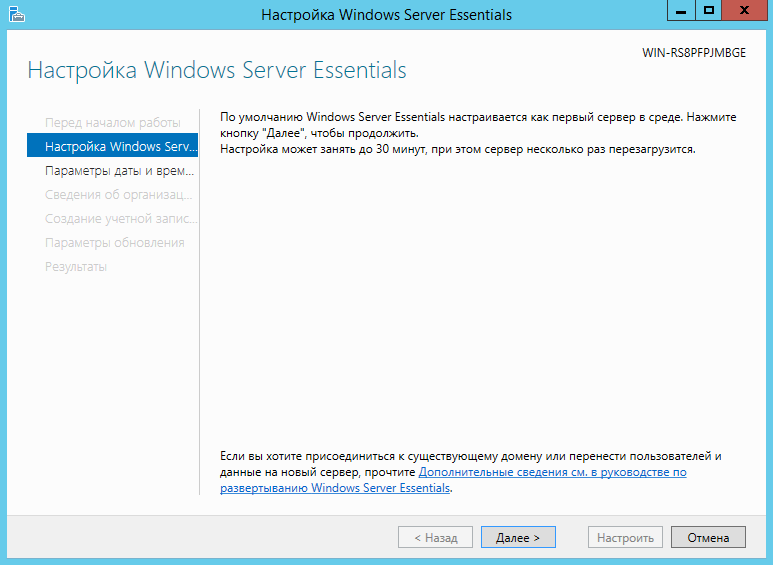
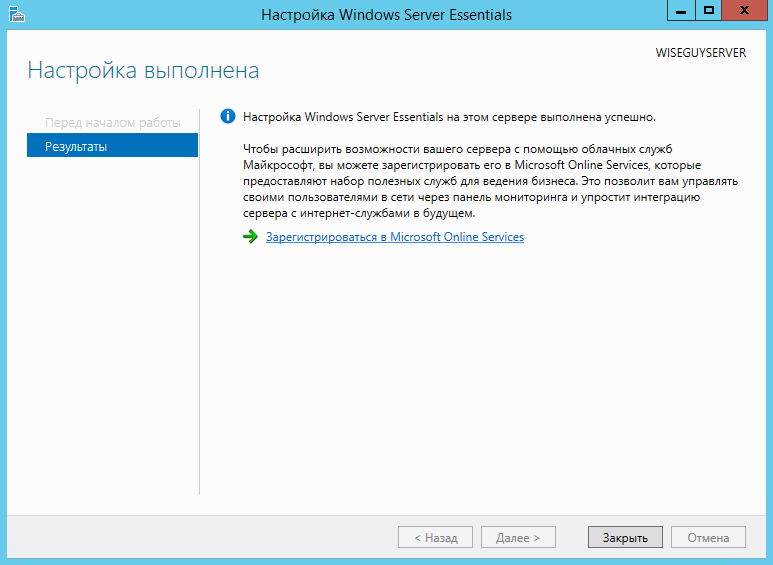
После первого входа в свежеустановленную ОС запустится мастер «Настройка Windows Server Essentials», который поможет произвести первоначальную настройку.
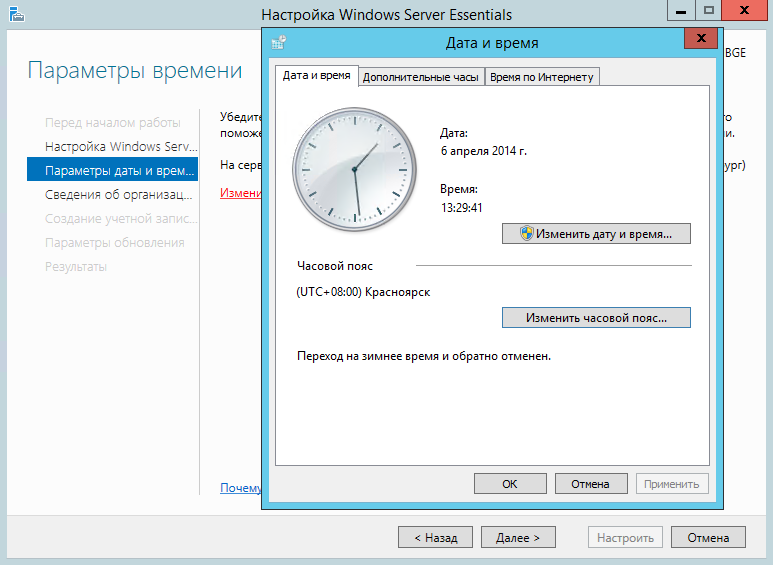
На первом шаге вам необходимо задать настройки даты и времени.
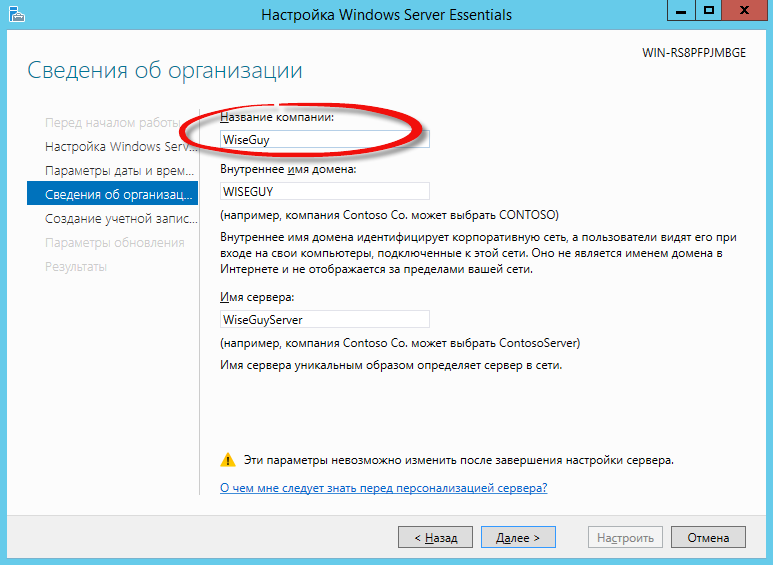
На втором шаге вам необходимо заполнить на английском языке название компании. Имя домена и имя сервера будут в таком случая сгенерированы автоматически, хотя конечно вы можете поменять их.
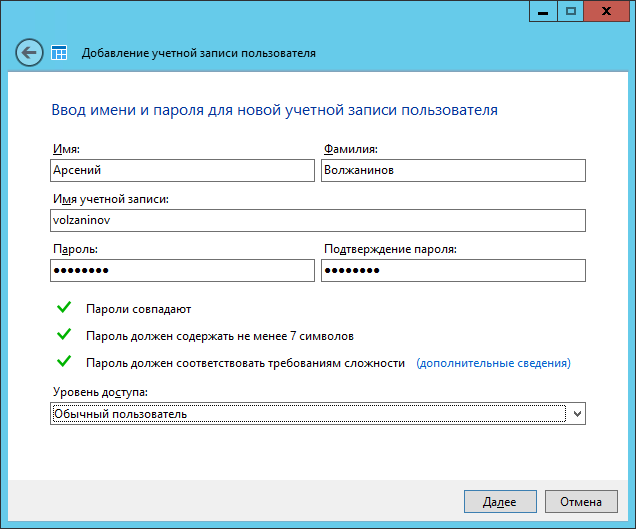
На следующем шаге вам необходимо заполнить имя администратора и задать его пароль.

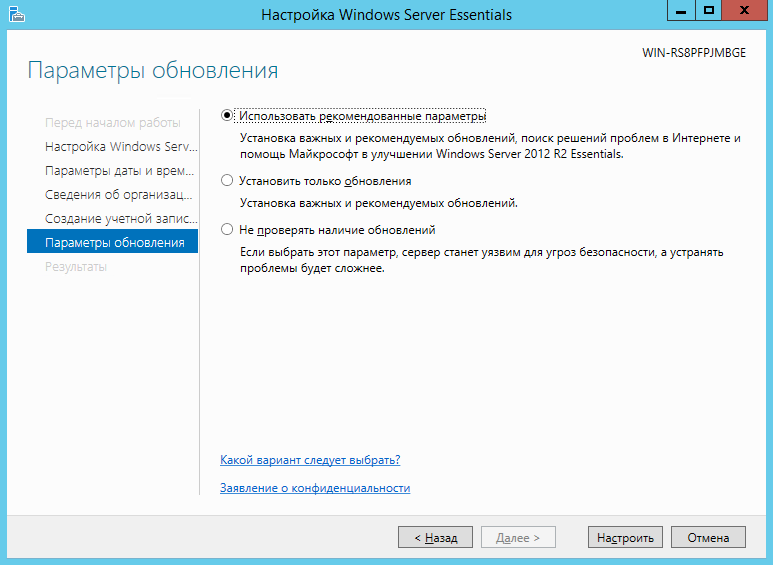
На последнем шаге необходимо указать способ обновления операционной системы и нажать настроить
После этого запустится процесс, который произведет все необходимые первоначальные настройки. Это займет около 30 минут и потребует несколько перезагрузок. За это время ОС успеет в частности установить необходимые роли и настроить сервер в качестве домен контроллера для нового домена.
Настройка
Продукт весьма большой и обширный, я хотел бы рассказать о самых базовых возможностях настройки, такие как создание пользователей, настройка удаленного доступа, создание папок, подключение клиентов.
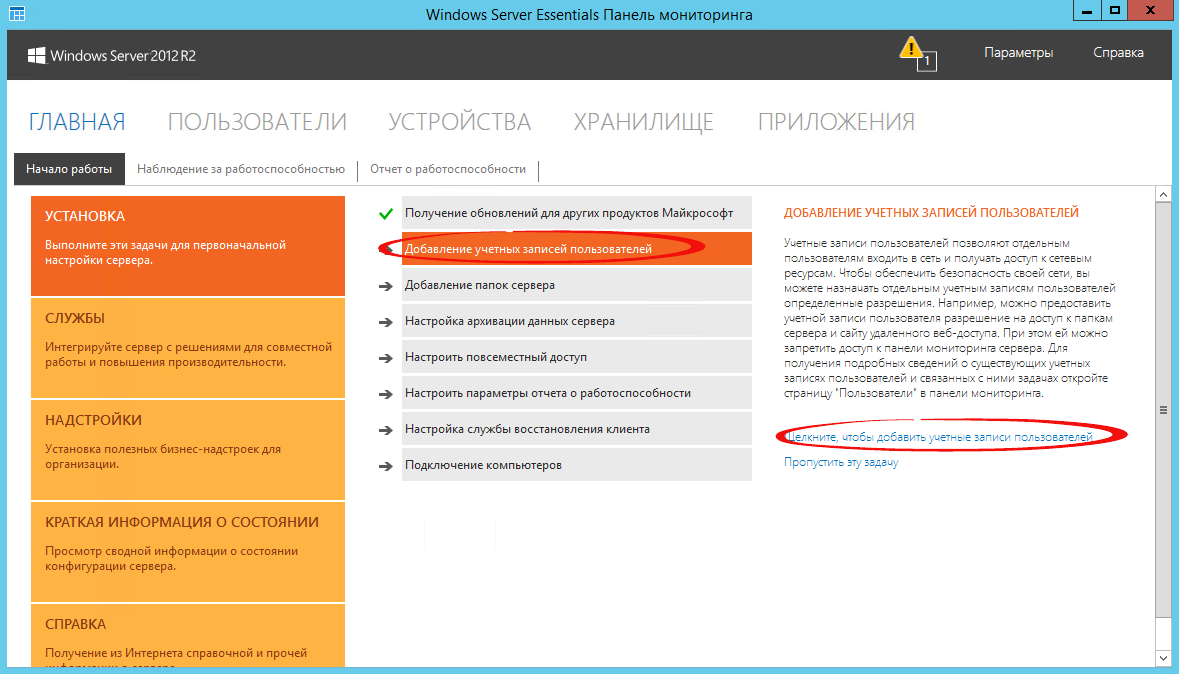
Вся настройка происходит в панели мониторинга, доступ к ней есть с рабочего стола, панели быстрого запуска и стартового экрана.
Создание пользователей
При первом запуске данной панели вам откроется вкладка установка, на которой можно выполнить ряд задач по настройке сервера.
Я начну с добавления пользователей. Щелкаем ссылку для добавления учетных записей.
Заполняем поля формы и нажимаем далее
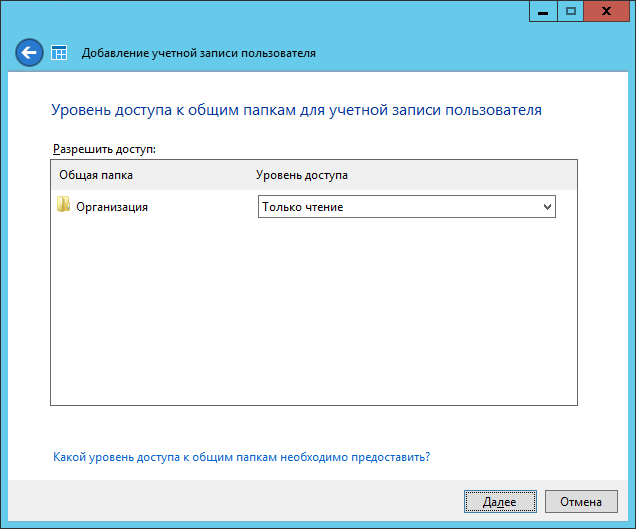
Выбираем уровень доступа к общим папкам, которые были созданы. На начальном этапе существует лишь одна – Организация. В дальнейшем вы можете менять разрешения на доступ как из свойств пользователя, так и из свойств папки.
Далее устанавливаем, что будет доступно для пользователя удаленно. Про удаленный доступ расскажу чуть позже.
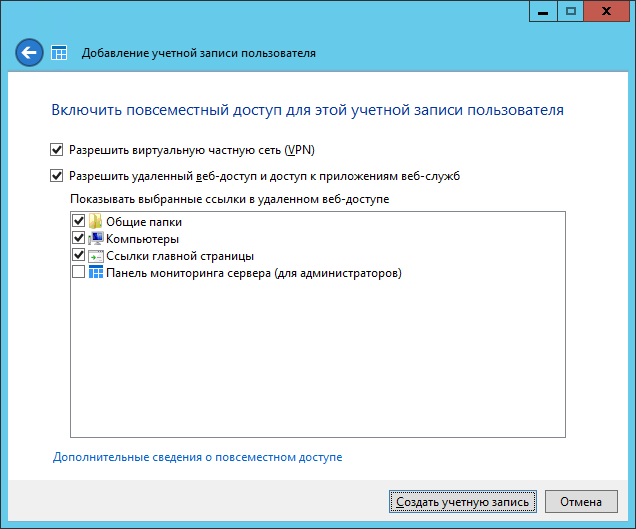
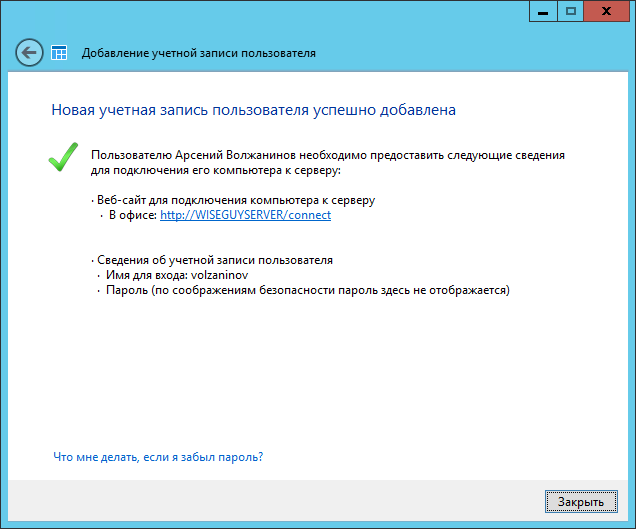
Учетная запись создана. Жмем закрыть.
Подобным образом можно создать множество учетных записей. Безусловно, Вы можете пользоваться и привычным и знакомым для вас интерфейсом Active Directory Users and Computers, но в таком случае выдавать разрешения на доступ вам придется ручками.
Добавление папок сервера
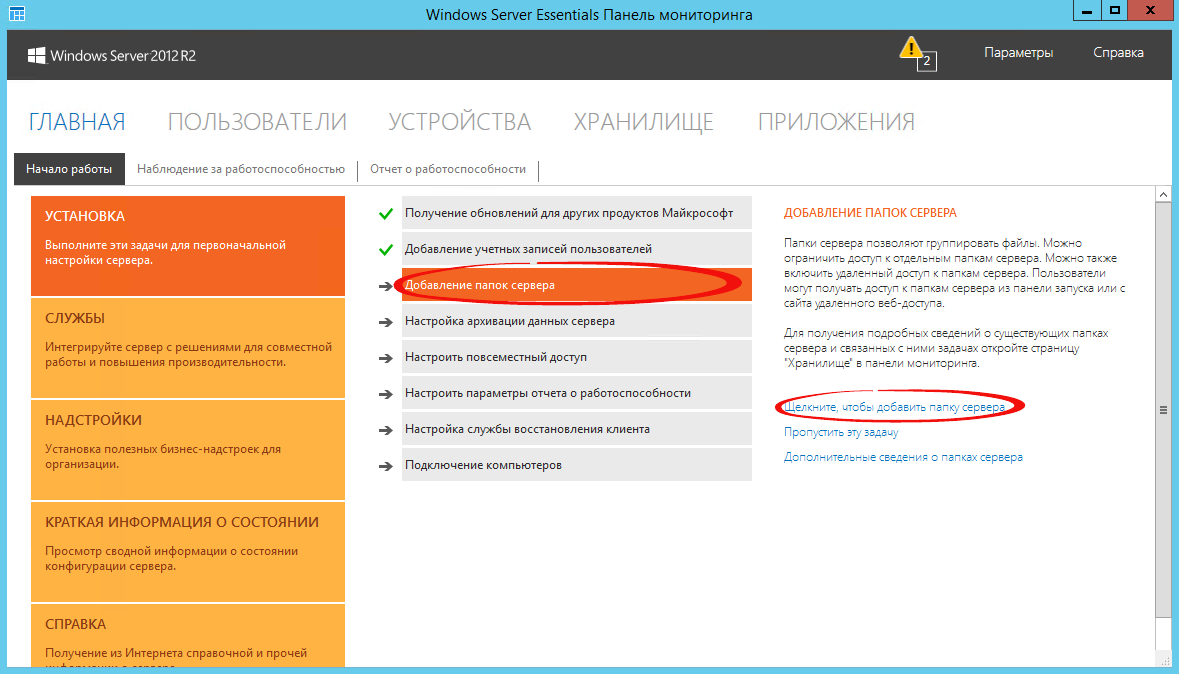
Для добавление папок существует другой мастер, который поможет и создать папку на диске, и общий доступ для нее настроить, и разрешения выдать. Для его запуска необходимо щелкнуть соответствующую ссылку в панели мониторинга.
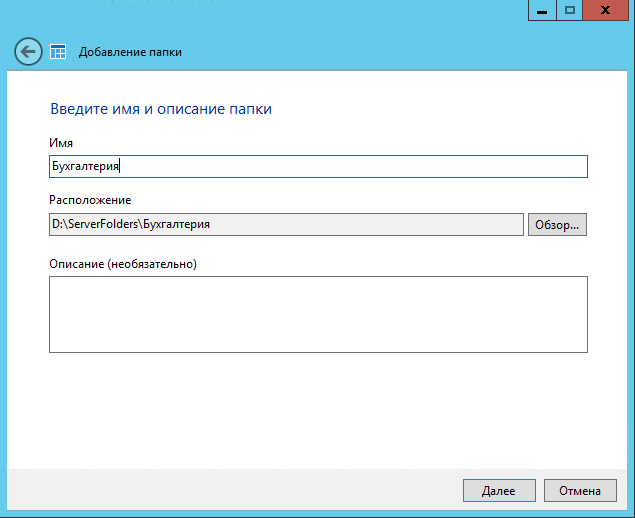
В открывшемся окне мастера вводим название. Можно изменить расположение и добавить описание. Нажимаем далее.
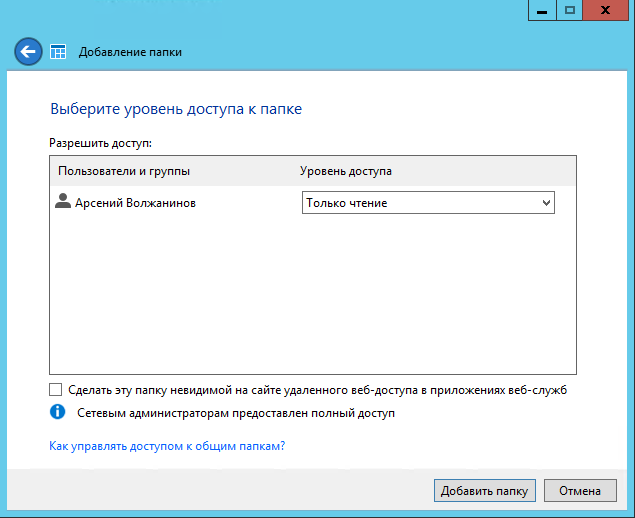
На следующей странице указываем необходимые разрешения. При необходимости делаем ее недоступной при удаленном доступе.
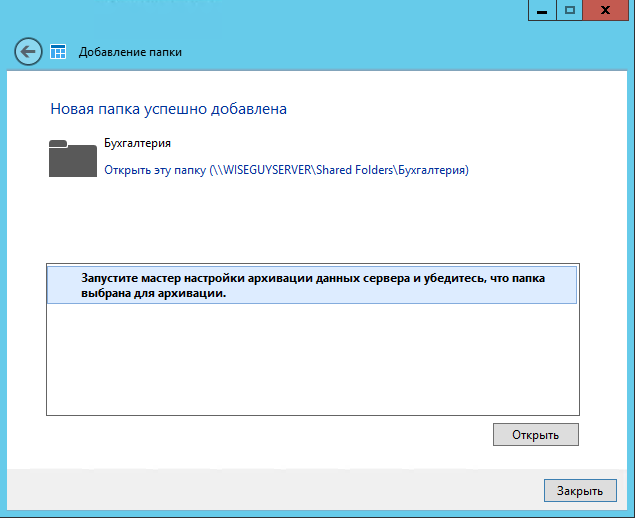
С последнего шага данного мастера можно запустить мастер настройки архивации. Нажимаем закрыть.
Настройка удаленного доступа
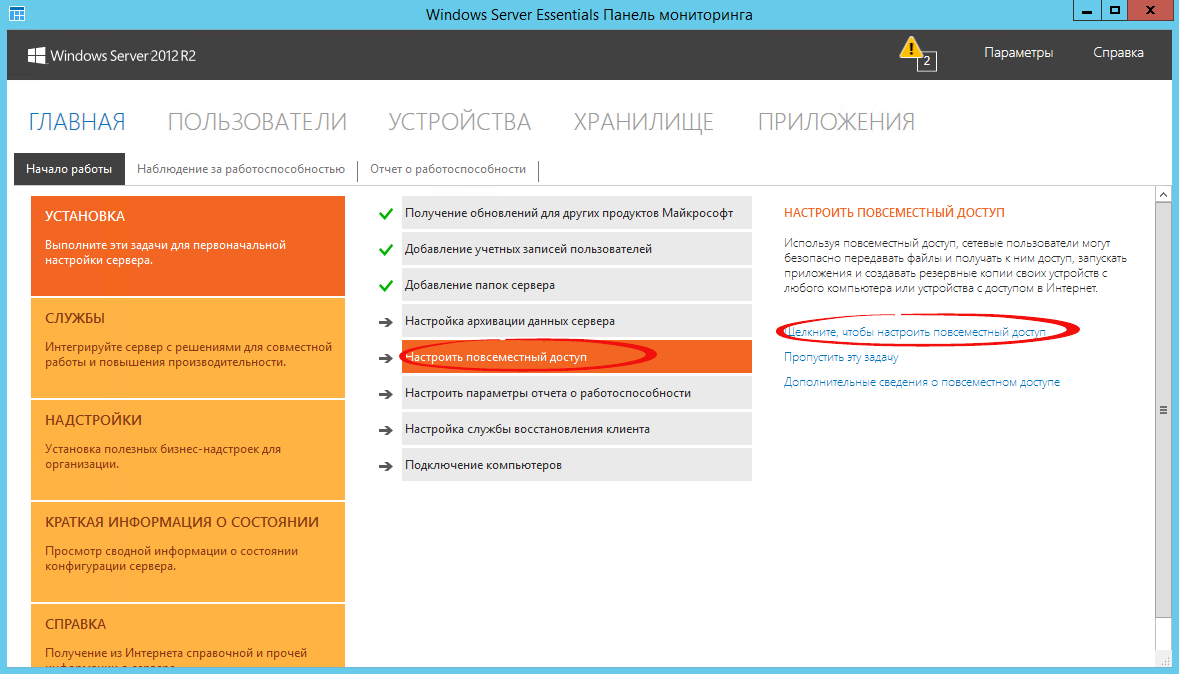
Один, наверное, из самых сложных этапов настройки Windows Server 2012R2 Essentials. Настройка так же происходит с помощью мастера. Мастер традиционно запускается из панели мониторинга.
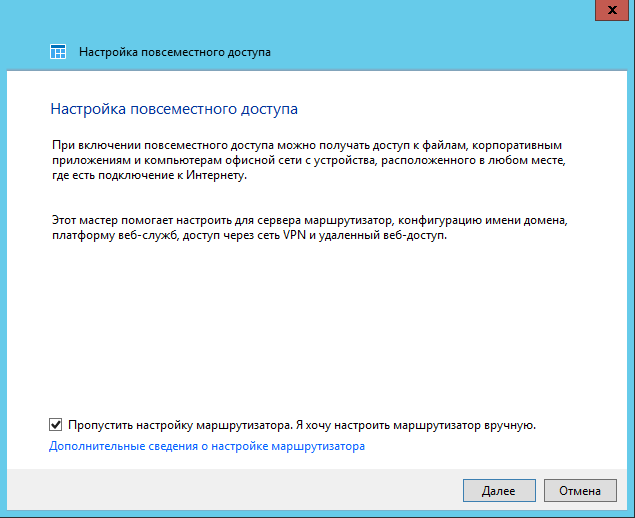
Первое что Вам необходимо настроить это ваш маршрутизатор – об этом Вам сообщает мастер. На самом деле Вам необходимо настроить перенаправление портов на маршрутизаторе. Для этого у маршрутизатора должен быть «белый» IP адрес. А на самом сервере лучше настроить статический IP адрес. Перенаправить нужно следующие порты 80, 443, 1723, 987 на IP адрес вашего сервера. В общем то процедуру настройки может выполнить и сам мастер, если ваш маршрутизатор поддерживает UPnP. Я делал настройку ручками, поэтому пропустил данный шаг.
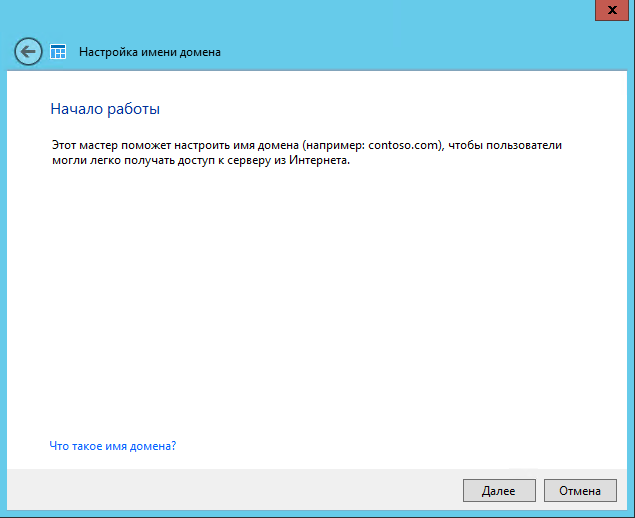
После этого открывается новый мастер настройки доменного имени. Нажимаем далее.
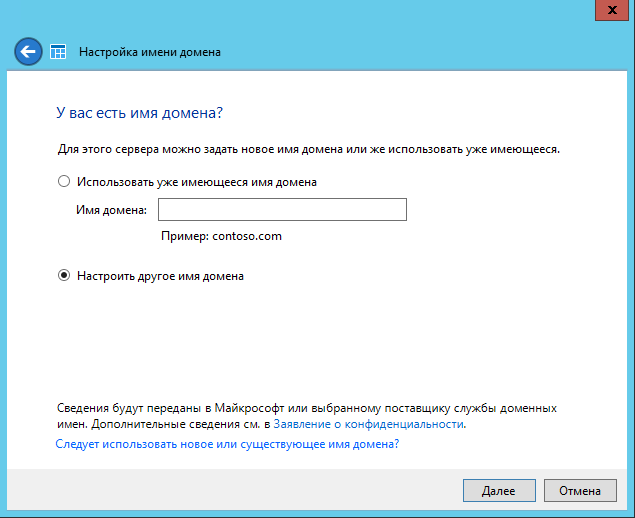
Мастер предложит ввести имя внешнего домена или создать новый. Для собственного домена Вам понадобится сертификат, поэтому рассмотрим тут вариант настройки с использованием домена Microsoft. Выбираем другое имя домена и щелкаем далее.
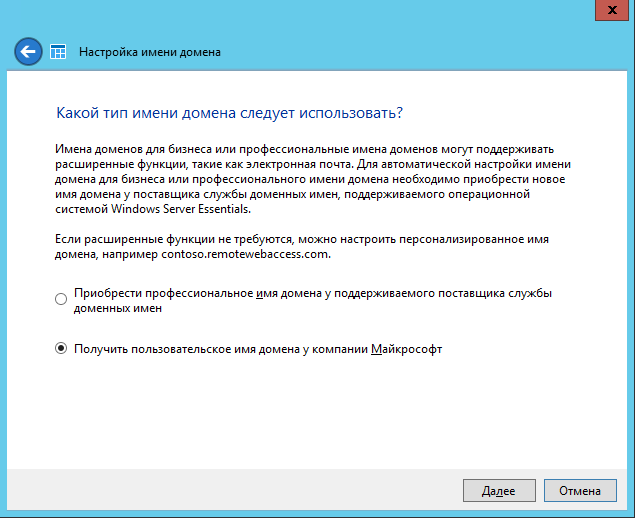
Рассмотрим вариант с доменом компании Microsoft.
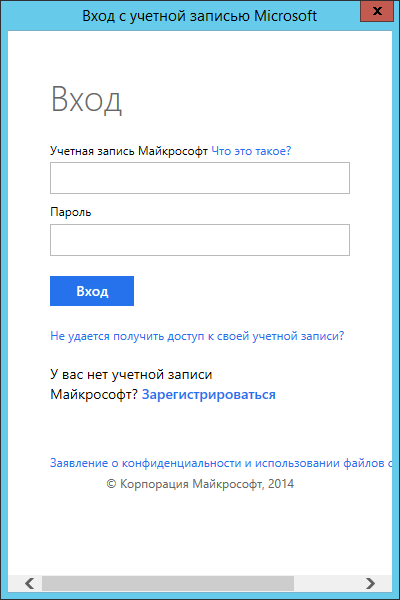
Тут попросит авторизоваться в Microsoft Account.
После авторизации принимаем заявление о конфиденциальности.

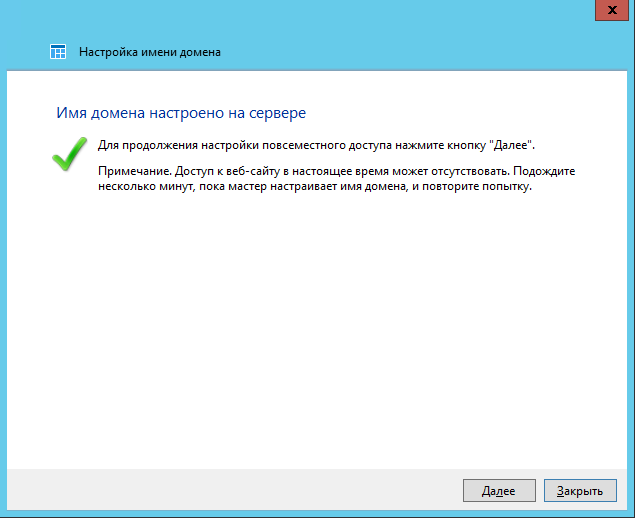
Вводим имя домена и проверяем доступность, жмем настроить.

Ну что с именем домена разобрались. Продолжаем — далее.
Выбираем какие именно возможности будут доступны.

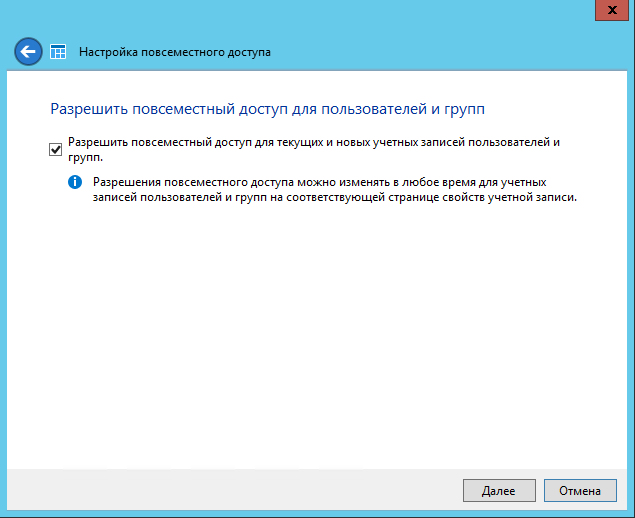
Выбираем будет ли доступен удаленный доступ для текущих пользователей.
Ну вот и все можете попробовать зайти на сайт wiseguy.remoteweaccess.com.

C данного веб сайта есть возможность доступа к общим папкам и доступ к рабочим столам пользователей.
Подключение рабочих станций
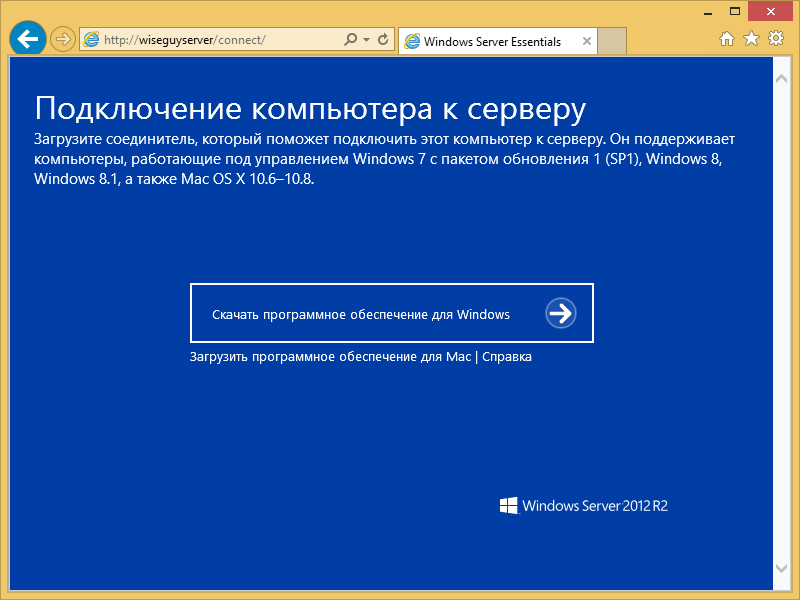
Если мы и на этот раз откроем панель мониторинга и перейдем на страницу подключение компьютеров, то увидим там лишь инструкцию к действию

Следуя инструкции на клиенте в браузере открываем страничку http://<Имя сервера>/connect. Нажимаем ссылку для скачивания.
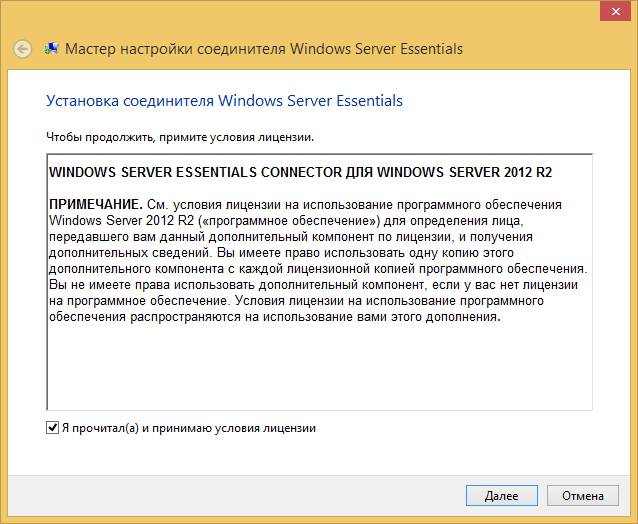
Выбираем выполнить.

Принимаем лицензию и ждем.
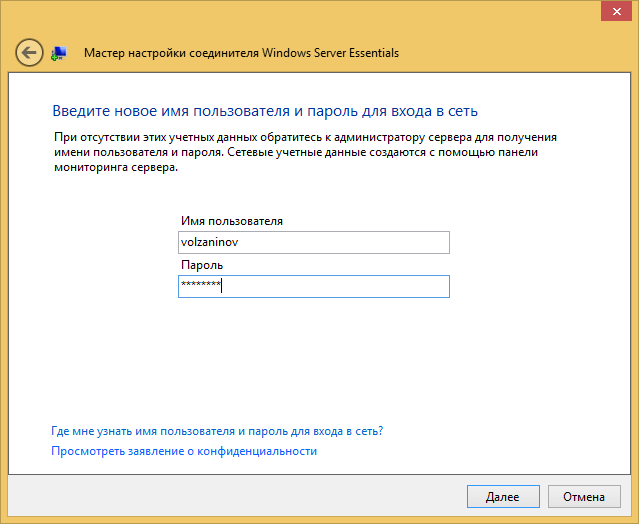
Вводим имя пользователя и пароль пользователя данного компьютера или администратора. Я вводил учетку пользователя.
Перезагружаем сервер.

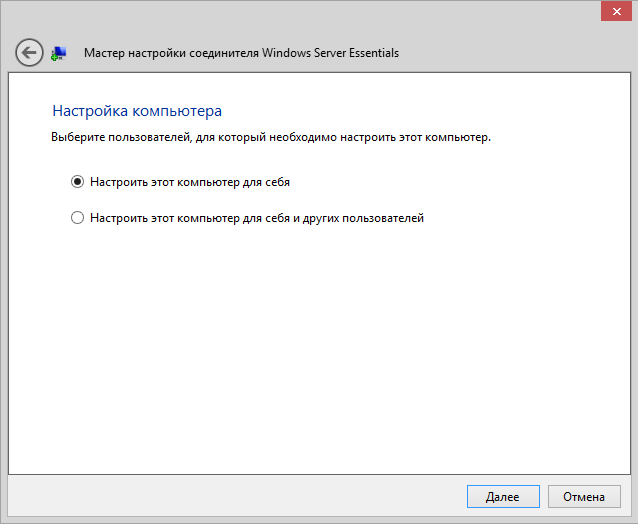
Выбираем, кто будет пользоваться компьютером.
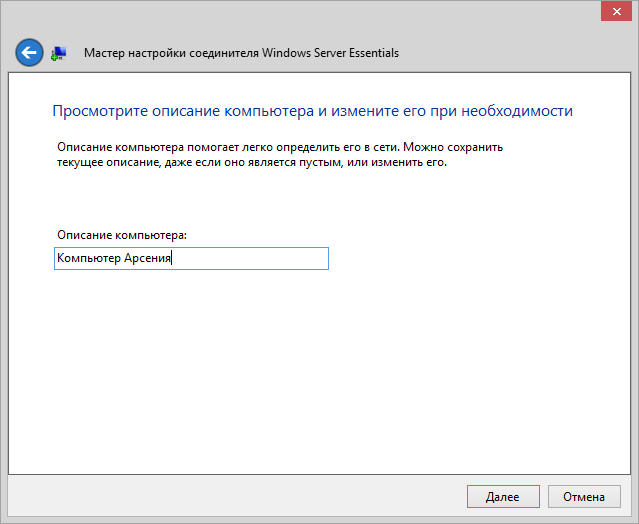
Вводим описание компьютера.
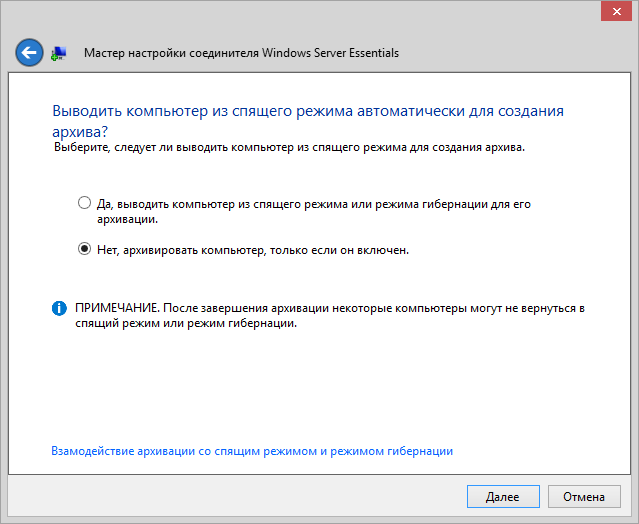
Параметры архивации.
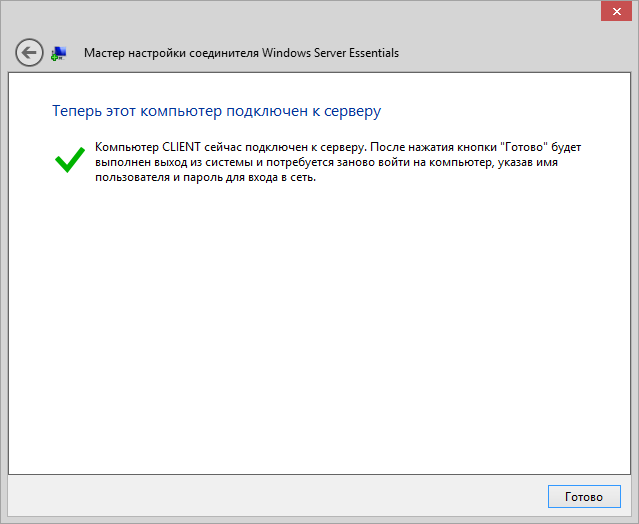
Ура! Готово.
Заходим на компьютер под учетной записью пользователя.

Можно работать. На рабочем столе уже есть все необходимые ярлыки.

Post scriptum
Безусловно Windows Server 2012R2 Essentials – это не панацея. Автоматизировано в ней многое, но не все. Тем не менее для малых организаций, это весьма интересное решение и его необходимо рассмотреть. В этой статье я рассказал лишь о самых базовых настройках Essentials. Если вы желаете чуть ближе познакомиться с продуктом, вы можете посмотреть мои видеодоклады на сайте Techdays.ru .
Windows Server 2012 R2 Essentials первый взгляд: www.techdays.ru/videos/7351.html — тут можно внимательно изучить процесс инсталляции Essentials.
Windows Server 2012 R2 Essentials настройка: www.techdays.ru/videos/7370.html — рассмотрены настройка всех возможностей, показана настройка удаленного доступа для своего домена.
Windows Server 2012 R2 Essentials интеграция Office 365: www.techdays.ru/videos/7380.html — интеграция с облачным офисом от Microsoft.
Комментарии и вопросы приветствуются.
Windows Server Essentials Experience is a vital component for small to medium-sized businesses looking to streamline their IT processes. It offers a simple interface and powerful features to optimize the management of users, devices, and security within a server environment. This article provides a comprehensive guide on how to install and configure Windows Server Essentials Experience for optimal performance and productivity.
Understanding Windows Server Essentials Experience
Windows Server Essentials Experience is designed for small businesses with up to 25 users and 50 devices, making it an excellent choice for organizations with limited IT resources. It offers features like centralized user management, file sharing, remote access, data protection, and integration with cloud services. The simplicity of its installation and configuration makes it appealing for IT administrators with varying levels of expertise.
Pre-Installation Requirements
Before diving into the installation process, certain pre-requisites must be established:
1. Hardware Requirements
Ensure that the hardware used meets the following minimum specifications:
- Processor: 1.4 GHz 64-bit processor or faster.
- RAM: 4 GB or more (8 GB is recommended).
- Disk Space: 160 GB or more of available disk space.
- Network Adapter: Ethernet adapter capable of at least 1-gigabit throughput.
2. Software Requirements
While Windows Server Essentials is designed to support its environment smoothly, ensure your system has:
- A supported version of Windows Server (Windows Server 2016 or Windows Server 2019).
- Latest updates from Microsoft.
3. Backup and Recovery Plan
Before making significant changes to the server systems, establish a robust backup plan to prevent data loss during installation and configuration.
4. Network Configuration
Ensure that your network infrastructure is set up correctly. Ideally, the server should have a static IP address configured before installation to facilitate easy access and management.
Installation Process of Windows Server Essentials Experience
The installation process of Windows Server Essentials Experience consists of several key steps. Below is a step-by-step guide:
Step 1: Obtain the Installation Package
Download the Windows Server Essentials installation package from the Microsoft website or through a licensed, trusted source. Ensure that the version you obtain matches your server’s architecture.
Step 2: Create Installation Media
Use a USB drive or DVD to create installation media:
- Insert your USB drive into your computer.
- Use a tool like Windows Media Creation Tool to create installation media. Follow the instructions provided by the tool to complete this step.
Step 3: Boot from the Installation Media
- Insert the USB drive or DVD into the server.
- Restart the server.
- Enter BIOS settings (typically done by pressing a key like F2 or Delete during boot).
- Set the system to boot from the USB drive or DVD first.
- Save the changes and exit.
Step 4: Start the Installation
- Once the server boots from the installation media, select your language, time, and keyboard preferences.
- Click on “Next” and then “Install Now.”
- When prompted, select the “Windows Server Essentials Experience” edition to proceed.
Step 5: Accept License Terms
Read and accept the Microsoft Software License Terms to continue with the installation.
Step 6: Select Installation Type
Choose the type of installation you prefer. For new installations:
- Select “Custom: Install Windows only (advanced)” if you are performing a fresh installation.
Step 7: Choose Installation Location
Select the disk where you want to install Windows Server Essentials. This should be the primary disk without any previous operating system installed. Click “Next” to begin the installation.
Step 8: Complete Installation
The installation process may take some time. The server will restart multiple times during this phase. Follow any on-screen prompts to complete the installation.
Initial Configuration of Windows Server Essentials Experience
Once the installation is complete, Windows Server Essentials Experience will guide you through the initial configuration process.
Step 1: Setting up Your Server
Upon restarting, you will be guided through the Windows Server Essentials Configuration Wizard:
- Connect to the Internet: Ensure your server is connected to the internet for updates and configuration.
- Set up Server Name: Assign a suitable name to your server.
Step 2: Configure Time and Language Settings
Verify that the server’s time zone, date, and time are correctly set to ensure accurate log management and system operation.
Step 3: Create and Configure Your Administrator Account
- Create a local administrator account if prompted, ensuring you secure it with a strong password.
- Optionally, link your server to a Microsoft account to enable additional features like backup to OneDrive.
Step 4: Configure Users and Groups
- In the Dashboard, navigate to «Users.»
- Use the «Add a user» wizard to create user accounts as needed. Ensure you assign appropriate roles and permissions based on job requirements.
Step 5: Set Up Devices
Go to the “Devices” tab in the Dashboard and add any devices that will access the server. This will allow you to monitor and manage these devices effectively.
Step 6: Configure Shared Folders
- Navigate to «File» in the Dashboard.
- Set up shared folders for users to access essential files collectively.
Step 7: Enable Remote Access
- Go to “Settings” from the Dashboard.
- Enable Remote Access to allow users to connect to the server remotely. This feature is especially useful for businesses with employees who work off-site.
Step 8: Configure Backup
- In the Dashboard, find the «Backup» section to set up backup schedules.
- Ensure that backups are pointed to a reliable storage solution, such as an external drive or cloud backup service.
Managing the Windows Server Essentials Experience
Once installed and configured, you need to actively manage your server to ensure security, performance, and user satisfaction.
User and Permissions Management
Regularly review user accounts and permissions to ensure only authorized users have access to sensitive data. This will also involve deactivating accounts of terminated employees or users no longer associated with your organization.
Updates and Security Patches
Regularly install Windows updates and security patches to protect your server from vulnerabilities. Monitor the update status via the dashboard and schedule updates during off-peak hours to minimize disruption.
Performance Monitoring
Utilize built-in tools to monitor server performance:
- Use the Resource Monitor to keep track of CPU, memory, and disk usage.
- Check event logs to investigate any issues affecting the server performance to enable timely troubleshooting.
Data Backup and Recovery
Maintain a strict backup schedule and periodically test your backups to ensure data can be recovered in case of a hardware failure or data corruption. Regularly update recovery plans to reflect current organizational requirements.
Utilizing Add-Ons and Extensions
Enhance functionality by exploring various plugins and add-ons designed for Windows Server Essentials Experience. These can expand capabilities, integrate with cloud services, or provide additional security features.
Common Installation Issues and Troubleshooting
While the installation and configuration process is relatively straightforward, you might encounter a few common issues during the setup phase. Below are some typical problems and their potential solutions:
-
Incompatible Hardware: Ensure that hardware meets the specifications required by Windows Server Essentials.
-
Network Configuration Issues: If unable to connect to the internet, check your network settings and ensure the server can properly communicate with external networks.
-
Installation Errors: If you encounter errors during installation, check the installation media for corruption. Recreate the installation media if required.
-
User Access Issues: If users can’t access shared folders, verify permissions generously and ensure users are added to the appropriate groups.
-
Performance Lags Post-Installation: Ensure that there are no resource-hogging applications running. You can monitor this using the Resource Monitor.
Conclusion
Installing and configuring Windows Server Essentials Experience can provide small and medium-sized businesses with a robust platform for managing users, devices, and data efficiently. By following this guide, you will be well on your way to creating an environment that boosts productivity, maintains security, and optimizes resource use.
With continued management, updates, and a robust backup plan in place, your organization’s IT infrastructure can thrive, adapting to the growing needs of your business while providing a secure and user-friendly framework for all employees. Remember, investing time to properly install and configure your server pays off substantially in the long run.

As mentioned in my previous post, Microsoft has completely removed the Windows Server Essentials Experience (WSEE) server role from Windows Server 2019. However, since the entire Windows Server Essentials Experience is basically just an elaborate .NET application that is installed on top of the Windows Server operating system (and not some tightly integrated system component of the OS itself), it can quite readily be installed onto Windows Server 2019 and beyond.
Background Information And Proof Of Concept
Windows Server 2016 is built upon the Windows 10 version 1607 platform, and so it stands to reason that any .NET application that runs on it “should” run equally well on Windows Server 2019 (which is built upon the similar, but newer, Windows 10 version 1809 platform). This certainly holds true for the Windows Server Essentials Experience .NET application seeing as it runs exactly the same under Windows Server 2019 (and beyond) as it does under Windows Server 2016.
To install the Windows Server Essentials Experience on Windows Server 2019 / 2022 / 2025, all that needs to be done is for you to copy its required files and registry entries from Windows Server 2016 over to Windows Server 2019 / 2022 / 2025, add its prerequisite server roles and features, create its required services, and then complete its setup process by running the Configure Windows Server Essentials wizard. As you can see from the following screenshots, everything works quite nicely once it has been properly installed and configured.
• The “Configure Windows Server Essentials” wizard works perfectly when performing the initial configuration of Windows Server Essentials on Windows Server 2019 / 2022 / 2025…
• The configuration wizard even works when Windows Server 2019 / 2022 / 2025 is joined to an existing domain (i.e. when it is running as a member server, rather than acting as the primary domain controller)…
After Windows Server Essentials has been successfully configured you can then simply open up the server Dashboard (as usual) and start enjoying all the features of the Windows Server Essentials Experience server role on Windows Server 2019 / 2022 / 2025.
• Client Connect and Client Backup works…
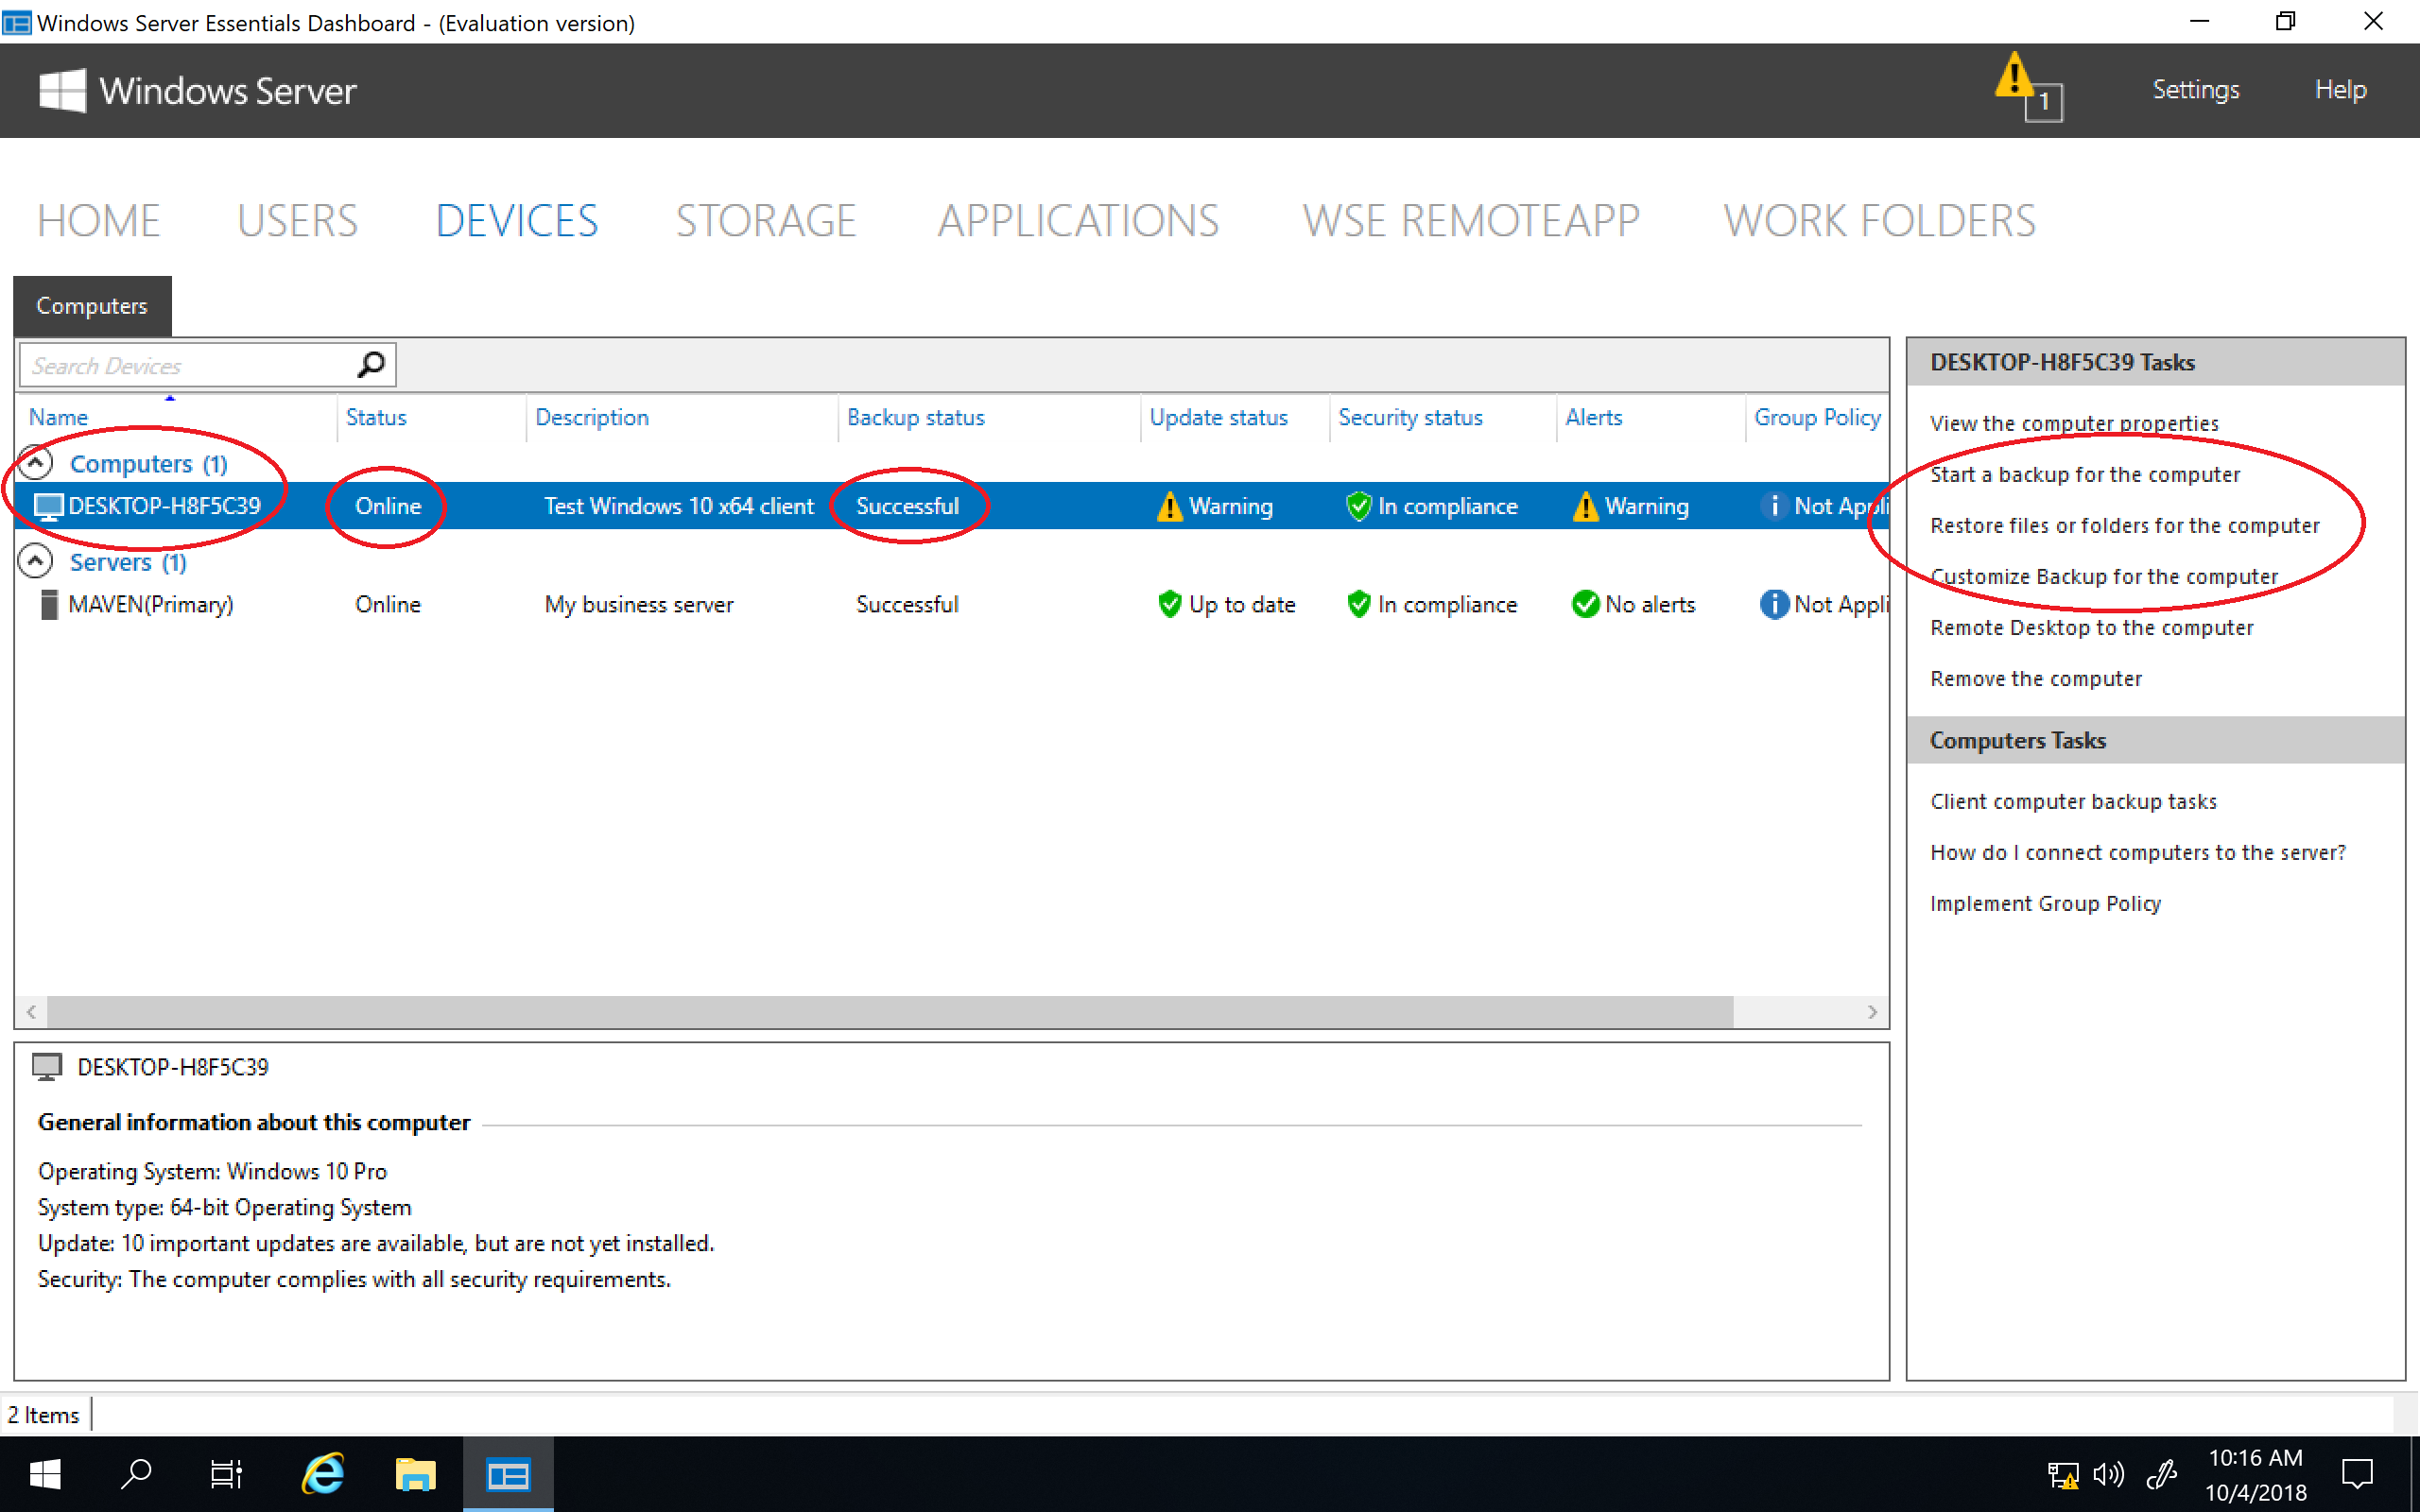
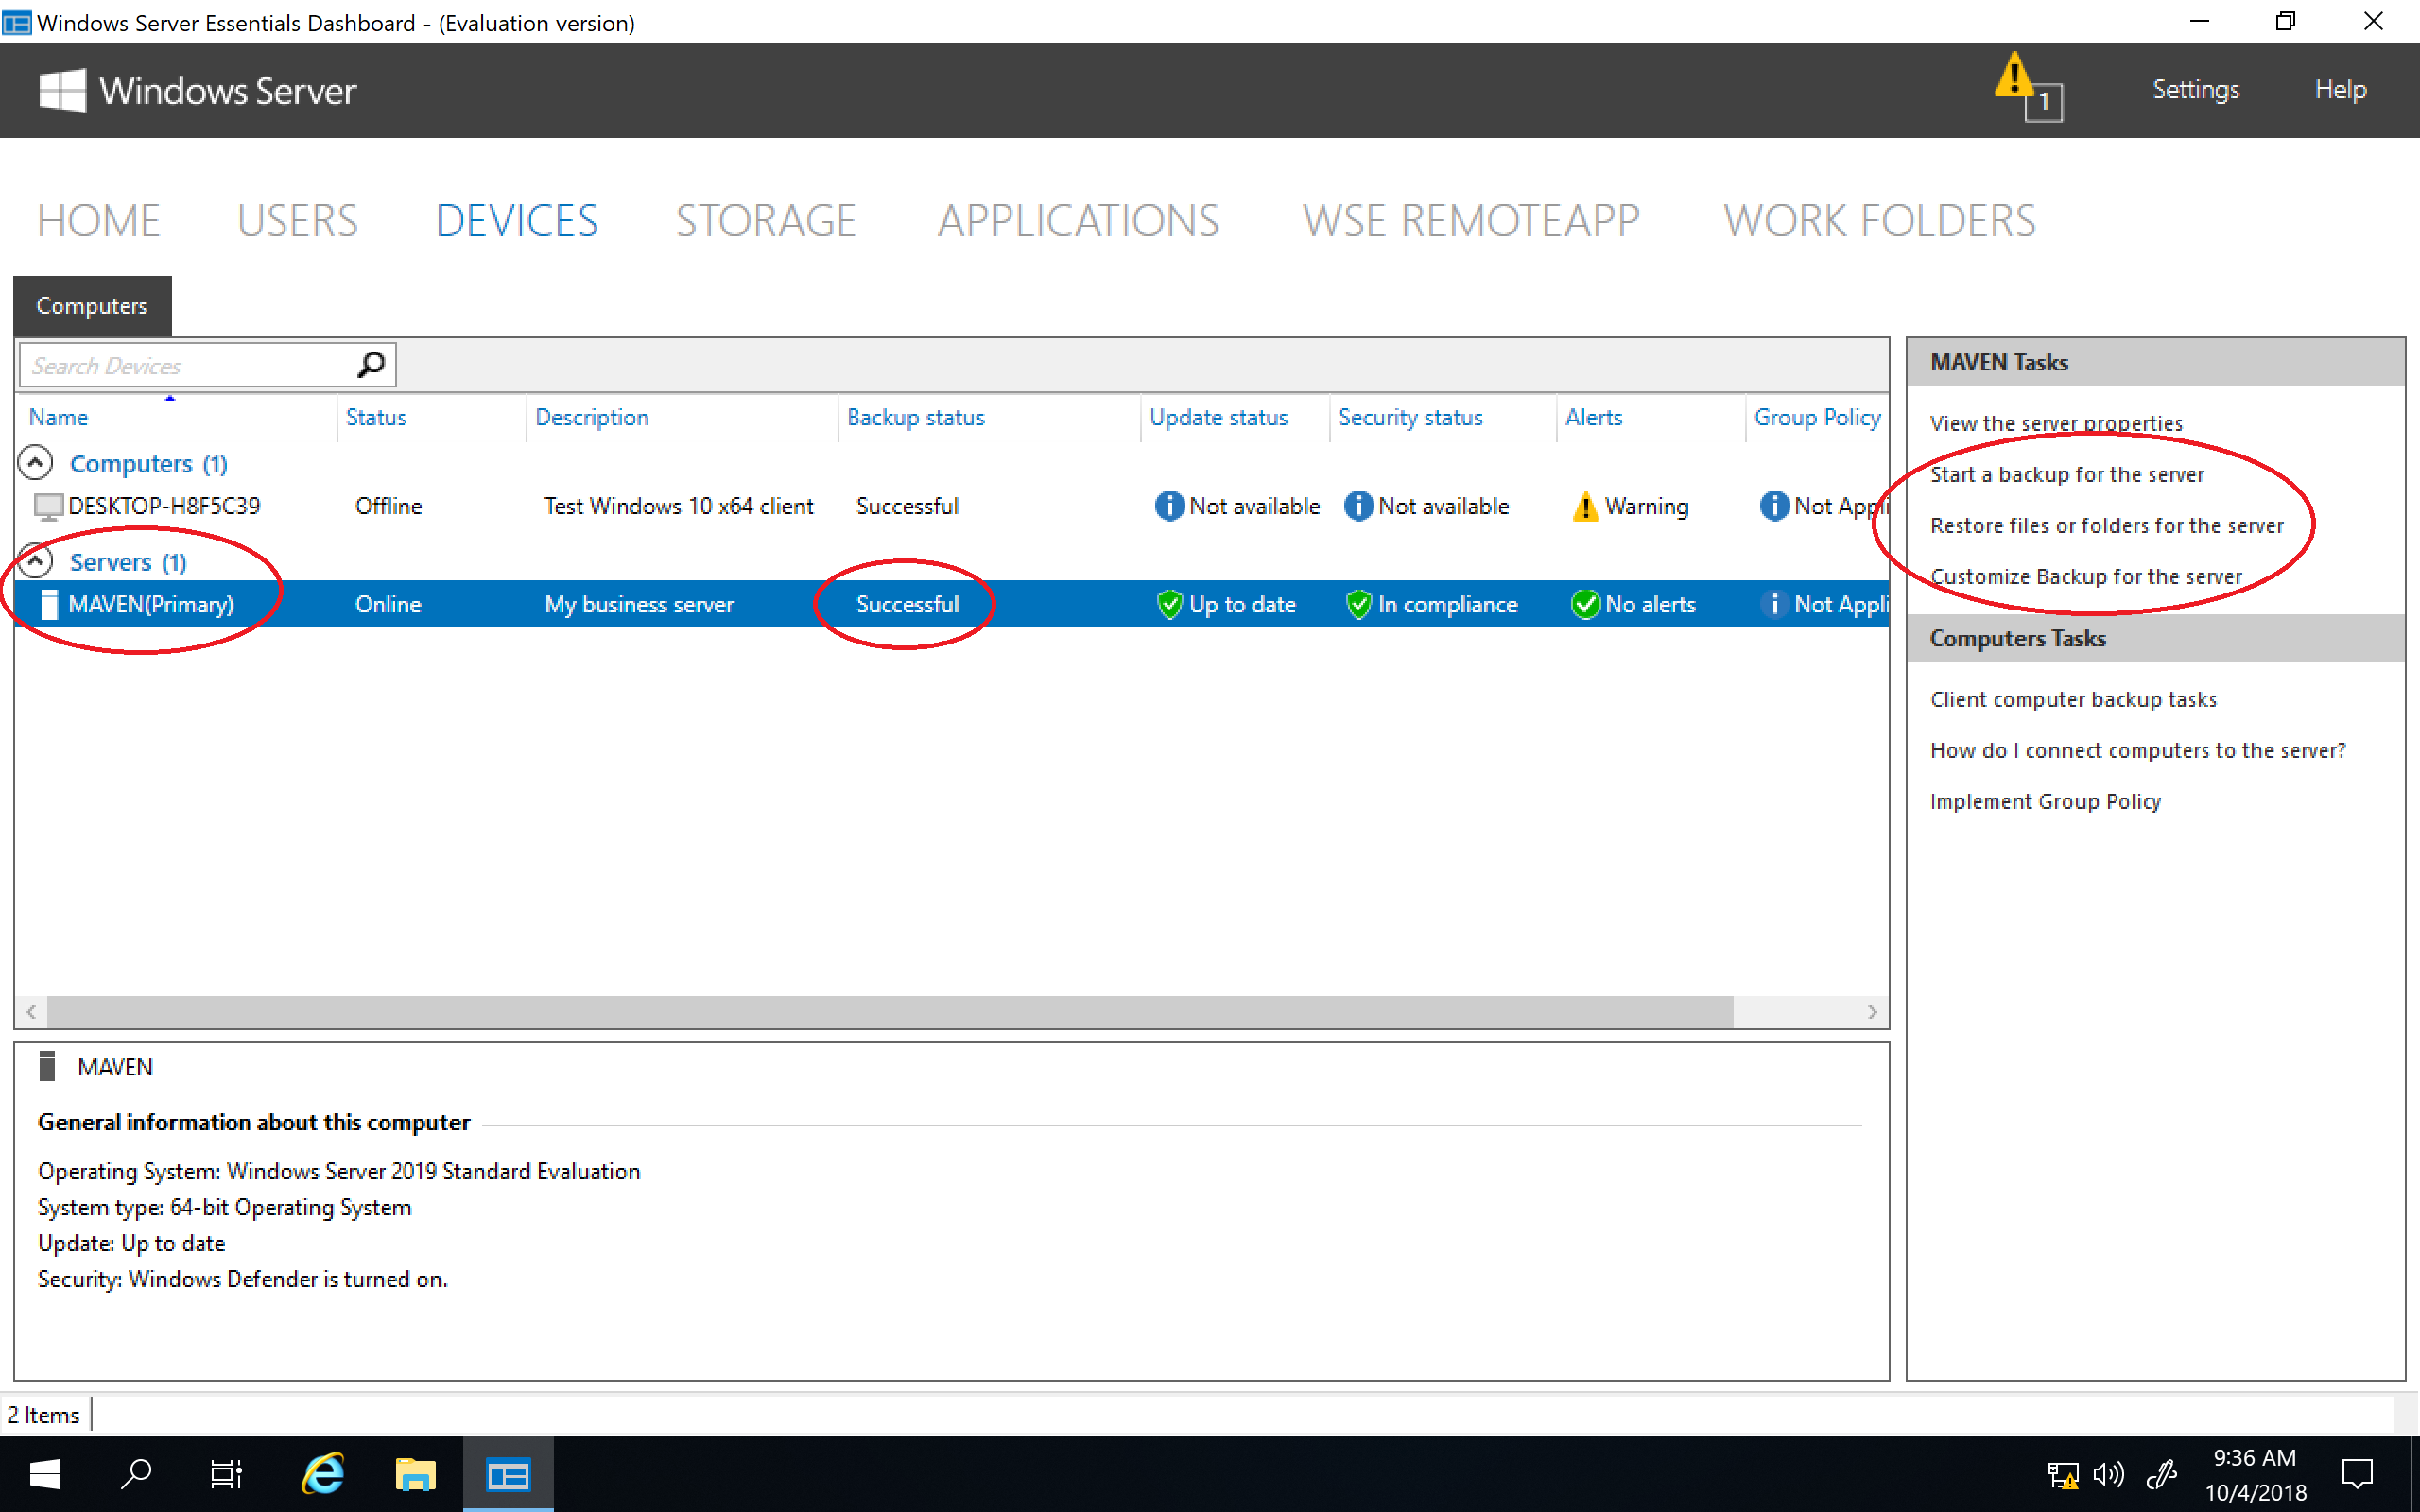
• Server Backup works…
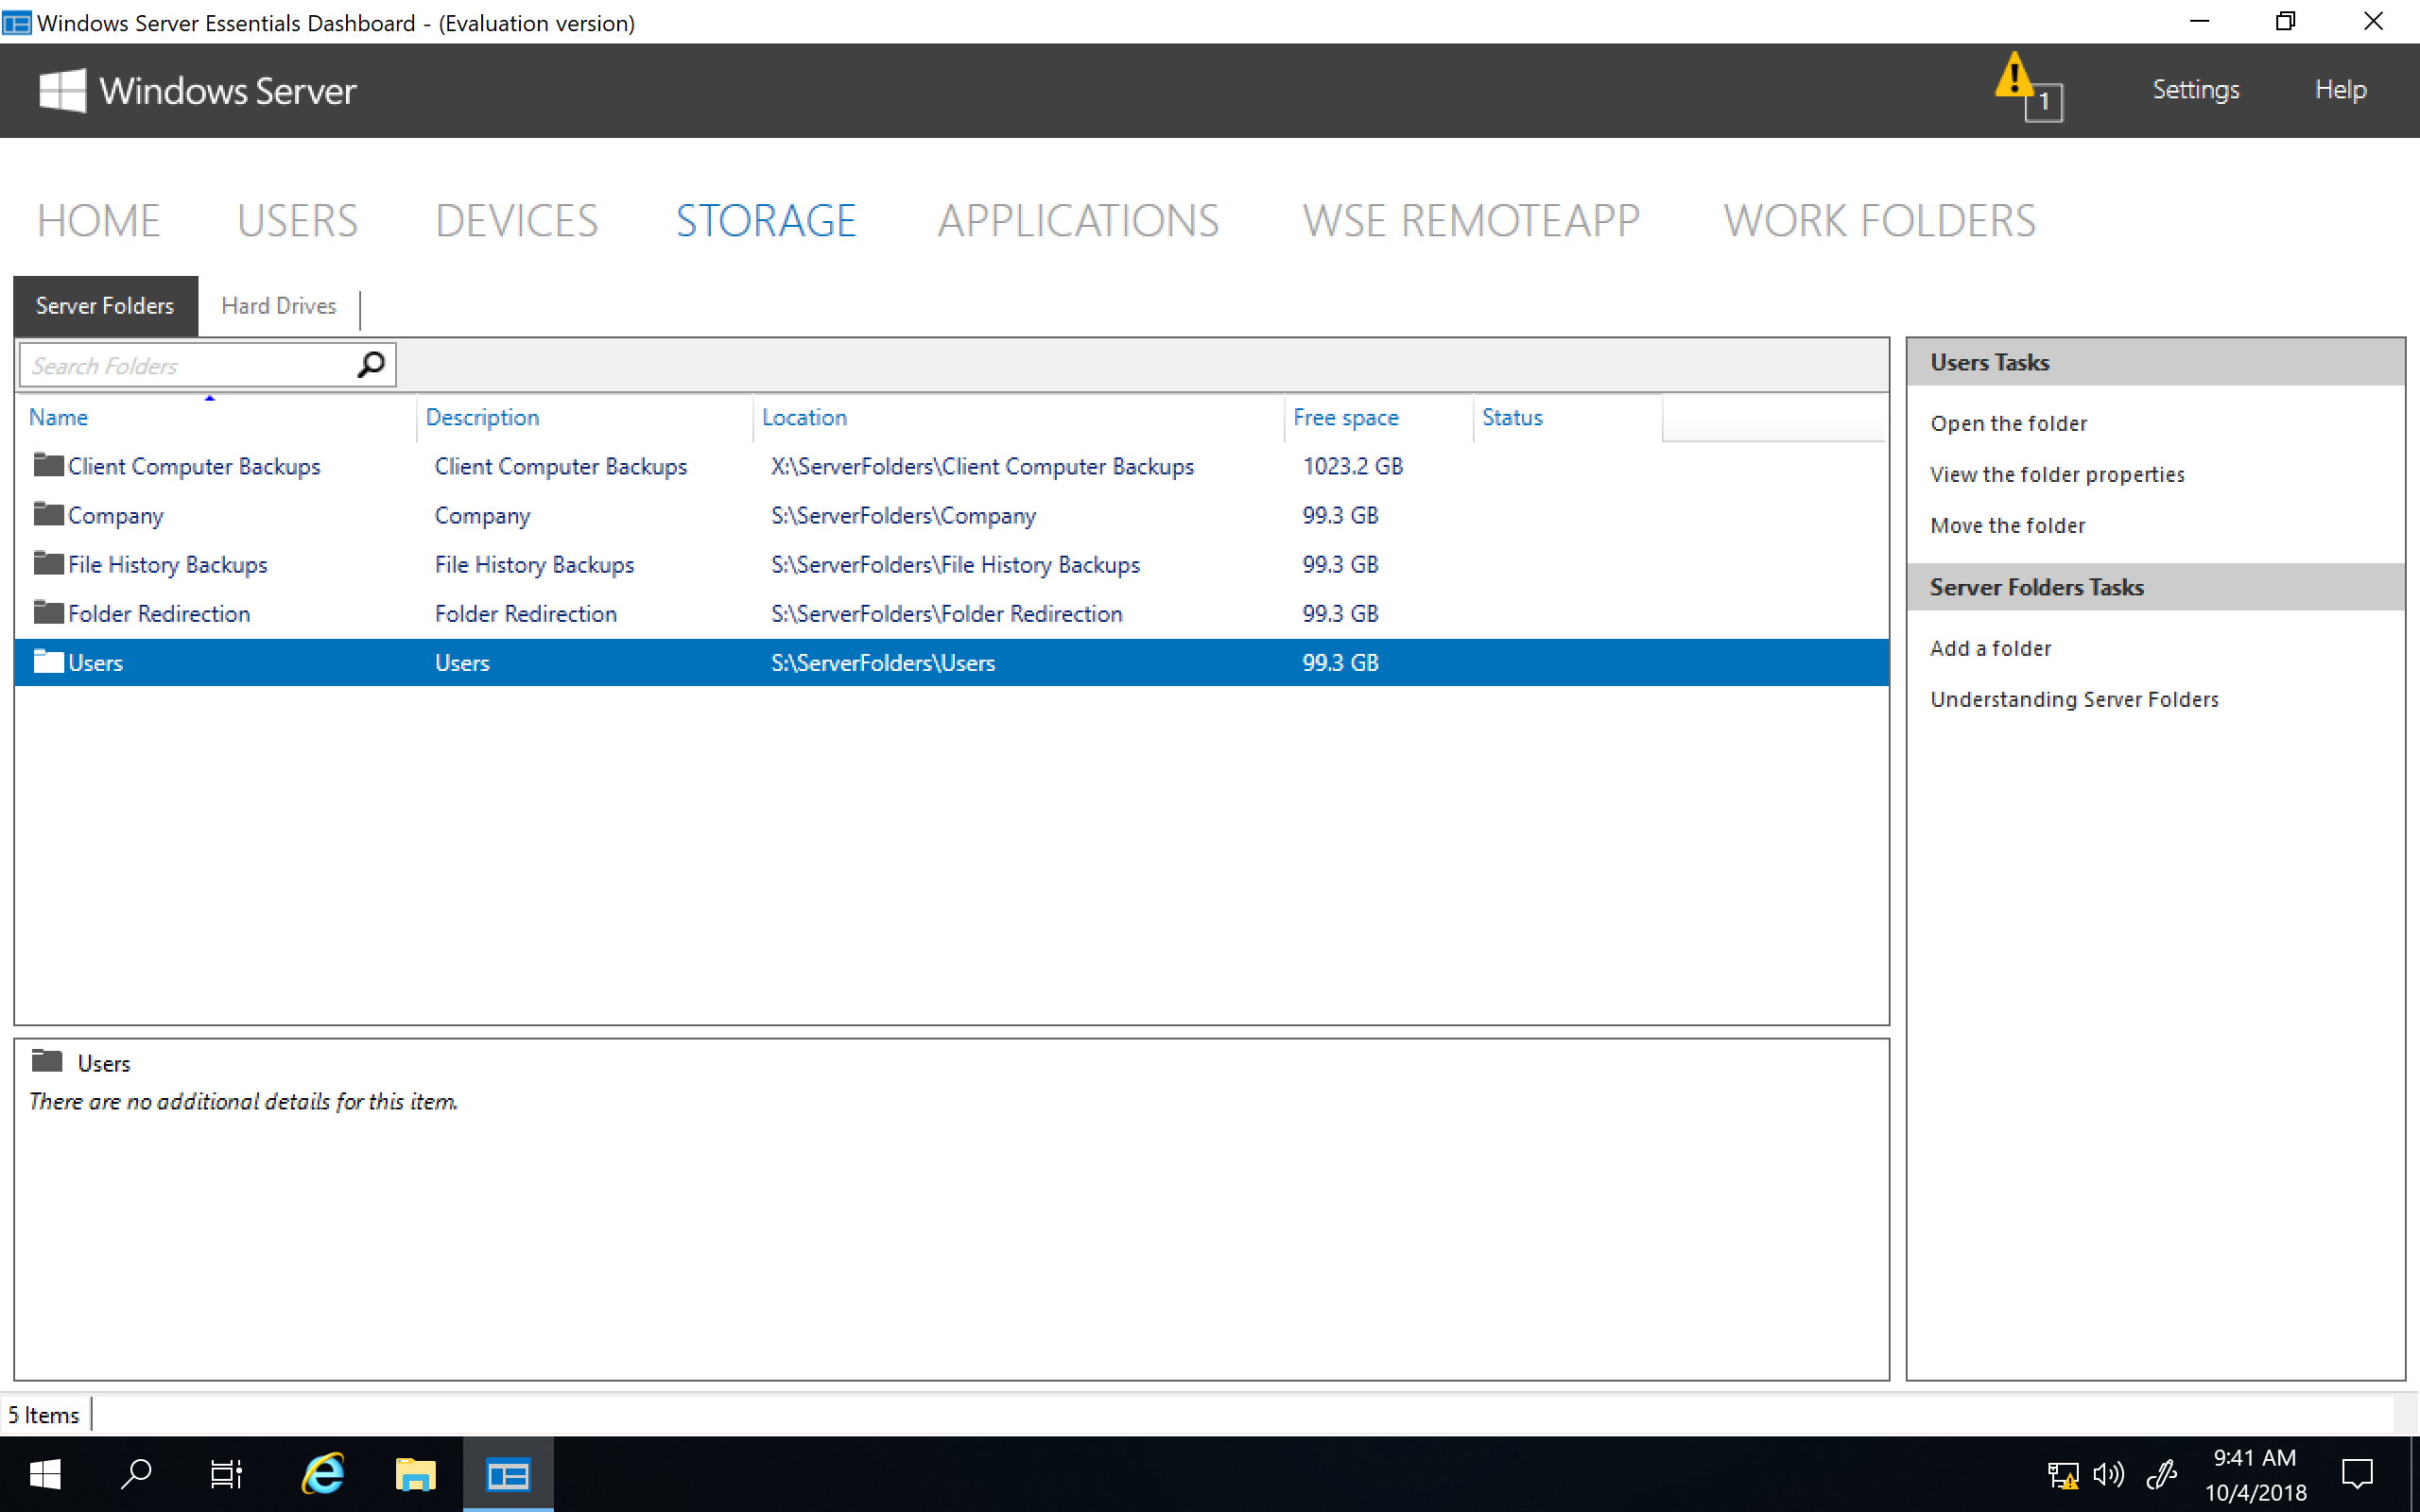
• Storage (Server Folders, Storage Spaces, etc.) works…
• Anywhere Access / Remote Web Access works…

• Add-ins work…
INFO: Our WSE RemoteApp and WSE WorkFolders products run splendidly on Windows Server 2019 / 2022 / 2025 with WSEE installed. Your existing, or newly purchased, license covers the use of the product on Windows Server 2016, 2019, 2022, or 2025. 😎

Everything works exactly as it does under Windows Server 2016!
Obviously, doing this will never be sanctioned nor supported by Microsoft, and so you may be asking yourself why not just stick with using Windows Server 2016 since it is supported by Microsoft until January 12, 2027? While you certainly can (and should) do that, probably the best answer I can give you is… Because you can! That being said, it’s worth mentioning that since Windows Server 2019, Windows Server 2022, and Windows Server 2025 have all now reached General Availability (A.K.A. RTM), there will most likely come a time, in the not too distant future, when Microsoft will stop selling Windows Server 2016 licenses. Being able to do this will allow those folks who wish to set up a newer server with the Windows Server Essentials Experience to continue to be able to do so once those Windows Server 2016 licenses become hard (if not impossible) to find. It will also allow those folks who would like to enjoy the added security, and other benefits, that come along with using Windows Server 2019 / 2022 / 2025 to be able to continue using the Windows Server Essentials Experience on their Small Office / Home Office (SOHO) servers.
How To Get Started
The installation can be performed by grabbing the install.wim file from a Windows Server 2016 Essentials installation disc (or from a mounted ISO image), and then mounting and extracting it using the Deployment Image Servicing and Management (DISM) command-line tool by following the steps Microsoft provides here. After doing that, grab all of the required Windows Server Essentials files (including the ones in the GAC), extract the required registry entries, and copy them over to Windows Server 2019 / 2022 / 2025. Then use Server Manager to add the prerequisite server roles and features, create the required services, and use PowerShell to start the initial configuration of Windows Server Essentials.
ALTERNATIVELY, if you already own (or newly purchase) a license for one of our software products, then you can contact us with the User Name from the license of your purchased software product, and we’ll be more than happy to share (at no additional charge) a password that you can enter below in order to download the WSEE Installer package (i.e. MSI file) that we’ve built for our own use in installing the Windows Server Essentials Experience onto Windows Server 2019 / 2022 / 2025.


The WSEE Installer makes installing the Windows Server Essentials Experience (WSEE) from Windows Server 2016 on Windows Server 2019 / 2022 / 2025 super simple! You just install Windows Server 2019 / 2022 / 2025 Standard or Datacenter, with the Desktop Experience GUI in the language of your choice, onto your server and then run the WSEE Installer package’s MSI file directly from the server desktop (the Windows Server 2019 Essentials SKU can be used, but is NOT recommended!). The WSEE Installer will handle installing all required files, registry entries, prerequisite server roles/features, services, permissions, etc., and then launch the “Configure Windows Server Essentials” wizard to walk you through configuring Windows Server Essentials on your server (as shown in the images above). The WSEE Installer will even monitor your installation and alert you whenever updates become available (via a health alert that gets displayed within the server Dashboard, and optionally emailed to you via the Windows Server Essentials server’s built-in Health Report Add-In feature). Available updates can then be, quickly and easily, installed via our WSEE Updater program.
INFO: The WSEE Installer does so much more for you than can ever be achieved with a manual installation of WSEE, that we no longer recommend folks attempt to install WSEE manually. Using the WSEE Installer will net you a MUCH MORE complete / proper / secure (and hassle free) installation of WSEE (including support for in place upgrades from prior releases of Windows Server and alerts whenever feature and/or security updates become available; along with a simple/easy means of installing those updates via our WSEE Updater program), and so we now STRONGLY RECOMMEND that everyone use it instead.
NOTE: We DO NOT SELL the WSEE Installer (seeing as the “Essentials bits” it installs are not ours to sell, and since we DO NOT officially provide support for it). It is ONLY made available, at no additional charge, as a convenience (and thank you) to purchasers of our software products.
NOTE: You may use the WSEE Installer to install WSEE on a single server only (i.e. it’s one WSEE installation per purchased software product). If you wish to use the WSEE Installer to install WSEE on multiple servers (for testing or migration purposes, for other clients, family members, friends, etc.), then each server installation MUST be associated with a unique licensee (i.e. User Name) from one of our software products. For additional information see the WSEE Installer policy.
NOTE: The WSEE Installer was built using Windows Server 2016 Standard OS Build 14393.7969 as its source. It is available in Dutch, English, French, German, Italian, Spanish, etc. Be sure to specify your language preference when requesting download access. The language of the WSEE Installer that you use should match the language of the installation media used to install Windows Server onto your server (i.e. don’t mismatch the languages).
💡 UPDATE (4/28/2025): The WSEE Installer Version 10.0.14393.7969 (Revision 2) is available for download (by entering a password below). Click here to see what’s new!
INFO: If you’ve installed WSEE on your server via any prior version of the WSEE Installer, use the WSEE Updater to bring your existing WSEE installation up-to-date. 😉
Enter Password to Download:
Enter Password to Download:
Enter Password to Download:
Enter Password to Download:
Enter Password to Download:
Enter Password to Download:
Enter Password to Download:
❗IMPORTANT NOTE: Support for Windows Server 2016, and hence for the Windows Server Essentials Experience and the WSEE Installer, ends on January 12, 2027.
Suggestions, Limitations, and Known Issues
• While in-place upgrades and domain migrations from earlier versions of Windows Server (Essentials) work just fine, we highly recommend that you always start off with a brand new/clean (i.e. straight out-of-the-box) installation of Windows Server 2019 / 2022 / 2025 Standard or Datacenter (with the Desktop Experience GUI in the language of your choice), that has all of the latest Windows Updates installed. The server may be natively joined to a domain if desired, but make sure that no other server roles, features or applications have been installed on the server.
• You should NOT attempt to install the Windows Server Essentials Experience on the Windows Server 2019 Essentials SKU (which, despite its name, has absolutely nothing whatsoever to do with “Essentials” as we currently know it). This is because Microsoft has removed all of the Remote Desktop Services roles from the SKU, and so the required Remote Desktop Gateway role will not be available for use by the Anywhere Access / Remote Web Access features of Windows Server Essentials. Save yourself the time and hassle, and just use Windows Server 2019 / 2022 / 2025 Standard or Datacenter instead (and don’t fret about silly CALs). If needed, you can convert the Windows Server 2019 Essentials SKU into Standard or Datacenter by running one of the DISM commands mentioned below…
NOTE: You can download an evaluation version of Windows Server 2019 (Standard or Datacenter), in ISO format, from the Microsoft Evaluation Center here. You can download an evaluation version of Windows Server 2022 (Standard or Datacenter), in ISO format, from the Microsoft Evaluation Center here. You can download an evaluation version of Windows Server 2025 (Standard or Datacenter), in ISO format, from the Microsoft Evaluation Center here.
INFO: You can evaluate the product for up to 180 days, and you can extend the trial period for another full 180 days (up to six times for a grand total of 3 years) by running the following command from an elevated command prompt:
slmgr -rearm
INFO: You can run one of the following commands, from an elevated command prompt, in order to convert the evaluation version into a regular retail version (Standard or Datacenter) using a purchased retail Product Key:
DISM /online /Set-edition:ServerStandard /ProductKey:XXXXX-XXXXX-XXXXX-XXXXX-XXXXX /AcceptEula
DISM /online /Set-edition:ServerDatacenter /ProductKey:XXXXX-XXXXX-XXXXX-XXXXX-XXXXX /AcceptEula
💡 HINT: You can use Windows Server 2019 / 2022 / 2025 for free by running one of the following commands, from an elevated command prompt, in order to convert the evaluation version into a volume-licensed version (Standard or Datacenter) using a Generic Volume License Key (GVLK) from Microsoft:
Windows Server 2019:
DISM /online /Set-edition:ServerStandard /ProductKey:N69G4-B89J2-4G8F4-WWYCC-J464C /AcceptEula
DISM /online /Set-edition:ServerDatacenter /ProductKey:WMDGN-G9PQG-XVVXX-R3X43-63DFG /AcceptEula
Windows Server 2022:
DISM /online /Set-edition:ServerStandard /ProductKey:VDYBN-27WPP-V4HQT-9VMD4-VMK7H /AcceptEula
DISM /online /Set-edition:ServerDatacenter /ProductKey:WX4NM-KYWYW-QJJR4-XV3QB-6VM33 /AcceptEula
Windows Server 2025:
DISM /online /Set-edition:ServerStandard /ProductKey:TVRH6-WHNXV-R9WG3-9XRFY-MY832 /AcceptEula
DISM /online /Set-edition:ServerDatacenter /ProductKey:D764K-2NDRG-47T6Q-P8T8W-YP6DF /AcceptEula
After doing that, you can then automate activation of the volume-licensed version using abbodi’s KMS_VL_ALL script that sets up a local KMS server emulator on the server. 😎
• (8/25/2019): If the Windows Server Essentials (Client) Connector software has trouble locating your Essentials server, or if you see a health alert stating that your “Active Directory domain names can’t be resolved“, then change the adapter settings/options for the network connection on your Essentials server so that its preferred IPv4 DNS server address is set to the default 127.0.0.1 localhost/loopback address, and its alternate IPv4 DNS server address is set to the IP address of your network router (e.g. 192.168.1.1) or other DNS server (e.g. 8.8.8.8). You should also verify that the preferred IPv6 DNS server address is set to its default ::1 value.
❗ NOTE: In addition, you should also change the adapter settings/options for the network connection on ALL of your client computers so that their preferred IPv4 DNS server address is set to the static IP address of your Essentials server, and their alternate IPv4 DNS server address is set to the IP address of your network router (e.g. 192.168.1.1) or other DNS server (e.g. 8.8.8.8). Doing so will allow the client-side Windows Server Essentials Connector software’s installer (which you can download from each of your client computers by browsing to http://<ServerName>/connect; where <ServerName> is the name of your Essentials server) to be able to successfully locate and connect the client computer to your Essentials server.
❗ INFO: If the Windows Server Essentials Connector software (still) has trouble locating your Essentials server, then try adding the “SchUseStrongCrypto” and “SystemDefaultTlsVersions” .NET Framework security settings to the Windows Registry of BOTH your server and ALL of your client computers, and then reboot them. The settings allow the older v2 and v4 versions of Microsoft’s .NET Framework packages (used in Windows Server Essentials) to be able to utilize newer/stronger TLS 1.2 SSL connections whenever the clients attempt to communicate with the server.
💡 HINT: If you do not want to join your connected client computers to the Windows Server Essentials domain, then you can use Microsoft’s SkipDomainJoin connection method instead.
• During (and after) the configuration of Anywhere Access / Remote Web Access, you may see a benign error about your firewall settings (e.g. “There is an error in your firewall settings – Your firewall may be blocking Anywhere Access to your server and the problem cannot be repaired automatically.“). You can safely ignore this error seeing as it is just a false-positive that is being caused by an issue where the localized names of the required firewall rules are not being properly read from their resource files.
NOTE: The accompanying health alert will automatically be disabled for you when using our WSEE Installer (but the error will still appear within the Configure/Repair Anywhere Access Wizard itself).
• (3/8/2021): The Microsoft Online Integration Services (such as Office 365 and Azure Active Directory) will work as designed when WSEE has been installed using our WSEE Installer (Version 10.0.14393.4169 (Revision 3) or greater).
NOTE: The online integration services in Windows Server Essentials are NOT compatible with multi-factor authentication (MFA) being enabled on your Office 365 / Azure Active Directory user accounts. Therefore, you should make sure that MFA is disabled by signing in to the Microsoft 365 admin center, clicking on Users → Active users, clicking on your admin user, and then clicking on the Manage multifactor authentication link located on the Account tab.
Microsoft has also implemented something called security defaults in Azure Active Directory, and since enforcing the enabling of MFA on all of your user accounts (within 14 days) is part of this security feature, you will need to disable it as follows:
• Sign in to the Azure portal as an administrator.
• Browse to Manage Azure Active Directory → Properties.
• Select Manage security defaults.
• Set the Enable security defaults toggle to No.
• Select Save.
• (3/15/2021): The Windows Server Essentials Best Practice Analyzer (BPA) tool works when WSEE has been installed using the WSEE Installer (Version 10.0.14393.4169 (Revision 4) or greater).
NOTE: To run the Windows Server Essentials Best Practice Analyzer (BPA) tool:
• Log on to the Essentials server as an administrator, and then open the Configure Windows Server Essentials wizard (click Start → type EssentialsRoleConfigWizard.exe).
• Close the configuration wizard after confirming that Windows Server Essentials has been successfully configured on the server.
• Open Server Manager, and then click the Windows Server Essentials Experience tab.
• In the details pane, scroll down to the BEST PRACTICES ANALYZER.
• If a filter is applied, click Clear All.
• Click TASKS, and then click Start BPA Scan.
• Review each BPA message, and follow the instructions to resolve issues, if necessary.
SEE: Rules used by the Windows Server Essentials Best Practices Analyzer (BPA) Tool
Closing Remarks
We’ve tested all of this quite extensively, and it consistently works great for us here. However, your results may vary. Please don’t blame us (nor Microsoft) if you can’t get it to work, or if something goes wrong on your server. None of this is officially supported by Microsoft (nor by us!), and so you should proceed at your own risk. You fully assume all risk, responsibility, and liability associated with the installation. And as always, make sure that you have a working backup of your server, and all of your data, before proceeding.
That being said, it works so well for us here, that we have now switched all of our SOHO servers over to running Windows Server 2019 / 2022 / 2025 with the Windows Server Essentials Experience installed.
That’s it! Enjoy using the Windows Server Essentials Experience on Windows Server 2019 / 2022 / 2025.
— MIKE (The Office Maven)
EDIT (6/26/2019): As the months keep flying on by, we’re finding that the longer we use the Windows Server Essentials Experience on Windows Server 2019, the more we’re coming to realize just how much better Windows Server 2019 is than Windows Server 2016. While the “Essentials” bits themselves are of course identical (seeing as they’re just being brought straight over, untouched, from 2016), they run just fine under 2019. Windows Server 2019 is leaps-and-bounds faster than Windows Server 2016 is (it boots up faster, and everything, including the server Dashboard, etc., just runs faster/better under it). Lots of bugs that plague 2016 are fixed under 2019, and overall, we’re finding that using WSEE on 2019 is an all-around better experience.
EDIT (9/1/2021): The Windows Server Essentials Experience installs, and runs wonderfully, on Microsoft’s GA/RTM release of Windows Server 2022 Version 21H2 OS Build 20348. — Enjoy! 😎
EDIT (5/23/2024): The Windows Server Essentials Experience installs, and runs okay, on Microsoft’s GA/RTM release of Windows Server 2025 Version 24H2 OS Build 26100 (i.e., the next version of Windows Server with the new Windows 11 style Graphical User Interface). — Enjoy! 😎
Установка и настройка Windows server 2016 Essentials
17 февраля 2017
Статьи по 1С
Решил написать подробную инструкцию по установке и настройке нового Windows server 2016 Essentials, а заодно и сделать небольшой обзор новых возможностей этой серверной «оси».
Почему собственно Essentials ?
Многие малые компании начинают свою работу с покупки Windows server standard.
И зря тратят деньги!
Ведь если в вашей компании, например, планируется работа до 25 пользователей в 1С Предприятии, тогда Вам идеально подойдет именно Essentials!
Минус, на мой взгляд, здесь только один:
Нет, возможность поднять службу терминалов для удаленной работы пользователей на этом сервере в 1С (Использовать обычный всем нам знакомый удаленный рабочий стол).
Эта версия лицензируется по количеству процессоров на сервере и главное не требует CAL лицензий! (клиентские лицензии на подключение).
Но большинству малых предприятий с уверенностью можно рекомендовать редакцию Essentials.
Экономия здесь очевидна:
Например, редакция –
Microsoft Windows Server 2012 R2 Standard Edition x64 Russian 2CPU/2VM DVD ОЕМ –
Обойдется примерно в ~ 43 000 руб. + CAL на каждого пользователя еще примерно ~1500 руб.
(20 пользователей = 30 000 руб).
Итого: ~ 73 000 руб.
Тогда как Microsoft Windows Server Essentials 2016 Single Multilanguage
Обойдется нам примерно в ~ 26 000 руб!
Если сравнивать редакции Essentials и Standard, на предмет функционала, то с уверенностью можно казать что Essentials почти не уступает Standard, все нужные основные компоненты и роли там также доступны, а сама операционная система идеально подойдет начинающим системным администраторам, так как многие функции, можно реализовать двумя, тремя кликами мышкой.
Много нового появилось в этой версии, и действительно есть, что рассказать, но об этом позже, пока скачаем дистрибутив Windows server 2016 Essentials и установим его.
Скачать бесплатно пакет установки рекомендую на сайте Microsoft.
Установка и настройка Windows server 2016 Essentials
Там же бесплатно получим ключик на 180 дней. За этот период мы успеем его хорошо протестировать и связаться с партнерами Microsoft для получения лицензии.
Установка и настройка Windows server 2016 Essentials
Итак, если образ *ISO скачали (его размер около 4500 Mb).
Запишем его на диск или сделаем «загрузочную флешку» здесь кому как удобно и приступаем к установке.
Сама установка довольно простая, и некоторые трудности могут быть лишь при настройке (первичной) редакции Essentials.
Установка и настройка Windows server 2016 Essentials
Установка и настройка Windows server 2016 Essentials
Укажем “Формат времени и денежных единиц” Ваша страна.
И выберем из списка “Метод ввода (раскладка клавиатуры)”, затем клик “Далее”.
Установка и настройка Windows server 2016 Essentials
Клик по кнопке “Установить”. Затем в следующем окне введем “Ключ продукта” (Тот который мы получили еще на сайте Microsoft когда качали установочный пакет). Так Essentials будет активирован в тестовом периоде на 180 дней.
Если Вы хотите больше узнать о технической стороне 1С, тогда регистрируйтесь на первый бесплатный модуль курса: Администратор 1С >>>