To put it simple, you can understand DNS forwarding as a method for DNS server to resolve a query by “asking for a help” from another DNS server. It is supported by on Windows DNS server, including Windows Server 2012 R2. The default behaviour is that Windows DNS Server will forward query that it cannot resolve to a list of public DNS servers on the internet which is called the root hints. But if you Configure DNS Forwarding in Windows Server 2012 R2, then it will forward the query to the designated DNS server which is called the forwarder.
If you install DNS server on Windows Server 2012 R2, you can configure DNS forwarding by using DNS Manager or PowerShell.
Using DNS Manager
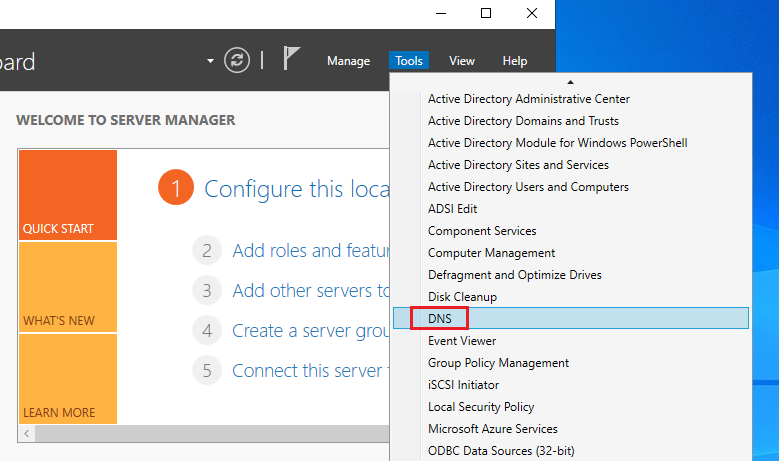
On the server where DNS Server role installed, open Server Manager then navigate to Tools > DNS to open up the DNS Manager.

In the DNS Manager, right click the DNS server hostname on the left-pane and select Properties.
Click on Forwarders tab, then click on Edit button.

Enter the IP address of the other DNS server (forwarder) then press Enter. If the IP address is a valid DNS server then it will show green checklist icon as in the picture below. Repeat this for each forwarder servers that you want.

You can click OK to confirm the settings.
Using PowerShell
You can also configure DNS forwarding in Windows Server 2012 R2 by using PowerShell. Below is the command you need to enter in an elevated PowerShell window:
Add-DnsServerForwarder —IPAddress FORWARDER_IP
Alternatively, you can also use the command below:
Set-DnsServerForwarder —IPAddress FORWARDER_IP
You only need to adjust the FORWARDER_IP value to match your configuration plan. You can specify more than one forwarder in a single command by separating each IP address with a comma. Note that there is difference between the two commands above. The “Add” command will append the specified forwarder IP to the existing list of forwarders that you have. Meanwhile, the “Set” command will overwrite the existing forwarders list with the specified IP address.
Here’s example of adjustment in the query that will resulting the same as the previous example:

Verification
To verify that DNS forwarding works, you can attempt to resolve any names that is not in the DNS server data. In this example, our DNS server only has data for names in domain mustbegeek.com. Therefore, now we will test to resolve for domain corp.mbg.com.
Before we have DNS forwarding configured to the authoritative server for domain corp.mbg.com, our DNS clients unable to get the name resolution for corp.mbg.com.

After DNS forwarding configured, our clients able to get the name resolution for corp.mbg.com.

Working with DNS Forwarding in Windows DNS Server
Before you configure DNS forwarding, you should make sure that recursion is not disabled on the server. DNS forwarding requires recursion to request for information from the forwarders on behalf of the client.
By default recursion is enabled on Windows DNS Server but in some case it may be disabled. To check if recursion enabled, you can go to the DNS server properties in the Advanced tab. Then, under Server Options, confirm that no tick mark on the check box for Disable recursion setting.

And that’s all you need to know to configure DNS forwarding in Windows Server 2012 R2.
The following two tabs change content below.
- Bio
- Latest Posts
I am IT practitioner in real life with specialization in network and server infrastructure. I have years of experience in design, analysis, operation, and optimization of infrastructure solutions for enterprise-scaled network. You can send me a message on LinkedIn or email to arranda.saputra@outlook.com for further inquiry regarding stuffs that I wrote or opportunity to collaborate in a project.
В этой статье мы рассмотрим два способа организации условного разрешения имен в DNS сервере на Windows Server 2016: DNS conditional forwarding и DNS policy. Эти технологии позволяют настроить условное разрешение DNS имен в зависимости от запрошенного имени, IP адреса и местоположения клиента, времени суток и т.д.
Содержание:
- Настройка DNS Conditional Forwarder в Windows Server
- Настройка DNS Conditional Forwarding с помощью PowerShell
- Фильтрация запросов DNS, политики разрешения имен в Windows Server 2016
Условная пересылка DNS (Conditional Forwarding) позволяет перенаправить DNS запросы об определенном домене на определенные DNS-сервера. Обычно Conditional Forwarders используется, когда нужно настроить быстрое разрешение имен между несколькими внутренними приватными доменами, или вы не хотите, чтобы DNS запросы с вашего сервера пересылались через публичную сеть Интернет. В этом случае вы можете создать на DNS сервере правило DNS пересылки DNS запросов для определенной доменной зоны (только !!!) на определенный DNS сервер.
Настройка DNS Conditional Forwarder в Windows Server
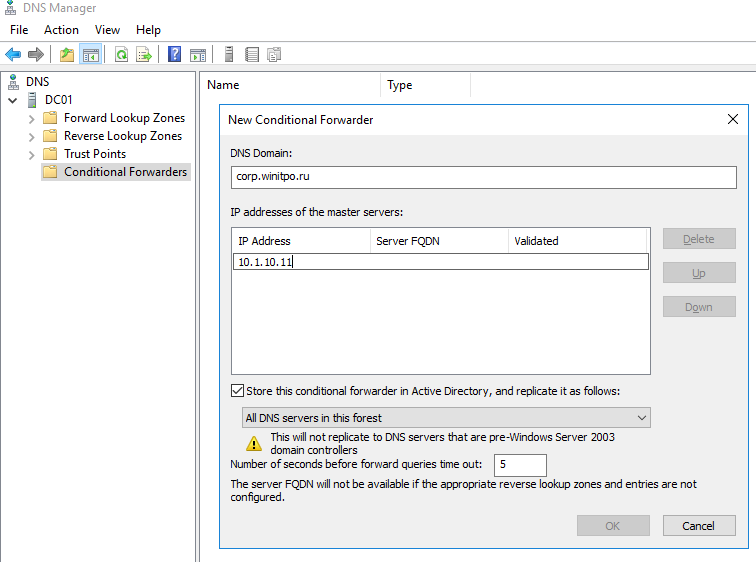
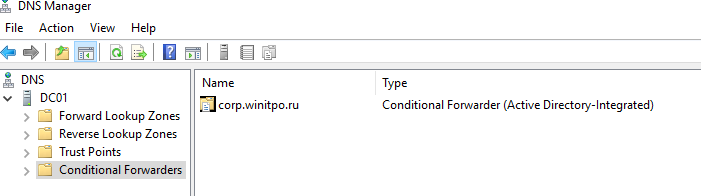
Попробуем настроить условное перенаправление DNS запросов для определенной доменной зоны на Windows Server 2016. Например, я хочу, чтобы все DNS запросы к зоне corp.winitpro.ru пересылались на DNS сервер 10.1.10.11.
- Запустите консоль управления DNS (
dnsmgmt.msc
); - Разверните ваш DNS сервер, щелкните правой кнопкой по разделу Conditional Forwarders и выберите New Conditional Forwarder;
- В поле DNS domain укажите FQDN имя домена, для которого нужно включить условную пересылку;
- В поле IP addresses of the master servers укажите IP адрес DNS сервера, на который нужно пересылать все запросы для указанного пространства имен;

- Если вы хотите хранить правило условной переадресации не только на этом DNS сервере, вы можете интегрировать его в AD. Выберите опцию “Store this conditional forwarder in Active Directory”;
- Выберите правило репликации записи conditional forwarding (All DNS servers in this forest, All DNS servers in this domain или All domain controllers in this domain).

Настройка DNS Conditional Forwarding с помощью PowerShell
Вы можете создать правило Conditional Forward для определенной DNS зоны с помощью PowerShell. Воспользуйтесь командлетом Add-DnsServerConditionalForwarderZone:
Add-DnsServerConditionalForwarderZone -Name dmz.winitpro.ru -MasterServers 192.168.1.11,192.168.101.11 -ReplicationScope Forest
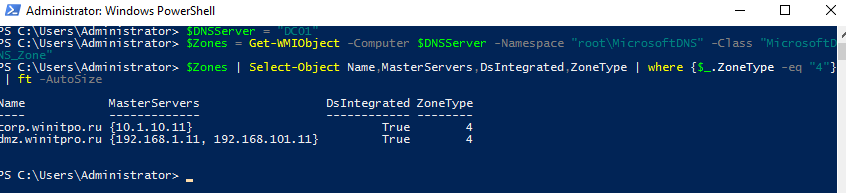
Чтобы вывести список DNS Conditional Forwarders на определенном сервере, выполните следующий PowerShell скрипт:
$DNSServer = "DC01"
$Zones = Get-WMIObject -Computer $DNSServer -Namespace "root\MicrosoftDNS" -Class "MicrosoftDNS_Zone"
$Zones | Select-Object Name,MasterServers,DsIntegrated,ZoneType | where {$_.ZoneType -eq "4"} | ft -AutoSize
Фильтрация запросов DNS, политики разрешения имен в Windows Server 2016
В Windows Server 2016 появилась новая фича в службе DNS сервера – DNS политики. DNS политики позволяют настроить DNS сервер так, чтобы он возвращал различные ответы на DNS запросы в зависимости от местоположения клиента (с какого IP адреса или подсети пришел запрос), интерфейса DNS сервера, времени суток, типа запрошенной записи (A, CNAME, PTR, MX) и т.д. DNS политики в Windows Server 2016 позволяют реализовать сценарии балансировки нагрузки, фильтрации DNS трафика, возврата DNS записей в зависимости от геолокации (IP адреса клиента) и многие другие сложные сценарии.
Вы можете создать политику как на уровне DNS сервера, так и на уровне всей зоны. Настройка DNS политик в Windows Server 2016 возможна только из командной строки PowerShell.
Попробуем создать простую политику, которая позволяет вернуть разный ответ на DNS запрос в зависимости от геолокации клиента. Допустим, вы хотите, чтобы клиенты в каждом офисе использовали собственный прокси на площадке. Вы создали политику назначения прокси в домене (на всех клиентах будет указано proxy.winitpro.ru). Но клиент из каждого офиса должен резолвить этот адрес по-разному, чтобы использовать для доступа свой локальный прокси-сервер.
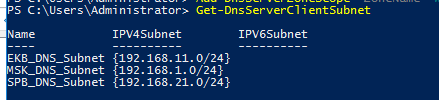
Я создал 3 подсети для разных офисов компании:
Add-DnsServerClientSubnet -Name "MSK_DNS_Subnet" -IPv4Subnet "192.168.1.0/24"
Add-DnsServerClientSubnet -Name "EKB_DNS_Subnet" -IPv4Subnet "192.168.11.0/24"
Add-DnsServerClientSubnet -Name "SPB_DNS_Subnet" -IPv4Subnet "192.168.21.0/24"
Эти команды придется выполнить на всех DNS серверах, на которых должна работать условная политика DNS. Эти записи не реплицируются в DNS и хранятся локально в реестре DNS сервера. Вы можете указать имя сервера с помощью параметра
-ComputerName dc01
.
Чтобы вывести список всех IP подсетей клиентов, выполните:
Get-DnsServerClientSubnet
Теперь нужно для каждого офиса создать отдельную DNS область:
Add-DnsServerZoneScope -ZoneName “winitpro.ru” -Name “MSKZoneScope”
Add-DnsServerZoneScope -ZoneName “winitpro.ru” -Name “EKBZoneScope”
Add-DnsServerZoneScope -ZoneName “winitpro.ru” -Name “SPBZoneScope”
Следующие команды добавят 3 DNS записи с одним именем, но указывающие на разные IP адреса в разных областях DNS:
Add-DnsServerResourceRecord -ZoneName “winitpro.ru” -A -Name “proxy” -IPv4Address “192.168.1.10” -ZoneScope “MSKZoneScope”
Add-DnsServerResourceRecord -ZoneName “winitpro.ru” -A -Name “proxy” -IPv4Address “192.168.11.10” -ZoneScope “EKBZoneScope”
Add-DnsServerResourceRecord -ZoneName “winitpro.ru” -A -Name “proxy” -IPv4Address “192.168.21.10” -ZoneScope “SPBZoneScope”
Вы можете вывести все ресурсные DNS записи для области с помощью команды:
Get-DnsServerResourceRecord -ZoneName “winitpro.ru” -ZoneScope SPBZoneScope

Теперь нужно создать DNS политики, которые свяжут IP подсети, DNS области и A записи.
Add-DnsServerQueryResolutionPolicy -Name “MSKResolutionPolicy” -Action ALLOW -ClientSubnet “eq,MSK_DNS_Subnet” -ZoneScope “MSKZoneScope,1” -ZoneName “winitpro.ru” –PassThru
Add-DnsServerQueryResolutionPolicy -Name “EKBResolutionPolicy” -Action ALLOW -ClientSubnet “eq,EKB_DNS_Subnet” -ZoneScope “EKBZoneScope,1” -ZoneName “winitpro.ru” -PassThru
Add-DnsServerQueryResolutionPolicy -Name “SPBResolutionPolicy” -Action ALLOW -ClientSubnet “eq,SPB_DNS_Subnet” -ZoneScope “SPBZoneScope,1” -ZoneName “winitpro.ru” –PassThru
В DNS политиках доступны следующие действия:
-
-Action ALLOW -
-Action DENY -
-Action IGNORE
Можно использовать следующие параметры в фильтре DNS:
-InternetProtocol "EQ,IPv4,NE,IPv6"
-TransportProtocol "EQ,UDP,TCP"
-ServerInterfaceIP "EQ,192.168.1.21"
-QType "EQ,A,AAAA,NE,PTR"
-TimeOfDay "EQ,9:00-18:00"
Вывести список всех DNS политик для DNS зоны на сервере можно так:
Get-DnsServerQueryResolutionPolicy -ZoneName winitpro.ru

Теперь с устройств из различных офисов проверьте, что DNS сервер на один и тот же запрос возвращает различные IP адреса прокси:
nslookup proxy.winitpro.ru
Можно запретить DNS серверу возвращать DNS адреса для определенного пространства имен (домена):
Add-DnsServerQueryResolutionPolicy -Name 'BlockFidhingPolicy' -Action IGNORE -FQDN "EQ,*.cberbank.ru"
To set up a DNS server, configuring DNS Forward and Reverse Lookup Zones is essential. The Forward Lookup Zone converts domain names into IP addresses, while the Reverse Lookup Zone does the opposite, converting IP addresses back into domain names. Below is a step-by-step guide on how to configure both zones on a Windows Server.
Understanding Forward and Reverse Lookup Zones
A Forward Lookup Zone acts like a directory for computing systems, helping to transform domain names (e.g., “example.com”) into IP addresses by using A (Address) records. This capability is crucial for web browsing as devices utilize IP addresses to communicate.
Conversely, a Reverse Lookup Zone allows users to find a hostname by using an IP address, similar to searching for a person’s name using their phone number. This function is facilitated through PTR (Pointer) records, allowing for IP tracing and accurate device recognition on a network.
Before creating these zones, organizations should review their requirements, including naming conventions and IP address selections to comply with internal policies.
Configuring Forward Lookup Zone
To create a Forward Lookup Zone, follow these steps:
- Open Server Manager and navigate to Tools > DNS.
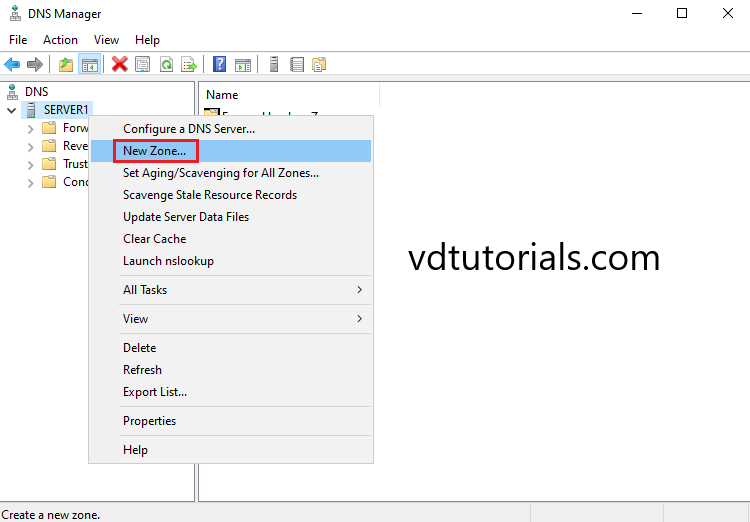
- Right-click on your server, then select New Zone.
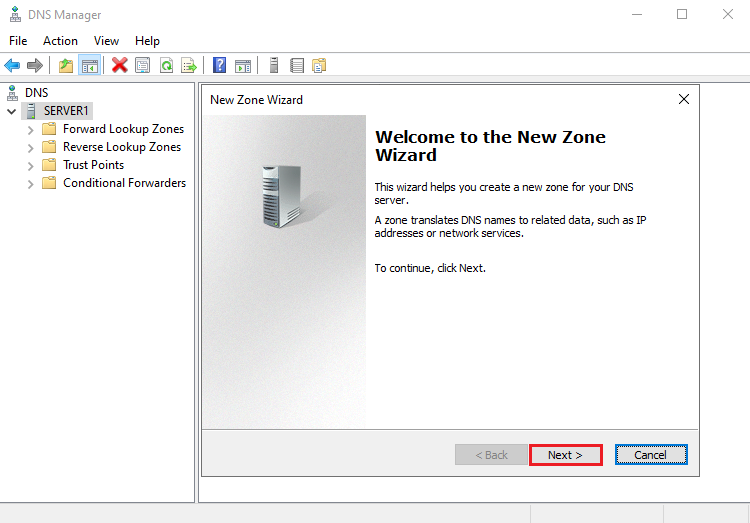
- Click Next in the wizard that appears.
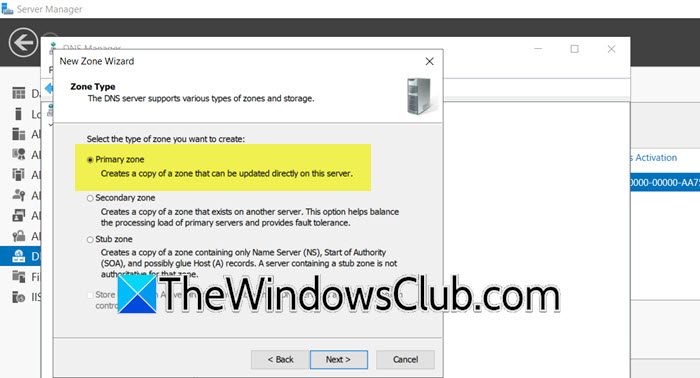
- Choose Primary zone and click Next.
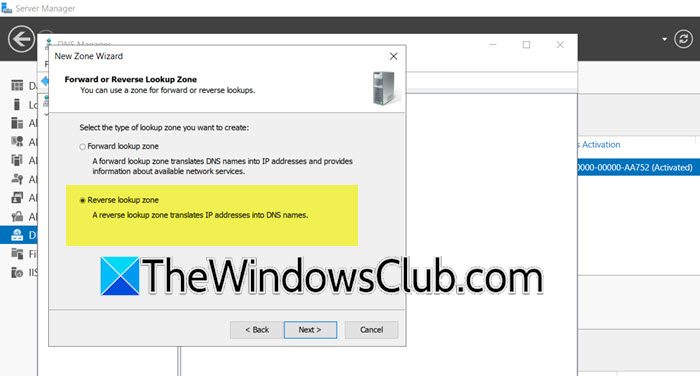
- Select the Forward Lookup Zone option, then click Next.
- Enter a Zone name and click Next.
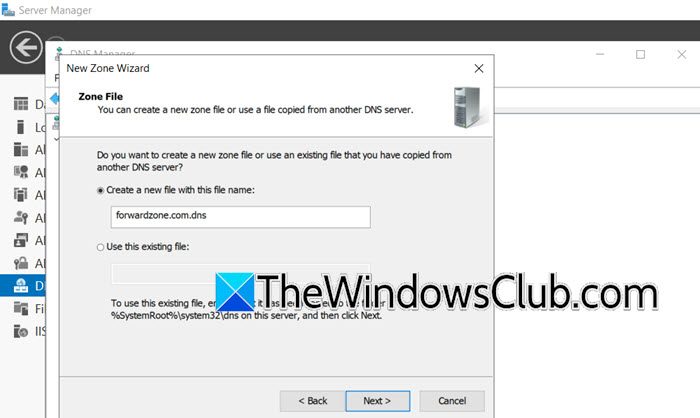
- Check the option Create a new file with this file name, input a file name, and click Next. The filename should have a “.dns” extension.
- Select an option on the Dynamic updates page and click Next.
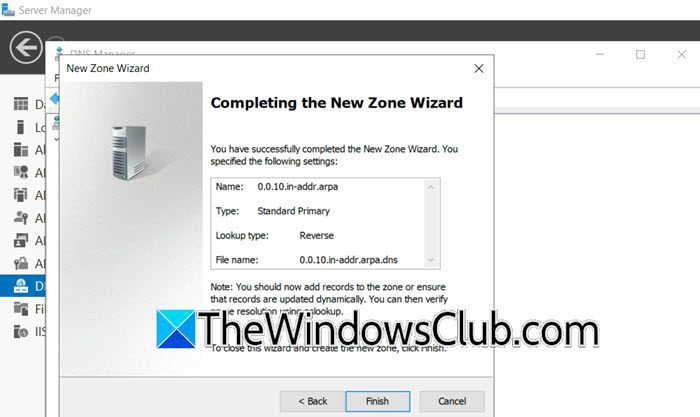
- Review the summary and click Finish.
You can verify the new zone by expanding the Forward Lookup Zones to see the recently created zone.
Configuring Reverse Lookup Zone
For the Reverse Lookup Zone, ensure to specify whether it is a Primary Zone. Both Forward and Reverse Lookup Zones can be configured as Primary Zones on the same server. To set up a Reverse Lookup Zone:
- Open the DNS wizard from Server Manager.
- Right-click on your server name and select New Zone.
- Click Next to proceed.
- Choose Primary zone (if there is no compliance) and click Next.
- Select Reverse lookup zone and click Next.
- Choose either the IPv4 Reverse Lookup Zone or IPv6 Reverse Lookup Zone based on your network, which may require creating both if both IP protocols are in use.
- Specify the Network ID or Reverse lookup zone name and click Next.
- Enter the zone name and click Next.
- Choose the dynamic update schedule and click Next.
- Finally, complete the setup by clicking Finish.
You can check the newly created zone under the Reverse Lookup Zones section.
If you wish to perform a reverse DNS lookup using Windows, you can use the nslookup command. Open the Command Prompt and run nslookup (replace with the actual IP). This command will return the hostname associated with that IP address.
ColoCrossing excels in providing enterprise Colocation Services, Dedicated Servers, VPS, and a variety of Managed Solutions, operating from 10 data center locations nationwide. We cater to the diverse needs of businesses of any size, offering tailored solutions for your unique requirements. With our unwavering commitment to reliability, security, and performance, we ensure a seamless hosting experience.
For Inquiries or to receive a personalized quote, please reach out to us through our contact form here or email us at sales@colocrossing.com.

Samantha Rattner is the Marketing Specialist at ColoCrossing with a keen understanding of the hosting industry. Samantha brings valuable insights to help businesses optimize their hosting infrastructure. Through her articles and expert advice, Samantha guides readers in navigating the complexities of hosting solutions and staying ahead in the dynamic world of infrastructure hosting.
Download Windows Speedup Tool to fix errors and make PC run faster
To promote your server as a DNS Server, you are required to configure DNS Forward and Reverse Lookup Zones. The Forward Lookup Zone will resolve hostnames to IP addresses, whereas the Reverse Lookup Zone will resolve IP addresses to hostnames. In this post, we are going to see how you can configure both on a DNS Server with a step-by-step guide.

A Forward Lookup Zone is like a phone book for computers, converting domain names into IP addresses. When you type a website name like “example.com,” the zone helps your device find the server hosting it. This process uses records called A (Address) records to make the connection happen. It’s essential for browsing the web, as computers rely on IP addresses to communicate effectively.
On the other hand, Reverse Lookup Zone is like flipping through a phone book to find a name using a phone number. Instead of converting domain names to IP addresses, IP addresses are turned back into domain names. This process uses PTR (Pointer) records to identify which hostname is linked to a specific IP. It’s useful for tracing IPs or ensuring devices on a network are properly recognized.
Before we create a Forward or Reverse Lookup Zone, you need to check a few things. First of all, you need to go through your organization’s requirements first. Every organization has its own set of protocols that need to be followed, and as you go forward in this tutorial, you will stumble upon a lot of options that need to adhere to their demands, be it the naming convention or IP selection. Once you have the idea, you can go ahead and create the zones.
If you want to configure DNS Forward and Reverse Lookup Zones on Windows Server, go to their respective guides.
Configure Forward Lookup Zone

Let us first go ahead and configure the Forward Lookup Zone. You can do that using the steps mentioned below.
- Launch the Server Manager and click on Tools > DNS.
- Right-click on your server and select New Zone.
- Once the wizard appears, click on Next.
- Select the Primary zone and click on Next.
- You need to check the Forward Lookup Zone option and click on Next.
- Now, enter a Zone name, and click on Next.
- Since we are setting things up, we need to check Create a new file with this file name option, enter a name, and click on Next. Give the file a “.dns” extension.
- On the Dynamic updates page, select an option and click Next.
- Now, go through the summary and click on Finish.
This will create a forward zone. To check it, you can expand Forward Lookup Zones, and you will see the newly created zone there.
Configure Reverse Lookup Zone
Before creating a Reverse Lookup Zone, you need to check what kind of zone it is going to be. Even though we have already created a Primary Zone earlier, this doesn’t mean that we can not create another one. Both Forward Lookup Zones and Reverse Lookup Zones can be configured as Primary Zones on the same DNS server. A primary zone is the authoritative source for its DNS records, allowing you to create, modify, and manage entries directly. Each zone operates independently but complements the other, ensuring seamless hostname-to-IP and IP-to-hostname resolutions.
A lot of users tend to make the Reverse Lookup Zone secondary, as they are not aware of the prospect of zones. Once that confusion is out of the way, let us go ahead and create a Reverse Lookup Zone.
- In the Server Manager, open the DNS wizard.
- Right-click on your server name and select New Zone.
- Now, you need to click on Next to continue.
- Select the Primary zone (if there is no compliance), and click on Next.
- Then, you have to select the Reverse lookup zone and click on Next.
- Choose either IPv4 Reverse Lookup Zone or IPv6 Reverse Lookup Zone. If your network uses both IPv4 and IPv6 protocols, you need to create both.
- You need to populate either of the two options mentioned below and click on Next.
- Network ID: The part of the IP address that identifies the network segment, used to define the range of addresses in the reverse lookup zone.
- Reverse lookup zone name: The DNS name format for the reverse zone, typically written in reverse IP order
- Enter the zone name and click on Next.
- Select the dynamic update schedule and click Next.
- Finally, finish the setup.
Check the newly created zone below the Reverse Lookup Zones directory.
That’s it!
Read: How to change DNS server with Command Prompt or PowerShell
How to configure DNS forward and reverse lookup zone?
If you want to configure DNS forward and reverse lookup zones, you first need to configure DNS on your server. Once you are done with that, follow the steps mentioned in this post to configure Forward and Reverse Lookup Zones. Hopefully, you will be able to do it with ease.
Read: Windows client does not register in DNS.
How to do Reverse DNS lookup on Windows?
To do a reverse DNS lookup on your Windows computer, we can use nslookup. Open the Command Prompt, and then run nslookup <ip-address>. Make sure to replace the placeholder <ip-address> with the actual IP. The command will return the hostname linked to that IP address.
Also Read: Enable and Configure DNS Aging & Scavenging in Windows Server.
Anand Khanse is the Admin of TheWindowsClub.com, a 10-year Microsoft MVP (2006-16) & a Windows Insider MVP (2016-2022). Please read the entire post & the comments first, create a System Restore Point before making any changes to your system & be careful about any 3rd-party offers while installing freeware.
This Windows Server 2022 Tutorial covers how to create DNS Forward Lookup Zone in Windows Server 2022. Domain Name System is a name resolution service that provides a naming system for computers, services, and other resources in the network. The DNS Server resolves computer names or other hostnames to IP addresses and IP addresses to computer names or other hostnames. A DNS zone is the specific portion of a DNS namespace hosted on a DNS server and it contains resource records. Forward lookup zones stored different resource records, but the most common record is the host record. A host record is used to resolve a hostname to an IP address.
Resource records in DNS forward lookup zones
- Host (A): A record used to resolve a name to an IPv4 address.
- Host (AAAA): AAA record used to resolve a name to an IPv6 address.
- Alias (CNAME): CNAME record used to resolve a name to another name.
- Service location (SRV): SRV record used by applications to identify the location of servers hosting that application. For example, AD DS uses SRV records to identify the location of domain controllers and related services.
- Mail exchanger (MX): MX record used to identify email servers for a domain.
- Text (TXT): TXT Record used to store arbitrary strings of information in the DNS.
- Start of authority (SOA): Start of authority Contains configuration information for the zone, including the name of the primary DNS server and how often secondary servers should be synchronized. There’s one SOA record per zone.
- Name server (NS): NS Identifies a DNS server for the domain. There’s one NS record for each DNS server that has a copy of the zone.
Prerequisite Required
- Install Domain Name System
Related Tutorial
- Install Domain Name System
Demo environment
- Computer Name: server1
- Operating System: Windows Server 2022 Datacenter
- IP Address: 192.168.3.3
Create Domain Name System Forward Lookup Zone
1. Open the Server Manager dashboard click Tools and select DNS.
2. Right-click on DNS Server and click New Zone.
3. To continue, click Next.
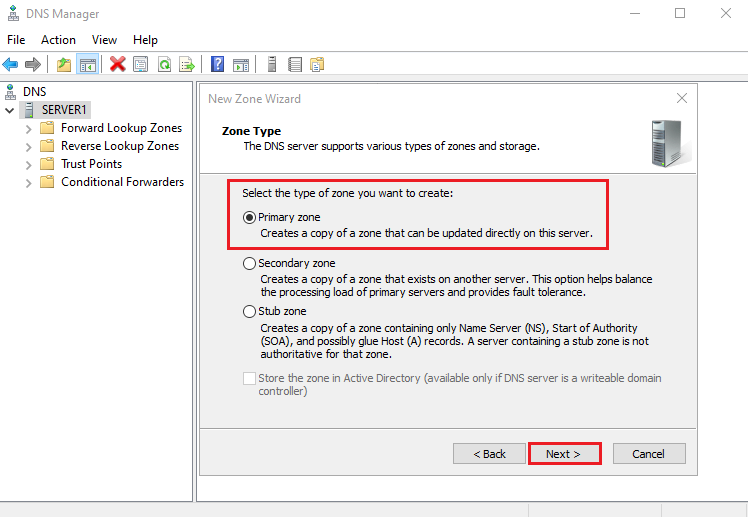
4. In Zone type selection, select the Primary zone and click Next.
The primary zone creates a copy of a zone that can be updated directly on this server.
5. Select Forward Lookup Zone and click Next.

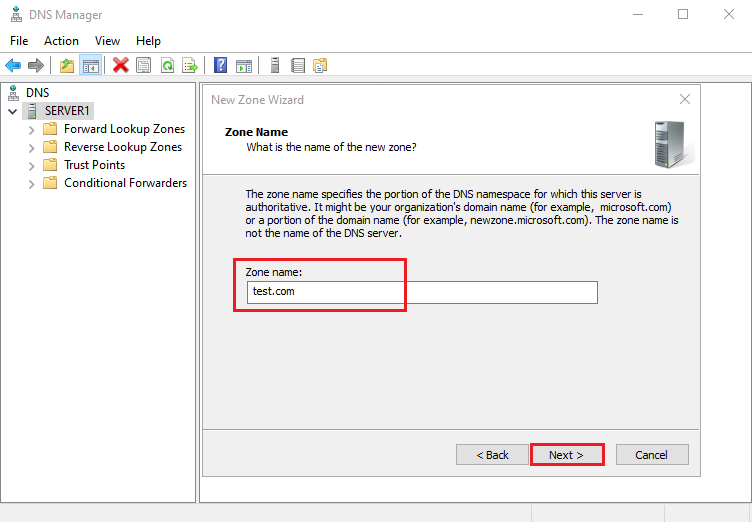
6. Enter the Forward Lookup Zone name and click Next.
Zone Name: test.com
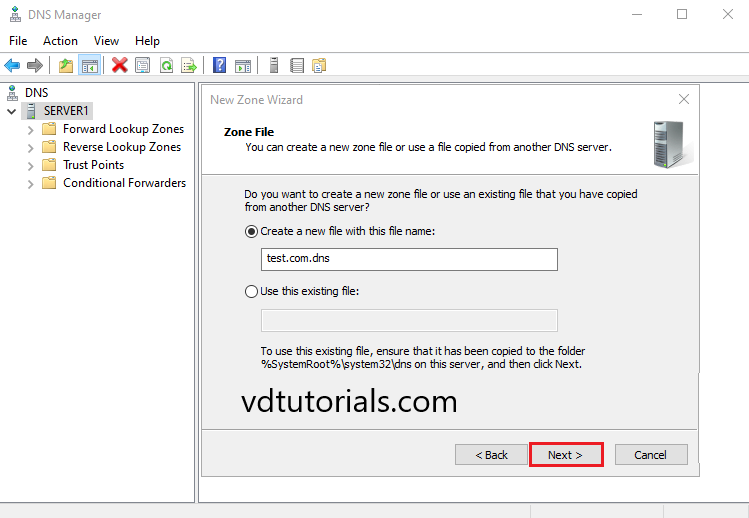
7. In Zone File, Click Next.
Create a new file or use an existing file that you have copied from another DNS server. In this tutorial, we create a new file with the file name test.com.dns
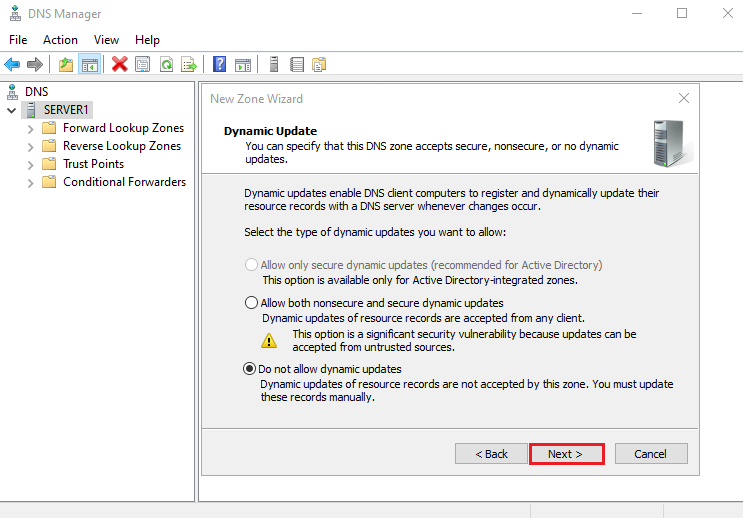
8. Do not allow dynamic updates and Click Next.
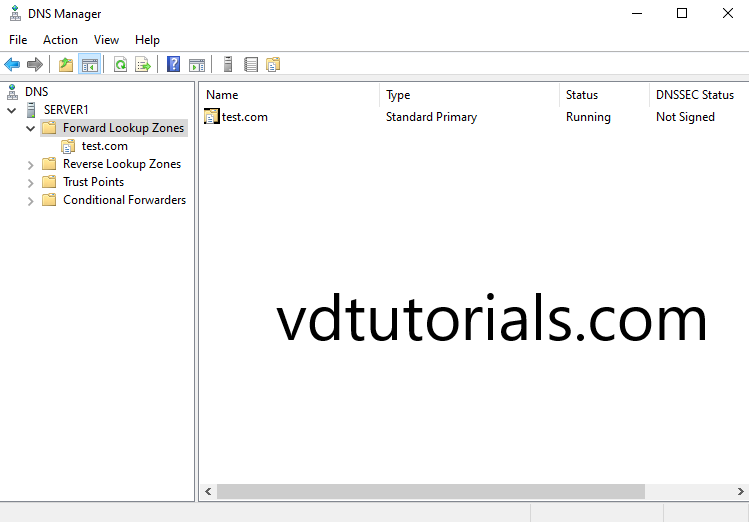
9. To close this wizard and create the new zone, click Finish.
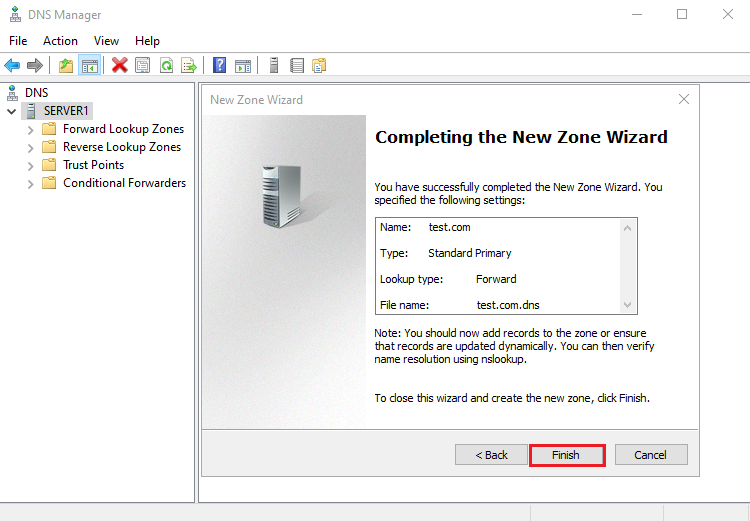
10. A new zone has been created under the Forward Lookup Zone.