
Network segmentation is a great way to compartmentalize the various networks you need to run in your environment. This provides many benefits from both a management and security perspective. When segmenting your networks, one of the things that you have to consider and take care of is IP addressing. Dynamic Host Configuration Protocol (DHCP) is an age-old standard that has been used in the enterprise for handing out IP addresses to clients on the network. DHCP requires its own broadcast domain, which in turn requires VLANs. Many organizations are using Windows Server for DHCP on their networks. In this post, we will take a look at Windows Server DHCP VLAN configuration. These steps work for Windows Server 2012, 2016, 2019, and Windows Server 2022.wind
Why are VLANs needed for DHCP?
When a client is provisioned on a network segment and is set up to have IP addressing configured automatically using DHCP, the client makes broadcast queries on the network segment to notify the DHCP server configured that it needs an IP address. The DHCP server responds with the appropriate IP address for the network segment and the additional configuration for network connectivity on the segment.
VLANs (Virtual Local Area Networks) allow taking a physical network switch and logically segmenting the physical network environment into multiple network segments. This makes much more efficient use of network hardware since additional segments do not require additional physical network switches. By introducing VLANs, you can provision multiple network segments on the same switch.
When you spin up a new network segment IP address range, you want to pair this with a new VLAN or logical network segment. VLANs control broadcast ranges. Within each VLAN, clients can initiate the broadcast for a network IP address from a DHCP server. There are many different ways to have a Windows Server participate in a VLAN network segment. Before we look at the specifics related to DHCP VLAN configuration, let’s take a look at the multiple options for connecting the Windows host into a VLAN-backed network.
Connecting Windows Server to Multiple VLANs
There are many different ways to connect Windows Server to multiple VLANs. This includes the following:
- Additional network interfaces Untagged for VLAN traffic
- A single network interface with Tagged VLAN frames
- Routed Layer 3 connectivity to VLAN-backed subnets
Additional network interfaces Untagged for VLAN traffic
With VLANs, you hear two different terms tossed out there related to the VLAN you are working with – untagged, and tagged. When you talk about untagged frames, this means the Windows host is not tagging the Ethernet frames originating from the host with VLAN information. Instead, it is relying on the upstream switch it is plumbed into to handle that configuration.
So, essentially, the Windows Server is unaware of the VLAN and doesn’t care. It simply relies on its physical uplink to do any VLAN tagging for it to communicate appropriately. However, this means that if you want to have a Windows Server to be a part of multiple VLANs, it means you need a physical uplink for each separate VLAN, since it is relying on the switch to tag the traffic appropriately for a specific VLAN.
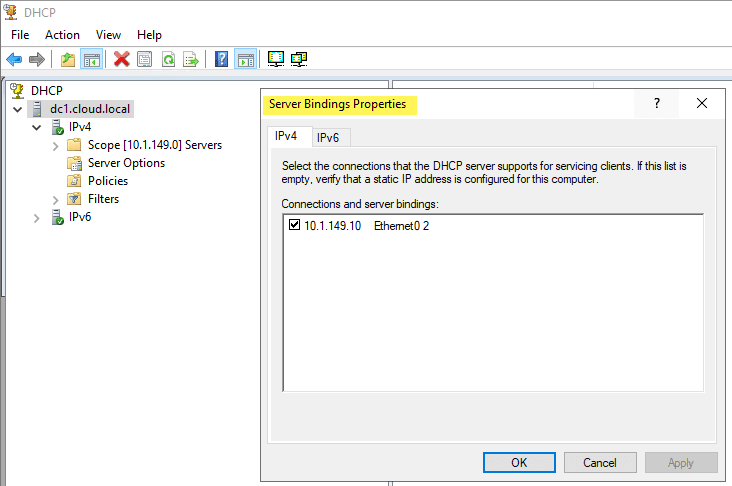
As shown below on a Windows Server 2019 server, you can specify the Bindings for the Windows DHCP Server so that it knows which interfaces to “listen” for DHCP on.
A single network interface with Tagged VLAN frames
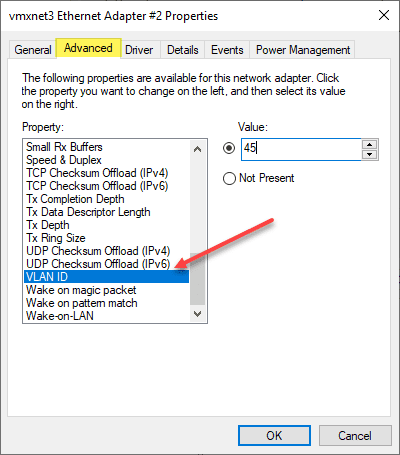
While there may be reasons that you use multiple physical uplinks with untagged frames for communicating with different VLANs, a more efficient approach is to use Tagged VLAN frames on a single network connection. When you use tagged frames, the Windows Server tags the frames appropriately for each VLAN it is associated with. The ability to Tag frames generally needs vendor-specific driver sets to be loaded, such as the Intel Pro Set drivers using Intel-based cards.
Routed Layer 3 connectivity to VLAN-backed subnets
The third option is simply relying on routing to take care of connectivity to the VLAN-backed subnets they need to communicate with. This technically does not connect the Windows Server into the VLAN as that would mean it would have the ability to be in the broadcast domain which is a Layer 2 VLAN construct. Instead, you are relying on Layer 3 connectivity to IP addresses. For many type of communication, including Windows Server 2012 DHCP VLAN configuration, this is all that is needed.
You can use all three of the methods above for Windows Server 2012, 2016, 2019, and Windows Server 2022 DHCP VLAN configuration. You can add multiple network adapters to each VLAN and have each scope listen on that specific network interface for DHCP requests. You can also use the tagging method listed above that allows adding multiple VLANs to a single network interface which allows keeping a single network adapter and connecting that physical network uplink to multiple VLANs.
You might assume the third option, since it is not connecting the uplink to the physical broadcast domain, would not be able to answer the broadcast DHCP request from the client on a specific VLAN. However, even though the DHCP server is not on the same broadcast domain/VLAN, there are really only two pieces of information the DHCP servers need to know to allocate an IP address on a particular subnet. This includes:
- Source subnet of the client
- MAC address of the client
You will note that the Windows Server DHCP server being a part of the VLAN is not a requirement for a successful DHCP request being made to the Windows Server. The third option is typically the option that I steer towards unless there are requirements for multiple physical uplinks for compliance or other security-based reasons. So, how does the Windows DHCP Server respond to a DHCP broadcast request if it is not on the same VLAN to take part in the broadcast traffic?
IP Helper Address, DHCP Relay, DHCP Proxy Address
This is made possible by the IP Helper Address which is sometimes referred to as DHCP Relay, or DHCP proxy address. Using an IP helper address, DHCP Relay, or DHCP proxy address allows the special DHCP broadcast messages to be forwarded from VLAN they originated from and forwarded to the DHCP server. This role is typically handled by a firewall or router device that is able to take the DHCP broadcast message and forward these to the DHCP server.
How does this work? When the DHCP client issues the DHCP broadcast request packet, is as of yet has no IP address configured. This being the case, it uses a broadcast with an all zero source address – 0.0.0.0. It also has no way to get to the DHCP Server with the lack of IP configuration. With this being the case, the client uses a general broadcast address of 255.255.255.255 as the destination with the DHCP request packet.
The device handling the DHCP proxy functionality receives the DHCP request packet from the client, replaces the destination address of 255.255.255.255 with the configured address of the server that was configured in the IP helper-address configuration. The client’s MAC address is included in the DHCP request so the receiving DHCP server knows the required MAC address of the client. This information is then forwarded to the DHCP server from the router, firewall, or another device in the role of the DHCP proxy.
The DHCP server issues an address now that it knows the subnet the client resides on along with the MAC address. It sends the DHCP response back to the DHCP Proxy device. The DHCP Proxy device then forwards the response to the correct MAC address of the requesting client and it is able to be configured with the IP address allowing network communication on the subnet.
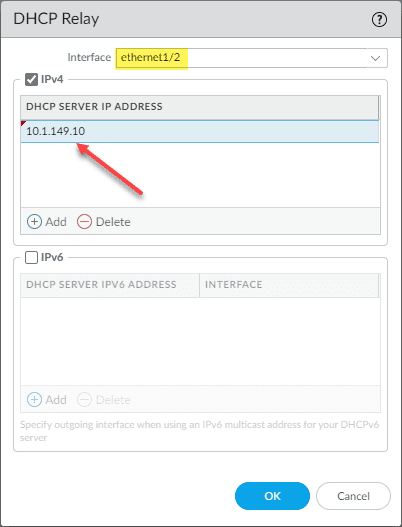
The configuration of DHCP Relay is generally simple but can vary depending on the vendor of router, firewall, or other device you might be using to perform this function. Below is the configuration of DHCP Relay on a Palo Alto firewall. You simply have to select the Interface and the DHCP Server IP Address you want to use for the target of DHCP requests.
Windows Server DHCP VLAN configuration for Virtual Machine DHCP servers
The principles still apply to Windows Server DHCP servers running inside a Windows Server virtual machine. The one method that is more difficult is the tagging of a single interface with multiple VLANs as this is not a feature that you can carry out with VMware Tools drivers that I am aware of. You can add multiple virtual NICs to a single VM and connect the virtual machine to different VLAN-backed port groups for each connection.
This will essentially place the Windows Server virtual machine on the same network segments as the clients that need addresses. Or, you can use the preferred method of using an IP Helper Address to forward the DHCP requests from all the other VLAN-backed subnets to the DHCP server and have the addresses issued by the server using only the single network connection.
Creating a Windows Server DHCP scope for a different VLAN
As detailed by the explanation above, the actual work of the Windows Server DHCP VLAN configuration takes place with the IP Helper Address/DHCP proxy device. Creating a Windows Server DHCP scope for a different VLAN is the same as creating a scope for the native VLAN network where the DHCP Server itself is located. Non-intuitively, you won’t see any part of the scope creation wizard that has you define the VLAN configuration. However, this is not needed in any of the configurations mentioned. With IP Helper Address, the packets are forwarded by the DHCP proxy to the DHCP server. If you are using different interfaces or tagged interfaces, the DHCP server will receive the DHCP broadcasts as normal.

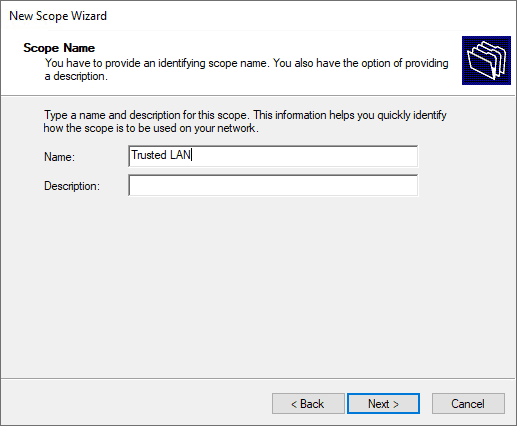
Set the name and description (optional) of the new DHCP scope.
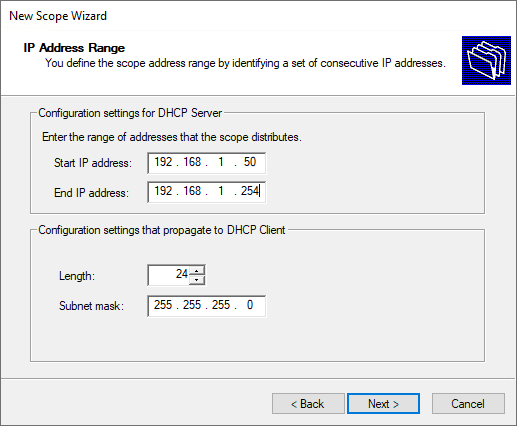
Specify the new DHCP address range.
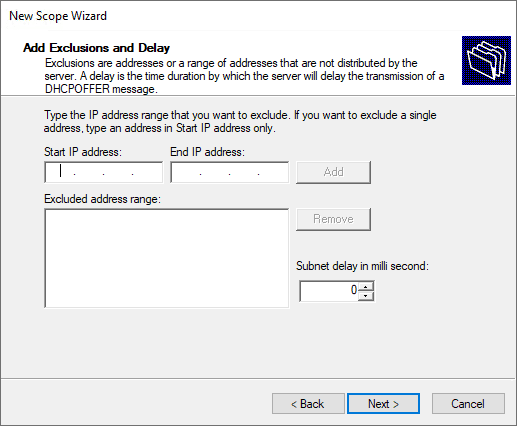
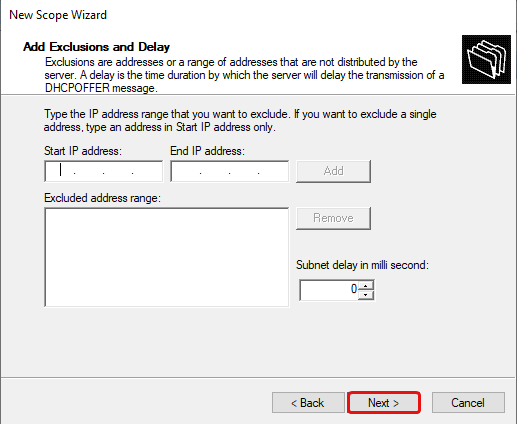
Set the exclusion range for the DHCP scope.
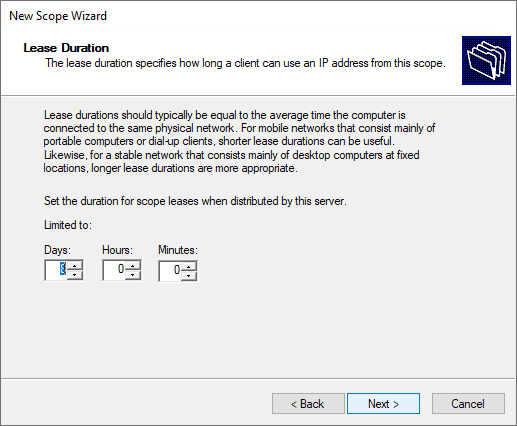
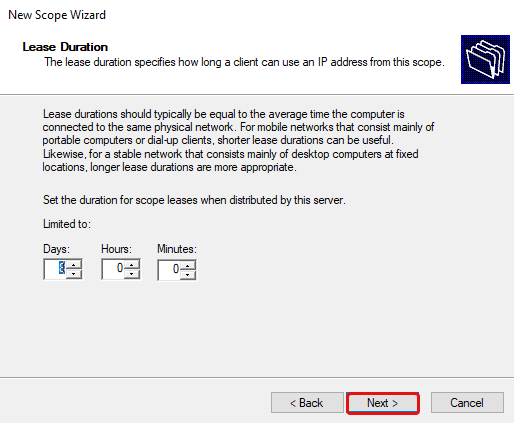
Specify the lease duration.
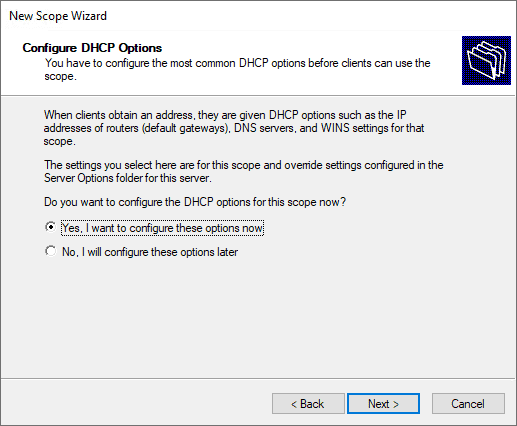
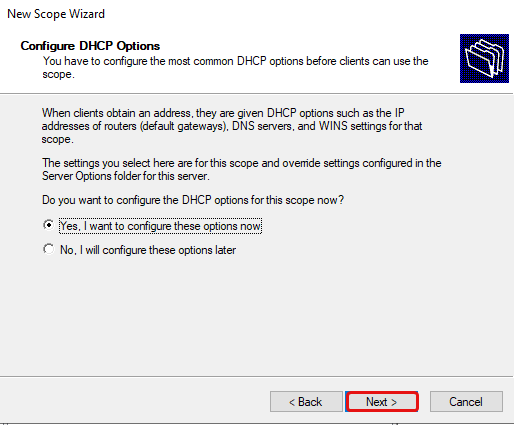
Configure the DHCP options for the new DHCP scope.
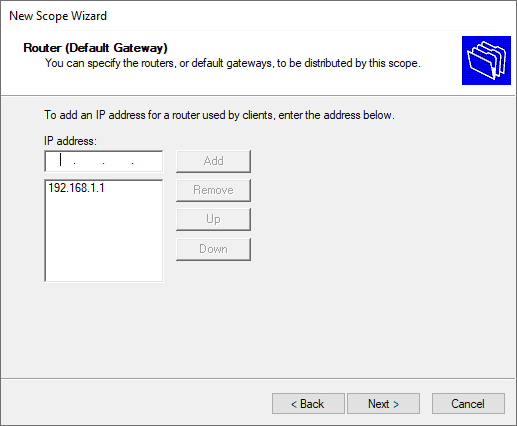
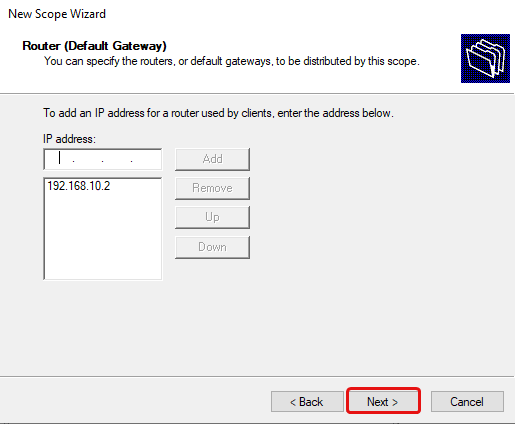
Define the default gateway of the new Windows Server DHCP VLAN configuration.
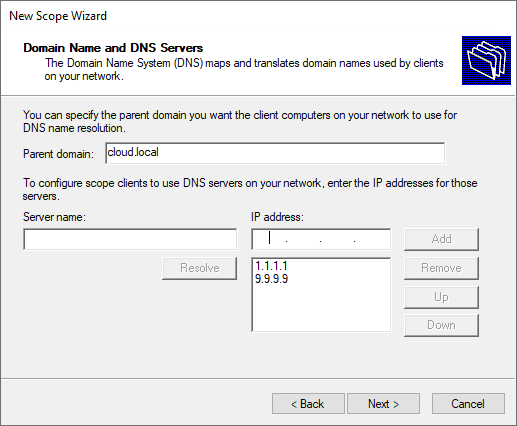
Configure domain name and DNS servers.
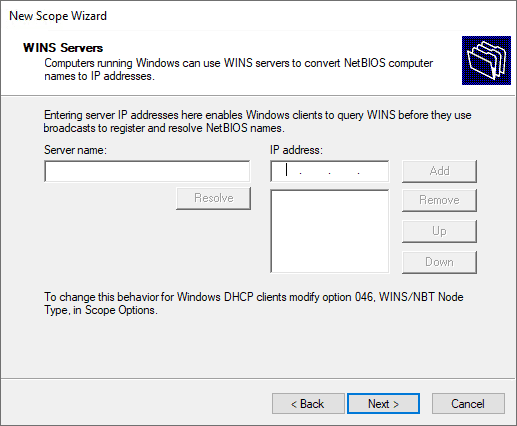
Setup any WINS server addresses.
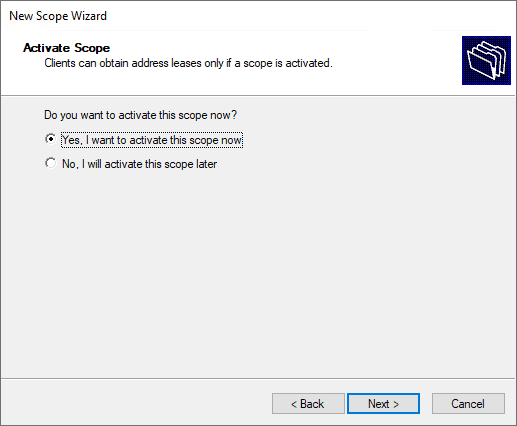
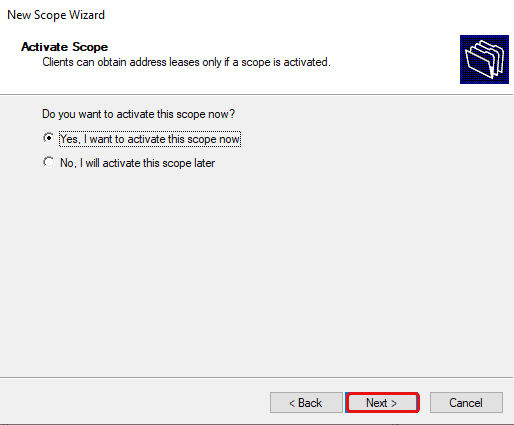
Activate the new DHCP scope.
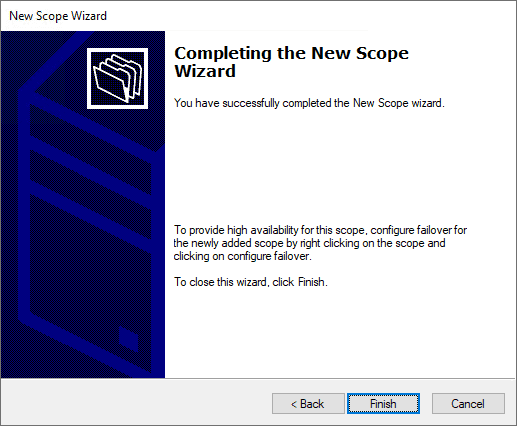
Complete the new DHCP scope wizard.
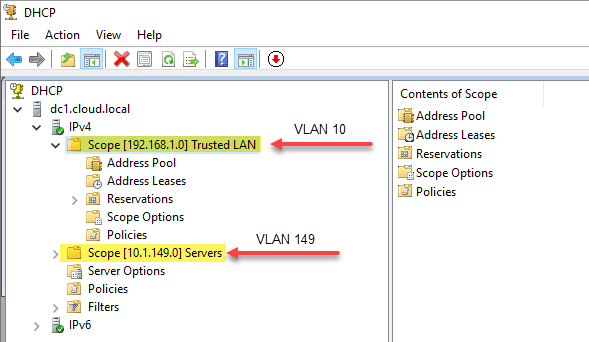
Below is an example of how my DHCP server looks after creating two different scopes for address leasing.
- 192.168.1.0/24 – associated with VLAN 10, which is not where the Windows Server DHCP server resides.
- 10.1.149.0/24 – associated with VLAN 149. This is the VLAN where the DHCP server resides.
Wrapping Up
Hopefully, this Windows Server DHCP VLAN Configuration: Detailed Guide will help any who may be trying to wrap their heads around the configuration of DHCP services for different VLANs and network segments in their network. By understanding the different means you have available to hand out IP addresses from a Windows DHCP Server you can effectively segment your network and easily handle IP addressing for all clients in the network, regardless of the VLAN they reside on.
This guide assumes the following:
- You have an OPNsense firewall.
- You have already configured your VLANs on OPNsense.
- You have a Windows Server 2019 server.
Windows Server 2019
Set Static IP
You will need to set a static IP address for the DHCP server to work. Follow the steps below to do so.
Open a Command Prompt and run:
1control.exe /name Microsoft.NetworkAndSharingCenter
Network and Sharing Center should open. Now navigate to Change adapter settings, then right click on your network adapter and click Properties. Double click on «Internet Protocol Version 4 (TCP/IPv4)». Switch from Obtain an IP address automatically to Use the following IP address.
Change your IP address to one that is in the VLAN subnet that your server is connected to. For instance, my DHCP server is connected to my Services VLAN. The subnet is 192.168.10.0/24. My server IP address is set to 192.168.10.3 for simplicity.
Change your Subnet mask to the subnet mask of your VLAN subnet. E.g. 255.255.255.0 for me.
Change your Default gateway to your OPNsense router’s IP that is on the same VLAN. Mine is 192.168.10.2 in this instance.
Change your DNS server to any DNS server you wish, e.g. 1.1.1.1 for Cloudflare DNS. If your server is a DNS server, enter the same IP from above e.g. 192.168.10.3.
Add DHCP Role
Now we will add the DHCP role to the server. Open a command prompt and run
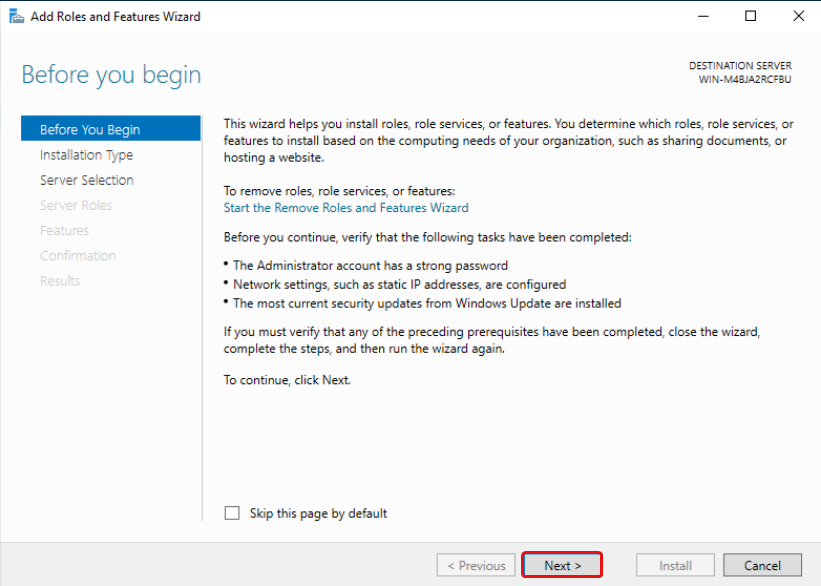
Add Roles and Features Wizard
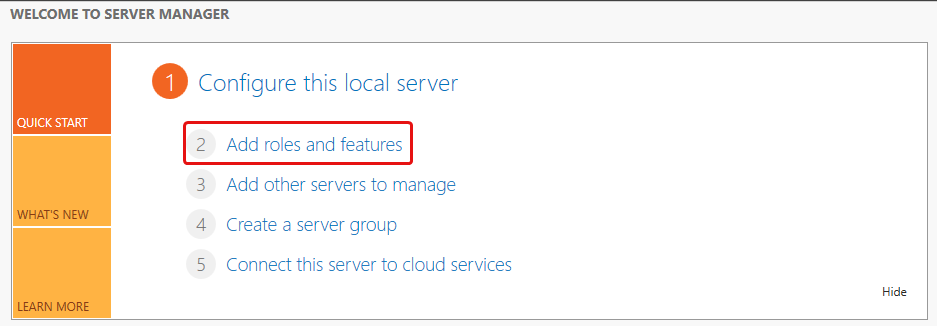
Click «Add roles and features»
Click Next.
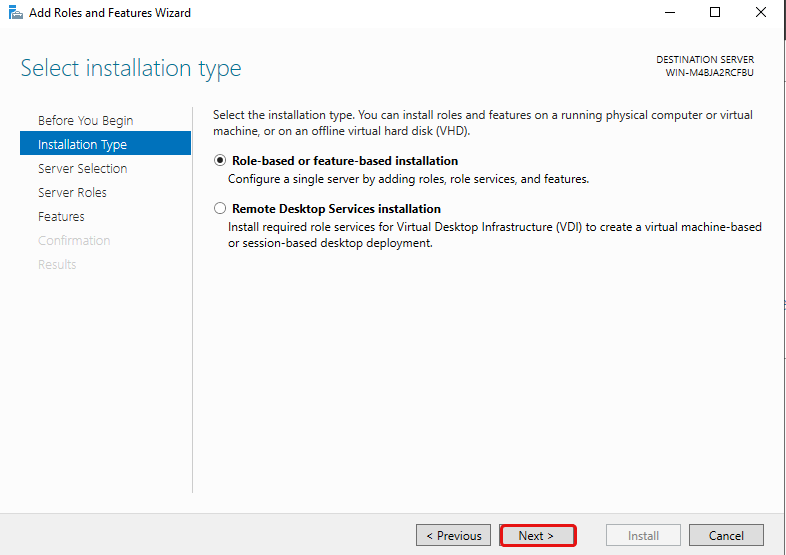
Select «Role-based or feature-base installation» and click Next.
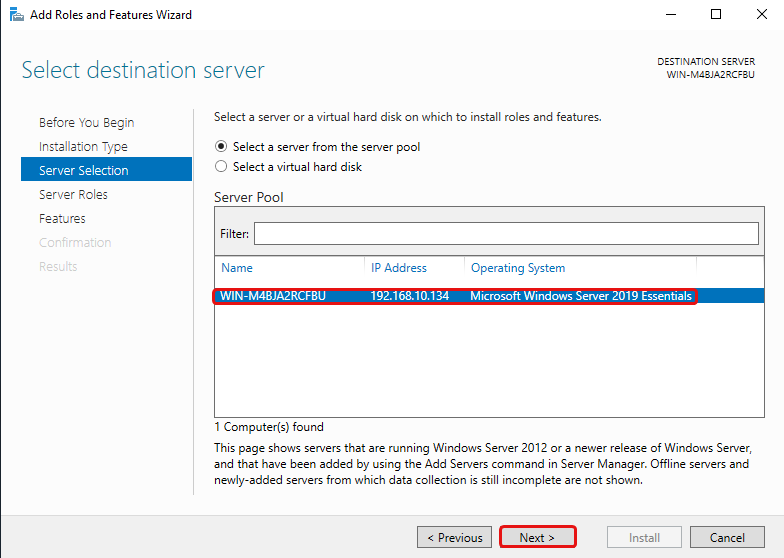
Select your server and click Next.
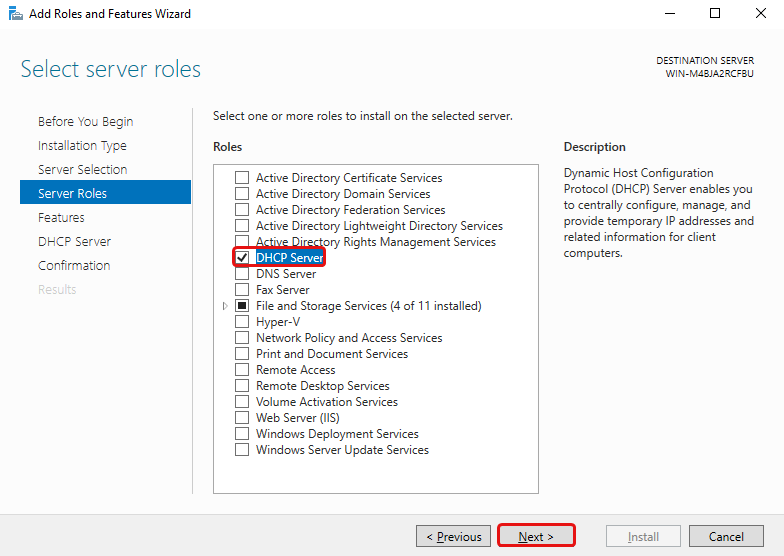
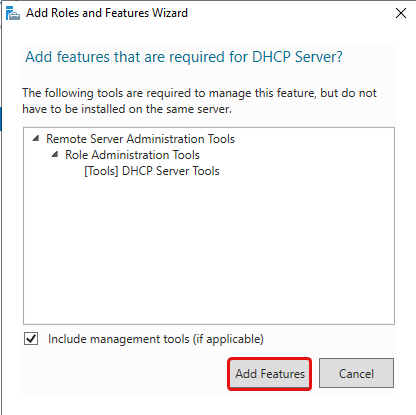
Tick the DHCP Server Role then click Add Features, then click Next until you can click Install. You may then click Close.
To check the status of the installation you can click the flag icon on Server Manager.
Post-deployment DHCP Configuration
After you’ve installed the DHCP Server role, you should see a yellow triangle next to the flag icon.
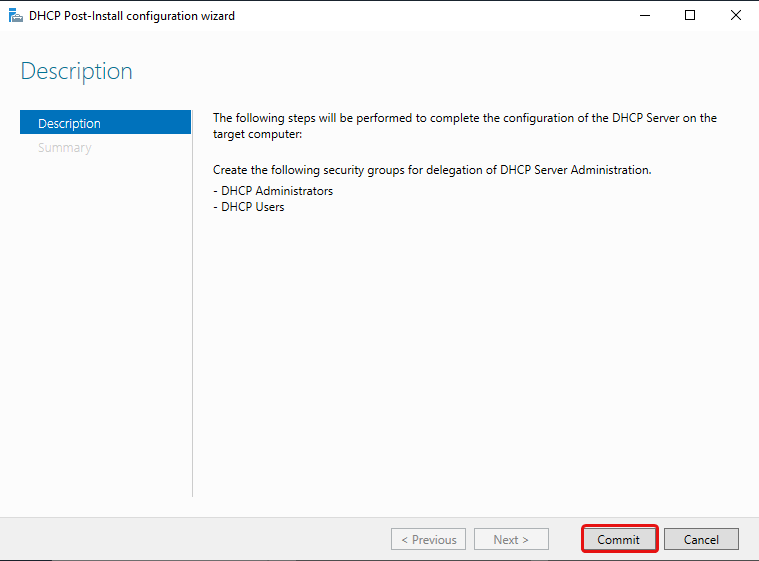
Click on the flag and then click Complete DHCP configuration. This will add the DHCP Administrators and DHCP Users security groups.
Click Commit.
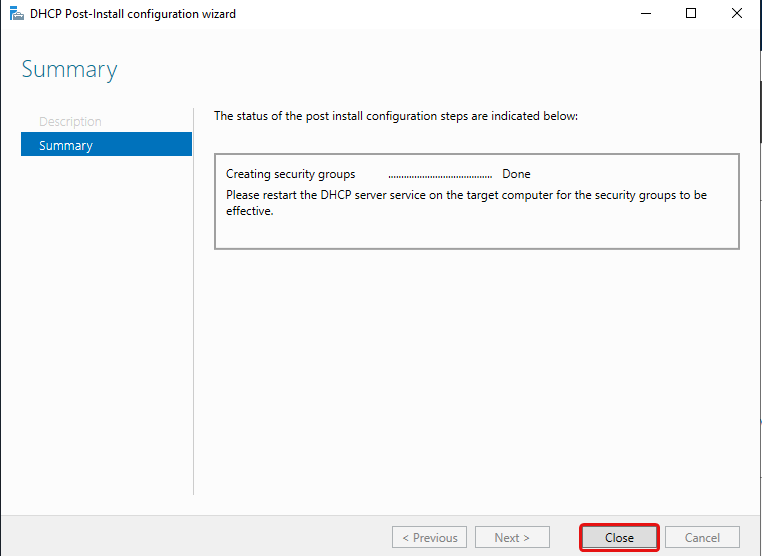
Click Close.
Configure DHCP Server
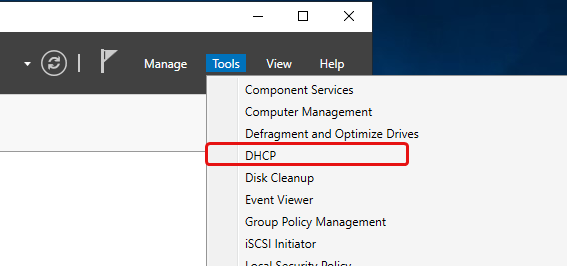
After everything has been installed, navigate to Tools > DHCP.
Add Scopes
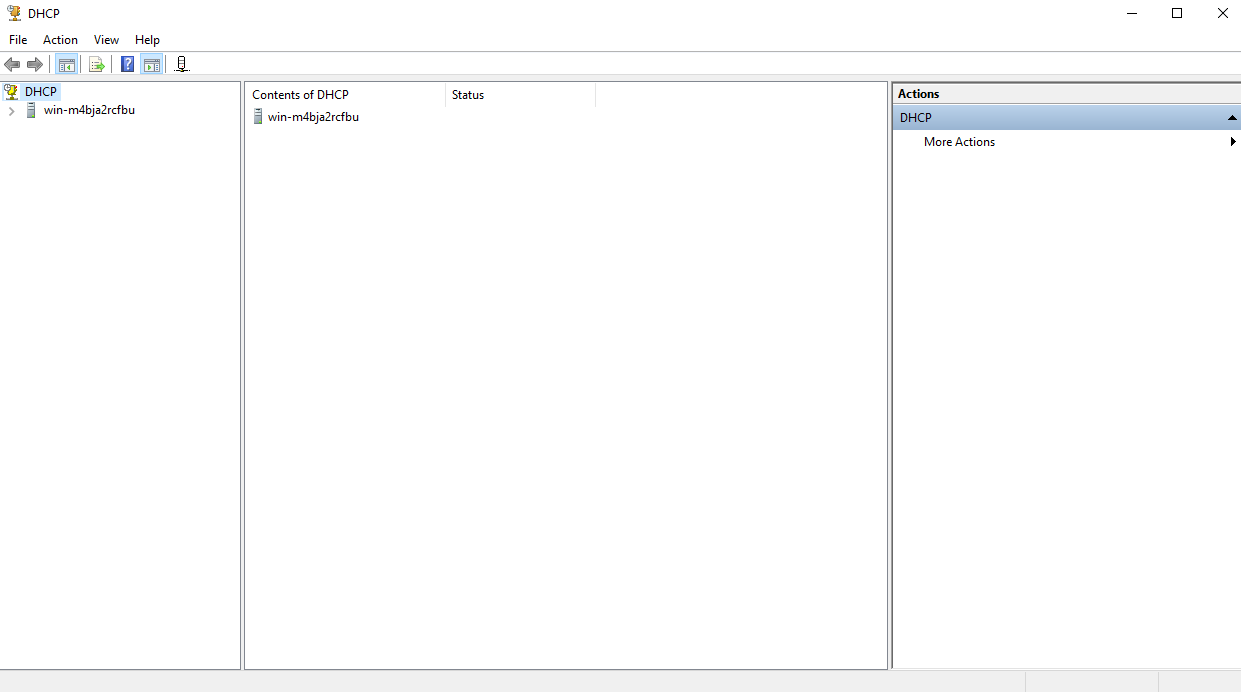
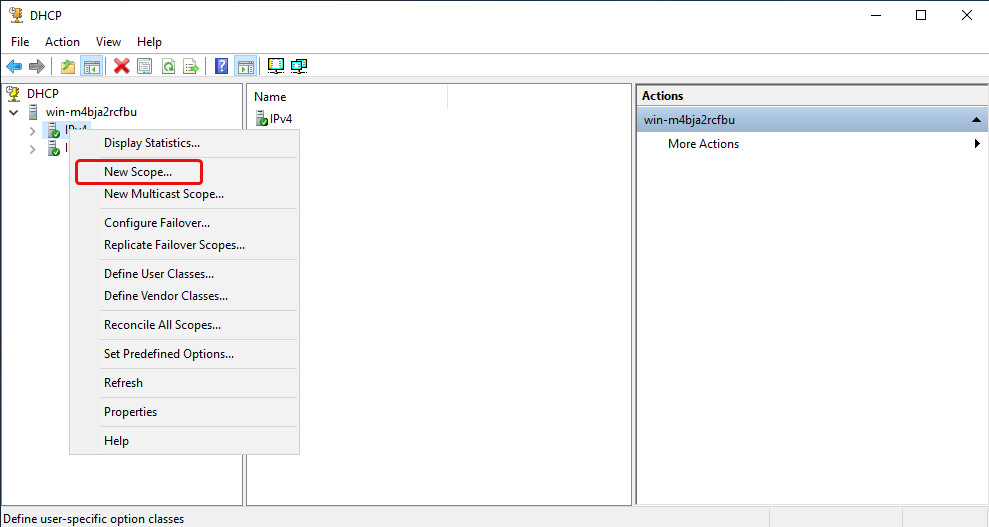
Click on the dropdown arrow then right click IPv4 and click «New Scope»
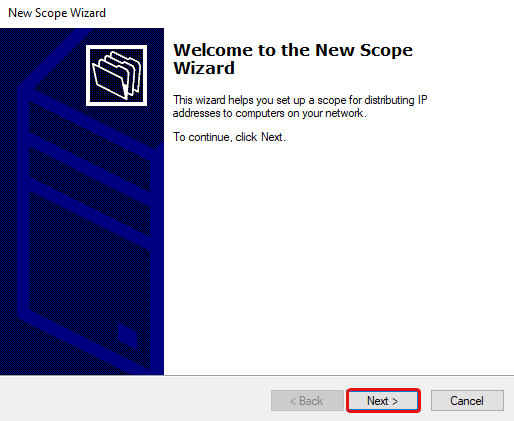
Click Next.
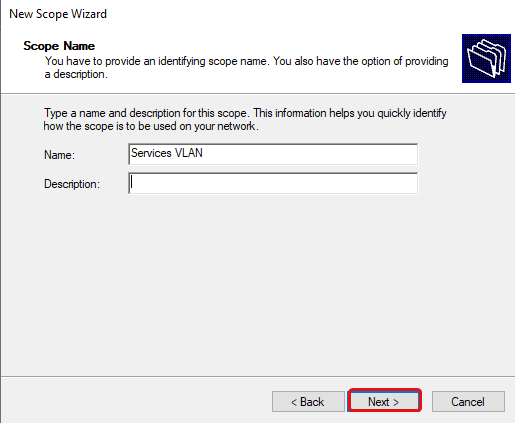
Add a name and description. The name is required, while the description is not.
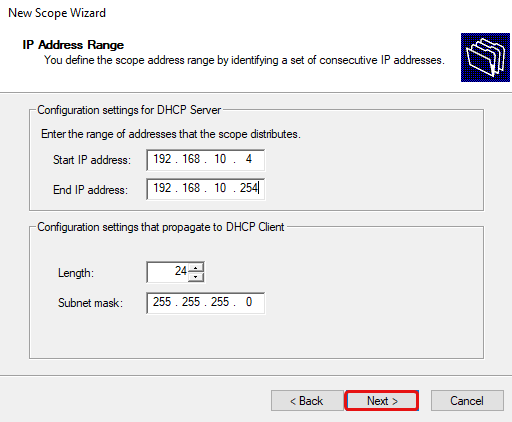
Define the IP address range that this scope will distribute. In my case, the IP address range would be 192.168.10.4-192.168.10.254.
The subnet mask defaults to 255.255.255.0 CIDR /24. Change this as necessary, for me I’ll leave this as is since it’s the same subnet mask as my Services VLAN. Then click Next.
You may add an exclusion range for IP addresses that you do not want the DHCP server to distribute. This is optional, click Next.
Set the lease duration here, this sets how long the IP address will be leased to each DHCP client. Either change it to another value, or leave it as is, then click Next.
Select «Yes, I want to configure these options now» then click Next.
Type in the Default Gateway (Router) IP address for the VLAN and click Add, then click Next.
Type in a DNS server IP address e.g. 1.1.1.1 for Cloudflare DNS, click Add, then click Next.
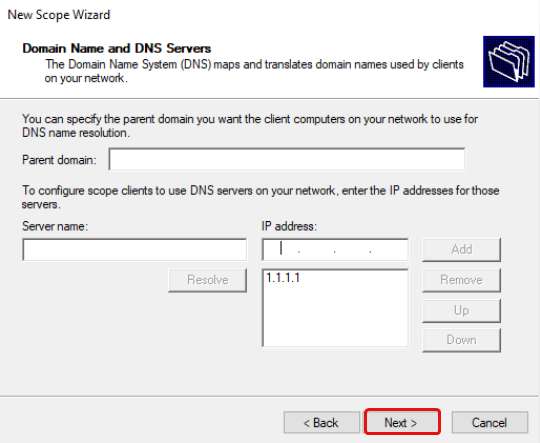
Click Next.

Select «Yes, I want to activate this scope now», then click Next, and then click Finish.
Additional DHCP Options
To configure additional DHCP options click the dropdown arrow next to IPv4, then the dropdown for your scope, and then right click on Scope Options, and click Configure Options.
You can configure various DHCP options here, such as an NTP server for time synchronization.
Repeat For Each VLAN
After you’ve configured your first VLAN scope, repeat the steps above for each VLAN subnet you have on your network.
OPNsense
Now that we have our DHCP server configured, we need to configure a DHCP relay on our OPNsense router. It basically forwards our DHCP request from our DHCP client to our DHCP server.
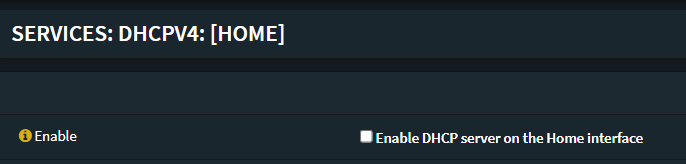
If you currently are using the DHCP server on OPNsense, you must disable it, navigate to the DHCP server for each VLAN interface, then untick «Enable DHCP server on x interface» then click Save at the bottom.
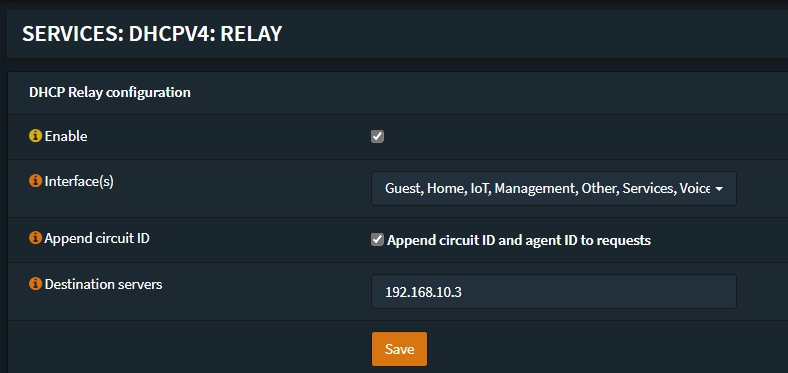
Now navigate to Services -> DHCPv4 -> Relay.
Tick Enable, select your VLAN interfaces, tick Append circuit ID, then enter your DHCP server IP address. Then click Save. This will then relay every DHCP request from clients on your VLANs to your DHCP server.
Conclusion
I hope this guide helped you! Now all of your DHCP clients will receive IP addresses from your DHCP server. Please contact me if you think I made any errors or if you have any suggestions to improve this guide.
We will be distributing IP to VLANs on Layer-3 and Layer-2 Switches in our test environment over DHCP. The commands here are for HP brand Switch devices and there is little difference in other brands of devices, for example, DELL, Cisco brands, but the logic is generally the same. You can view our structure in the image below.

We will activate the DHCP service over Windows Server 2019, which we will connect to the VLAN-100, and distribute IP automatically to the relevant VLANs. Now we are connecting to the Layer-3 Switch.
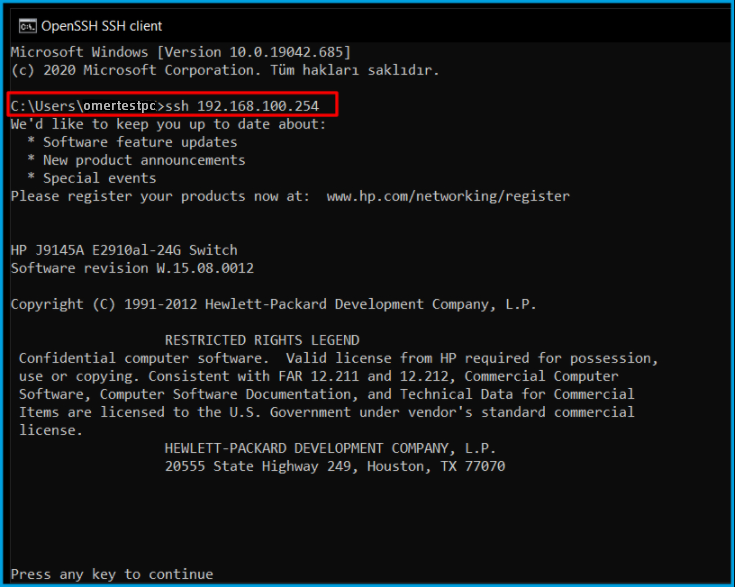
We specify the IP address of our DHCP Server by writing ip “helper-address 192.168.100.5″ to the VLANs that we want to get an IP address over DHCP. Since we want to make automatic IP distribution over VLAN-100 and VLAN-200 in our Bezim structure, we have added the relevant command to these VLANs.

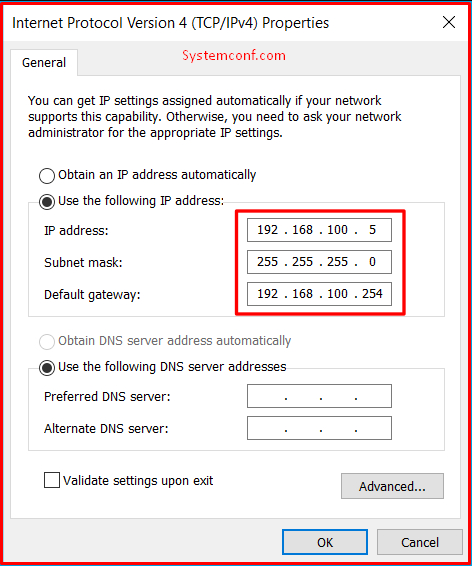
We have completed our transaction on the switch side. Now we go to our DHCP Server. We set our server’s IP address to be fixed. We have given the 192.168.100.5/24 Block. This server will be connected to a port of VLAN-100 in the system.
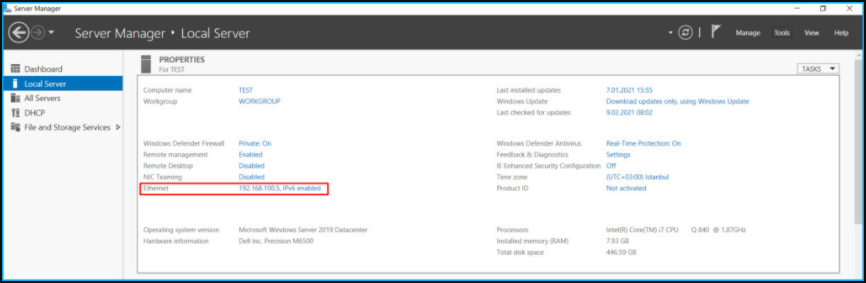
We set the server’s IP configuration as follows.
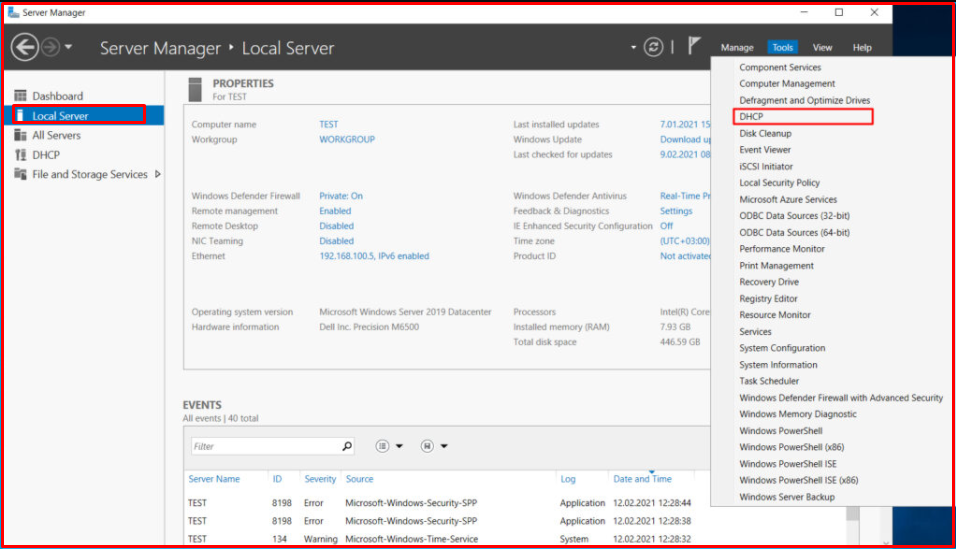
Now, to make the settings of the DHCP service, we click on the “Server Manager> Local Server> Tools> DHCP” field as on the screen.
Our server’s name is a TEST and we see that there is no “Scope” definition available.
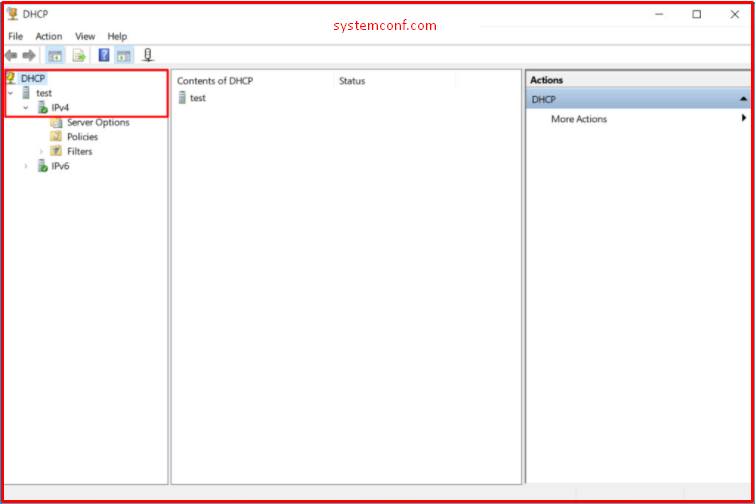
Since we will distribute the IPv4 address, we right-click in the IPv4 field and start creating a new “Scope”.

The “Scope” creation wizard greets us. We continue by clicking the “Next” button.
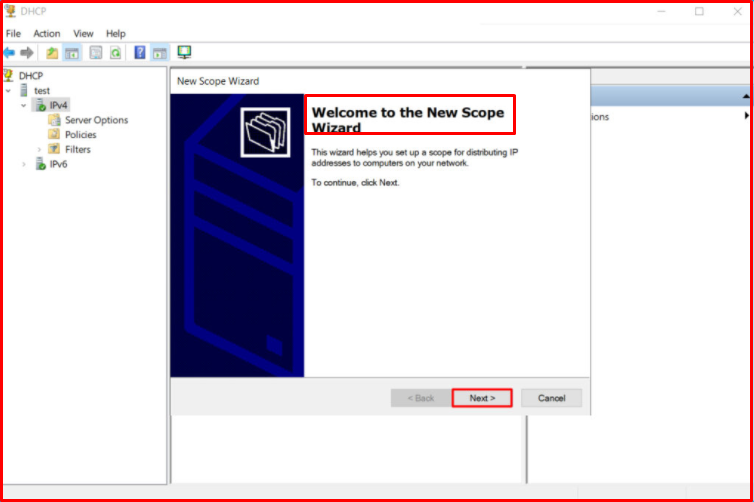
First, we will create a “Scope” for DEPO-VLAN [192.168.100.0/24] VLAN-100. We continue by clicking the “Next” button by giving the name.

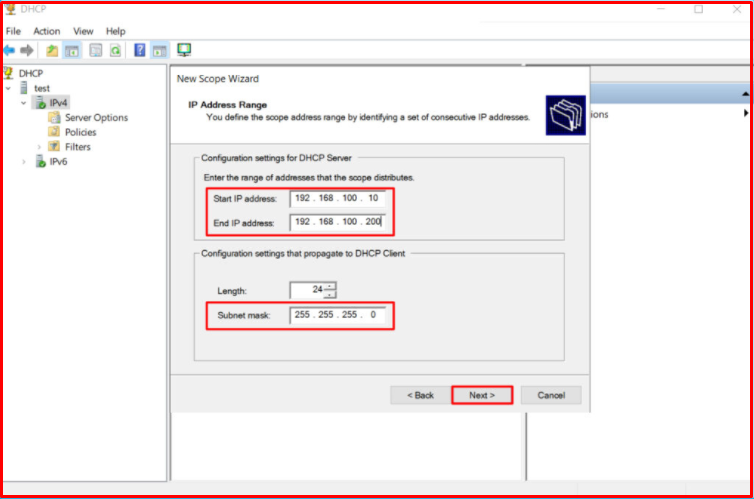
We choose our IP address pool from 192.168.100.10 to 192.168.100.200, and we want it to distribute IP addresses in this range.
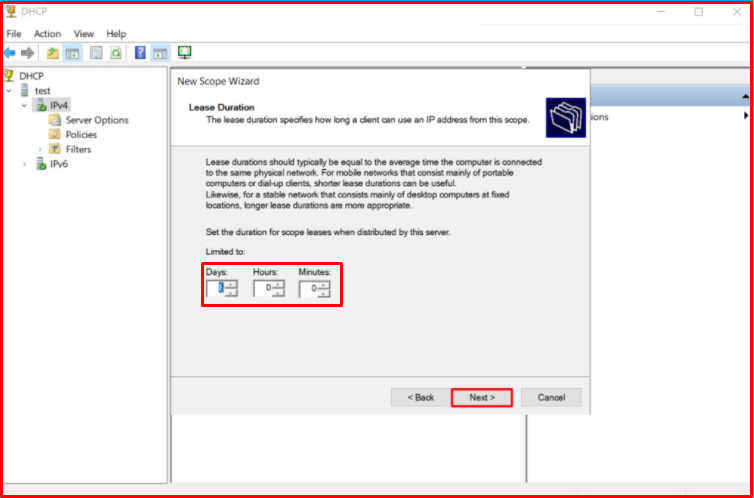
We do not touch the default time for rental IP addresses and continue by clicking the “Next” button.
We declare that we will make our settings for this “Scope” and “Yes, I want to configure these options now.” We choose the option. We continue by clicking the “Next” button.

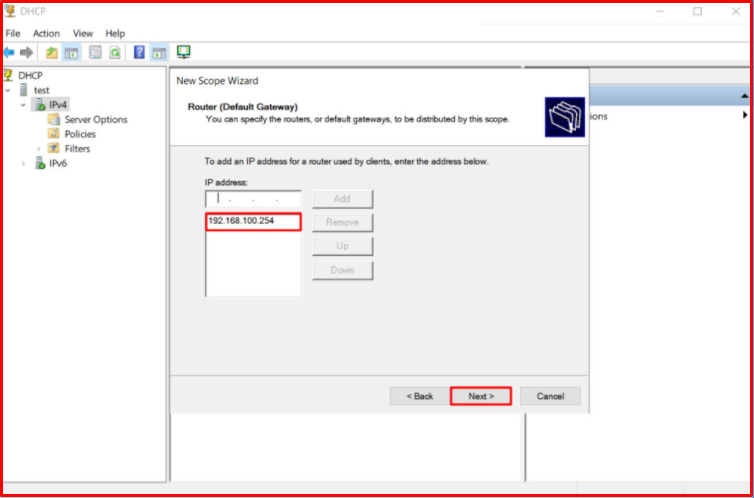
We enter whatever the Default Gateway is for the relevant VLAN. Since it is 192.168.100.254 in our structure, we enter it and continue by clicking the “Add” button.

Our gateway address has been added. We continue by clicking the “Next” button.
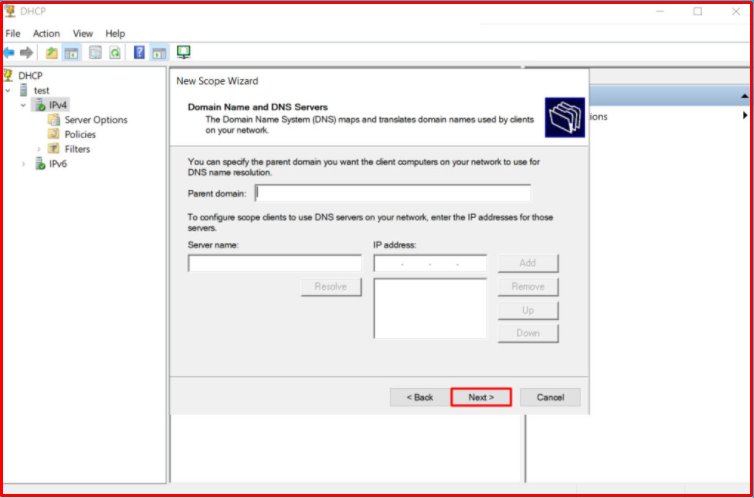
On this page, you can see the add DNS Server screen. Normally, you need to enter the IP and FQDN name of your DNS Server in your structure. We do not have a DNS server, so we skip this step. We continue by clicking the “Next” button.
On this screen, “Yes, I want to active this scope now.” We choose the option. We continue by clicking the “Next” button.
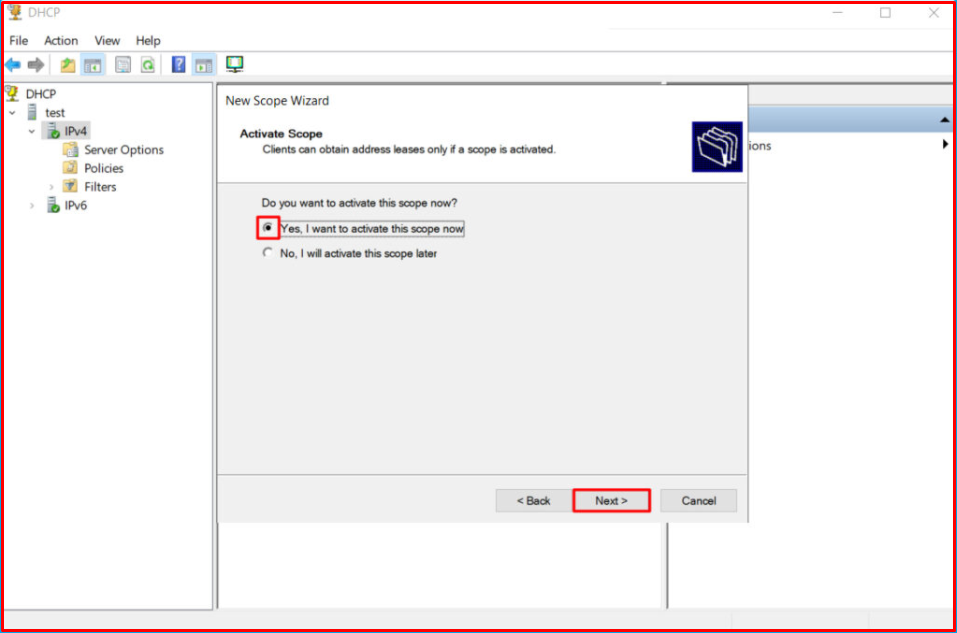
We have completed the related “Scope” setup for “VLAN-100“. We finish by clicking the “Finish” button.

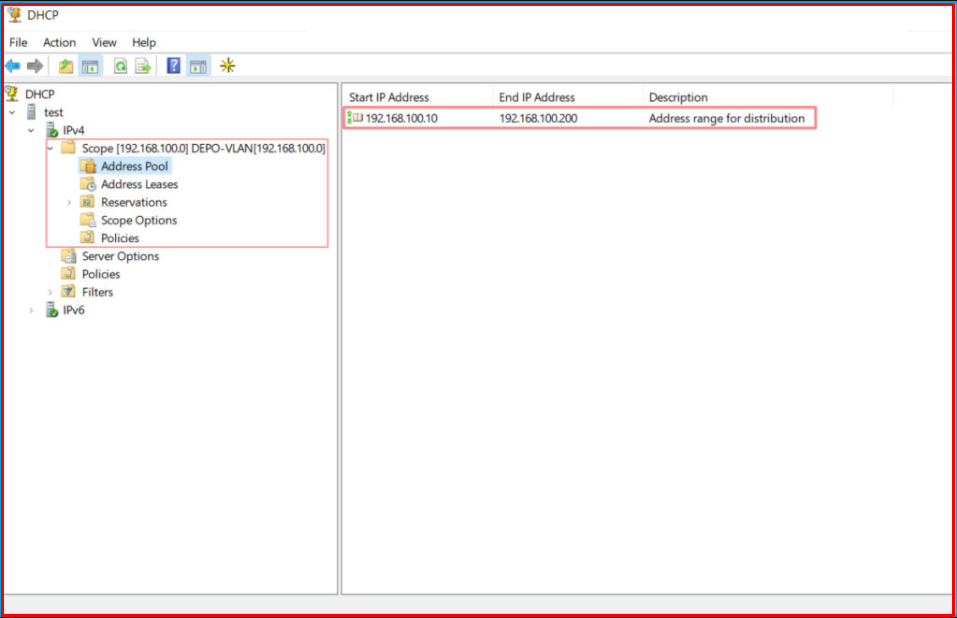
The “Scope” we have created comes under IPv4. Under “Address Pool“, you can see the IP range we defined.
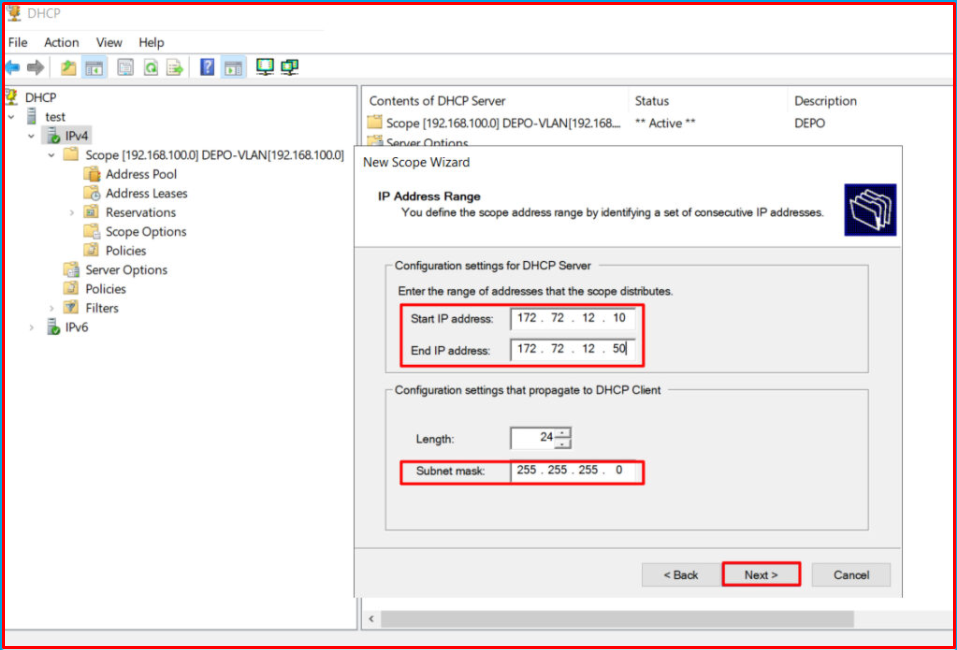
Now we will create a “Scope” for the SHIP-VLAN [172.72.12.0/24] VLAN-200. We only change the IP address and range for the relevant Scope, and enter its Gateway address.

We set this Scope IP range from 172.72.12.10 to 172.72.12.50.
Now it came in two Scopes under the IPv4 tab as we set IP ranges.

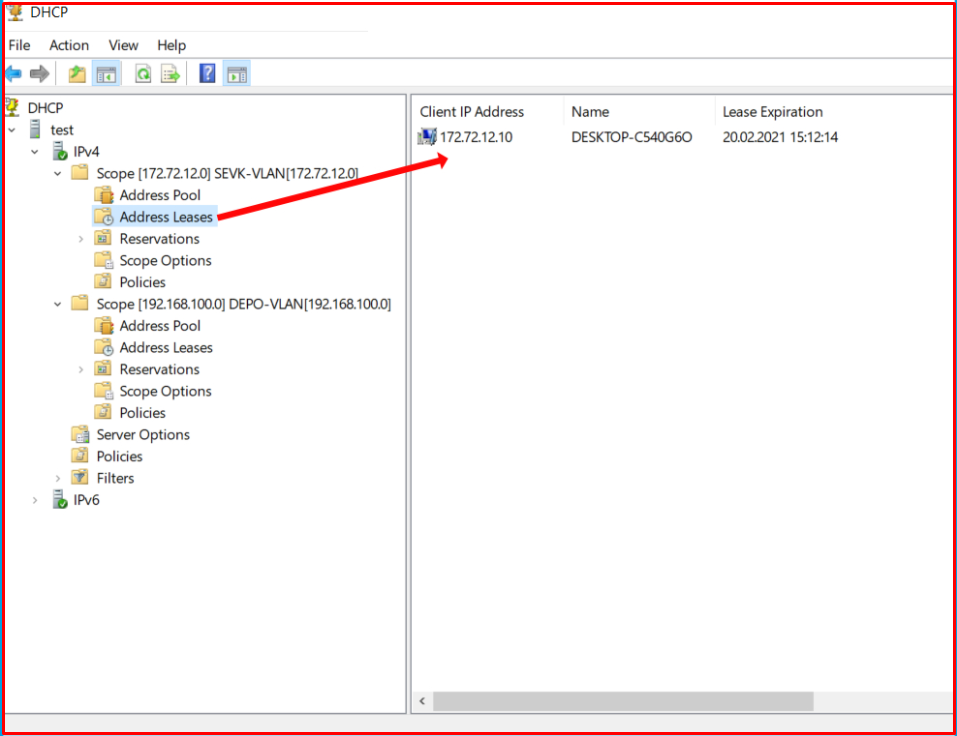
Now, we connect a computer whose network settings are set to receive IP automatically to the Port of the VLAN-200 and check whether it can obtain its IP address automatically. The address 172.72.12.10, which is the first IP address of the range we have specified, is given as follows.
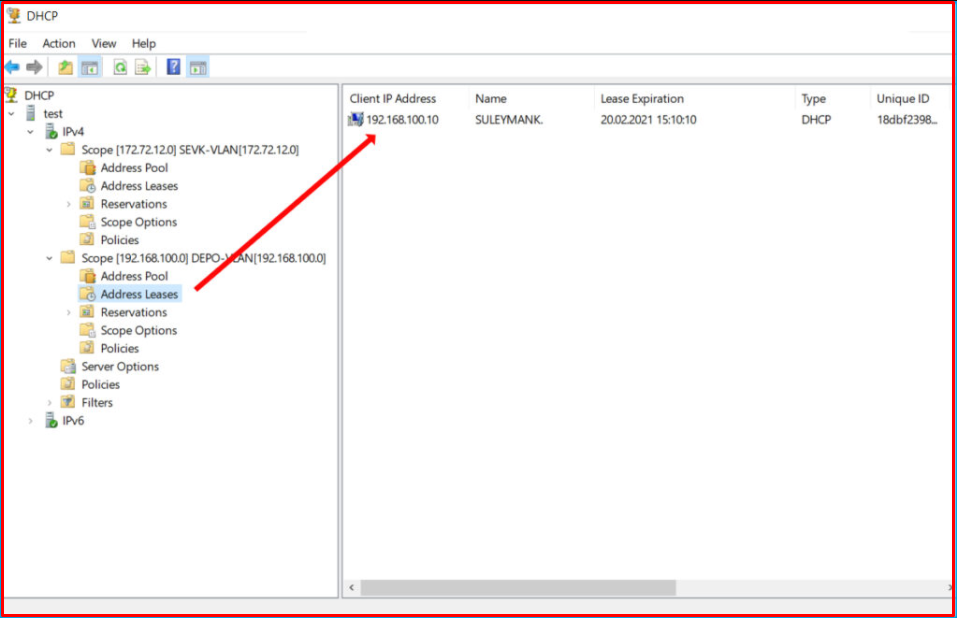
Likewise, we connect another computer to a port belonging to VLAN-100 and we control it. We see that it automatically obtains the IP address from the range for the VLAN-100 we have specified.
We created VLANs on HP brand Switches and enabled these VLANs to communicate with each other. Then, in such a setup, we practically realized how to distribute the IP distribution process to more than one VLAN over a DHCP.
- Create 6 Layer 2 Vlans on one of your 2950 switches.
- Provision a trunk port on the 2950 switch which will connect to a port on the Router.
- Setup the same L2 Vlans on the Router and then create a subinterface for each of these Vlans with the IP address being the Default Gateway for the clients in each Vlan.
Does WDS need DHCP?
Scenario 2: WDS and DHCP running on different servers that are on different subnets (broadcasting would be problematic because most enviornments don’t allow broadcast traffic to cross subnets: for the WDS client to find the WDS server you’ll need to configure two DHCP options—option 66 and option 67.
Under Which option in DHCP we can provide PXE server information in scope properties?
Setting DHCP options for WDS PXE booting Although Microsoft does not recommend this method, you can use the following DHCP options to direct PXE clients to an appropriate NBP to download: Option 60 = client identifier. You should set this to the string PXEClient.
Which option from DHCP is required for PXE boot clients?
DHCP Option 60 – You need this PXE Service to provide the “network boot program” details to your PXE clients.
Can DHCP assign VLAN?
DHCP VLAN Relay can be applied in such scenario: a DHCP server is deployed to offer IP addresses to clients in multiple VLANs. These VLANs do not have VLAN interfaces. DHCP VLAN Relay can manually designate an L3 interface for all the VLANs as the default relay agent interface.
What is option 82?
Option 82 is called the relay agent information option and is inserted by the DHCP relay agent when forwarding client-originated DHCP packets to a DHCP server. The routing switch can operate as a DHCP relay agent to enable communication between a client and a DHCP server on a different subnet.
What port does WDS use?
The following UDP ports need to be open for WDS to work across a firewall: 67, 69, and 4011 for DHCP and TFTP; 64001 through 65000 (random ports from this range are used by TFTP and for multicasting); and 68 if DHCP authorization is required on the server.
What is option 67 used for?
That 67 option tells the client a path to a file from a tftp server (option 66) that will be retrieved and used to boot. That file needs to be a basic boot loader that will do any other required work.
What is option 43 used for?
Lync Server 2010 introduced the usage of DHCP Option 43 which is used to provide clients and devices on a network the ability to locate the Lync Server’s Certificate Provisioning service, and thus automatically download a certificate required to support secure HTTPS and TLS communications for the remainder of the …
What is option 66 used for?
Option 66 allows you to specify the address of a TFTP server on your network, which is how Endpoint Manager serves configuration files to phones. So basically you need to add a DHCP configuration setting specifying your PBX server’s IP address for option 66.
How does DHCP know which VLAN?
The DHCP server will use the source IP address on the request to determine the appropriate scope to use for assigning the address. VLAN is the answer here. The easiest thing to do would be to have individual NICs for each VLAN subnet and bind the DHCP server IP ranges to their respective NIC.
What is option 43?
–> Option 43 helps an Access Point to find out Wireless Controller in Layer 3 Network. –> As soon as AP boots up it sends DHCP message, this DHCP message is forwarded by Switch or router to the Wireless Contoller.
When configuring a Windows Server 2019 DHCP environment in tandem with a Watchguard firewall, network administrators may find themselves juggling multiple design considerations—from setting up VLAN interfaces to deciding if an L3 switch fits into their network blueprint. Let’s take a deep dive into a practical implementation scenario along with some expert analysis on potential pitfalls and decision points.

Overview of VLAN and DHCP Configuration
The core concept behind the configuration is simple: separate your network into logically distinct segments (VLANs) while centralizing DHCP services, but not without careful planning. In one typical configuration example, two VLANs are set up:
• VLAN 10 – dubbed “Internal Wired” with a subnet such as 10.10.10.1/24
• VLAN 20 – referred to as “Internal WiFi” on a different subnet, for instance 10.10.20.1/24
The DHCP server, located on VLAN 10 with an IP address (say, 10.10.10.254), serves one subnet directly while relying on a DHCP relay for VLANs that reside on other subnets. This design keeps the DHCP service centralized, reducing overhead on multiple points.
Step-by-Step VLAN Configuration
The first essential step is to define your VLANs within the network configuration area of your Watchguard firewall. Follow these guidelines for a smooth setup:
- Open the Network Configuration Interface:
Access the VLAN configuration section. Here, you’ll define the VLAN IDs and assign them meaningful names. For our test configuration:
• Define VLAN 10 as “Internal Wired” with an interface IP of 10.10.10.1/24
• Define VLAN 20 as “Internal WiFi” with an interface IP of 10.10.20.1/24 - DHCP Server Setup:
Since the DHCP server is situated on VLAN 10 (10.10.10.254), no additional DHCP changes are required on that subnet. However, for VLAN 20 (or any other subnet that doesn’t host the DHCP service), you will need to configure a DHCP relay. This relay ensures that DHCP broadcast messages from that VLAN are forwarded to the server on VLAN 10. - Interface Assignment and VLAN Tagging:
Change the type of physical interfaces from “Trusted” to “VLAN”. This is done via the “Interfaces” tab, where you assign the appropriate VLANs to each physical interface. The firewall will then know exactly how to apply policies based on which VLAN the traffic originates from. - Policy Configuration:
When you select and edit a firewall policy, you notice consolidated options such as “Any-Trusted” (applicable across all trusted VLANs) and explicit options like “Internal Wired” and “Internal WiFi”. This selective granularity allows you to tailor security rules precisely for the traffic type (wired versus WiFi).
This step-by-step approach emphasizes precise segmentation—keeping traffic neatly partitioned while ensuring that critical resources like DHCP remain reachable via proper relay mechanisms.
Configuring the DHCP Relay and Server
A centralized DHCP server simplifies management, but when dealing with multiple VLANs, the DHCP relay agent becomes critical. Some points to consider:
• The DHCP relay is necessary on VLANs where the DHCP server isn’t directly present. For example, in our scenario, VLAN 20 requires a relay so that devices in its broadcast domain can still obtain IP addresses from the DHCP server in VLAN 10.
• Ensure that the relay settings are correctly configured within your firewall. Incorrect configurations can lead to devices not receiving IP addresses or facing conflicts that destabilize the network.
• Windows Server 2019 offers robust DHCP management, and when combined with a DHCP relay configuration on the Watchguard firewall, it makes the process of centralized IP management much more efficient. It’s important to verify that any relay agent configuration is secure and routinely tested to avoid issues in production environments.
By centralizing DHCP with a well-configured relay, administrators can minimize the need to run multiple DHCP services across different network segments.
Interfacing with the Watchguard Firewall
The Watchguard firewall is a powerful networking tool that supports flexible VLAN configuration. Here are some key insights:
• Interface Reclassification:
The ability to change interface types from Trusted to VLAN allows for straightforward physical setup. This means that administrators aren’t shackled by static physical allocations and can easily reassign interfaces based on evolving network requirements.
• Multiple VLANs on a Single Physical Interface:
Many modern firewalls, including Watchguard devices, let you assign multiple VLANs to one physical interface. This approach reduces hardware complexity but requires careful policy management. For instance, policies configured under “Any-Trusted” are broadly applied, while others like “Internal-Wired” or “Internal WiFi” are guaranteed to affect only the intended traffic.
• Rule-Based Security:
The duality of having broad policies alongside the option for granular control means that administrators have the flexibility to enforce different security postures depending on the segment’s needs. However, this flexibility relies on accurate VLAN tagging and robust DHCP/DHCP relay configuration.
With proper planning, firewall administrators can keep traffic segregated, while still providing centralized management of common services like DHCP.
Evaluating the Need for an L3 Switch
On one of the discussion threads, the question arose: Is it worth investing in an L3 switch? The expert opinions in the conversation reveal a nuanced approach:
• Model and Capability Considerations:
The decision heavily depends on the model of Watchguard firewall you’re using. For instance, inter-VLAN routing on lower-end models (like the T30) might not cater to the demands of larger networks. Lower-end models may struggle with processing power needed for routing extensive traffic between VLANs.
• Security Implications:
One view suggests that leveraging an L3 switch does not inherently weaken overall security; it merely shifts how and where traffic filtering is enforced. Instead of relying solely on the firewall for inter-VLAN security, the L3 switch’s Access Control Lists (ACLs) can help compartmentalize security rules, albeit at the cost of having to manage configurations in two separate locations. If an organization prefers centralized management, splitting configurations across the firewall and a dedicated switch might introduce complexity.
• Cost versus Benefit:
For organizations using VLANs strictly for logical segmentation (without sharply distinct security requirements), the incremental benefits of an L3 switch might not justify the additional cost. Conversely, if your network demands rigorous traffic filtering between segments, investing in an L3 switch could offer improved performance and more nuanced security control.
In summary, whether or not to invest in an L3 switch is highly contextual. Administrators must weigh the added control against the challenges of managing security rules across multiple devices.
Practical Considerations and Best Practices
When implementing these configurations, seasoned IT administrators keep a few best practices front and center:
• Comprehensive Documentation:
Always map out your VLAN and DHCP configurations. Document which VLANs are tagged to which interfaces, and note any DHCP relay configurations. This roadmap will save troubleshooting time when network issues arise.
• Consistent Monitoring and Testing:
Regularly verify that DHCP relays work as expected. Test the environment by connecting devices to each VLAN and ensuring they receive proper IP addresses via the relay agent. Monitoring tools on Windows Server 2019 can help you track DHCP request logs and identify any anomalies.
• Policy Review:
Firewall policies should be periodically reviewed. With the ability to assign security rules to broad groups like “Any-Trusted” and specific ones like “Internal-Wired,” administrators should ensure that policies do not inadvertently override one another, leading to either overly restrictive or too permissive access.
• Training and Skill Development:
Given that configurations spanning VLANs, DHCP, and firewall policies can become complex, ensuring that your IT staff is well-trained on both Windows Server 2019 and Watchguard firewall management is crucial. Regular internal workshops or refresher courses can prevent configuration mishaps.
Real-World Application and Further Analysis
Imagine a mid-sized company with both wired office setups and a wireless network designed for guest access. Using a centralized Windows Server 2019 DHCP configuration with a Watchguard firewall means that while both segments of the network are managed under one roof, each still gets the custom configuration it needs. The internal wired network might have different security and performance considerations than the guest WiFi. With VLAN tagging, administrators can easily apply certain policies (like restricted guest access) without affecting the internal network’s operations.
Similarly, if an organization experiences rapid growth, the discussion about whether to deploy an L3 switch becomes more than academic. It’s a real-world decision balancing network performance with security management. By carefully planning which devices enforce which layers of security (firewall vs. switch ACLs), companies can maintain performance without sacrificing the granularity of security enforcement.
Conclusion: Planning for a Secure and Scalable Network
Setting up Windows Server 2019 DHCP with a Watchguard VLAN configuration is an exercise in precision. It requires a solid understanding of both network segmentation and DHCP relay functionality. Crucially, it also demands flexibility in policy management—a realm where the Watchguard firewall excels, but which may sometimes prompt the question of whether an L3 switch could provide additional benefits.
In the end, the decision hinges on your network’s size, the specific Watchguard model in use, and the nature of your security requirements. For environments that need tight security rules across very different network segments, an L3 switch offers additional control at the cost of increased complexity. For simpler setups, sticking with carefully configured VLANs and a centralized DHCP system on Windows Server 2019 may be sufficient.
Administrators are encouraged to evaluate their network designs critically. As with many IT decisions, one size rarely fits all. Balancing centralized services with logical segmentation may well be the secret ingredient to both secure and scalable network architecture. For further topics on Windows server management and firewall configurations, consider exploring other expert discussions on WindowsForum.com—where real-world troubleshooting meets robust IT solutions.
Source: Spiceworks Community Windows Server 2019 DHCP for VLAN with Watchguard firewall questions