
After installing the DHCP role in Windows Server 2016 and setting up the first IPv4 Scopes to serve IP addresses to clients, it’s time to see how DHCP Filters work.
DHCP Filters are primarily used to further shield an infrastructure by allowing or denying specific clients based on their MAC addresses. Setting up DHCP Filters is quite simple and works at the server level, not at Scope level.
In a nutshell, with DHCP Filtering, you can filter clients, based on their MAC addresses, in order to either allow them to receive addresses from a DHCP Server or prevent (Deny) that from happening.
Before proceeding with the implementation of DHCP Filters, you will need to know how these filters are applied.
- When the Allow list is enabled, DHCP Server only serves IP addresses to the clients in this list automatically while rejecting all the others. If clients already had an IP address before filtering, then their IP will not automatically renew when Lease expires.
- When the Deny list is enabled, DHCP Server discards all the clients in this list. If clients already had an IP address and are now in the Deny list, then their Lease will not be renewed once they expire.
- By combining the two, Allow and Deny, the Deny list has precedence. This means that if a client is on the Deny list, it will be prevented in any case even if it is in the Allow list.
Now, let’s see how to configure DHCP filters.
In the DHCP console, expand the server and IPv4 objects and go to the Filters object. Here, you’ll see two sub-folders (lists), Allow and Deny. By default, the two lists are deactivated and you can see this from the red down arrow, as shown in the figure below.
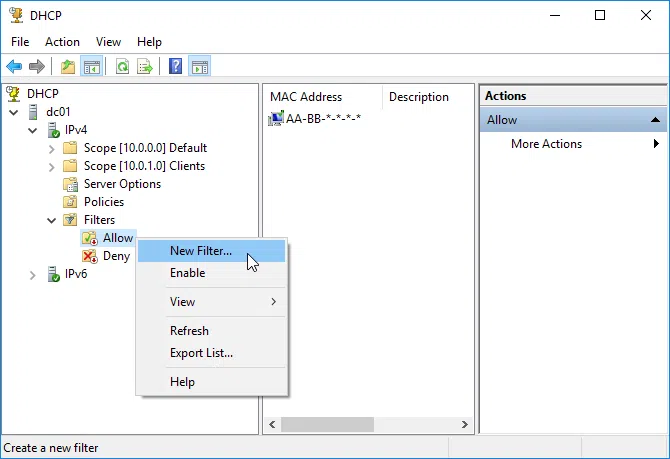
To add a DHCP Client to the Allow list, right-click and then click New Filter. Next, type the client’s MAC address and a description (optional) and click the Add button to complete the process.
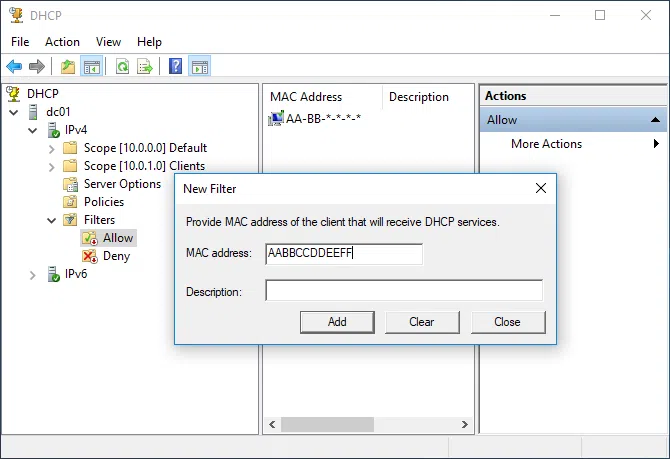
The MAC address you type can be dashed (eg AA-BB-CC-DD-EE-FF) or without (eg AABBCCDDEEFF). You can also use the asterisk (*) as a wildcard to declare a range of MAC addresses. For example, AA-BB-*-DD-EE-FF, AA-BB-CC-*-*-*, AA-BB-*.
Respectively, follow the same procedure to add clients to the Deny list.
What is important to know is that the Deny list is superior to any other setting. So, if a client does not receive an IP address from a DHCP Server and the Filters are enabled, then your first action will be to check if it is in the Deny and then in Allow lists.
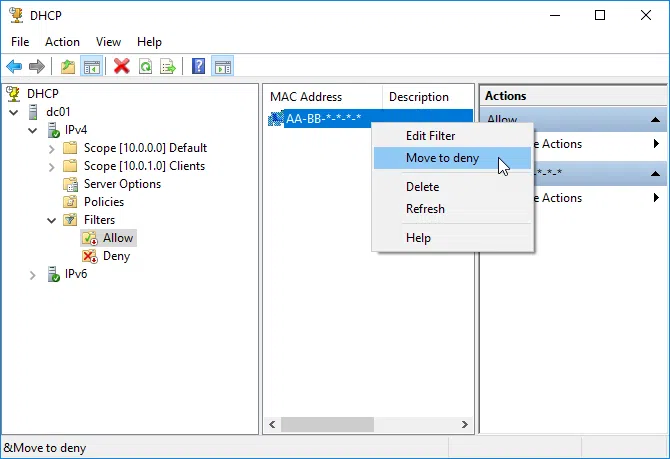
Additionally, you can move one or more clients from one list to another by right-clicking and then choose the corresponding option.
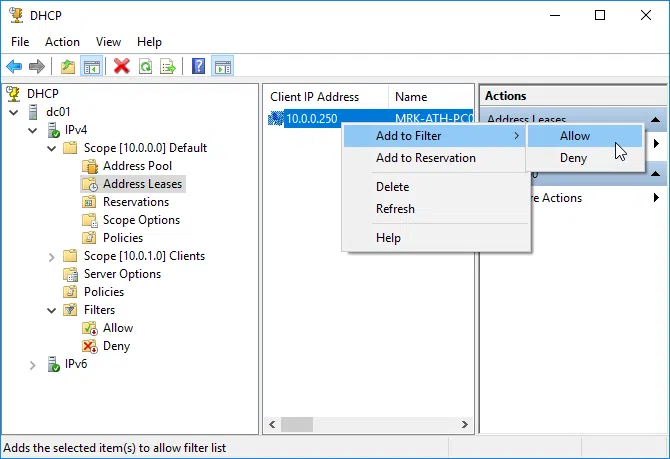
You can do the same for clients already in Address Leases, of course not having to type the MAC address.
Finally, do not forget to enable or disable the Allow and Deny lists by right-clicking and then choosing the corresponding option.
If the DHCP clients are VMs of a Hyper-V Server, you may prefer to set static MAC address instead of dynamic MAC addresses that are assigned by default.
In this post, we’ll learn the steps to enable and configure MAC address Filtering in DHCP Server 2012 R2. In the previous posts, we have learned the steps to install and configure DHCP server in Windows Server 2012 R2. Network Administrators can filter the assigning of IP addresses from the DHCP server on the basis of MAC addresses. To prevent the network from the security threat this low-level security method plays a vital and important role. On DHCP server, both allow and deny list can be configured separately. After configuring both the lists DHCP server will start assigning the IP addresses to the clients on the basis of MAC address filtering.
Steps to enable and configure MAC address filtering in DHCP Server 2012 R2
1. Open DHCP, under IPv4 expand Filters. Here, we can see two options. The first option is “Allow” and the another option is of “Deny”. The Allow filter is used to assign IP addresses to those MAC addresses only which are added in the allow list. Whereas, the Deny filter is used to restrict the assigning of IP addresses to those MAC addresses which are in the deny list i.e. DHCP Server would not assign IP Address to the clients that are part of the Deny Filter. For this practical, we will configure the Deny Filter. Right click on Deny and then click on New Filter.
How to configure Scope of DHCP Server
2. To enable and configure MAC address Filtering in DHCP Server 2012 R2, on New Filter console, enter the MAC address of the client that will not receive IP address from the DHCP server. Click on Add to add the MAC address in the Deny list. Here, for this practical, the MAC address of our client is “00-0C-29-EB-1C-5E“. Click on Close to close the console.
Steps to promote Domain Controller
3. Again on DHCP console, click on the Deny filter. We can see that the MAC address we have entered on the previous console is showing in the Deny list. Right click on Deny and then click on Enable to enable the deny filter.
4. Now go to the client computer whose MAC address is added to the Deny list. Open command prompt and type command “ipconfig /release” to release the IP address that was previously assigned. Now run the command “ipconfig /renew” to renew the lease of the IP address from the DHCP server. It shows an error while renewing the lease from the DHCP server. The client computer is not able to renew the lease of the IP address from the DHCP server because the MAC address of this client computer is added in the Deny list of the DHCP filters.
Assign Static IP Address to Server using Command Prompt
5. Now you can right click on the Deny filter and click on Disable, it would disable the filter. Now try to run the renew command again. It would assign an IP address to the client computer.
Hope you understood the steps to enable and configure MAC address Filtering in DHCP Server 2012 R2. Please feel free to leave comments and suggestions in the comment section.
Как мы все знаем, DHCP сервера используются для назначения IP-адресов и другой конфигурационной информации на клиентских компьютерах под управлением практически любой операционной системы, начиная от настольных и портативных компьютеров, до тонких клиентов и мобильных устройств. Более подробный FAQ по DHCP читайте в предыдущей статье. Одной из основных головных болей при использовании DHCP-сервера является то, что в тот момент, когда компьютер подключается в вашу сеть, он запросит, и затем получит от любого из доступных DHCP серверов, свои сетевые настройки. Это происходит всегда, не зависимо от того, надежный или ненадежный компьютер попал в вашу сеть, что естественно несет потенциальную угрозу безопасности для безопасности всей сети.
А вам никогда не хотелось иметь на сервере DHCP Windows возможность фильтрации нежелательных MAC адресов? До сего момента, единственным вариантом такого решения, было использование ручных резервация для всех ваших клиентов DHCP, либо же использование фильтрующего оборудования сторонних производителей.
Однако недавно Raunak Pandya опубликовал специальную библиотеку DLL, установив которую на DHCP сервер Windows Server 2003 или Windows Server 2008, можно получить возможность фильтровать запросы DHCP в зависимости от MAC адреса клиента. Эта DLL называется «DHCP Server Callout DLL».
Примечание: MAC-адрес (Media Access Control) является уникальным идентификатором аппаратной карты сетевого интерфейса (NIC), и представляется в формате 03-40-A4-45-4E-01.
Как это работает?
Когда устройство или компьютер подключается к сети, он сначала пытается получить IP-адрес от любого доступного DHCP-сервера. При установке библиотеки DHCP Server Callout DLL, она проверяет, если MAC-адрес этого устройства в списке MAC-адресов, настроенных администратором. Если он присутствует, устройству будет разрешено получать IP адрес от DHCP сервера. В противном случае запросы от этого устройства будут игнорироваться, основываясь на действии, настроенном администратором.
Фильтрация MAC-адресов позволяет администратору сети убедиться, что только определенный список устройств в сети сможет получить IP-адрес по DHCP. Эта библиотека поможет администраторам ввести в свою сеть дополнительную меру безопасности.
«DHCP Server Callout DLL» поможет сетевым администраторам решать одну из следующих проблем:
- Разрешить только определенным наборам известных MAC-адресов получать IP-адреса от сервера DHCP. Этот список может быть легко составлен с помощью документации от компьютеров, либо с помощью программного обеспечения мониторинга, например SMS\SCCM 2003, или же с помощью WMI скриптов.
- Запретить машинам, с определенными MAC адресами, получать IP-адрес от сервера DHCP.
К сожалению, эта библиотека DLL в настоящий момент может выполнить лишь одно действие. Либо разрешать, либо отказывать в выдаче IP-адреса конкретным MAC адресам, но е одновременно и то, и то.
Библиотека DHCP Server Callout DLL работает на DHCP-сервере и в среде Windows Server 2003 и в Windows Server 2008.
При установке, DLL (MacFilterCallout.dll) и документация к ней (SetupDHCPMacFilter.rtf), копируются в папку %SystemRoot\%system32. На 64-битных операционных систем в %SystemRoot%\SysWOW64, соответственно.
можете скачать эту библиотеку можно по адресу http://blogs.technet.com/b/teamdhcp/archive/2007/10/03/dhcp-server-callout-dll-for-mac-address-based-filtering.aspx
В предыдущих статьях вы можете познакомится с процедурой переноса сервера DHCP.
This Windows Server 2022 Tutorial covers how to Configure IP Reservation on DHCP (Dynamic Host Configuration Protocol). DHCP is a network management protocol, DHCP server dynamically assigns an IP address and other network configuration parameters to each device on the network. DHCP Server enables you to centrally configure, manage, and provide temporary IP addresses and related information for client computers.
In order to Configure DHCP Reservation in Windows Server 2022, you will need the MAC address information of the client device.
Server demo environment
- Computer Name: server1.test.com
- Operating System: Windows Server 2022 Datacenter
- IP Address: 192.168.3.3
- DHCP Scope: 192.168.3.150 to 192.168.3.200
Prerequisite Required
- Install and configure Dynamic Host Configuration Protocol (DHCP)
- Create DHCP Scope
Related tutorial
- Install and configure DHCP on Windows Server 2022
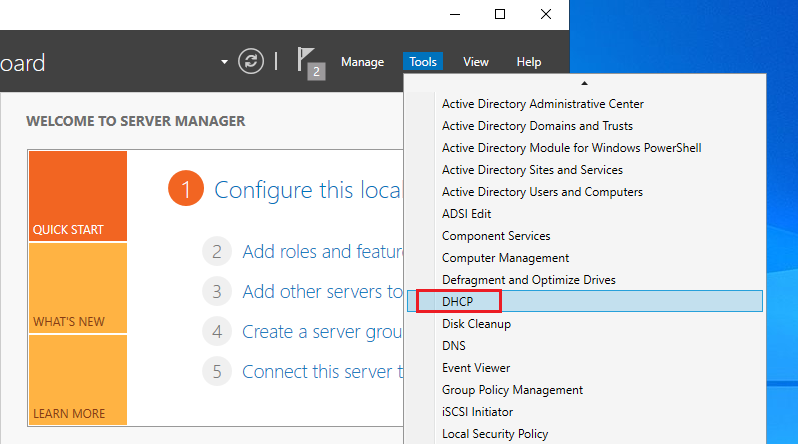
1. Open the Server Manager dashboard, click Tools, and select DHCP.
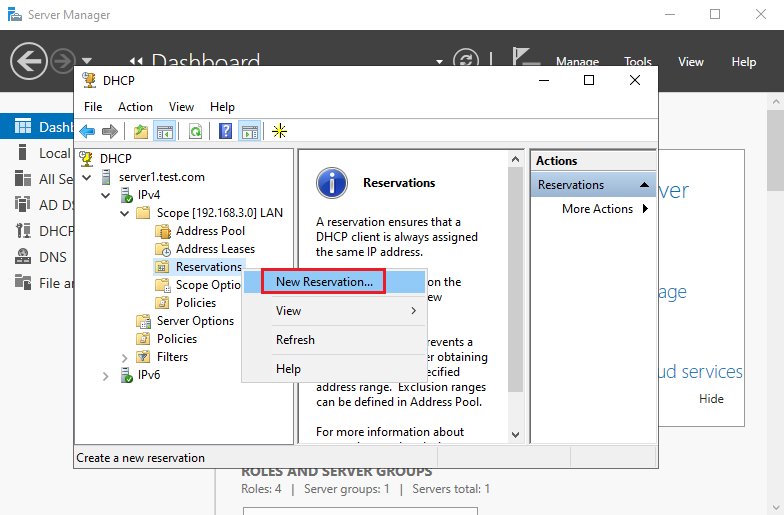
2. Open Scope right-click on Reservations and select New Reservation.
3. Enter Reservation name (specify the network name of the device), Enter IP address (specify the IP address from your DHCP scope that you want to assign to the device), Enter MAC address (MAC address of the client machine) and click Add.
- The MAC address of the Windows device can be found using the ‘
Ipconfig /all’ command.

DHCP Reservation has been configured, restart the client device for which we have created a reservation.
Windows devices command prompt commands
- ‘
ipconfig /release’: Release the existing IP address - ‘
ipconfig /renew’: Renew an IP address
Client Demo environment
- Computer Name: server2.test.com
- Operating System: Windows Server 2022 Datacenter
The IP address is assigned by DHCP (Dynamic Host Configuration Protocol) by default. Make sure the client and the server are on the same network.
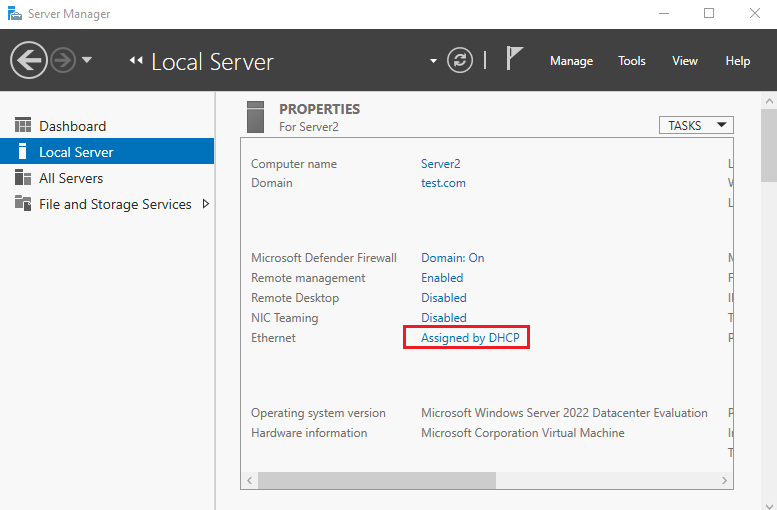
4. Open Server Manager Select the local server, and Click Assigned by DHCP.
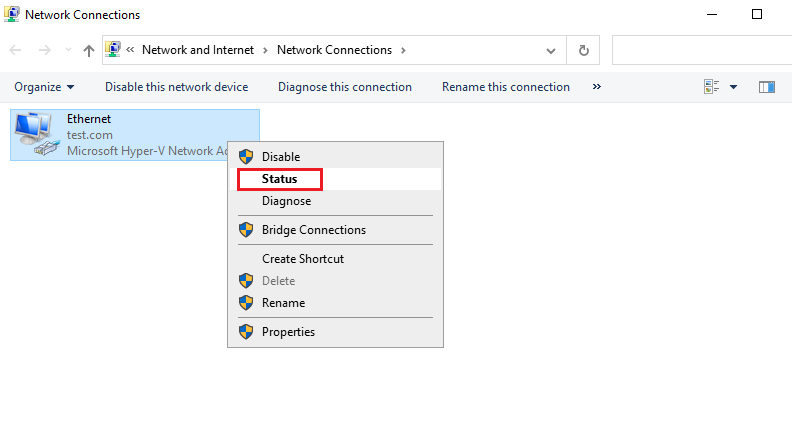
5. Right-click on the Ethernet adapter and click Status.
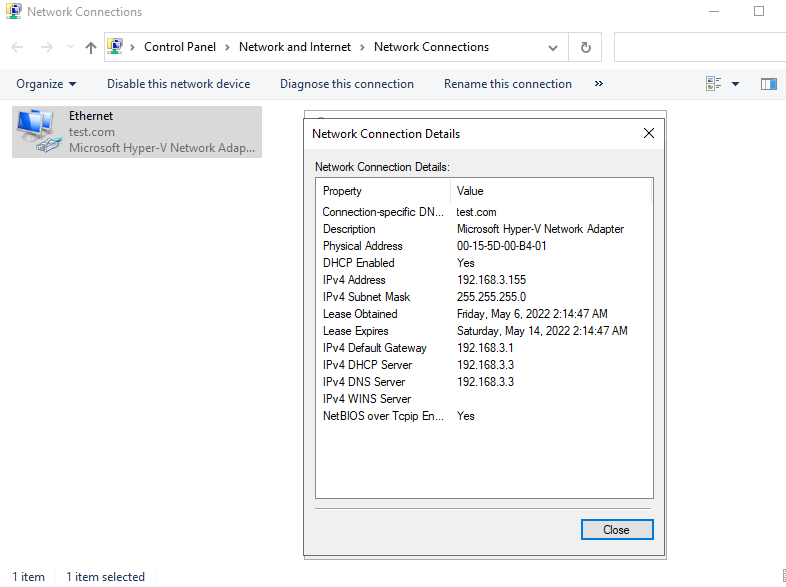
6. Click Details for Network Connection Details.

7. Verify the IP address and click Close.
It’s straightforward process. Estimated time to complete is 30 min.
- Open up Server Manager — Click on Windows logo on taskbar and type server manager.
- Click on Manage and Add Roles and Features

- Click on Next >

- Select Role-based or feature-based installation and Next >

- Select Select a server from the server pool and select server name from the pool and Next >

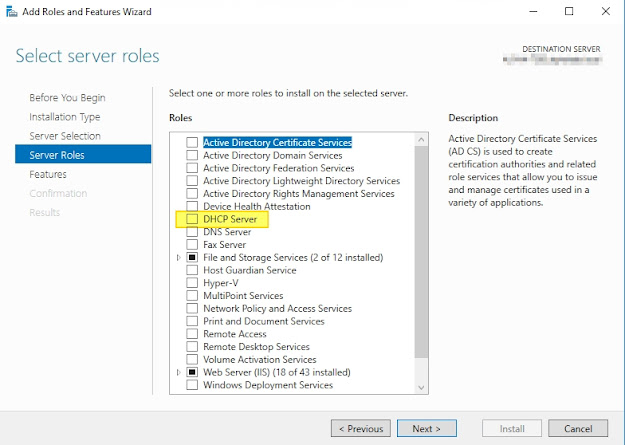
- Select DHCP Server and Next >
- New window pops up and leave default value selected. Click on Add Features button.

- Leave default value selected and click on Next >

- Click on Next >

- Select Restart the destination server automatically if required and click on Install button.

Now installation completed. We need to configure it to use.
- Open up DHCP console — Click on Windows logo and type dhcpmgmt.msc
- From DHCP console expand up to IPv4.

- Right click on IPv4 and select New Scope…

- New Scope Wizard pops up and click on Next > button.

- Type in scope name and description.

- Type in your desired start and end IP address. In my example first IP address is 192.168.1.100 and last IP address is 192.168.1.200. Because this is class C IP range, leave subnet mask as default.

- You can add exclusions and delay. If a range of IP already used from above range you can exclude the range. For example 192.168.1.130, 192.168.1.131, 192.168.1.132 are already assigned to devices, you can set exclusion range with start IP address 192.168.1.130 and end IP address 192.168.1.132. A delay is mainly used for load balancing among DHCP servers but in this example we only have a DHCP server so leave it blank which is 0.

- Recommended lease duration for wired connection is 8 days. So we keep it as default. During 8 days client will keep same IP which assigned first time.

- We need to set DNS and gateway for DHCP clients. So select Yes, I want to configure these options now and click Next >.

- Type in gateway IP address and click Add button and Next >.

- Your domain name and DNS servers are pre-defined from AD environment, leave as default unless you need to modify them.

- If you have WINS servers running, you can add server name or IP address. In this example I’ll leave it blank.

- Now all basic configuration is done. We can activate the scope now. Click on Next >.

- New Scope Wizard is completed now by clicking Finish.

- Now we need to authorize this DHCP server in AD. Right click on server name from DHCP console and click on Authorize.

- Once it authorized and activated you will see green tick icon on IPv4 and IPv6 icons.
- Now we need to set MAC filtering so that only authorized computers will gain IP address from this DHCP server. Expand Filters and right click on Allow. And click on Enable.
- Once it enabled, red down arrow will be disappeared. Right click on Allow again and click on New Filter…

- New Filter window pops up and you can type in MAC address and Description. Click Add button.

- Keep adding all computers’ MAC address one by one. There is no import function for bulk upload.
Only computers in Allow list will gain IP address now.