
Установим роль контроллера домена на Windows Server 2019. На контроллере домена работает служба Active Directory (AD DS). С Active Directory связано множество задач системного администрирования.
AD DS в Windows Server 2019 предоставляет службу каталогов для централизованного хранения и управления пользователями, группами, компьютерами, а также для безопасного доступ к сетевым ресурсам с проверкой подлинности и авторизацией.
Подготовительные работы
Нам понадобится компьютер с операционной системой Windows Server 2019. У меня контроллер домена будет находиться на виртуальной машине:
Установка Windows Server 2019 на виртуальную машину VMware
После установки операционной системы нужно выполнить первоначальную настройку Windows Server 2019:
Первоначальная настройка Windows Server 2019
Хочется отметить обязательные пункты, которые нужно выполнить.
Выполните настройку сети. Укажите статический IP адрес. DNS сервер указывать не обязательно, при установке контроллера домена вместе с ним установится служба DNS. В настройках сети DNS сменится автоматически. Отключите IPv6, сделать это можно и после установки контроллера домена.

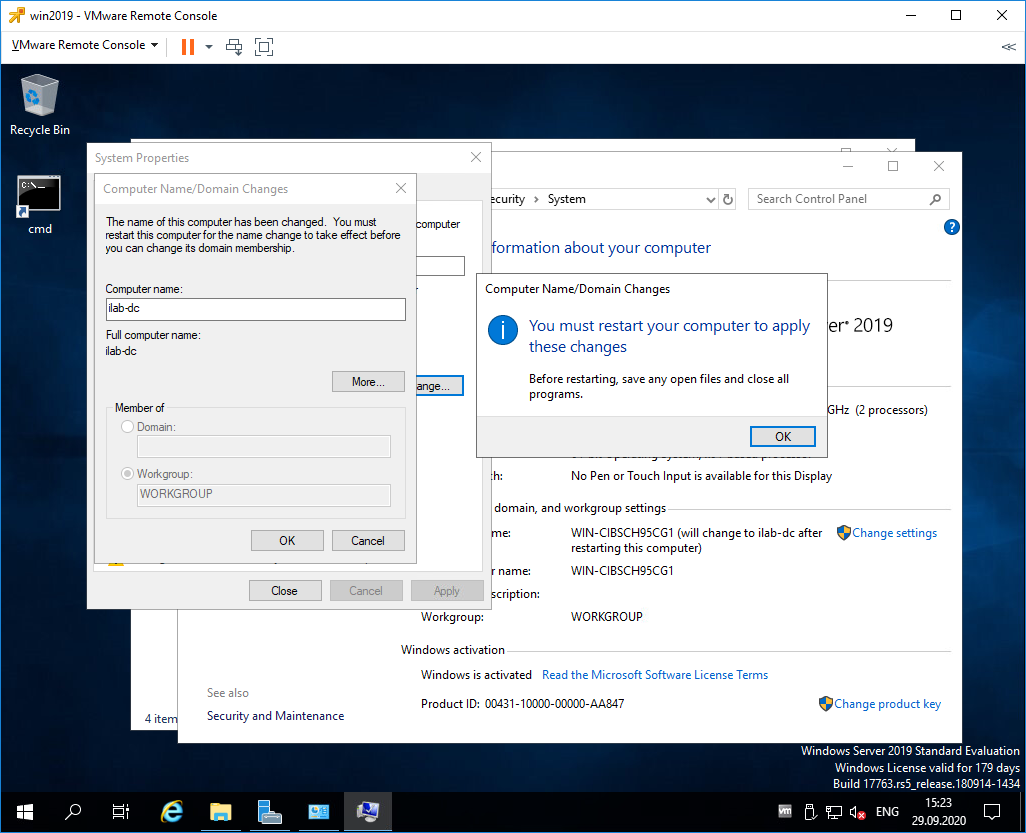
Укажите имя сервера.
Было бы неплохо установить последние обновления, драйвера. Указать региональные настройки, время. На этом подготовка завершена.
Установка роли Active Directory Domain Services
Работаем под учётной записью локального администратора Administrator (или Администратор), данный пользователь станет администратором домена.
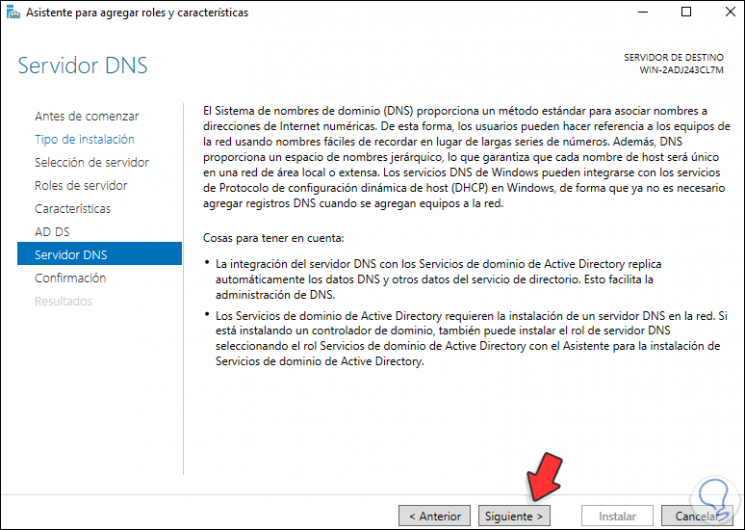
Дополнительно будет установлена роль DNS.
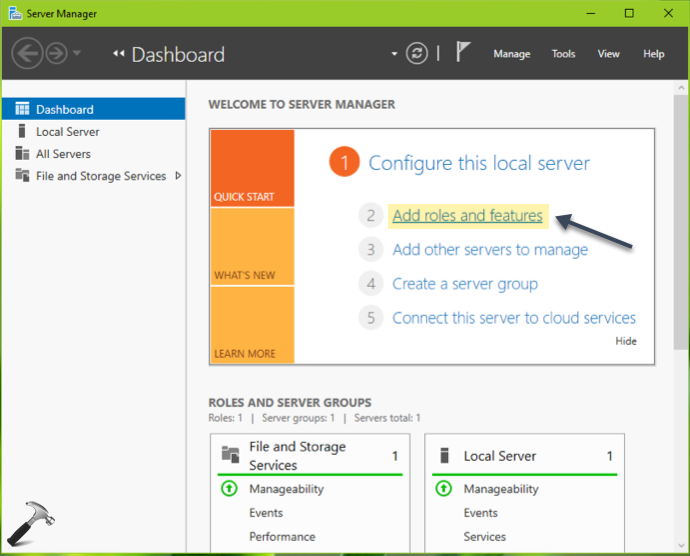
Следующий шаг — установка роли AD DS. Открываем Sever Manager. Manage > Add Roles and Features.
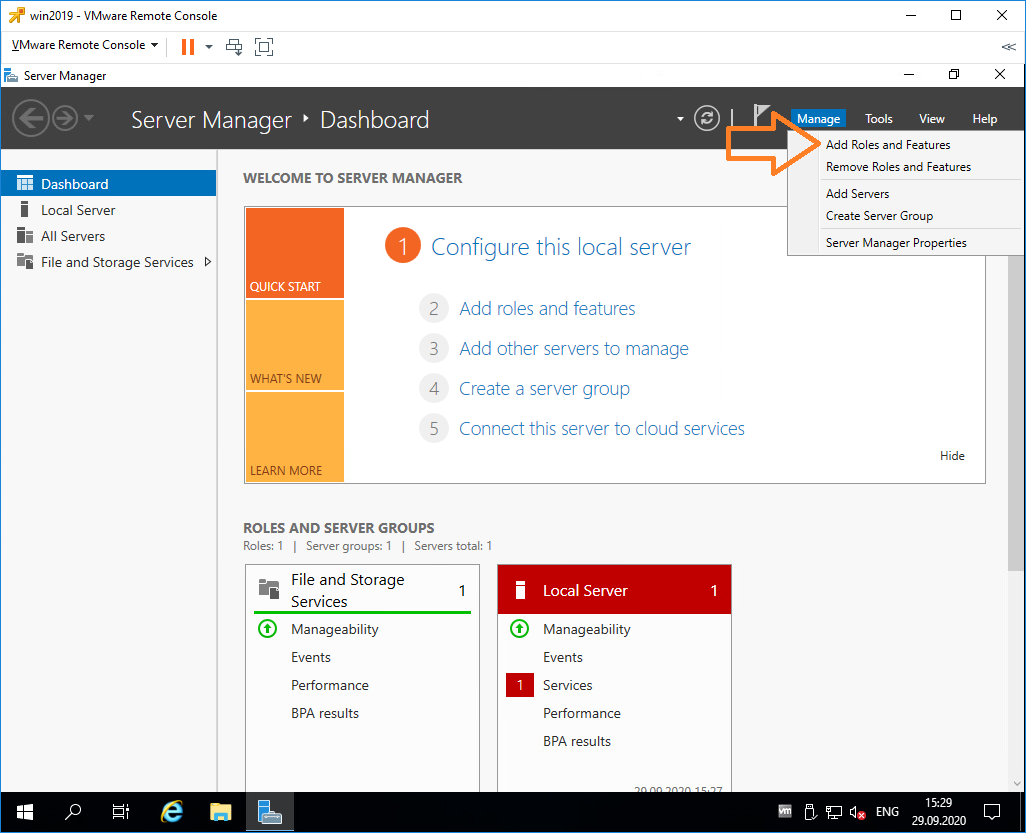
Запускается мастер добавления ролей.

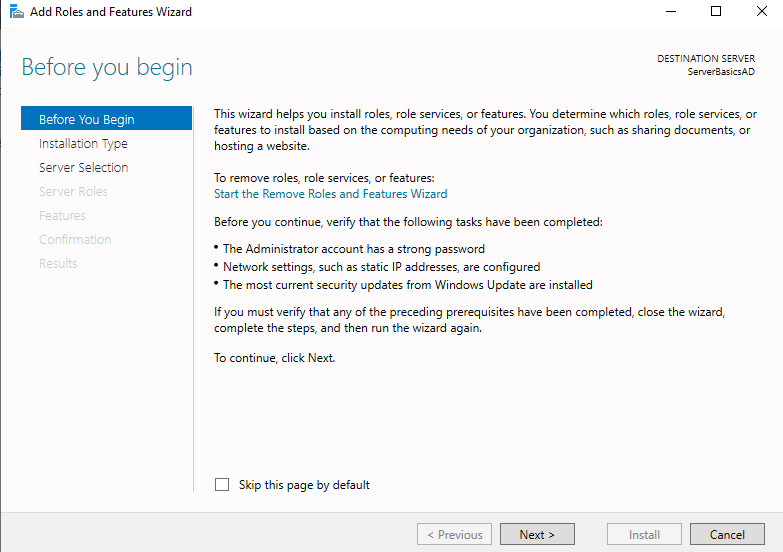
Раздел Before You Begin нас не интересует. Next.
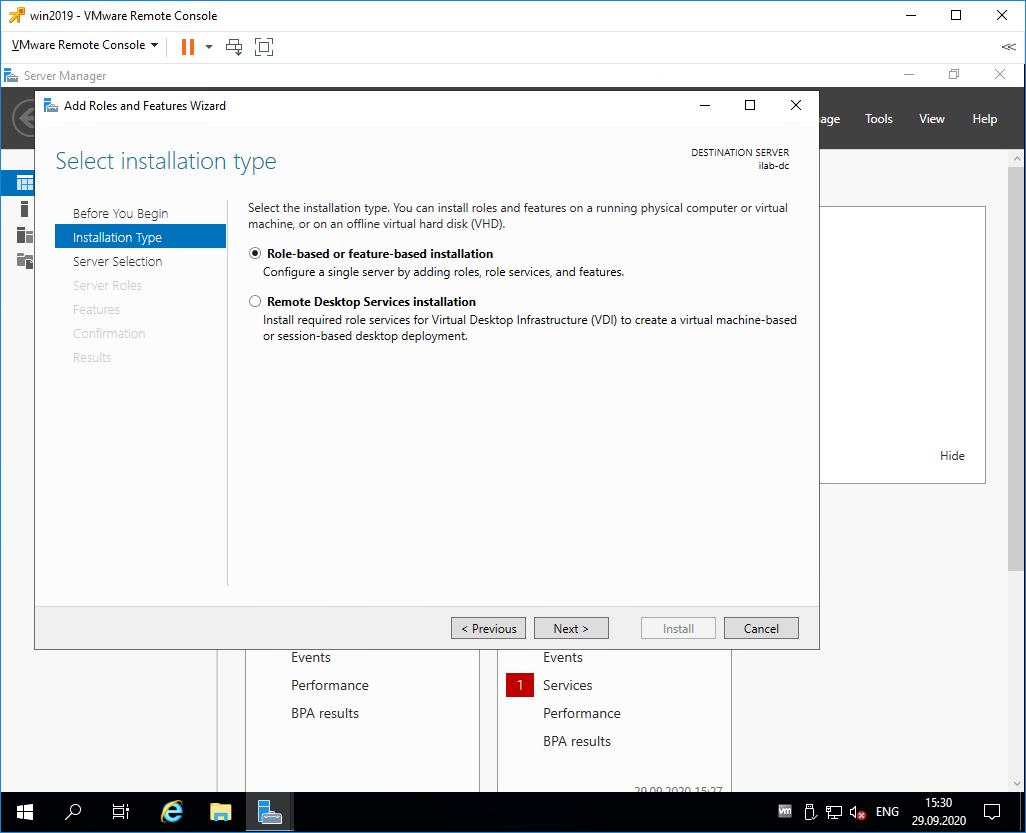
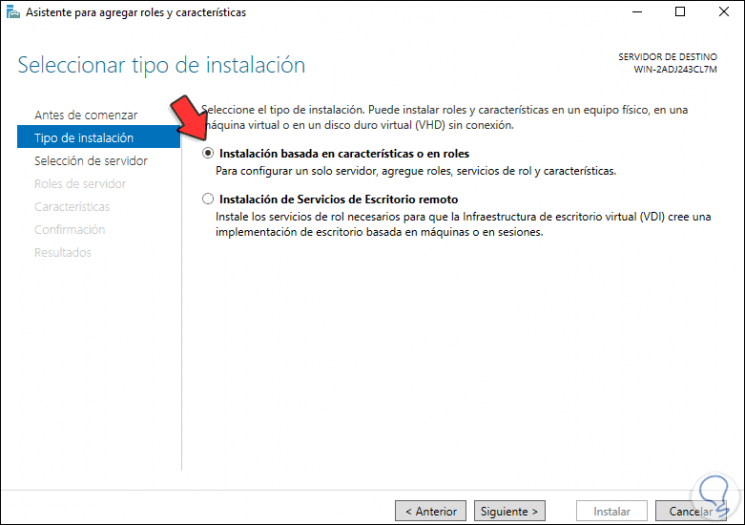
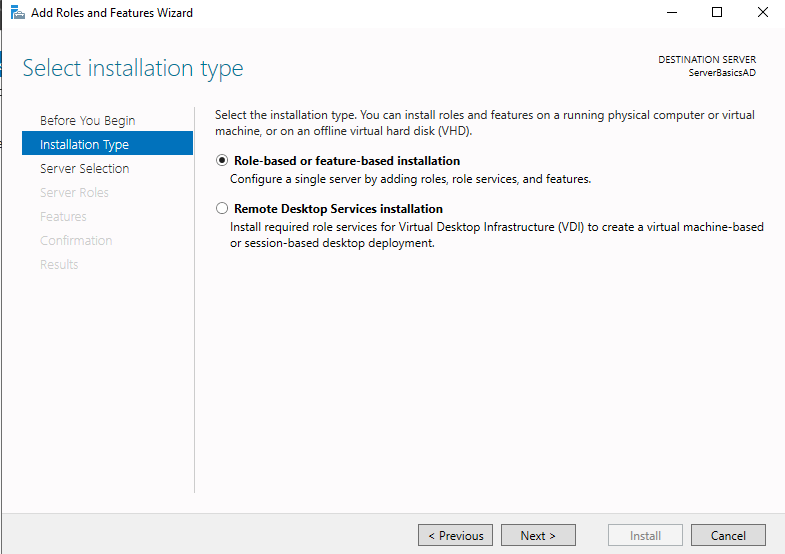
В разделе Installation Type выбираем Role-based or feature-based installation. Next.
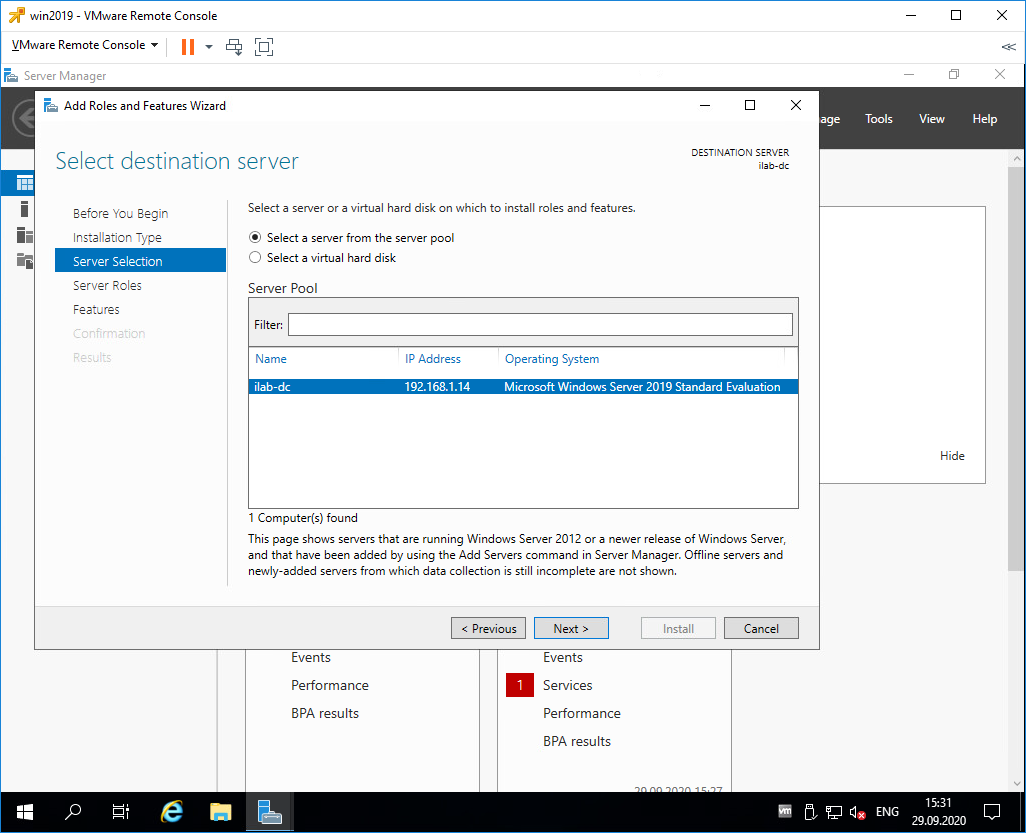
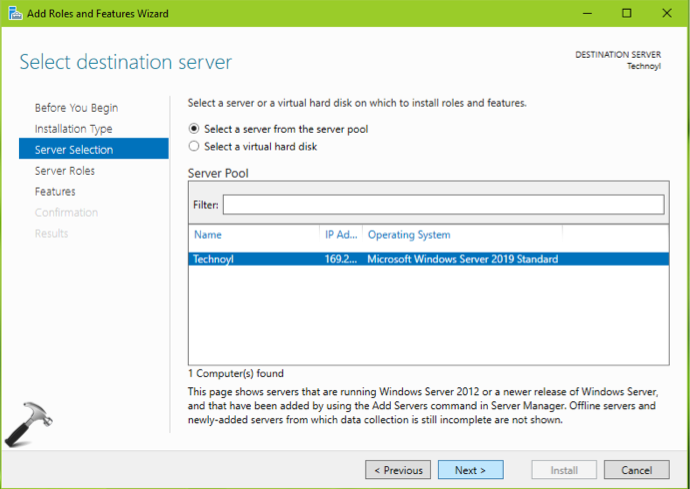
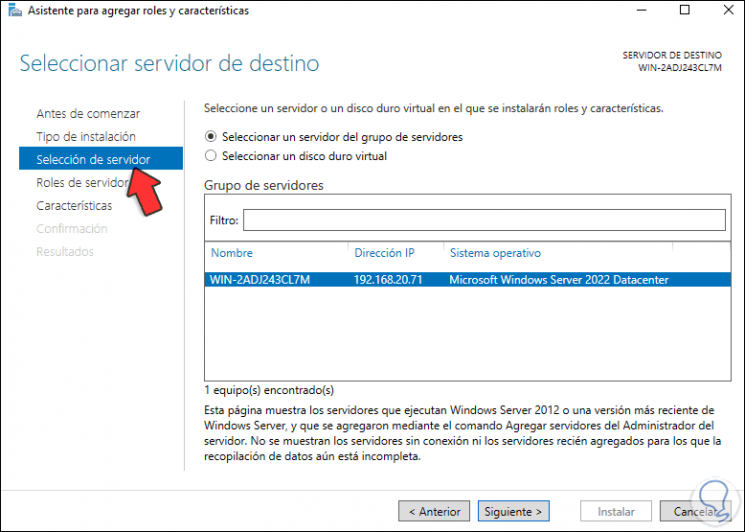
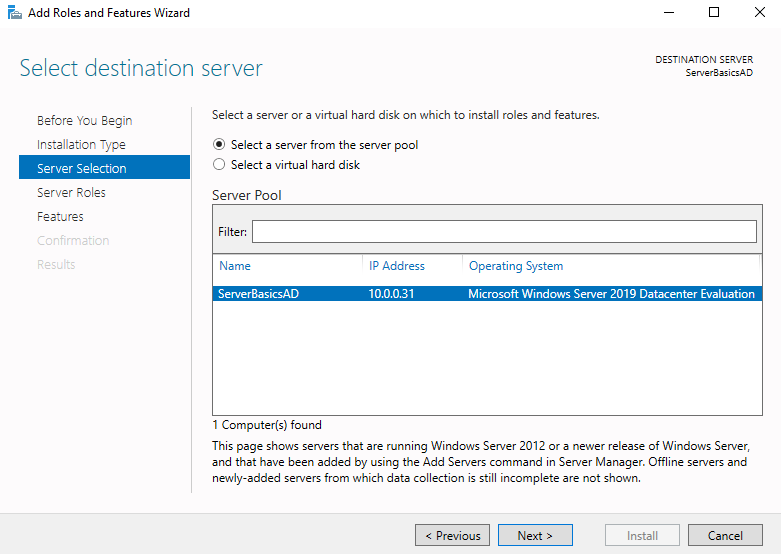
В разделе Server Selection выделяем текущий сервер. Next.
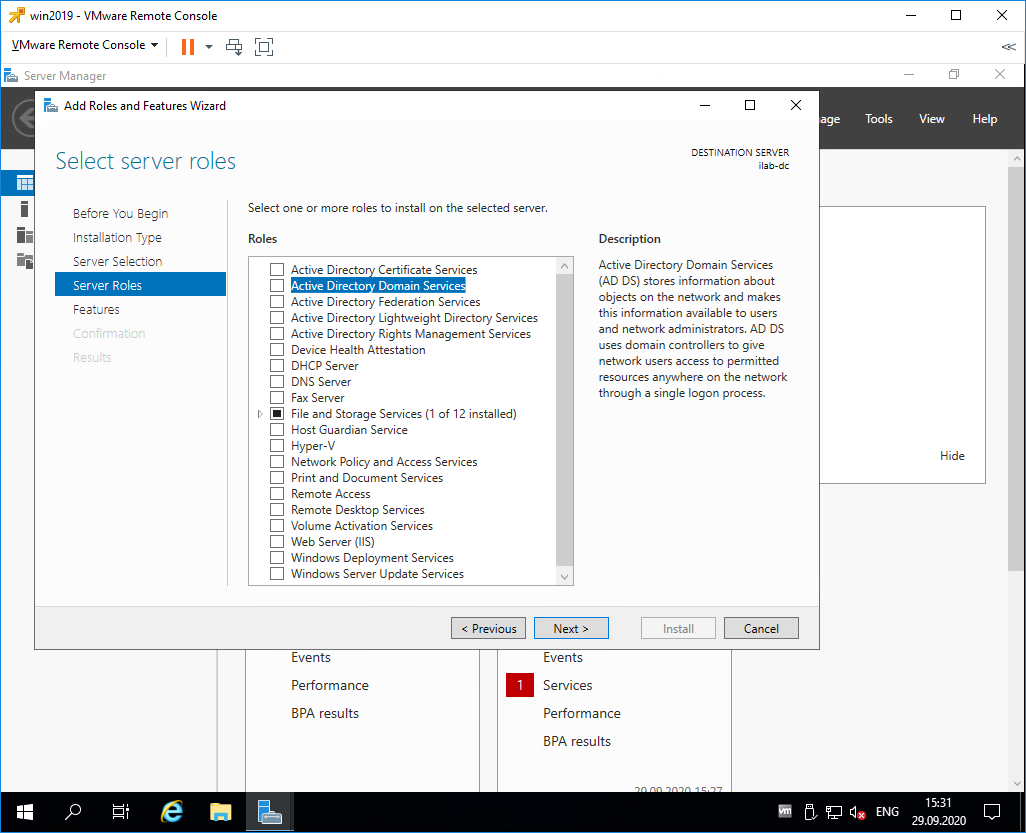
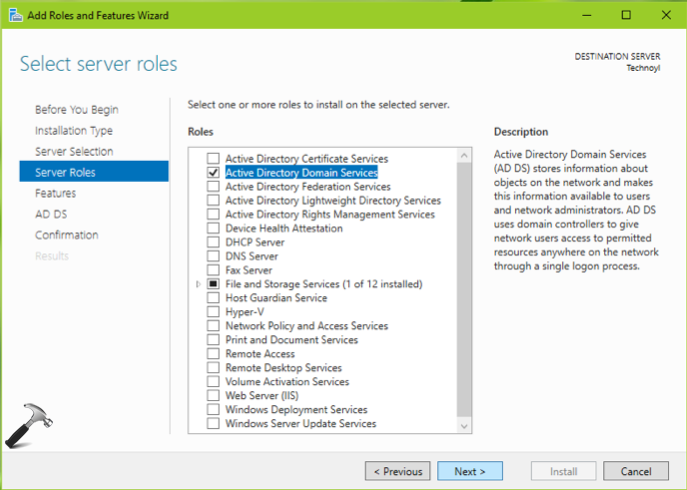
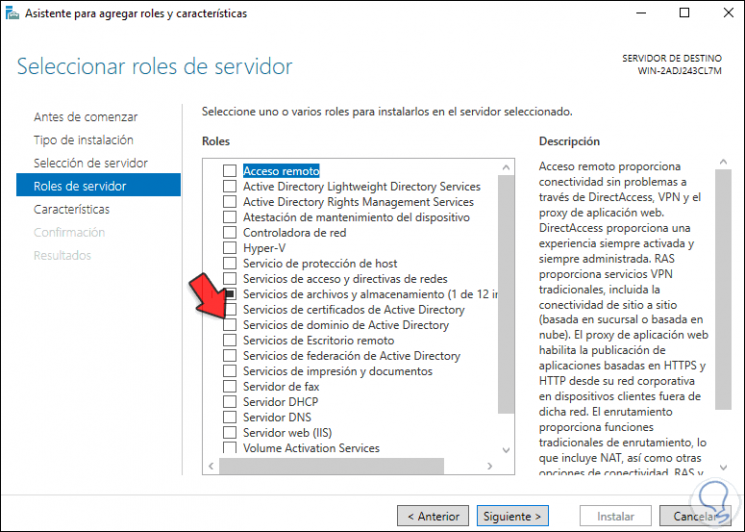
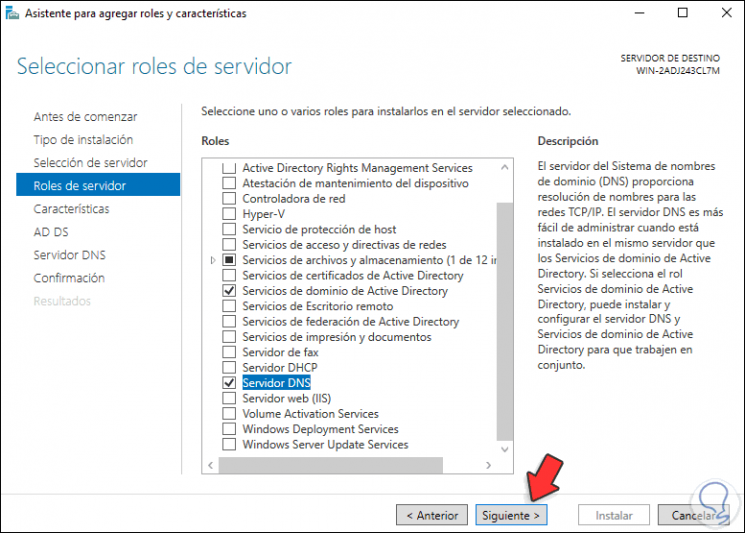
В разделе Server Roles находим роль Active Directory Domain Services, отмечаем галкой.
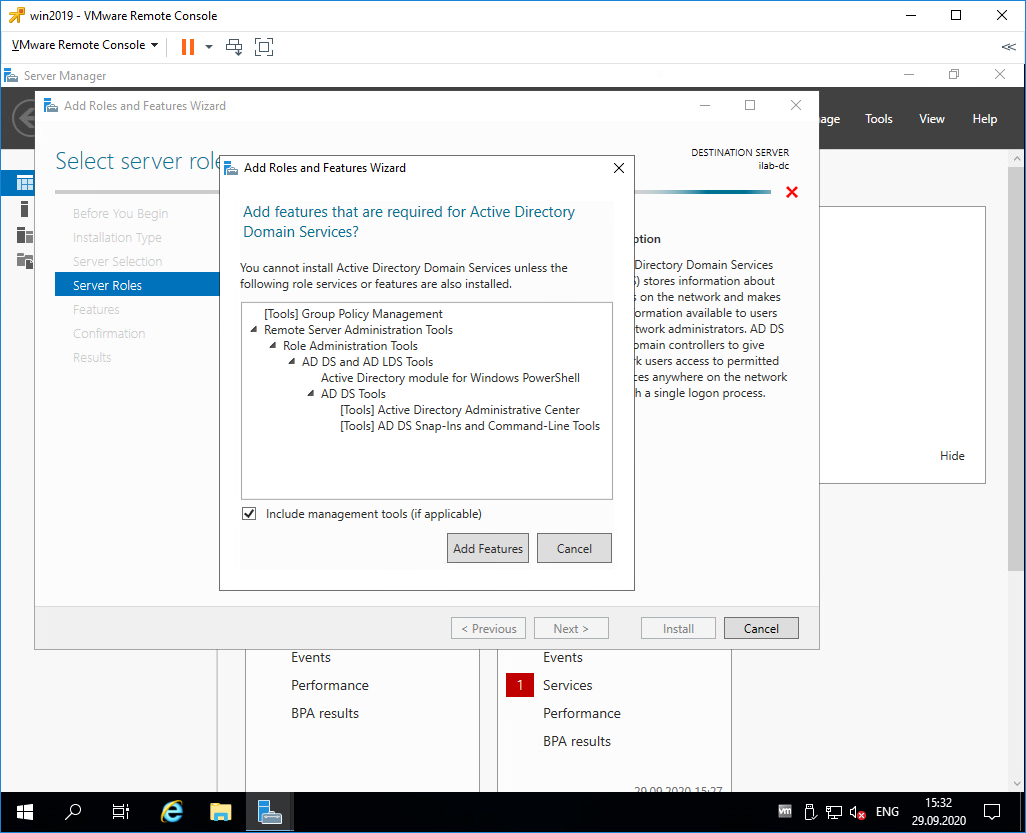
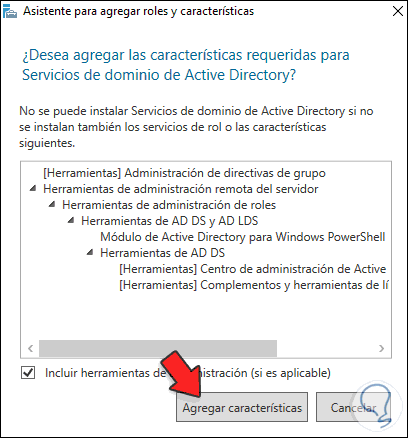
Для роли контроллера домена нам предлагают установить дополнительные опции:
- [Tools] Group Policy Management
- Active Directory module for Windows PowerShell
- [Tools] Active Directory Administrative Center
- [Tools] AD DS Snap-Ins and Command-Line Tools
Всё это не помешает. Add Features.

Теперь роль Active Directory Domain Services отмечена галкой. Next.
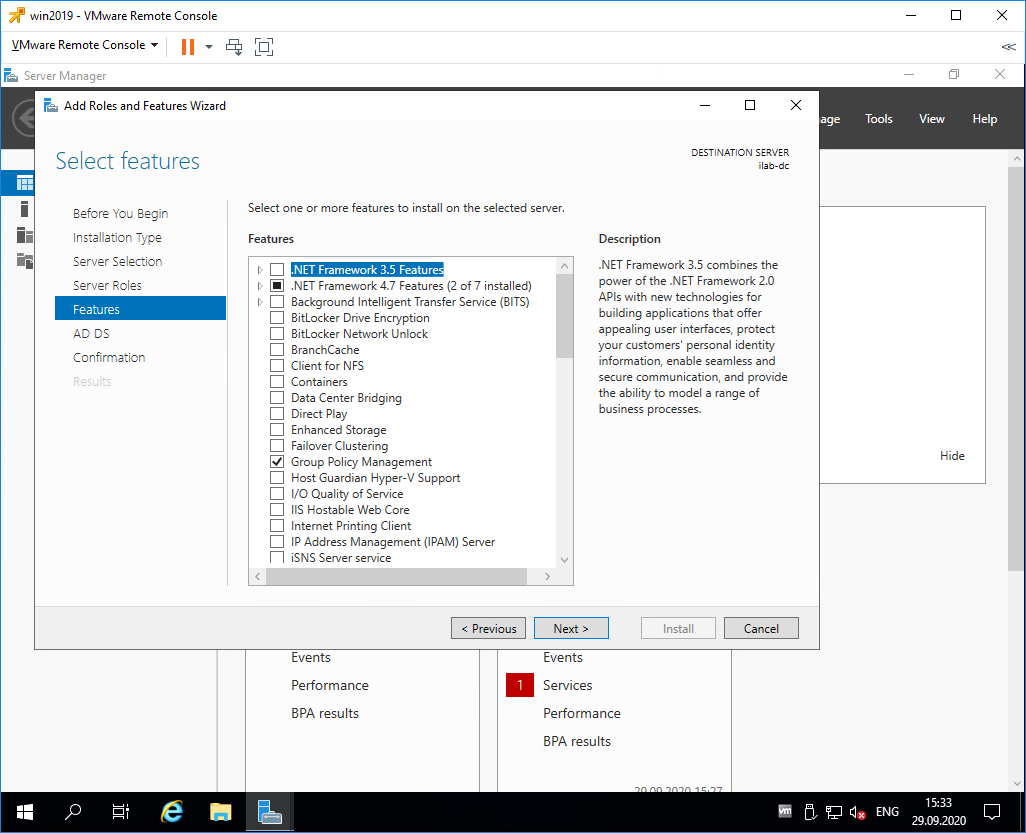
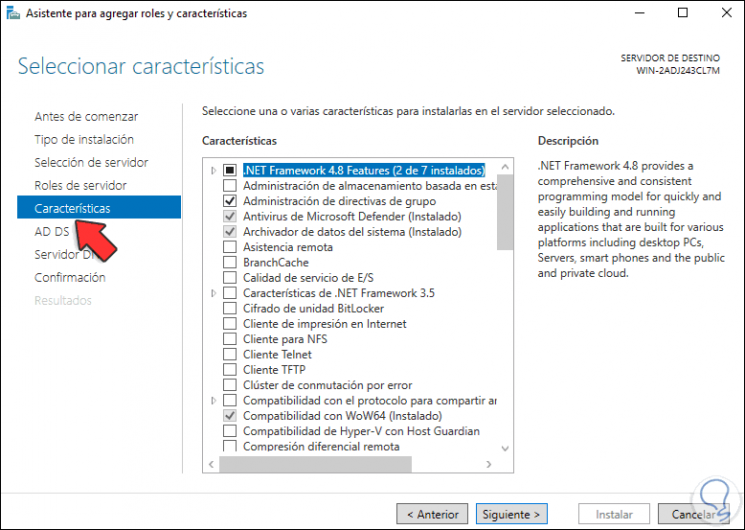
В разделе Features нам не нужно отмечать дополнительные опции. Next.
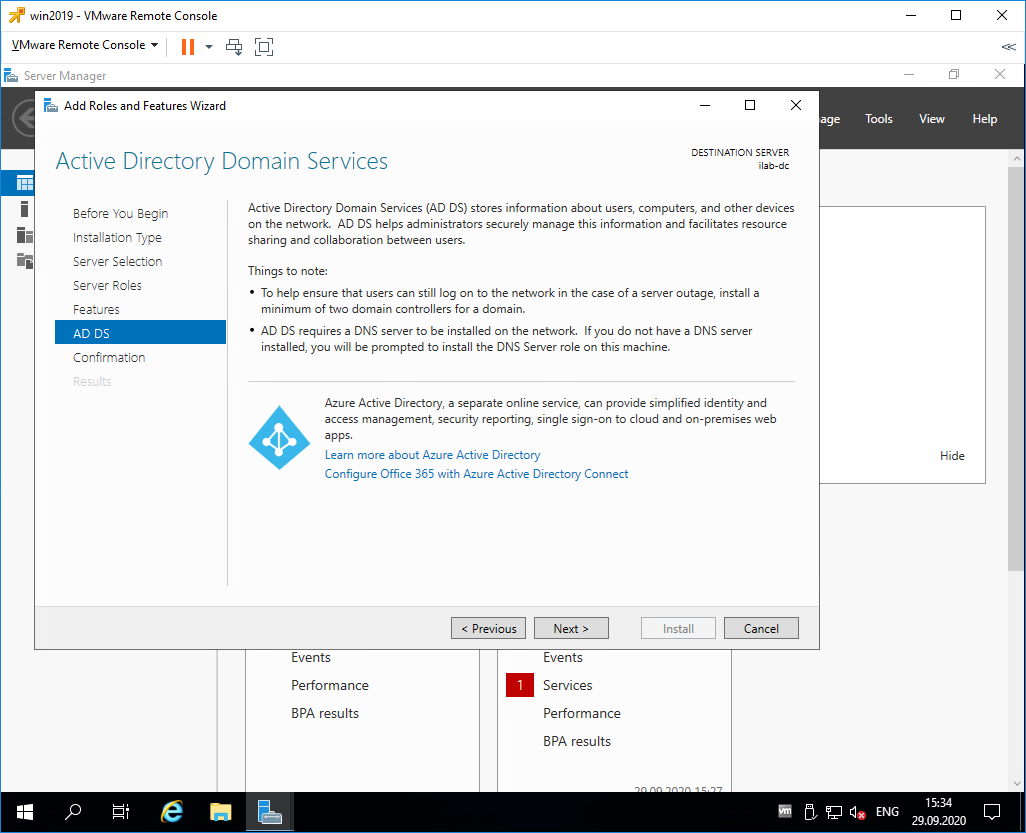
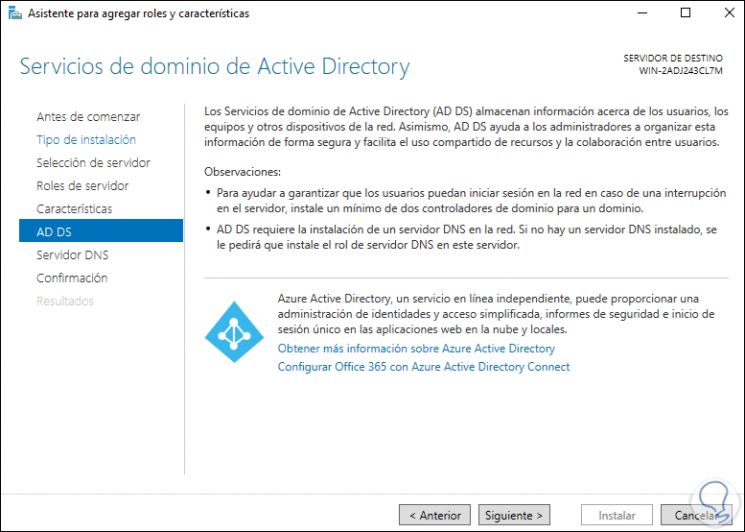
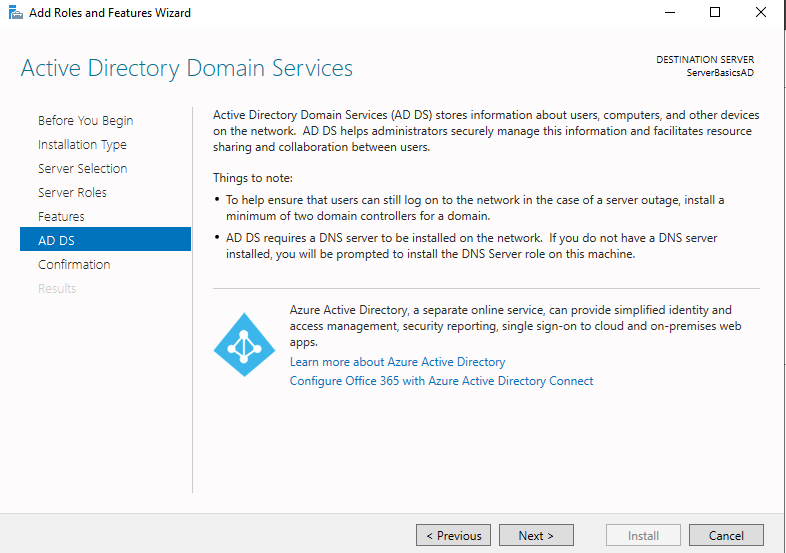
У нас появился раздел AD DS. Здесь есть пара ссылок про Azure Active Directory, они нам не нужны. Next.
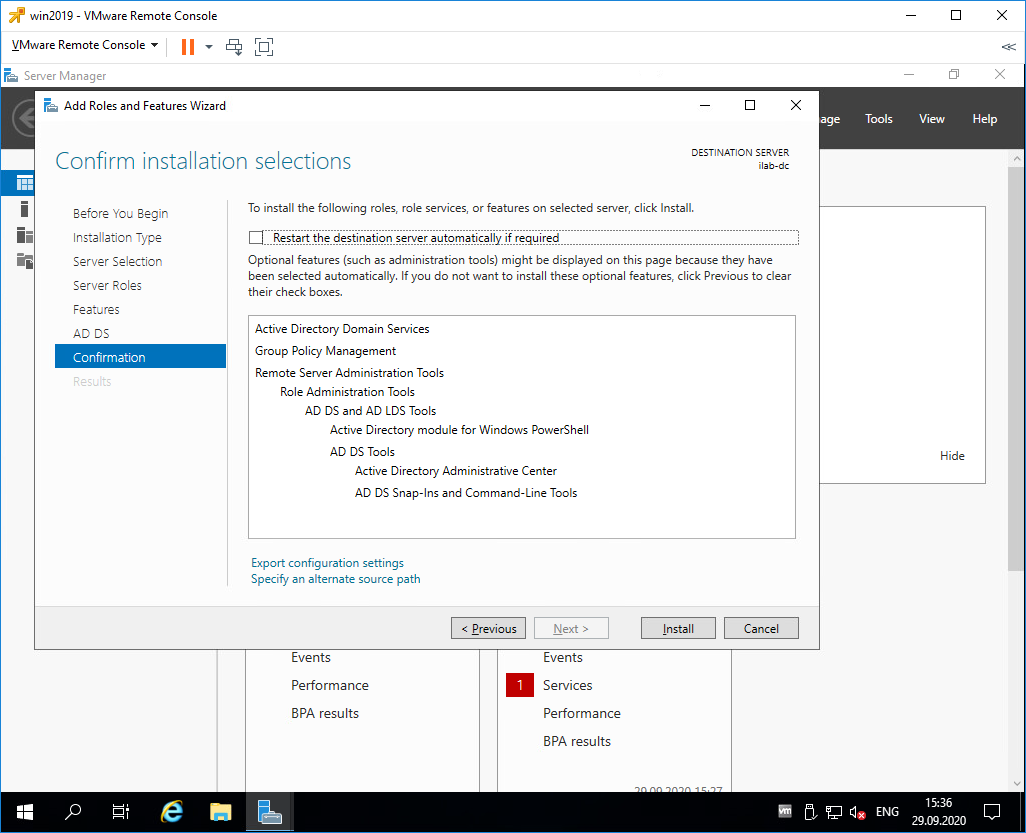
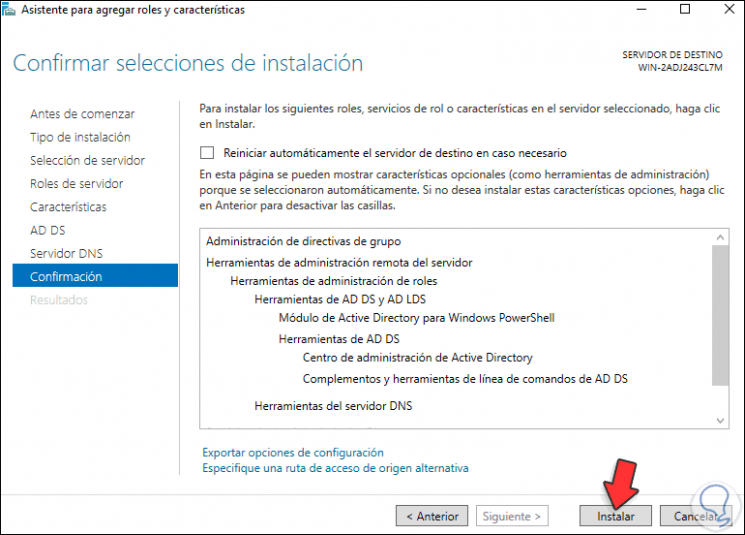
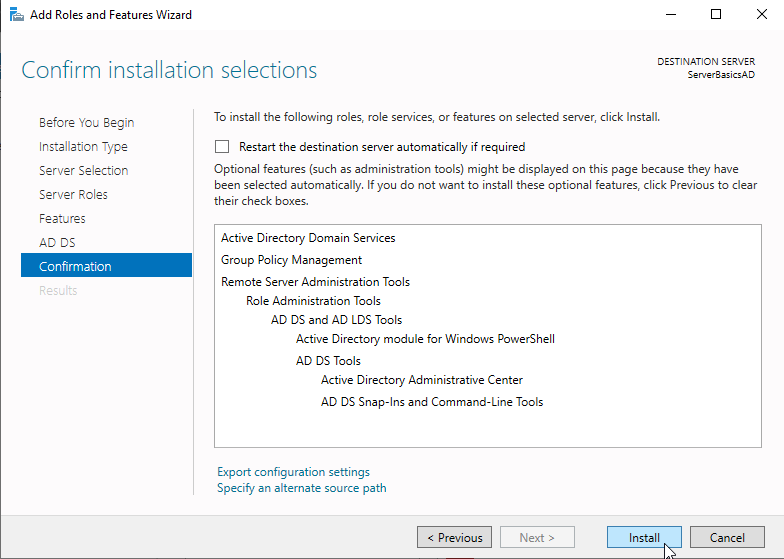
Раздел Confirmation. Подтверждаем установку компонентов кнопкой Install.
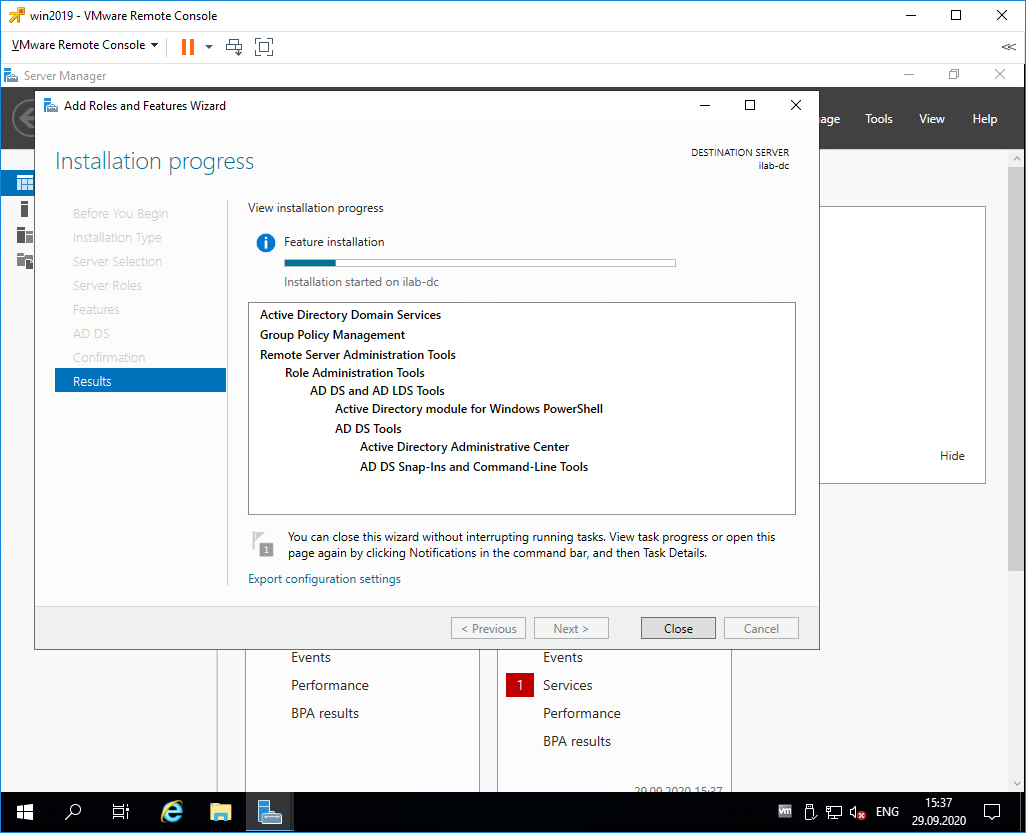
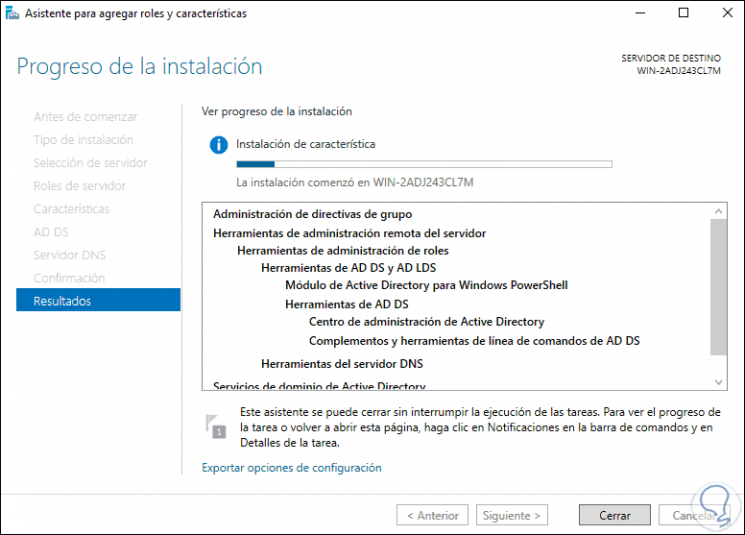
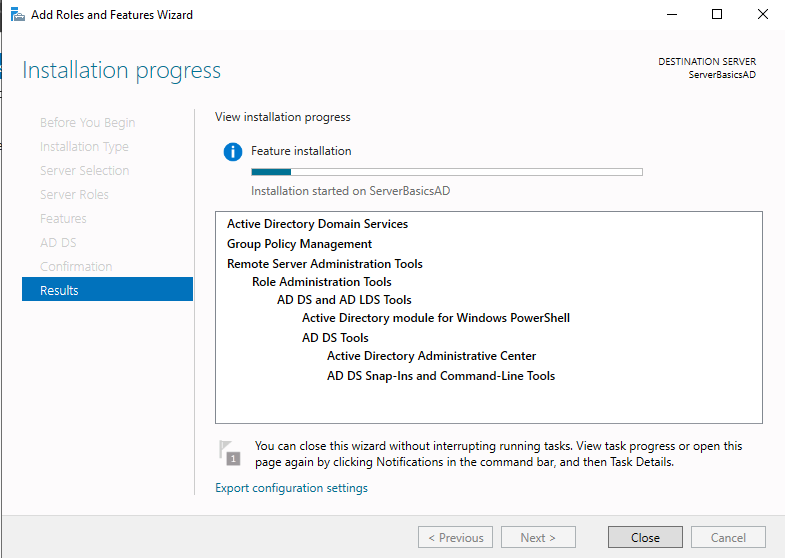
Начинается установка компонентов, ждём.
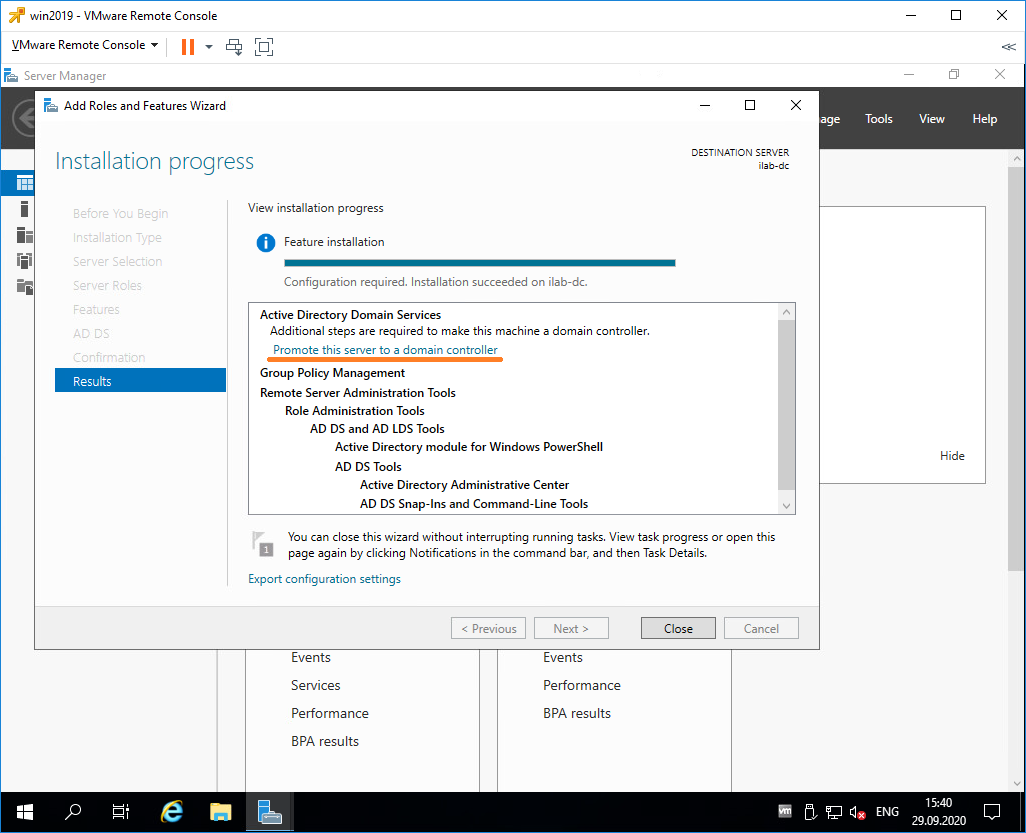
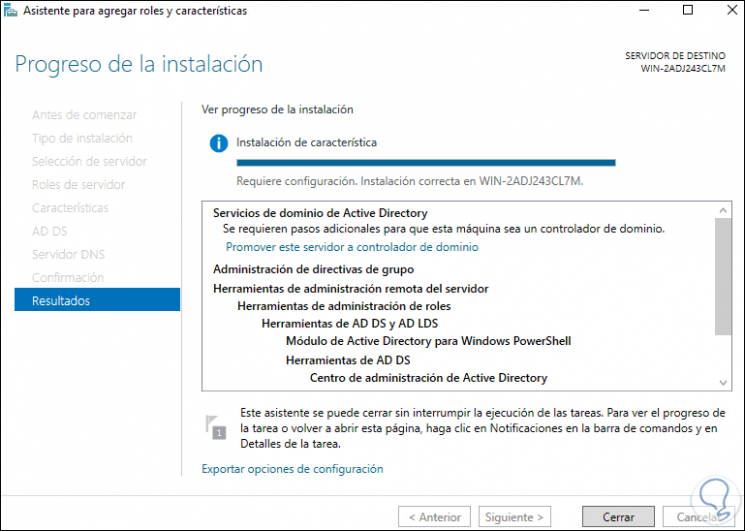
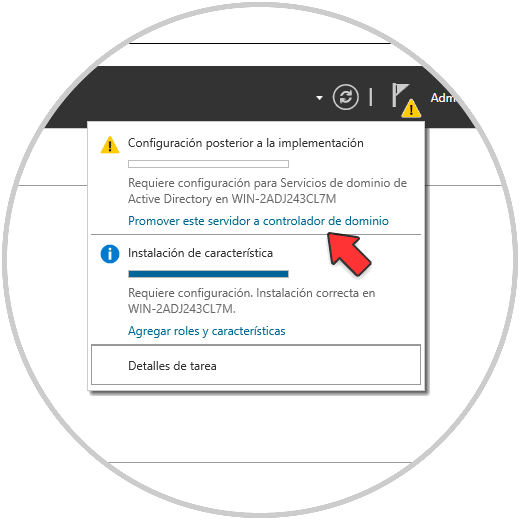
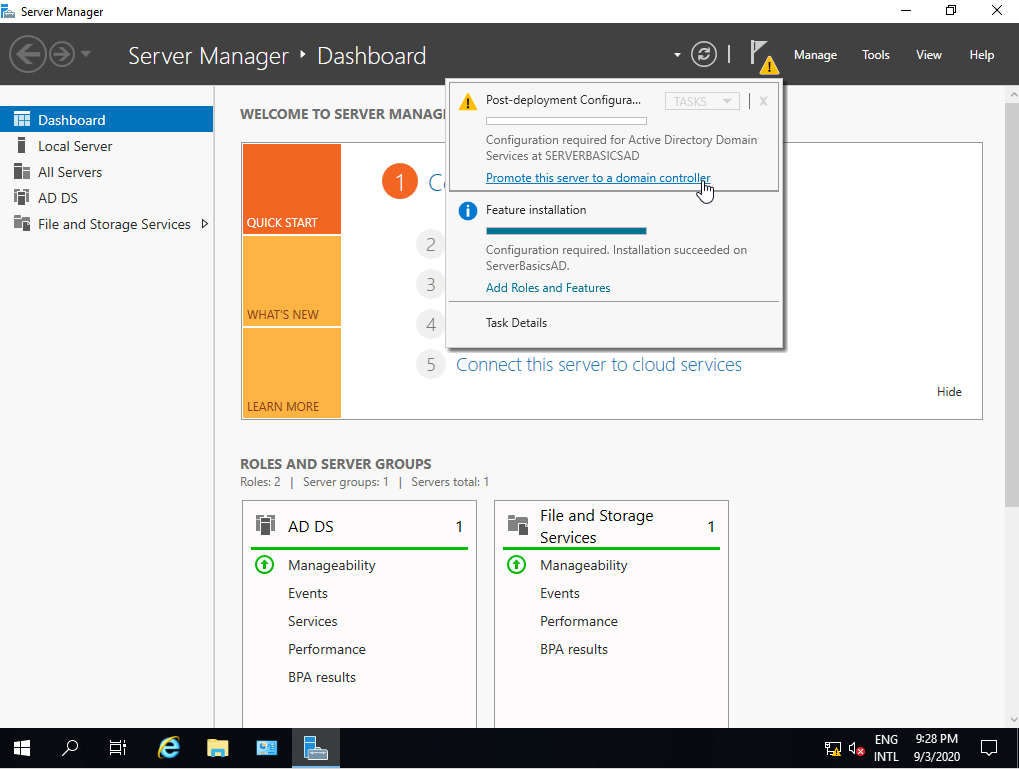
Configuration required. Installation succeeded on servername. Установка компонентов завершена, переходим к основной части, повышаем роль текущего сервера до контроллера домена. В разделе Results есть ссылка Promote this server to domain controller.
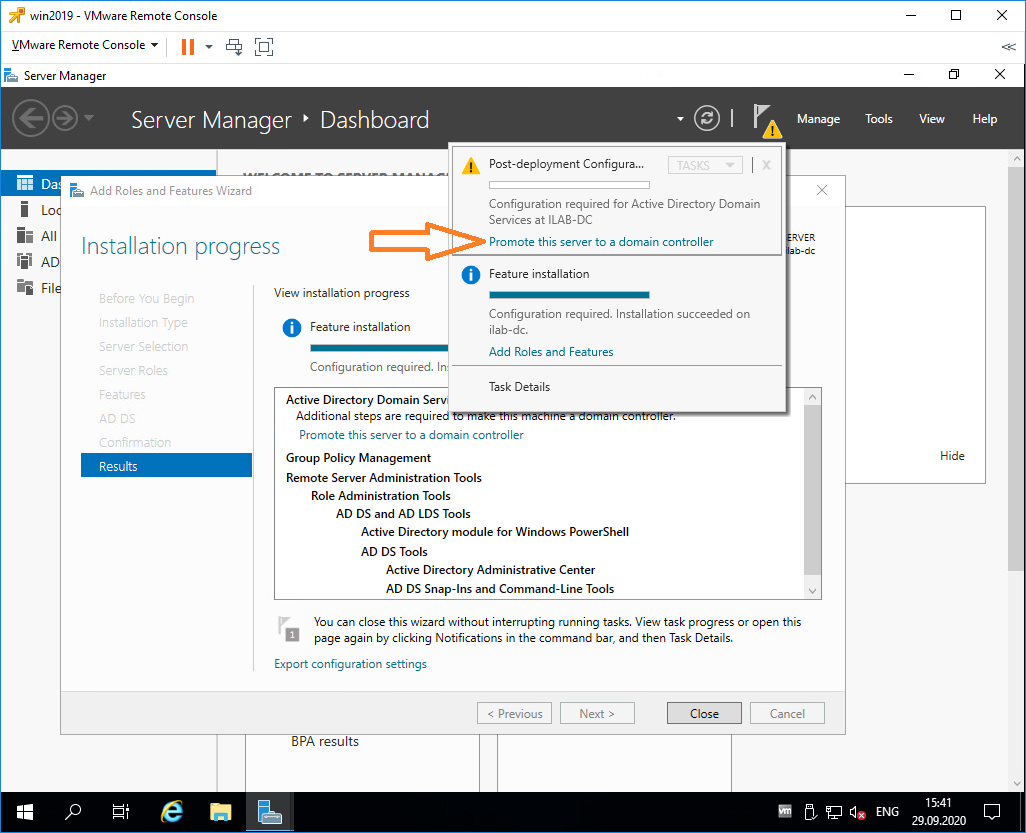
Она же доступна в предупреждении основного окна Server Manager. Нажимаем на эту ссылку, чтобы повысить роль сервера до контроллера домена.
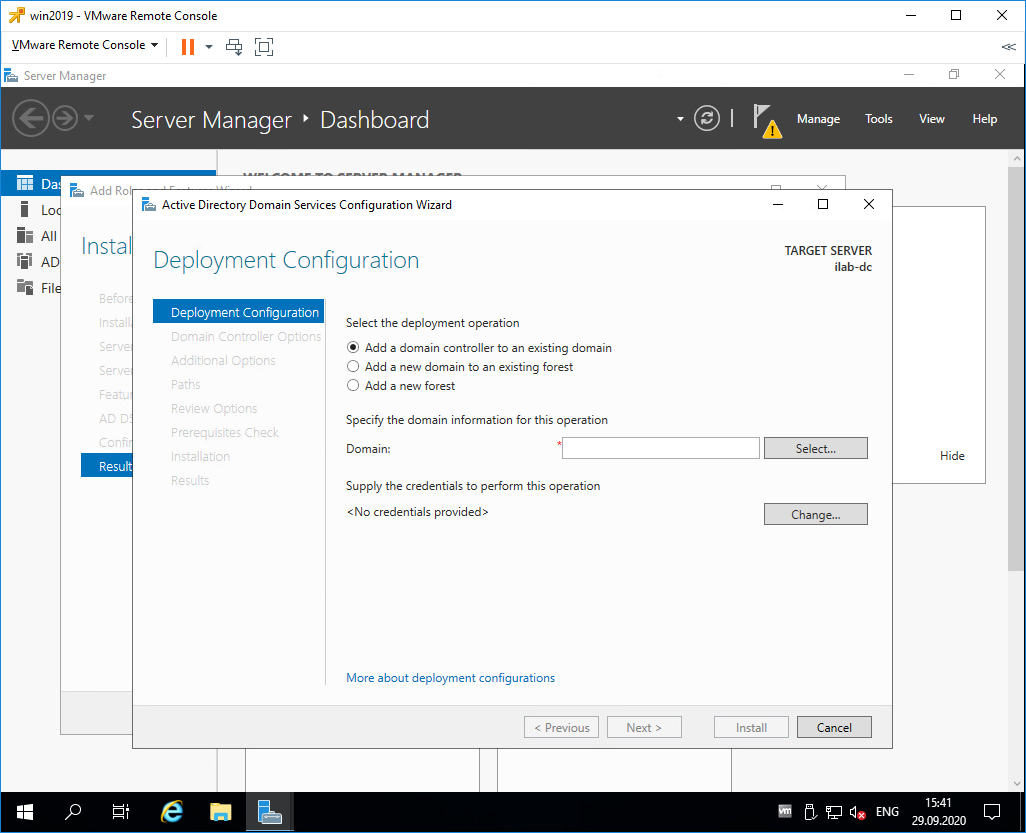
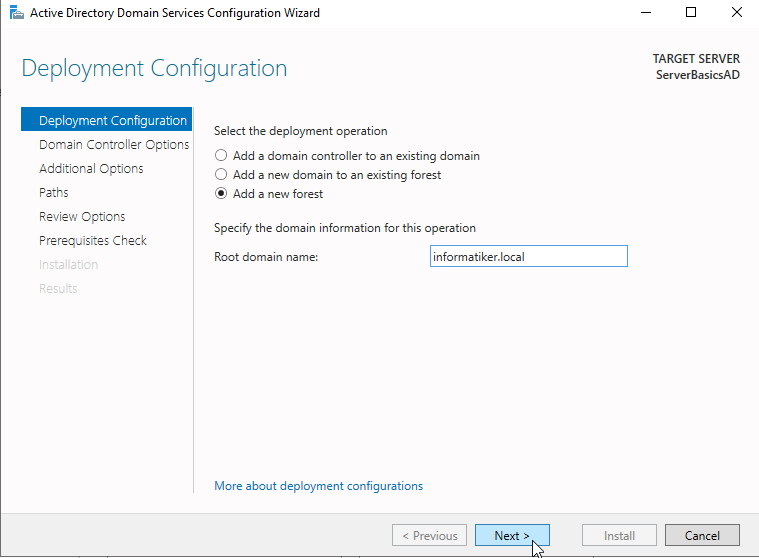
Запускается мастер конфигурации AD DS — Active Directory Domain Service Configuration Wizard. В разделе Deployment Configuration нужно выбрать один из трёх вариантов:
- Add a domain controller to an existing domain
- Add a new domain to an existing forest
- Add a new forest
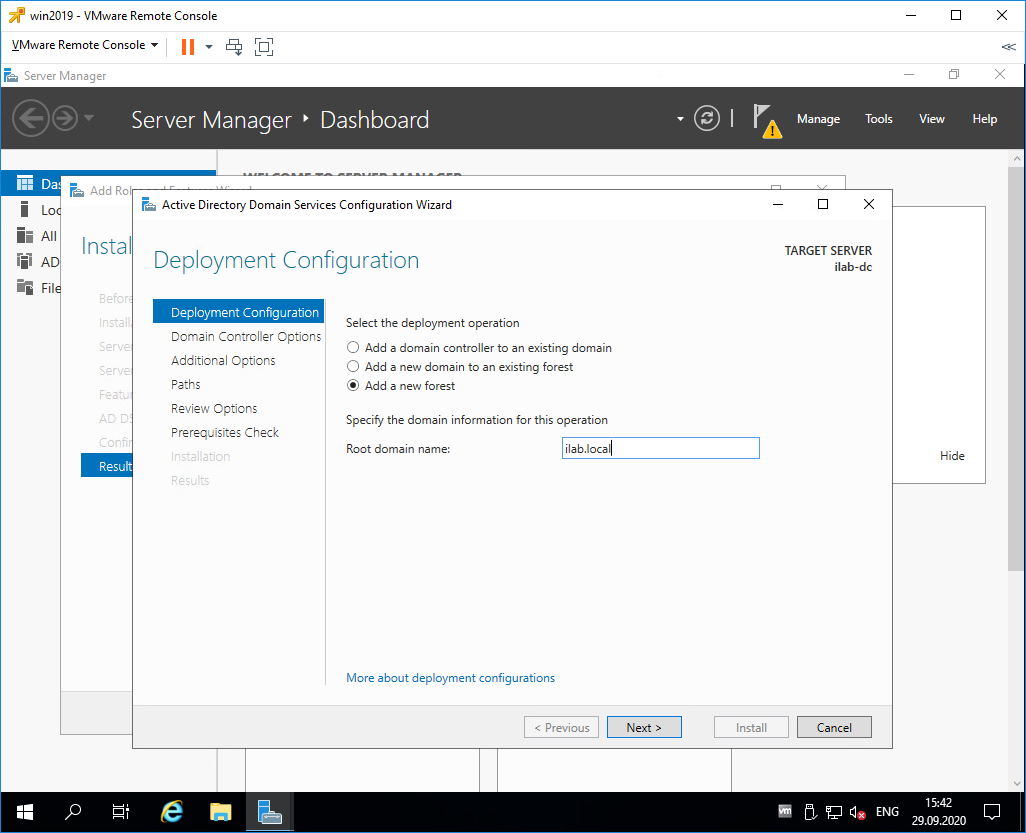
Первый вариант нам не подходит, у нас нет текущего домена, мы создаём новый. По той же причине второй вариант тоже не подходит. Выбираем Add a new forest. Будем создавать новый лес.
Укажем в Root domain name корневое имя домена. Я пишу ilab.local, это будет мой домен. Next.
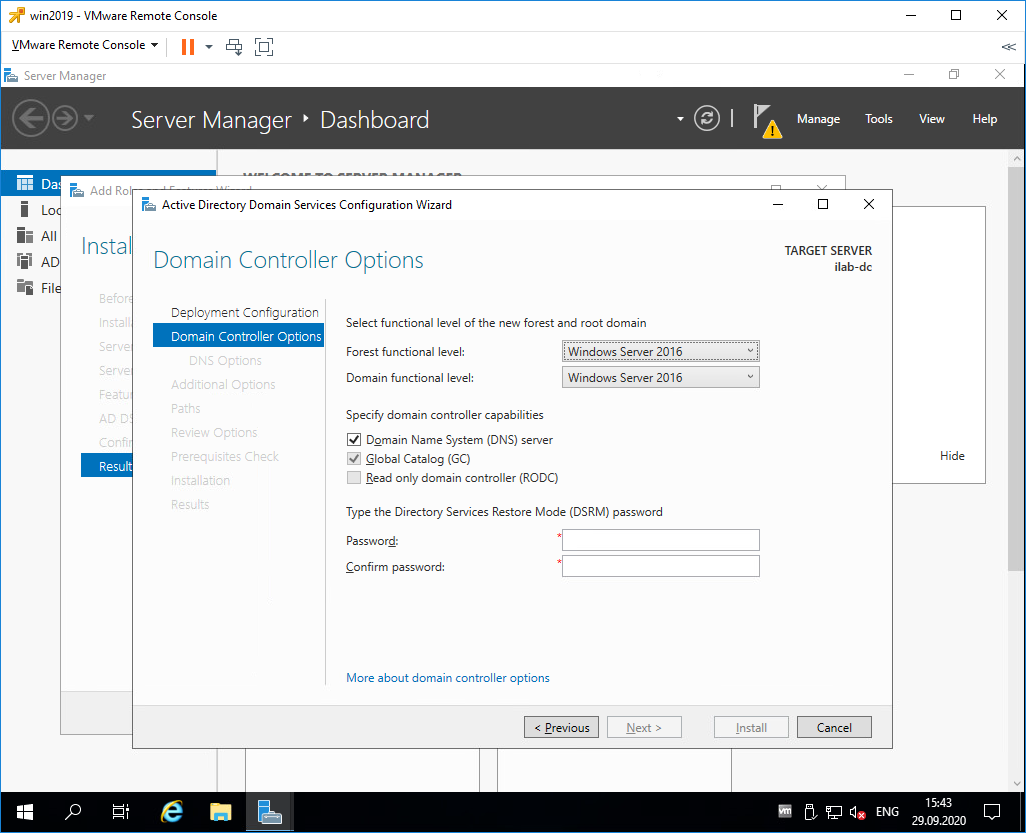
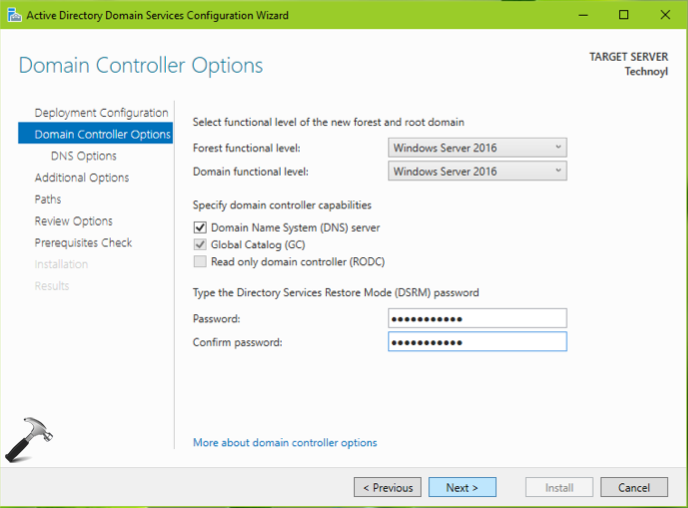
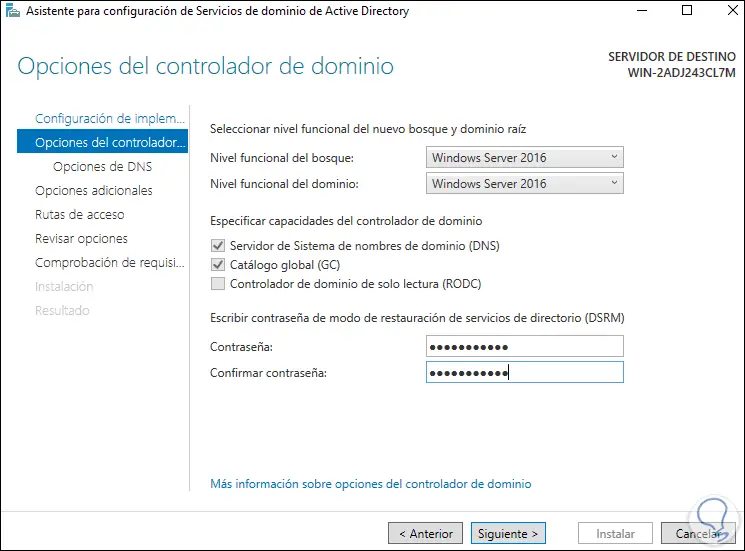
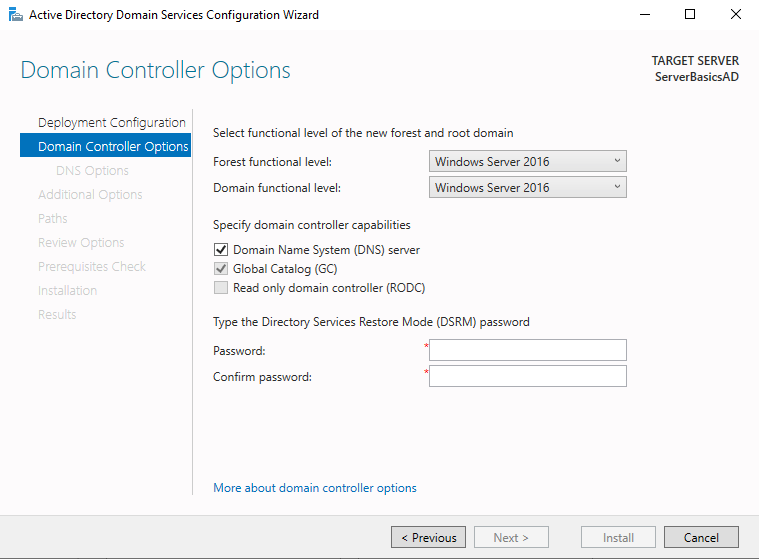
Попадаем в раздел Doman Controller Options.
В Forest functional level и Domain functional level нужно указать минимальную версию серверной операционной системы, которая будет поддерживаться доменом.

У меня в домене планируются сервера с Windows Server 2019, Windows Server 2016 и Windows Server 2012, более ранних версий ОС не будет. Выбираю уровень совместимости Windows Server 2012.
В Domain functional level также выбираю Windows Server 2012.
Оставляю галку Domain Name System (DNS) server, она установит роль DNS сервера.
Укажем пароль для Directory Services Restore Mode (DSRM), желательно, чтобы пароль не совпадал с паролем локального администратора. Он может пригодиться для восстановления службы каталогов в случае сбоя.
Next.
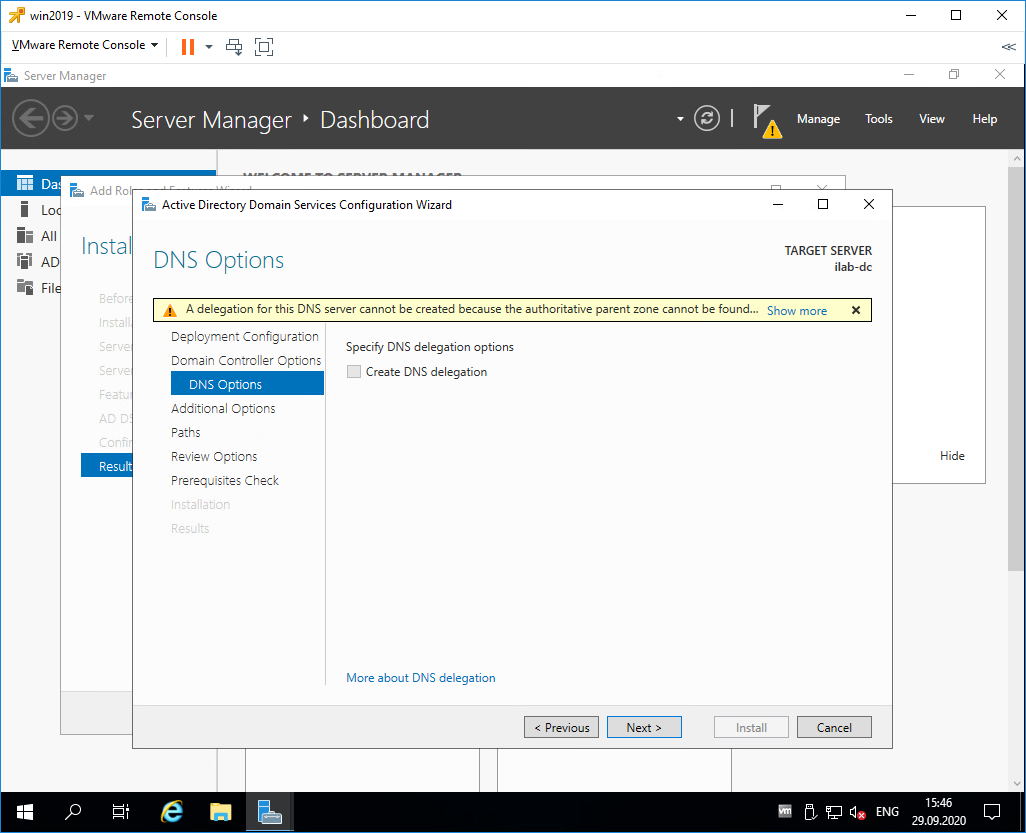
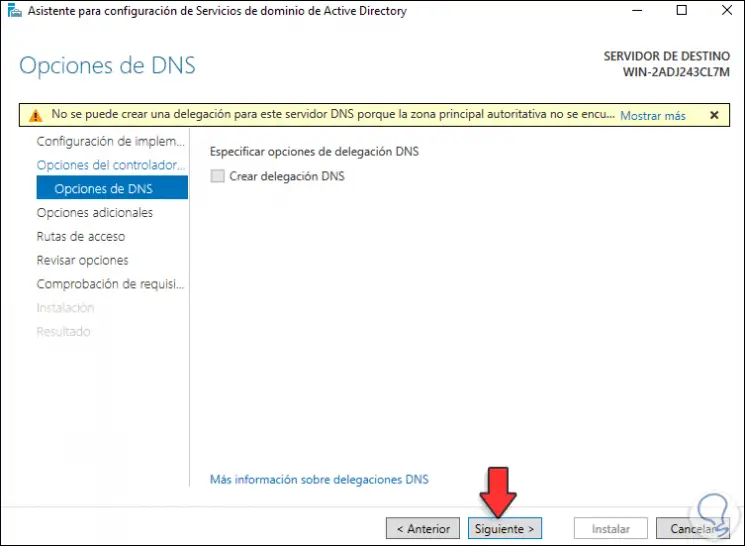
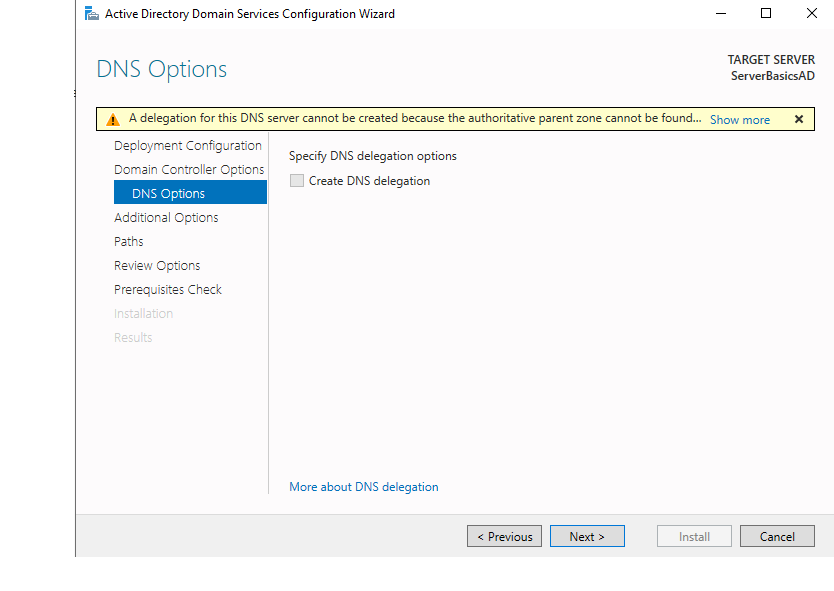
Не обращаем внимание на предупреждение «A delegation for this DNS server cannot be created because the authoritative parent zone cannot be found…». Нам не нужно делать делегирование, у нас DNS сервер будет на контроллере домена. Next.
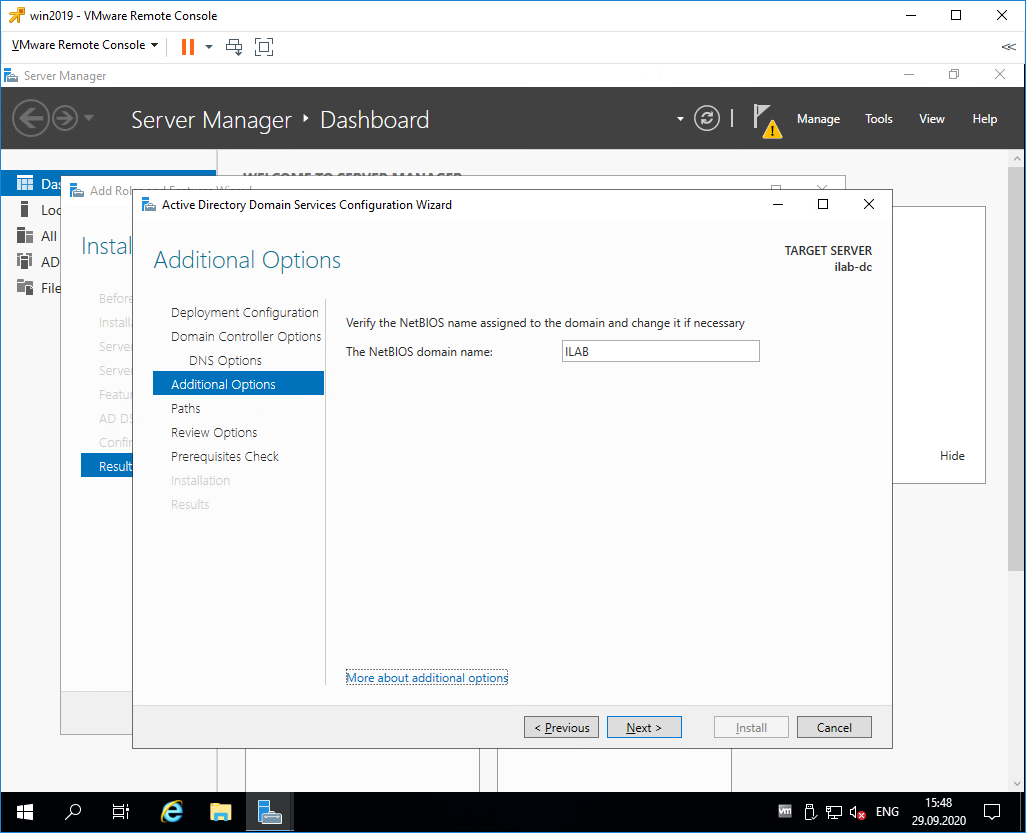
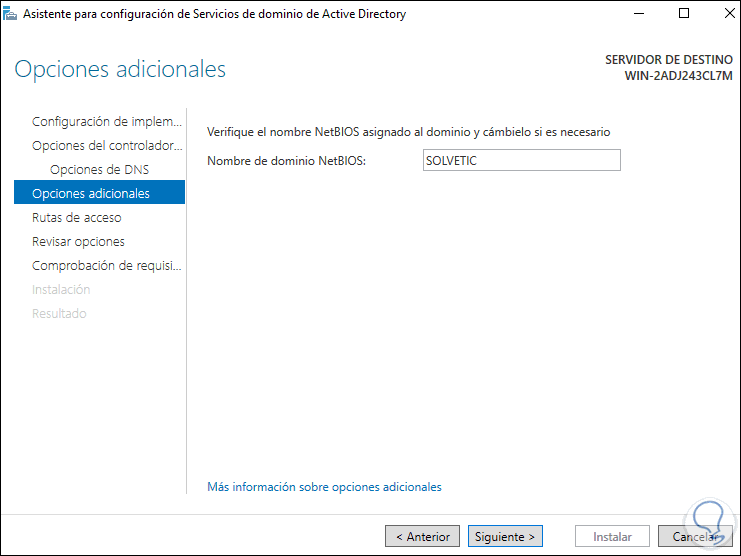
В разделе Additional Options нужно указать NetBIOS name для нашего домена, я указываю «ILAB». Next.
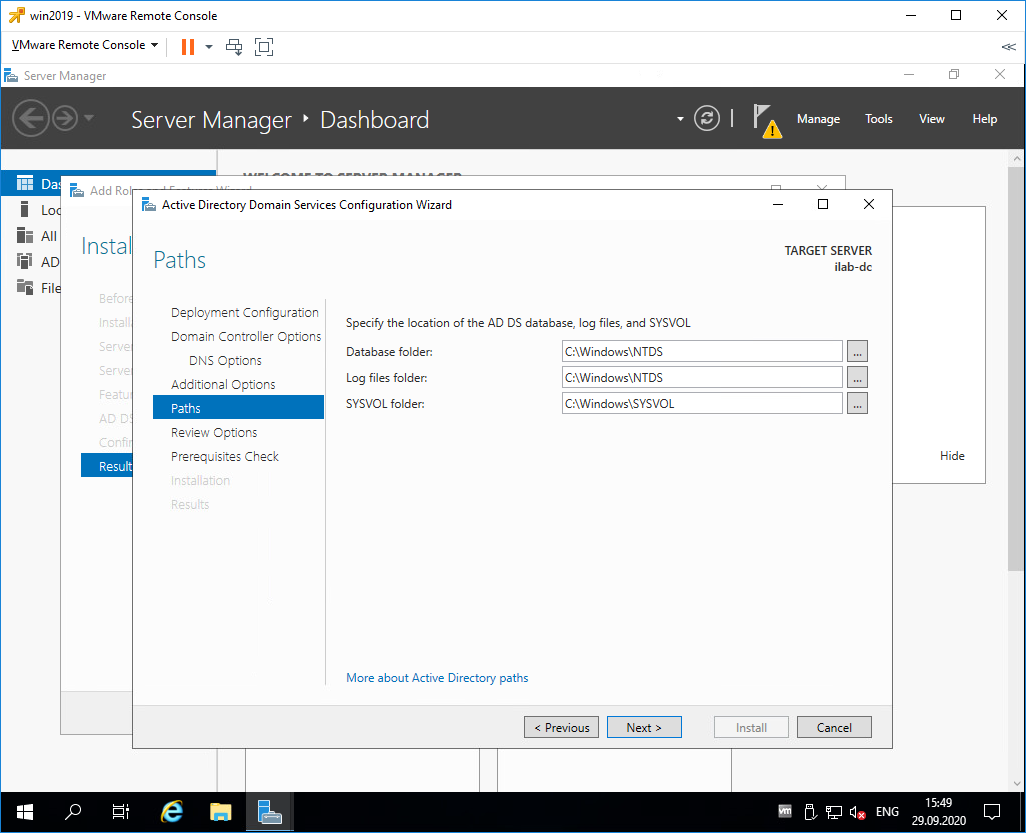
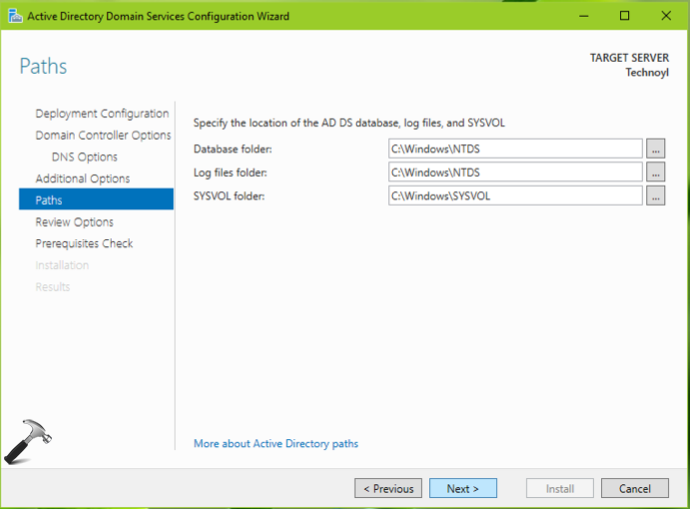
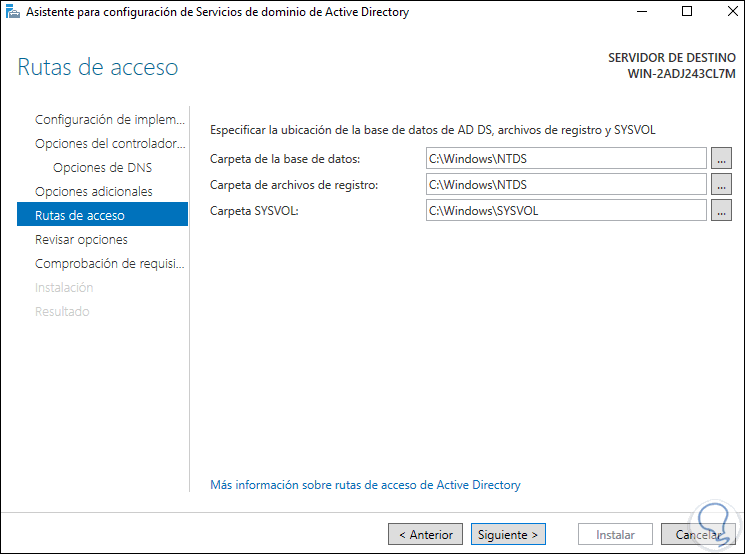
В разделе Paths можно изменить пути к базе данных AD DS, файлам журналов и папке SYSVOL. Без нужды менять их не рекомендуется. По умолчанию:
- Database folder: C:\Windows\NTDS
- Log files folder: C:\Windows\NTDS
- SYSVOL folder: C:\Windows\SYSVOL
Next.
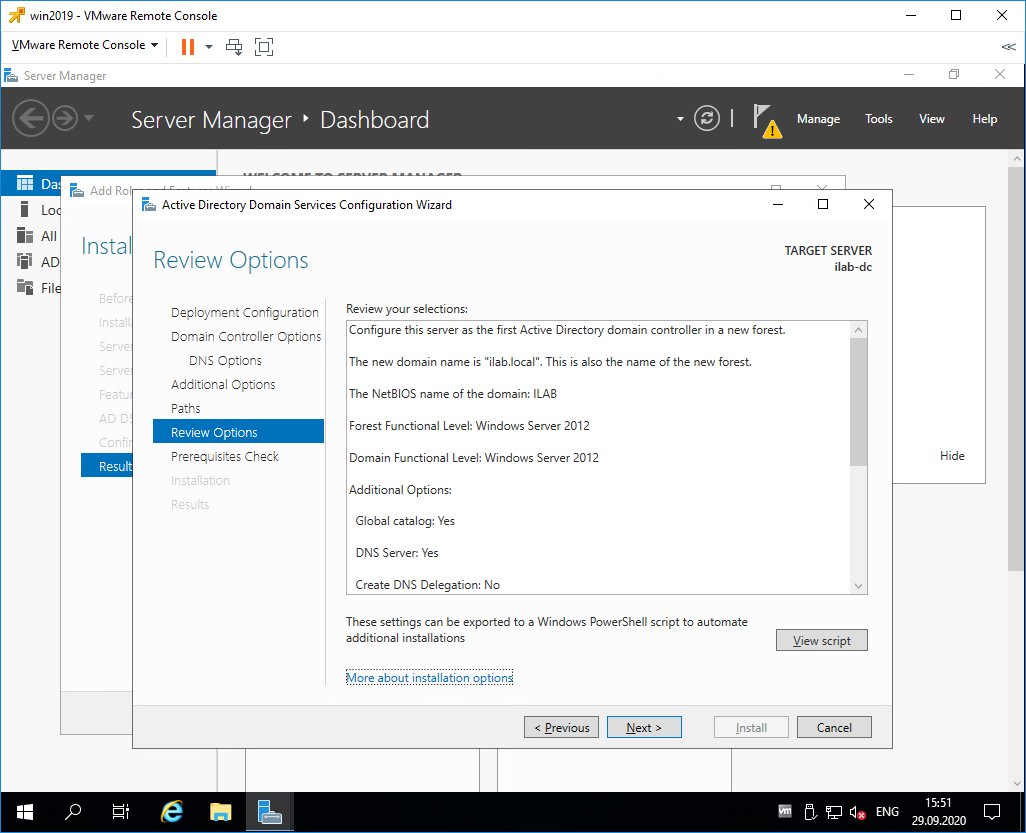
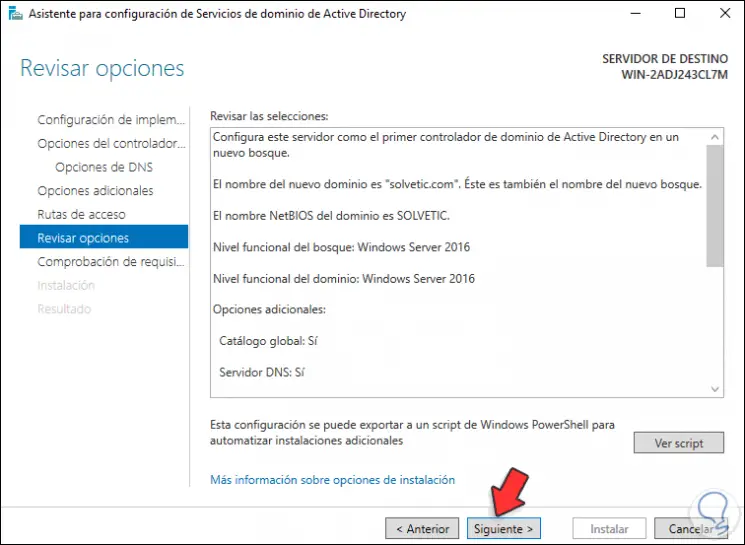
В разделе Review Options проверяем параметры установки. Обратите внимание на кнопку View script. Если её нажать, то сгенерируется tmp файл с PowerShell скриптом для установки контроллера домена.
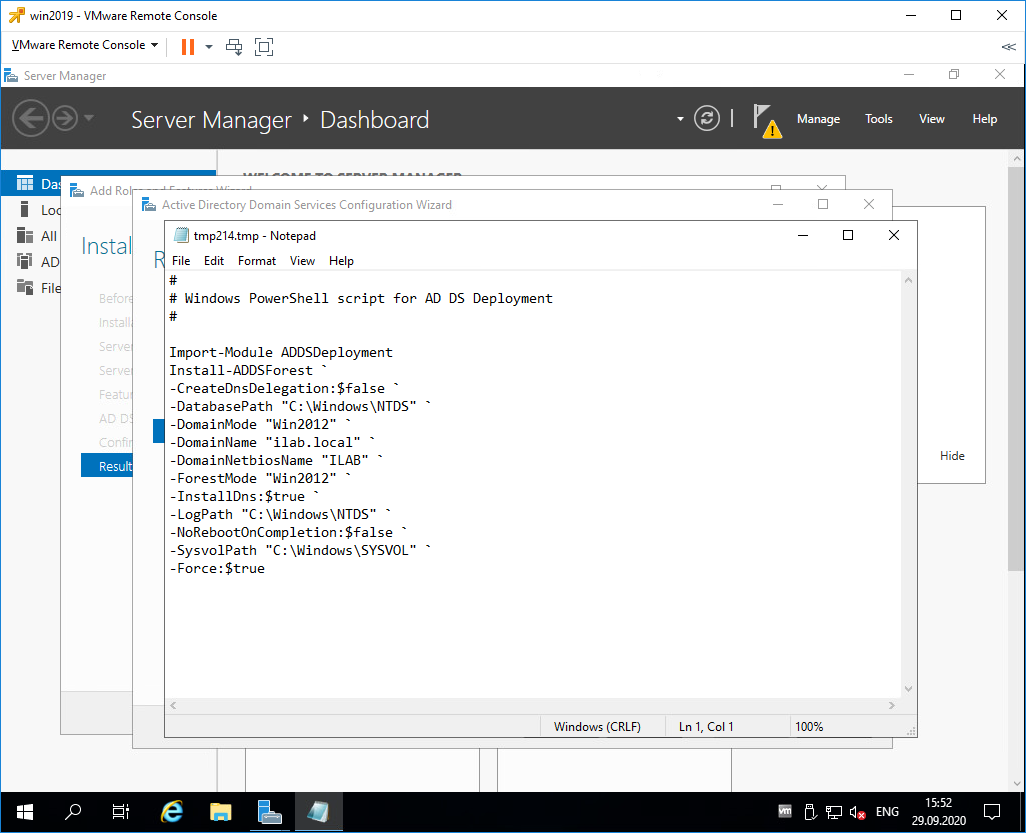
Сейчас нам этот скрипт не нужен, но он может быть полезен системным администраторам для автоматизации установки роли контроллера домена с помощью PowerShell.
Next.
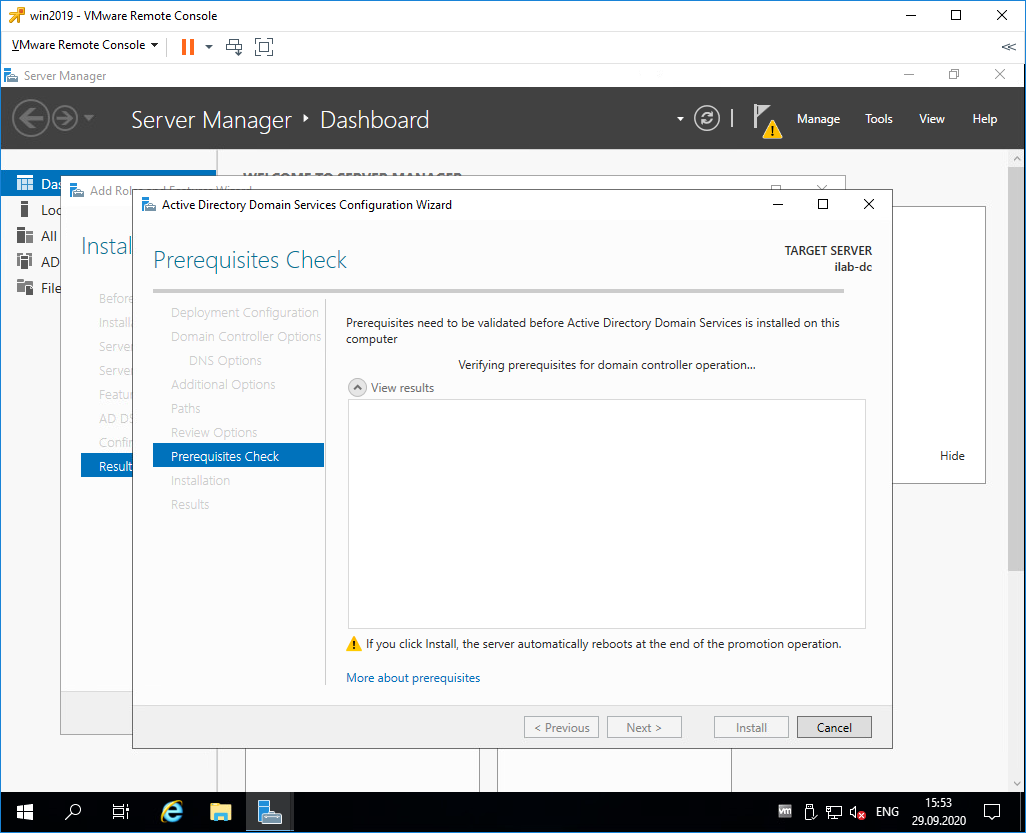
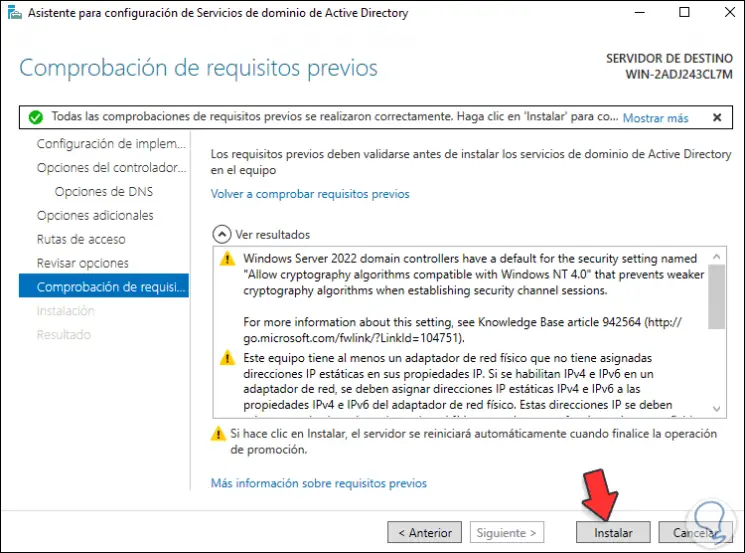
Попадаем в раздел Prerequisites Check, начинаются проверки предварительных требований.
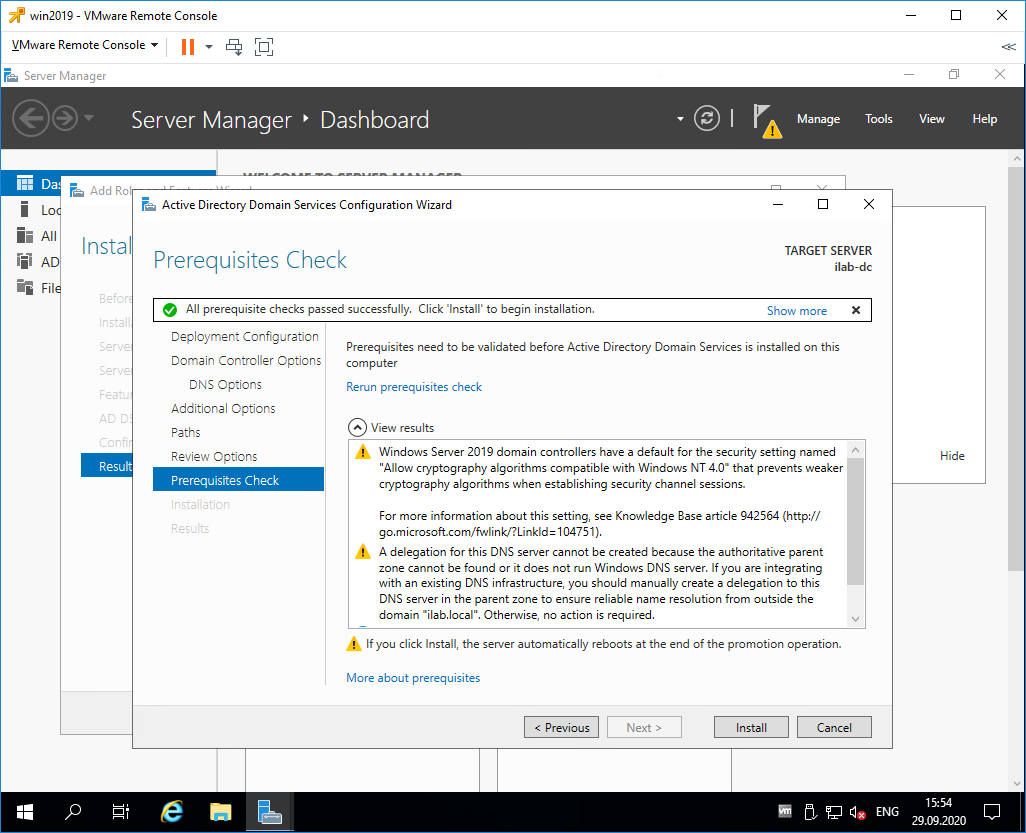
Проверки прошли успешно, есть два незначительных предупреждения про DNS, которое мы игнорируем и про безопасность, тож игнорируем. Пытался пройти по предложенной ссылке, она оказалась нерабочей.
Для начала установки роли контроллера домена нажимаем Install.
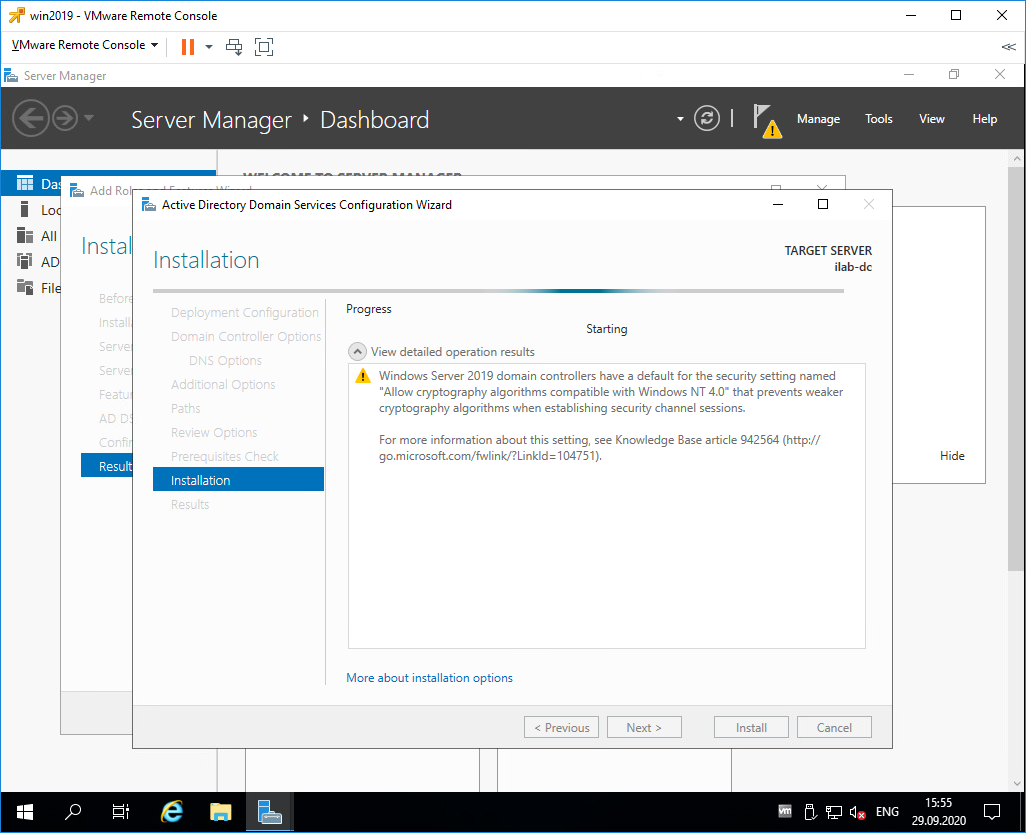
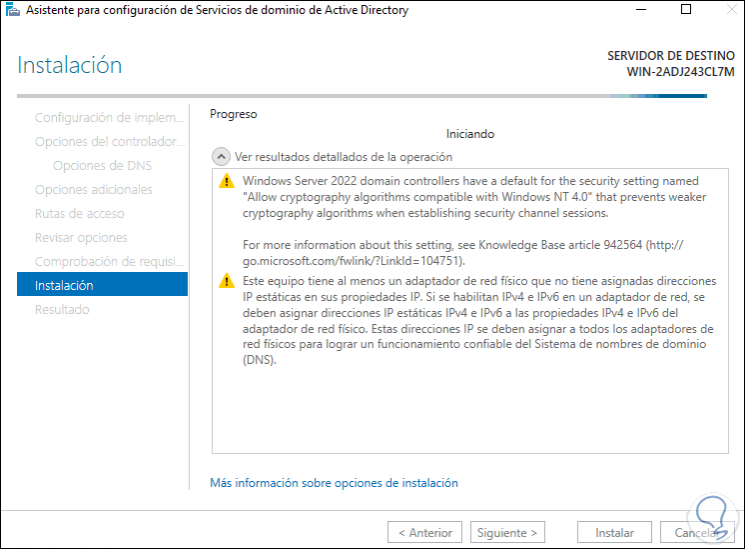
Начинается процесс установки.
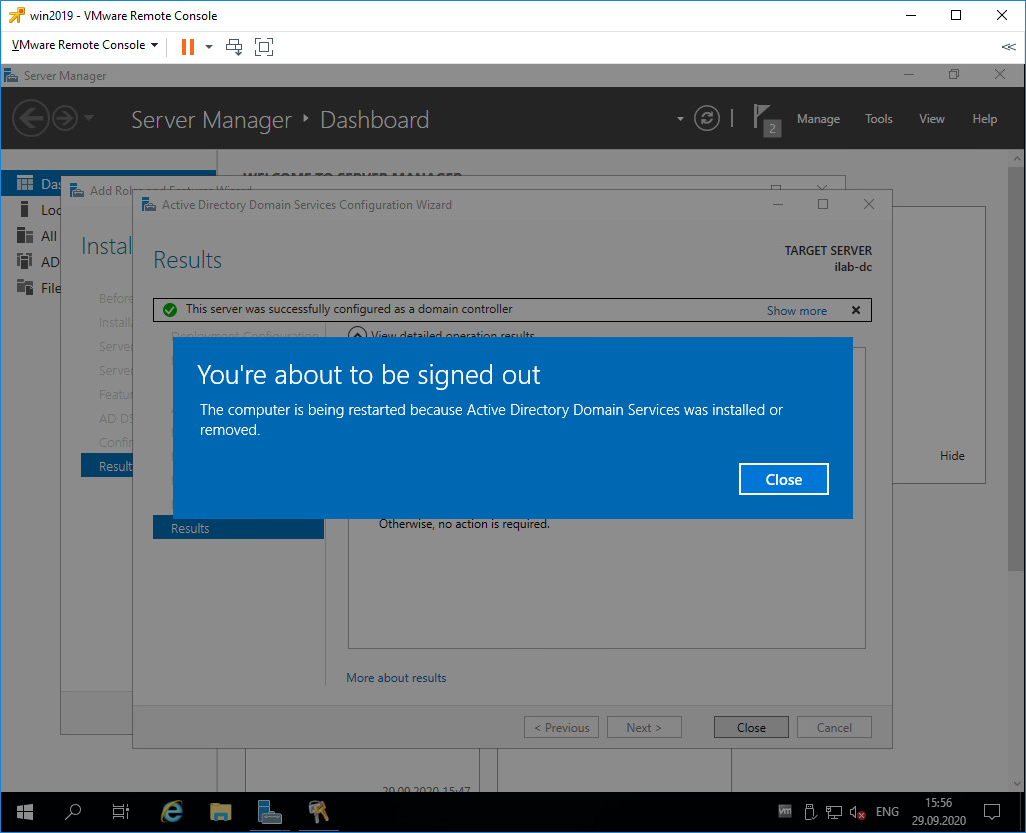
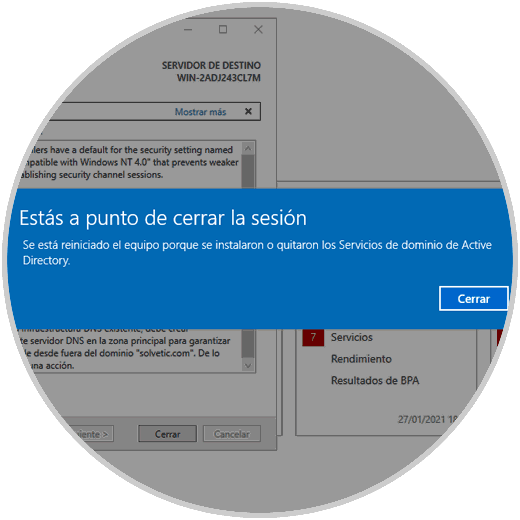
Сервер будет перезагружен, о чём нас и предупреждают. Close.

Дожидаемся загрузки сервера.
Первоначальная настройка контроллера домена
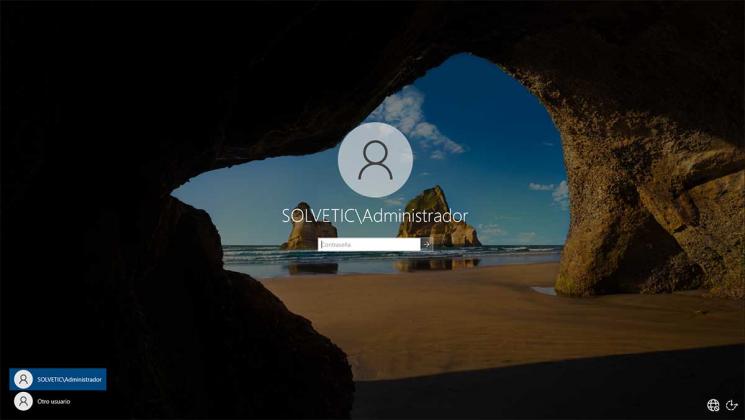
Наша учётная запись Administrator теперь стала доменной — ILAB\Administrator. Выполняем вход.
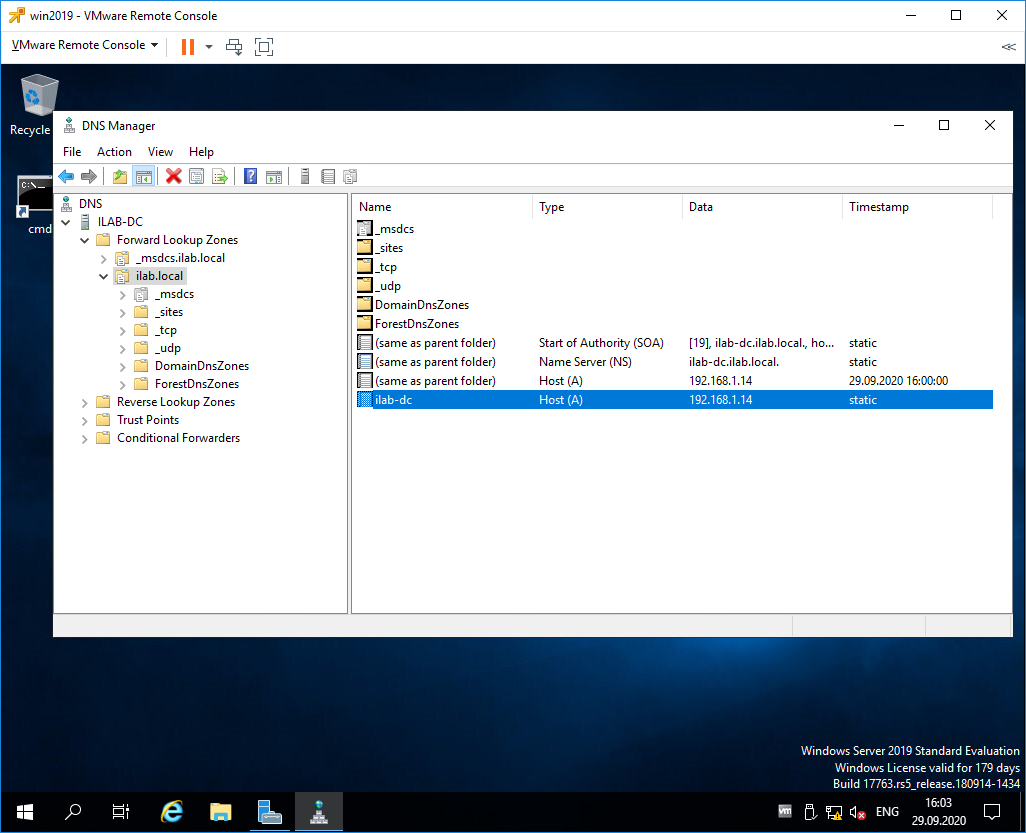
Видим, что на сервере автоматически поднялась служба DNS, добавилась и настроилась доменная зона ilab.local, созданы A-записи для контроллера домена, прописан NS сервер.
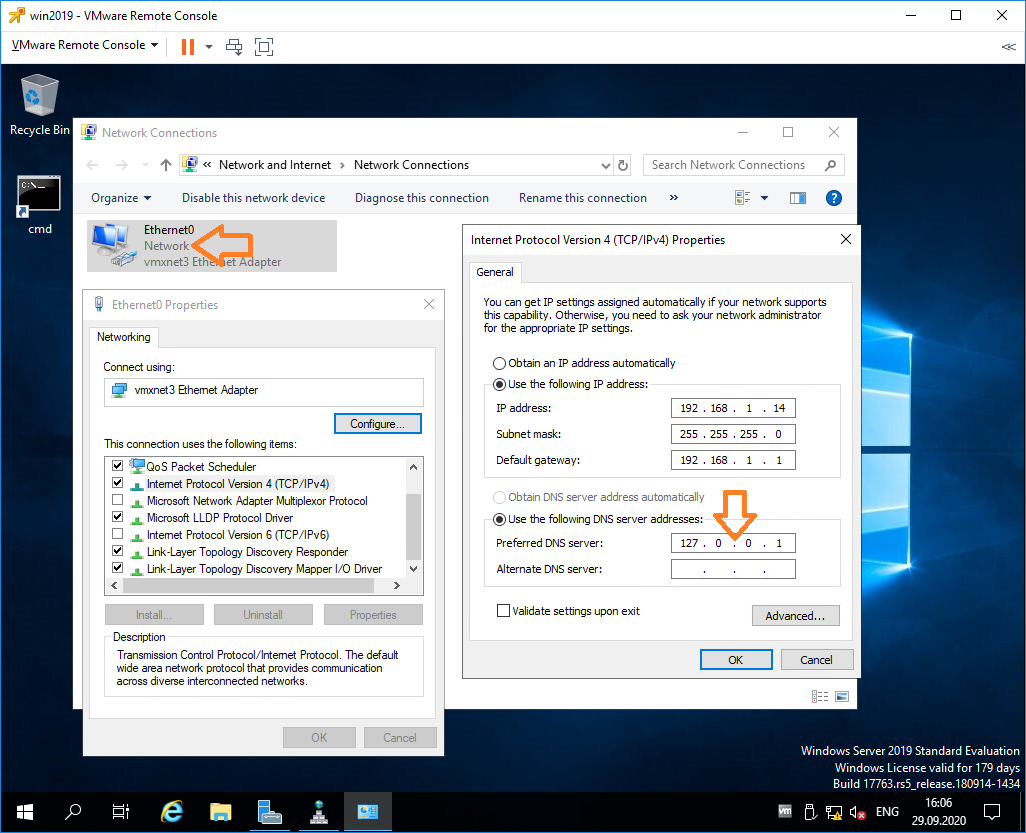
На значке сети отображается предупреждение, по сетевому адаптеру видно, что он не подключен к домену. Дело в том, что после установки роли контроллера домена DNS сервер в настройках адаптера сменился на 127.0.0.1, а данный адрес не обслуживается DNS сервисом.
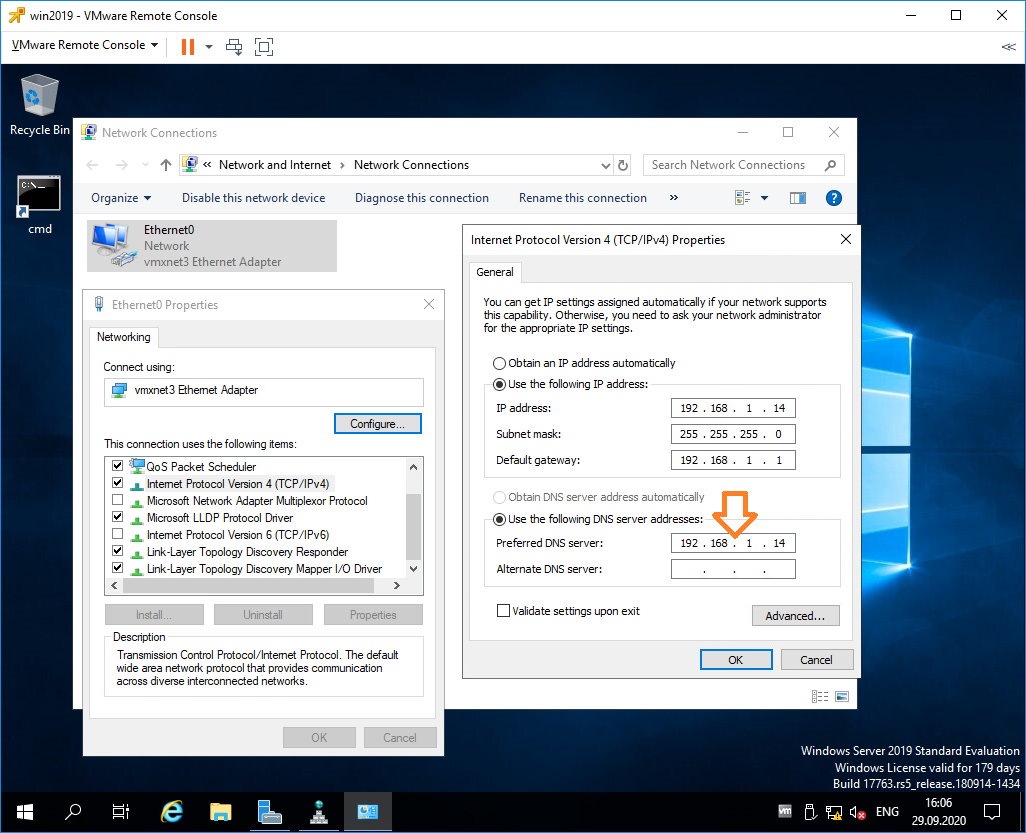
Сменим 127.0.0.1 на статический IP адрес контроллера домена, у меня 192.168.1.14. OK.
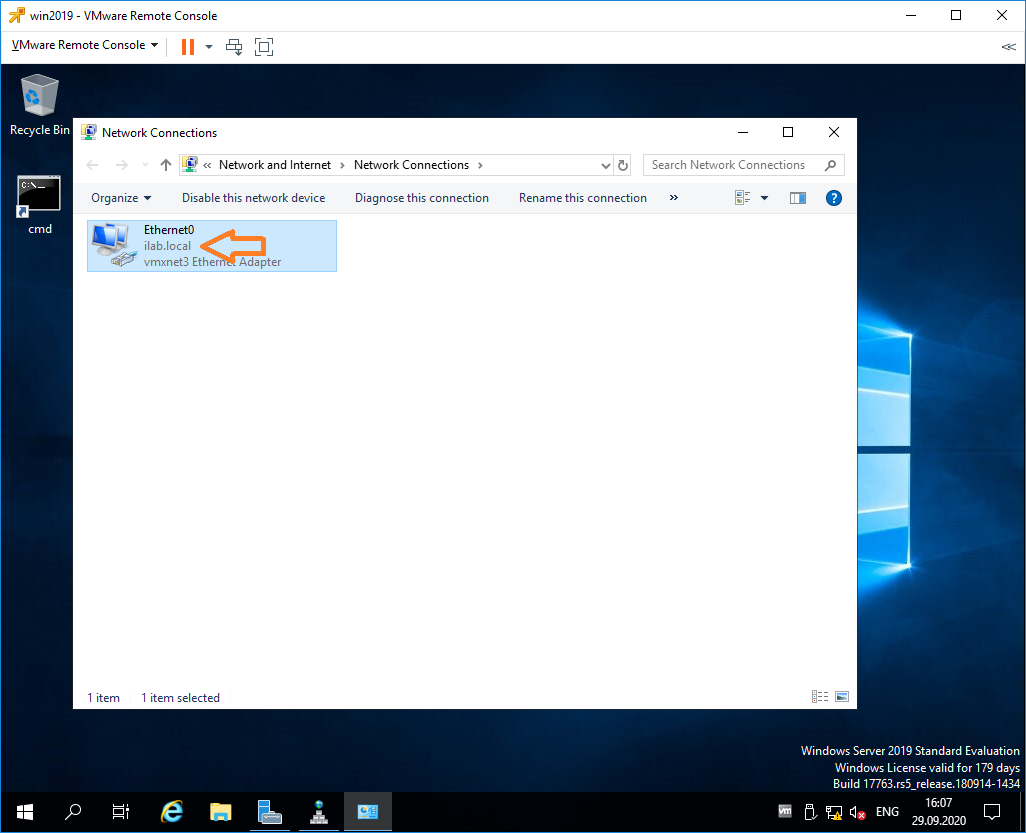
Теперь сетевой адаптер правильно отображает домен, предупреждение в трее на значке сети скоро пропадёт.
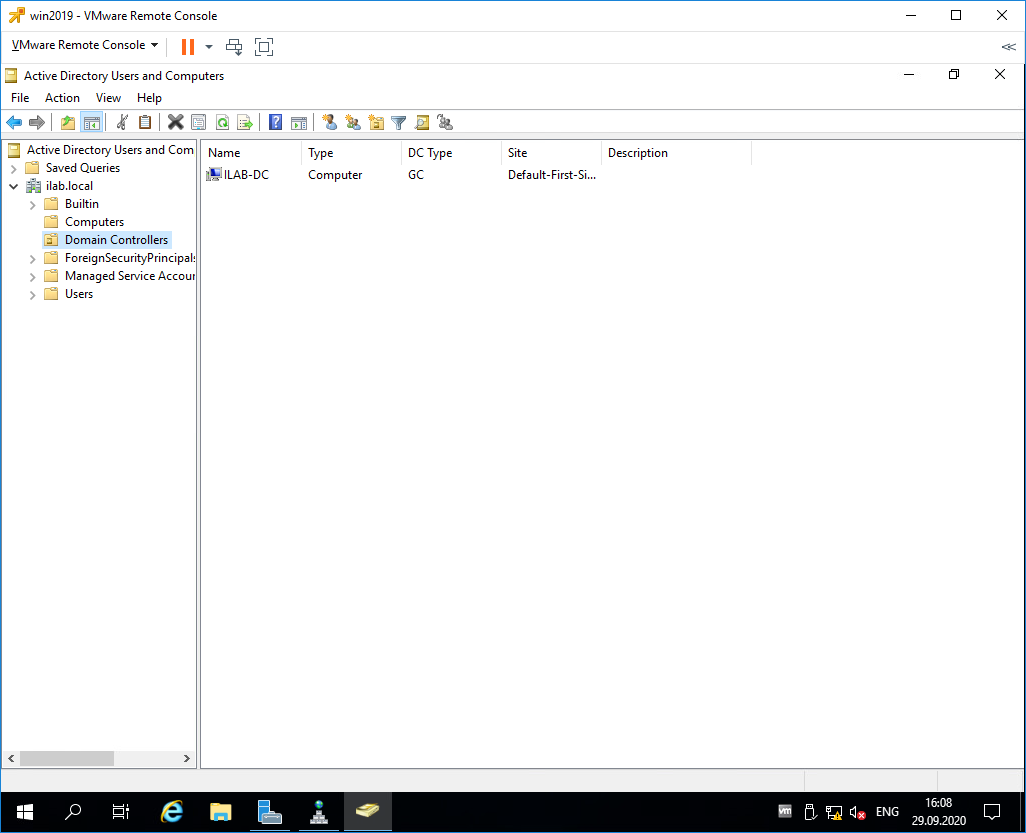
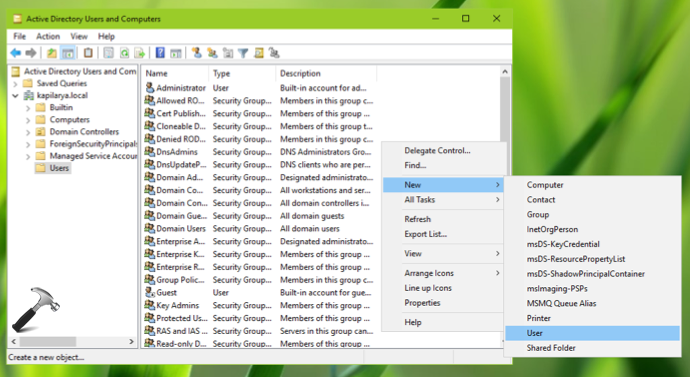
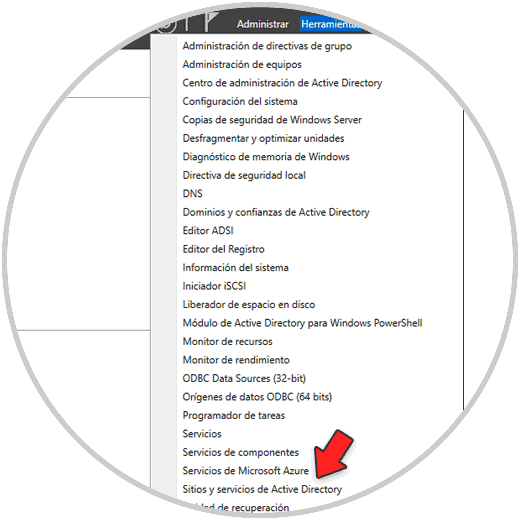
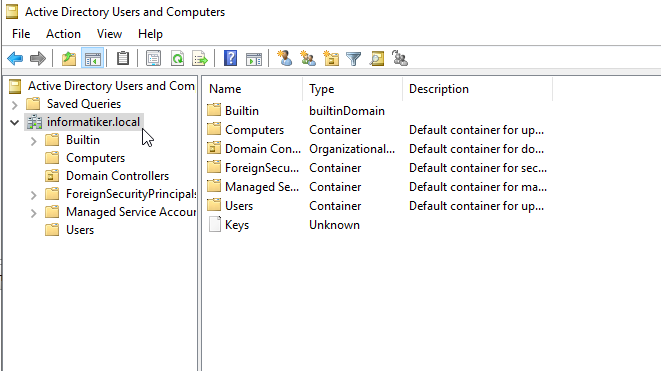
Запускаем оснастку Active Directory Users and Computers. Наш контроллер домена отображается в разделе Domain Controllers. В папкe Computers будут попадать компьютеры и сервера, введённые в домен. В папке Users — учётные записи.

Правой кнопкой на корень каталога, New > Organizational Unit.
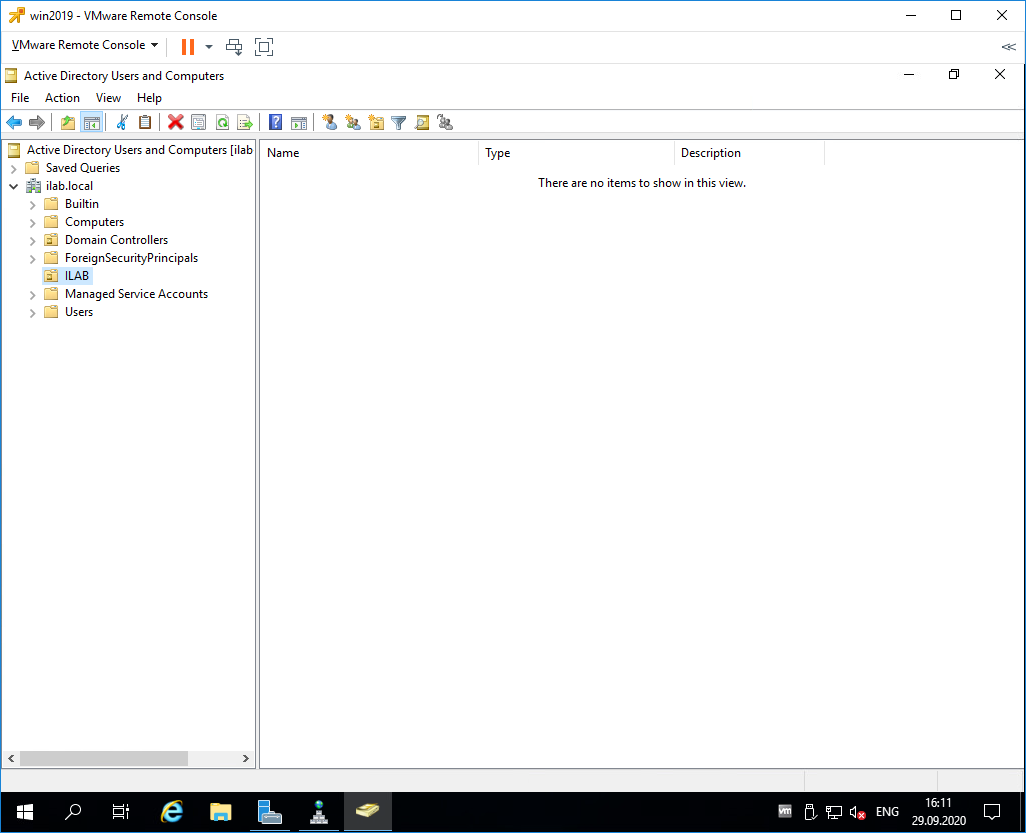
Создаём корневую папку для нашей компании. При создании можно установить галку, которая защищает от случайного удаления.

Внутри создаём структуру нашей компании. Можно создавать учётные записи и группы доступа. Создайте учётную запись для себя и добавьте её в группу Domain Admins.
Рекомендуется убедиться, что для публичного сетевого адаптера включен Firewall, а для доменной и частной сетей — отключен.
If you’re configuring a Windows Server and you need to create a domain, this step-by-step guide is for you. Creating a domain on a server is three-phase process including:
1. Activation of Active Directory Domain Services
2. Creation of domain or forest
3. Creating users for the domain
Before we start this guide, let us get familiar with these terms which is involved in this process:
1. Domain: Domain is basically logical grouping of machines. It is created so that users, computers and other security peripherals can be registered on a central database, known as domain controller.
2. Domain Controller: It is a server which can manage all security aspects of a domain. Whether it is interaction of users to domain, security management, or centralized administration, a domain controller can do all of these things.
3. Active Directory: Active Directory Domain Services (AD DS) is used to store information about network objects and it ensures that this information is available to network administrators and users.
4. NetBIOS: Network Basic Input/Output System basically provides session layer of networking model, allowing applications on separate systems to communicate on local network.
Page Contents
How To Create Domain In Windows Server 2019
Part 1: Enable Active Directory Domain Services
1. Open Server Manager. Under Dashboard, click on Add roles and features.
2. In Add Roles and Features Wizard window, click on Next in Before You Begin section.

3. Now choose the Installation Type as Role-based or feature-based installation and hit Next.

4. Select the server now and then hit Next.
5. Under Server Roles, select Active Directory Domain Services.

6. You’ll next get a pop-up window, click Add Features in it.

7. Then ensuring Active Directory Domain Services checked in, click Next.
8. Moving on, under Features section, make sure you enable or select Group Policy Management and hit Next.

9. Then click Next in AD DS section.

10. On Confirmation, click Install.

11. The installation may take few moments and you’ll confirmed in Results section, click Close then.

Part 2: Create A Domain/Forest
1. Open Server Manager and click on notifications icon. Then click on Promote this server to a domain controller.

2. This will open Active Directory Domain Services Configuration Wizard. Under Deployment Configuration, select Add a new forest.

3. Next, under Domain Controller Options, type the DRSM password and hit Next. You can reset DRSM password later, using this guide.
4. Moving on, under DNS Options, skip warning and click Next.

5. Under Additional Options, let the NetBIOS domain name auto-detected, click Next.

6. Let the default paths/foders remain set and click Next.
7. Now review all settings and if you like to re-configure, click Previous, else click Next.

8. So far let all prerequisites checked and click Install finally.

9. Once the installation is completed, you’ll asked to reboot server. Click Close and let reboot complete.

Part 3: Creating User Account On Domain
1. After reboot, open Active Directory Users and Computers using search feature.

2. In Active Directory Users and Computers window, go to your domain name > Users. In right pane of Users, right click on empty space and select New > User.
3. Then type in new user information and click Next.

4. Now type a strong password for this user account and hit Next.

5. Finally, click on Finish to complete this wizard.

So in this way, we’ve created a domain and also created user account on it.
Here is the video showing how to promote Windows Server 2019 as domain controller:
Next, learn how to allow Windows 10 clients to join this domain.
That’s it!
Windows Server is the preferred system for millions of companies to manage everything related to the internal processes of the company at the level of users, computers and objects . The most centralized way to do this is thanks to the domain controller that we can implement on the server so that all client computers have access to what is hosted on the server..
Windows Server 2022
Windows Server is available now in its future version 2022 which gives us some features such as:
- Compatible with AES-256-GCM and AES-256-CCM cryptographic suites
- Option to copy files to SMB with compression using the Robocopy, compress and Xcopy / compress commands
- SMB Direct protocol over RMDA networks supports AES-256 encryption
- Native management with Windows Admin Center and more
Windows Server as controller
But without a doubt that one of the main points in Windows Server is its operation as a domain controller and as a DNS server, let’s remember some of the main tasks of a server:
- Work as a DNS server (Domain Name System, Domain Name System) to resolve network names, that is, translate IP addresses into domain names and vice versa.
- Serve as a domain controller for multiple users and computers on the local network to connect to it.
- Manage all user and computer policies.
- Manage third-party software and applications.
- Centralize user access to the system.
TechnoWikis will explain to you how to create your domain in Windows Server 2022 and with this make the most of it.
To stay up to date, remember to subscribe to our YouTube channel! SUBSCRIBE
How to create a domain and configure Active Directory in Windows Server 2022
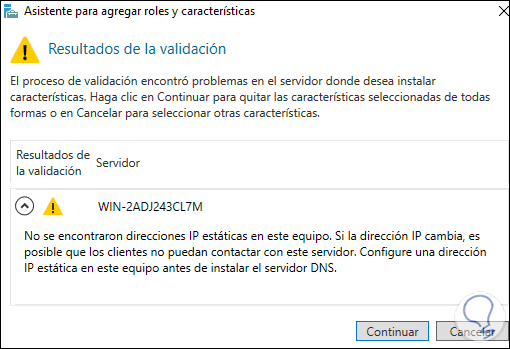
One of the essential keys is to have a static IP since as it is a central server many processes depend on this, when changing the IP the connection will be lost. Later we will explain why you should do this.
Step 1
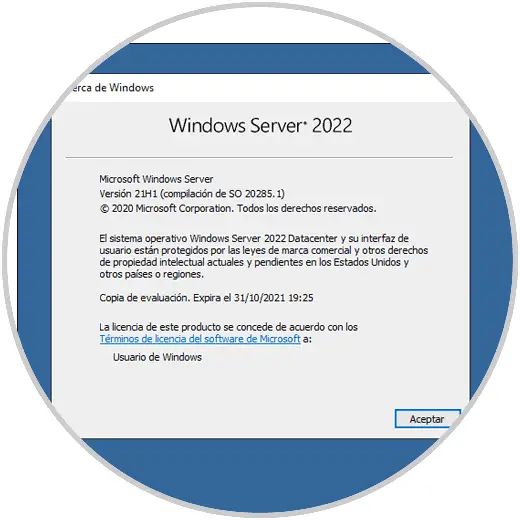
First we check with winver that we use Windows Server 2022:
Step 2
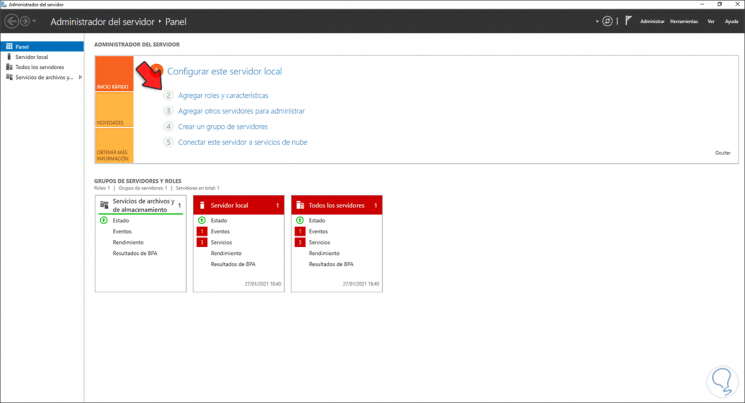
Now open the Server Manager, we will see the following:
Step 3
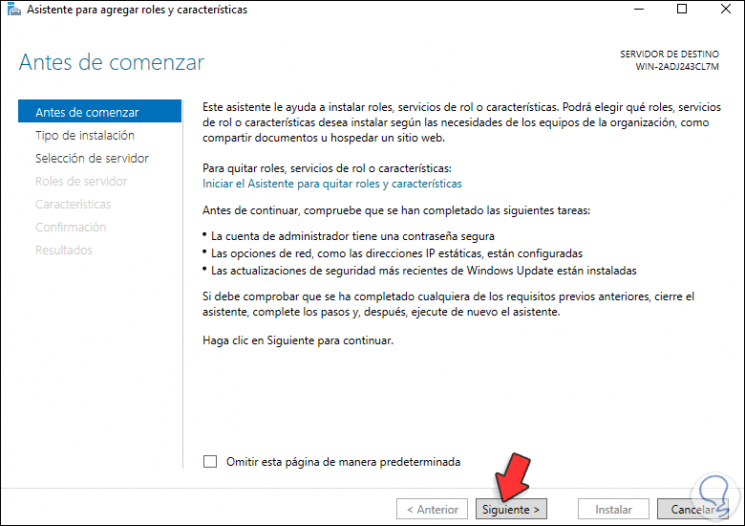
Select «Add roles and characteristics» and the following wizard will be launched:
Step 4
We click Next and select «Role-based or feature-based installation»:
Step 5
Click Next and choose the server:
Step 6
In the next window we select «Active Directory Domain Services»:
Step 7
This will display the following window:
Step 8
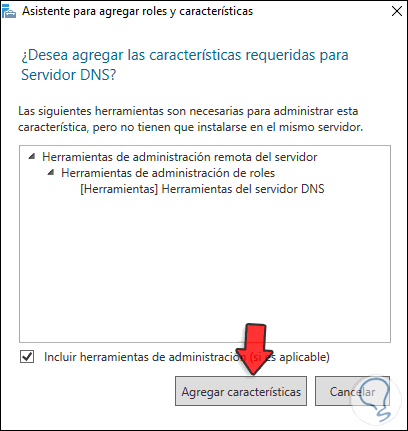
Click Add Features to add the role:
Step 9
We select «DNS Server» and the following will be opened:
Step 10
When we click on Add features we will see the following message:
Step 11
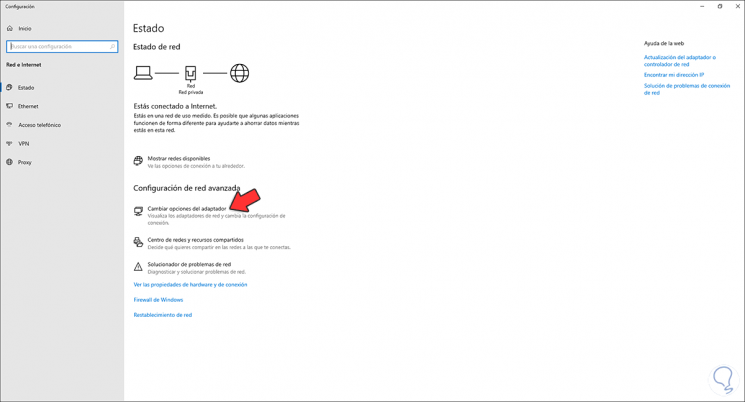
As we mentioned, the IP address is essential for the operation of Windows Server 2022 when delivering services, to achieve this we go to the network properties:
Step 12
Click on «Change adapter options» and then right click on the adapter and select «Properties»:

Step 13
Select Internet Protocol version IPv4 and click on properties:
Step 14
We establish the static IP based on the available range:
Note
The IP address of the «Preferred DNS server» field is the same IP of the equipment as it will act as DNS server.
We apply the changes..
Step 15
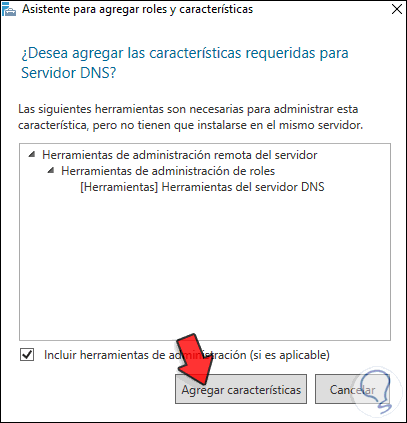
Now we can add the DNS role again:
Step 16
We will see that this time it allows it:
Step 17
Click Next and we will go to the Features section:
Step 18
There we do not make any changes, then we will see a brief summary of the role:
Step 19
Click Next and we access information about the DNS server of Windows Server 2022:
Step 20
Click Next and we find a summary of the task to be carried out:
Step 21
We click on «Install» to start the Active Directory installation process on the server:
Step 22
When this process comes to an end we will see the following:
Step 23
We click on Close and at the top we click on «Promote this server to a domain controller»:
Step 24
We click there and in the wizard displayed we activate the «Add a new forest» box and register the domain name to use in Server 2022:

Step 25
Click on next to see the functional levels of the forest and enter the password for recovery:
Step 26
Click Next and we will see the DNS delegation section:
Step 27
In the next window we find the NETBIOS name which is automatically assigned by the system:
Step 28
After this we see the default values of the databases, it is advisable not to alter these values:
Step 29
Click Next and we find a summary of the activity to be executed:
Step 30
We click Next to perform the prerequisite validation:
Step 31
If everything is correct, click on «Install» to start the promotion process to domain controller in Windows Server 2022:
Step 32
At the end we will see the following:
Step 33
The system must be rebooted to complete the process:
Step 34
We can see in the login screen that the domain has already been established:
Step 35
When logging in we open the Server Manager and go to «Tools — Active Directory Users and Computers»:
Step 36
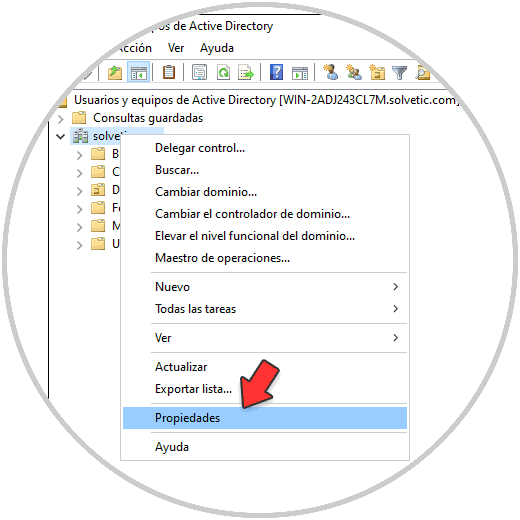
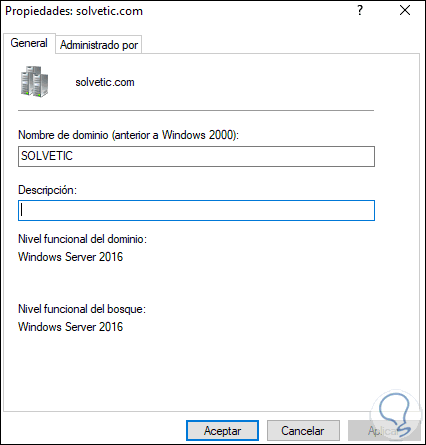
We select the domain, right click and choose Properties:
Step 37
We can see the functional levels that we have defined:
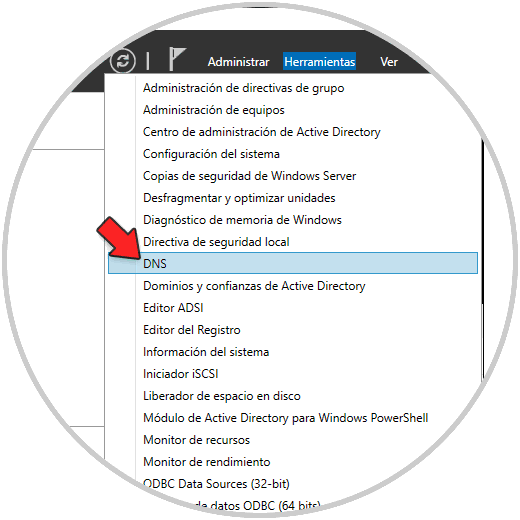
Step 38
Now we go to «Tools — DNS»:
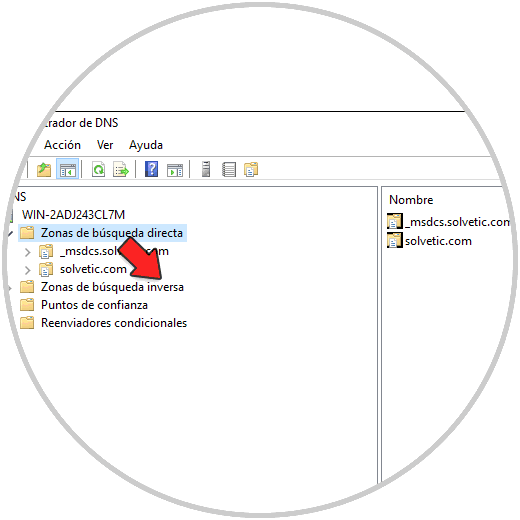
Step 39
We deploy the DNS server
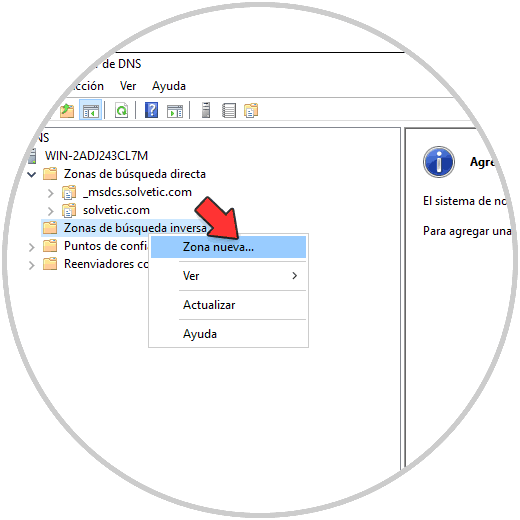
Step 40
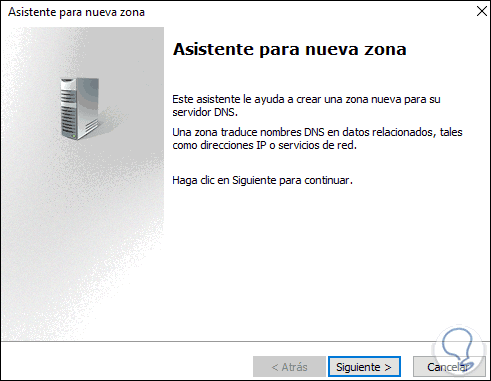
We right click on «Reverse search area» and select «New area»:
Step 41
The following wizard will be launched:
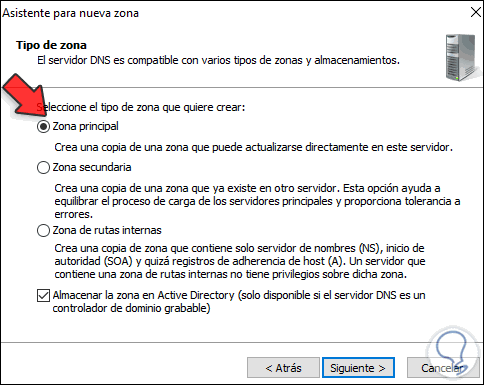
Step 42
Click on next and set the Main zone option:
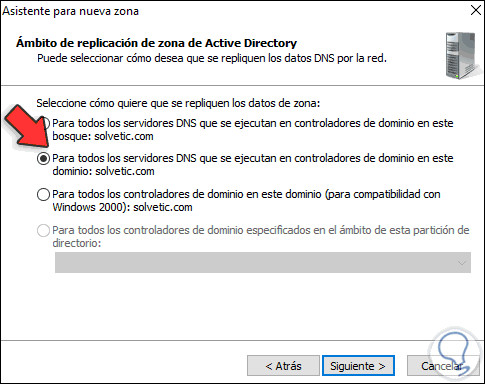
Step 43
In the next window we leave the option «Leave for all DNS servers that run on domain controllers in this domain»:
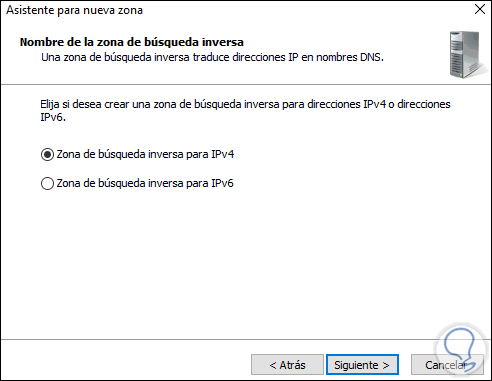
Step 44
Click on Next and we leave the area for IPv4 addressing:
Step 45
In the next window we enter the network identifier:
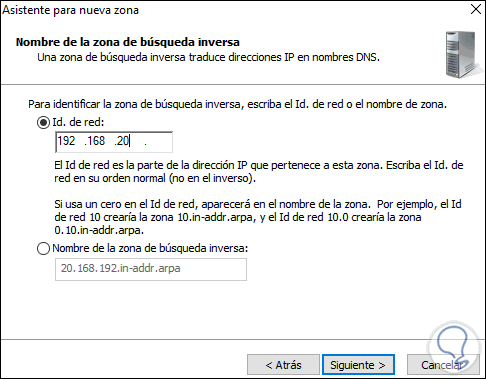
Step 46
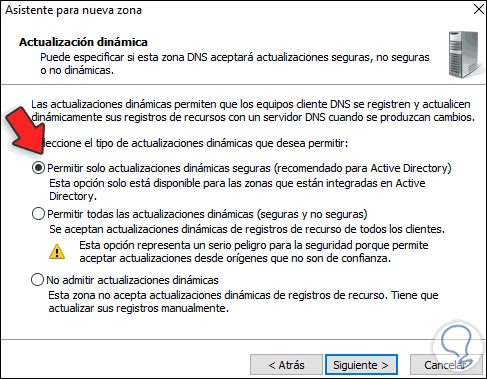
Then we define the way the updates will be applied:
Step 47
Click Next and we will see a summary of the area to create:
Step 48
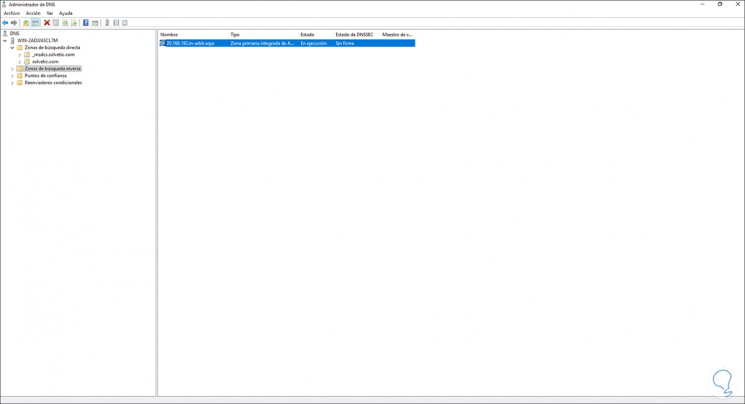
Click on Finish and we check the created zone:
Step 49
We go to the domain and click on the Host (A) file to validate the IP of Windows Server 2022:
Step 50
We will see the following:
Step 51
Finally we can check the server properties from «Local Server» in the Server Manager:

This is the step by step that TechnoWikis has taught you to create your domain controller in the new version of Windows Server 2022.
After we went through all the basic settings, and learned how to install Windows Server 2019, set basic configuration for it, installed Hyper-V and created our first virtual machine, it is time to get our hand dirty with enterprise services. First – Active Directory.
Now, these are your first steps into Windows based enterprise environment. Active Directory is at the foundations of every serious enterprise.
Server Basics series is oriented more to hand-on and less to theory, so, let’s set our first domain and domain controller.
Before we start
It would be wise to go through Server Basics 02: First steps after Windows Server 2019 installation guide I already wrote, because some of the prerequisites written down below for domain controller are described there, and if you are not sure how to do them, check that tutorial.
Create and setup new VM inside Hyper-V. I named my VM ServerBasicsAD.
Active Directory machine can work with 2cores, 3GB of RAM, and 40GB of HDD (if you can’t afford a bit more)
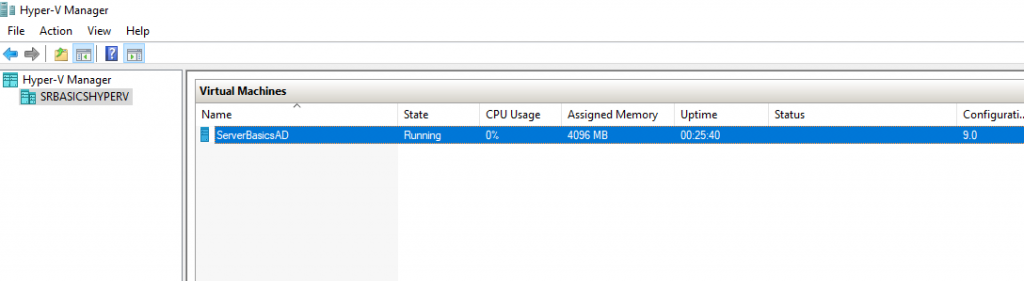
These are my settings for domain controller:
I will name my VM for Domain Controller: SBasicsAD
(Don’t mind screenshots below, you should always name your machine with less than 15 characters)
My Administrator Account will be: InfoAdmin
Domain name: informatiker.local
My network settings:
IP: 10.0.0.31
Subnet mask: 255.255.255.0
Gateway: 10.0.0.31
DNS: 127.0.0.1
It is important that future domain controller has its own fixed IP as a DNS.
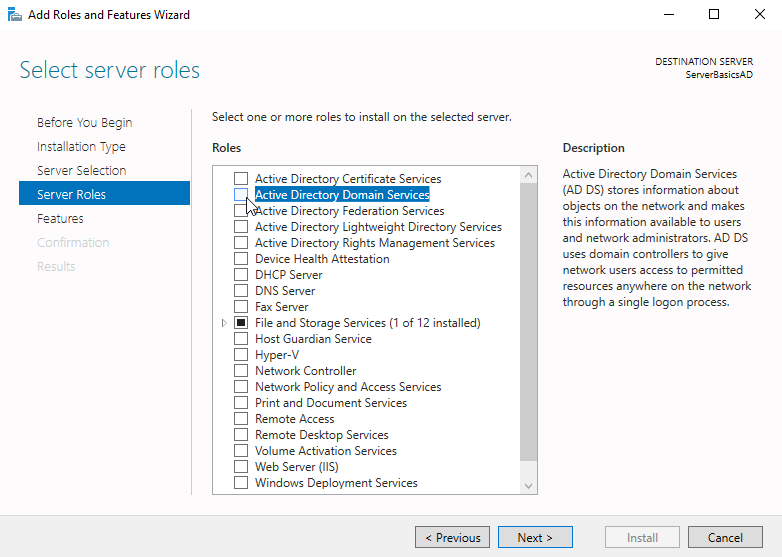
Installing Active Directory Roles
Lets create our first domain and setup our domain controller.
Start following on the VM you prepared earlier. I will start the process on ServerBasicsAD VM.
Start | Server Manager | Manage | Add Roles and Features
Wizard will start…
Next
Role-based or feature-based installation | Next
Select a server from the server pool. Select your VM on which you started this…
Next
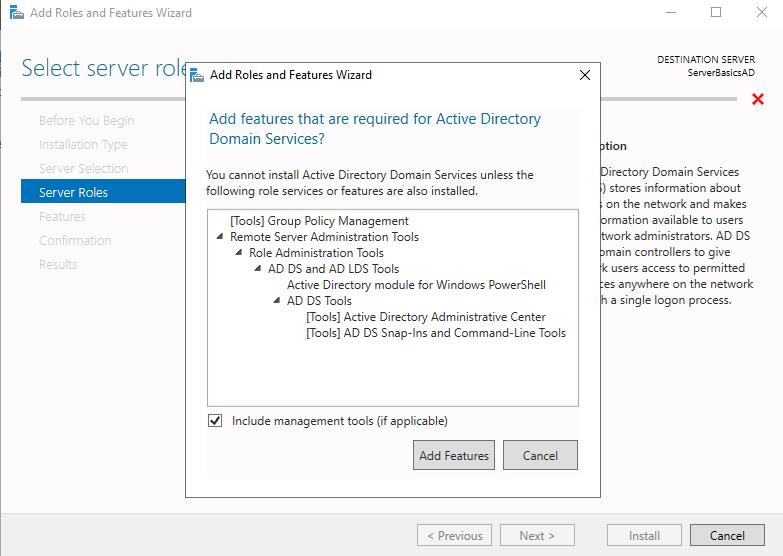
From the Server Roles screen we need “Active Directory Domain Services” – click on the box next to it.
Additional pop-up will appear. Confirm all by clicking on Add Features
Now, Active Directory Domain Services is selected – Next
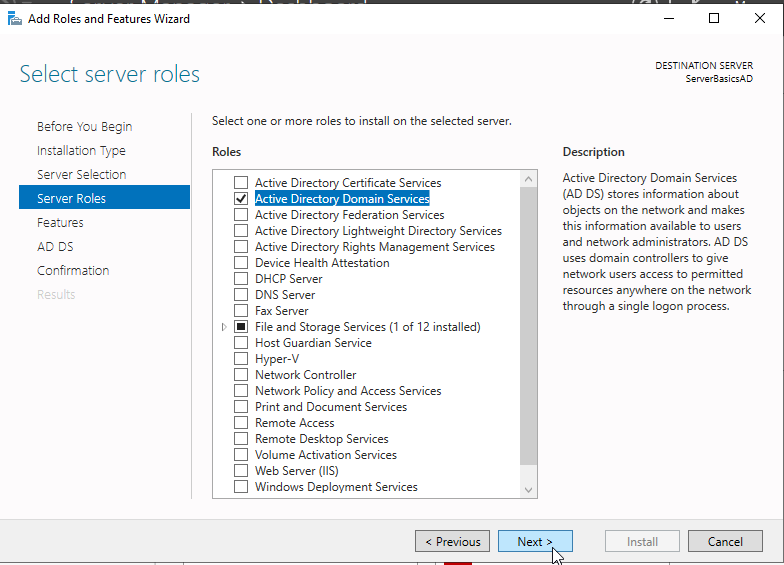
Next
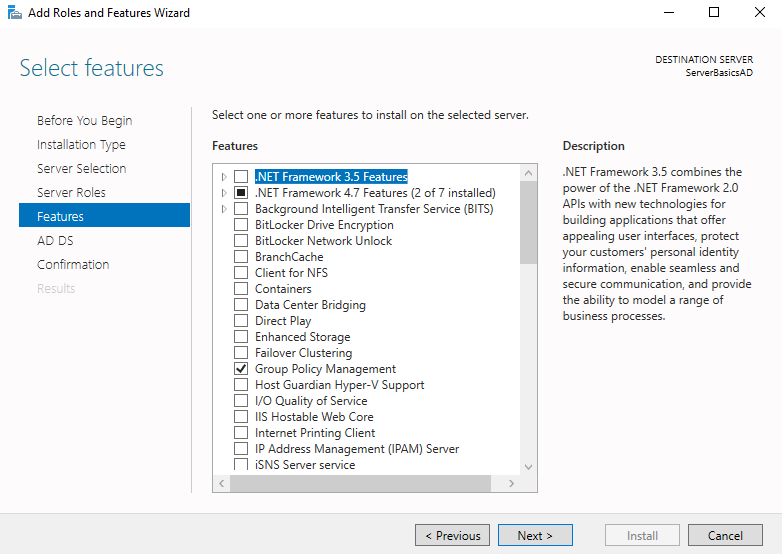
Next
Install
…
Installation is a success, but we will need to configure more after we select Close on bottom of this screen.
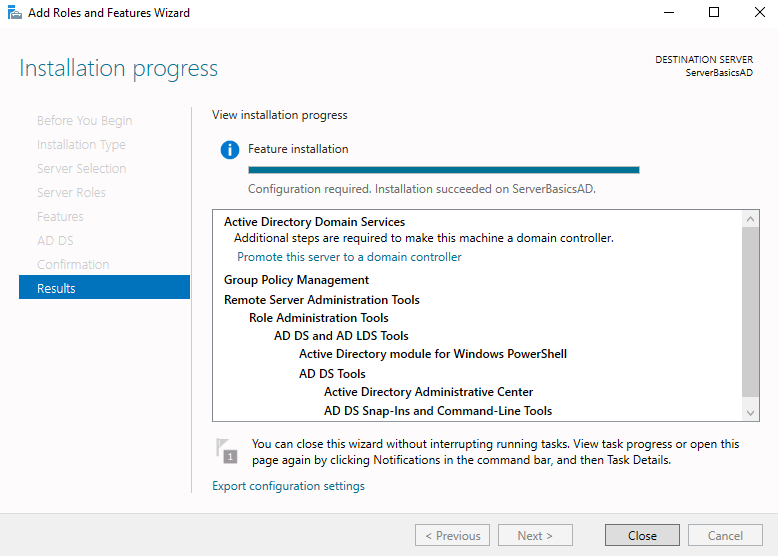
On the Server Manager screen, there is a yellow triangle under the flag on top right portion of the screen. Click on it, and select “Promote this server to a domain controller“
Now, the process of domain creation and domain controller configuration starts…
Since this is our first domain – select “Add a new forest”, and under root domain name – enter domain name, mine will be informatiker.local.
Under this name will reside your entire future local domain within enterprise. Usually domain name is a name of the company, organization unit… But you can also be creative, just stay within some business boundaries.
Next
If you have some older Windows Server installations (2008 (obsolete), 2012, 2016) that will have part of your domain functions you will need to set “Forest and Domain functional level” to that Windows Server Version. Since this will be only Windows Server 2019 level lab, I will leave Windows Server 2016 for both settings.
Since this is our first domain controller, it will be both Domain Name System (DNS) server and Global Catalog (GC) – so select that.
In the end – DSRM password – enter it and write it down somewhere, remember it well !!
In case of any problems with your domain, you will need it, this is very important part. When you are done – click on Next.
DNS is integral part of Active Directory, without DNS, domain cannot function properly. Since this is entry level tutorial, we will let Domain wizard configure it, and it will reside on our Active Directory VM. Just click on Next
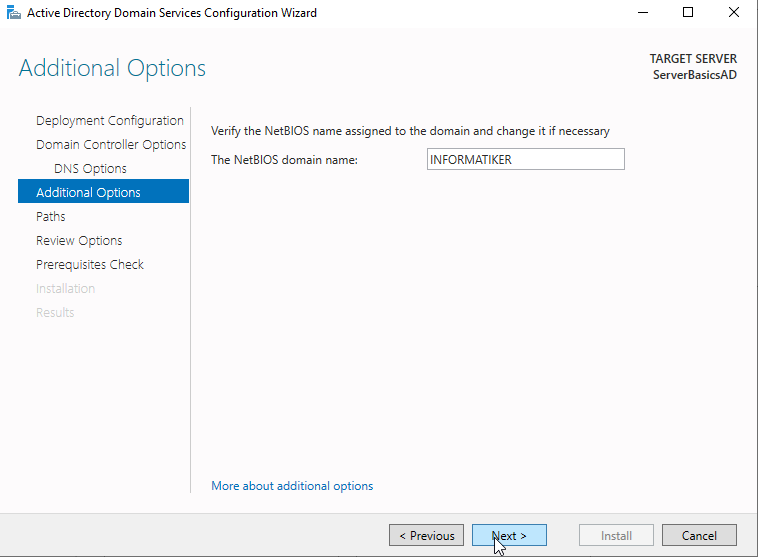
Check NetBIOS name, remember it and select Next
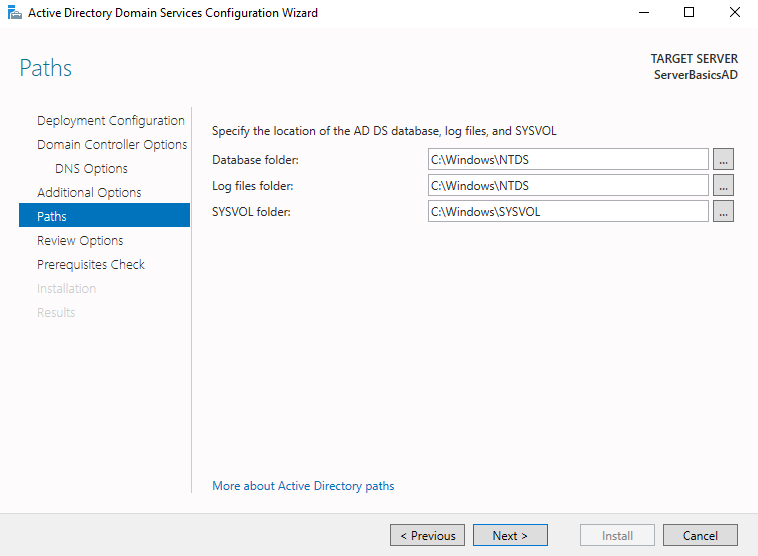
Read through paths of Active Directory (AD) database, logs and sysvol, don’t change anything and select Next.
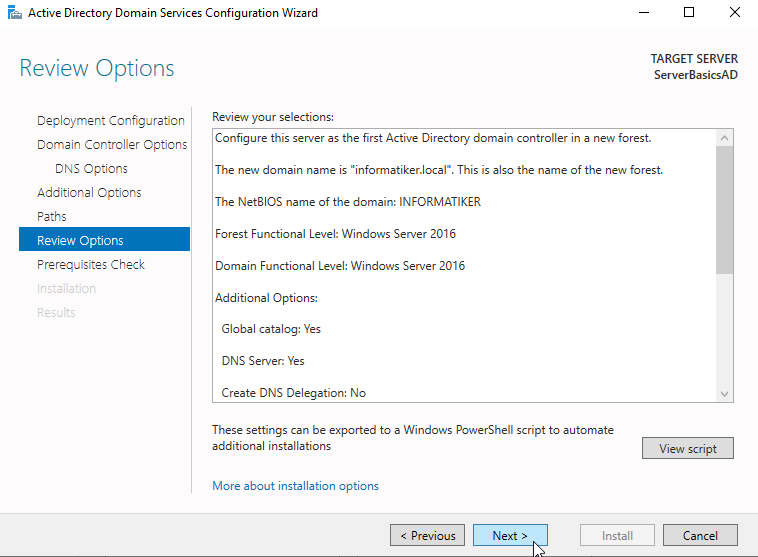
Review your settings and select Next
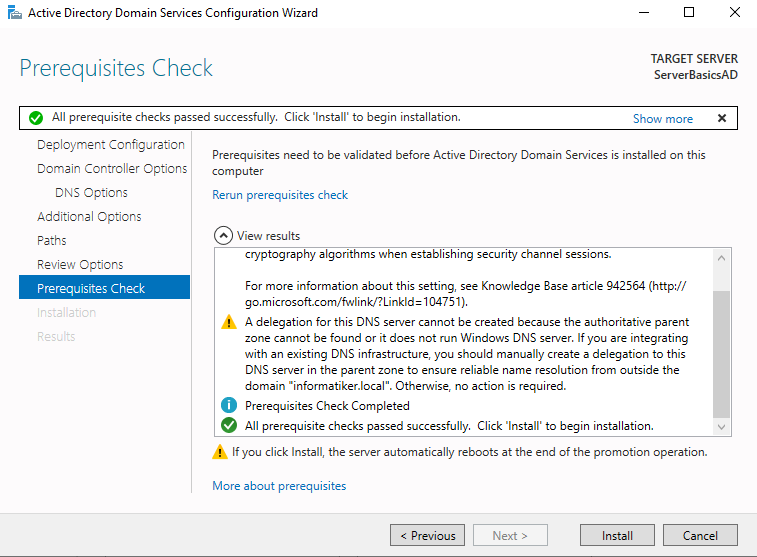
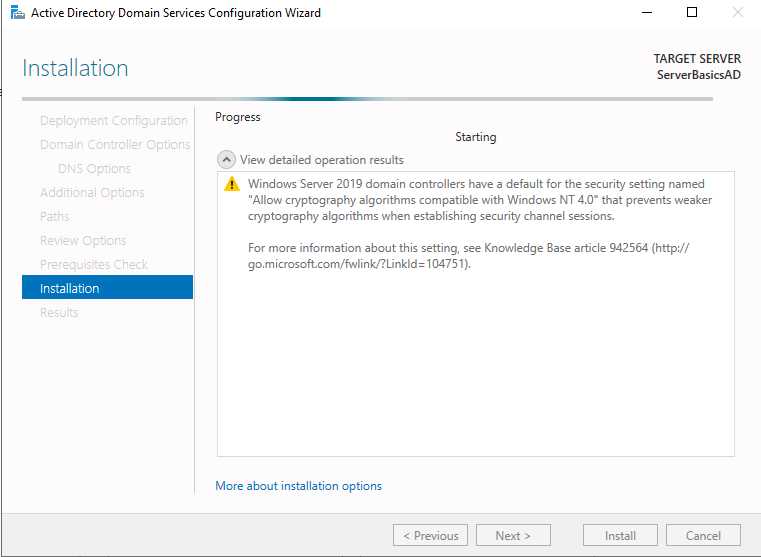
Don’t stress over yellow triangle warnings, just press install and continue with your install…
Installing…
Your VM will reboot at some point, so be aware of that
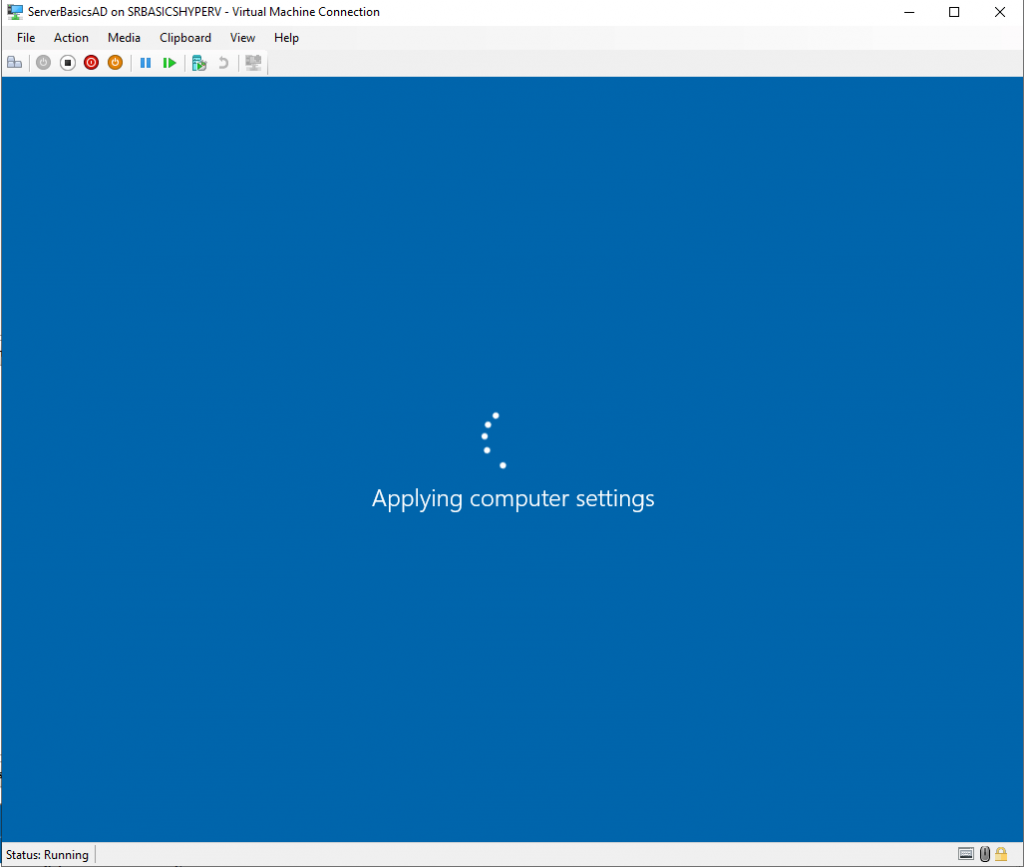
After reboot, log back in with your user and pass

Your user account is Domain Administrator now.
On Server Manager screen after login, you see now that you have installed AD DS and DNS services.
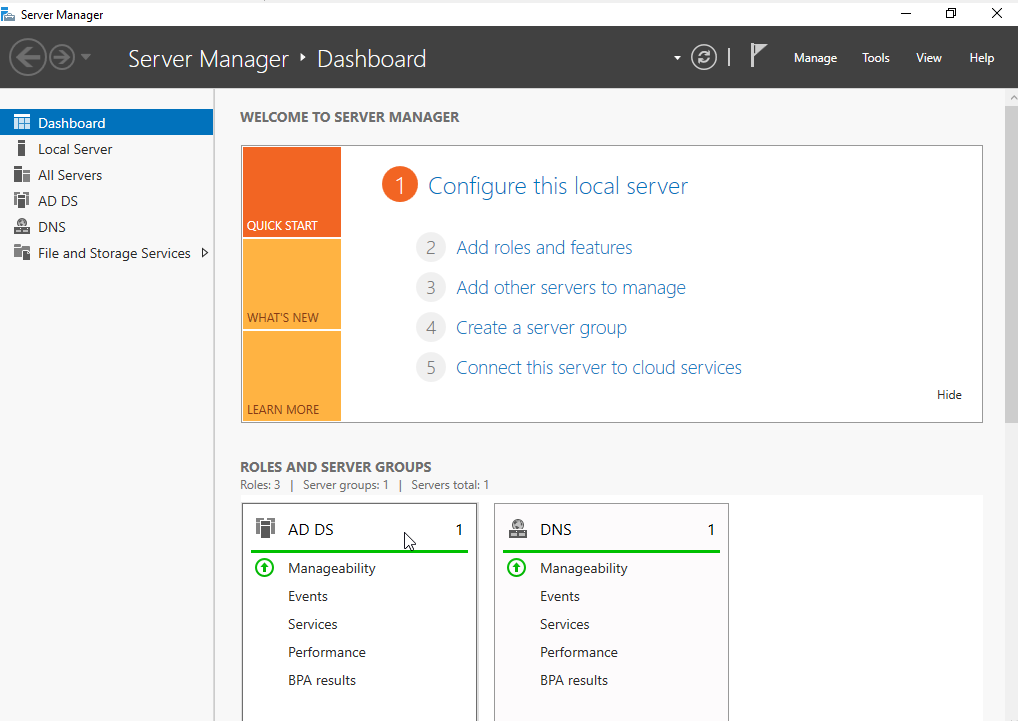
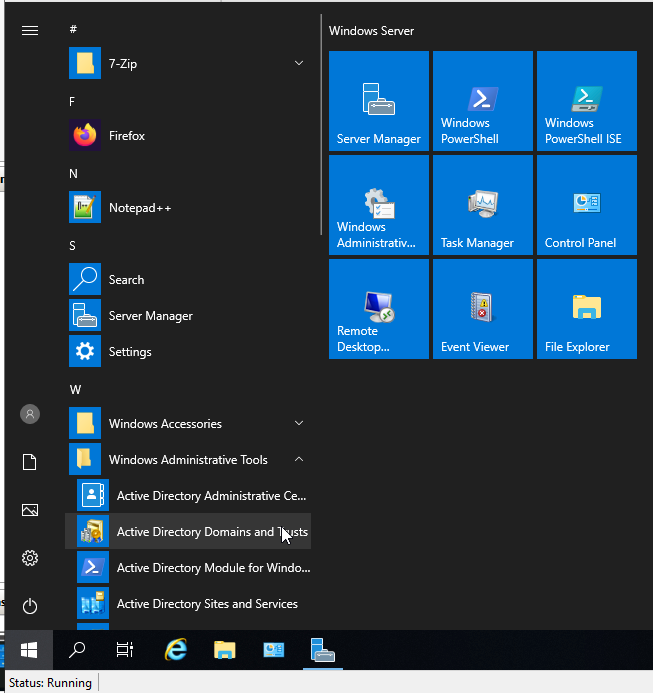
If you click on Start and expand Windows Administrative Tools, you will see that you have a bunch of new tools starting with Active Directory… That is it, we succeeded.
Congratulations, we have our first domain now up and running, foundation of enterprise IT system is up and running.
In next part of this series we will learn how to create groups and user accounts in AD, add computers to domain.
If you are interested in video version of this article, check this out
Disclaimer
Whether you’re trying to configure a new active directory Forest and Domain on Windows Server Core, or you just want to use Powershell instead of the ‘Install Roles’ GUI, you’re in the right place. This short guide will show you how to create a new Forest & Domain faster than if you were trying to use the GUI.
ℹ️
The screenshots below are from a Windows Server Standard Core 2022 installation, but the commands should work fine on Server 2016 and 2019. Equally, the commands will work on a server with Desktop Experience (GUI) in Powershell.
Windows Server Core is a slimmed-down version of Windows Server, and as such, it requires fewer resources to run, as well as presenting a much smaller attack surface (in regards to security).
Server Configuration
First, we need to make sure we have some basic things set. We’ll do this from the server config window (sconfig) which opens by default now on Server 2022. For older versions, run sconfig.
- Hostname — exceptionally important. This will be the name of your domain controller.
dc01is a boring, but fine choice. - Date and time. Make sure the date/time is correct and set your timezone.
- IP and DNS. Make sure you have a static IP set. We’re also installing the domain DNS service, and we can’t have a DNS server running with a dynamic IP. Only set one DNS server, and set it to itself.
- Enable remote desktop. Optional. Useful for management.
Install the Feature

Exit from sconfig to the command prompt. Server 2022 defaults to powershell. If you end up somewhere else, enter into a powershell prompt with powershell.
Enter the command below:
Install-WindowsFeature AD-Domain-ServicesOptional things here: –IncludeManagementTools, -Verbose
The management tools might be a valid option if you’re installing via Powershell on a Server with GUI, but we don’t need this on our Server Core installation. We’ll install management tools on a client machine in future.
It’s a fairly short installation, so -Verbose is probably not necessary.
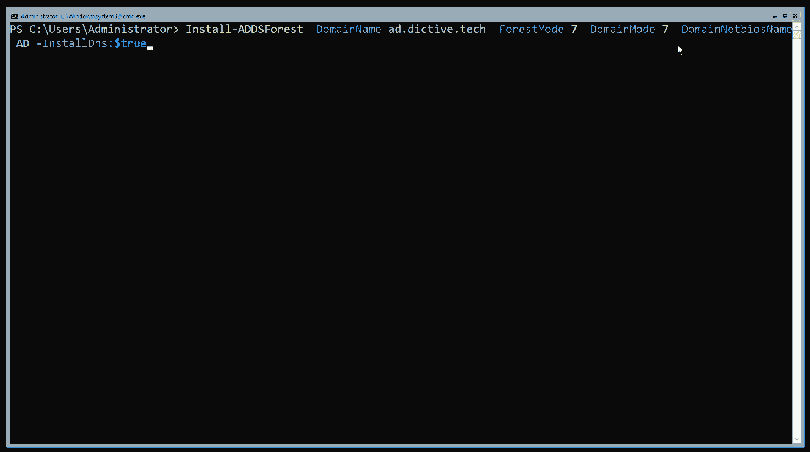
Install the Forest
Now we install the new Forest, and therefore, our domain, using the Install-ADDSForest cmdlet. We specify the -DomainName, in this case, I’m using a subdomain of ad, which is fairly common. Equally common would be using a subdomain of ‘corp’. Because we’re installing a new forest, we’ve set the -ForestMode and -DomainMode to the same level of 7, which is the current latest domain and forest functional level: Server2016.
ℹ️
The domain mode and forest mode determine the level of features of the domain services. If this is a new domain, there’s no reason to go for anything other than the latest (2016). For older modes, you could specify ‘Win2012R2’, ‘Win2008’, etc., but for 2016, Microsoft seems to have limited it to the equivalent integer (which for 2016 is 7).
The -DomainNetbiosName is the first part of the domain. If you chose just ‘example.com’, the netbios name would be ‘EXAMPLE’. In our case, it’s the sub-domain part: ‘AD’. Finally, -InstallDns:$true says that we want to install the DNS service. The complete command looks like:
Install-ADDSForest -DomainName ad.dictive.tech -ForestMode 7 -DomainMode 7 -DomainNetbiosName AD -InstallDns:$trueℹ️
If you want logs and database locations to be anything but the default, you can add the flags: -DatabasePath "path", -SysvolPath "path", -LogPath "path"

Once you run this, you’ll be prompted for a SafeModeAdministratorPassword. This can be the same as the administrator password but it’s worth knowing what the safe mode password is for: If you ever need to use directory services restore mode, or start the DC in safe mode, you will need this password.
⚠️
As you have probably gathered, ‘directory services restore mode’ is what you’d use if you were having severe issues, so you certainly won’t want to make it more severe by not remembering the password.
Enter the SMAP, and you’ll be presented with the final opportunity to cancel the process: «The target server will be configured as a domain controller and restarted when this operation is complete. Do you want to continue with this operation?»
❓
I test across numerous hosts and domains, so when I ran this command initially, I got the error ‘The netbios domain name AD is already being used». This is because I had another domain using the ad subdomain. Here’s how to fix that error.
Say yes to this, and watch the progress. It will throw some warnings, but as this is a new domain/forest, we can safely ignore them.
Once it has finished, it will automatically restart the server and can take some time to continue configuring/applying some group policy stuff after boot. After a little patience, you’ll be able to login to your brand new domain controller!
That’s it! You’ve created a new Windows Forest & Domain, and can now start adding users, hosts and DNS records.