
In this guide, I’m going to show you how to make Google Chrome the default browser using Group Policy (GPO). This guide applies to Windows Server 2012,2016,2019, 2022 as well as Windows 8/10/11.
To do this, there are several steps you’ll need to do. It’s not as simple as just creating a GPO and applying it to a target computer.
This guide assumes you’ve already implemented Google Chrome Enterprise and are already managing Google Chrome browsers at an enterprise level. If not, follow step 1 first.
Step 1: (Optional) Import Google Chrome .ADMX Template Files
Before you begin to manage settings and policies for your Google Chrome browser, you first need to download the .admx and .adml files from here: https://chromeenterprise.google/browser/for-your-enterprise/
Extract it once download and expand the subfolder Configuration.
- In the “adm” folder, find your language (en-US) and copy the chrome.adm file to your desktop.
- In the admx folder, find your language again (en-US), and copy the chrome.adml file to your desktop.
Next, RDP to your Domain Controller. Copy those two extracted files to the desktop of your DC.
- Browse to
C:\Windows\PolicyDefinitionsand drag the chrome.admx. - In C:\Windows\PolicyDefinitions\en-US\folder, drag the chrome.adml file.
Now that you’ve copied in the necessary Group Policy files to manage your Google Chrome browsers, install Chrome Enterprise from here.
I used PDQ Deploy to push this out to all computers, but for testing you can simply install it on your PC.
Step 2: Create a new Group Policy Object
Log into your Domain Controller and open Group Policy Management. Right-click Group Policy Objects > New. Give it a helpful name like “Chrome Default Browser”.
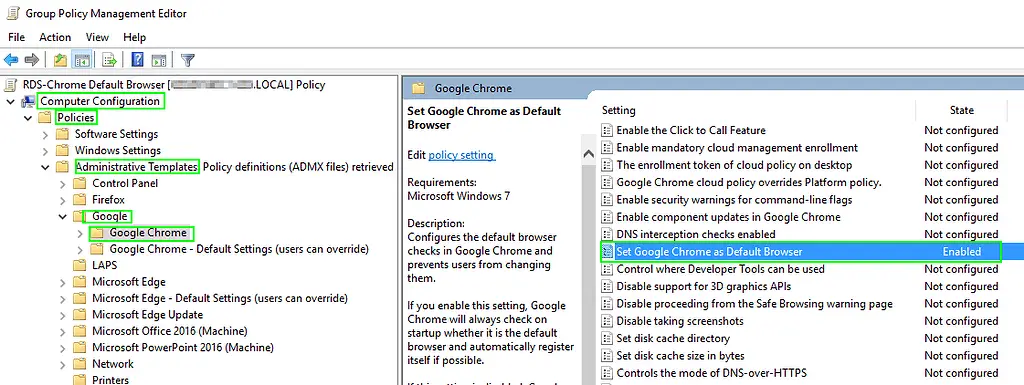
Right-click the new policy > Edit. Then expand Computer Configuration > Policies > Administrative Templates > Google > Google Chrome. Double-click that and switch to Enabled.
You’ll notice in the Help section of the GPO that this will only work for Windows 7. For Windows 8-10, you will need to define a file associates XML file.

Step 3: Deploy File Associations File
The next step is to download a “default file associations” sample file, place it on a network share, and then configure another group policy.
Download the sample file from here: https://smarthomepursuits.com/download/5801/
You can either place the file in a network share available by everyone. Or, you could also use Powershell or PDQ Deploy/SCCM to push this file to a certain location on everyone’s computer.
For this example, I put the file in a network share like this: \\server01\fileshare01\chromedefault.xml
Step 4: Edit Chrome Browser GPO to include path to XML
Next, open up Group Policy Management from your DC again. Edit your new “Chrome Default Browser” policy.
Navigate to Computer Configuration > Policies > Administrative Templates > Windows Components > File Explorer.
Locate the “Set a default associations configuration file” policy. Edit it, and use the path from step 3.

Click Apply and OK once complete.
Step 5: Update GPO and Test
Next, you need to apply this GPO to a target OU or computer. I always recommend moving a test computer from Active Directory Users & Computers into a test OU to prevent breaking any production systems.
Locate the OU > right-click > Link an existing GPO > Choose the new “Chrome Default Browser” GPO.

Once the computer has been moved into the test OU, and you’ve applied the policy to that same OU, run the following command on the command to update the policy:
gpupdate /forceThen, sign out. The default browser will not be switched until after you log out.
To confirm it’s working properly, search Windows for “Default Apps” on your computer and switch it to Edge. Then, sign out and sign back in. If all goes well – you can open Default Apps again and successfully see that it has switched your default web browser to Google Chrome!

Wrapping Up
Hopefully this guide helped you force change the default web browser to Google Chrome for your company!
In this tutorial, we will demonstrate how you can set Microsoft Edge as default browser using GPO on your Windows devices. On Active Directory domain joined computers, you can change the default browser to Edge by configuring Set a default associations configuration file via group policy.
When you buy a PC or laptop with Windows 11, the default browser is Microsoft Edge. The default browser is changed after you install other browsers such as Google Chrome, Firefox, and so on. In most organisations, employees are only allowed to use software programs approved by the business, and this is where a GPO can be used to enforce the default browser.
If you want to set Microsoft Edge as default browser on domain-joined computers, you can do so using a GPO or Microsoft Intune. Group Policy is preferred approach when you don’t have an MDM solution such as Intune. In this article, we will configure the Group Policy setting, Set a default associations configuration file, to set the default browser for your company devices running Windows 11 and Windows 10.

Note: Internet Explorer 11 has gone out of support on June 15, 2022. The product will not receive any updates from Microsoft once it goes out of support. Microsoft recommends switching from IE 11 to Microsoft Edge stable browser. To prevent using the IE11, you can disable it using group policy.
Create default associations configuration XML File for Edge
To set Microsoft Edge as default browser for HTML files, http/https links, and PDF files, use the following application association file example. On your domain controller, create a new application association file (.xml) that contains the below code.
<?xml version="1.0" encoding="UTF-8"?>
<DefaultAssociations>
  <Association ApplicationName="Microsoft Edge" ProgId="MSEdgeHTM" Identifier=".html"/>
  <Association ApplicationName="Microsoft Edge" ProgId="MSEdgeHTM" Identifier=".htm"/>
  <Association ApplicationName="Microsoft Edge" ProgId="MSEdgeHTM" Identifier="http"/>
  <Association ApplicationName="Microsoft Edge" ProgId="MSEdgeHTM" Identifier="https"/>
  <Association ApplicationName="Microsoft Edge" ProgId="MSEdgePDF" Identifier=".pdf"/>
</DefaultAssociations>
Copy the XML association file to a shared folder on your domain controller. This path should be accessible to the client computers.

Set Microsoft Edge as default browser using GPO
In this step, we will create a new group policy object and configure the settings that set Microsoft Edge as the default browser. Once the GPO is ready, we will link it to the domain or OU and test the policy.
When you deploy a new group policy, you either do it at the domain level or at the organizational unit level. I suggest making a new group policy object, linking it to a test OU that contains the pilot computers, and then deploying it to a larger group of computers.
To create a GPO, you can either log in to a domain controller or a member server installed with GPMC. You can also install the GPMC on Windows 11 and configure the group policies. Launch the Server Manager from start and click Tools > Group Policy Management console. In the Group Policy Management console, expand the domain and right-click Group Policy Objects and select New.

Enter the name for the new group policy. For example, you can specify the GPO name as “Set Microsoft Edge as default browser” and click OK. The new GPO is created and is visible under the list of Group Policy Objects in the console.

Right-click the GPO that you just created and select Edit.

In the GPMC editor, browse to Computer Configuration > Administrative Templates > Windows Components > File Explorer. Double click Set a default associations configuration file policy setting.

Select Enabled to enable the policy setting. Optionally, you can also add a comment. Next, enter the network path of the Default Associations Configuration File. Click OK.

We see that the GPO setting “Set a default associations configuration file policy” now shows as Enabled.

After the group policy object is configured, you need to link the GPO to an OU if you haven’t already. You can also link it to the domain, but doing so will make the GPO applicable to every computer in the domain, so it is not advised. The best approach is to choose a test OU, connect your GPO, and test the policy settings.
Perform Group Policy Update
On the client computers, it’s time to perform the group policy update and test if the GPO has set Microsoft Edge as default browser. You can use multiple ways to perform the group policy update on remote computers. On a test client machine, you can manually perform the group policy update by running gpupdate /force command.

Verify if the Default Browser is Microsoft Edge
Once the group policy settings are updated on the client computers, you can verify if Microsoft Edge is the default browser using the following steps:
- Log in to Windows 11 computer.
- Go to Settings > Apps > Default Apps.
- Under Web Browser, we see Microsoft Edge is listed as the default browser.

This confirms that the GPO we applied to set Microsoft Edge as default browser worked on domain joined computers.
Use ConfigMgr to find the default browser
If you manage your Windows devices using Configuration Manager, you can use the below SQL query to determine the default browser on the device. Run the below SQL query against the Configuration Manager database to find the default browser of devices.
select SMS_R_System.Name, SMS_G_System_DEFAULT_BROWSER.BrowserProgID from SMS_R_System inner join SMS_G_System_DEFAULT_BROWSER on SMS_G_System_DEFAULT_BROWSER.ResourceID = SMS_R_System.ResourceId order by SMS_R_System.Name
In the Configuration Manager console, we see the devices with the default browser program ID, which represents the Microsoft Edge app.

Read Next
- How to Rename Administrator Account using GPO (Group Policy)
- Hide the Task View Button using Group Policy
- 4 Ways to Enable Spell Check in Microsoft Edge Browser
- Create Desktop Shortcut using Group Policy (GPO)
- Disable Windows Hello Using Group Policy
Still Need Help?
If you need further assistance on the above article or want to discuss other technical issues, check out some of these options.
GPO – Configure Chrome as the default browser
GPO – Configure Chrome as the default browser
Would you like to learn how to use a group policy to configure Google Chrome as the default browser? In this tutorial, we will show you how to create a group policy to configure Chrome as the default browser of Windows on all computers in the domain.
• Windows 2012 R2
• Windows 2016
• Windows 2019
• Windows 2022
• Windows 10
• Windows 11
Equipment list
Here you can find the list of equipment used to create this tutorial.
This link will also show the software list used to create this tutorial.
Windows Related Tutorial:
On this page, we offer quick access to a list of tutorials related to Windows.
Tutorial GPO – Configure Chrome as the default browser
Create a shared folder.
This will be the distribution point of the required XML configuration file.

In our example, a shared folder named CONFIGURATION was created.
All the domain users and all the domain computers were given read permission over this folder.

In our example, this is the path to access the network share.
On the notepad application, create an XML file named MYCONFIG.
In our example, this is the network path to access the XML file.
On the domain controller, open the group policy management tool.

Create a new group policy.

Enter a name for the new group policy.

In our example, the new GPO was named: MY-GPO.
On the Group Policy Management screen, expand the folder named Group Policy Objects.
Right-click your new Group Policy Object and select the Edit option.
On the group policy editor screen, expand the Computer configuration folder and locate the following item.
Access the folder named File explorer.
Enable the option named Set a default associations configuration file.
Enter the network path to the XML file.

To save the group policy configuration, you need to close the Group Policy editor.
Congratulations! You have finished the GPO creation.
Tutorial – Applying the GPO to configure Chrome as the default browser
On the Group policy management screen, you need to right-click the Organizational Unit desired and select the option to link an existent GPO.

In our example, we are going to link the group policy named MY-GPO to the root of the domain.

Reboot a remote computer and verify if Google Chrome was configured as the default browser.

In our example, Google Chrome was configured as the default browser of Windows using a GPO.
VirtualCoin CISSP, PMP, CCNP, MCSE, LPIC22023-03-21T08:30:04-03:00
Related Posts
Page load link
Ok
Key Points
How to Set a Default Browser Using Group Policy (GPO)
1. Access GPMC:
- Open Group Policy Management Console (
gpmc.msc) on a domain controller - Create or edit a GPO
2. Configure the policy:
- Go to:
Computer Configuration > Administrative Templates > Windows Components > File Explorer - Edit “Set a default associations configuration file”
- Enable it and enter path to
.xmlassociations file
3. Apply the policy:
- File applies during user sign-in on domain-joined devices
Administrators can use Group Policy Objects (GPOs) to define and manage settings and configurations across your organization’s devices. Streamline your endpoint administration and learn how to use GPO to set default browsers for your users.
What is a Group Policy Object?
A GPO in Windows is a collection of Group Policy settings that let network administrators control settings and restrictions for users and computers in your network. The GPO provides a centralized method for implementing and enforcing policies, configurations, and restrictions across multiple devices at once instead of manually changing settings on each device, saving time and effort for IT administrators.
Use the Group Policy Management Console (GPMC) snap-in to access a graphical user interface so you can manage GPOs from a single console.
History and evolution of GPO in IT management
GPOs were formally introduced in Windows 2000 and were primarily used for managing security settings, scripts, and user configurations. GPOs allowed administrators to enforce consistent settings across the organization, improving security and compliance while reducing the risk of misconfigurations.
Later Windows versions have expanded GPO capabilities. With newer features, GPOs now have support for advanced filtering and policy inheritance. Windows Server 2012 added the ability to manage policies for mobile devices through Mobile Device Management (MDM), so you can extend policy management to smartphones and tablets.
GPOs have become indispensable tools for managing IT environments and remain a core component of an Active Directory-based environment. GPOs provide a granular level of control over settings, making it easier to enforce security policies, ensure consistent configurations, change settings remotely, and streamline management tasks across an organization.
Reasons to set a default browser with Group Policy
Using GPO to set a default browser lets you ensure that all users in your network are using a consistent and secure web browser. There are several reasons why you might want to know how to set a default browser with GPO:
- Security and compliance: Different web browsers have varying levels of security features and vulnerabilities. Standardizing your web browser lets you ensure users run a supported and regularly updated browser that meets your organization’s standards. This helps prevent security risks that come from outdated browsers. You may also need to use a specific browser version or configuration to meet regulatory requirements.
- Software licensing: You may have licensing agreements for a particular browser, and it’s more cost-effective to set that browser as the default across your organization.
- Compatibility: Certain web-based applications, services, or intranet sites may work better or require specific browser compatibility. Setting a default browser allows you to provide a consistent browsing experience for your organization’s specific needs.
The process to set a default browser with Group Policy in a Windows Active Directory environment is fairly straightforward. Here’s a step-by-step Group Policy browser selection walkthrough guide to follow:
Step 1: Accessing GPO
- Log in to a domain controller or a computer with the Group Policy Management Console (GPMC) installed.
- Open the GPMC by clicking on the Start menu, typing “Group Policy Management” in the search bar, and selecting the appropriate option.
- Alternatively, you can open Command Prompt, type “gpmc.msc” and hit Enter.
- Once the GPMC opens, navigate to the Group Policy Object you want to modify. You can either create a new GPO or modify an existing one.
Step 2: Navigating the relevant settings
- In the GPMC, right-click on the selected GPO and choose “Edit” to open the Group Policy Management Editor.
- Navigate to the following path: “Computer Configuration” > “Administrative Templates” > “Windows Components” > “File Explorer.”
- Select “Set a default associations configuration file.”
- Select “policy setting” and click on “Enabled.”
Step 3: Specifying the default browser
- Under “Options,” type the location to your default associations configuration file.
- Click on “OK” to save the settings.
- After enabling the settings, the next time a user signs on a domain-joined device, the configuration file will be processed.
When you need to create a new GPO or change one, use the Group Policy browser selection walkthrough guide.
Avoiding issues when using GPO to set default browsers
While using GPO to set default browsers is an efficient method, you need to be aware of potential issues. Here are a few tips to avoid common pitfalls that may arise:
- Verify compatibility: Ensure that the version of the default browser you’re setting is compatible with the operating system and other applications used in your organization. Incompatibilities may lead to unexpected behavior or errors.
- Test and validate: Before deploying the GPO settings to the entire network, thoroughly test and validate the changes in a controlled environment. This helps identify any issues or conflicts that may arise during implementation.
- Monitor and troubleshoot: Enable GPO logging and regularly review the logs to monitor the GPO settings and ensure they are being applied correctly. In case of any issues, use tools like Group Policy Results or Group Policy Modeling to troubleshoot and diagnose problems.
- Communicate and train users: Let users know about the changes made to the default browser and any impact it may have on their workflows. Provide training or documentation so users can familiarize themselves with the new default browser.
Addressing these potential issues before using GPO to set default browsers will help you minimize the risk of problems and have a smooth transition.
Using GPO for different user groups or departments
You can further manage exceptions and customize browser settings by using GPOs for different user groups or departments within your organization. This allows you to customize the default browser settings based on specific requirements. The basic workflow is:
- Create separate GPOs for different user groups or departments.
- Modify the GPO settings to define specific default browser configurations for each group.
- Link the appropriate GPO to the respective Organizational Unit (OU) or Active Directory group.
Using this approach allows you to tailor the default browser experience for different user groups while still maintaining overall consistency and control.
Simplify browser management with GPO
GPOs provide a powerful and centralized method for managing various settings in your organization’s networked environment. By using GPO to set default browsers, you can ensure consistency, security, and compatibility across all devices. Remember to test and validate your GPO settings before deploying them to the entire network, and monitor GPO settings to address any issues that may arise. By using GPO for different user groups or departments, you can further customize browser settings to meet specific requirements.
Simplify your browser management process and enhance the browsing experience for your organization with GPO. NinjaOne can help you automate the deployment and management of software, patches and updates to all of your endpoints, no matter where they are located. Save time and let your IT team work on priority projects. Learn more about NinjaOne’s automated patch management software today.
У нас есть определенная платформа, которая адаптирована под IE. Задача сделать IE браузером по умолчанию, а за одно и все остальные корпоративные программы (типа Acrobat. Outlook и т.д.), создать ярлыки на рабочем столе с помощью групповых политик. Я сам не фанат IE (а EDGE и тем более), сам пользуюсь Google Chrome на всех устройствах включая устройства от Apple, для меня он удобен во всех отношениях, но корпоративный стандарт-есть корпоративный стандарт…
На своем локальном компьютере выставляем те программы по умолчанию, которые необходимо чтоб были потом в политике (соответственно меняю Google Chrome на IE по умолчанию).

Далее запускаем Windows Power Shell от имени администратора также на своем локальном ПК:
Dism.exe /online /Export-DefaultAppAssociations:C:\DefaultAssoc.xml

Получаем нужный нам xml:
Редактируем его, так, чтобы открывались нужные нам ассоциации по умолчанию (Adobe, IE и Outlook).

Пример файла:
<?xml version=»1.0″ encoding=»UTF-8″?>
<DefaultAssociations>
<Association Identifier=».acrobatsecuritysettings» ProgId=»AcroExch.acrobatsecuritysettings» ApplicationName=»Adobe Acrobat Reader DC» />
<Association Identifier=».htm» ProgId=»htmlfile» ApplicationName=»Internet Explorer» />
<Association Identifier=».html» ProgId=»htmlfile» ApplicationName=»Internet Explorer» />
<Association Identifier=».key» ProgId=»Applications\AcroRD32.exe» ApplicationName=»Adobe Acrobat Reader DC» />
<Association Identifier=».pdf» ProgId=»AcroExch.Document.DC» ApplicationName=»Adobe Acrobat Reader DC» />
<Association Identifier=».pdfxml» ProgId=»AcroExch.pdfxml» ApplicationName=»Adobe Acrobat Reader DC» />
<Association Identifier=».pdx» ProgId=»PDXFileType» ApplicationName=»Adobe Acrobat Reader DC» />
<Association Identifier=».rar» ProgId=»Applications\7zG.exe» ApplicationName=»7-Zip GUI» />
<Association Identifier=».secstore» ProgId=»AcroExch.SecStore» />
<Association Identifier=».txt» ProgId=»txtfile» ApplicationName=»Блокнот» />
<Association Identifier=».url» ProgId=»IE.AssocFile.URL» ApplicationName=»Браузер» />
<Association Identifier=».website» ProgId=»IE.AssocFile.WEBSITE» ApplicationName=»Internet Explorer» />
<Association Identifier=».xdp» ProgId=»AcroExch.XDPDoc» ApplicationName=»Adobe Acrobat Reader DC» />
<Association Identifier=».xfdf» ProgId=»AcroExch.XFDFDoc» ApplicationName=»Adobe Acrobat Reader DC» />
<Association Identifier=».xml» ProgId=»xmlfile» ApplicationName=»Internet Explorer» />
<Association Identifier=»ftp» ProgId=»IE.FTP» ApplicationName=»Internet Explorer» />
<Association Identifier=»http» ProgId=»IE.HTTP» ApplicationName=»Internet Explorer» />
<Association Identifier=»https» ProgId=»IE.HTTPS» ApplicationName=»Internet Explorer» />
<Association Identifier=»mailto» ProgId=»Outlook.URL.mailto.15″ ApplicationName=»Outlook 2016″ />
</DefaultAssociations>
Далее кладем полученный xml файл например вот сюда: \\yourdomain.loc\NETLOGON\gpo\DefaultAssoc.xml
Создаем отдельную групповую политику (или правим дефолтную, я предпочитаю отдельную):
ПУСК-ПАНЕЛЬ УПРАВЛЕНИЯ-АДМИНИСТРИРОВАНИЕ-УПРАВЛЕНИЕ ГРУППОВОЙ ПОЛИТИКОЙ

Применяем ее ко всему домену

После обновления политики перезагружаем ПК или набираем gpupdate /force в командной строке.
Все приложения, установленные по умолчанию ранее у нас должны измениться на те, которые только что задали.
Создаем необходимый нам ярлык для приложения, как раз нам необходимо, чтоб именно оно открывалось через IE, так как оно адаптировано под IE.
Создаем еще одну политику для ярлыков.


Добавляем сайт в Надежные узлы для этого снова правим нашу политику IE default:

Значение 2 для Надежных узлов должно быть обязательно.

Снова набираем gpupdate /force
На рабочем столе появляется ярлык Eludia и Helpdesk соответственно, все открывается Internet Explorer-ом, что собственно нам и требовалось.
Всем хорошей работы!!!
05.02.2019 —
Опубликовал: |
scripts&GPO
Sorry, the comment form is closed at this time.