
Время на прочтение2 мин
Количество просмотров69K
В прошлом нашем посте мы рассказали как готовим стандартные клиентские виртуальные машины и показали на примере нашего нового тарифа с Ultralight windows vds за 99 рублей, как мы создавали стандартный образ Windows Server 2019 Core.
В службу поддержки стали поступать заявки как работать с Server 2019 Core без привычной графической оболочки. Мы решили показать работу с Windows Server 2019 Core и как установить на него GUI.

Не повторяйте это на рабочих машинах, не используйте Server Core как рабочий стол, отключите RDP, обезопасьте свою информационную систему, именно безопасность — это главная фишка «Core» инсталляции.
В одной из следующих наших статей мы рассмотрим таблицу совместимости программ с Windows Server Core. В этой статье мы затронем то, как установить оболочку.
Оболочка сторонними средствами
1. Сложный, но наиболее экономичный способ
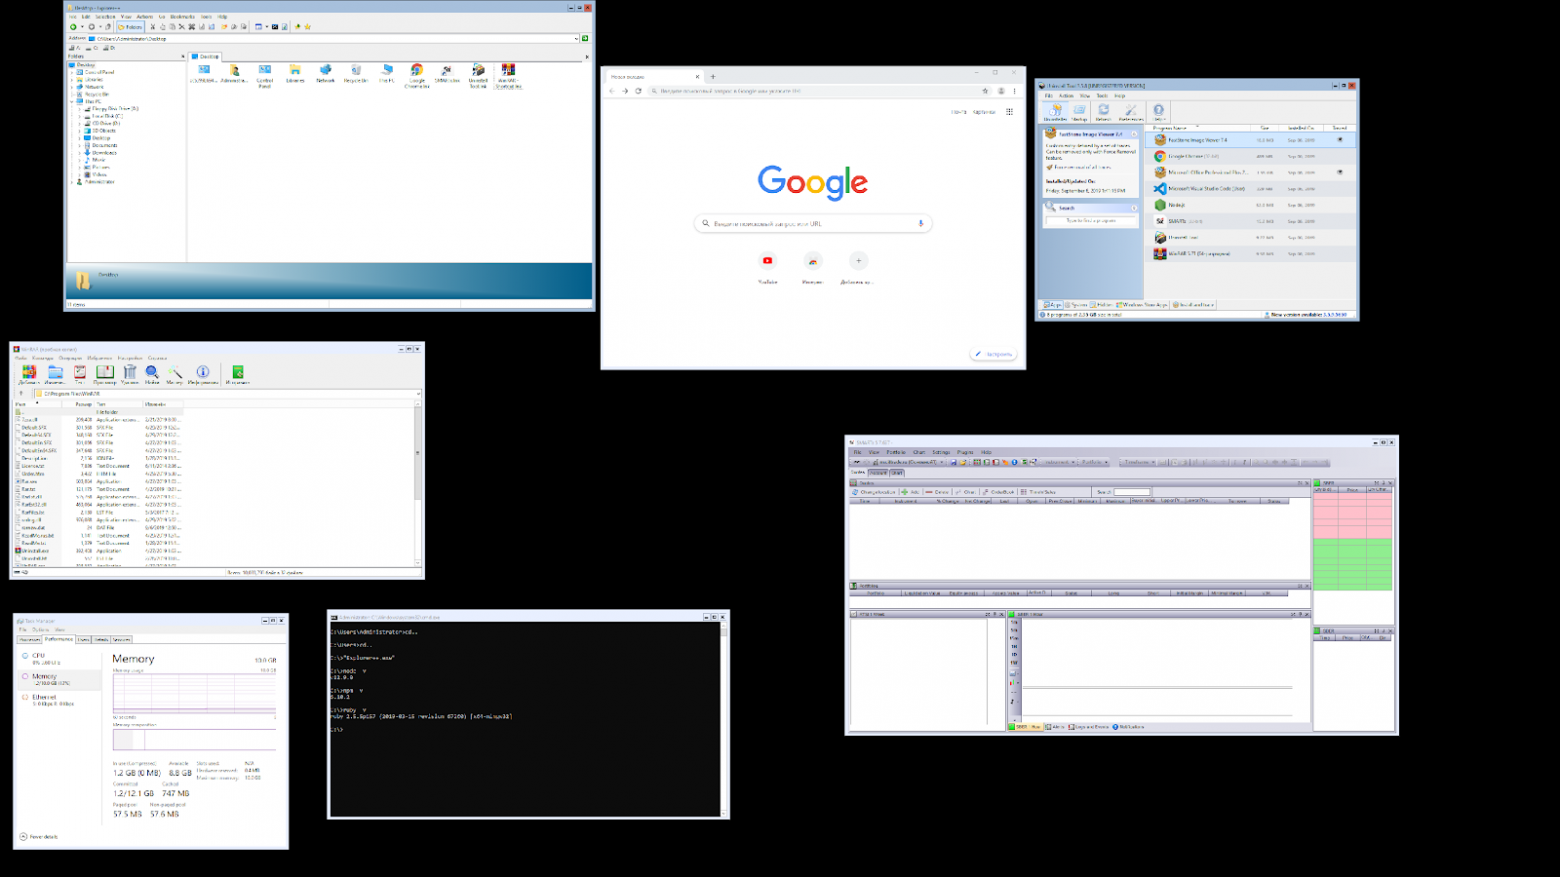
В Server Core из коробки нет привычного нам explorer.exe, чтобы облегчить нам жизнь, мы скачаем explorer++. Он заменяет все, что умеет оригинальный explorer. Рассматривался только explorer++, но подойдет почти любой файловый менеджер, в том числе Total Commander, FAR Manager и другие.
Скачиваем файлы.
Сначала нам нужно скачать файл на сервер. Это можно сделать через SMB (общую папку), Windows Admin Center и Invoke-WebRequest, он работает с параметром -UseBasicParsing.
Invoke-WebRequest -UseBasicParsing -Uri 'https://website.com/file.exe' -OutFile C:\Users\Administrator\Downloads\file.exeГде -uri это URL файла, а -OutFile полный путь куда его скачивать, указывая расширение файла и
C помощью Powershell:
На сервере создаём новую папку:
New-Item -Path 'C:\OurCoolFiles\' -ItemType DirectoryРасшариваем общую папку:
New-SmbShare -Path 'C:\OurCoolFiles\' -FullAccess Administrator
-Name OurCoolShare
На вашем ПК папка подключается как сетевой диск.

Через Windows Admin Center создаем новую папку выбрав пункт в меню.
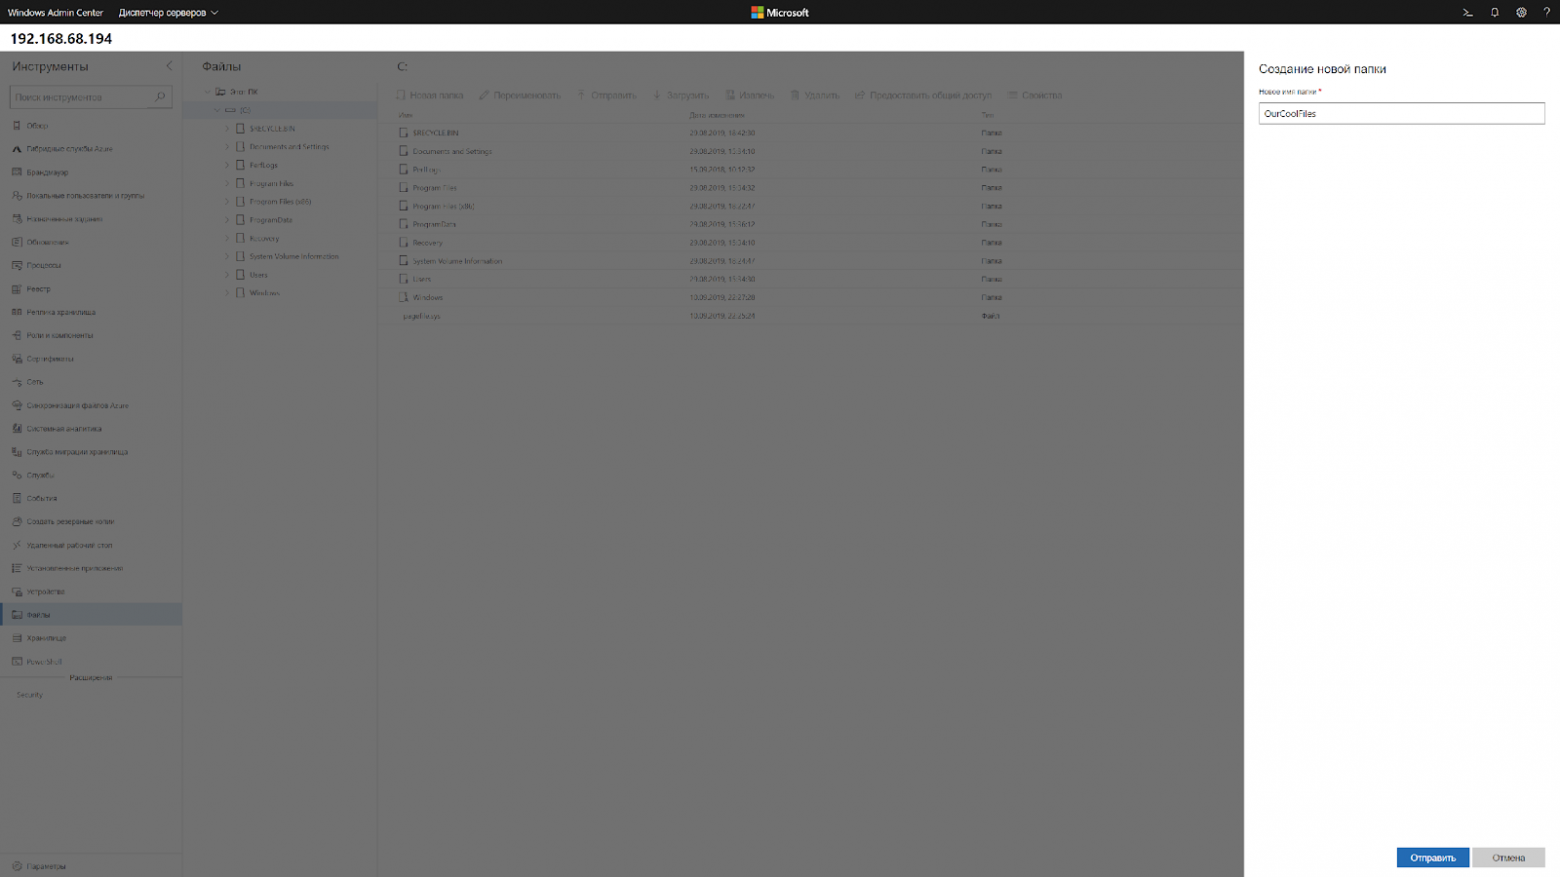
Переходим в общую папку и жмем кнопку отправить, выбираем файл.

Добавляем оболочку в планировщик.
Если вы не хотите запускать оболочку вручную при каждом входе в систему, то нужно добавить её в планировщик задач.
$A = New-ScheduledTaskAction -Execute "C:\OurCoolFiles\explorer++.exe"
$T = New-ScheduledTaskTrigger -AtLogon
$P = New-ScheduledTaskPrincipal "local\Administrator"
$S = New-ScheduledTaskSettingsSet
$D = New-ScheduledTask -Action $A -Principal $P -Trigger $T -Settings $S
Register-ScheduledTask StartExplorer -InputObject $D
Без планировщика можно запустить через CMD:
CD C:\OurCoolFiles\Explorer++.exeСпособ 2. Запускаем родной Explorer
Remember, no GUI
Server Core App Compatibility Feature on Demand (FOD), вернет в систему: MMC, Eventvwr, PerfMon, Resmon, Explorer.exe и даже Powershell ISE. Подробнее можете ознакомиться на MSDN. Существующий набор ролей и компонентов он не расширяет.
Запустите Powershell и введите следующую команду:
Add-WindowsCapability -Online -Name ServerCore.AppCompatibility~~~~0.0.1.0Затем перезагрузите сервер:
Restart-Computer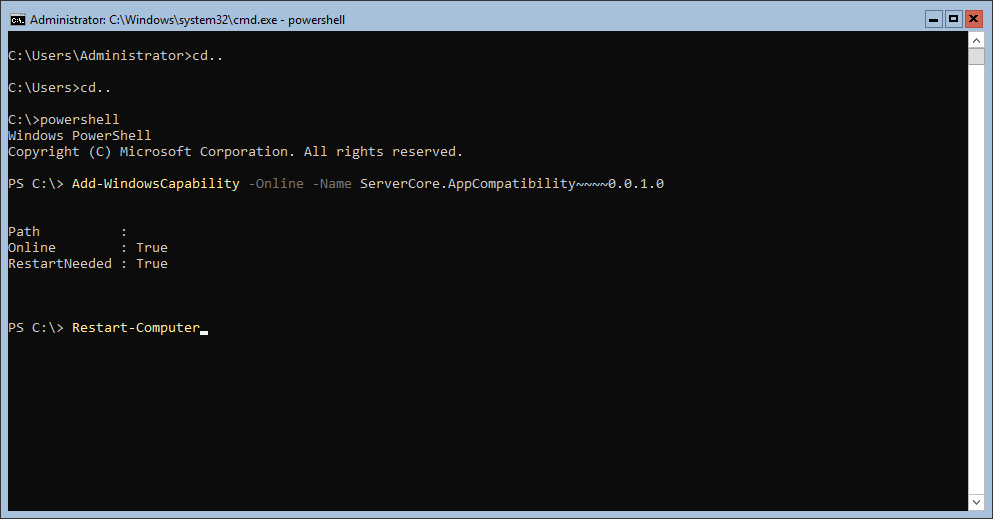
После этого вы сможете запускать даже Microsoft Office, но потеряете примерно 200 мегабайт ОЗУ навсегда, даже если в системе нет активных пользователей.

Windows Server 2019 c установленным Features on Demand
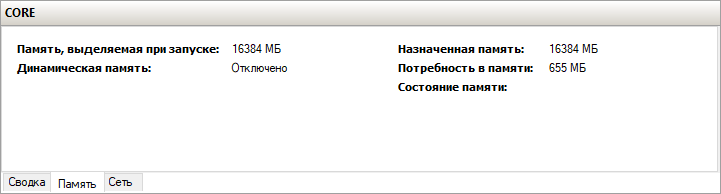
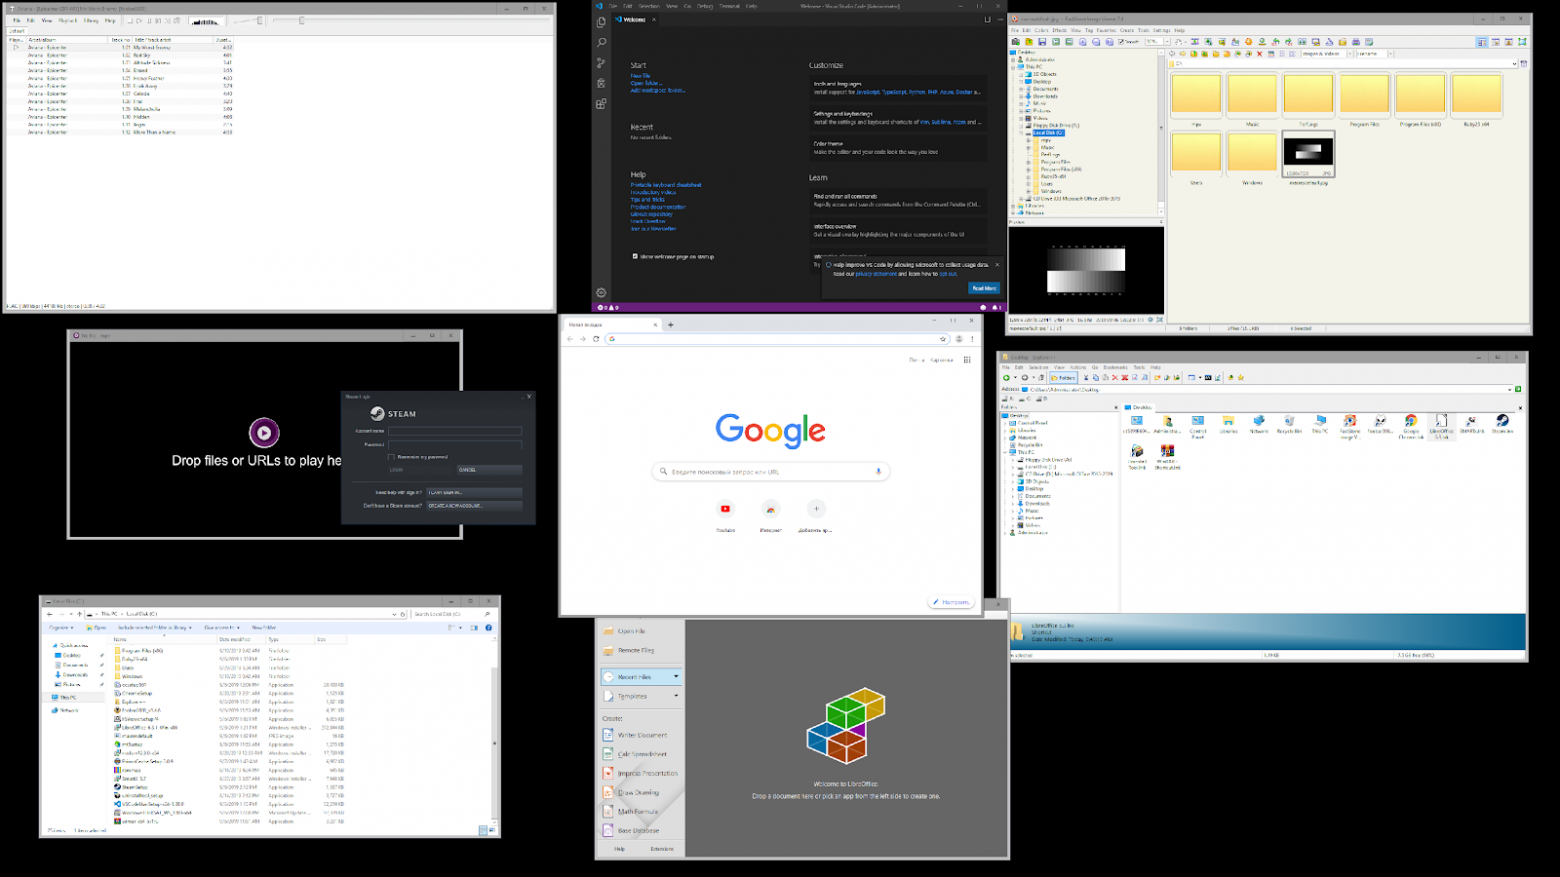
Windows Server 2019 CORE
На этом всё. В следующей статье мы рассмотрим таблицу совместимости программ с Windows Server Core.
Предлагаем обновлённый тариф UltraLite Windows VDS за 99 рублей с установленной Windows Server 2019 Core.

Windows Server 2019 is the operating system that bridges on-premises environments with Azure services enabling hybrid scenarios maximizing existing investments. Increase security and reduce business risk with multiple layers of protection built into the operating system. Evolve your datacenter infrastructure to achieve greater efficiency and scale with Hyper-converged Infrastructure. Windows Server 2019 also enables you to create cloud native and modernize traditional apps using containers and micro-services. For more details, check out the Windows Server Website.
In addition to downloading the ISO, run Windows Server on Azure. Azure provides a great way to test Windows Server 2019 with pre-built images.
Choose an edition and an installation option:
Customers who download the full ISO will need to choose an edition and an installation option. This ISO evaluation is for the Datacenter and Standard editions. The Datacenter edition is the most complete edition and includes the new Datacenter-specific features (Shielded Virtual Machines, Storage Spaces Direct, and Software-Defined Networking) in addition to unlimited server virtualization.
Installation options:
- Server Core: This is the recommended installation option. It’s a smaller installation that includes the core components of Windows Server and supports all server roles but does not include a local graphical user interface (GUI). It is used for “headless” deployments which are managed remotely through Windows Admin Center, PowerShell, or other server management tools.
- Server with Desktop Experience: This is the complete installation and includes a full GUI for customers who prefer this option.
Before you begin your evaluation, be sure to check out What’s new in Windows Server 2019.
When you complete your evaluation, you can convert your evaluation versions to retail. Also, check out our technical documentation to learn how to upgrade or migrate your other existing servers to Windows Server 2022.
Languages:
- Chinese (Simplified), English, French, German, Italian, Japanese, Russian, Spanish
Evaluation Options:
- Windows Server 2019 on Microsoft Azure
- Windows Server 2019 | 64-bit ISO
- Windows Server 2019 | 64-bit VHD
- Review Windows Server 2019 release notes and system requirements.
- Register, then download and install. (Note: This evaluation edition expires in 180 days.)
- Receive emails with resources to guide you through your evaluation.
Installation Guidelines
After installation, install the latest servicing package.
- Go to: Microsoft update catalog and search for «Windows Server 2019”.
- Evaluation versions of Windows Server must activate over the internet in the first 10 days to avoid automatic shutdown.
How to install Server 2019 gui
Windows Server 2019 is the latest version of the server operating system of Microsoft.
Server 2019 has the following new features.
Storage space direct
Storage migration service
Storage replica
system insights
Improved windows defender
windows admin center
Windows Server 2019 iso download link
System requirements
- Processor — 1.4 GHz 64-bit processor
- RAM — 512 MB
- Disk Space — 32 GB
- Network — Gigabit (10/100/1000baseT) Ethernet adapter
- Optical Storage — DVD drive
- Video — Super VGA (1024 x 768) or higher-resolution (optional)
- Keyboard and mouse
Power on the server which server on want to install windows server 2019
Go to Bios and set first boot device cd rom
Insert windows server 2019 image CD
once cd insert in cd drive press ctrl +alt+del
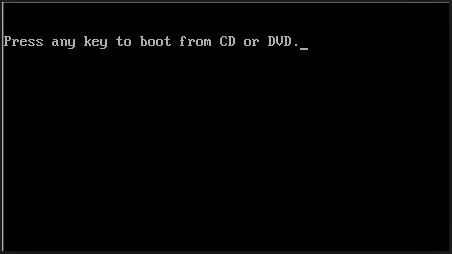
after restart the system press any key once show massage on your computer screen
Now file load start

Here you can change some if you need to change and Click on Next

Click on Install now

Here windows setup is starting

Select on Windows server 2019 datacenter Evaluation(Desktop Experience) for GUI. if you want command base installation core install select Windows server 2019 standard and windows server 2019 Datacenter Evaluation and click on Next

Check on (I accept the License terms) and click on Next

Select Custom: install windows only(advanced)

Click on New for the partitions.

Click on Apply
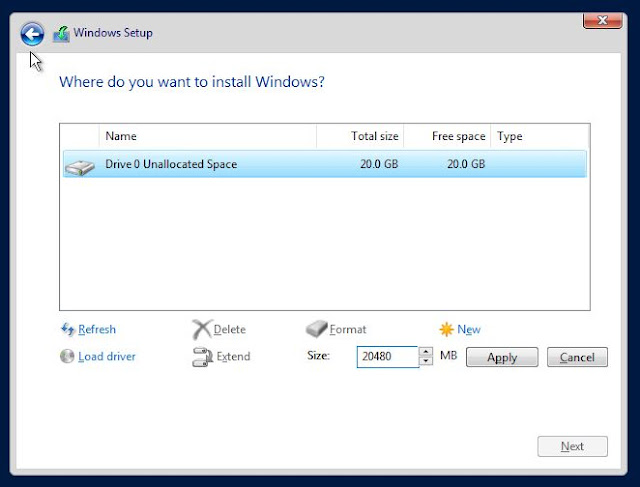
After partitions creations done click on one drive where you want to install windows server 2019

Now windows installation start


After installation completed server now restart

When server restarted set your server administrator password for login

Finalizing your setting

Hello World,
Today, it will be a quick post. We will basically perform a basic installation of Windows 2019 Server. This type of post is probably all around internet but we needed to test and check by ourselves if any major changes occurred. As you can guess, the installation nowadays is quite straight forward. The most difficult decision to take is which flavor/version of Windows 2019 Server to install. We will quickly go through some of the basics about Windows 2019 and then we will move on the installation part….
So,let’s start this !
Overview Windows 2019 Server
Windows Editions
As mentioned in our previous post, Windows 2019 server ship in 3 Editions
- Windows 2019 Essentials
- Windows 2019 Standard
- Windows 2019 Datacenter
When working on projects, most of the time the Windows 2019 Datacenter edition is used because there is no feature limitations and because it’s also a good choice when using it in highly virtualized environment. When using a Windows 2019 Standard edition, the licensing includes the right to run 2 additional Virtual machines while Datacenter allows you to run an unlimited of virtual machines without paying extra costs.
Windows Datacenter offers more features that the standard edition. Storage Replica, Storage Direct spaces, shielded virtual machines, software defined network… for example are not included in the Standard Edition.
Windows Servicing Channel Models
Another important element to take into account is the Windows servicing Channel a company want to use. As briefly explained in our previous post, a user can choose between two type of releases when working with Windows Server Operating system. You can choose between
- Long Term Service Channel (LTSC)
- Semi-Annual Channel (SAC)
This choice is important because it will define if a desktop interface can be used or not on top of your Server installation. Long Term service Channel (LTSC) would be the way forward if you need a desktop interface on your server and if you need to have a stable and predictable release cycle. Choosing LTSC release ensure that Desktop experience feature is available and you would benefit from a mainstream support for 5 years and extra 5 years for extended support.
Semi-annual Channel (SAC) release are made available twice a year and they will be supported for 18 months. The SAC release does not ship with any desktop interface and no option to install any. So, if you need a desktop interface (for example, you want to use Remote Desktop services), you should stick to the LTSC. SAC releases will probably include latest technology and features but no all companies can move to this aggressive cycle release
Step by Step installation
Assumptions
To perform this installation,
- we have downloaded the Windows 2019 Evaluation Edition which ships with Desktop Experience option.
- We have installed Windows 2019 and Hyper-v role on a physical machine (this is not explained on this post)
- We have created a virtual machine and installation will be performed on top of it
- We will install the Datacenter edition with Desktop experience in this guide
Quick Step by Step Guide
Step 1 – Your virtual machine is powered off
Step 2 – Open your virtual machine settings and mount the iso file, change the boot order if needed.
Step 3 – Boot your virtual machine
Step 4 – the windows installer will show up and will prompt you to Select your regional settings (Language and Keyboard layout)
click on picture for better resolution
Step 5 – The Wizard start and you can see the Install now button. click on it to proceed with the installation.
click on picture for better resolution
The setup wizard initialize and will prepare the next steps
click on picture for better resolution
Step 6 – in the selection dialog box, you can choose which Windows 2019 edition you want to use and with or without desktop interface. We have selected Datacenter + Desktop Experience option
click on picture for better resolution
Step 7 – In the license agreement page, accept it and proceed
click on picture for better resolution
Step 8 – In the installation page, select the option custom.
click on picture for better resolution
Step 9 – In the Disk page, accept default and proceed. The wizard will create all the necessary partition needed
click on picture for better resolution
Step 10 – In the Installing Windows step, you can relax and wait for the machine to reboot
click on picture for better resolution
click on picture for better resolution
Step 11 – The system will reboot perform some post actions
click on picture for better resolution
Step 12 – You will be presented with the Customize page where you basically need to provide password for the local admin account to be used
click on picture for better resolution
Step 13 – When done, you will be presented with the login page with the familiar background image used in Windows 2016 and Windows 10
click on picture for better resolution
Step 14 – You can login and start customize your installation by providing computer name, join the machine to a domain, set network settings, install roles and anything you would need to do have a functional server that meets your requirements. When you open server manager (or when started automatically), you will see a popup messaging inviting you to test the Windows Admin Center.
click on picture for better resolution
We are planning to install and play around with the new web interface that will provide another set of tool that can be used to manage remotely a server box. We might share our findings in a future post….
Final notes
As you can see, the process has not changed much. Installation process is quite straight forward and seems even simplify as almost no questions or customization settings are shown during the installation. Now that the installation has been performed, we will need to dig a little bit to see what has been changed and/or improved in this release. This might be the subject of a future post as well.
Till next time
See ya
Have you recently installed Windows Server 2019 and noticed that it lacks certain user interface features typically found in a desktop operating system? Don’t worry! In this tutorial, we will guide you through the steps to add the Desktop Experience feature to Windows Server 2019.
Step 1: Launch the Server Manager by clicking on the Windows icon in the taskbar and selecting «Server Manager» from the Start menu.
Step 2: In the Server Manager window, click on «Manage» located at the top-right corner and then select «Add Roles and Features» from the drop-down menu.
Step 3: The Add Roles and Features Wizard will open. Click «Next» to proceed.
Step 4: Select «Role-based or feature-based installation» and click «Next.«
Step 5: Choose the appropriate server from the server pool and click «Next.«
Step 6: Scroll down and expand «User Interfaces and Infrastructure» in the list of features. Check the box next to «Desktop Experience» and click «Next.«
Step 7: Review the information on the «Features» screen and click «Install» to begin the installation process. Wait for the installation to complete.
Once the installation is finished, you will have successfully added the Desktop Experience feature to Windows Server 2019. Now you can enjoy a more familiar desktop user interface and access features such as Windows Media Player, desktop themes, and various administration tools.
| Pros | Cons |
|---|---|
| 1. Enhanced user interface with desktop features. | 1. Consumes additional system resources. |
| 2. Provides access to familiar tools like Windows Media Player. | 2. Could potentially introduce additional security risks. |
| 3. Simplifies administration tasks with graphical interfaces. | 3. May not be necessary for server-only environments. |
By following these simple steps, you can easily add the Desktop Experience feature to Windows Server 2019 and enjoy a more intuitive user experience.
Video Tutorial:How do I add desktop experience feature?
To add the desktop experience to Windows Server, you can follow these steps:
1. Open Server Manager: Click on the Windows icon in the taskbar, type «Server Manager,» and click on the Server Manager app.
2. Add required features: In the Server Manager dashboard, click on «Manage» and select «Add Roles and Features.» This will open the Add Roles and Features Wizard.
3. Select server: On the Before You Begin page, click «Next» to proceed.
4. Installation Type: Choose «Role-based or feature-based installation» and click «Next.«
5. Select server: Choose the desired server on which you want to install the Desktop Experience feature and click «Next.«
6. Features: Scroll down and expand «User Interfaces and Infrastructure» category. Check the box next to «Desktop Experience» and click «Next.«
7. Confirmation: Review the selected features and click «Install.«
8. Installation progress: Wait for the installation to complete. You can monitor the progress in the progress bar.
9. Completion: Once the installation is finished, you will see the «Installation succeeded» message. Click «Close» to exit the wizard.
10. Restart the server: After adding the desktop experience, it is recommended to restart the server for the changes to take effect. You can either restart immediately or manually restart later.
Following these steps will add the desktop experience to your Windows Server, allowing you to have a more familiar desktop-like user interface. This can be particularly useful if you intend to use the server for tasks that require a graphical interface.
Note: Adding the desktop experience may increase the resource usage of the server, so make sure your server meets the hardware requirements to handle the additional load.
Can you install Windows Server Core and then upgrade to desktop experience?
Yes, it is possible to install Windows Server Core and then upgrade to the desktop experience. Here are the steps to follow:
1. Begin by installing the Windows Server Core edition on your system. This version of Windows Server has a minimal graphical interface and is optimized for server-related tasks.
2. Once the installation is complete, you can choose to upgrade to the Windows Server with Desktop Experience edition if you require a more traditional desktop environment similar to the client versions of Windows.
3. To initiate the upgrade process, you need to access the Server Manager. You can do this by typing «sconfig» at the command prompt and pressing Enter.
4. In the Server Manager, navigate to the «Add roles and features» section.
5. A wizard will open, guiding you through the upgrade process. Click on «Next» to proceed.
6. Select «Role-based or feature-based installation» and click «Next.«
7. Choose the local server from the server pool and click «Next» again.
8. Scroll down and locate the «User Interfaces and Infrastructure» section. Expand it and tick the box next to «Server Graphical Shell.» This option will install the desktop experience.
9. A pop-up window will appear, asking to install additional features required by the server graphical shell. Click «Add Features» to proceed.
10. Hit «Next» until you reach the «Confirmation» page.
11. Review your selections, confirm the upgrade, and click «Install» to initiate the process.
12. The system will now install the desktop experience components. This may take a while, so be patient.
13. Once the installation is complete, you will receive a notification. Restart your system to apply the changes.
After the reboot, your Windows Server Core will be upgraded to the Windows Server with Desktop Experience edition. You will now have a desktop environment similar to Windows client versions, along with the additional features and capabilities of Windows Server.
Does Windows Server 2019 have desktop experience?
Yes, Windows Server 2019 does have a desktop experience option. The desktop experience feature provides a Windows interface, similar to the desktop version of Windows, allowing users to interact with the server using a graphical user interface (GUI). This can be particularly useful for users who are more accustomed to working with a traditional desktop environment and prefer a visual interface over command-line interactions.
Here are the steps to install the desktop experience feature in Windows Server 2019:
1. Log in to your Windows Server 2019 machine with administrative privileges.
2. Open the Server Manager application.
3. On the Dashboard page, click on «Add roles and features.«
4. The «Add Roles and Features Wizard» will appear. Click «Next» to proceed.
5. Choose the installation type as «Role-based or feature-based installation» and click «Next.«
6. Select your server’s target server from the server pool and click «Next.«
7. In the «Server Roles» section, leave the default settings and click «Next.«
8. On the «Features» page, check the box next to «Desktop Experience» and click «Next.«
9. Review the information on the «Confirmation» page, then click «Install» to begin the installation process.
10. Once the installation is completed, you can access the desktop experience on your Windows Server 2019 machine.
Enabling the desktop experience feature can provide a familiar interface for tasks such as managing files, installing applications, and configuring server settings without relying solely on command-line interactions. However, it’s important to note that enabling the desktop experience may consume additional system resources compared to running Windows Server without it. Therefore, it is recommended to carefully evaluate your server’s specifications and requirements before deciding to install the desktop experience feature.
Which version of Windows Server 2019 has GUI?
Windows Server 2019 provides multiple editions, each with different features and capabilities. When it comes to graphical user interface (GUI), there are two editions to consider: Windows Server 2019 with Desktop Experience and Windows Server 2019 without Desktop Experience (also known as Windows Server Core).
1. Windows Server 2019 with Desktop Experience: This edition includes the standard GUI that most users are familiar with. It offers a full Windows desktop environment with features like a Start menu, Taskbar, and Windows Explorer. The Desktop Experience edition is suitable for organizations that prefer a traditional server environment and require a graphical interface for managing and configuring the server.
2. Windows Server 2019 without Desktop Experience (Server Core): This edition provides a minimalistic installation option without the traditional Windows desktop environment. It does not include the standard GUI elements and is managed primarily through command-line tools, PowerShell, and remote management. Server Core is designed for efficiency, reduced resource usage, and improved security by minimizing the attack surface.
Determining which edition to choose depends on your specific requirements and preferences. Below are a few reasons why you might opt for each edition:
Reasons for Windows Server 2019 with Desktop Experience:
– Familiarity: If you have extensive experience managing Windows servers with a graphical interface, the Desktop Experience edition provides a familiar environment that reduces the learning curve.
– Administrative Tools: The Desktop Experience edition includes a wide array of administrative tools and wizards accessible through the graphical interface.
– Compatibility: Certain legacy applications and software may rely on a full GUI to function properly. If you have dependencies on such software, the Desktop Experience edition ensures compatibility.
Reasons for Windows Server 2019 without Desktop Experience (Server Core):
– Improved Performance: Server Core has a smaller footprint compared to the Desktop Experience edition, resulting in lower resource usage. This can lead to improved performance and reduced maintenance.
– Enhanced Security: Removing the GUI elements in Server Core reduces the attack surface of the server. Fewer components running on the server means fewer potential vulnerabilities.
– Automation and Scripting: Server Core is designed to be managed through command-line tools and PowerShell. It provides a streamlined environment for automation and scripting, making it ideal for environments that heavily use these approaches.
Ultimately, the choice between Windows Server 2019 editions with or without GUI depends on factors such as your level of expertise, specific server requirements, compatibility needs, and security considerations.
How do I change Windows Server 2019 to desktop experience?
To change Windows Server 2019 to the desktop experience, follow these steps:
1. Open the Server Manager:
– Click on the Start button.
– Type «Server Manager» in the search bar.
– Select the Server Manager from the search results.
2. In the Server Manager window, click on «Manage» from the top toolbar, and then click on «Remove Roles and Features» from the dropdown menu.
3. This will open the «Remove Roles and Features Wizard.» Click «Next» to proceed.
4. In the «Server Selection» screen, the local server should be selected by default. If not, choose the appropriate server from the server pool. Click «Next» to continue.
5. In the «Features» screen, locate and expand the «User Interfaces and Infrastructure» option.
6. Select the «Desktop Experience» checkbox and click «Next.«
7. The wizard may prompt you to install additional features that are required by the Desktop Experience. If prompted, click «Add Features» to install the required features and then click «Next» to proceed.
8. In the «Confirmation» screen, review the selected options. If everything looks correct, click «Install» to start the installation process.
9. Once the installation is complete, you will see the «Results» screen. Verify that the installation was successful, and then click «Close» to exit the wizard.
10. Finally, restart your Windows Server 2019 for the changes to take effect. After the restart, the server will boot into the desktop experience.
Please note that switching to the desktop experience may impact the performance and security of your server. Consider the specific requirements and use cases of your server environment before making the switch.